How to Create Regional Load Balancers
Validated on 27 Mar 2025 • Last edited on 17 Apr 2025
DigitalOcean fully manages Regional Load Balancers and Global Load Balancers, ensuring they are highly available load balancing services. Load balancers distribute traffic to groups of backend resources in specific regions or across different regions, which prevents the health of a service from depending on the health of a single server, cluster, or region.
Regional load balancers route traffic within a single datacenter. Setting up a regional load balancer is a two step process: creating the load balancer and then adding Droplets or Kubernetes nodes to its backend pool.
Create a Load Balancer Using the CLI
You can only add firewall rules to a load balancer using the CLI or API. To add a firewall to a load balancer during its creation, use the --allow-list and --deny-list flags to define a list of IP addresses or CIDRs that the load balancer accepts or blocks connections from.
The load balancer creation command requires a value for the --region flag. Use the doctl compute region list command to retrieve a list of available datacenter regions.
You can also automatically add Droplets to a load balancer during creation by providing a list of Droplet IDs for the --droplet-ids flag. Use the doctl compute droplet list command to retrieve a list of Droplets and their ID’s.
To create an internal-only load balancer that has no public IP address and is only accessible by resources in its VPC, use the --network INTERNAL flag with doctl version v1.108.0 or higher. You cannot switch load balancers between regular and internal after creation.
To create a load balancer with dual-stack IPv4 and IPv6 networking, use the --network-stack DUALSTACK flag with doctl version v1.121.0 or higher. You cannot change the network stack configuration after creation.
To create a network load balancer that routes TCP and UDP traffic at the network layer, use the --type REGIONAL_NETWORK flag with doctl version v1.108.0 or higher.
Create a Load Balancer Using the API
You can only add firewall rules to a load balancer using the CLI or API. To add a firewall to a load balancer during its creation, use the firewall field to define a list of IP addresses and CIDRs the load balancer accepts or blocks connections from.
The load balancer creation call requires a value for the region field. Use the /v2/regions endpoint to retrieve a list of available datacenter regions.
You can also automatically add Droplets to a load balancer during creation by providing an array of Droplet IDs in the droplet_ids field. Use the /v2/droplets endpoint to retrieve a list of Droplets and their IDs.
To create an internal-only load balancer that has no public IP address and is only accessible to resources in its VPC, specify the network field as INTERNAL. You cannot switch load balancers between regular and internal after creation.
To create a load balancer with dual-stack IPv4 and IPv6 networking, use the network_stack key with a value of DUALSTACK. You cannot change the network stack configuration after creation.
To create a network load balancer that routes TCP and UDP traffic at the network layer, set the type field to REGIONAL_NETWORK.
Create a Load Balancer Using the Control Panel
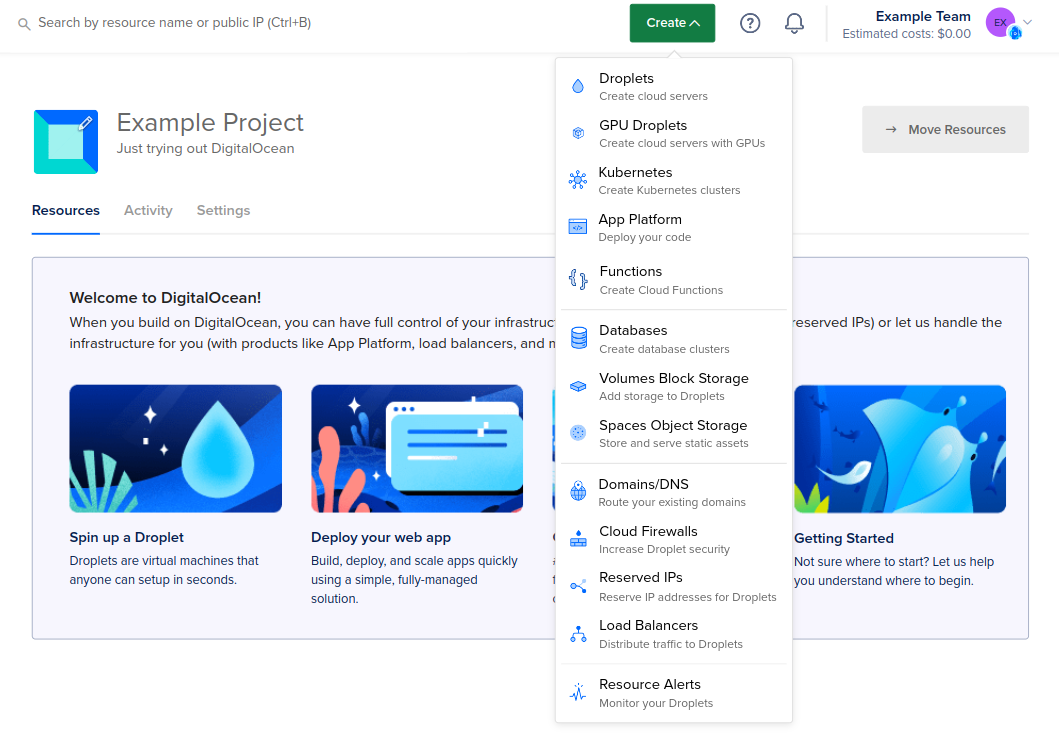
Start by creating a load balancer using the Create button at the top of the control panel. Alternatively, use the Create load balancer button on the Load Balancers overview page.
On the creation page, you:
-
Choose a Load Balancer type. Choose Regional to create a regional load balancer. To create a Global load balancer, see How to Create a Global Load Balancer.
-
Choose a datacenter region. Ensure your regional load balancer and its backend Droplets are in the same datacenter. If you have existing Droplets, select that datacenter.
-
Select a VPC Network for the load balancer. You can choose one you have created or use your default network for the datacenter region. VPC networking provides an additional networking interface accessible only to resources within the same VPC network. This keeps traffic between Droplets and other applicable resource from being routed outside the datacenter over the public internet.
-
Choose a traffic management type. Select HTTP for most use cases needing general web traffic load balancing, where routing decisions are based on the content of the request (for example, HTTP headers and application protocols). Choose Network for high-performance TCP and UDP protocol-level routing with low latency.
-
Set the Network Visibility of your regional load balancer. Choose External to create a load balancer that serves traffic publicly. Select Internal to create a private load balancer that is only accessible to resources on the same VPC network.
-
Choose the load balancer’s Scaling configuration.
The load balancer’s scaling configuration allows you to adjust the load balancer’s number of nodes. The number of nodes determines:
- How much traffic the load balancer can handle:
- For HTTP load balancers this is affects maximum requests per second and simultaneous connections
- For network load balancers the number of nodes determines overall ingress throughput
- The load balancer’s overall monthly cost
The load balancer must have at least one node. You can add or remove nodes at any time to meet your traffic needs.
-
Connect Droplets to the load balancer. If you are creating this load balancer for DigitalOcean Kubernetes, you can skip this step. Use the Search for Droplet or a tag search bar to add Droplets or groups of tagged Droplets to the load balancer’s backend pool upon creation. You can add or remove resources from the load balancer’s pool at anytime after creation.
-
Add forwarding rules. Forwarding rules define how traffic is routed from the load balancer to its backend Droplets. You need at least one rule.
The default route is HTTP port 80 on the load balancer to HTTP port 80 on the backend Droplets. You can create new rules during creation with the New Rule drop-down. After creation, you can modify a load balancer’s rules at any time on its Settings page.
If you create a forwarding rule that requires a Let’s Encrypt certificate, you have the option to allow us to automatically create the necessary DNS record, at the apex of your domain, to support the certificate. The Create DNS records for all the new Let’s Encrypt certificates box is checked by default. If you want to manage your own DNS records for your Let’S Encrypt certificate, uncheck the box to opt out of creating any records when creating the forwarding rule.
You can update this selection when adding or updating forwarding rules at a later time. However, the updated selection applies only to the new rules going forward, existing DNS records are not updated.
-
Select Additional Networking Options. Choose Enable IPv6 Address to add an IPv6 address to the load balancer, alongside the standard IPv4 address. IPv6 can not be enabled after the load balancer is created.
-
Set advanced settings. Advanced settings allow you to modify additional parameters for the load balancer, sticky sessions, health checks, SSL forwarding, and PROXY protocol. You can also modify these settings after you create the load balancer.
-
Finalize and create, which includes Choose a name and Select project. Load balancer names must be unique and contain alphanumeric characters, dashes, and periods only. You can rename load balancers at any time after creation by clicking on the existing name on the load balancer page.
After you create the load balancer, you can add Droplets or Kubernetes nodes to the load balancer on its detail page. To add Kubernetes nodes, see our guide, How to Add Load Balancers to Kubernetes Clusters. To add Droplets, click Choose Droplets to open the Add Droplets window.
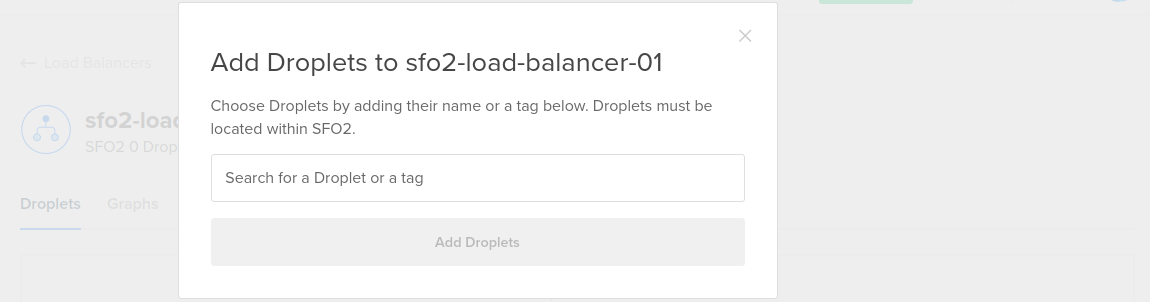
You can add individual Droplets or you can choose a tag. You can only choose Droplets that are in the same region as the load balancer, and if you use a tag, only tagged Droplets in the same region as the load balancer are part of its backend. You can use one tag per load balancer.
When you’ve selected the tag or Droplets, click Add Droplets. When you add Droplets to a load balancer, the Droplets start in a DOWN state and remain in a DOWN state until they pass the load balancer’s health check. Once the backends have passed the health check the required number of times, they are marked healthy and the load balancer begins forwarding requests to them.
Once you have at least one load balancer, you can view and manage them on the load balancer index page.
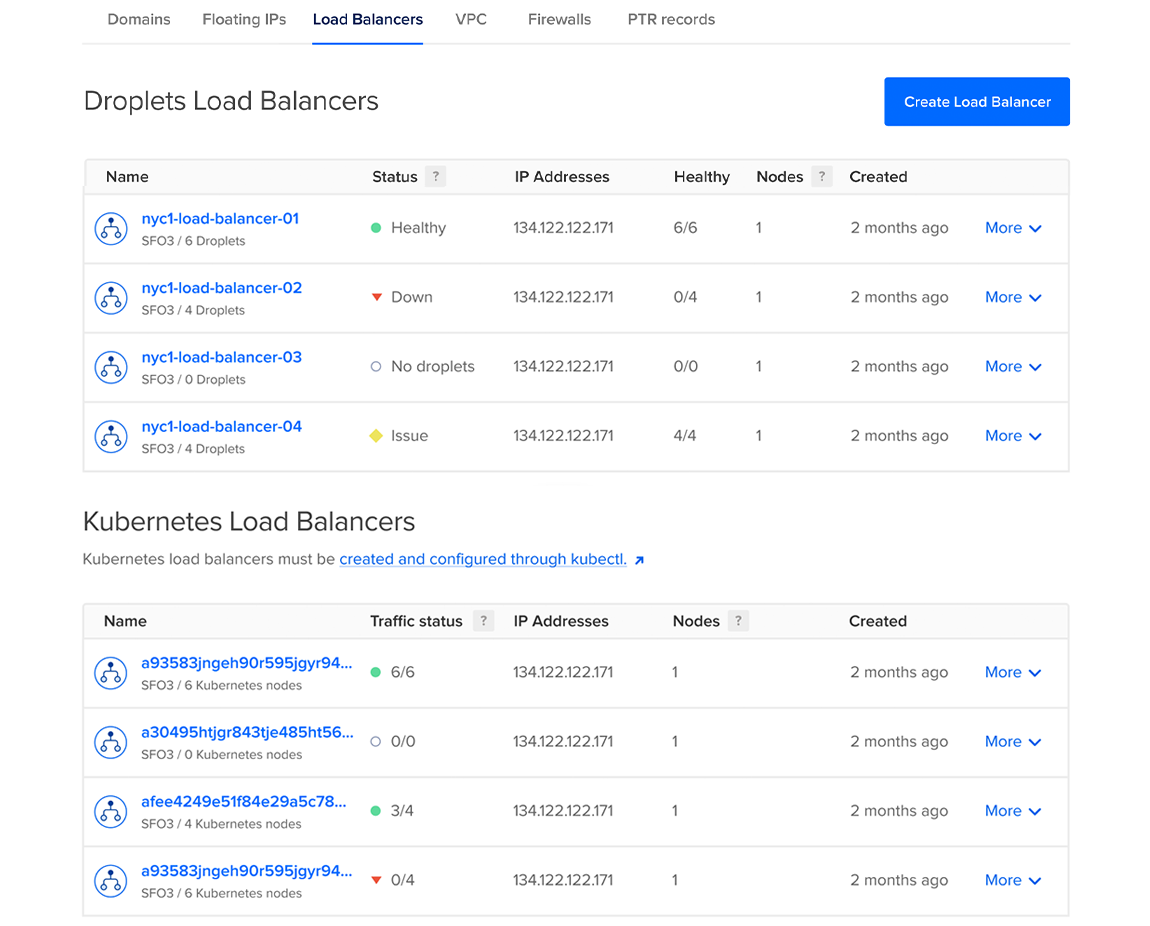
Clicking on a load balancer from the index page takes you to its detail page. On the detail page, you can manage and customize the load balancer by modifying its backend Droplet pool, viewing its performance graphs, and changing advanced settings.