How to Configure SSL Termination
Validated on 28 Oct 2019 • Last edited on 17 Apr 2025
DigitalOcean fully manages Regional Load Balancers and Global Load Balancers, ensuring they are highly available load balancing services. Load balancers distribute traffic to groups of backend resources in specific regions or across different regions, which prevents the health of a service from depending on the health of a single server, cluster, or region.
When load balancing encrypted web traffic, there are two main configuration choices:
-
SSL termination, which decrypts SSL requests at the load balancer and sends them unencrypted to the backend via the Droplets’ private IP addresses.
SSL termination places the slower and more CPU-intensive work of decryption on the load balancer and simplifies certificate management. Traffic between the load balancer and its Droplets is secured by routing over the VPC network. However, if you host multiple customer applications in a single account or team, data could be readable by others on the private network. We recommend separating customers by team or using SSL passthrough instead.
-
SSL passthrough, which sends encrypted SSL requests directly to the backend, via the Droplets’ private IP addresses. This secures the traffic between the load balancers and the backend servers.
SSL passthrough distributes the decryption load across the backend servers, but every server must have the certificate information. You also can’t add or modify HTTP headers, so you may lose the client’s IP address, port, and other information contained in the
X-forwarded-*headers.
To configure SSL termination, you need to add an SSL termination rule and choose or create an SSL certificate to use.
If you added your domain to DigitalOcean, you can use our Let’s Encrypt integration to create a fully managed SSL certificate. You can also manually upload a certificate if you don’t use DigitalOcean to manage your DNS, want to generate your own certificate, or have an existing certificate you want to upload.
Add the SSL Termination Rule
From the control panel, click Networking in the main menu, then click Load Balancers. Click the load balancer you want to modify, then click the Settings tab to go to its settings page.
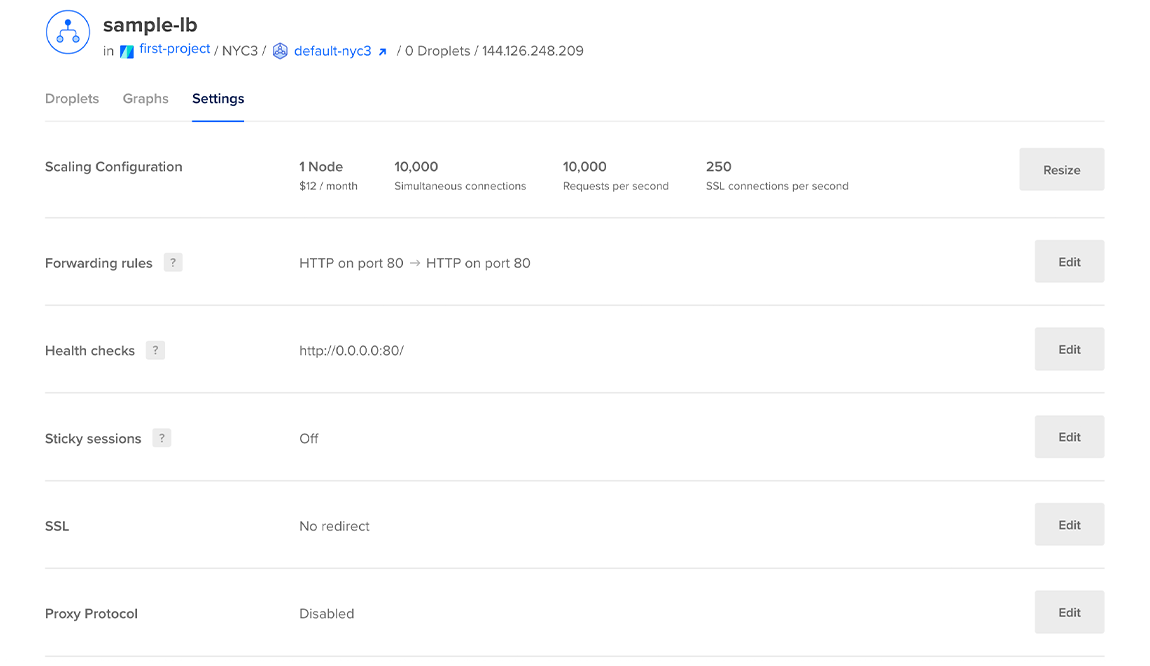
In the Forwarding Rules section, click Edit. You see any existing forwarding rules and an option to add additional rules.
From the New rule drop-down, select HTTPS or HTTP2, which opens a new row of options. Fill in the fields to forward HTTPS or HTTP2 traffic on port 443 on the load balancers to HTTP port 80 on the Droplets.
Add an SSL Certificate
Next, you need to add an SSL certificate. In the Forwarding Rules section, where you’re filling in the new rule, the Certificate drop-down displays any SSL certificates already uploaded to your account.
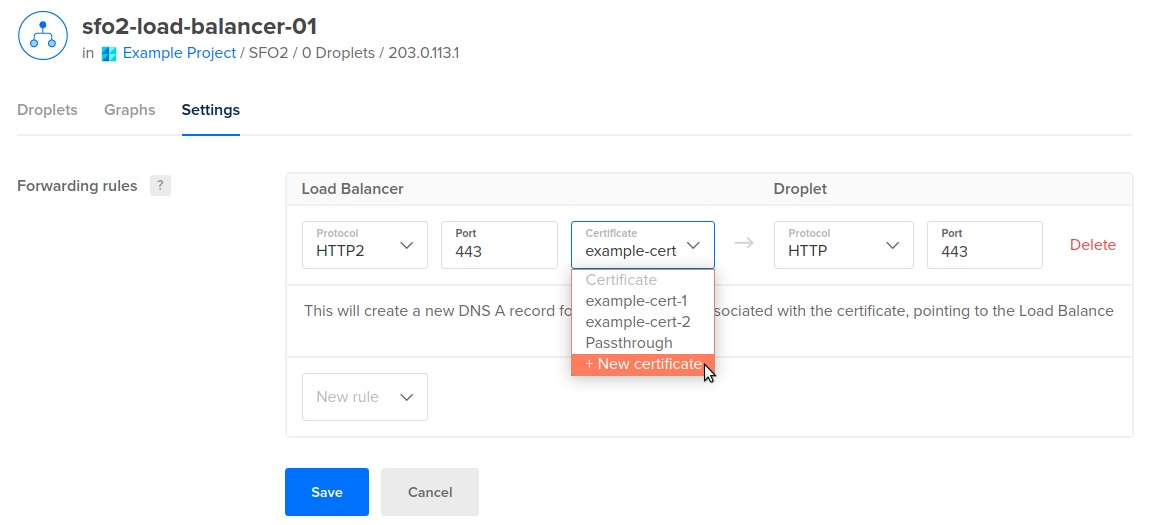
If you want to use one of these certificates, select it from the menu and then click Save. We automatically create a new DNS A record for the apex domain pointing to the load balancer.
If you don’t have a certificate uploaded that you want to use, select the + New Certificate option. This opens a New Certificate window to guide you through either creating a new certificate with Let’s Encrypt and DigitalOcean DNS or uploading your own certificate manually.
If you create a forwarding rule that requires a Let’s Encrypt certificate, you have the option to allow us to automatically create the necessary DNS record, at the apex of your domain, to support the certificate. The Create DNS records for all the new Let’s Encrypt certificates box is checked by default. If you want to manage your own DNS records for your Let’S Encrypt certificate, uncheck the box to opt out of creating any records when creating the forwarding rule.
You can update this selection when adding or updating forwarding rules at a later time. However, the updated selection applies only to the new rules going forward, existing DNS records are not updated.
Use an Existing Domain
If you manage your domain with DigitalOcean DNS, you can choose the Let’s Encrypt option to create a new, fully-managed SSL certificate. We create and automatically renew this certificate for you.
Select the domain you want to use, then select a subdomain option:
-
All subdomains (wildcard): Create a wildcard certificate that secures the domain’s apex and any subdomains that do not have an existing DNS records defined.
-
Select an existing subdomain: Create a certificate that secures the domain’s apex and only selected subdomains.
We do not create or change DNS records for subdomains. If your subdomains do not already point at the load balancer, you need to add DNS records for that.
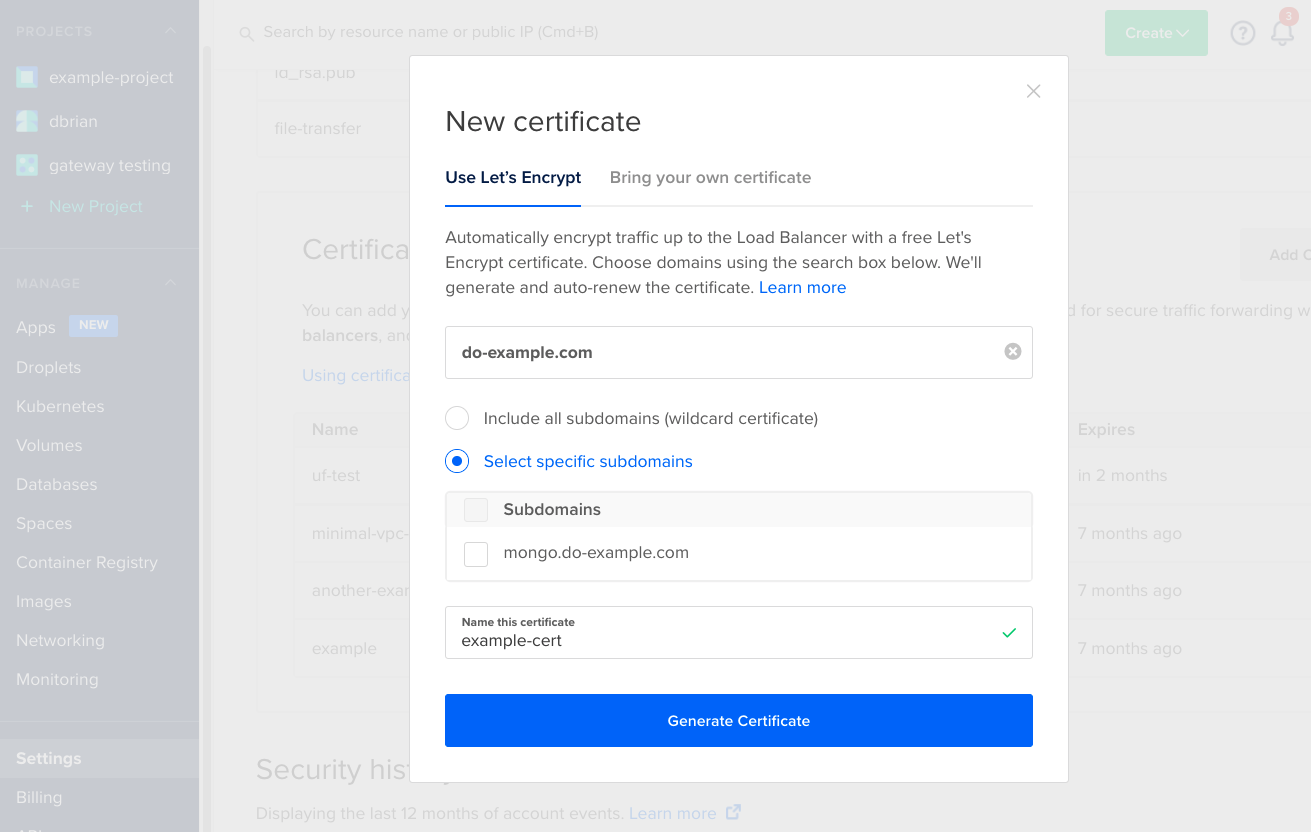
Enter a name for the certificate, then click Generate Certificate. You see a pending status until the certificate has been issued, which typically takes a few seconds, after which you can click Save. As soon as the rule is saved, it’s active and you can begin testing.
Add a New Domain
If you want to start managing a new domain with DigitalOcean DNS to use, select the + Add new domain option to automatically import your domain to the control panel, add DNS records, and create the certificate.
When you do, an Additional steps required window opens to tell you that you need to update your name server records with your domain registrar.
After you click Yes, continue, you return to the New certificate window with the Add New Domain options.
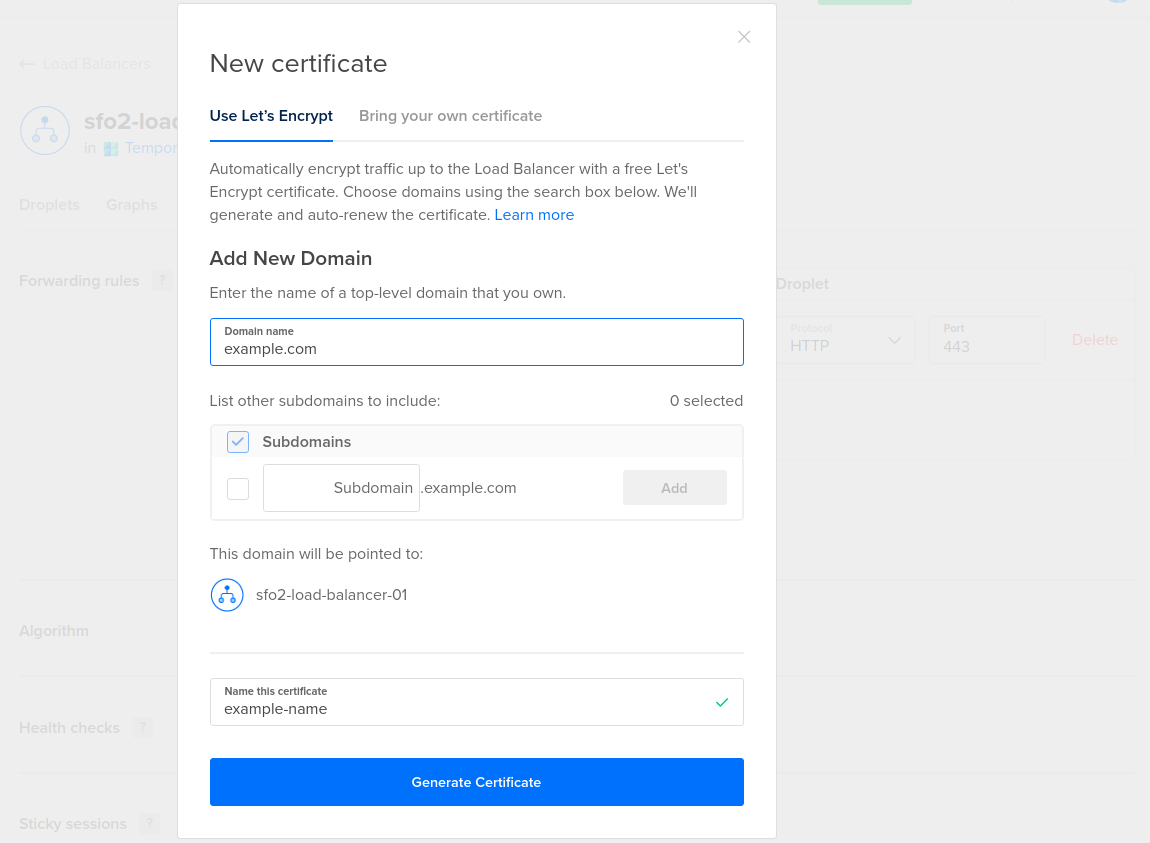
In the Add New Domain section, enter a domain you own. When you generate the certificate, this domain is imported into the control panel. We automatically create an A record pointing to the load balancer’s IP address.
Next, select any subdomains you want to use. We automatically create CNAME records that reference the A record of the apex domain.
Enter a name for the certificate, then click Generate Certificate. You see a pending status until the certificate has been issued, which typically takes a few seconds, after which you can click Save. As soon as the rule is saved, it’s active and you can begin testing.
In the Bring Your Own Certificate tab, you can manually enter the details of an existing certificate.
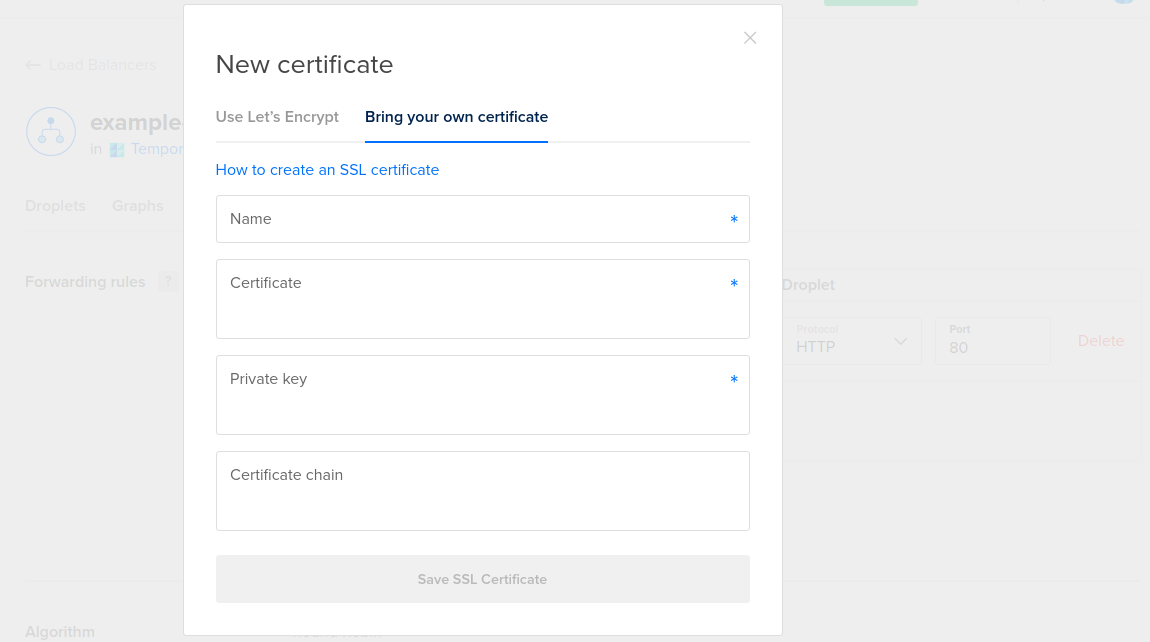
You need to fill in four fields:
-
Name. This is a name you choose to identify the certificate in the DigitalOcean interface. It can only contain letters, numbers, periods, and dashes.
-
Public key. This is the actual SSL public key or certificate file.
-
Private key. This is the secret key associated with the certificate.
-
Certificate Chain. This is the full trust chain between the trusted certificate authority’s certificate and your domain’s certificate.
Click the Save SSL Certificate button, then click Save to implement the new forwarding rule. As soon as the rule is saved, it’s active and you can begin testing.
You can manage all of your account’s SSL certificates in the Settings section of the main menu, in the Security tab. Learn more in our certificate management documentation.
Force SSL Traffic
If you would like to force visitors to connect over HTTPS for data integrity and security purposes, you can optionally redirect HTTP traffic to HTTPS. Any insecure connections made to the load balancer are redirected to use the certificate you loaded.
To do this, click the Edit button associated with the SSL row in the settings. Inside, select the Redirect HTTP to HTTPS checkbox:
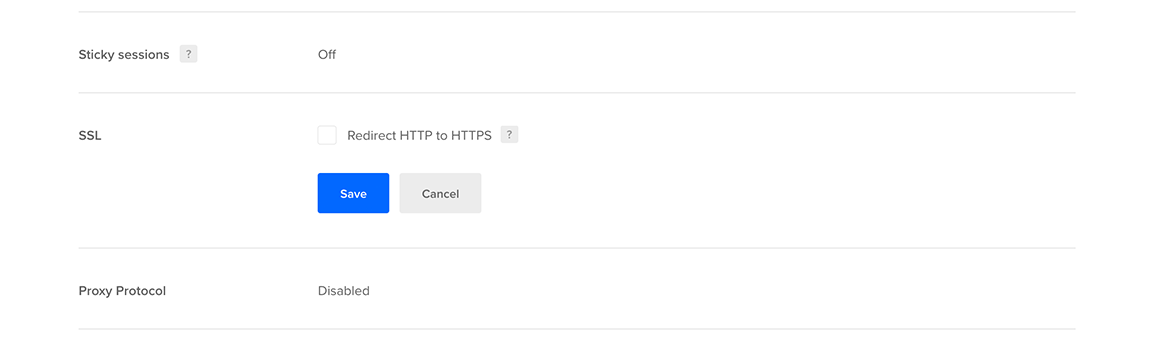
Click Save to implement the change.