By Ryan Quinn
 on Fedora 22")
##Introduction
A LAMP stack is a group of open source software used to get web servers up and running. The acronym stands for Linux, Apache, MySQL, and PHP. Since the server is already running Fedora, the Linux part is taken care of. Here is how to install the rest.
Prerequisites
Before beginning this tutorail you should have a running Fedora 22 droplet and be logged in via SSH.
##Setup
Before you start installing the LAMP programs, you should first download and install all of the updates with dnf update dnf replaced yum as the default package manager for Fedora in version 22:
sudo dnf update
##Step One—Install Apache
Apache is a free open source software which runs over 50% of the world’s web servers.
To install apache, open terminal and type in this command:
sudo dnf install httpd
Once it installs, you can start apache running on your VPS:
sudo systemctl start httpd.service
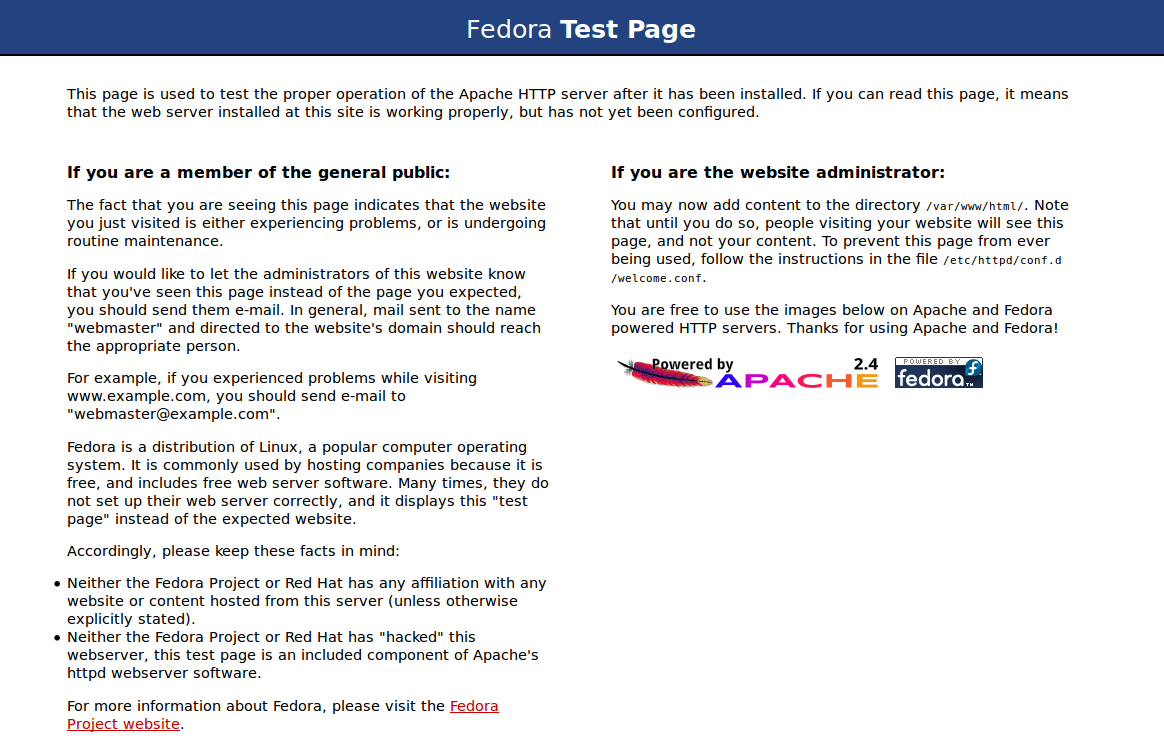
That’s it. To check if Apache is installed, direct your browser to your server’s IP address (eg. http://12.34.56.789). You should see the default Fedora page
###How to find your Droplet’s IP address
You can run the following command to reveal your server’s IP address.
ifconfig eth0 | grep inet | awk '{ print $2 }'
##Step Two—Install MySQL
MySQL/MariaDB is a powerful database management system used for organizing and retrieving data on a virtual server
To install MySQL, open terminal and type in these commands:
sudo dnf install mysql mysql-server
sudo systemctl start mariadb.service
Once it is done installing, you can set a root MySQL password:
sudo /usr/bin/mysql_secure_installation
The prompt will ask you for your current root password.
Since you just installed MySQL, you most likely won’t have one, so leave it blank by pressing enter.
Enter current password for root (enter for none):
OK, successfully used password, moving on...
Then the prompt will ask you if you want to set a root password. Go ahead and choose Y and follow the instructions.
Fedora automates the process of setting up MySQL, asking you a series of yes or no questions.
It’s easiest just to say Yes to all the options. At the end, MySQL will reload and implement the new changes.
<pre>By default, a MariaDB installation has an anonymous user, allowing anyone
to log into MariaDB without having to have a user account created for
them.  This is intended only for testing, and to make the installation
go a bit smoother.  You should remove them before moving into a
production environment.

Remove anonymous users? [Y/n] Y
 ... Success!

Normally, root should only be allowed to connect from 'localhost'.  This
ensures that someone cannot guess at the root password from the network.

Disallow root login remotely? [Y/n] Y
 ... Success!

By default, MariaDB comes with a database named 'test' that anyone can
access.  This is also intended only for testing, and should be removed
before moving into a production environment.

Remove test database and access to it? [Y/n] Y
 - Dropping test database...
 ... Success!
 - Removing privileges on test database...
 ... Success!

Reloading the privilege tables will ensure that all changes made so far
will take effect immediately.

Reload privilege tables now? [Y/n] Y
 ... Success!

Cleaning up...

All done!  If you've completed all of the above steps, your MariaDB
installation should now be secure.

Thanks for using MariaDB!
##Step Three—Install PHP
PHP is an open source web scripting language that is widely used to build dynamic web pages.
To install PHP on your virtual private server, open terminal and type in this command:
sudo dnf install php php-mysql
Once you answer yes to the PHP prompt, PHP will install itself.
###PHP Modules
PHP also has a variety of useful libraries and modules that you can add onto your server. You can see the libraries that are available by typing:
dnf search php-
The terminal then will display the list of possible modules. The beginning looks like this:
php-fpdf-doc.noarch : Documentation for php-fpdf
php-libvirt-doc.noarch : Document of php-libvirt
php-pear-Auth-radius.noarch : RADIUS support for php-pear-Auth
php-pear-Auth-samba.noarch : Samba support for php-pear-Auth
ice-php-devel.i686 : PHP tools for developping Ice applications
ice-php-devel.x86_64 : PHP tools for developping Ice applications
perl-PHP-Serialization.noarch : Converts between PHP's serialize() output and
                              : the equivalent Perl structure
php-IDNA_Convert.noarch : Provides conversion of internationalized strings to
                        : UTF8
php-Kohana.noarch : The Swift PHP Framework
php-LightweightPicasaAPI.noarch : A lightweight API for Picasa in PHP
php-PHPMailer.noarch : PHP email transport class with a lot of features
php-Smarty.noarch : Template/Presentation Framework for PHP
php-ZendFramework.noarch : Leading open-source PHP framework
php-ZendFramework-Auth-Adapter-Ldap.noarch : Zend Framework LDAP
                                           : Authentication Adapter
php-ZendFramework-Cache-Backend-Apc.noarch : Zend Framework APC cache backend
To see more details about what each module does, type the following command into terminal, replacing the name of the module with whatever library you want to learn about.
dnf info name of the module
Once you decide to install the module, type:
sudo dnf install name of the module
You can install multiple libraries at once by separating the name of each module with a space.
Congratulations! You now have LAMP stack on your droplet!
We should also set the processes to run automatically when the server boots (php will run automatically once Apache starts):
sudo chkconfig httpd on
sudo chkconfig mariadb on
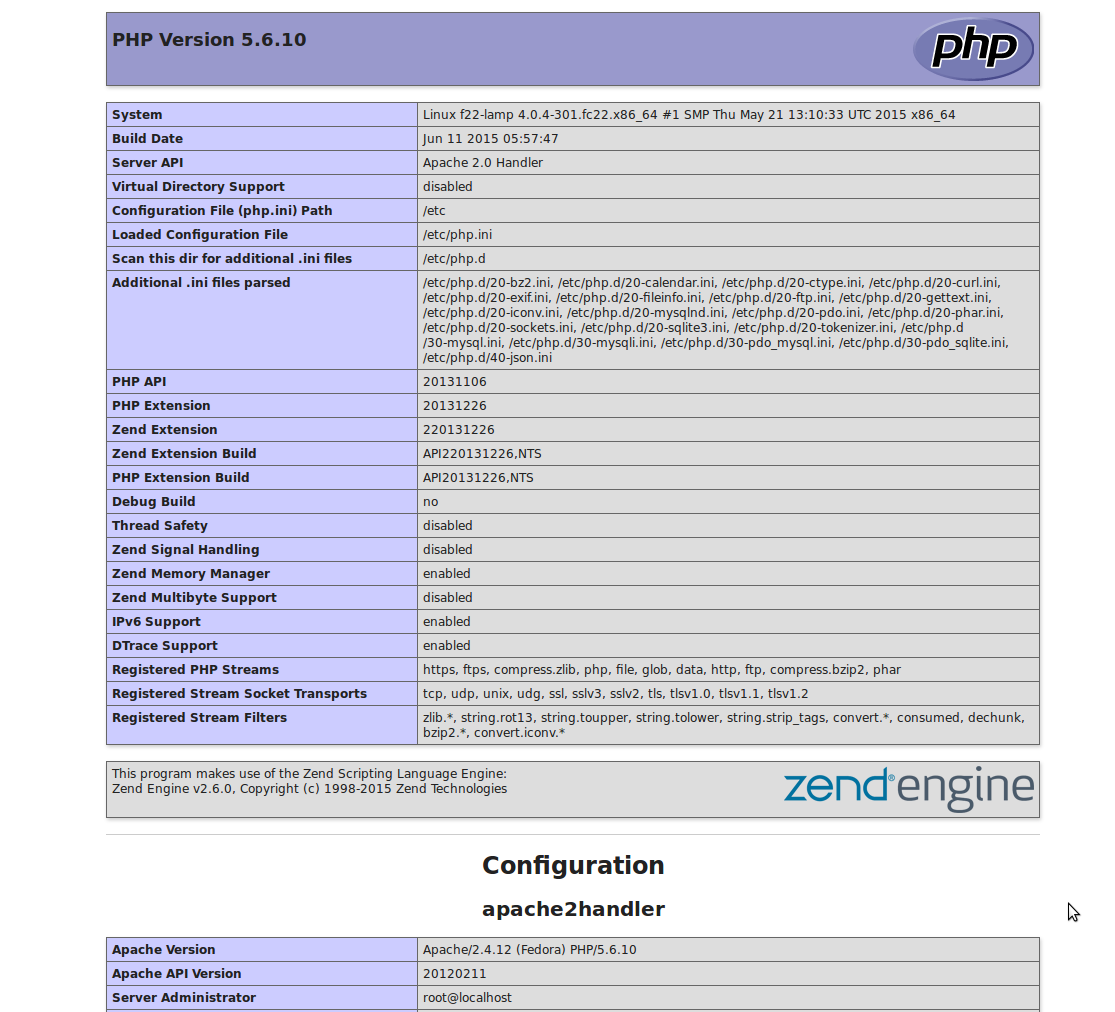
##Step Four—RESULTS: See PHP on your Server
Although LAMP is installed on your virtual server, we can still take a look and see the components online by creating a quick php info page
To set this up, first install the nano text editor and create a new file:
sudo dnf install nano
sudo nano /var/www/html/info.php
Add in the following line:
<?php
phpinfo();
?>
Then Save and Exit.
Restart apache so that all of the changes take effect on your virtual server:
sudo systemctl restart httpd.service
Finish up by visiting your php info page (make sure you replace the example ip address with your correct one): http://12.34.56.789/info.php
It should look similar to this:
Thanks for learning with the DigitalOcean Community. Check out our offerings for compute, storage, networking, and managed databases.
About the author
Software Engineer @ DigitalOcean.
Still looking for an answer?
This textbox defaults to using Markdown to format your answer.
You can type !ref in this text area to quickly search our full set of tutorials, documentation & marketplace offerings and insert the link!
sudo dnf install php php-mysql
I’m on fedora 29 and it’s rejecting this command. I managed to install by
sudo dnf install php php-mysqlnd
 This work is licensed under a Creative Commons Attribution-NonCommercial- ShareAlike 4.0 International License.
Become a contributor for community
Get paid to write technical tutorials and select a tech-focused charity to receive a matching donation.

DigitalOcean Documentation
Full documentation for every DigitalOcean product.

Resources for startups and AI-native businesses
The Wave has everything you need to know about building a business, from raising funding to marketing your product.
The developer cloud
Scale up as you grow — whether you're running one virtual machine or ten thousand.

Start building today
From GPU-powered inference and Kubernetes to managed databases and storage, get everything you need to build, scale, and deploy intelligent applications.
