By Amit Jotwani
Developer Educator

At GTC 2026, NVIDIA announced NemoClaw, an open-source stack that makes it easy to run OpenClaw autonomous agents securely. OpenClaw is an open-source agent platform that Jensen Huang called “the operating system for personal AI.” We covered how to run OpenClaw on a Droplet in an earlier tutorial. NemoClaw takes a different approach - it wraps OpenClaw with sandboxing, security policies, and inference routing through NVIDIA’s cloud.
NemoClaw is still in alpha, so expect rough edges. Interfaces may change, features might be incomplete, and things could break. But if you’re curious to try it out or just want to see what NVIDIA’s vision for agents looks like, this tutorial will get you up and running on a DigitalOcean Droplet in under 10 minutes.
Prerequisites
Before you begin, you’ll need:
- A DigitalOcean account (sign up here if you don’t have one)
- An NVIDIA account to generate an API key at build.nvidia.com
Step 1 - Create a Droplet from the Marketplace
Head to the NemoClaw 1-Click Droplet on the DigitalOcean Marketplace. Click Create NemoClaw Droplet.
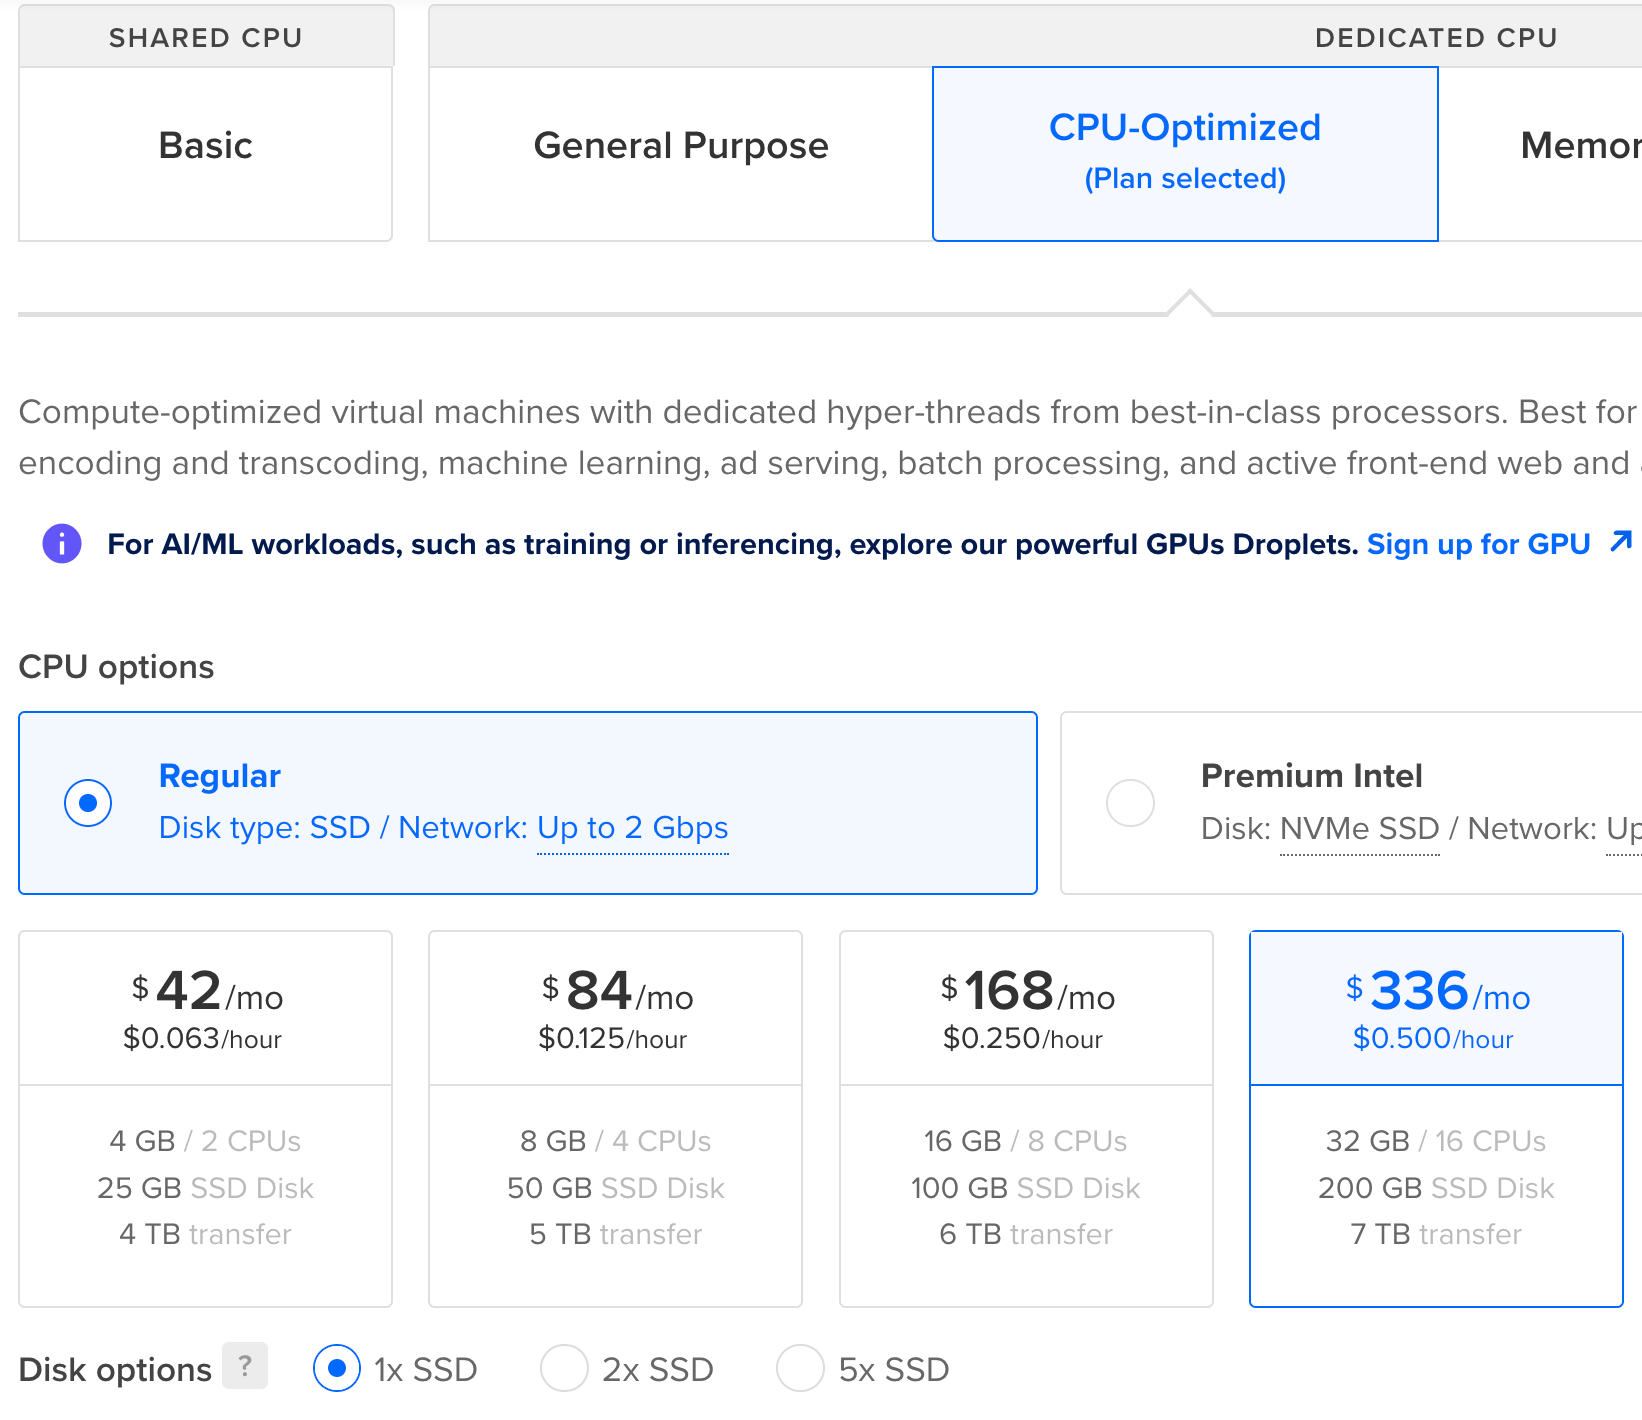
When configuring the Droplet, select the CPU-Optimized plan with Premium Intel. You’ll want the option with 32 GB of RAM and 16 CPUs. NemoClaw runs Docker containers, a Kubernetes cluster (k3s), and the OpenShell gateway, so it needs the headroom.
Pick a datacenter region close to you, add your SSH key, and hit Create Droplet.
Heads up: This Droplet costs $336/mo, so make sure to destroy it when you’re done experimenting. It adds up fast if you forget about it.
Step 2 - SSH into the Droplet
Once your Droplet is ready, SSH in:
ssh root@your_server_ip
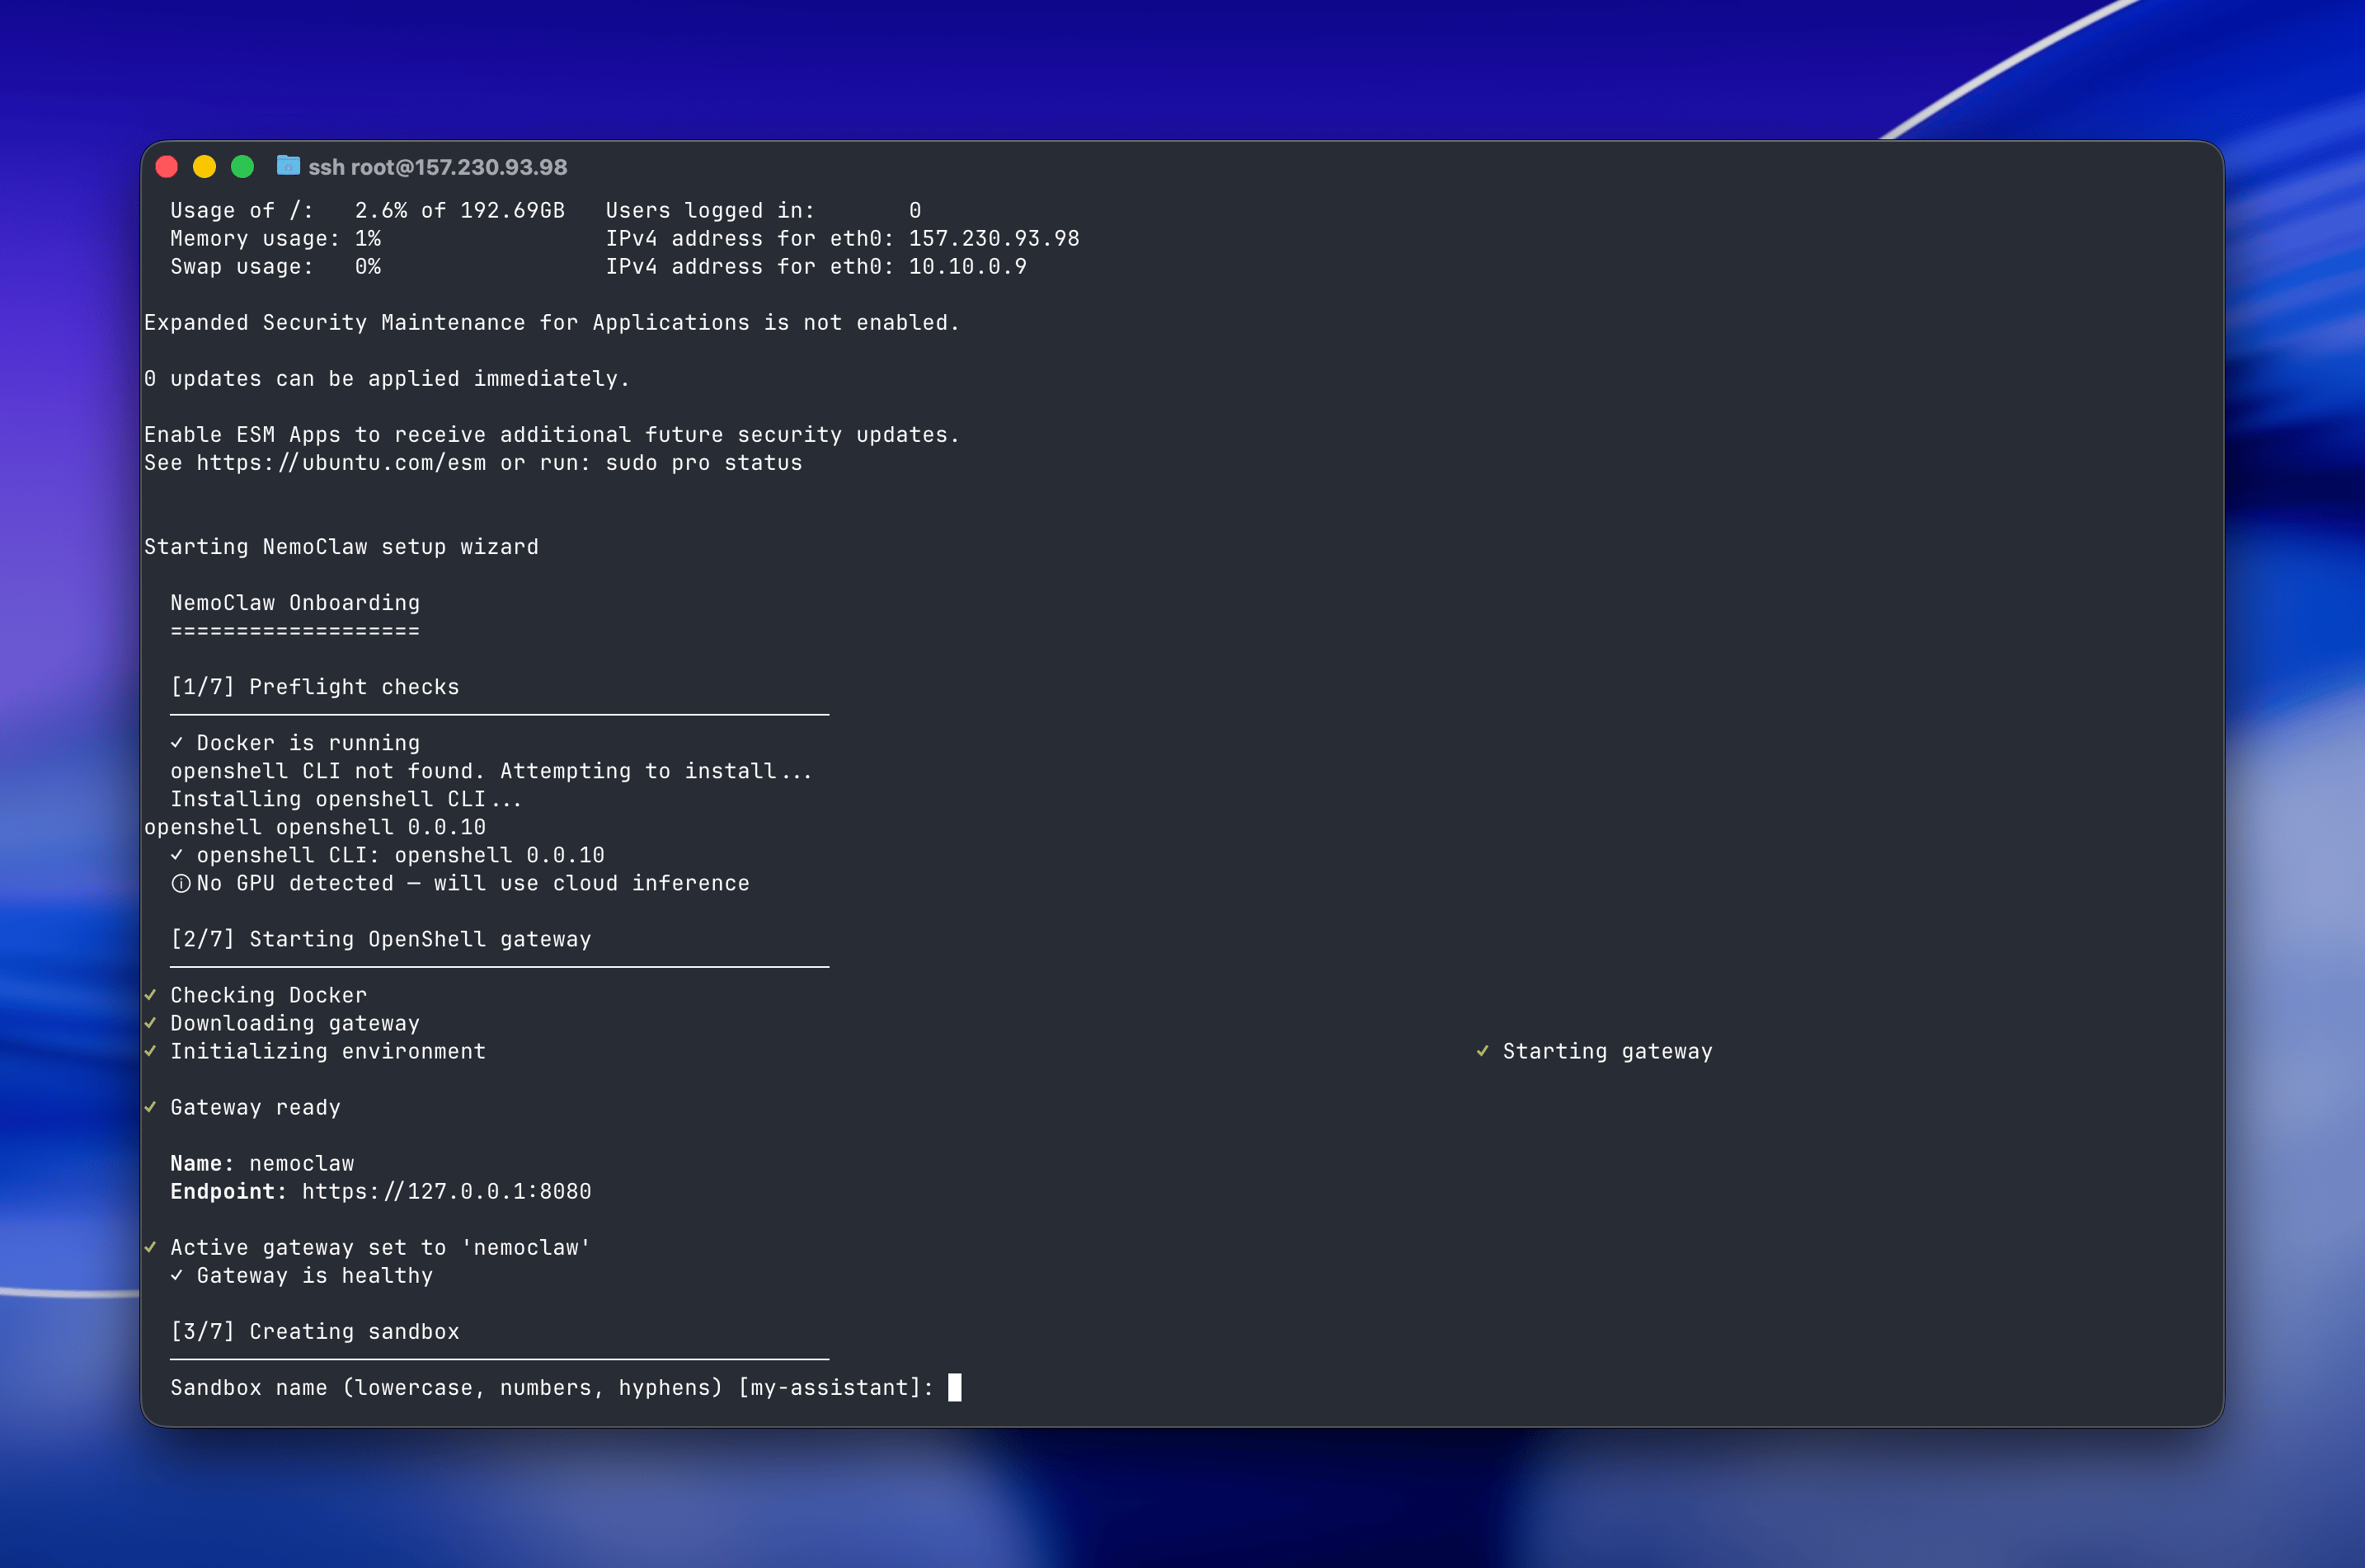
You’ll see the usual Ubuntu login banner, and then the NemoClaw onboarding wizard will kick off automatically. It runs through a series of preflight checks, making sure Docker is running, installing the OpenShell CLI, and spinning up the gateway. You’ll see checkmarks fly by as each step completes.
Step 3 - Walk Through the Onboarding Wizard
The onboarding wizard will ask you a few things. Here’s what to do at each prompt:
Sandbox Name
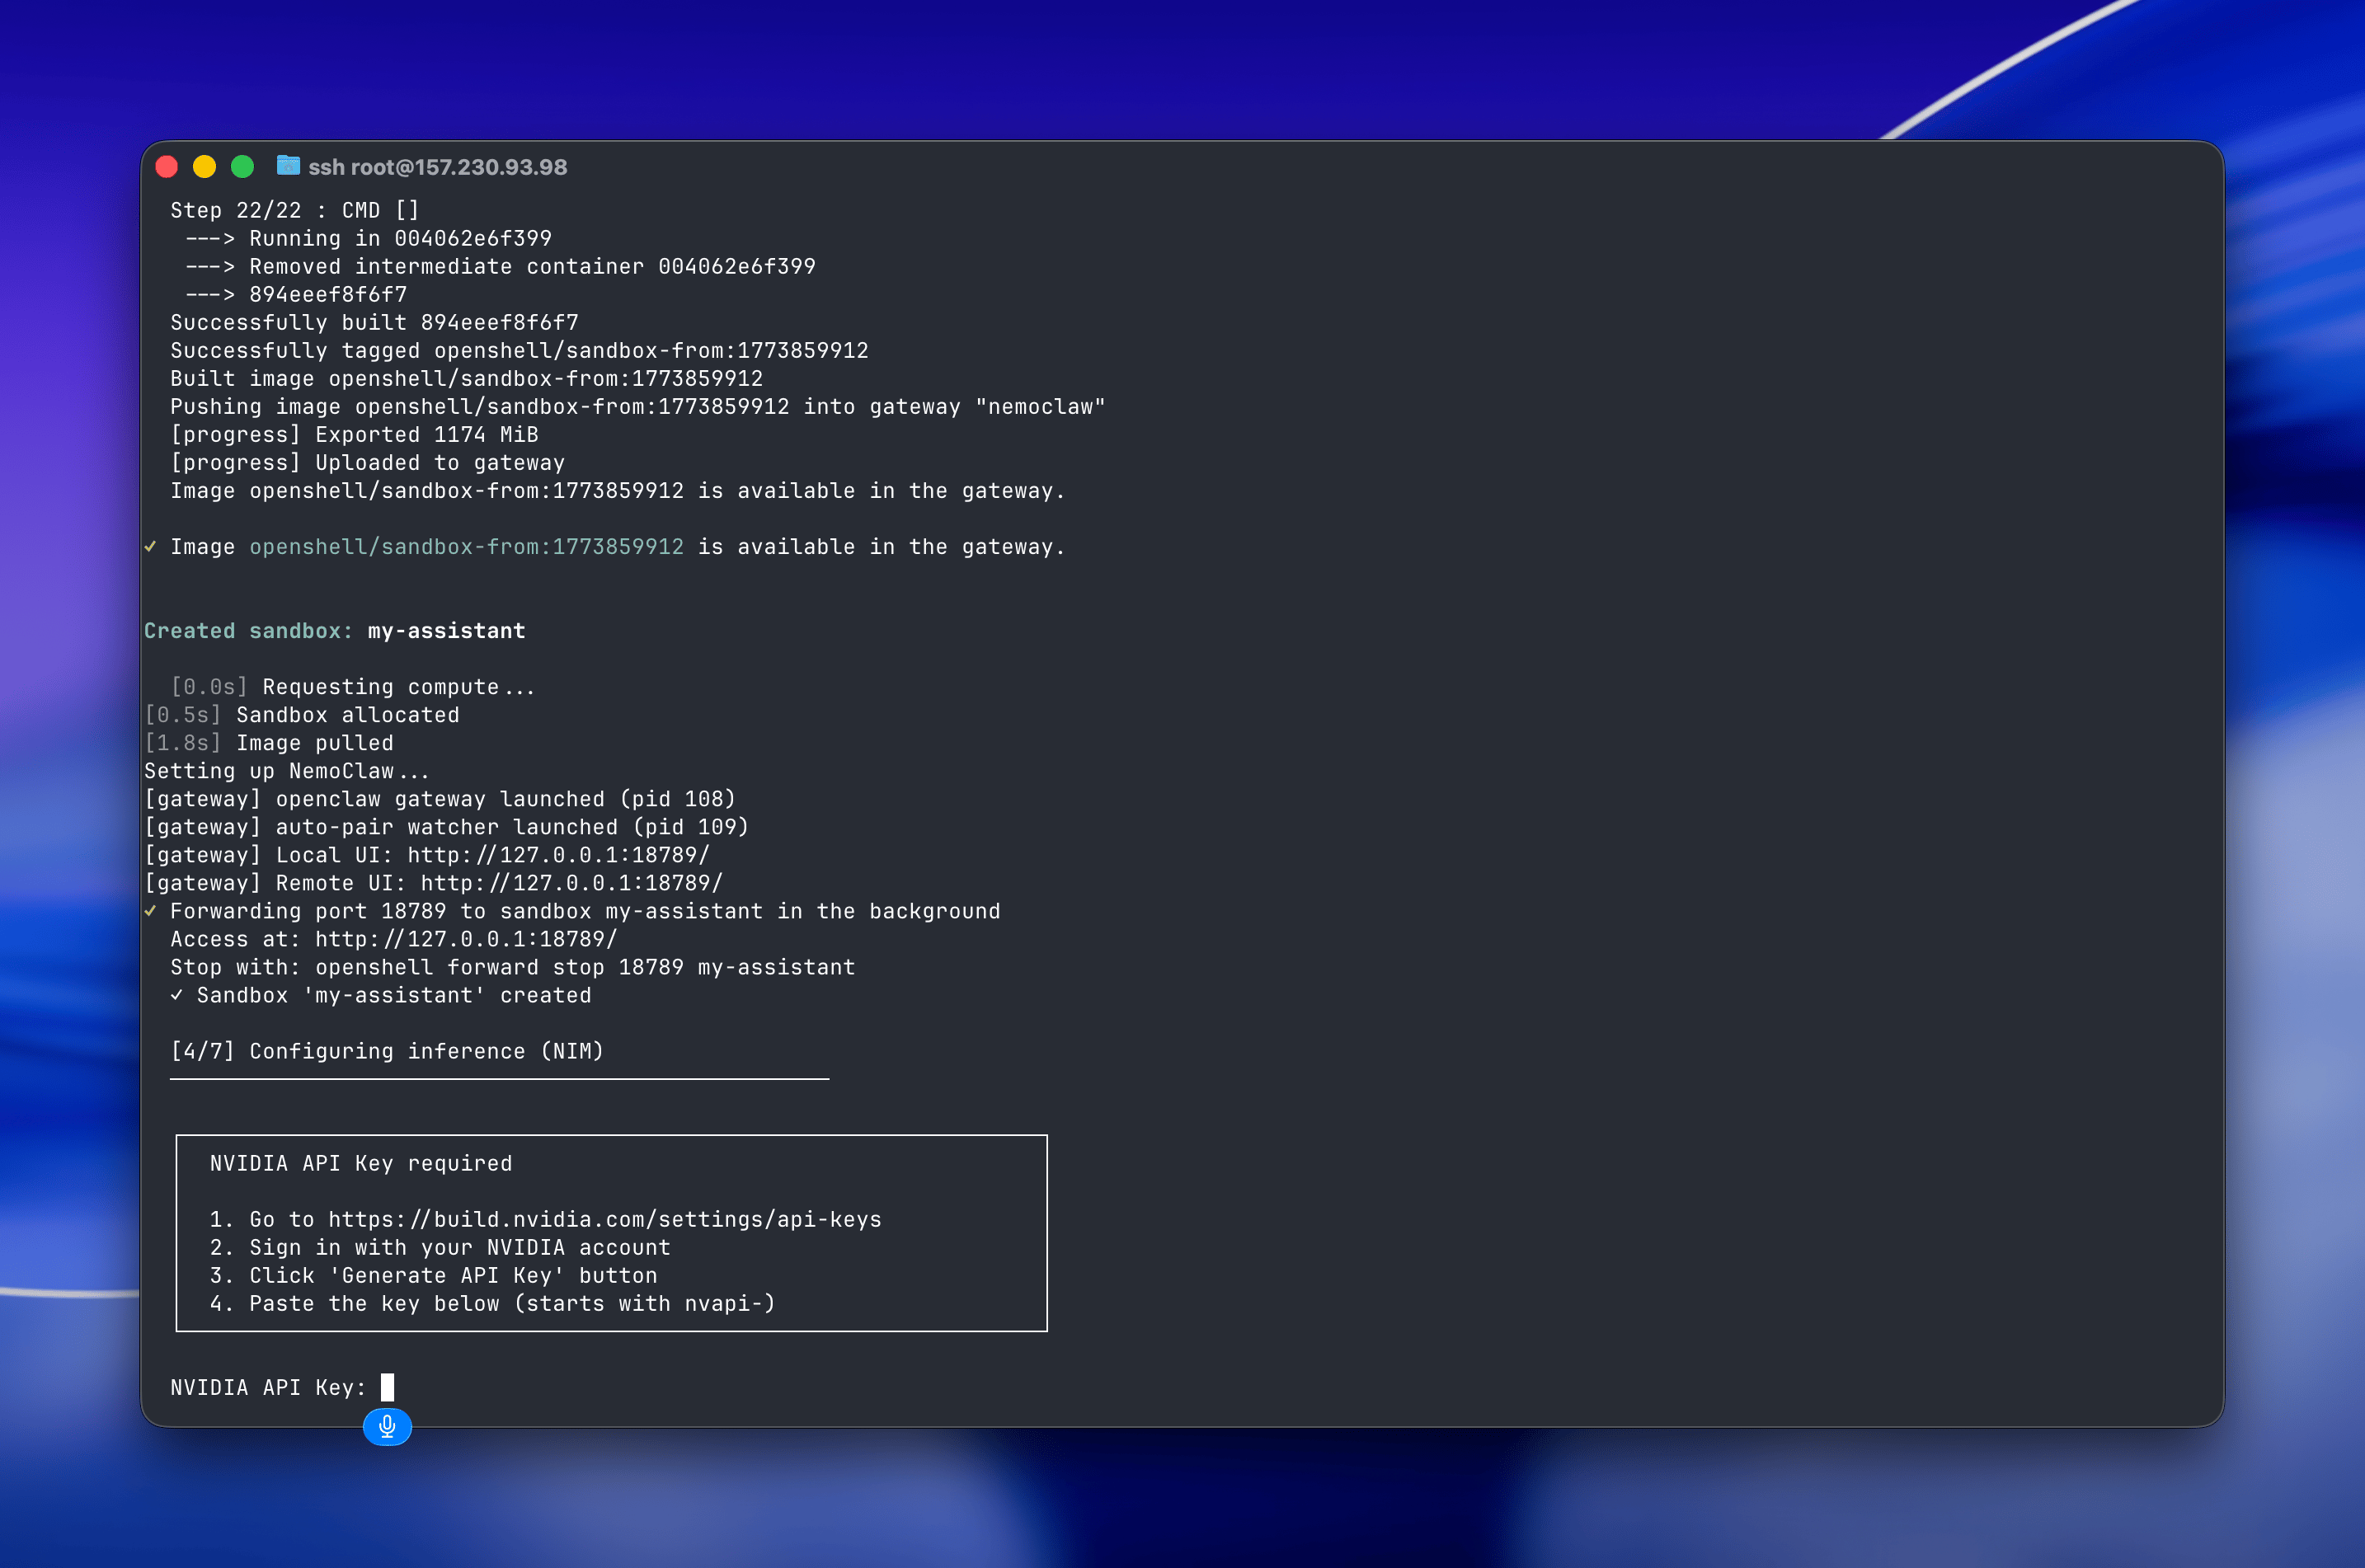
The first prompt asks for a sandbox name. Just press Enter to accept the default (my-assistant). The wizard will then create the sandbox, build the container image, and push it to the gateway. This takes a couple of minutes, and you’ll see it run through about 20 steps as it builds and uploads everything.
NVIDIA API Key
Once the sandbox is ready, the wizard asks for your NVIDIA API key. In this setup, inference is routed through NVIDIA’s cloud using the nvidia/nemotron-3-super-120b-a12b model, so it needs a key to authenticate.
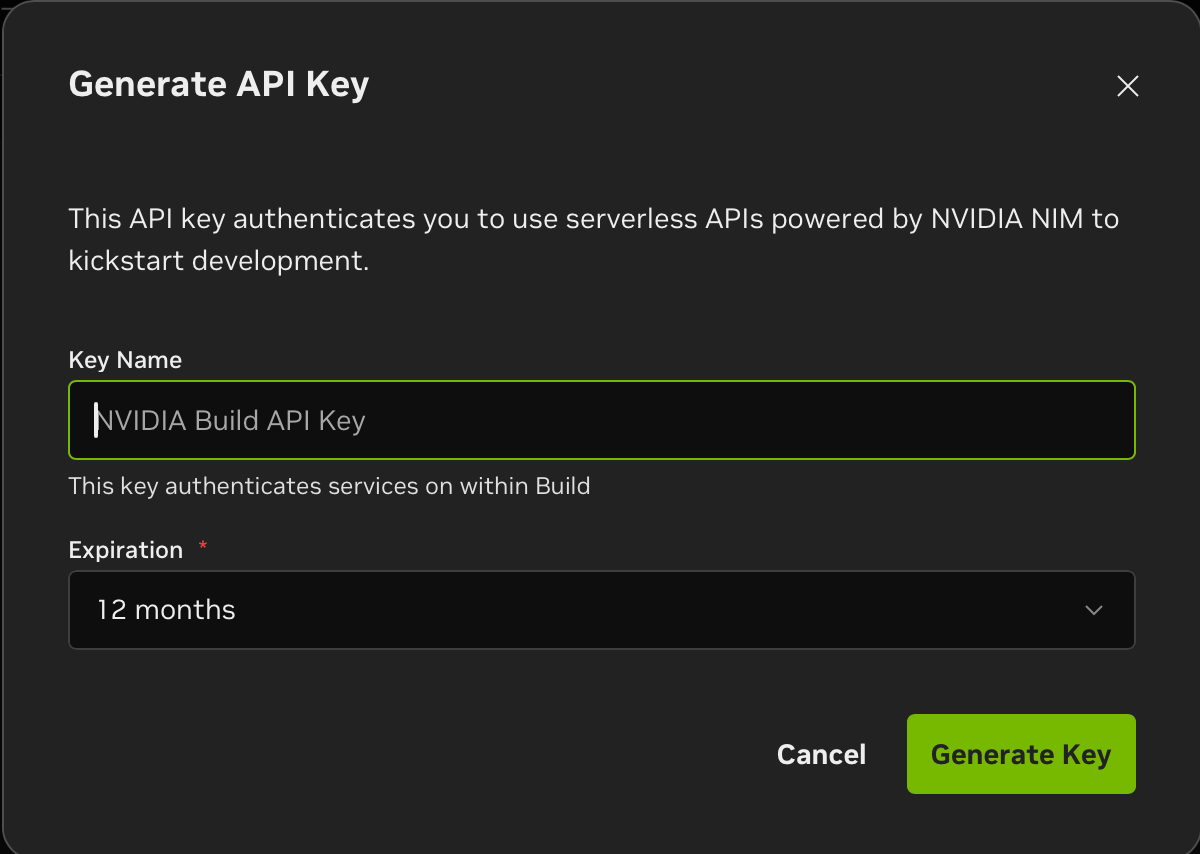
To get your key, head to build.nvidia.com/settings/api-keys, sign in, and click Generate API Key. Give it a name, pick an expiration, and hit Generate Key.
Copy the key (it starts with nvapi-), paste it into the terminal prompt, and press Enter.
The wizard saves the key to ~/.nemoclaw/credentials.json and sets up the inference provider. You’ll see it confirm the model and create an inference route.
Policy Presets
After the inference setup, NemoClaw sets up OpenClaw inside the sandbox and then asks about policy presets. You’ll see a list of available presets including Discord, Docker Hub, Hugging Face, Jira, npm, PyPI, Slack, and more. These control what external services the agent is allowed to reach.

At the bottom, the wizard asks:
Apply suggested presets (pypi, npm)? [Y/n/list]:
Type n and press Enter. These presets grant the sandbox network access to package registries, which you don’t need for a basic setup. You can always add them later if your agent needs to install packages.
Once onboarding finishes, you’ll see a clean summary with your sandbox details and the commands you’ll need going forward:
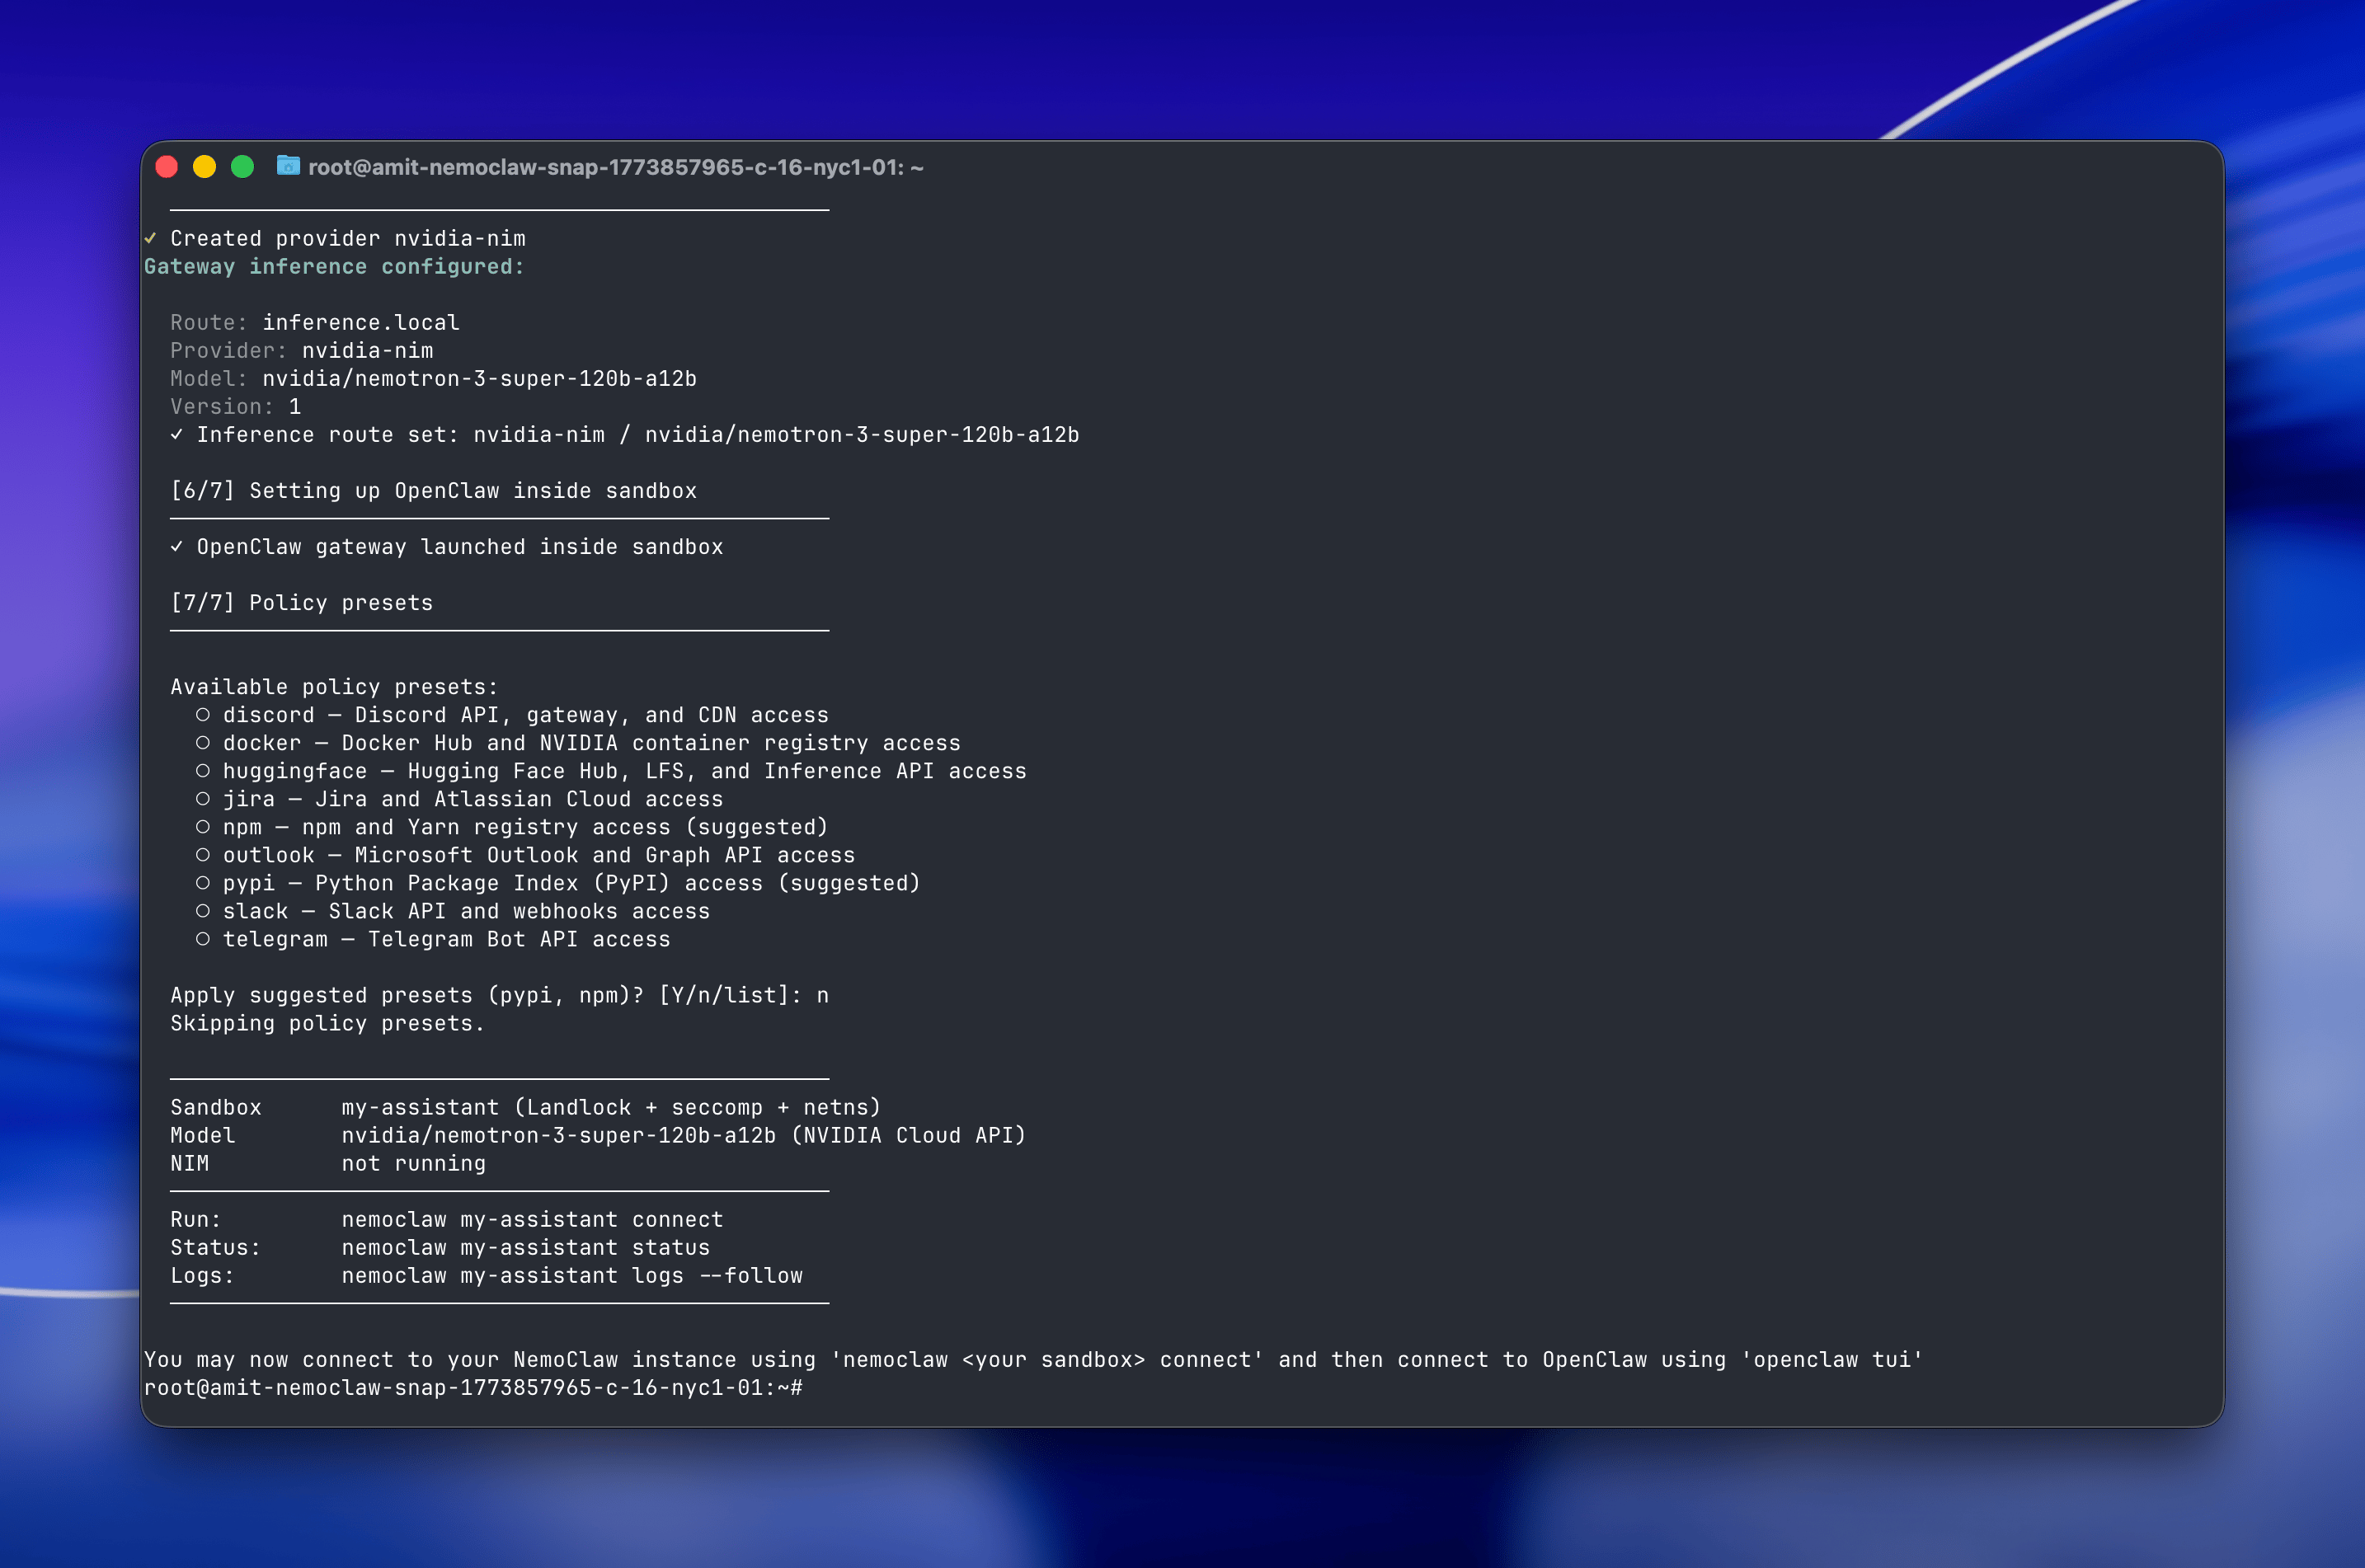
Sandbox    my-assistant (Landlock + seccomp + netns)
Model      nvidia/nemotron-3-super-120b-a12b (NVIDIA Cloud API)
NIM        not running

Run:       nemoclaw my-assistant connect
Status:    nemoclaw my-assistant status
Logs:      nemoclaw my-assistant logs --follow
Step 4 - Connect to NemoClaw
Now for the fun part. Connect to your sandbox:
nemoclaw my-assistant connect
This drops you into a shell inside the sandboxed environment. From here, launch the OpenClaw TUI (terminal user interface):
openclaw tui
That’s it. You should see the OpenClaw chat interface come up. The agent will greet you and introduce itself, ready to chat.
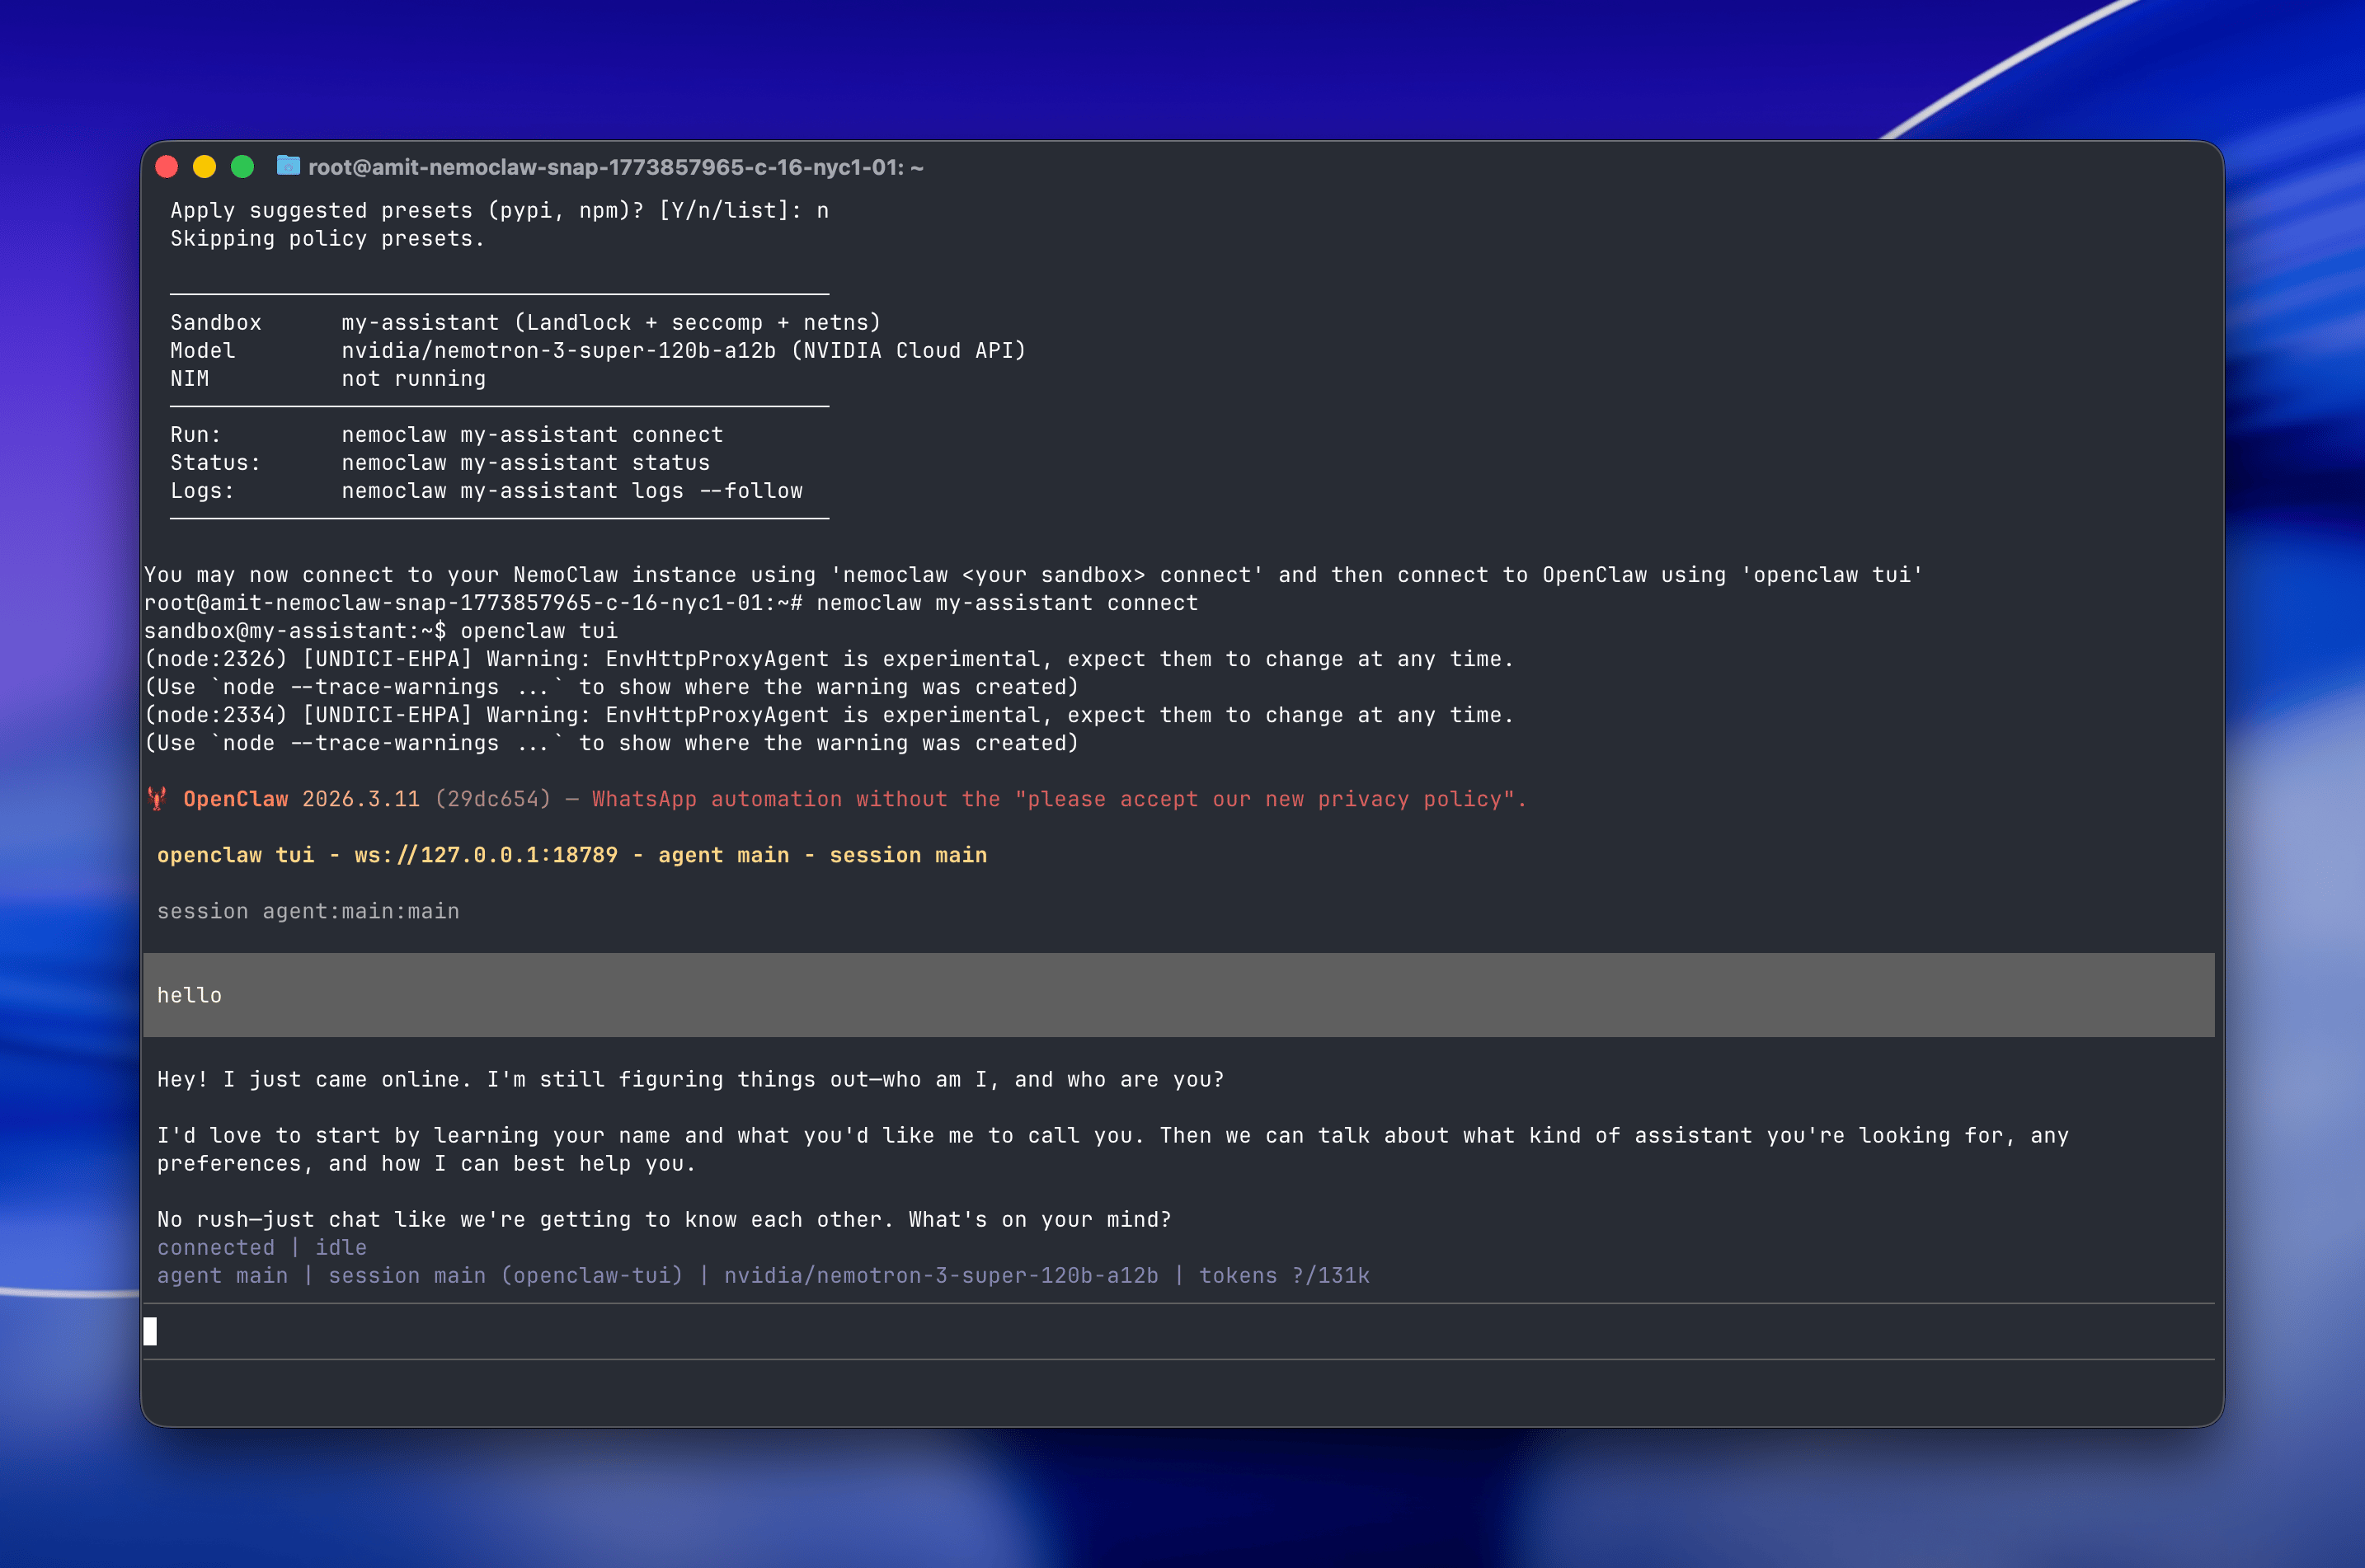
Type a message and hit Enter. You’re now talking to an AI agent running inside a secure, sandboxed environment on your own Droplet.
Reconnecting After a New SSH Session
If you close your terminal and SSH back into the Droplet later, you’ll find that nemoclaw and related commands aren’t available. That’s because the onboarding script installed everything through nvm in a separate shell, and that doesn’t carry over to new sessions.
Run this once to fix it permanently. It adds nvm to your .bashrc so it loads automatically on every login:
echo 'export NVM_DIR="$HOME/.nvm"' >> ~/.bashrc && echo '[ -s "$NVM_DIR/nvm.sh" ] && \. "$NVM_DIR/nvm.sh"' >> ~/.bashrc && echo '[ -s "$NVM_DIR/bash_completion" ] && \. "$NVM_DIR/bash_completion"' >> ~/.bashrc && source ~/.bashrc
Then reconnect to your sandbox and launch the TUI the same way as before:
nemoclaw my-assistant connect
openclaw tui
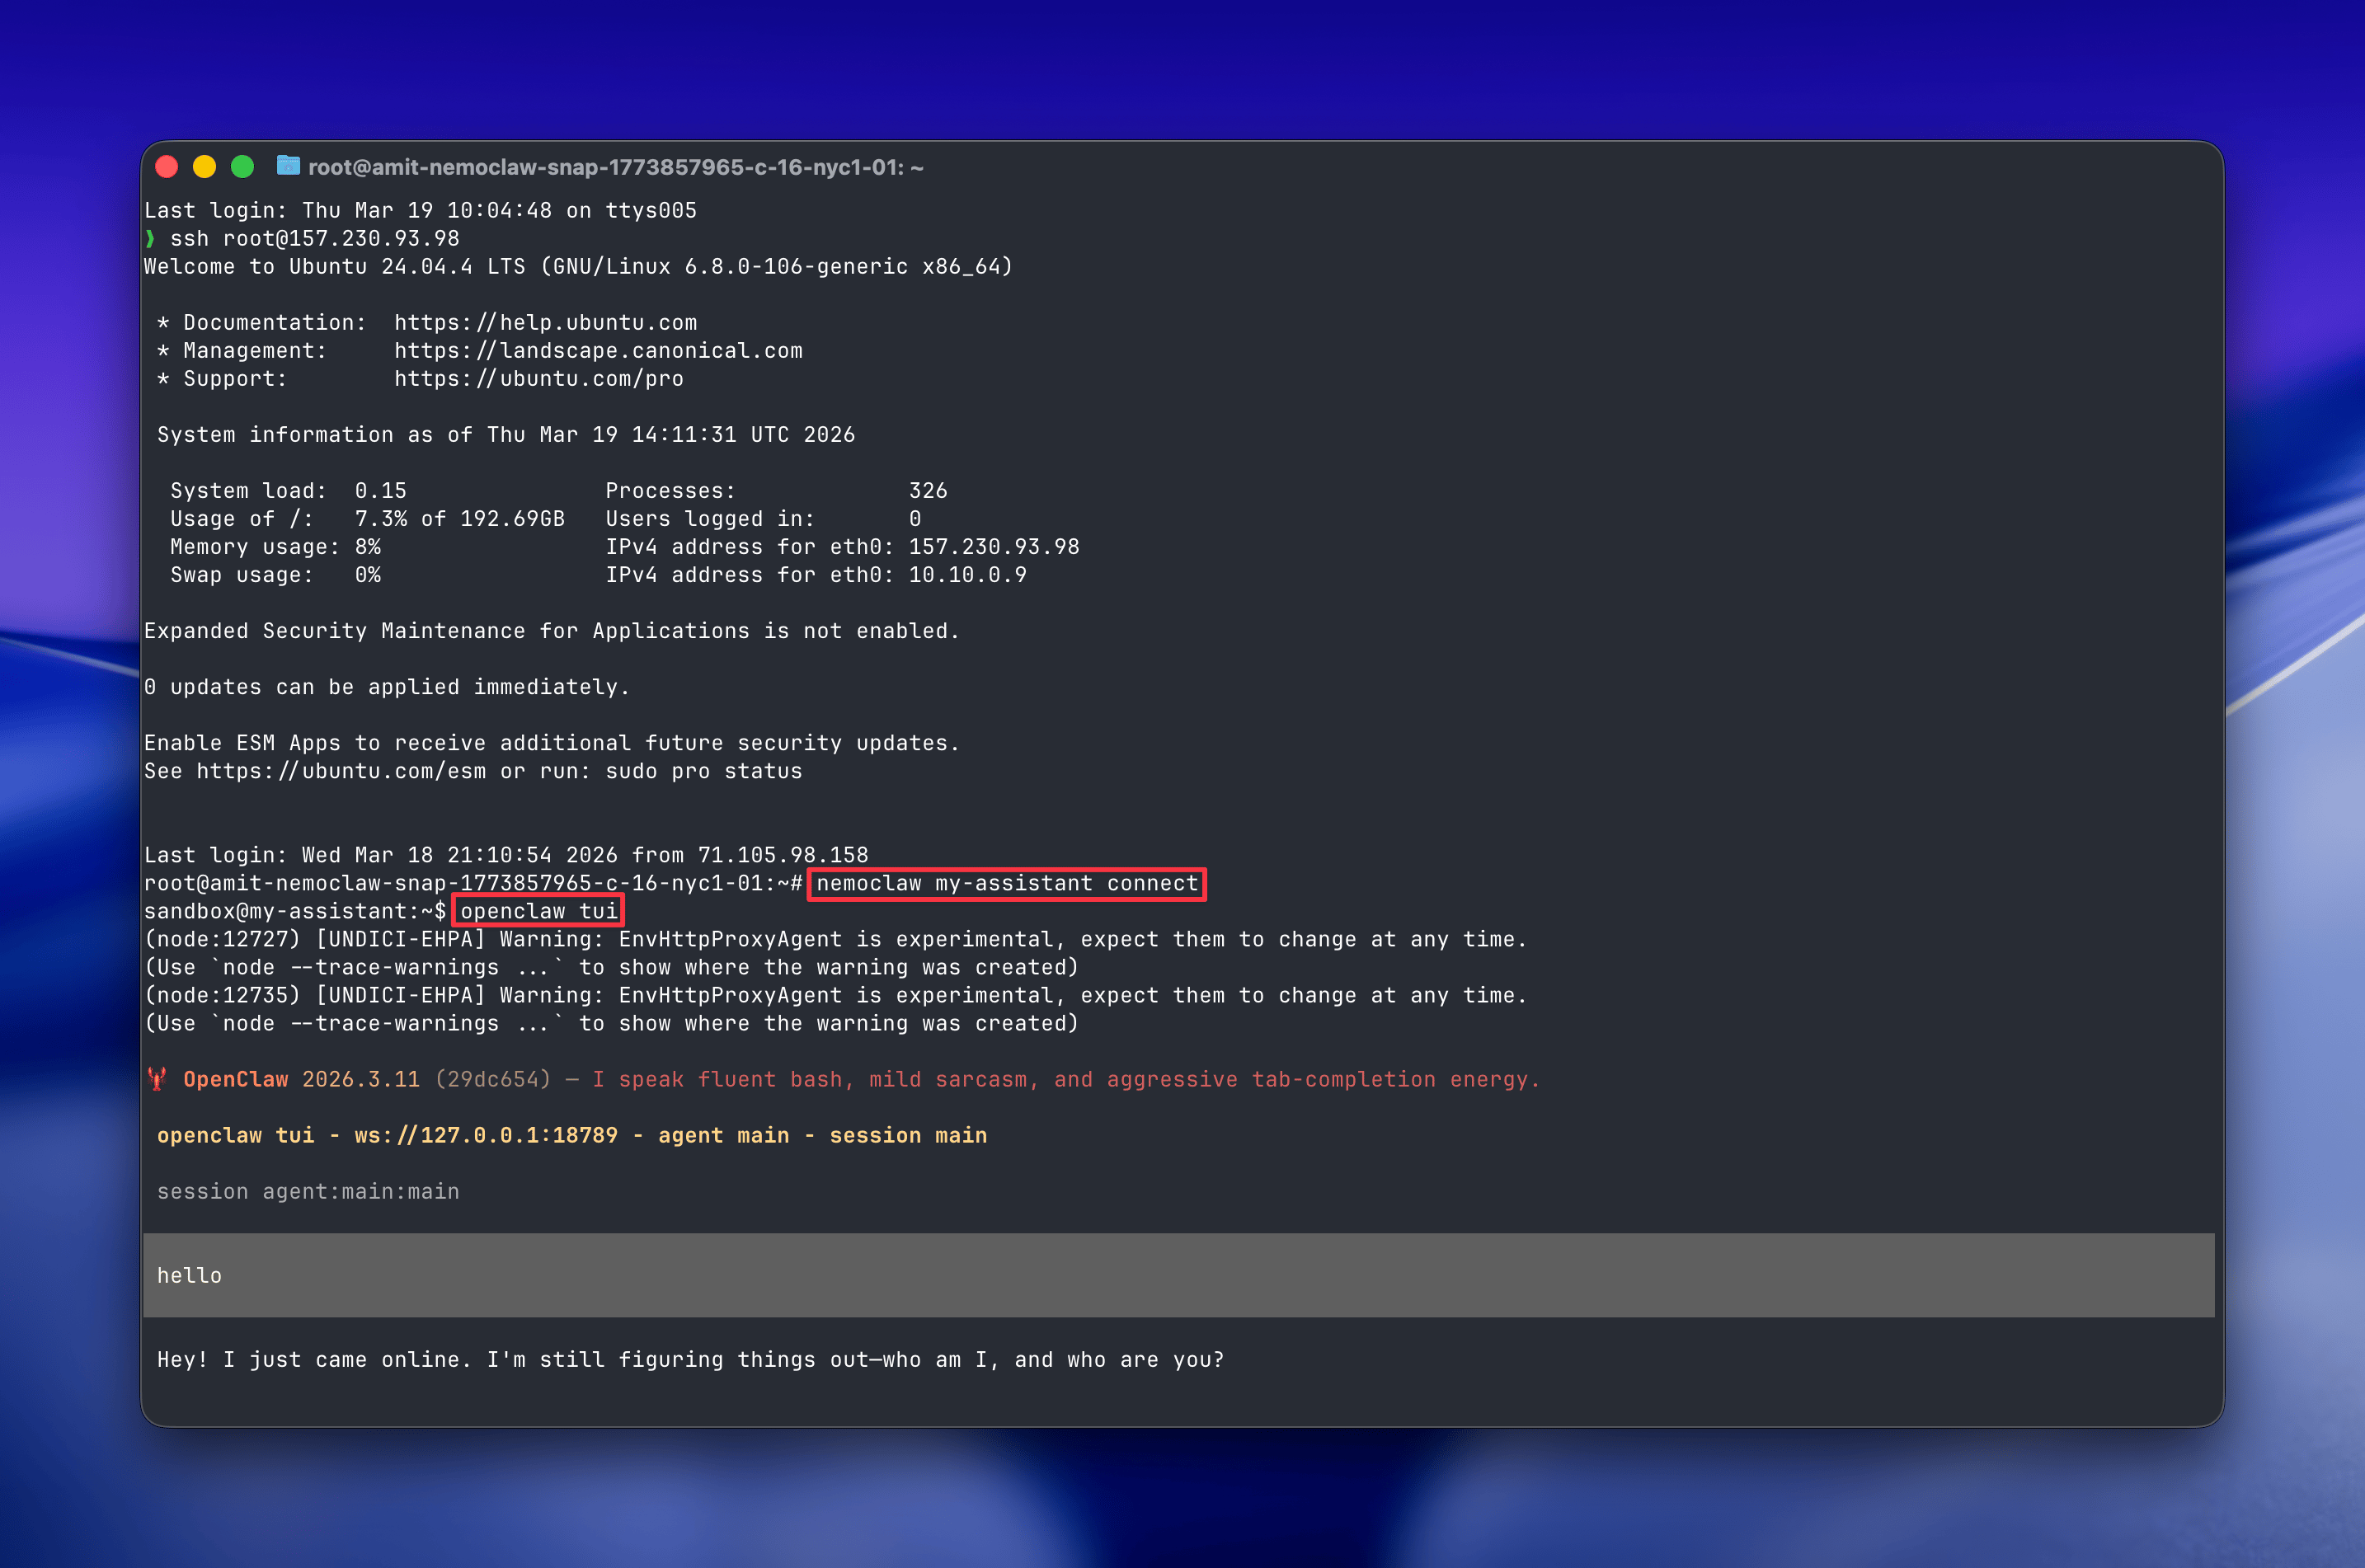
Everything picks up right where you left off. Your sandbox and agent are still running.
What’s Next
By default, the sandbox has limited network access, so the agent can’t reach external services out of the box. To unlock more capabilities - like connecting to Slack, GitHub, or pulling packages from PyPI - you’ll want to configure policy presets. Check the NemoClaw documentation for the full list of available integrations and how to set them up.
NemoClaw is still very early, so expect things to be rough around the edges. But if you want to get a feel for where always-on agents are headed, this is a good way to start poking around.
Thanks for learning with the DigitalOcean Community. Check out our offerings for compute, storage, networking, and managed databases.
About the author
Amit is a Developer Advocate at DigitalOcean 🐳, where he helps developers build and ship better apps on the cloud. Compulsive Seinfeld quoter. LEGO nerd. 🧱 AMA.
Still looking for an answer?
This textbox defaults to using Markdown to format your answer.
You can type !ref in this text area to quickly search our full set of tutorials, documentation & marketplace offerings and insert the link!
 This work is licensed under a Creative Commons Attribution-NonCommercial- ShareAlike 4.0 International License.
Become a contributor for community
Get paid to write technical tutorials and select a tech-focused charity to receive a matching donation.

DigitalOcean Documentation
Full documentation for every DigitalOcean product.

Resources for startups and AI-native businesses
The Wave has everything you need to know about building a business, from raising funding to marketing your product.
The developer cloud
Scale up as you grow — whether you're running one virtual machine or ten thousand.

Start building today
From GPU-powered inference and Kubernetes to managed databases and storage, get everything you need to build, scale, and deploy intelligent applications.
