By Theo B, Mark Drake and Kathleen Juell
Not using Debian 10?
Choose a different version or distribution.
Introduction
Webmin is a modern web control panel that allows you to administer your Linux server through a browser-based interface. With Webmin, you can manage user accounts, configure DNS settings, and change settings for common packages on the fly.
In this tutorial, you’ll install and configure Webmin on your server and secure access to the interface with a valid certificate from Let’s Encrypt. You’ll then use Webmin to add new user accounts, and update all packages on your server from the dashboard.
Prerequisites
To complete this tutorial, you will need:
- One Debian 10 server. This server should have a non-root user with sudo privileges and a UFW firewall configured. Set this up by following our Debian 10 initial server setup guide.
- Apache installed by following our tutorial on How To Install the Apache Web Server on Debian 10. As you follow this prerequisite guide, be sure to configure a virtual host.
- A Fully-Qualified Domain Name (FQDN), with a DNS A record pointing to the IP address of your server. To configure this, follow these instructions on DNS hosting on DigitalOcean.
Step 1 — Installing Webmin
First, we need to add the Webmin repository so that we can install and update Webmin using our package manager. We do this by adding the repository to the /etc/apt/sources.list file.
Open the file in your preferred editor. Here, we’ll use nano:
- sudo nano /etc/apt/sources.list
Then add this line to the bottom of the file to add the new repository:
. . .
deb http://download.webmin.com/download/repository sarge contrib
Save the file and exit the editor. If you used nano, do so by pressing CTRL+X, Y, then ENTER.
Next, you’ll add the Webmin PGP key so that your system will trust the new repository. In order to do that, though, you must install the gnupg1 package, which is GNU’s tool for secure communication and data storage.
Update your server’s package index if you’ve not done so recently:
- sudo apt update
Then install gnupg1:
- sudo apt install gnupg1
Following that, download the Webmin PGP key with wget:
wget http://www.webmin.com/jcameron-key.asc
Then add the package key:
- sudo apt-key add jcameron-key.asc
Next, update the list of packages again in order to include the now-trusted Webmin repository:
- sudo apt update
Then install Webmin:
- sudo apt install webmin
Once the installation finishes, you’ll be presented with the following output:
Output. . .
Webmin install complete. You can now login to
https://your_server:10000 as root with your
root password, or as any user who can use sudo.
Note: If you installed and enabled ufw during the prerequisite step, you will need to run the following command in order to allow Webmin through the firewall:
- sudo ufw allow 10000
For extra security, you may want to configure your firewall to only allow access to this port from certain IP ranges.
Let’s secure access to Webmin by adding a valid certificate.
Step 2 — Adding a Valid Certificate with Let’s Encrypt
Webmin is already configured to use HTTPS, but it uses a self-signed, untrusted certificate. Let’s replace it with a valid certificate from Let’s Encrypt.
Navigate to https://your_domain:10000 in your web browser, replacing your_domain with the domain name pointing to your server’s IP address.
Note: When logging in for the first time, you will see an “Invalid SSL” warning. This warning may say something different depending on your browser, but the reason for it is that the server has generated a self-signed certificate. Allow the exception and proceed to your domain so you can replace the self-signed certificate with one from Let’s Encrypt.
You’ll be presented with a login screen. Sign in with the non-root user you created while fulfilling the prerequisites for this tutorial.
Once you log in, the first screen you will see is the Webmin dashboard. Before you can apply a valid certificate, you have to set the server’s hostname. Look for the System hostname field and click on the link to the right, as shown in the following figure:
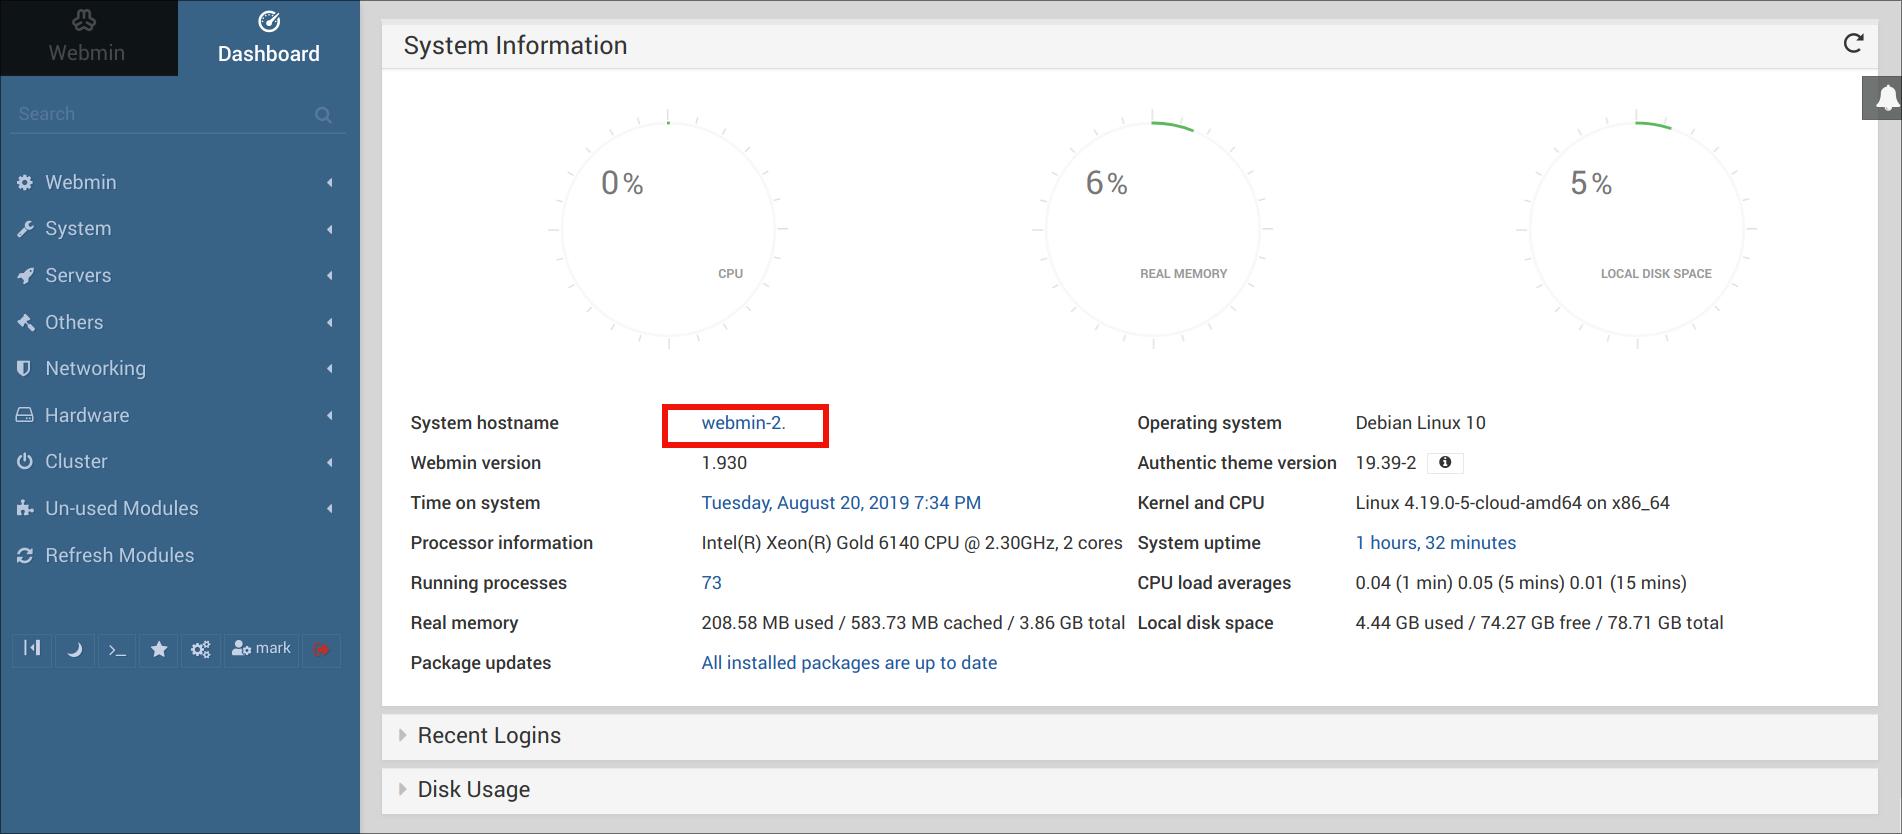
This will take you to the Hostname and DNS Client page. Locate the Hostname field, and enter your Fully-Qualified Domain Name into the field. Then click the Save button at the bottom of the page to apply the setting.
After you’ve set your hostname, click on the Webmin dropdown menu in the left-hand navigation bar, and then click on Webmin Configuration.
From the Webmin Configuration page, select SSL Encryption from the list of icons, and then click on the Let’s Encrypt tab. You’ll see a screen like the following figure:
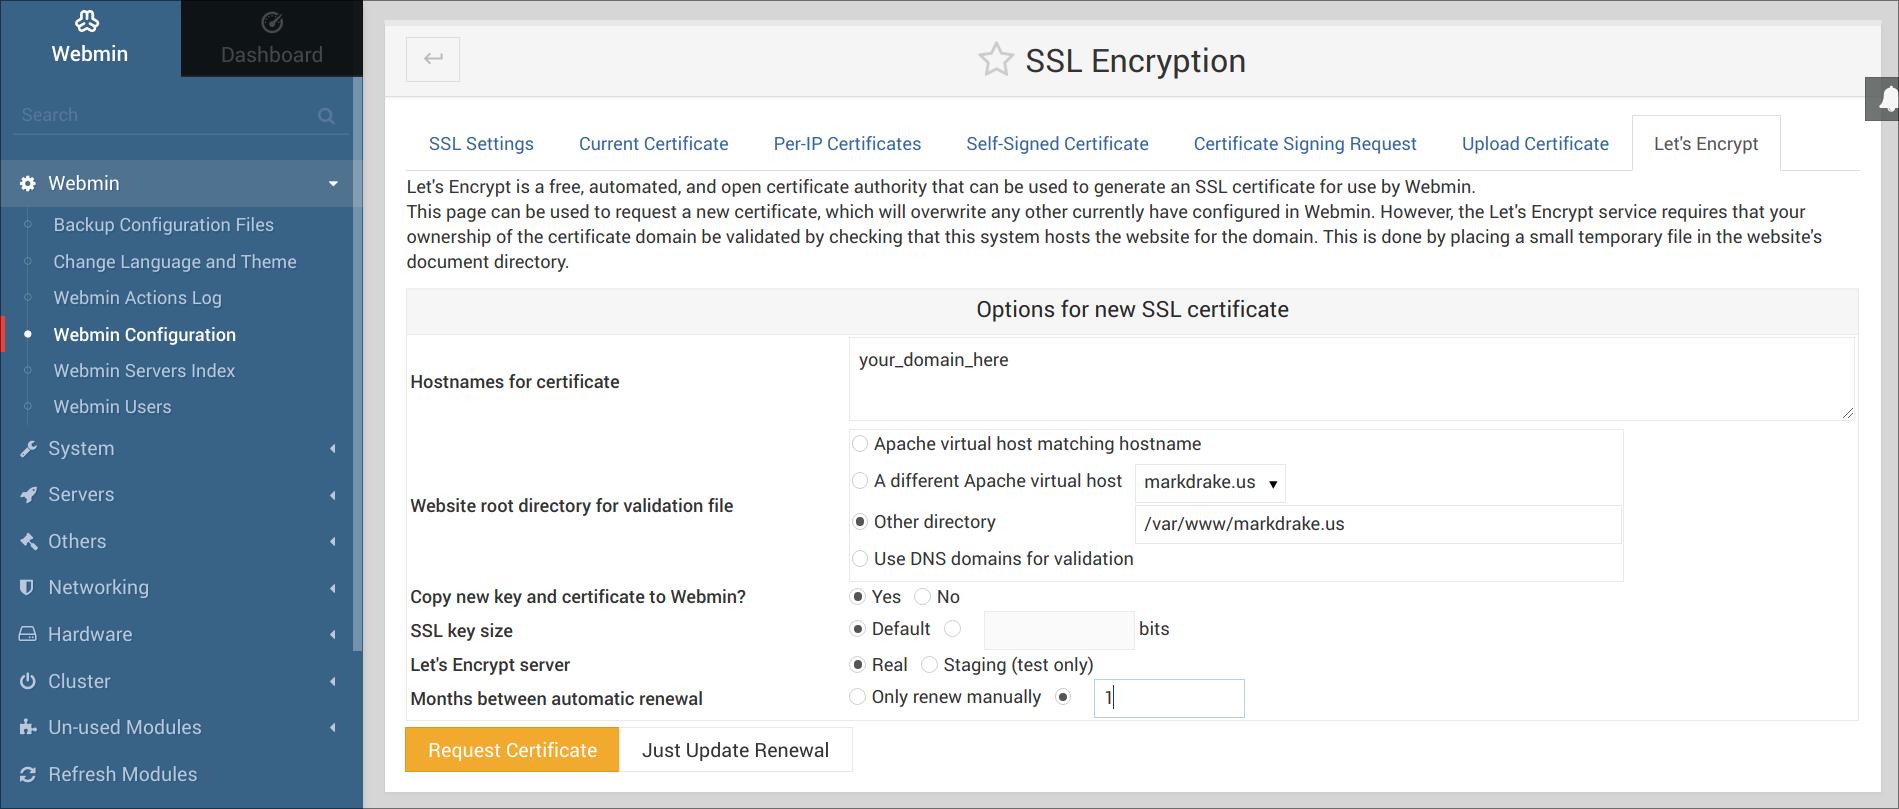
On this page, you’ll tell Webmin how to obtain and renew your certificate. Let’s Encrypt certificates expire after 3 months, but you can instruct Webmin to automatically attempt to renew the Let’s Encrypt certificate every month. Let’s Encrypt looks for a verification file on the server, so we’ll configure Webmin to place the verification file inside the folder /var/www/your_domain, which is the folder that the Apache web server you configured in the prerequisites uses. Follow these steps to set up your certificate:
- Fill in Hostnames for certificate with your FQDN.
- For Website root directory for validation file, select the Other Directory button and enter your website’s document root. Assuming you followed the prerequisite Apache tutorial this will be
/var/www/your_domain. - For Months between automatic renewal section, deselect the Only renew manually option by typing
1into the input box, and select the radio button to the left of the input box.
Click the Request Certificate button. After a few seconds, you will see a confirmation screen.
To use the new certificate, click the Return to Webmin configuration button on the confirmation screen. From that page, scroll down and click the Restart Webmin button. Wait around 30 seconds, and then reload the page and log in again. Your browser should now indicate that the certificate is valid.
Step 3 – Using Webmin
You’ve now set up a secured working instance of Webmin. Let’s look at how to use it.
Webmin has many different modules that can control everything from the BIND DNS Server to something as simple as adding users to the system. Let’s look at how to create a new user, and then explore how to update your system’s packages using Webmin.
Managing Users and Groups
Let’s explore how to manage the users and groups on your server.
First, click the System dropdown menu in the left-hand sidebar, and then click the link for Users and Groups. From here, you can add and manage users and groups.
Let’s create a new user called deploy which you can use to host web applications. When creating a user, you can set options for password expiry, the user’s shell, and whether or not they are allowed a home directory.
To add a user, click Create a new user, which is located at the top of the users table. This displays the Create User screen, where you can supply the username, password, groups and other options. Follow these instructions to create the user:
- Fill in Username with
deploy. - Select Automatic for User ID.
- Fill in Real Name with a descriptive name like
Deployment user. - For Home Directory, select Automatic.
- For Shell, select /bin/bash from the dropdown list.
- For Password, select Normal Password and type in a password of your choice.
- Jump down to Primary Group and select New group with same name as user.
- For Secondary Group, select sudo from the All groups list. This should automatically be added to the In groups list, but if it isn’t press the -> button to add it.
After making those selections, press Create. This will create the deploy user in short order.
Next, let’s look at how to install updates to our system.
Updating Packages
Webmin lets you update all of your packages through its user interface. To update all of your packages, first, click the Dashboard button above the left-hand sidebar, and then locate the Package updates field. If there are updates available, you’ll see a link that states the number of available updates.
Click this link, and then press Update selected packages to start the update. You may be asked to reboot the server, which you can also do through the Webmin interface.
Conclusion
You now have a secured working instance of Webmin and you’ve used the interface to create a user and update packages. Webmin gives you access to many things you’d normally need to access through the console, and it organizes them in an intuitive way. For example, if you have Apache installed, you would find the configuration tab for it under Servers, and then Apache.
Explore the interface, or read the Official Webmin wiki to learn more about managing your system with Webmin.
Thanks for learning with the DigitalOcean Community. Check out our offerings for compute, storage, networking, and managed databases.
About the author(s)
I like tech.
Former Technical Writer at DigitalOcean. Focused on SysAdmin topics including Debian 11, Ubuntu 22.04, Ubuntu 20.04, Databases, SQL and PostgreSQL.
Former Developer at DigitalOcean community. Expertise in areas including Ubuntu, Docker, Ruby on Rails, Debian, and more.
Still looking for an answer?
This textbox defaults to using Markdown to format your answer.
You can type !ref in this text area to quickly search our full set of tutorials, documentation & marketplace offerings and insert the link!
Virtualmin and Webmin both work on Debian 10 Buster? The Virtualmin people have not officially released an update to support so I wanted to know if the above is a hack you’ve discovered. Thanks.
 This work is licensed under a Creative Commons Attribution-NonCommercial- ShareAlike 4.0 International License.
Become a contributor for community
Get paid to write technical tutorials and select a tech-focused charity to receive a matching donation.

DigitalOcean Documentation
Full documentation for every DigitalOcean product.

Resources for startups and AI-native businesses
The Wave has everything you need to know about building a business, from raising funding to marketing your product.
The developer cloud
Scale up as you grow — whether you're running one virtual machine or ten thousand.

Start building today
From GPU-powered inference and Kubernetes to managed databases and storage, get everything you need to build, scale, and deploy intelligent applications.
