
Introduction
Ghost is an exciting new blogging platform that can be used to easily manage your posts, update themes, and edit content. A simple, yet powerful interface allows you to get to work immediately and publish beautiful results.
In this guide, we will discuss how to use Ghost to create and manage your content. In the second half of the article, we will discuss how to change themes and adjust basic settings.
We assume that you have used the DigitalOcean Ghost one-click application to deploy your server.
We also assume that you have completed the basic Ghost configuration outlined in this guide. You should be able to access your blog by going to your domain name.
How to Navigate the Content Interface
Ghost’s content creation interface is incredibly simple. We can access our content by going to:
<pre> <span class=“highlight”>your_domain_name</span>/ghost </pre>
You may have to sign in with the credentials you used to create the site. After that, you will be taken to the “content” tab, which is exactly where we want to be:
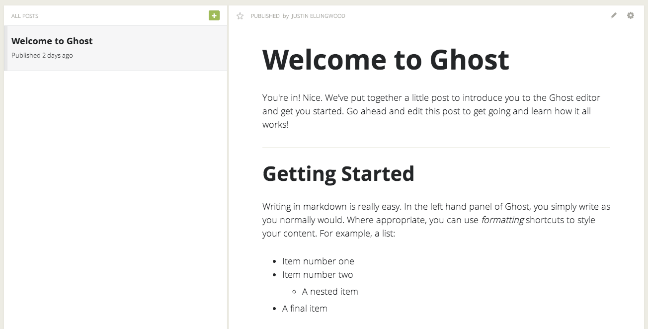
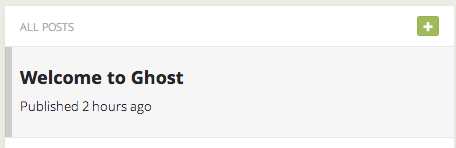
You will see the pre-configured sample post called “Welcome to Ghost”. Currently, it is the only post that we have on our blog.
As we add content, each new post will get a tab on the left-hand side. If we select any of these posts, a preview will be displayed on the right side. This represents how the content will be displayed on our site.
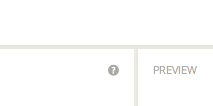
In the preview pane, we can see two buttons useful for editing.
How To Adjust Post Information
The gear is for adjusting the settings for the post:
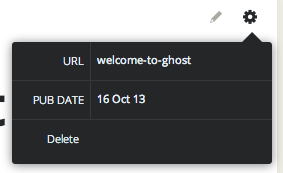
If you click it, you can adjust the URL snippet that will be used to refer to the post. By default, this will be an adjusted string made from the post title.
You will also have the option to edit the post date. This date must be in the past and must be in the following format:
DD MMM YY
[08 Oct 13]
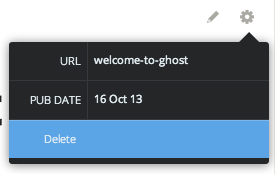
This is also where you can delete a post. Click on the “Delete” button:
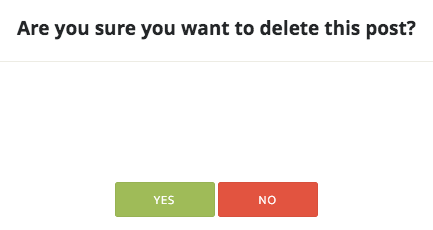
You will be asked to confirm this action to avoid accidentally destroying a post:
How To Edit a Post
The pencil icon next to the gear is used to edit the current post. If we click it, we will be taken to the editing interface:
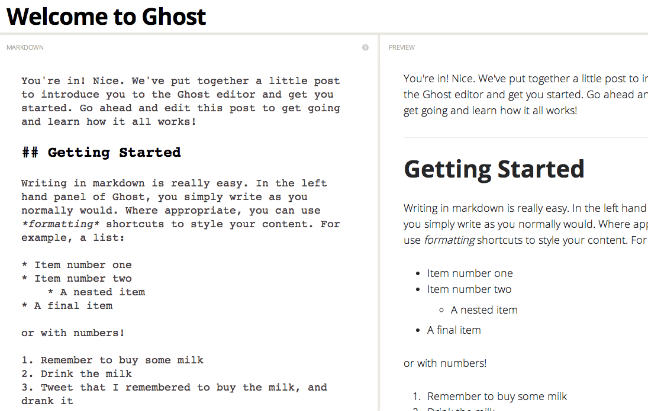
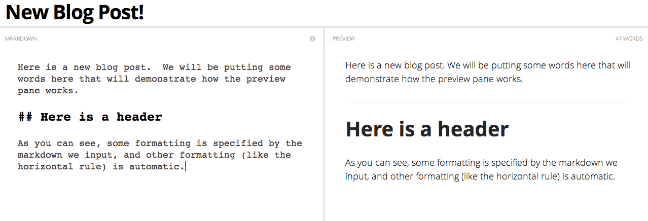
You will be taken to a screen where you can edit on the left side and see the results on the right side. Ghost uses markdown, a simple markup language, to create post content.
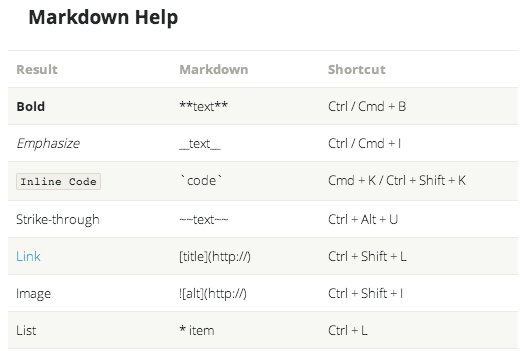
If you need some help with markdown syntax, you can either visit the markdown site linked to above, or click on the in-site shortcut button that ghost provides.
It is in the upper-right corner of the editing half (left pane) in the editor window:
A reference sheet will pop up with the appropriate way to style different elements in your page.
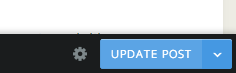
When you are done editing, click on the “Update Post” button in the lower-right corner:
You may notice that you also have a gear icon in this interface. It provides a consistent menu that mirrors the gears in the other screen.
If you wish to take a post down from the public site, but not delete it, you can unpublish it by clicking on the arrow to the right of the Update button:
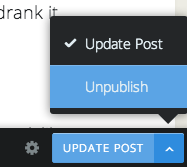
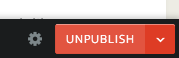
The button will change to a red “unpublish” button. Click the button to confirm.
How to Create a New Post
To create a new post, you can either click the green box with a plus in it on the content page:
Or, you can click on the “New Post” button that is present in the top navigation bar on all pages:

You will be taken to the editor screen, just like when you edit a post. This time, all fields will be blank.
Choose a title and begin writing your post in the left-hand side.
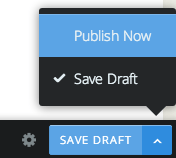
You can save your progress in the lower-bottom corner by clicking the “Save Draft” button:

When you are ready to publish, click on the arrow to the right of the “Save Draft” button and select “Publish Now”:
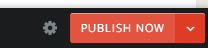
Now, click the red “Publish Now” button to confirm:
Continuing…
You should now have a good idea how to navigate the content management pages of Ghost. You can create posts, update posts, and delete content easily.
In the next section, we will demonstrate how to adjust your Ghost theme and settings.
<div class=“author”>By Justin Ellingwood</div>
Thanks for learning with the DigitalOcean Community. Check out our offerings for compute, storage, networking, and managed databases.
About the author
Former Senior Technical Writer at DigitalOcean, specializing in DevOps topics across multiple Linux distributions, including Ubuntu 18.04, 20.04, 22.04, as well as Debian 10 and 11.
Still looking for an answer?
This textbox defaults to using Markdown to format your answer.
You can type !ref in this text area to quickly search our full set of tutorials, documentation & marketplace offerings and insert the link!
Not meaning to spam or anything, but I also created a tutorial showing how to use Ghost with Digital Ocean http://www.ghostforbeginners.com/wp-admin/edit.php?post_type=page
My Ghost installation tutorial also still works with latest versions: http://meshfields.de/install-ghost-linux/
 This work is licensed under a Creative Commons Attribution-NonCommercial- ShareAlike 4.0 International License.
Become a contributor for community
Get paid to write technical tutorials and select a tech-focused charity to receive a matching donation.

DigitalOcean Documentation
Full documentation for every DigitalOcean product.

Resources for startups and AI-native businesses
The Wave has everything you need to know about building a business, from raising funding to marketing your product.
The developer cloud
Scale up as you grow — whether you're running one virtual machine or ten thousand.

Start building today
From GPU-powered inference and Kubernetes to managed databases and storage, get everything you need to build, scale, and deploy intelligent applications.
