
Introduction
Django is a powerful web framework that can help you get your Python application or website off the ground quickly. Django includes a simplified development server for testing your code locally, but for anything even slightly production related, a more secure and powerful web server is required.
In this guide, we will demonstrate how to install and configure Django in a Python virtual environment on CentOS 7. We’ll then set up Apache in front of our application so that it can handle client requests directly before passing requests that require application logic to the Django app. We will do this using the mod_wsgi Apache module that can communicate with Django over the WSGI interface specification.
Prerequisites and Goals
In order to complete this guide, you should have a fresh CentOS 7 server instance with a non-root user with sudo privileges configured. You can learn how to set this up by running thorugh our initial server setup guide.
We will be installing Django within a Python virtual environment. Installing Django into an environment specific to your project will allow your projects and their requirements to be handled separately.
Once we have our application up and running, we will configure Apache to interface with the Django app. It will do this with the mod_wsgi Apache module, which can translate HTTP requests into a predictable application format defined by a specification called WSGI. You can find out more about WSGI by reading the linked section on this guide.
Let’s get started.
Install Packages from the CentOS and EPEL Repos
To begin the process, we’ll download and install all of the items we need from our distribution’s repositories. This will include the Apache web server, the mod_wsgi module used to interface with our Django app, and pip, the Python package manager that can be used to download our Python-related tools.
To get pip, we’ll need to enable the EPEL repository, which as some additional packages. You can do that easily by typing:
sudo yum install epel-release
With EPEL enabled, we can install the components we need by typing:
sudo yum install python-pip httpd mod_wsgi
Configure a Python Virtual Environment
Now that we have the components from the repositories, we can start working on our Django project. The first step is to create a Python virtual environment so that our Django project will be separate from the system’s tools and any other Python projects we may be working on.
We need to install the virtualenv command to create these environments. We can get this using pip:
sudo pip install virtualenv
With virtualenv installed, we can start forming our project. Create a directory where you wish to keep your project and move into the directory:
mkdir ~/myproject
cd ~/myproject
Within the project directory, create a Python virtual environment by typing:
virtualenv myprojectenv
This will create a directory called myprojectenv within your myproject directory. Inside, it will install a local version of Python and a local version of pip. We can use this to install and configure an isolated Python environment for our project.
Before we install our project’s Python requirements, we need to activate the virtual environment. You can do that by typing:
source myprojectenv/bin/activate
Your prompt should change to indicate that you are now operating within a Python virtual environment. It will look something like this: (myprojectenv)user@host:~/myproject$.
With your virtual environment active, install Django with the local instance of pip by typing:
pip install django
Create and Configure a New Django Project
Now that Django is installed in our virtual environment, we can create the actual Django project files.
Create the Django Project
Since we already have a project directory, we will tell Django to install the files here. It will create a second level directory with the actual code, which is normal, and place a management script in this directory. The key to this is the dot at the end that tells Django to create the files in the current directory:
django-admin.py startproject myproject .
Adjust the Project Settings
The first thing we should do with our newly created project files is adjust the settings. Open the settings file with your text editor:
nano myproject/settings.py
We are going to be using the default SQLite database in this guide for simplicity’s sake, so we don’t actually need to change too much. We will focus on configuring the static files directory, where Django will place static files so that the web server can serve these easily.
At the bottom of the file, we will add a line to configure this directory. Django uses the STATIC_ROOT setting to determine the directory where these files should go. We’ll use a bit of Python to tell it to use a directory called “static” in our project’s main directory:
STATIC_ROOT = os.path.join(BASE_DIR, "static/")
Save and close the file when you are finished.
Complete Initial Project Setup
Now, we can migrate the initial database schema to our SQLite database using the management script:
cd ~/myproject
./manage.py makemigrations
./manage.py migrate
Create an administrative user for the project by typing:
./manage.py createsuperuser
You will have to select a username, provide an email address, and choose and confirm a password.
We can collect all of the static content into the directory location we configured by typing:
./manage.py collectstatic
You will have to confirm the operation. The static files will be placed in a directory called static within your project directory.
Finally, you can test your project by starting up the Django development server with this command:
./manage.py runserver 0.0.0.0:8000
In your web browser, visit your server’s domain name or IP address followed by :8000:
http://server_domain_or_IP:8000
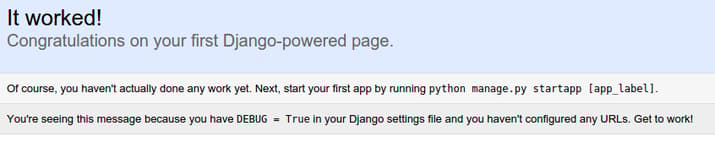
You should see the default Django index page:
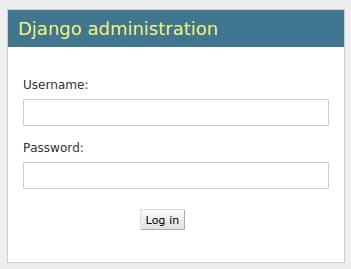
If you append /admin to the end of the URL in the address bar, you will be prompted for the administrative username and password you created with the createsuperuser command:
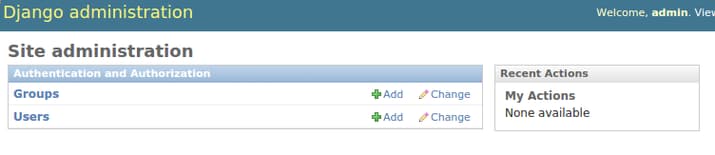
After authenticating, you can access the default Django admin interface:
When you are finished exploring, hit CTRL-C in the terminal window to shut down the development server.
We’re now done with Django for the time being, so we can back out of our virtual environment by typing:
deactivate
Configure Apache
Now that your Django project is working, we can configure Apache as a front end. Client connections that it receives will be translated into the WSGI format that the Django application expects using the mod_wsgi module. This should have been automatically enabled upon installation earlier.
To configure the WSGI pass, we’ll need to create a new configuration file that defines the WSGI pass. Create and open a file with sudo privileges within the /etc/httpd/conf.d directory. We will call this file django.conf:
sudo nano /etc/httpd/conf.d/django.conf
To start, let’s configure the static files. We will use an alias to tell Apache to map any requests starting with /static to the “static” directory within our project folder. We collected the static assets there earlier. We will set up the alias and then grant access to the directory in question with a directory block:
Alias /static /home/user/myproject/static
<Directory /home/user/myproject/static>
    Require all granted
</Directory>
Next, we’ll grant access to the wsgi.py file within the second level project directory where the Django code is stored. To do this, we’ll use a directory section with a file section inside. We will grant access to the file inside of this nested construct:
Alias /static /home/user/myproject/static
<Directory /home/user/myproject/static>
    Require all granted
</Directory>

<Directory /home/user/myproject/myproject>
    <Files wsgi.py>
        Require all granted
    </Files>
</Directory>
After this is configured, we are ready to construct the portion of the file that actually handles the WSGI pass. We’ll use daemon mode to run the WSGI process, which is the recommended configuration. We can use the WSGIDaemonProcess directive to set this up.
This directive takes an arbitrary name for the process. We’ll use myproject to stay consistent. Afterwards, we set up the Python path where Apache can find all of the components that may be required. Since we used a virtual environment, we will have to set up two path components. The first is our project’s parent directory, where the project files can be found. The second is the lib/pythonx.x/site-packages path within our virtual environment folder (where the Xs are replaced by the Python version number components). This way, Apache can find all of the other Python code needed to run our project.
Afterwards, we need to specify the process group. This should point to the same name we selected for the WSGIDaemonProcess directive (myproject in our case). Finally, we need to set the script alias so that Apache will pass requests for the root domain to the wsgi.py file:
Alias /static /home/user/myproject/static
<Directory /home/user/myproject/static>
    Require all granted
</Directory>

<Directory /home/user/myproject/myproject>
    <Files wsgi.py>
        Require all granted
    </Files>
</Directory>

WSGIDaemonProcess myproject python-path=/home/user/myproject:/home/user/myproject/myprojectenv/lib/python2.7/site-packages
WSGIProcessGroup myproject
WSGIScriptAlias / /home/user/myproject/myproject/wsgi.py
When you are finished making these changes, save and close the file.
Wrapping Up Some Permissions Issues
Next, we need to fix a few permissions sets so that the Apache service can access our files. By default, CentOS locks down each user’s home directory very restrictively. To get around this, we’ll add the apache user to our own user’s group. This will let us open up the permissions just enough so that it can get to the appropriate files.
Add the apache user to your group with the following command. Substitute your own username for the user in the command:
sudo usermod -a -G user apache
Now, we can give our user group execute permissions on our home directory. This will allow the Apache process to enter and access content within:
chmod 710 /home/user
This will give Apache the ability to enter our home directory.
If you are using the SQLite database, which is the default used in this article, you need to allow the Apache process access to the database file itself.
To do so, the first step is to change the permissions so that the group owner of the database can read and write. The database file is called db.sqlite3 by default and it should be located in your base project directory:
chmod 664 ~/myproject/db.sqlite3
Afterwards, we need to give the group Apache runs under, the apache group, group ownership of the file:
sudo chown :apache ~/myproject/db.sqlite3
In order to write to the file, we also need to give the Apache group ownership over the database’s parent directory:
sudo chown :apache ~/myproject
Once these steps are done, you are ready to start the Apache service. To do so, type:
sudo systemctl start httpd
You should now be able to access your Django site by going to your server’s domain name or IP address without specifying a port. The regular site and the admin interface should function as expected.
If everything works as expected, you can enable the Apache service so that it starts automatically at boot:
sudo systemctl enable httpd
Conclusion
In this guide, we’ve set up a Django project in its own virtual environment. We’ve configured Apache with mod_wsgi to handle client requests and interface with the Django app.
Django makes creating projects and applications simple by providing many of the common pieces, allowing you to focus on the unique elements. By leveraging the general tool chain described in this article, you can easily serve the applications you create from a single server.
Thanks for learning with the DigitalOcean Community. Check out our offerings for compute, storage, networking, and managed databases.
About the author
Former Senior Technical Writer at DigitalOcean, specializing in DevOps topics across multiple Linux distributions, including Ubuntu 18.04, 20.04, 22.04, as well as Debian 10 and 11.
Still looking for an answer?
This textbox defaults to using Markdown to format your answer.
You can type !ref in this text area to quickly search our full set of tutorials, documentation & marketplace offerings and insert the link!
Hi
I have done the same thing, but , I am getting issue :- wsgi.py in my project folder, not able to find wsgi module. I am using virtual environment.
Logs :- [Fri May 01 18:57:19.187843 2015] [core:notice] [pid 12113] AH00094: Command line: ‘/usr/sbin/httpd -D FOREGROUND’ [Fri May 01 18:57:26.082506 2015] [:error] [pid 12115] [remote 192.168.40.34:56] mod_wsgi (pid=12115): Target WSGI script ‘/var/www/html/demoportal/demoportal/wsgi.py’ cannot be loaded as Python module. [Fri May 01 18:57:26.082599 2015] [:error] [pid 12115] [remote 192.168.40.34:56] mod_wsgi (pid=12115): Exception occurred processing WSGI script ‘/var/www/html/demoportal/demoportal/wsgi.py’. [Fri May 01 18:57:26.082680 2015] [:error] [pid 12115] [remote 192.168.40.34:56] Traceback (most recent call last): [Fri May 01 18:57:26.082727 2015] [:error] [pid 12115] [remote 192.168.40.34:56] File “/var/www/html/demoportal/demoportal/wsgi.py”, line 23, in <module> [Fri May 01 18:57:26.082848 2015] [:error] [pid 12115] [remote 192.168.40.34:56] from django.core.wsgi import get_wsgi_application [Fri May 01 18:57:26.082886 2015] [:error] [pid 12115] [remote 192.168.40.34:56] ImportError: No module named django.core.wsgi
How can I run it on a different port so that it does not conflict with a different app?
Thanks! This is exactly what I was looking for. How would you modify this to use an existing project built on a local machine, instead of creating a project from scratch on the server? Would you just upload the whole project via ftp?
I’m having a problem visiting my development server from http://IP:8000 any idea what might be causing this and how to debug?
This guide works great if SELINUX is disabled. However, I need it to be enabled, and I’m having issues.
Is this behavior expected?
Hi, how testing this, i have a problem visiting localhost nothing well show welcome window apache same if testing 127.0.0.1 or 127.0.0.1 :8000 . :(
My default Django page/app is not working
Error is as follows: Not Found
The requested URL / was not found on this server.
I have tried changing debug from true to false Changing allowed hosts Changing urls.py file but the problem still persists
Fantastic… have run into a slew of issues trying to “figure it out myself”, or following other documentation out on the web.
Great tutorial! Worked first time through (finally!).
 This work is licensed under a Creative Commons Attribution-NonCommercial- ShareAlike 4.0 International License.
Become a contributor for community
Get paid to write technical tutorials and select a tech-focused charity to receive a matching donation.

DigitalOcean Documentation
Full documentation for every DigitalOcean product.

Resources for startups and AI-native businesses
The Wave has everything you need to know about building a business, from raising funding to marketing your product.
The developer cloud
Scale up as you grow — whether you're running one virtual machine or ten thousand.

Start building today
From GPU-powered inference and Kubernetes to managed databases and storage, get everything you need to build, scale, and deploy intelligent applications.
