By Savic and Caitlin Postal
Not using Ubuntu 22.04?
Choose a different version or distribution.
The author selected the Free and Open Source Fund to receive a donation as part of the Write for DOnations program.
Introduction
With developer tools moving to the cloud, creation and adoption of cloud IDE (Integrated Development Environment) platforms is growing. Cloud IDEs allow for real-time collaboration between developer teams to work in a unified development environment that minimizes incompatibilities and enhances productivity. Accessible through web browsers, cloud IDEs are available from every type of modern device.
code-server is Microsoft Visual Studio Code running on a remote server and accessible directly from your browser. Visual Studio Code is a modern code editor with integrated Git support, a code debugger, smart autocompletion, and customizable and extensible features. With code-server, you can use various devices running different operating systems and always have a consistent development environment available.
In this tutorial, you will set up the code-server cloud IDE platform on your Ubuntu 22.04 machine and expose it at your domain, secured with free Let’s Encrypt TLS certificates. By the end of the tutorial, you’ll have Microsoft Visual Studio Code running on your Ubuntu 22.04 server, available at your domain and protected with a password.
Prerequisites
-
A server running Ubuntu 22.04 with at least 2GB RAM, root access, and a sudo, non-root account. You can set this up by following this initial server setup guide.
-
Nginx installed on your server. For a guide on how to do this, complete Steps 1 to 4 of How To Install Nginx on Ubuntu 22.04.
-
A fully registered domain name to host code-server, pointed to your server. This tutorial will use
code-server.your-domainthroughout. You can purchase a domain name on Namecheap, get one for free on Freenom, or use the domain registrar of your choice. For DigitalOcean, you can follow this introduction to DigitalOcean DNS for details on how to add them.
Step 1 — Installing code-server
In this step, you will set up code-server on your server by downloading the latest version and creating a systemd service that will keep code-server running in the background. You’ll also specify a restart policy for the service, so that code-server stays available after any possible crashes or reboots.
You’ll store all data pertaining to code-server in a folder named ~/code-server. Create it with the following command:
- mkdir ~/code-server
Then navigate to it:
- cd ~/code-server
You’ll need to get the latest Linux build from code-server’s Github releases (the file will contain linux in its name). At the time of writing, the latest version was 4.8.2. Download it with wget by running the following command:
- wget https://github.com/coder/code-server/releases/download/v4.8.2/code-server-4.8.2-linux-amd64.tar.gz
Then unpack the archive by running:
- tar -xzvf code-server-4.8.2-linux-amd64.tar.gz
You’ll get a folder named exactly as the original file you downloaded, which contains the code-server source code. Run the following command to copy it to /usr/lib/code-server so you’ll be able to access it system wide:
- sudo cp -r code-server-4.8.2-linux-amd64 /usr/lib/code-server
Then create a symbolic link at /usr/bin/code-server, pointing to the code-server executable:
- sudo ln -s /usr/lib/code-server/bin/code-server /usr/bin/code-server
Next, create a folder where code-server will store user data:
- sudo mkdir /var/lib/code-server
Now that you’ve downloaded code-server and made it available system-wide, you will create a systemd service to keep code-server running in the background at all times.
You’ll store the service configuration in a file named code-server.service in the /lib/systemd/system directory, where systemd stores its services. Create it using your text editor (this tutorial uses nano):
- sudo nano /lib/systemd/system/code-server.service
Add the following lines:
[Unit]
Description=code-server
After=nginx.service

[Service]
Type=simple
Environment=PASSWORD=your_password
ExecStart=/usr/bin/code-server --bind-addr 127.0.0.1:8080 --user-data-dir /var/lib/code-server --auth password
Restart=always

[Install]
WantedBy=multi-user.target
You first specify the description of the service. Then, you state that the nginx service must be started before this one. After the [Unit] section, you define the type of the service (simple means that the process should be simply run) and provide the command that will be executed.
You also specify that the global code-server executable should be started with a few arguments specific to code-server:
--bind-addr 127.0.0.1:8080binds it tolocalhostat port8080, so it’s only directly accessible from inside of your server.--user-data-dir /var/lib/code-serversets its user data directory.--auth passwordspecifies that it should authenticate visitors with a password, specified in thePASSWORDenvironment variable declared on the line above it.
Remember to replace your_password with your desired password. The next line tells systemd to restart code-server in all malfunction events (for example, when it crashes or the process is killed).
The [Install] section orders systemd to start this service when it becomes possible to log in to your server.
Save and close the file.
Start the code-server service by running the following command:
- sudo systemctl start code-server
Check that it’s started correctly by observing its status:
- sudo systemctl status code-server
You’ll receive an output similar to this:
Output
● code-server.service - code-server
     Loaded: loaded (/lib/systemd/system/code-server.service; disabled; preset: enabled)
     Active: active (running) since Thu 2022-11-03 12:39:26 UTC; 5s ago
   Main PID: 2670 (node)
      Tasks: 22 (limit: 1116)
     Memory: 90.9M
        CPU: 799ms
     CGroup: /system.slice/code-server.service
             ├─2670 /usr/lib/code-server/lib/node /usr/lib/code-server --bind-addr 127.0.0.1:8080 --user-data-dir /var/lib/code-server --auth password
             └─2692 /usr/lib/code-server/lib/node /usr/lib/code-server/out/node/entry
To make code-server start automatically after a server reboot, enable its service with the following command:
- sudo systemctl enable code-server
You’ll receive a response that a symlink was generated:
OutputCreated symlink /etc/systemd/system/multi-user.target.wants/code-server.service → /lib/systemd/system/code-server.service.
In this step, you downloaded code-server and made it available globally. Then you created a systemd service for code-server and enabled it so code-server will start at every server boot. Next, you’ll expose it at your domain by configuring Nginx to serve as a reverse proxy between the visitor and code-server.
Step 2 — Exposing code-server at Your Domain
In this section, you will configure Nginx as a reverse proxy for code-server.
As you have experienced during the Nginx prerequisite step, site configuration files are stored under /etc/nginx/sites-available and must later be symlinked to /etc/nginx/sites-enabled to become active.
You’ll store the configuration for exposing code-server at your domain in a file named code-server.conf under /etc/nginx/sites-available. Start by creating this file using your editor:
- sudo nano /etc/nginx/sites-available/code-server.conf
Add the following lines:
server {
	listen 80;
	listen [::]:80;

	server_name code-server.your-domain;

	location / {
	  proxy_pass http://localhost:8080/;
	  proxy_set_header Upgrade $http_upgrade;
	  proxy_set_header Connection upgrade;
	  proxy_set_header Accept-Encoding gzip;
	}
}
Replace code-server.your-domain with your desired domain.
In this file, you define that Nginx should listen to HTTP port 80. Then you specify a server_name that tells Nginx which domain to accept requests and apply this particular configuration.
In the root location (/) block, you specify that requests should be passed back and forth to code-server running at localhost:8080. The next three lines (starting with proxy_set_header) order Nginx to carry over some HTTP request headers that are needed for correct functioning of WebSockets, which code-server extensively uses.
Save and close the file.
To make this site configuration active, you will need to create a symlink of it in the /etc/nginx/sites-enabled folder. Run this command to do so:
- sudo ln -s /etc/nginx/sites-available/code-server.conf /etc/nginx/sites-enabled/code-server.conf
To test the validity of the configuration, run the following command:
- sudo nginx -t
You’ll receive the following output:
Outputnginx: the configuration file /etc/nginx/nginx.conf syntax is ok
nginx: configuration file /etc/nginx/nginx.conf test is successful
For the configuration to take effect, you’ll need to restart Nginx:
- sudo systemctl restart nginx
You now have your code-server installation accessible at your domain. In the next step, you’ll secure it with a free Let’s Encrypt TLS certificate.
Step 3 — Securing Your Domain
In this section, you will secure your domain using a Let’s Encrypt TLS certificate, which you’ll provision using Certbot. Once configured, your code-server installation will be running behind HTTPS.
As part of the prerequisites, you enabled ufw (Uncomplicated Firewall) and configured it to allow unencrypted HTTP traffic. To be able to access the secured site, you’ll need to configure it to accept encrypted traffic, which you can do by running the following command:
- sudo ufw allow https
The output will be:
OutputRule added
Rule added (v6)
Similarly to Nginx, you’ll need to reload it for the configuration to take effect:
- sudo ufw reload
This output will print:
OutputFirewall reloaded
Then, in your browser, navigate to the domain you used for code-server. The code-server login prompt will load:
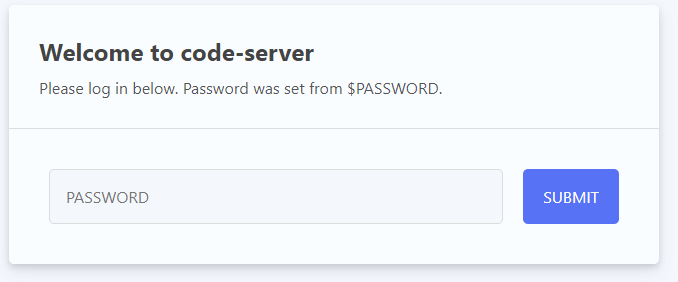
code-server is asking you for your password. Enter the one you set in the previous step and press Enter IDE. You’ll now enter code-server and immediately access its editor GUI.
Now that you’ve checked that code-server is correctly exposed at your domain, you’ll install Let’s Encrypt TLS certificates to secure it, using Certbot.
To install the latest version of Certbot and its Nginx plugin, run the following command:
- sudo apt install certbot python3-certbot-nginx -y
To request certificates for your domain, run the following command:
- sudo certbot --nginx -d code-server.your-domain
In this command, you run certbot to request certificates for your domain. You pass the domain name with the -d parameter. The --nginx flag tells it to automatically change Nginx site configuration to support HTTPS. Remember to replace code-server.your-domain with your domain name.
If this is your first time running Certbot, you’ll be asked to provide an email address for urgent notices and to accept the EFF’s Terms of Service. Certbot will then request certificates for your domain from Let’s Encrypt.
The output will be similar to this:
OutputRequesting a certificate for code-server.your-domain

Successfully received certificate.
Certificate is saved at: /etc/letsencrypt/live/code-server.your-domain/fullchain.pem
Key is saved at:         /etc/letsencrypt/live/code-server.your-domain/privkey.pem
This certificate expires on 2023-02-01.
These files will be updated when the certificate renews.
Certbot has set up a scheduled task to automatically renew this certificate in the background.

Deploying certificate
Successfully deployed certificate for code-server.your-domain.com to /etc/nginx/sites-enabled/code-server.conf
Congratulations! You have successfully enabled HTTPS on https://code-server.your-domain

- - - - - - - - - - - - - - - - - - - - - - - - - - - - - - - - - - - - - - - -
If you like Certbot, please consider supporting our work by:
 * Donating to ISRG / Let's Encrypt:   https://letsencrypt.org/donate
 * Donating to EFF:                    https://eff.org/donate-le
- - - - - - - - - - - - - - - - - - - - - - - - - - - - - - - - - - - - - - - -
This output indicates that Certbot has successfully generated TLS certificates and applied them to the Nginx configuration for your domain. You can now reload your code-server domain in your browser and observe a padlock to the left of the site address, which means that your connection is properly secured.
Now that you have code-server accessible at your domain through a secured Nginx reverse proxy, you’re ready to review the user interface of code-server.
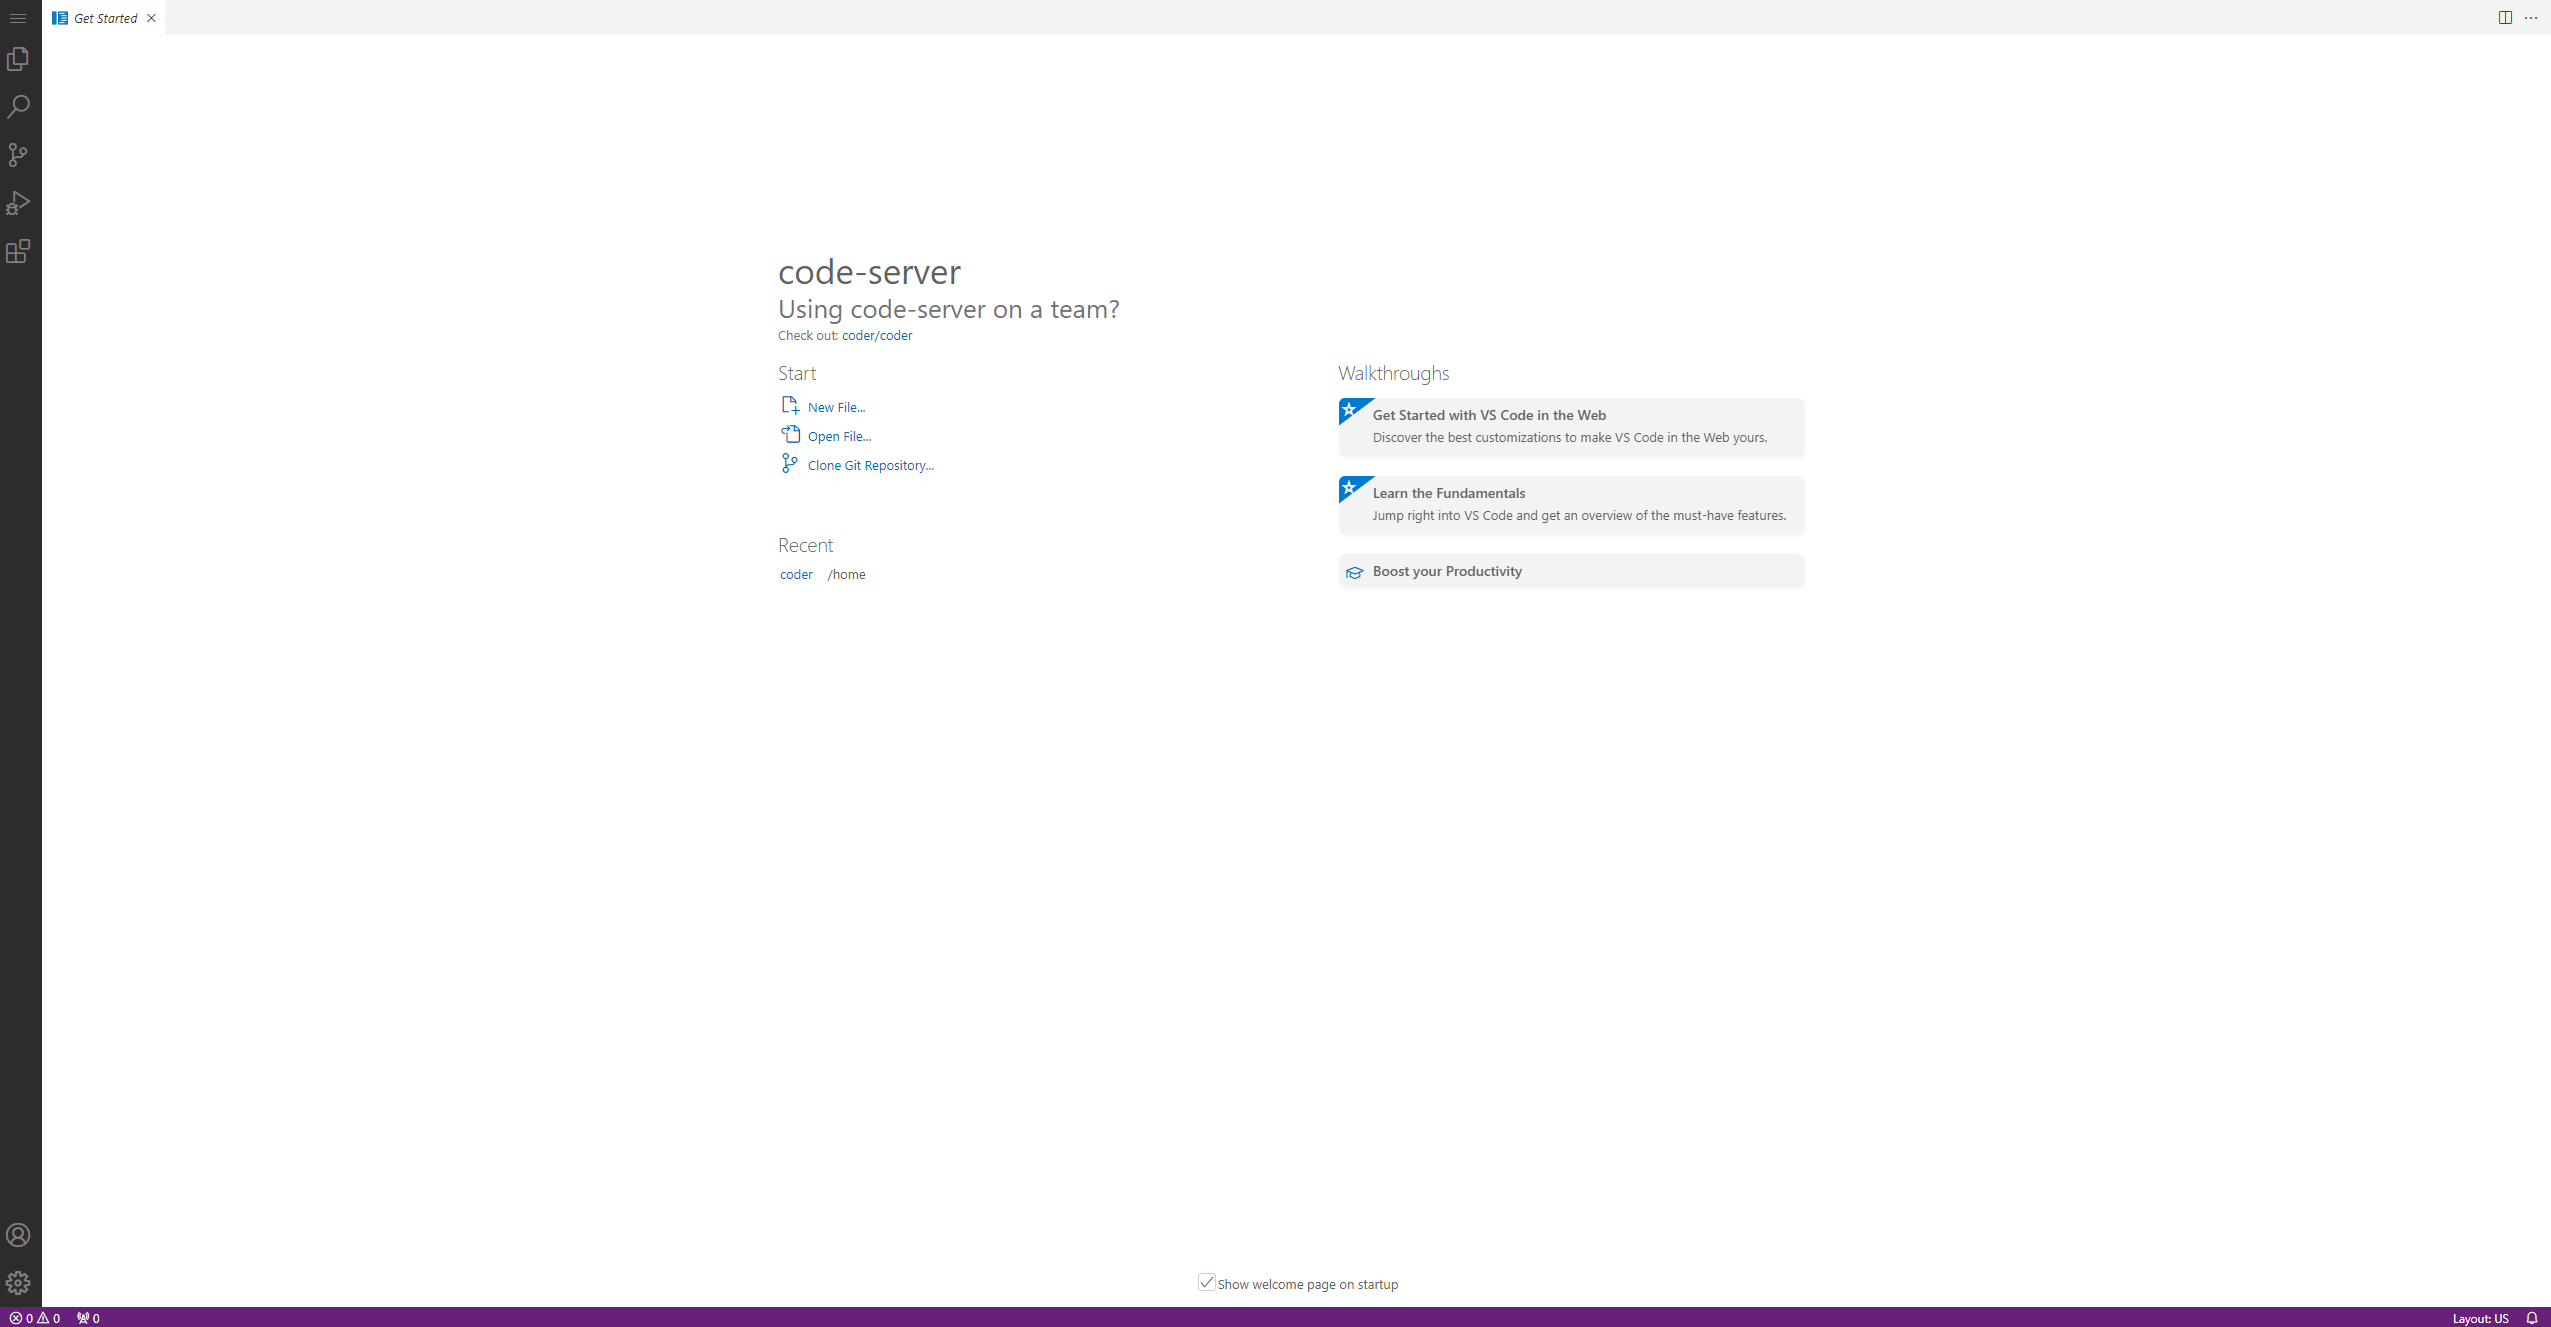
Step 4 — Using the code-server Interface
In this section, you’ll use some of the features of the code-server interface. Since code-server is Visual Studio Code running in the cloud, it has the same interface as the standalone desktop edition.
On the left-hand side of the IDE, there is a vertical row of six buttons that will the most commonly used features in a side panel known as the Activity Bar:
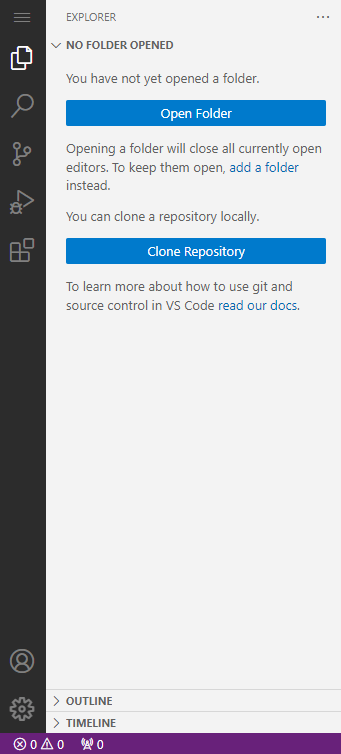
This bar is customizable so you can move these buttons or remove them from the bar. By default, the first button (the hamburger menu icon) opens the general menu in a dropdown, while the second button (the folder icon) opens the Explorer panel that provides tree-like navigation of the project’s structure. You can manage your folders and files here, creating, deleting, moving, and renaming them as necessary. The magnifying glass button provides access to a search and replace functionality.
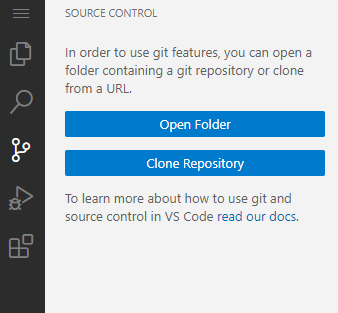
Following this, in the default order, is the icon that provides your view of the source control systems, like Git. Visual Studio Code also supports other source control providers.
The debugger option (the triangle with a little bug icon) provides common actions for debugging in the panel. Visual Studio Code comes with built-in support for the Node.js runtime debugger and any language that transpiles to Javascript. For other languages, you can install extensions for the required debugger. The four blocks button, which is the final view in the Activity Bar, provides a menu to access available extensions on the VSCode Marketplace.
The primary area of the GUI is your editor, which you can separate by tabs for code editing. You can change your editing view to a grid system or to side-by-side files.
Open code-server.your-domain/?folder=/var/lib/code-server/User in your browser, which will load an existing folder.
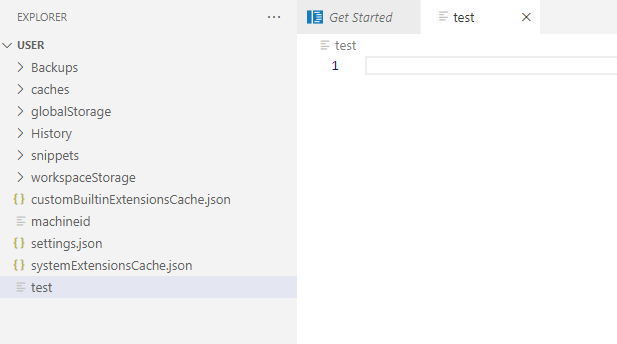
Select the hamburger menu icon to open a menu of options, then select the File menu where you will create a New File. Name the file and save it to the default folder location.
Once saved, the file will be viewable in the Explorer side panel. Creating folders can be done by right clicking on the Explorer sidebar and clicking on New Folder. You can expand a folder by clicking on its name as well as dragging and dropping files and folders to upper parts of the hierarchy to move them to a new location.
You can gain access to a terminal by clicking on Terminal in the upper menu dropdown, and selecting New Terminal. You can also use the keyboard shortcut listed in the menu. The terminal will open in a lower panel and its working directory will be set to the project’s workspace, which contains the files and folders shown in the Explorer side panel.
In this step, you reviewed the code-server interface and some of the most commonly used features.
Conclusion
You now have code-server, a versatile cloud IDE, installed on your Ubuntu 22.04 server, exposed at your domain, and secured using Let’s Encrypt certificates. You can now work on projects individually or collaboratively as a team. Running a cloud IDE frees resources on your local machine and allows you to scale the resources when needed. For further information, see the Visual Studio Code documentation for additional features and detailed instructions on other components of code-server.
If you would like to run code-server on your DigitalOcean Kubernetes cluster check out our tutorial on How To Set Up the code-server Cloud IDE Platform on DigitalOcean Kubernetes.
Thanks for learning with the DigitalOcean Community. Check out our offerings for compute, storage, networking, and managed databases.
About the author(s)
Expert in cloud topics including Kafka, Kubernetes, and Ubuntu.
Still looking for an answer?
This textbox defaults to using Markdown to format your answer.
You can type !ref in this text area to quickly search our full set of tutorials, documentation & marketplace offerings and insert the link!
 This work is licensed under a Creative Commons Attribution-NonCommercial- ShareAlike 4.0 International License.
Become a contributor for community
Get paid to write technical tutorials and select a tech-focused charity to receive a matching donation.

DigitalOcean Documentation
Full documentation for every DigitalOcean product.

Resources for startups and AI-native businesses
The Wave has everything you need to know about building a business, from raising funding to marketing your product.
The developer cloud
Scale up as you grow — whether you're running one virtual machine or ten thousand.

Start building today
From GPU-powered inference and Kubernetes to managed databases and storage, get everything you need to build, scale, and deploy intelligent applications.
