By Chimezie Enyinnaya

Introduction
In this article, you will build a blog that will make use of a GraphQL server. We will build the blog app using Apollo client and Vue.
Prerequisites
To complete this tutorial, you will need:
- Node.js installed locally, which you can do by following How to Install Node.js and Create a Local Development Environment.
- MySQL installed and running locally, which you can do by following How To Install MySQL.
This tutorial assumes knowledge of JavaScript and some familiarity with Vue and GraphQL.
This tutorial was verified with Node v14.4.0, npm v6.14.5, MySQL v14.14, @adonisjs/cli v4.0.12, @vue/cli v4.4.6, vue v2.5.2, graphql v15.1.0, and apollo-client v2.6.10.
Creating a GraphQL Server
You can grab the GraphQL server so you can follow along with the tutorial.
Once you have cloned the repo, navigate to the GraphQL server project directory:
- cd adonis-graphql-server
Install the required packages:
- npm install
Copy .env.example to .env:
- cp .env.example .env
Edit the .env file as necessary so the database information provides proper credentials for a MySQL database you have running. DB_USER and DB_PASSWORD may need to be changed.
Generate a key for Adonis:
- npx @adonisjs/cli key:generate
Migrate the database configurations:
- npx @adonisjs/cli migration:run
Enabling CORS
The GraphQL server was built with AdonisJS. AdonisJS provides a package that we can use to handle Cross-Origin Resource Sharing (CORS) on our API. By default CORS is turned off on AdonisJS, so we need to enable it.
To enable CORS on AdonisJS app, we set origin to true in config/cors.js as below:
origin: true
The cloned GraphQL server has CORS already enabled but it’s worth mentioning it.
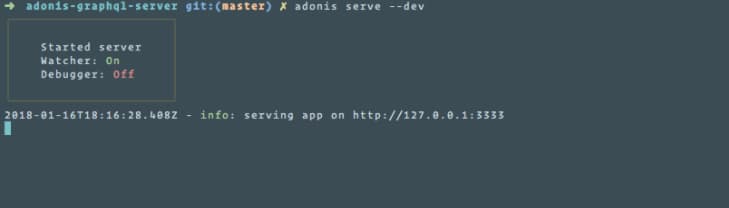
Starting the GraphQL Server
Since our blog app will be making use of the GraphQL server, we’ll need to start the server and keep it running for the rest of the tutorial.
To do start, ensure that you are in the GraphQL server project directory and run the command below:
- npx @adonisjs/cli serve --dev
This will start the GraphQL server and keep it running.
The rest of the tutorial assumes you already started the GraphQL server and it is running.
With that taken care of, let’s start building our blog app.
Step 1 — Create a Vue App
We’ll start by creating a new Vue app using the Vue CLI:
- npx -p @vue/cli -p @vue/cli-init vue init webpack graphql-blog-app
Note: Modern Vue projects can utilize:
- npx @vue/cli create graphql-blog-app
You will be prompted with questions about your project. Here are some of the choices that were made. For this tutorial it will be important to install vue-router:
? Project name graphql-blog-app
? Project description A Vue.js project
? Vue build standalone
? Install vue-router? Yes
? Use ESLint to lint your code? Yes
? Pick an ESLint preset Standard
? Set up unit tests No
? Setup e2e tests with Nightwatch? No
? Should we run `npm install` for you after the project has been created? (recommended) npm
This will create a new Vue app with the name graphql-blog-app and install its dependencies.
Navigate to the newly created directory:
- cd graphql-blog-app
The application can be run and viewed in the browser at any time by running the following in your terminal:
- npm start
Step 2 — Installing the Packages
With the app created, we can move on to installing the necessary packages for building our GraphQL blog app:
- npm install --save vue-apollo graphql apollo-client apollo-link apollo-link-context apollo-link-http apollo-cache-inmemory graphql-tag
Let’s quickly go over each package:
vue-apollo: An Apollo/GraphQL integration for VueJS. We install the latest version of the plugin that allows us to use all the great features that comes with Apollo client 2.0.graphql: A reference implementation of GraphQL for JavaScript.apollo-client: A fully featured, production-ready caching GraphQL client for every server or UI framework.apollo-link: A standard interface for modifying the control flow of GraphQL requests and fetching GraphQL results.apollo-link-context: Used to set a context on your operation, which is used by other links further down the chain.apollo-link-http: Used to get GraphQL results over a network using HTTP fetch.apollo-cache-inmemory: Cache implementation for Apollo Client 2.0.graphql-tag: A JavaScript template literal tag that parses GraphQL queries.
Step 3 — Setting up Vue Apollo
Next, let’s put the packages to use. We’ll start by creating an ApolloClient instance and install the VueApollo plugin. Open src/main.js and add the code below to it:
// ...

import { ApolloClient } from 'apollo-client'
import { HttpLink } from 'apollo-link-http'
import { InMemoryCache } from 'apollo-cache-inmemory'
import VueApollo from 'vue-apollo'

const httpLink = new HttpLink({
    // URL to graphql server, you should use an absolute URL here
    uri: 'http://localhost:3333/graphql'
})

// create the apollo client
const apolloClient = new ApolloClient({
    link: httpLink,
    cache: new InMemoryCache()
})

// install the vue plugin
Vue.use(VueApollo)
We create a new instance of httpLink with the URL (http://localhost:3333/graphql) of our GraphQL server. Then we create an Apollo client using the httpLink created above and specify we want an in-memory cache. Lastly, we install the Vue Apollo plugin.
Next, let’s create an apolloProvider object that we’ll specify on our root component:
// ...

const apolloProvider = new VueApollo({
    defaultClient: apolloClient
})

// update Vue instance by adding `apolloProvider`
/* eslint-disable no-new */
new Vue({
    el: '#app',
    router,
    apolloProvider,
    template: '<App/>',
    components: { App }
})
We create a new instance of the Vue Apollo plugin using the apolloClient created as our default client. Lastly, we make use of the apolloProvider object by adding it in our Vue instance, the same way we would use Vue router.
Step 4 — Adding Bulma
For the purpose of this tutorial, we’ll be using Bulma CSS. So, let’s add it in. Open index.html and update as below:
<!DOCTYPE html>
<html>
<head>
    <meta charset="utf-8">
    <meta name="viewport" content="width=device-width,initial-scale=1.0">
    <title>GraphQL Blog App</title>
    <link rel="stylesheet" href="https://cdnjs.cloudflare.com/ajax/libs/bulma/0.6.1/css/bulma.min.css">
</head>
<body>
    <div id="app"></div>
    <!-- built files will be auto injected -->
</body>
</html>
We reference Bulma on this content delivery network (CDN).
Step 5 — Removing Unused Code
There are some files and code that came along when we created our Vue app which we won’t be using in this tutorial. Let’s remove them so they won’t interfere with our app.
Delete the HelloWorld component and remove all its references from src/router/index.js.
Step 6 — Creating the Primary Layout
The blog will use a generic layout across its pages. In that case, let’s define a layout that all pages will use. To do this, open src/App.vue and update as below:
<template>
    <div id="app">
        <nav class="navbar is-primary" role="navigation" aria-label="main navigation">
            <div class="container">
                <div class="navbar-brand">
                    <router-link class="navbar-item" to="/">Blog App</router-link>

                    <button class="button navbar-burger">
                        <span></span>
                        <span></span>
                        <span></span>
                    </button>
                </div>
            </div>
        </nav>
        <router-view/>
    </div>
</template>

<script>
export default {
  name: 'app'
}
</script>
We add a header that all pages will use.
Step 7 — Creating the User Signup Page
Users should be able to signup to our blog app. We’ll create a SignUp component that will handle that. So, within src/components create a new Admin folder. All admin-related components will be created insider this folder.
Before we create the SignUp component, let’s create a dedicated file that will hold all our GraphQL queries and mutations. We’ll create this file directly inside src. Create a graphql.js file inside src and paste the code below into it:
import gql from 'graphql-tag'

export const SIGNUP_MUTATION = gql`
  mutation SignupMutation($username: String!, $email: String!, $password: String!) {
    createUser(
      username: $username,
      email: $email,
      password: $password
    ) {
      id
      username
      email
    }
  }
`
This is the GraphQL mutation that will handle creating a new user on our GraphQL server. It takes the username, email, and password of a user. These variables will be passed from the SignUp component.
Next, let’s create the SignUp component. Within the Admin folder, create a SignUp.vue file and paste the code below into it:
<template>
   <section class="section">
    <div class="columns">
      <div class="column is-4 is-offset-4">

        <h2 class="title has-text-centered">Signup</h2>

        <form method="POST" @submit.prevent="signup">
          <div class="field">
            <label class="label">Username</label>
            <p class="control">
              <input
                type="text"
                class="input"
                v-model="username"
              />
            </p>
          </div>

          <div class="field">
            <label class="label">E-Mail Address</label>
            <p class="control">
              <input
                type="email"
                class="input"
                v-model="email"
              />
            </p>
          </div>

          <div class="field">
            <label class="label">Password</label>
            <p class="control">
              <input
                type="password"
                class="input"
                v-model="password"
              />
            </p>
          </div>

          <p class="control">
            <button class="button is-primary is-fullwidth is-uppercase">SignUp</button>
          </p>
        </form>
      </div>
    </div>
   </section>
</template>

<script>
import { SIGNUP_MUTATION } from '@/graphql'

export default {
  name: 'SignUp',
  data () {
    return {
      username: '',
      email: '',
      password: ''
    }
  },
  methods: {
    signup () {
      this.$apollo
        .mutate({
          mutation: SIGNUP_MUTATION,
          variables: {
            username: this.username,
            email: this.email,
            password: this.password
          }
        })
        .then(response => {
          // redirect to login page
          this.$router.replace('/login')
        })
    }
  }
}
</script>
This component renders a form for users to signup. Once the form is submitted, a signup method is called. Within the signup method, we make use of mutate method available on this.$apollo (from the Vue Apollo plugin). We use the SIGNUP_MUTATION mutation created earlier and pass along the necessary variables. Once the signup process is successful (that is, the user has been created), we redirect the user to the login page (which we’ll create shortly).
Adding the Signup Route
Open src/router/index.js, and add the code below to it:
// ...

import SignUp from '@/components/Admin/SignUp'

// ...

export default new Router({
  routes: [
    // add these inside the `routes` array
    {
      path: '/signup',
      name: 'SignUp',
      component: SignUp
    }
  ]
})
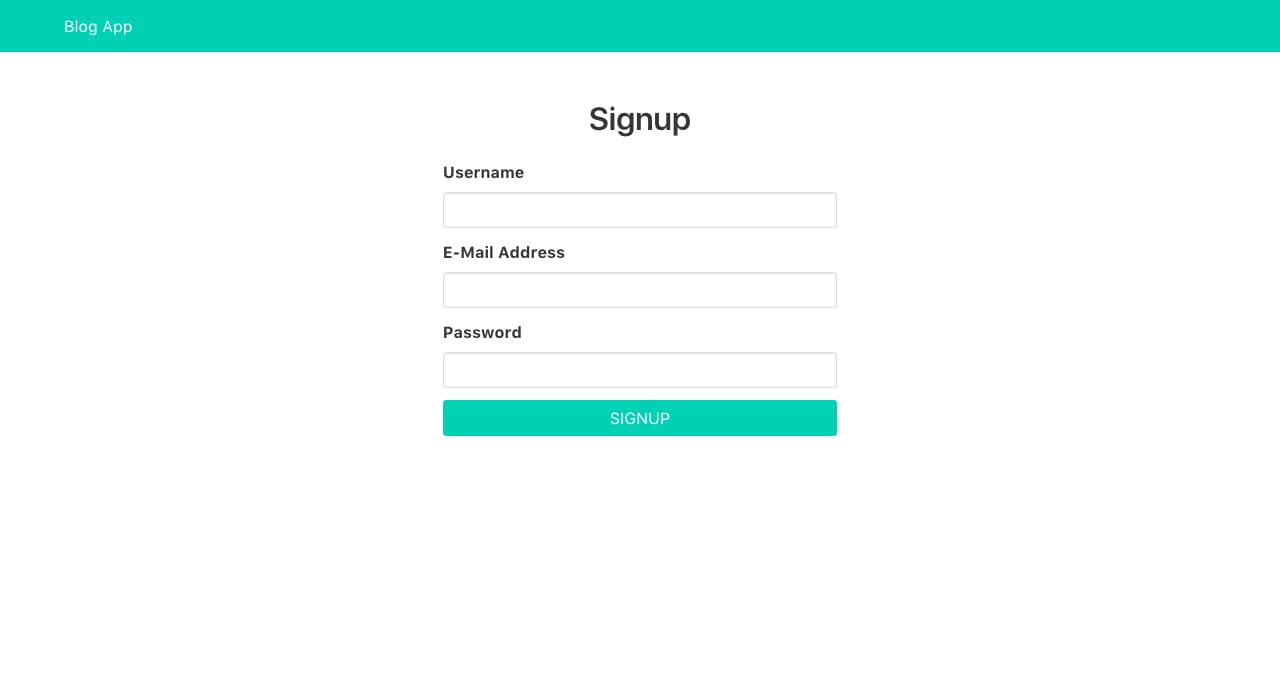
Now when we visit the /signup route, we should see our signup form as in the image below:
Step 8 — Creating the User Login Page
Let’s add the ability for users to log in. Just as we did with user sign-up, let’s first create the GraphQL mutation. Add the code below to src/graphql.js:
export const LOGIN_MUTATION = gql`
  mutation LoginMutation($email: String!, $password: String!) {
    login(
      email: $email,
      password: $password
    )
  }
`
This GraphQL mutation handles user log-in to our GraphQL server. It takes the email and password of a user.
Next, within the Admin folder, create a LogIn.vue file and paste the code below into it:
<template>
   <section class="section">
    <div class="columns">
      <div class="column is-4 is-offset-4">

        <h2 class="title has-text-centered">Login</h2>

        <form method="POST" @submit.prevent="login">
          <div class="field">
            <label class="label">E-Mail Address</label>

            <p class="control">
              <input
                type="email"
                class="input"
                v-model="email"
              />
            </p>
          </div>

          <div class="field">
            <label class="label">Password</label>

            <p class="control">
              <input
                type="password"
                class="input"
                v-model="password"
              />
            </p>
          </div>

          <p class="control">
            <button class="button is-primary is-fullwidth is-uppercase">Login</button>
          </p>
        </form>
      </div>
    </div>
   </section>
</template>

<script>
import { LOGIN_MUTATION } from '@/graphql'

export default {
  name: 'LogIn',
  data () {
    return {
      email: '',
      password: ''
    }
  },
  methods: {
    login () {
      this.$apollo
        .mutate({
          mutation: LOGIN_MUTATION,
          variables: {
            email: this.email,
            password: this.password
          }
        })
        .then(response => {
          // save user token to localstorage
          localStorage.setItem('blog-app-token', response.data.login)

          // redirect user
          this.$router.replace('/admin/posts')
        })
    }
  }
}
</script>
This component renders a simple form for users to log in. Once the form is submitted, a login method is called. Within the login method, we make use of mutate method. We use the LOGIN_MUTATION mutation created earlier and pass along the necessary variables. Once the login process is successful, we save the token gotten from our GraphQL server to localStorage and redirect the user.
Adding the Login Route
Open src/router/index.js, and add the code below to it:
// ...

import LogIn from '@/components/Admin/LogIn'

// ...

export default new Router({
  routes: [
    // ...

    // add these inside the `routes` array
    {
      path: '/login',
      name: 'LogIn',
      component: LogIn
    }
  ]
})
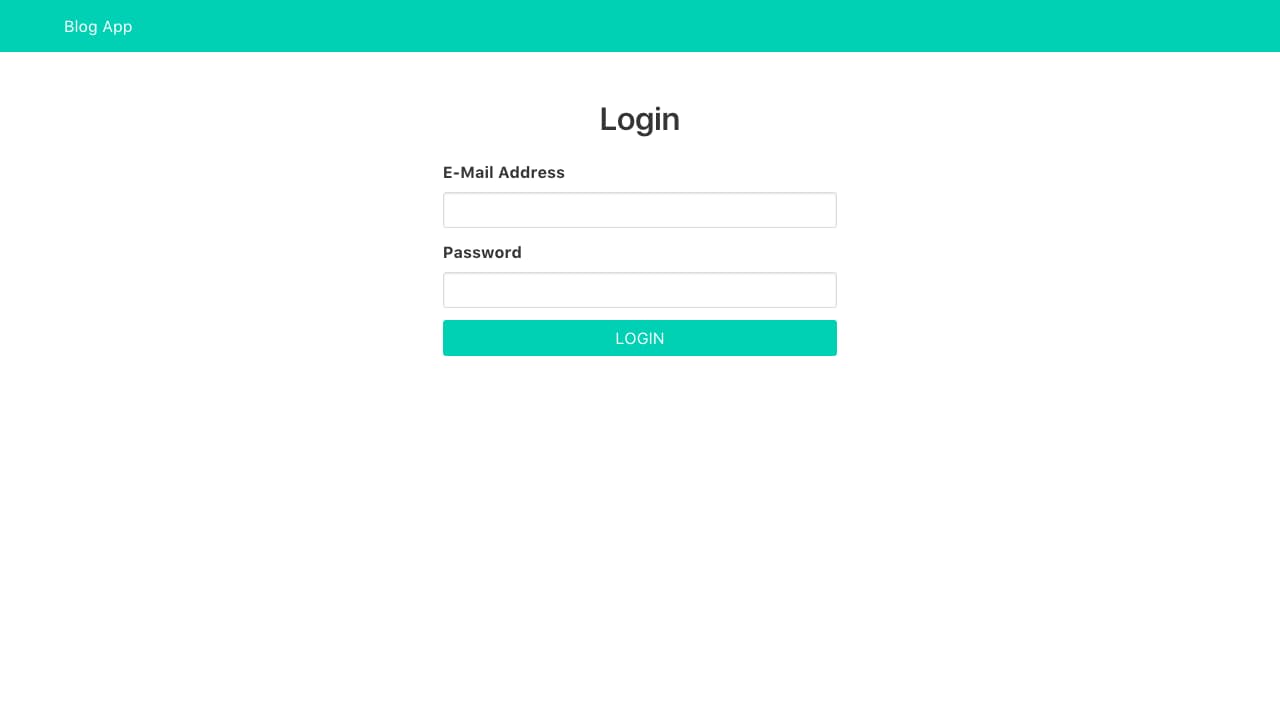
Now when we visit the /login route, we should see our login form as in the image below:
Step 9 — Creating the Menu Component
Before we start fleshing out the admin-ish part of our blog, let’s create a Menu component that will serve as the sidebar navigational menu. Within the Admin folder, create a Menu.vue file and paste the code below into it:
<template>
  <aside class="menu">
    <p class="menu-label">Post</p>
      <ul class="menu-list">
        <li>
          <router-link to="/admin/posts/new">New Post</router-link>
        </li>
        <li>
          <router-link to="/admin/posts">Posts</router-link>
        </li>
      </ul>
    <p class="menu-label">User</p>
    <ul class="menu-list">
      <li>
        <router-link to="/admin/users">Users</router-link>
      </li>
    </ul>
  </aside>
</template>
This renders links to some admin sections of our blog app.
Step 10 — Creating the Users List Page
In the admin section, we want to be able to see the list of users that have been created. For that, we created a Users component. But first, let’s write the GraphQL query that will fetch all users created. Add the code below to src/graphql.js:
export const ALL_USERS_QUERY = gql`
  query AllUsersQuery {
    allUsers {
      id
      username
      email
    }
  }
`
This GraphQL query fetches all users from our GraphQL server.
Next, let’s create the Users component. Within the Admin folder, create a Users.vue file and paste the code below into it:
<template>
  <section class="section">
    <div class="container">
      <div class="columns">
        <div class="column is-3">
          <Menu/>
        </div>
        <div class="column is-9">
          <h2 class="title">Users</h2>

          <table class="table is-striped is-narrow is-hoverable is-fullwidth">
            <thead>
              <tr>
                <th>Username</th>
                <th>Email</th>
                <th></th>
              </tr>
            </thead>
            <tbody>
              <tr
                v-for="user in allUsers"
                :key="user.id">
                <td>{{ user.username }}</td>
                <td>{{ user.email }}</td>
                <td>
                  <router-link :to="`/admin/users/${user.id}`">View</router-link>
                </td>
              </tr>
            </tbody>
          </table>
        </div>
      </div>
    </div>
  </section>
</template>

<script>
import Menu from '@/components/Admin/Menu'
import { ALL_USERS_QUERY } from '@/graphql'

export default {
  name: 'Users',
  components: {
    Menu
  },
  data () {
    return {
      allUsers: []
    }
  },
  apollo: {
    // fetch all users
    allUsers: {
      query: ALL_USERS_QUERY
    }
  }
}
</script>
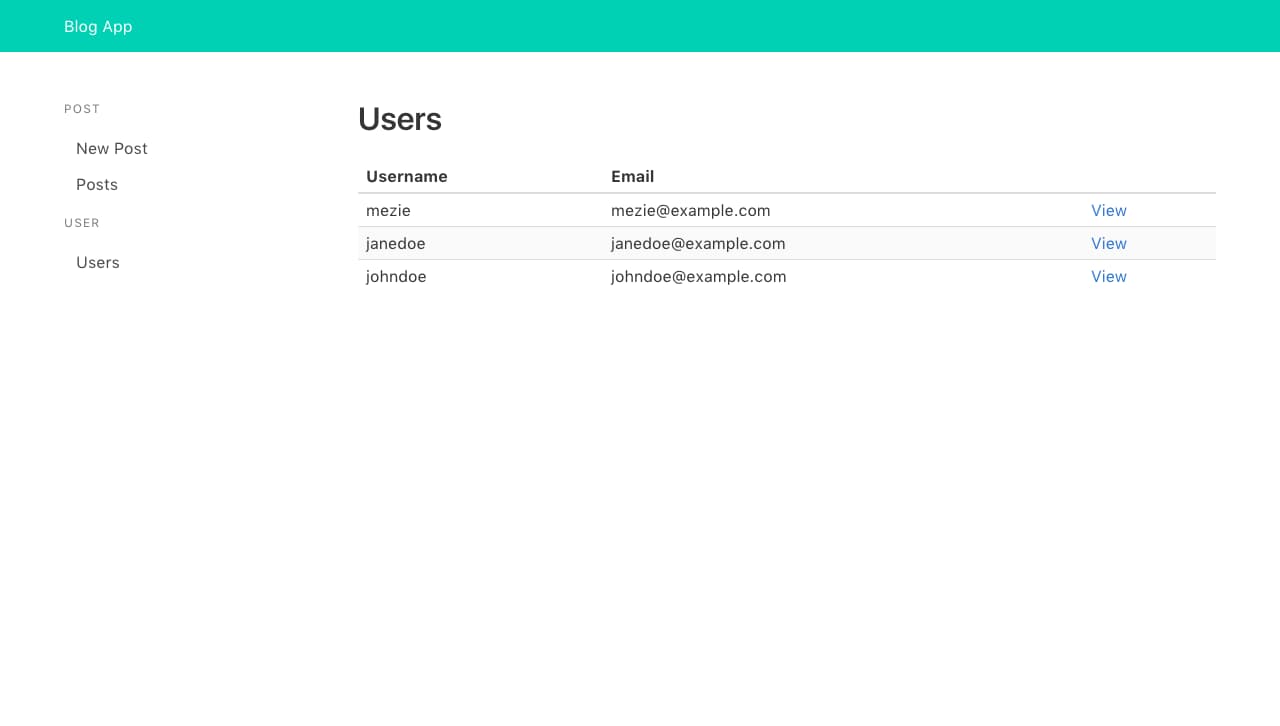
We make use of the Menu component created earlier. Then we define our data which will be populated once the data is gotten from our GraphQL server. Within the apollo object, we add our GraphQL query to fetch all users. This makes use of the ALL_USERS_QUERY we created above. It is important to note that, the name of our data (allUsers in this case) must be the same name used in our GraphQL query (allUsers in this case). Once allUsers is populated with data from our GraphQL server, we display the users in a table by looping through the array of users. We also add a link to view each user’s details.
Adding the Users Route
Open src/router/index.js, and add the code below to it:
// ...

import Users from '@/components/Admin/Users'

// ...

export default new Router({
  routes: [
    // ...

    // add these inside the `routes` array
    {
      path: '/admin/users',
      name: 'Users',
      component: Users
    }
  ]
})
Now when we visit the /admin/users route, we should see a list of users as in the image below:
Step 11 — Creating the User Details Page
In the last section, we add a link to view user details. Now, let’s implement it. Add the code below to src/graphql.js:
export const USER_QUERY = gql`
  query UserQuery($id: Int!) {
    user(id: $id) {
      id
      username
      email
      posts {
        id
      }
    }
  }
`
This GraphQL query fetches a user by their ID from our GraphQL server. It takes the ID of the user as an argument. The user ID will be passed from the UserDetails component.
Next, let’s create the UserDetails component. Within the Admin folder, create a UserDetails.vue file and paste the code below into it:
<template>
  <section class="section">
    <div class="container">
      <div class="columns">
        <div class="column is-3">
          <Menu/>
        </div>
        <div class="column is-9">
          <h2 class="title">User Details</h2>

          <div class="field is-horizontal">
            <div class="field-label is-normal">
              <label class="label">Username</label>
            </div>
            <div class="field-body">
              <div class="field">
                <p class="control">
                  <input class="input is-static" :value="user.username" readonly />
                </p>
              </div>
            </div>
          </div>

          <div class="field is-horizontal">
            <div class="field-label is-normal">
              <label class="label">Email Address</label>
            </div>
            <div class="field-body">
              <div class="field">
                <p class="control">
                  <input class="input is-static" :value="user.email" readonly />
                </p>
              </div>
            </div>
          </div>

          <div class="field is-horizontal">
            <div class="field-label is-normal">
              <label class="label">Number of posts</label>
            </div>
            <div class="field-body">
              <div class="field">
                <p class="control">
                  <input class="input is-static" :value="user.posts.length" readonly />
                </p>
              </div>
            </div>
          </div>
        </div>
      </div>
    </div>
  </section>
</template>

<script>
import Menu from '@/components/Admin/Menu'
import { USER_QUERY } from '@/graphql'

export default {
  name: 'UserDetails',
  components: {
    Menu
  },
  data () {
    return {
      user: '',
      id: this.$route.params.id
    }
  },
  apollo: {
    // fetch user by ID
    user: {
      query: USER_QUERY,
      variables () {
        return {
          id: this.id
        }
      }
    }
  }
}
</script>
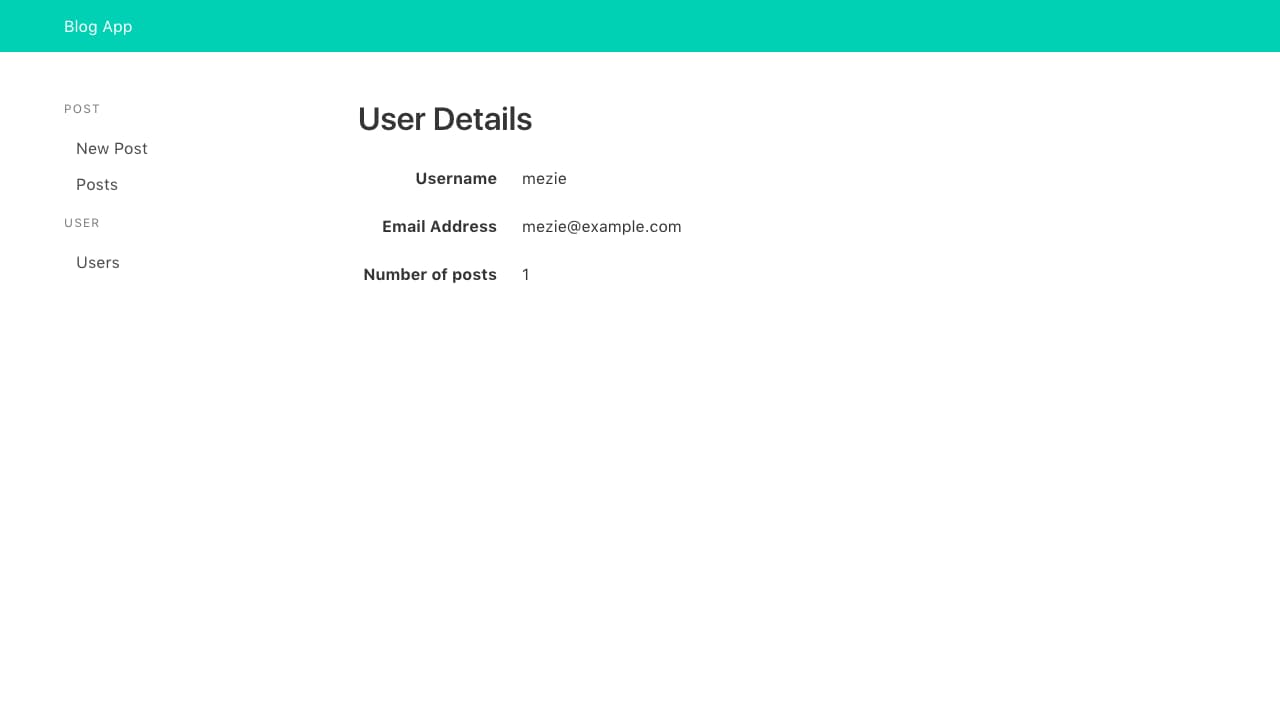
We display the specified user’s username, email, and the number of posts created. The USER_QUERY accepts the ID of the user we want to view their details. The user ID is gotten from the route params. That is, given /admin/users/12, 12 is the ID of a particular user. We need a way to pass this ID to our query. To do this, we make use of reactive parameter by defining a variables function that returns an object containing the user ID.
Adding the User Details Route
Open src/router/index.js, and add the code below to it. This route should be below all the previous routes:
// ...

import UserDetails from '@/components/Admin/UserDetails'

// ...

export default new Router({
  routes: [
    // ...

    // add these inside the `routes` array
    {
      path: '/admin/users/:id',
      name: 'UserDetails',
      component: UserDetails,
      props: true
    }
  ]
})
We should be able to view a particular user detail now:
Step 12 — Authorizing Users
Only authenticated users can add new posts. So, we need a way to pass an Authorization header with the user token along with the request to add a new post that will signify the user can actually add new post. With apollo-link-context, we can easily do this. Open src/main.js and add the code below to it:
// ...

import { setContext } from 'apollo-link-context'

// ...

const authLink = setContext((_, { headers }) => {
  // get the authentication token from localstorage if it exists
  const token = localStorage.getItem('blog-app-token')

  // return the headers to the context so httpLink can read them
  return {
    headers: {
      ...headers,
      authorization: token ? `Bearer ${token}` : null
    }
  }
})

// ...

// update apollo client as below
const apolloClient = new ApolloClient({
  link: authLink.concat(httpLink),
  cache: new InMemoryCache()
})
First, we import apollo-link-context. Then we make use of it to create an authLink that gets the user token from local storage and return the headers which contains the Authorization header. Lastly, we make use of the authLink in our Apollo client.
Now, an Authorization header will be sent along with all requests made to our GraphQL server.
Step 13 — Creating the New Posts Page
Posts are the heart of any blog. Users should be able to add a new post. Again, we’ll first create the GraphQL mutation for adding new posts to our blog. Add the code below to src/graphql.js:
export const ADD_POST_MUTATION = gql`
  mutation AddPostMutation($title: String!, $content: String!) {
    addPost(
      title: $title,
      content: $content
    ) {
      id
      slug
      title
      content
      user {
        id
        username
        email
      }
    }
  }
`
This mutation takes the title and content of a post we want to add to our GraphQL server.
Next, create an AddPost component within the Admin folder and paste the code below into it:
<template>
  <section class="section">
    <div class="container">
      <div class="columns">
        <div class="column is-3">
          <Menu/>
        </div>
        <div class="column is-9">
          <h2 class="title">Add Post</h2>

          <form method="post" @submit.prevent="addPost">
            <div class="field">
              <label class="label">Title</label>

              <p class="control">
                <input
                  class="input"
                  v-model="title"
                  placeholder="Post title"
                />
              </p>
            </div>

            <div class="field">
              <label class="label">Content</label>

              <p class="control">
                <textarea
                  class="textarea"
                  rows="10"
                  v-model="content"
                  placeholder="Post content"
                  ></textarea>
              </p>
            </div>

            <p class="control">
              <button class="button is-primary">Add Post</button>
            </p>
          </form>
        </div>
      </div>
    </div>
  </section>
</template>

<script>
import Menu from '@/components/Admin/Menu'
import { ADD_POST_MUTATION, ALL_POSTS_QUERY } from '@/graphql'

export default {
  name: 'AddPost',
  components: {
    Menu
  },
  data () {
    return {
      title: '',
      content: ''
    }
  },
  methods: {
    addPost () {
      this.$apollo
        .mutate({
          mutation: ADD_POST_MUTATION,
          variables: {
            title: this.title,
            content: this.content
          },
          update: (store, { data: { addPost } }) => {
            // read data from cache for this query
            const data = store.readQuery({ query: ALL_POSTS_QUERY })

            // add new post from the mutation to existing posts
            data.allPosts.push(addPost)

            // write data back to the cache
            store.writeQuery({ query: ALL_POSTS_QUERY, data })
          }
        })
        .then(response => {
          // redirect to all posts
          this.$router.replace('/admin/posts')
        })
    }
  }
}
</script>
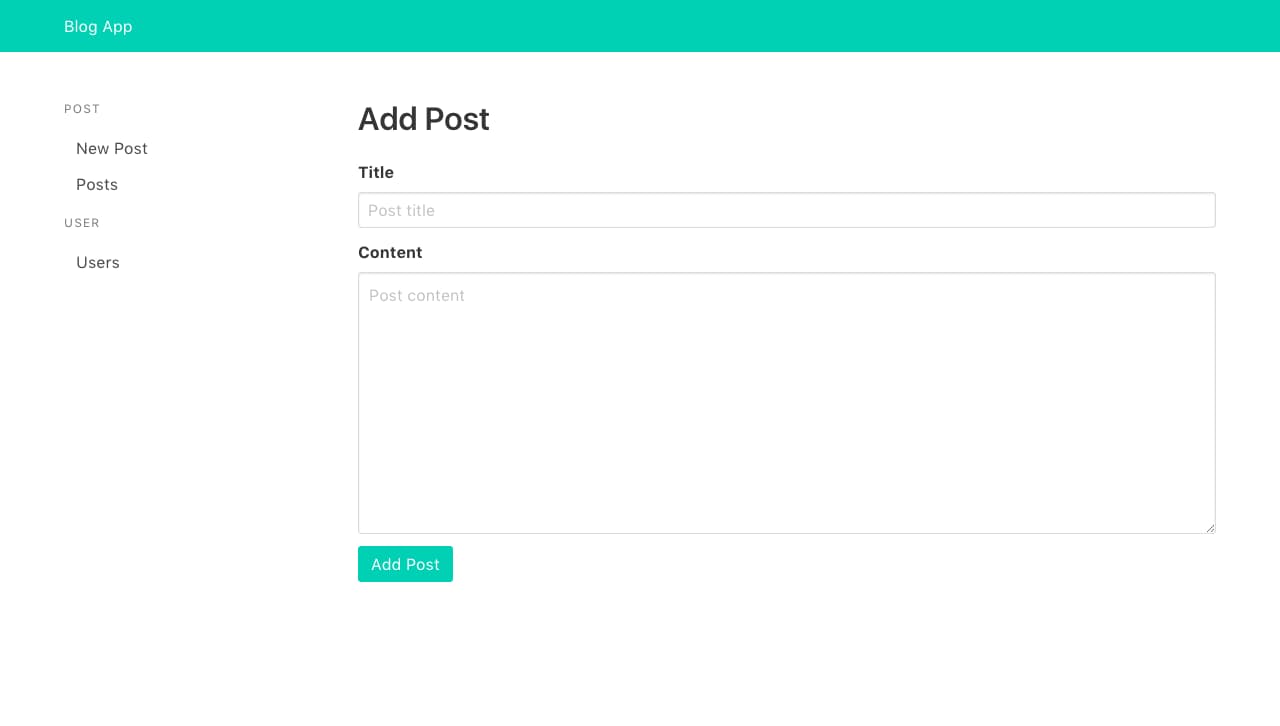
This component renders a form for adding new posts. It uses the ADD_POST_MUTATION passing to it the necessary variables. Since Apollo client caches (in memory in our case) it queries, we need a way to update the cache whenever we perform mutation actions. Notice there is an update function which we use to update the store by adding the newly added post to cache. First, we fetch the data from the cache matching our query (ALL_POSTS_QUERY), then we add the new post to the allPosts array. Lastly, we write the new data back to cache. Once the post is successfully added, we redirect to the list of posts (which we’ll create shortly).
Adding the Add Post Route
Open src/router/index.js, and add the code below to it:
// ...

import AddPost from '@/components/Admin/AddPost'

// ...

export default new Router({
  routes: [
    // ...

    // add these inside the `routes` array
    {
      path: '/admin/posts/new',
      name: 'AddPost',
      component: AddPost
    }
  ]
})
Users should be able to add new posts now:
Step 14 — Displaying all Posts
We’ll first create the GraphQL query by adding the code below to src/graphql.js:
export const ALL_POSTS_QUERY = gql`
  query AllPostsQuery {
    allPosts {
      id
      title
      slug
      user {
        username
      }
    }
  }
`
This GraphQL query fetches all posts from our GraphQL server.
Next, create a Posts component within the Admin folder and paste the code below into it:
<template>
  <section class="section">
    <div class="container">
      <div class="columns">
        <div class="column is-3">
          <Menu/>
        </div>
        <div class="column is-9">
          <h2 class="title">Posts</h2>

          <table class="table is-striped is-narrow is-hoverable is-fullwidth">
            <thead>
              <tr>
                <th>Title</th>
                <th>User</th>
                <th></th>
              </tr>
            </thead>
            <tbody>
              <tr
                v-for="post in allPosts"
                :key="post.id"
              >
                <td>{{ post.title }}</td>
                <td>{{ post.user.username }}</td>
              </tr>
            </tbody>
          </table>
        </div>
      </div>
    </div>
  </section>
</template>

<script>
import Menu from '@/components/Admin/Menu'
import { ALL_POSTS_QUERY } from '@/graphql'

export default {
  name: 'Posts',
  components: {
    Menu
  },
  data () {
    return {
      allPosts: []
    }
  },
  apollo: {
    // fetch all posts
    allPosts: {
      query: ALL_POSTS_QUERY
    }
  }
}
</script>
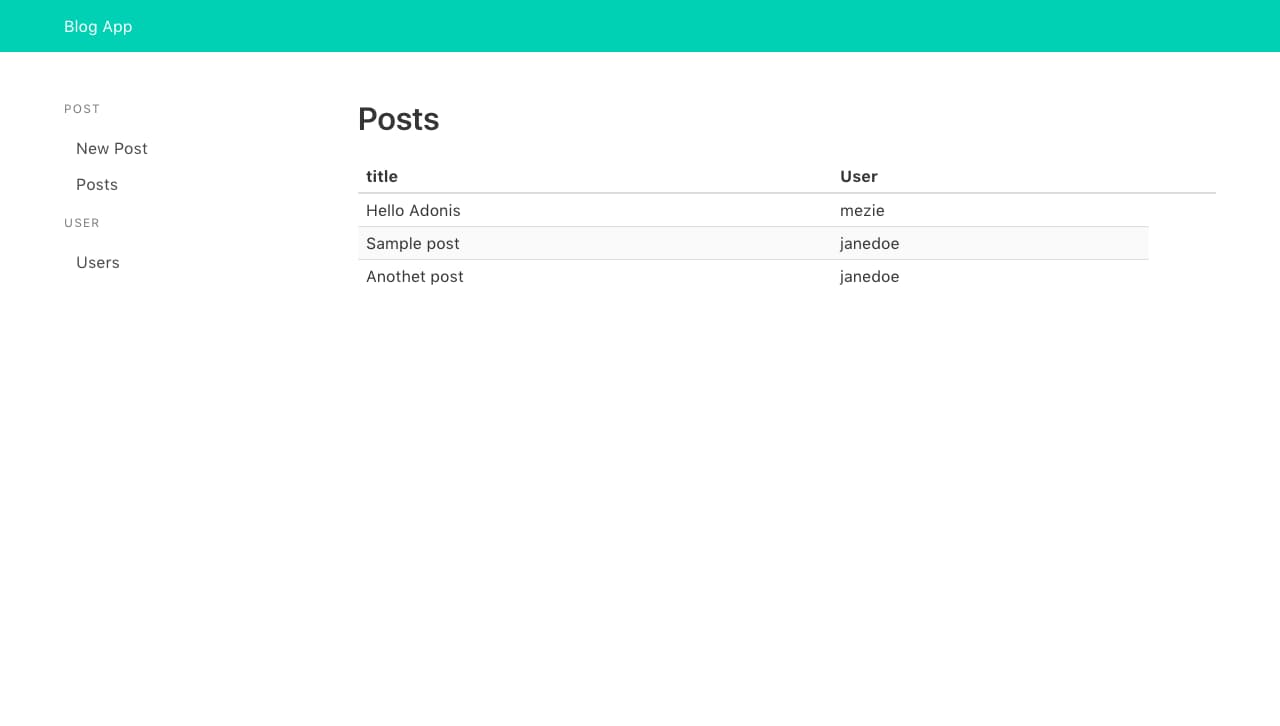
We make use of the Menu component created earlier. Then we define our data which will be populated once the data is gotten from our GraphQL server. Within the apollo object, we add our GraphQL query to fetch all users. This makes use of the ALL_USERS_QUERY we created above. It is important to note that, the name of our data (allUsers in this case) must be the same name used in our GraphQL query (allUsers in this case). Once allUsers is populated with data from our GraphQL server, we display the users in a table by looping through the array of users. We also add a link to view each user details.
Adding Posts Route
Open src/router/index.js, and add the code below to it:
// ...

import Posts from '@/components/Admin/Posts'

// ...

export default new Router({
  routes: [
    // ...

    // add these inside the `routes` array
    {
      path: '/admin/posts',
      name: 'Posts',
      component: Posts
    }
  ]
})
Now when we visit the /admin/posts route, we should see a list of posts as in the image below:
Step 15 — Creating the Blog Homepage
The blog homepage will display a list of all posts created just like in the displaying posts section. In fact, the homepage will use the exact same GraphQL used in displaying posts. It is only the markup of the homepage that will be different. Create a Home component inside src/components and add the code below to it:
<template>
<section class="section">
<div class="columns">
<div class="column is-6 is-offset-3">
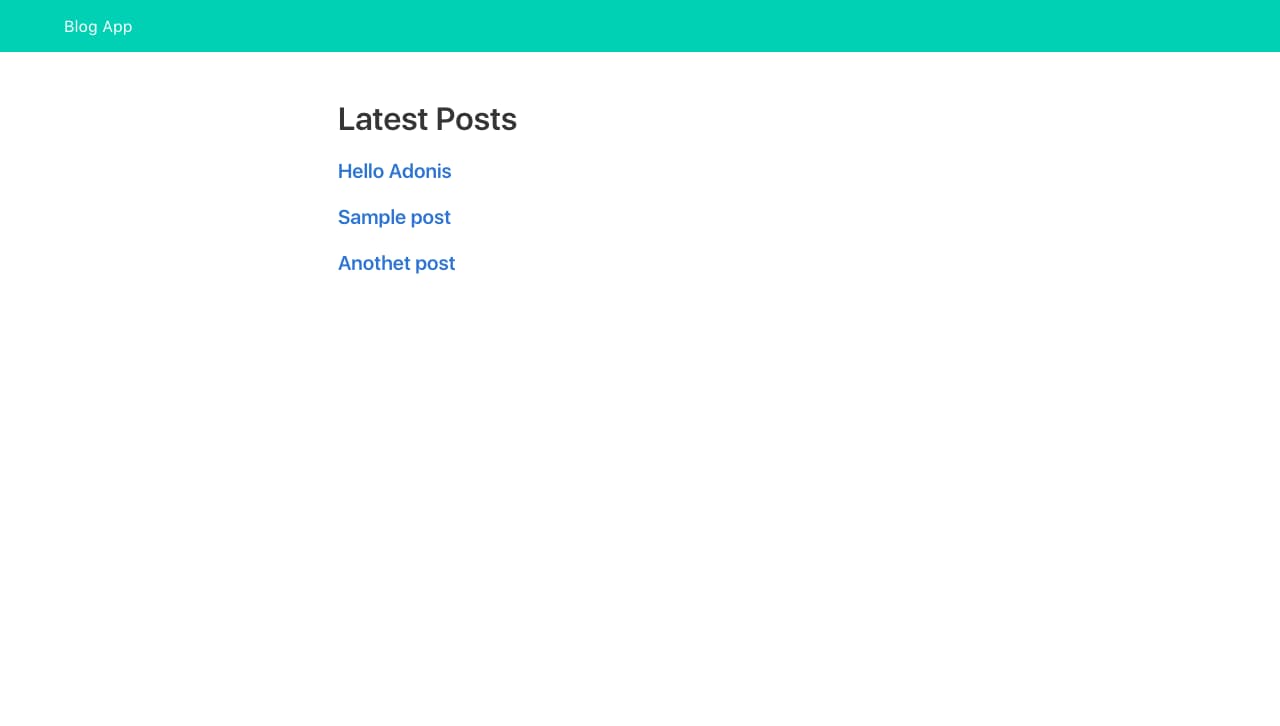
<h1 class="title">Latest Posts</h1>
<h3
v-for="post in allPosts"
:key="post.id"
class="title is-5"
>
<router-link :to="post.slug">
{{ post.title }}
</router-link>
</h3>
</div>
</div>
</section>
</template>
<script>
import { ALL_POSTS_QUERY } from '@/graphql'
export default {
name: 'Home',
data () {
return {
allPosts: []
}
},
apollo: {
// fetch all posts
allPosts: {
query: ALL_POSTS_QUERY
}
}
}
</script>
As we can see the JavaScript section is identical to that of Posts component. Just different markup. We loop through the posts array and display the title of each post linked with their slug.
Adding the Home Route
Open src/router/index.js, and add the code below to it:
// ...

import Home from '@/components/Home'

// ...

export default new Router({
  routes: [
    // ...

    // add these inside the `routes` array
    {
      path: '/',
      name: 'Home',
      component: Home
    }
  ]
})
Visiting the / route, we should see our blog homepage as in the image below:
Step 16 — Creating the Single Post Page
The last thing to add is the ability to view a specific post. Add the code below to src/graphql.js:
export const POST_QUERY = gql`
  query PostQuery($slug: String!) {
    post(slug: $slug) {
      id
      title
      slug
      content
      user {
        id
        username
        email
      }
    }
  }
`
This query fetches a post by its slug. It takes the slug of the post to be fetched as an argument.
Next, create a SinglePost component inside src/components and add the code below to it:
<template>
<section class="section">
<div class="columns">
<div class="column is-6 is-offset-3">
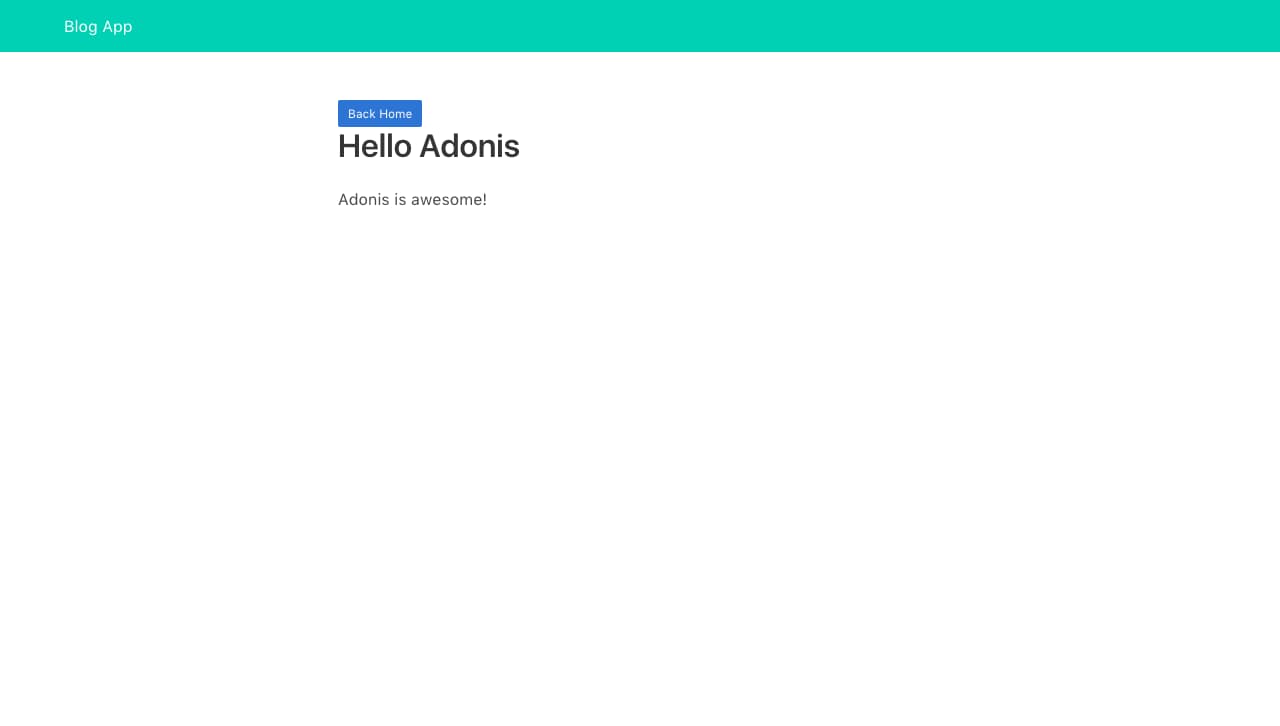
<router-link class="button is-link is-small" to="/">Back Home</router-link>
<h1 class="title">
{{ post.title }}
</h1>
<div class="content">
{{ post.content }}
</div>
</div>
</div>
</section>
</template>
<script>
import { POST_QUERY } from '@/graphql'
export default {
name: 'SinglePost',
data () {
return {
post: '',
slug: this.$route.params.slug
}
},
apollo: {
// fetch post by slug
post: {
query: POST_QUERY,
variables () {
return {
slug: this.slug
}
}
}
}
}
</script>
We display the post title and its content and a link to go back to the homepage. The JavaScript section follows the implementation used in displaying user details. In this case, we get the post slug from the route params.
Adding the View Post Route
Open src/router/index.js, and add the code below to it:
// ...

import SinglePost from '@/components/SinglePost'

// ...

export default new Router({
  routes: [
    // ...

    // add these inside the `routes` array
    {
      path: '/:slug',
      name: 'SinglePost',
      component: SinglePost,
      props: true
    }
  ]
})
Note: This route should be the last route in the routes array.
We should be able to view a single post now:
Conclusion
In this tutorial, we have seen how to build a blog app with GraphQL, Apollo client, and VueJS. We also saw how to connect our frontend app to a GraphQL server.
Thanks for learning with the DigitalOcean Community. Check out our offerings for compute, storage, networking, and managed databases.
About the author
Still looking for an answer?
This textbox defaults to using Markdown to format your answer.
You can type !ref in this text area to quickly search our full set of tutorials, documentation & marketplace offerings and insert the link!
 This work is licensed under a Creative Commons Attribution-NonCommercial- ShareAlike 4.0 International License.
Become a contributor for community
Get paid to write technical tutorials and select a tech-focused charity to receive a matching donation.

DigitalOcean Documentation
Full documentation for every DigitalOcean product.

Resources for startups and AI-native businesses
The Wave has everything you need to know about building a business, from raising funding to marketing your product.
The developer cloud
Scale up as you grow — whether you're running one virtual machine or ten thousand.

Start building today
From GPU-powered inference and Kubernetes to managed databases and storage, get everything you need to build, scale, and deploy intelligent applications.
