By Peter Ekene, Bradley Kouchi and Vinayak Baranwal

Introduction
React Hooks let you use state and lifecycle behavior in functional components. Stable since React 16.8, Hooks are now the recommended approach for writing React components, and functional components with Hooks have largely replaced class components in modern codebases.
In this tutorial, you will explore five patterns for converting React class components to functional components using Hooks. Each pattern includes a before-and-after comparison so you can apply the same approach to your own codebase.
Key Takeaways
- Hooks are stable since React 16.8 and are the recommended pattern for new and migrated components.
useStatereplacesthis.stateandthis.setState; each independent state variable gets its ownuseStatecall.useEffectwith an empty dependency array ([]) replacescomponentDidMount; returning a cleanup function replacescomponentWillUnmount.useEffectwith a dependency array replacescomponentDidUpdatefor selective side effect execution.React.memois the functional equivalent ofPureComponentfor preventing unnecessary re-renders.useCallbackanduseMemoprevent referential instability after migration and are critical in performance-sensitive components.- Error boundaries cannot be converted to functional components; they must remain class components.
thisbinding bugs disappear entirely in functional components: no.bind(), no arrow class properties required for event handlers.
Prerequisites
To complete this tutorial, you’ll need:
- Familiarity with JavaScript. You can review the How To Code in JavaScript series to learn more and get started.
- Familiarity with React. You can review our How To Code in React.js series for guides to help you get started.
- Familiarity with React component lifecycle. You can review How To Manage State on React Class Components for reference.
No local development is required, but CodeSandbox examples are provided for further experimentation.
Way 1 — Converting a Render-Only Class Component
Let’s start with a React class that has neither state nor lifecycle components:
// ExampleClassComponent.js
import React, { Component } from 'react';

class App extends Component {
  alertName = () => {
    alert('John Doe');
  };

  render() {
    return (
      <div>
        <h3>This is a Class Component</h3>
        <button onClick={this.alertName}>
          Alert
        </button>
      </div>
    );
  }
};

export default App;
Here you have a typical React class, which lacks state or a lifecycle method. It alerts a name when a button is clicked.
The functional equivalent of this class will look like this:
// ExampleFunctionalComponent.js
import React from 'react';

function App() {
  const alertName = () => {
    alert('John Doe');
  };

  return (
    <div>
      <h3>This is a Functional Component</h3>
      <button onClick={alertName}>
        Alert
      </button>
    </div>
  );
};

export default App;
This functional component behaves identically to the class version above.
The table below summarizes what changes in this conversion:
| Class component | Functional equivalent |
|---|---|
extends Component |
Plain function declaration |
render() { return (...) } |
return (...) directly |
this.methodName |
methodName (no this) |
import { Component } |
No Component import needed |
However, this example does not use Hooks or anything new yet. This component has no side effects or state, so no Hooks are needed.
Let’s take a look at class-based components with state and learn how to convert them to functional components using Hooks.
Way 2 — Converting this.state and setState Using useState
Let’s consider a situation where you have a global name variable that you can update within the app from a text input field.
In React, you handle cases like this by defining the name variable in a state object and calling setState() when we have a new value to update the name variable with:
// ExampleClassComponentWithState.js
import React, { Component } from 'react';

class App extends Component {
  state = {
    name: ''
  }

  alertName = () => {
    alert(this.state.name);
  };

  handleNameInput = e => {
    this.setState({ name: e.target.value });
  };

  render() {
    return (
      <div>
        <h3>This is a Class Component</h3>
        <input
          type="text"
          onChange={this.handleNameInput}
          value={this.state.name}
          placeholder="Your Name"
        />
        <button onClick={this.alertName}>
          Alert
        </button>
      </div>
    );
  }
}

export default App;
When a user types a name in the input field and clicks the Alert button, it pops up an alert with the name defined in state.
You can convert this entire class into a functional React component using Hooks:
// ExampleFunctionalComponentWithState.js
import React, { useState } from 'react';

function App() {
  const [name, setName] = useState('John Doe');

  const alertName = () => {
    alert(name);
  };

  const handleNameInput = e => {
    setName(e.target.value);
  };

  return (
    <div>
      <h3>This is a Functional Component</h3>
      <input
        type="text"
        onChange={handleNameInput}
        value={name}
        placeholder="Your Name"
      />
      <button onClick={alertName}>
        Alert
      </button>
    </div>
  );
};

export default App;
Here, you have introduced the useState Hook. It allows you to make use of state in React functional components. With the useState() Hook, you can use state in this functional component. It uses a similar syntax with a destructuring assignment for arrays.
Consider this line:
const [name, setName] = useState('John Doe')
Here, name is the equivalent of this.state in a normal class component, and setName is the equivalent of this.setState.
The initial value of the state in the useState() Hook comes from an argument. In other words, the useState() argument is the initial value of the state. In your case, you set it to 'John Doe'. This means that the initial state of the name in state is 'John Doe'.
This code is an example of how you can convert a class-based React component with state to a functional component using Hooks.
The table below maps this.state patterns to their useState equivalents:
| Class pattern | Hook equivalent |
|---|---|
this.state = { count: 0 } |
const [count, setCount] = useState(0) |
this.setState({ count: 1 }) |
setCount(1) |
this.setState(prev => ...) |
setCount(prev => ...) |
| Complex multi-field state updates | useReducer(reducer, initialState) |
Using useReducer for Complex State
When a class component’s this.state contains multiple related fields that update together, useReducer is often a cleaner replacement than multiple useState calls. It keeps state transitions explicit and co-located.
Here is a class component managing a fetch lifecycle with related fields:
// FetchClassComponent.js
import React, { Component } from 'react';

class UserFetcher extends Component {
  state = { loading: false, data: null, error: null };

  fetchUser = () => {
    this.setState({ loading: true, error: null });
    fetch('/api/user')
      .then(res => res.json())
      .then(data => this.setState({ loading: false, data }))
      .catch(err => this.setState({ loading: false, error: err.message }));
  };

  render() {
    const { loading, data, error } = this.state;
    return (
      <div>
        <button onClick={this.fetchUser}>Fetch User</button>
        {loading && <p>Loading...</p>}
        {error && <p>Error: {error}</p>}
        {data && <p>Name: {data.name}</p>}
      </div>
    );
  }
}

export default UserFetcher;
Here is the same component converted using useReducer:
// FetchFunctionalComponent.js
import React, { useReducer } from 'react';

const initialState = { loading: false, data: null, error: null };

function reducer(state, action) {
  switch (action.type) {
    case 'FETCH_START':
      return { ...state, loading: true, error: null };
    case 'FETCH_SUCCESS':
      return { loading: false, data: action.payload, error: null };
    case 'FETCH_ERROR':
      return { loading: false, data: null, error: action.payload };
    default:
      return state;
  }
}

function UserFetcher() {
  const [state, dispatch] = useReducer(reducer, initialState);
  const { loading, data, error } = state;

  const fetchUser = () => {
    dispatch({ type: 'FETCH_START' });
    fetch('/api/user')
      .then(res => res.json())
      .then(data => dispatch({ type: 'FETCH_SUCCESS', payload: data }))
      .catch(err => dispatch({ type: 'FETCH_ERROR', payload: err.message }));
  };

  return (
    <div>
      <button onClick={fetchUser}>Fetch User</button>
      {loading && <p>Loading...</p>}
      {error && <p>Error: {error}</p>}
      {data && <p>Name: {data.name}</p>}
    </div>
  );
}

export default UserFetcher;
Use useReducer when multiple state fields transition together in response to a single action. Use separate useState calls when fields are independent.
Let’s explore other scenarios, including classes with multiple state properties.
Way 3 — Converting Multiple State Properties
You have looked at how you might convert one state property with useState. When a component has multiple state properties, declare a separate useState call for each one rather than grouping them in a single object. If, for example, you had two or more input fields for userName, firstName, and lastName, then you would have a class-based component with three state properties:
// ExampleClassComponentWithMultipleStateProperties.js
import React, { Component } from 'react';

class App extends Component {
  state = {
    userName: '',
    firstName: '',
    lastName: ''
  };

  logName = () => {
    console.log(this.state.userName);
    console.log(this.state.firstName);
    console.log(this.state.lastName);
  };

  handleUserNameInput = e => {
    this.setState({ userName: e.target.value });
  };
  handleFirstNameInput = e => {
    this.setState({ firstName: e.target.value });
  };
  handleLastNameInput = e => {
    this.setState({ lastName: e.target.value });
  };

  render() {
    return (
      <div>
        <h3>This is a Class Component</h3>
        <input
          type="text"
          onChange={this.handleUserNameInput}
          value={this.state.userName}
          placeholder="Your Username"
        />
        <input
          type="text"
          onChange={this.handleFirstNameInput}
          value={this.state.firstName}
          placeholder="Your First Name"
        />
        <input
          type="text"
          onChange={this.handleLastNameInput}
          value={this.state.lastName}
          placeholder="Your Last Name"
        />
        <button
          className="btn btn-large right"
          onClick={this.logName}
        >
          Log Names
        </button>
      </div>
    );
  }
}

export default App;
To convert this class to a functional component with Hooks, declare a separate useState call for each field. Using the useState() Hook, the above example can be written as:
// ExampleFunctionalComponentWithMultipleStateProperties.js
import React, { useState } from 'react';

function App() {
  const [userName, setUsername] = useState('');
  const [firstName, setFirstname] = useState('');
  const [lastName, setLastname] = useState('');

  const logName = () => {
    console.log(userName);
    console.log(firstName);
    console.log(lastName);
  };

  const handleUserNameInput = e => {
    setUsername(e.target.value);
  };
  const handleFirstNameInput = e => {
    setFirstname(e.target.value);
  };
  const handleLastNameInput = e => {
    setLastname(e.target.value);
  };

  return (
    <div>
      <h3>This is a Functional Component</h3>
      <input
        type="text"
        onChange={handleUserNameInput}
        value={userName}
        placeholder="Your Username"
      />
      <input
        type="text"
        onChange={handleFirstNameInput}
        value={firstName}
        placeholder="Your First Name"
      />
      <input
        type="text"
        onChange={handleLastNameInput}
        value={lastName}
        placeholder="Your Last Name"
      />
      <button
        className="btn btn-large right"
        onClick={logName}
      >
        Log Names
      </button>
    </div>
  );
};

export default App;
Here’s a CodeSandbox for this example.
This demonstrates how you can convert a class-based component with multiple state properties to a functional component using the useState() Hook.
Note: Unlike this.setState, the setter returned by useState does not merge objects. Each setter replaces the entire value for that variable. If you store an object in a single useState call, spread the previous state manually: setProfile(prev => ({ ...prev, updatedField: value })), where setProfile is the setter returned by useState.
Way 4 — Converting Lifecycle Methods Using useEffect
Let’s consider a class with state and componentDidMount. This example extends the three-field component from Way 3 by adding a lifecycle method that updates all fields after five seconds.
To achieve this, you will declare an initial state value for the input fields and implement a componentDidMount() lifecycle method that will run after the initial render to update the state values:
// ExampleClassComponentWithStateAndComponentDidMount.js
import React, { Component } from 'react';

class App extends Component {
  state = {
    // initial state
    userName: 'johndoe',
    firstName: 'John',
    lastName: 'Doe'
  }

  componentDidMount() {
    setInterval(() => {
      this.setState({
        // update state
        userName: 'janedoe',
        firstName: 'Jane',
        lastName: 'Doe'
      });
    }, 5000);
  }

  logName = () => {
    console.log(this.state.userName);
    console.log(this.state.firstName);
    console.log(this.state.lastName);
  };

  handleUserNameInput = e => {
    this.setState({ userName: e.target.value });
  };
  handleFirstNameInput = e => {
    this.setState({ firstName: e.target.value });
  };
  handleLastNameInput = e => {
    this.setState({ lastName: e.target.value });
  };

  render() {
    return (
      <div>
        <h3>This is a Class Component</h3>
        <input
          type="text"
          onChange={this.handleUserNameInput}
          value={this.state.userName}
          placeholder="Your Username"
        />
        <input
          type="text"
          onChange={this.handleFirstNameInput}
          value={this.state.firstName}
          placeholder="Your First Name"
        />
        <input
          type="text"
          onChange={this.handleLastNameInput}
          value={this.state.lastName}
          placeholder="Your Last Name"
        />
        <button
          className="btn btn-large right"
          onClick={this.logName}
        >
          Log Names
        </button>
      </div>
    );
  }
}

export default App;
When the app runs, the input fields will have the initial values you’ve defined in the state object. These values will then update to the values you’ve defined inside the componentDidMount() method after five seconds.
Next, you will convert this class to a functional component using the React useState and useEffect Hooks:
// ExampleFunctionalComponentWithStateAndComponentDidMount.js
import React, { useState, useEffect } from 'react';

function App() {
  const [userName, setUsername] = useState('johndoe');
  const [firstName, setFirstname] = useState('John');
  const [lastName, setLastname] = useState('Doe');

  useEffect(() => {
    setInterval(() => {
      setUsername('janedoe');
      setFirstname('Jane');
      setLastname('Doe');
    }, 5000);
  }, []);

  const logName = () => {
    console.log(userName);
    console.log(firstName);
    console.log(lastName);
  };

  const handleUserNameInput = e => {
    setUsername(e.target.value);
  };
  const handleFirstNameInput = e => {
    setFirstname(e.target.value);
  };
  const handleLastNameInput = e => {
    setLastname(e.target.value);
  };

  return (
    <div>
      <h3>This is a Functional Component</h3>
      <input
        type="text"
        onChange={handleUserNameInput}
        value={userName}
        placeholder="Your Username"
      />
      <input
        type="text"
        onChange={handleFirstNameInput}
        value={firstName}
        placeholder="Your First Name"
      />
      <input
        type="text"
        onChange={handleLastNameInput}
        value={lastName}
        placeholder="Your Last Name"
      />
      <button
        className="btn btn-large right"
        onClick={logName}
      >
        Log Names
      </button>
    </div>
  );
};

export default App;
Here’s a CodeSandbox for this example.
In terms of functionality, this component does exactly the same thing as the previous example. The only difference is that instead of using the conventional state object and componentDidMount() lifecycle method as you did in the class component, you used the useState and useEffect Hooks.
The table below maps each lifecycle method to its useEffect equivalent:
| Lifecycle method | useEffect equivalent |
|---|---|
componentDidMount |
useEffect(() => { ... }, []) |
componentDidUpdate |
useEffect(() => { ... }, [dep1, dep2]) |
componentWillUnmount |
useEffect(() => { return () => { ... } }, []) |
| Both mount and every update | useEffect(() => { ... }) (no dependency array) |
Replacing componentWillUnmount with a Cleanup Function
Return a function from useEffect to run cleanup when the component unmounts. This is the direct replacement for componentWillUnmount.
Here is a class component that attaches and removes a window event listener:
// ResizeListenerClass.js
import React, { Component } from 'react';

class ResizeListener extends Component {
  state = { width: window.innerWidth };

  handleResize = () => {
    this.setState({ width: window.innerWidth });
  };

  componentDidMount() {
    window.addEventListener('resize', this.handleResize);
  }

  componentWillUnmount() {
    window.removeEventListener('resize', this.handleResize);
  }

  render() {
    return <p>Window width: {this.state.width}px</p>;
  }
}

export default ResizeListener;
Here is the functional equivalent using a single useEffect with a cleanup return:
// ResizeListenerFunctional.js
import React, { useState, useEffect } from 'react';

function ResizeListener() {
  const [width, setWidth] = useState(window.innerWidth);

  useEffect(() => {
    const handleResize = () => setWidth(window.innerWidth);
    window.addEventListener('resize', handleResize);
    return () => {
      window.removeEventListener('resize', handleResize);
    };
  }, []);

  return <p>Window width: {width}px</p>;
}

export default ResizeListener;
The cleanup function runs before the component unmounts and before the effect re-runs if dependencies change.
Adding componentDidUpdate
Next, let’s look at a React class with state and two lifecycle methods: componentDidMount and componentDidUpdate. Most of the solutions up to this point have used the useState Hook. In this example, you will focus on the useEffect Hook.
To best demonstrate how this works, let’s modify your code to dynamically update the <h3> header on the page.
Currently, the header says This is a Class Component. Now, you will define a componentDidMount() method to update the header to say Welcome to React Hooks after three seconds:
// ExampleClassComponentWithStateAndTwoLifecycleMethods.js
import React, { Component } from 'react';

class App extends Component {
  state = {
    header: 'Welcome to React Hooks'
  }

  componentDidMount() {
    const header = document.querySelectorAll('#header')[0];
    setTimeout(() => {
      header.innerHTML = this.state.header;
    }, 3000);
  }

  render() {
    return (
      <div>
        <h3 id="header">This is a Class Component</h3>
      </div>
    );
  }
}

export default App;
When the app runs, it will start with the initial header This is a Class Component and change it to Welcome to React Hooks after three seconds. This is the classic componentDidMount() behavior since it runs after the render function is executed successfully.
Let’s add functionality to dynamically update the header from another input field so that the header gets updated with the new text while you type.
To accomplish this, you will need to implement the componentDidUpdate() lifecycle method:
// ExampleClassComponent.js
import React, { Component } from 'react';

class App extends Component {
  state = {
    header: 'Welcome to React Hooks'
  }

  componentDidMount() {
    const header = document.querySelectorAll('#header')[0];
    setTimeout(() => {
      header.innerHTML = this.state.header;
    }, 3000);
  }

  componentDidUpdate() {
    const node = document.querySelectorAll('#header')[0];
    node.innerHTML = this.state.header;
  }

  handleHeaderInput = e => {
    this.setState({ header: e.target.value });
  };

  render() {
    return (
      <div>
        <h3 id="header">This is a Class Component</h3>
        <input
          type="text"
          onChange={this.handleHeaderInput}
          value={this.state.header}
        />
      </div>
    );
  }
}

export default App;
Here, you have state, componentDidMount(), and componentDidUpdate(). When you run the app, the componentDidMount() function will update the header to Welcome to React Hooks after three seconds. When you start typing in the header text input field, the <h3> text will update with the input text as defined in the componentDidUpdate() method.
Next, you will convert this class to a functional component with the useEffect() Hook:
// ExampleFunctionalComponentWithStateAndTwoLifecycleMethods.js
import React, { useState, useEffect } from 'react';

function App() {
  const [header, setHeader] = useState('Welcome to React Hooks');

  useEffect(() => {
    const newheader = document.querySelectorAll('#header')[0];
    setTimeout(() => {
      newheader.innerHTML = header;
    }, 3000);
  }); // no dependency array — runs after every render, replicating both componentDidMount and componentDidUpdate

  const handleHeaderInput = e => {
    setHeader(e.target.value);
  };

  return (
    <div>
      <h3 id="header">This is a Functional Component</h3>
      <input
        type="text"
        onChange={handleHeaderInput}
        value={header}
      />
    </div>
  );
};

export default App;
Check out this example on CodeSandbox.
You achieved the same functionality with this component as you did previously by using the useEffect() Hook. You optimized the code as well, since you did not have to write separate code for the componentDidMount() and componentDidUpdate() functions. With the useEffect() Hook, you get the functionality of both. This is because useEffect() runs both after the initial render and after every subsequent update by default.
Way 5 — Optimizing Performance After Conversion
React PureComponent works in a similar manner to Component. The major difference between them is that React.Component doesn’t implement the shouldComponentUpdate() lifecycle method while React.PureComponent does.
If you have an application where the render() function renders the same result given the same props and state, you can use React.PureComponent for a performance boost in some cases.
React.memo() works in a similar way. When your function component renders the same result given the same props, you can wrap it in a call to React.memo() to enhance performance. Using PureComponent and React.memo() can reduce unnecessary renders in components with stable props, which improves performance in render-heavy trees. For simple components, the overhead of comparison may outweigh the benefit.
To understand what they both do, you will first look at code where a component renders every two seconds, whether or not there’s a change in value or state:
// ExampleClassComponent.js
import React, { Component } from 'react';

function Unstable(props) {
  // monitor how many times this component is rendered
  console.log('Rendered Unstable component');
  return (
    <div>
      <p>{props.value}</p>
    </div>
  );
};

class App extends Component {
  state = {
    value: 1
  };

  componentDidMount() {
    setInterval(() => {
      this.setState(() => {
        return { value: 1 };
      });
    }, 2000);
  }

  render() {
    return (
      <div>
        <Unstable value={this.state.value} />
      </div>
    );
  }
}
export default App;
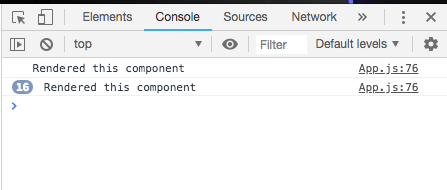
When you run the app and check the logs, you will notice that it renders the component every two seconds, without any change in state or props. This is a situation that you can improve with both PureComponent and React.memo().
Most of the time, you only want to re-render a component when there’s been a change in state or props. Using the example above, you can improve it with PureComponent so that the component only re-renders when there’s a change in state or props.
You can accomplish this by importing PureComponent and extending it:
// ExamplePureComponent.js
import React, { PureComponent } from 'react';

function Unstable(props) {
  console.log('Rendered Unstable component');
  return (
    <div>
      <p>{props.value}</p>
    </div>
  );
};

class App extends PureComponent {
  state = {
    value: 1
  };

  componentDidMount() {
    setInterval(() => {
      this.setState(() => {
        return { value: 1 };
      });
    }, 2000);
  }

  render() {
    return (
      <div>
        <Unstable value={this.state.value} />
      </div>
    );
  }
}

export default App;
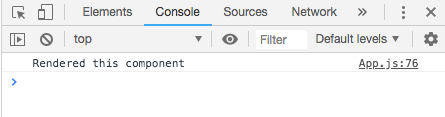
Now, if you run the app again, you only get the initial render. Nothing else happens after that. This is because you have class App extends PureComponent {} instead of class App extends Component {}.
This solves the problem of components being re-rendered without respect to the current state. However, if you implement a state change within your setState method, you would run into another issue.
For example, consider the following changes to setState():
Currently, value set to 1:
componentDidMount() {
  setInterval(() => {
    this.setState(() => {
      return { value: 1 };
    });
  }, 2000);
}
Let’s consider a situation where value is set to Math.random():
componentDidMount() {
  setInterval(() => {
    this.setState(() => {
      return { value: Math.round(Math.random()) };
    });
  }, 2000);
}
In this scenario, the first example component would re-render each time the value updates to the next random number. However, PureComponent makes it possible to re-render components only when there has been a change in state or props.
Now you can explore how to use React.memo() to achieve the same fix. To accomplish this, wrap the component with React.memo():
// ExampleReactMemo.js
import React, { Component } from 'react';

const Unstable = React.memo(function Unstable (props) {
  console.log('Rendered Unstable component');
  return (
    <div>
      <p>{props.value}</p>
    </div>
  );
});

class App extends Component {
  state = {
    value: 1
  };

  componentDidMount() {
    setInterval(() => {
      this.setState(() => {
        return { value: 1 };
      });
    }, 2000);
  }

  render() {
    return (
      <div>
        <Unstable value={this.state.value} />
      </div>
    );
  }
}

export default App;
Here’s the CodeSandbox for this example.
This achieves the same result as using PureComponent. The component only renders after the initial render and does not re-render again until there is a change in state or props.
Preventing Unnecessary Re-renders with useCallback
When a functional component passes a callback as a prop to a child wrapped in React.memo, the callback gets a new reference on every render, which defeats memoization. useCallback stabilizes the reference so the child only re-renders when the callback’s dependencies change.
// import { useCallback } from 'react'

// Without useCallback — new function reference on every render
const handleClickUnstable = () => doSomething(id);

// With useCallback — stable reference, child skips re-render if id is unchanged
const handleClickStable = useCallback(() => doSomething(id), [id]);
Pass handleClickStable as a prop to a React.memo-wrapped child and the child will skip re-rendering unless id changes.
Preventing Expensive Recalculations with useMemo
useMemo memoizes a computed value so it is not recalculated on every render. Use it when a derived value involves a loop, sort, or filter that is expensive enough to cause a visible render delay.
// import { useMemo } from 'react'

// Without useMemo — sorted list is recalculated on every render
const sortedUsers = users.slice().sort((a, b) => a.name.localeCompare(b.name));

// With useMemo — recalculates only when users changes
const sortedUsers = useMemo(
  () => users.slice().sort((a, b) => a.name.localeCompare(b.name)),
  [users]
);
The table below summarizes the optimization patterns covered in this section:
| Optimization goal | Class equivalent | Hook |
|---|---|---|
| Prevent child re-renders | PureComponent / shouldComponentUpdate |
React.memo |
| Stable callback references | No direct equivalent | useCallback |
| Memoized derived values | Manual instance variable caching | useMemo |
Handling Edge Cases and Migration Boundaries
Not every class component can or should be converted. Two patterns require special handling.
Error Boundaries Must Remain Class Components
React’s error boundary API (componentDidCatch and getDerivedStateFromError) has no hook equivalent. Any component that catches rendering errors in a child subtree must remain a class component.
// ErrorBoundary.js — must stay a class component
import React, { Component } from 'react';

class ErrorBoundary extends Component {
  state = { hasError: false };

  static getDerivedStateFromError() {
    return { hasError: true };
  }

  componentDidCatch(error, info) {
    console.error('Caught error:', error, info);
  }

  render() {
    if (this.state.hasError) {
      return <p>Something went wrong.</p>;
    }
    return this.props.children;
  }
}

export default ErrorBoundary;
Note: You can use functional components freely inside an error boundary’s subtree. Only the boundary wrapper itself must remain a class component.
Migrating the Context API with useContext
The class contextType API is replaced by the useContext hook in functional components.
// Class component — reads context via contextType
import React, { Component } from 'react';
import { ThemeContext } from './ThemeContext';

class ThemedButton extends Component {
  static contextType = ThemeContext;

  render() {
    return <button style={{ background: this.context.background }}>Click</button>;
  }
}
// Functional component — reads context via useContext
import React, { useContext } from 'react';
import { ThemeContext } from './ThemeContext';

function ThemedButton() {
  const { background } = useContext(ThemeContext);
  return <button style={{ background }}>Click</button>;
}
useContext eliminates the static contextType declaration and this.context reference. The component re-renders whenever the context value changes.
Frequently Asked Questions
Can all React class components be converted to functional components with hooks?
Almost all can. The exception is error boundaries: components implementing componentDidCatch or getDerivedStateFromError must remain class components because React does not provide hook equivalents for these methods.
What is the functional equivalent of componentDidMount in React hooks?
Use useEffect with an empty dependency array: useEffect(() => { /* runs once after mount */ }, []). The empty array tells React there are no dependencies to watch, so the effect runs only after the initial render.
How do I handle multiple state variables that were previously in a single this.state object?
Use separate useState calls for each independent variable. If variables update together as a unit, use useReducer with a reducer function and dispatch to manage them as a single state object with explicit transitions.
Does converting to functional components improve performance automatically?
No. Functional components do not inherently re-render less often than class components. Wrap components in React.memo to skip re-renders when props have not changed, and use useCallback and useMemo to stabilize references passed to memoized children.
How does React.memo differ from PureComponent?
PureComponent applies a shallow prop and state comparison to the entire class component. React.memo applies a shallow prop comparison to a functional component. For custom comparison logic, pass a second argument: React.memo(Component, (prevProps, nextProps) => prevProps.id === nextProps.id).
What happens to this binding bugs when I convert to a functional component?
They disappear. Functional components do not use this, so there is no context to lose and no need for .bind(this) in constructors or arrow class properties for event handlers.
How does React 18 Strict Mode affect useEffect during migration?
In React 18 Strict Mode during development, effects run twice on mount (mount, unmount, remount) to surface missing cleanup logic. This does not happen in production. If your useEffect produces unexpected behavior during migration, verify that it returns a proper cleanup function.
Is there a codemod or automated tool to convert class components to functional components?
The community-maintained react-codemod package includes transformations for some patterns. Automated tools cannot reliably handle lifecycle methods, this references, or complex state logic. Treat codemods as a starting point and review each converted component manually.
Conclusion
In this tutorial, you covered five patterns for converting React class components to functional components: render-only components, state management with useState and useReducer, lifecycle methods with useEffect, context migration with useContext, and performance optimization with React.memo, useCallback, and useMemo. You also identified the one exception, error boundaries, that must remain class components.
You can now systematically migrate existing class components to functional equivalents, map each lifecycle method to its useEffect pattern, and apply memoization hooks to maintain performance after conversion.
To continue building on these patterns, see How To Manage State with Hooks on React Components, Understanding React Class Components, How To Manage State on React Class Components, and How To Create Custom Components in React.
Thanks for learning with the DigitalOcean Community. Check out our offerings for compute, storage, networking, and managed databases.
About the author(s)
Former Technical Editor at DigitalOcean. Expertise in areas including Vue.js, CSS, React, and more.
Building future-ready infrastructure with Linux, Cloud, and DevOps. Full Stack Developer & System Administrator. Technical Writer @ DigitalOcean | GitHub Contributor | Passionate about Docker, PostgreSQL, and Open Source | Exploring NLP & AI-TensorFlow | Nailed over 50+ deployments across production environments.
Still looking for an answer?
This textbox defaults to using Markdown to format your answer.
You can type !ref in this text area to quickly search our full set of tutorials, documentation & marketplace offerings and insert the link!
Really nice article and gr8 explanation, based on this I tried to convert this ( https://stackblitz.com/edit/bs-stepper-react ) class component in functional component, but it shows error ( TypeError: Cannot read properties of null (reading ‘previous’) ), can you please suggest what can be done ?
1 When I try to open the CodeSandbox link, I get the error ModuleNotFoundError Could not find module in path: ‘react/jsx-runtime’ relative to ‘/src/index.js’
2 Here is an alternative version of Step 5. I find it is simpler: it avoids using document.querySelectorAll and innerHTML:
import React, { useState, useEffect } from 'react';

function App() {
  const [header, setHeader] = useState('This is a Functional Component');

useEffect(() => {
    setTimeout(() => {
    setHeader("Welcome to React hooks");
  }, 3000); }, []);


  const handleHeaderInput = e => {
    setHeader(e.target.value);
  };

  return (
    <div>
      <h3 id="header">{header}</h3>
      <input
        type="text"
        onChange={handleHeaderInput}
        value={header}
      />
    </div>
  );
};

export default App; This work is licensed under a Creative Commons Attribution-NonCommercial- ShareAlike 4.0 International License.
Become a contributor for community
Get paid to write technical tutorials and select a tech-focused charity to receive a matching donation.

DigitalOcean Documentation
Full documentation for every DigitalOcean product.

Resources for startups and AI-native businesses
The Wave has everything you need to know about building a business, from raising funding to marketing your product.
The developer cloud
Scale up as you grow — whether you're running one virtual machine or ten thousand.

Start building today
From GPU-powered inference and Kubernetes to managed databases and storage, get everything you need to build, scale, and deploy intelligent applications.
