By Steve Milburn, Mateusz Papiernik and Caitlin Postal
Not using Ubuntu 20.04?
Choose a different version or distribution.
Introduction
An effective logging solution is crucial to the success of any application. Winston is a versatile logging library and a popular logging solution available for Node.js applications. Winston’s features include support for multiple storage options, log levels, log queries, and a built-in profiler.
In this tutorial, you will use Winston to log a Node/Express application that you’ll create as part of this process. You’ll also see how to combine Winston with Morgan, another popular HTTP request middleware logger for Node.js, to consolidate HTTP request data logs with other information. After completing this tutorial, your Ubuntu server will be running a small Node/Express application, and Winston will be implemented to log errors and messages to a file and the console.
Prerequisites
To follow this tutorial, you will need:
-
An Ubuntu 20.04 server with a sudo non-root user, which you can set up by following the initial server setup.
-
Node.js installed using the official PPA (personal package archive), which is explained in How To Install Node.js on Ubuntu 20.04, Option 2.
Step 1 — Creating a Basic Node/Express App
Winston is often used for logging events from web applications built with Node.js. In this step, you will create a simple Node.js web application using the Express framework. You will use express-generator, a command-line tool, to get a Node/Express web application running quickly.
Because you installed the Node Package Manager during the prerequisites, you can use the npm command to install express-generator:
- sudo npm install express-generator -g
The -g flag installs the package globally, which means it can be used as a command-line tool outside of an existing Node project/module.
With express-generator installed, you can create your app using the express command, followed by the name of the directory you want to use for the project:
- express myApp
For this tutorial, the project will be called myApp.
Note: It is also possible to run the express-generator tool directly without installing it globally as a system-wide command first. To do so, run this command:
- npx express-generator myApp
The npx command is a command-runner shipped with the Node Package Manager that makes it easy to run command-line tools from the npm registry.
During the first run, it will ask you if you agree to download the package:
Need to install the following packages:
  express-generator
Ok to proceed? (y)
Answer y and press ENTER. Now you can use npx express-generator in place of express.
Next, install Nodemon, which will automatically reload the application whenever you make changes. A Node.js application needs to be restarted any time changes are made to the source code for those changes to take effect, so Nodemon will automatically watch for changes and restart the application. Since you want to be able to use nodemon as a command-line tool, install it with the -g flag:
- sudo npm install nodemon -g
To finish setting up the application, move to the application directory and install dependencies as follows:
- cd myApp
- npm install
By default, applications created with express-generator run on port 3000, so you need to ensure that the firewall does not block the port.
To open port 3000, run the following command:
- sudo ufw allow 3000
You now have everything you need to start your web application. To do so, run the following command:
- nodemon bin/www
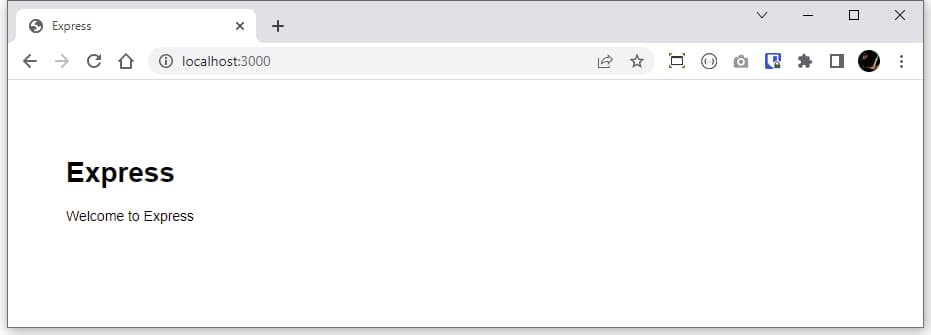
This command starts the application on port 3000. You can test if it’s working by pointing your browser to http://your_server_ip:3000. You should see something like this:
At this point, you can start a second SSH session to your server for the remainder of this tutorial, leaving the web application you just started running in the original session. For the rest of this article, the initial SSH session currently running the application will be called Session A. Any commands in Session A will appear on a dark navy background like this:
- nodemon bin/www
You will use the new SSH session for running commands and editing files. This session will be called Session B. Any commands in Session B will appear on a light blue background like this:
- cd ~/myApp
Unless otherwise noted, you will run all remaining commands in Session B.
In this step, you created the basic app. Next, you will customize it.
Step 2 — Customizing the Logging Variables
While the default application created by express-generator is a good start, you need to customize the application so that it will call the correct logger when needed.
express-generator includes the Morgan HTTP logging middleware that you will use to log data about all HTTP requests. Since Morgan supports output streams, it pairs nicely with the stream support built into Winston, enabling you to consolidate HTTP request data logs with anything else you choose to log with Winston.
The express-generator boilerplate uses the variable logger when referencing the morgan package. Since you will use morgan and winston, which are both logging packages, it can be confusing to call either one of them logger. To specify which variable you want, you can change the variable declarations by editing the app.js file.
To open app.js for editing, use nano or your favorite text editor:
- nano ~/myApp/app.js
Find the following line near the top of the file:
...
var logger = require('morgan');
...
Change the variable name from logger to morgan:
...
var morgan = require('morgan');
...
This update specifies that the declared variable morgan will call the require() method linked to the Morgan request logger.
You need to find where else the variable logger was referenced in the file and change it to morgan. You will also need to change the log format used by the morgan package to combined, which is the standard Apache log format and will include useful information in the logs, such as remote IP address and the user-agent HTTP request header.
To do so, find the following line:
...
app.use(logger('dev'));
...
Update it to the following:
...
app.use(morgan('combined'));
...
These changes will help you understand which logging package is referenced at any given time after integrating the Winston configuration.
When finished, save and close the file.
Now that your app is set up, you can start working with Winston.
Step 3 — Installing and Configuring Winston
In this step, you will install and configure Winston. You will also explore the configuration options available as part of the winston package and create a logger to log information to a file and the console.
Install winston with the following command:
- cd ~/myApp
- npm install winston
It’s helpful to keep any support or utility configuration files for your applications in a special directory. Create a config folder that will contain the winston configuration:
- mkdir ~/myApp/config
Next, create a folder that will contain your log files:
- mkdir ~/myApp/logs
Finally, install app-root-path:
- npm install app-root-path --save
The app-root-path package is useful when specifying paths in Node.js. Though this package is not directly related to Winston, it is helpful when determining paths to files in Node.js. You will use it to specify the location of the Winston log files from the project’s root and to avoid ugly relative path syntax.
Now that the configuration for handling logging is in place, you can define your settings. Create and open ~/myApp/config/winston.js for editing:
- nano ~/myApp/config/winston.js
The winston.js file will contain your winston configuration.
Next, add the following code to require the app-root-path and winston packages:
const appRoot = require('app-root-path');
const winston = require('winston');
With these variables in place, you can define the configuration settings for your transports. Transports are a concept introduced by Winston that refers to the storage/output mechanisms used for the logs. Winston comes with four core transports built-in: Console, File, HTTP, and Stream.
You will focus on the console and file transports for this tutorial. The console transport will log information to the console, and the file transport will log information to a specified file. Each transport definition can contain configuration settings, such as file size, log levels, and log format.
Here is a quick summary of the settings you will use for each transport:
level: level of messages to log.filename: the file to be used to write log data to.handleExceptions: catch and log unhandled exceptions.maxsize: max size of log file, in bytes, before a new file will be created.maxFiles: limit the number of files created when the log file size is exceeded.format: how the log output will be formatted.
Logging levels indicate message priority and are denoted by an integer. Winston uses npm logging levels that are prioritized from 0 to 6 (highest to lowest):
- 0: error
- 1: warn
- 2: info
- 3: http
- 4: verbose
- 5: debug
- 6: silly
When specifying a logging level for a particular transport, anything at that level or higher will be logged. For example, when setting a level of info, anything at level error, warn, or info will be logged.
Log levels are specified when calling the logger, which means you can run the following command to record an error: logger.error('test error message').
Still in the config file, add the following code to define the configuration settings for the file and console transports in the winston configuration:
...
// define the custom settings for each transport (file, console)
const options = {
  file: {
    level: "info",
    filename: `${appRoot}/logs/app.log`,
    handleExceptions: true,
    maxsize: 5242880, // 5MB
    maxFiles: 5,
    format: winston.format.combine(
      winston.format.timestamp(),
      winston.format.json()
    ),
  },
  console: {
    level: "debug",
    handleExceptions: true,
    format: winston.format.combine(
      winston.format.colorize(),
      winston.format.simple()
    ),
  },
};
Next, add the following code to instantiate a new winston logger with file and console transports using the properties defined in the options variable:
...
// instantiate a new Winston Logger with the settings defined above
const logger = winston.createLogger({
  transports: [
    new winston.transports.File(options.file),
    new winston.transports.Console(options.console),
  ],
  exitOnError: false, // do not exit on handled exceptions
});
By default, morgan outputs to the console only, so you will define a stream function that will be able to get morgan-generated output into the winston log files. You will use the info level to pick up the output by both transports (file and console). Add the following code to the config file:
...
// create a stream object with a 'write' function that will be used by `morgan`
logger.stream = {
  write: function(message, encoding) {
    // use the 'info' log level so the output will be picked up by both
    // transports (file and console)
    logger.info(message);
  },
};
Finally, add the code below to export the logger so it can be used in other parts of the application:
...
module.exports = logger;
The completed winston configuration file will now look like this:
const appRoot = require("app-root-path");
const winston = require("winston");

// define the custom settings for each transport (file, console)
const options = {
  file: {
    level: "info",
    filename: `${appRoot}/logs/app.log`,
    handleExceptions: true,
    maxsize: 5242880, // 5MB
    maxFiles: 5,
    format: winston.format.combine(
      winston.format.timestamp(),
      winston.format.json()
    ),
  },
  console: {
    level: "debug",
    handleExceptions: true,
    format: winston.format.combine(
      winston.format.colorize(),
      winston.format.simple()
    ),
  },
};

// instantiate a new Winston Logger with the settings defined above
const logger = winston.createLogger({
  transports: [
    new winston.transports.File(options.file),
    new winston.transports.Console(options.console),
  ],
  exitOnError: false, // do not exit on handled exceptions
});

// create a stream object with a 'write' function that will be used by `morgan`
logger.stream = {
  write: function (message, encoding) {
    // use the 'info' log level so the output will be picked up by both
    // transports (file and console)
    logger.info(message);
  },
};

module.exports = logger;
Save and close the file.
You now have the logger configured, but your application is still not aware of it, or how to use it, so you need to integrate the logger with the application.
Step 4 — Integrating Winston with the Application
To get your logger working with the application, you need to make express aware of it. You saw in Step 2 that your express configuration is located in app.js, so you can import your logger into this file.
Open the file for editing:
- nano ~/myApp/app.js
Add a winston variable declaration near the top of the file with the other require statements:
...
var winston = require('./config/winston');
...
The first place you will use winston is with morgan. Still in app.js, find the following line:
...
app.use(morgan('combined'));
...
Update it to include the stream option:
...
app.use(morgan('combined', { stream: winston.stream }));
...
Here, you set the stream option to the stream interface you created as part of the winston configuration.
Save and close the file.
In this step, you configured your Express application to work with Winston. Next, you will review the log data.
Step 5 — Accessing Log Data and Recording Custom Log Messages
Now that the application has been configured, you’re ready to see some log data. In this step, you will review the log entries and update your settings with a sample custom log message.
If you reload the page in the web browser, you should see something similar to the following output in the console of SSH Session A:
Output[nodemon] restarting due to changes...
[nodemon] starting `node bin/www`
info: ::1 - - [25/Apr/2022:18:10:55 +0000] "GET / HTTP/1.1" 200 170 "-" "Mozilla/5.0 (Windows NT 10.0; Win64; x64) AppleWebKit/537.36 (KHTML, like Gecko) Chrome/100.0.4896.127 Safari/537.36"

info: ::1 - - [25/Apr/2022:18:10:55 +0000] "GET /stylesheets/style.css HTTP/1.1" 304 - "http://localhost:3000/" "Mozilla/5.0 (Windows NT 10.0; Win64; x64) AppleWebKit/537.36 (KHTML, like Gecko) Chrome/100.0.4896.127 Safari/537.36"
There are two log entries here: the first for the request to the HTML page; the second for the associated stylesheet. Since each transport is configured to handle info level log data, you should also see similar information in the file transport located at ~/myApp/logs/app.log.
To view the contents of the log file, run the following command:
- tail ~/myApp/logs/app.log
tail will output the last parts of the file in your terminal.
You should see something similar to the following:
{"level":"info","message":"::1 - - [25/Apr/2022:18:10:55 +0000] \"GET / HTTP/1.1\" 304 - \"-\" \"Mozilla/5.0 (Windows NT 10.0; Win64; x64) AppleWebKit/537.36 (KHTML, like Gecko) Chrome/100.0.4896.127 Safari/537.36\"\n","timestamp":"2022-04-25T18:10:55.573Z"}
{"level":"info","message":"::1 - - [25/Apr/2022:18:10:55 +0000] \"GET /stylesheets/style.css HTTP/1.1\" 304 - \"http://localhost:3000/\" \"Mozilla/5.0 (Windows NT 10.0; Win64; x64) AppleWebKit/537.36 (KHTML, like Gecko) Chrome/100.0.4896.127 Safari/537.36\"\n","timestamp":"2022-04-25T18:10:55.588Z"}
The output in the file transport will be written as a JSON object since you used winston.format.json() in the format option for the file transport configuration. You can learn more about JSON in An Introduction to JSON.
So far, your logger is only recording HTTP requests and related data. This information is essential to have in your logs.
In the future, you may want to record custom log messages, such as for recording errors or profiling database query performance. As an example, you will call the logger from the error handler route. By default, the express-generator package already includes a 404 and 500 error handler route, so you will work with that.
Open the ~/myApp/app.js file:
- nano ~/myApp/app.js
Find the code block at the bottom of the file that looks like this:
...
// error handler
app.use(function(err, req, res, next) {
  // set locals, only providing error in development
  res.locals.message = err.message;
  res.locals.error = req.app.get('env') === 'development' ? err : {};

  // render the error page
  res.status(err.status || 500);
  res.render('error');
});
...
This section is the final error-handling route that will ultimately send an error response back to the client. Since all server-side errors will be run through this route, it’s a good place to include the winston logger.
Because you are now dealing with errors, you want to use the error log level. Both transports are configured to log error level messages, so you should see the output in the console and file logs.
You can include anything you want in the log, including information like:
err.status: The HTTP error status code. If one is not already present, default to500.err.message: Details of the error.req.originalUrl: The URL that was requested.req.path: The path part of the request URL.req.method: HTTP method of the request (GET, POST, PUT, etc.).req.ip: Remote IP address of the request.
Update the error handler route to include the winston logging:
...
// error handler
app.use(function(err, req, res, next) {
  // set locals, only providing error in development
  res.locals.message = err.message;
  res.locals.error = req.app.get('env') === 'development' ? err : {};

  // include winston logging
  winston.error(
    `${err.status || 500} - ${err.message} - ${req.originalUrl} - ${req.method} - ${req.ip}`
  );

  // render the error page
  res.status(err.status || 500);
  res.render('error');
});
...
Save and close the file.
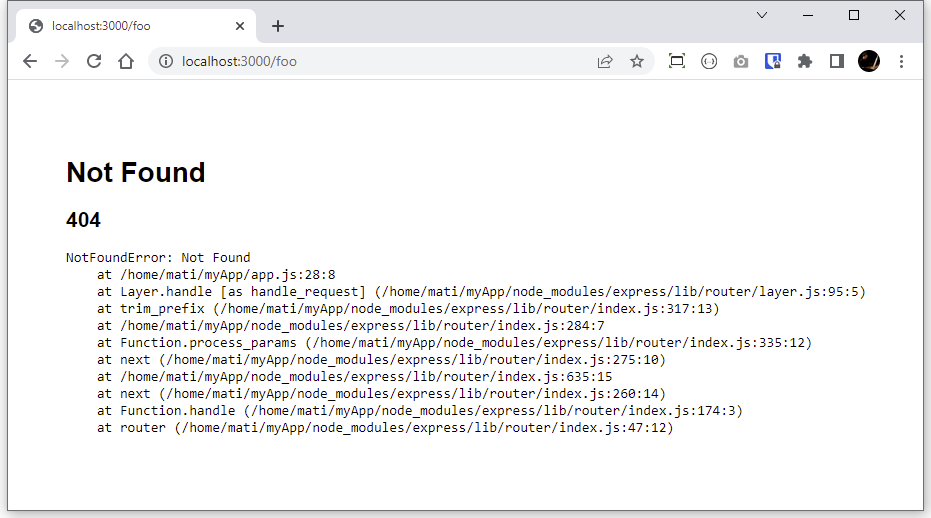
To test this process, try to access a non-existent page in your project. Accessing a non-existent page will throw a 404 error. In your web browser, attempt to load the following URL: http://your_server_ip:3000/foo. Thanks to the boilerplate created by express-generator, the application is set up to respond to such an error.
Your browser will display an error message like this:
When you look at the console in SSH Session A, there should be a log entry for the error. Thanks to the colorize format applied, it should be easy to spot:
Output[nodemon] starting `node bin/www`
error: 404 - Not Found - /foo - GET - ::1
info: ::1 - - [25/Apr/2022:18:08:33 +0000] "GET /foo HTTP/1.1" 404 982 "-" "Mozilla/5.0 (Windows NT 10.0; Win64; x64) AppleWebKit/537.36 (KHTML, like Gecko) Chrome/100.0.4896.127 Safari/537.36"

info: ::1 - - [25/Apr/2022:18:08:33 +0000] "GET /stylesheets/style.css HTTP/1.1" 304 - "http://localhost:3000/foo" "Mozilla/5.0 (Windows NT 10.0; Win64; x64) AppleWebKit/537.36 (KHTML, like Gecko) Chrome/100.0.4896.127 Safari/537.36"
As for the file logger, running the tail command again should show you the new log records:
- tail ~/myApp/logs/app.log
You will see a message like the following:
{"level":"error","message":"404 - Not Found - /foo - GET - ::1","timestamp":"2022-04-25T18:08:33.508Z"}
The error message includes all the data you specifically instructed winston to log as part of the error handler. This information will include the error status (404 - Not Found), the requested URL (localhost/foo), the request method (GET), the IP address making the request, and the timestamp for when the request was made.
Conclusion
In this tutorial, you built a simple Node.js web application and integrated a Winston logging solution that will function as an effective tool to provide insight into the application’s performance.
You can do much more to build robust logging solutions for your applications, particularly as your needs become more complex. To learn more about Winston transports, see Winston Transports Documentation. To create your own transports, see Adding Custom Transports To create an HTTP endpoint for use with the HTTP core transport, see winstond. To use Winston as a profiling tool, see Profiling.
Thanks for learning with the DigitalOcean Community. Check out our offerings for compute, storage, networking, and managed databases.
About the author(s)
Creating bespoke software ◦ CTO & co-founder at Makimo. I'm a software enginner & a geek. I like making impossible things possible. And I need tea.
Still looking for an answer?
This textbox defaults to using Markdown to format your answer.
You can type !ref in this text area to quickly search our full set of tutorials, documentation & marketplace offerings and insert the link!
 This work is licensed under a Creative Commons Attribution-NonCommercial- ShareAlike 4.0 International License.
Become a contributor for community
Get paid to write technical tutorials and select a tech-focused charity to receive a matching donation.

DigitalOcean Documentation
Full documentation for every DigitalOcean product.

Resources for startups and AI-native businesses
The Wave has everything you need to know about building a business, from raising funding to marketing your product.
The developer cloud
Scale up as you grow — whether you're running one virtual machine or ten thousand.

Start building today
From GPU-powered inference and Kubernetes to managed databases and storage, get everything you need to build, scale, and deploy intelligent applications.
