Creating a Simple Contacts List with Laravel and PostgreSQL
By Kamal Nasser
- Published:
- 10 min read
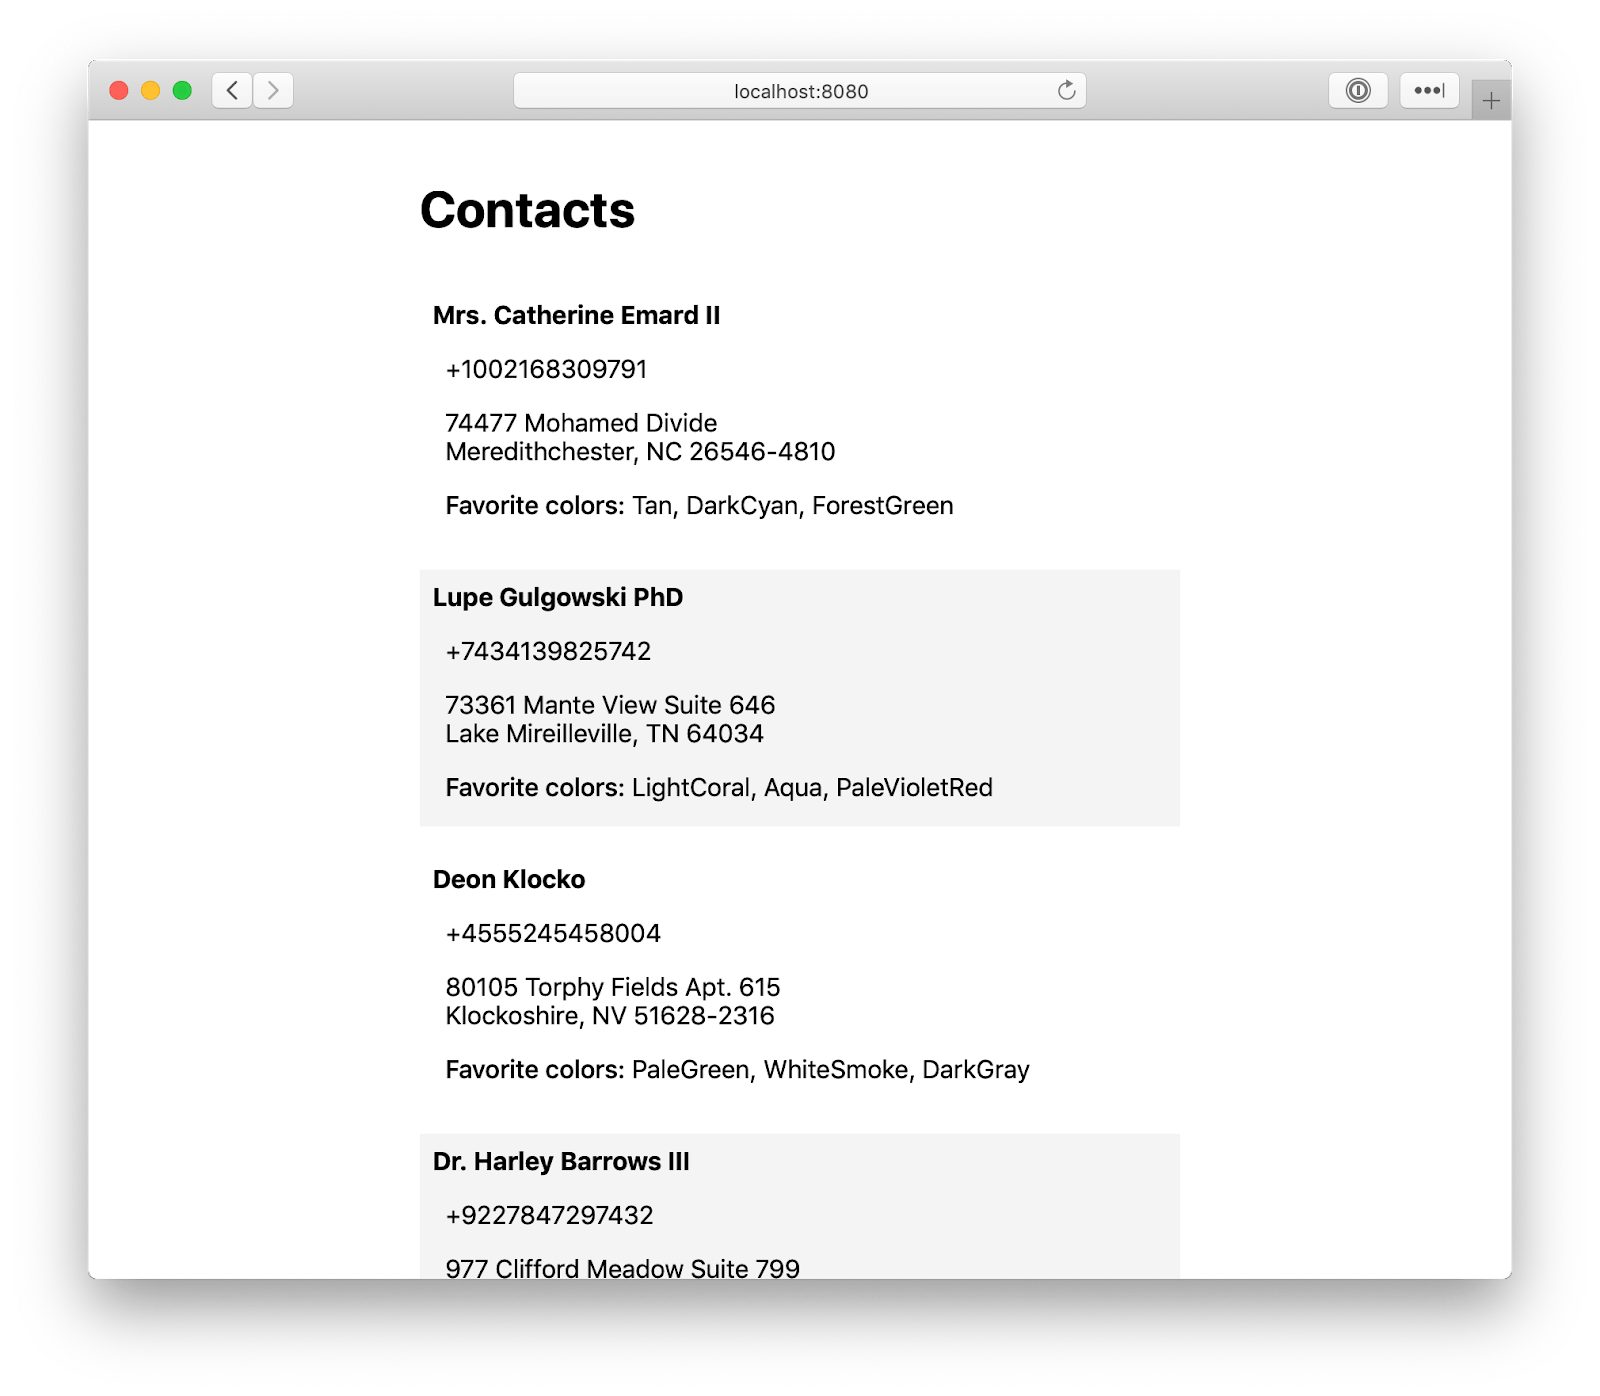
In this post, we will build a simple Laravel app that displays a contacts list on a page. Using Eloquent and PostgreSQL’s JSON object support, the app will query the database for the contacts and their details. This is what the result will look like:
By doing this, you will learn how to connect Laravel to a DigitalOcean Managed PostgreSQL database cluster, initialize the database with random data using Laravel factories and seeders, and store and read JSON documents in PostgreSQL using Laravel Eloquent.
Requirements
This post assumes that you have a working PHP development environment. You will need:
- PHP 7.1+
- Composer
- Laravel’s required PHP extensions
Step 1: Create a Base Laravel App
Let’s start by creating a new blank Laravel app that will serve as a base for our web app. In a directory of your liking, generate a new project using Composer:
composer create-project --prefer-dist laravel/laravel laravel-contacts
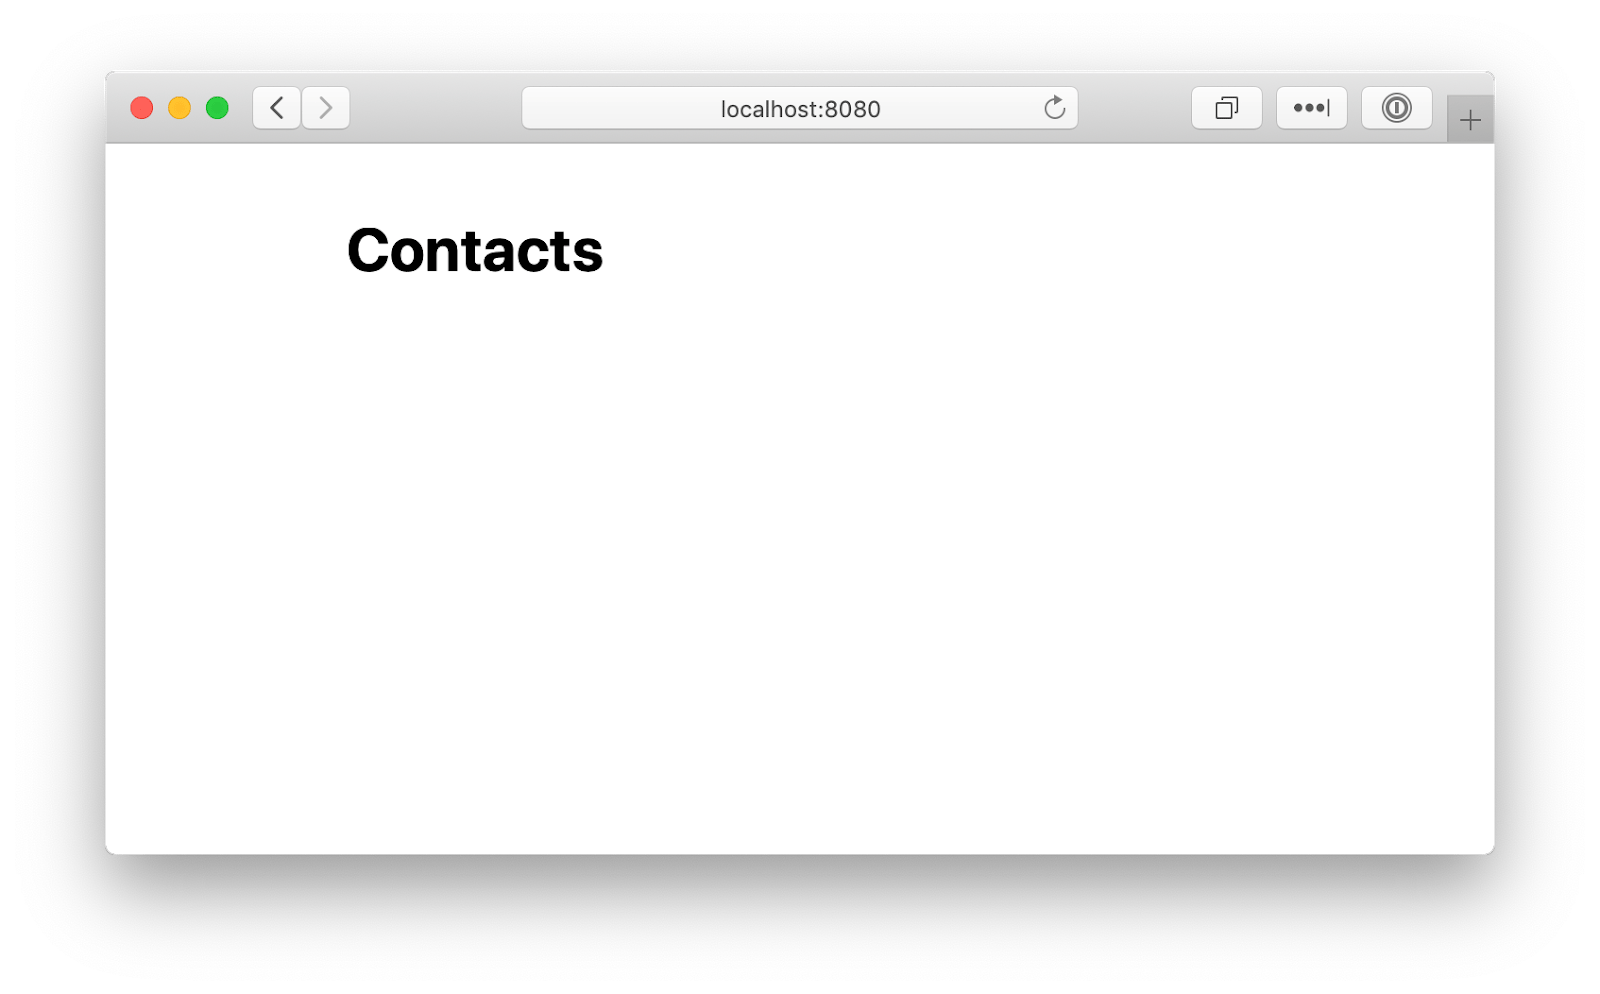
If you browse into the newly-created `laravel-contacts` directory and run Laravel’s built-in web server, you will see the default Laravel welcome page:
cd laravel-contacts php artisan serve
Let’s think about what our app will need. We want to have a list of contacts, so the database will store them. This means that we will need a Contact model and a migration for the contacts table. We’ll also want to initialize the database with some random contacts so we have something to see, which will require a Contact Factory and Seeder.
Let’s build them out step by step:
Step 2: Create the Contact Model
As shown in the screenshot above, a contact will have the following properties:
- Name
- Phone Number
- Address
- Favorite Colors
For the favorite colors property, we will make use of Postgres’s JSON data type. We will create a generic “favorites” column that will contain a JSON object with a list of favorite things. In this post we will store favorite colors only, but using a generic “favorites” object allows us to add different types in the future.
Generate a model, factory, and migration using artisan:
php artisan make:model -f -m Contact
Now we’ll configure the different parts of the model.
Migration
Edit the generated migration file stored in database/migrations/*_create_contacts_table.php. Inside the Schema::create() block, we will define the structure of the table:
increments('id'); $table->string('name'); $table->string('phone'); $table->string('address'); $table->jsonb('favorites')->default('{}'); $table->timestamps(); }); } /\*\* \* Reverse the migrations. \* \* @return void \*/ public function down() { Schema::dropIfExists('contacts'); } } This will configure the database column as described above with the \`favorites\` column set to a JSON object. The default value is an empty object. ### Random Contact Generation The contact factory generates random values for a contact. We will configure a seeder that will use the factory to insert 10 random contacts to the database. This will provide us with an option to seed the database with random contacts when running the migration. Let's start with the factory. #### Factory Edit the generated factory file stored in database/factories/ContactFactory.php. First, we will generate three random colors to use as favorites: $colors = collect(range(1, 3))->map(function() use ($faker) { return $faker->colorName; })->toArray(); We will use these colors along with other data generated using the Faker library to return the contact's properties: return \[ 'name' => $faker->name, 'phone' => $faker->e164PhoneNumber, 'address' => $faker->address, 'favorites' => \['colors' => $colors\], \]; The resulting factory should look like this: define(App\\Contact::class, function (Faker $faker) { // generate 3 random colors $colors = collect(range(1, 3))->map(function() use ($faker) { return $faker->colorName; })->toArray(); return \[ 'name' => $faker->name, 'phone' => $faker->e164PhoneNumber, 'address' => $faker->address, 'favorites' => \['colors' => $colors\], \]; }); #### Seeder Now we need to define a seeder that will be run upon migrating the database. Start by generating the file: php artisan make:seeder ContactsTableSeeder Open the generated file database/seeds/ContactsTableSeeder.php in an editor and call the factory inside the run() function like so: create(); } } To enable the seeder, edit \`database/seeds/DatabaseSeeder.php\` and call it inside the \`run()\` function: call(ContactsTableSeeder::class); } } ### Model There is one final adjustment that we need to make to the model. The artisan make:model command generated a model file for us, located in app/Contact.php. The \`favorites\` column represents a JSON object, so we need to cast it to a PHP array before using it. Eloquent makes this very easy by automatically casting back and forth between the correct formats. Inside the Contact class in app/Contact.php, we can add the cast: 'array', \]; } Step 3: Configure the Database ------------------------------ We will use DigitalOcean Databases for our PostgreSQL cluster. If you haven’t yet, create a new one—it only takes a few minutes. If you prefer a text post, see [the product documentation for Databases](https://www.digitalocean.com/docs/databases/how-to/clusters/create/). If you prefer a video, [click here](https://www.youtube.com/watch?v=jY5FhyiEdig).  In the cluster’s Overview page in the control panel, get its connection details as “Connection parameters”. Open Laravel's .env file and set DB\_CONNECTION=pgsql. Below it, set all the other variables according to your connection credentials. 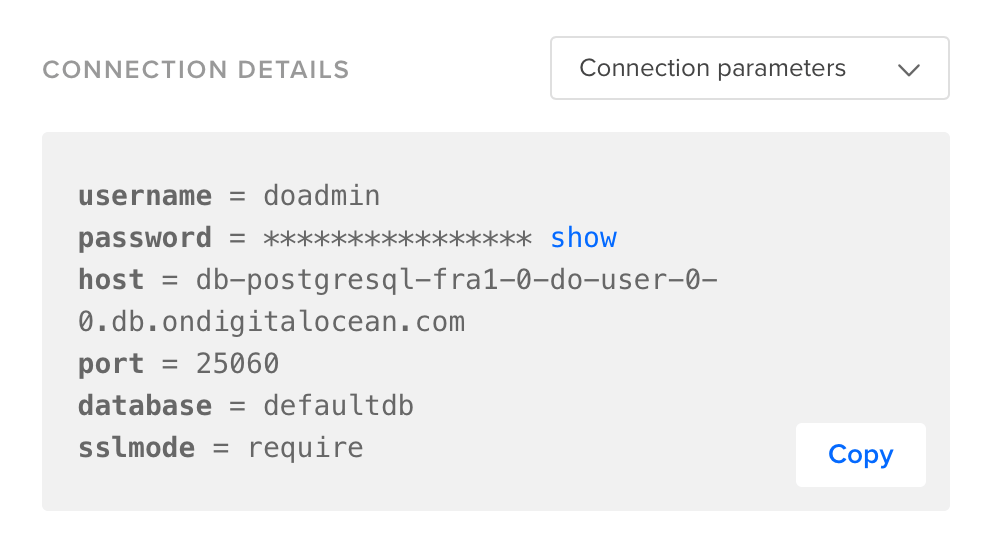 There is one setting that isn’t available as an environment variable: sslmode. DigitalOcean Databases do not support non-TLS connections so we need to set sslmode to require. Open config/database.php in an editor, scroll down to the pgsql definition, and update the setting like so: 'pgsql' => \[ ... 'sslmode' => 'require', \], [\[Related: Check out our Resource Center for resources and guides on Managed Databases\]](https://www.digitalocean.com/resources/managed-databases/) Step 4: Migrate and seed ------------------------ Now that we have completed defining everything database-related in our app, from the Contact model to the database connection info, we can execute the migration and seed the database: php artisan migrate --seed We have a database filled with contacts now—nice! Step 4: Build the Contact List Page ----------------------------------- Ok, let's finish up by creating a page to show our contacts. To keep things simple we will replace Laravel's default home page. Edit \`routes/web.php\` and set the \`/\` route to the following: Route::get('/', function () { $contacts = App\\Contact::all(); return view('welcome', \['contacts' => $contacts\]); }); This will fetch all the contacts from the database and pass them to the welcome view. Then, edit the view located in \`resources/views/welcome.blade.php\` and replace its contents with the following:Contacts
@foreach($contacts as $contact){{ $contact->phone }}
{{ $contact->address }}
Favorite colors: {{ implode(', ', $contact->favorites\['colors'\]) }}
About the author
Related Articles
Under the Hood: Serving Kimi K3
Jonathan Dieu
- July 30, 2026
- 12 min read
The Inference Alpha: Maximizing Frontier Models on AMD
Balaji Varadarajan
- June 10, 2026
- 12 min read

Open by Design: How NVIDIA and DigitalOcean Are Building the Stack for the Always-On Agentic Era
- June 2, 2026
- 7 min read