By Alex Feiszli

Overview
DigitalOcean provides a convenient Managed Database service for those who do not want to worry about configuring and maintaining their own database clusters. It offers both SQL and NoSQL options, and can be deployed in minutes.
Managed databases are deployed into specific regions. They are accessible via both a public endpoint and the VPC they are deployed in, but what if you want to access the database over a private endpoint from other regions, or even from another cloud provider.
For instance, I have an application in Region A, but it needs data from a managed database running in Region B. What can I do?
This tutorial shows how to securely access a managed database from outside of the region in which it is deployed.
Prerequisites
- If you have not already, create a managed database. In our example, we use Postgres.
- Deploy Netmaker
Deploy Netmaker
If you do not already have a Netmaker instance, deploy it in the same region as your managed database.
-
A DigitalOcean account. Sign up for free if you don’t already have one.
-
Create a Netmaker account by logging into https://dashboard.license.netmaker.io. You will need this for a free Netmaker license.
-
[Recommended] Prepare a dedicated subdomain for Netmaker, such as “nm.yourcompany.com.” We will use a wildcard from this subdomain for Netmaker.
-
Create a Netmaker Droplet
Recommended Settings: if desired, Netmaker can run with 1GB RAM, but we recommend 2GB or larger for production
-
Setup DNS: point the wildcard domain from the prerequisites (e.g. *.nm.yourdomain.com) to the IP of the 1-Click Droplet.
-
Log into your Netmaker Droplet
-
Upon login, you will be prompted with a series of steps to install Netmaker. You can use either Community or Enterprise, but we recommend Enterprise, since it has extra features and a generous free tier.
-
Once everything looks right and you’ve hit confirm, the install script will run. This will take about 5 minutes.
-
Log into the Netmaker dashboard and create a username and password for the Netmaker server.
Create Egress Node
If Netmaker is deployed into the same region as your managed database, skip this step.
Otherwise, you need to deploy a Node into the same Region as the DB, which will act as the Gateway to access the DB. We will refer to this machine as the “egress node” throughout the tutorial.
- Deploy a small Droplet in the Database region, or use an existing droplet.
- Use the steps to install Netclient. For instance, on Debian distros:
curl -sL 'https://apt.netmaker.org/gpg.key' | sudo tee /etc/apt/trusted.gpg.d/netclient.asc
curl -sL 'https://apt.netmaker.org/debian.deb.txt' | sudo tee /etc/apt/sources.list.d/netclient.list
sudo apt update
sudo apt -y install netclient
Next, join the network. In Netmaker, go to the “Access Keys” section, click on the access key, and copy the “Join” command. It should look like this:
netclient join -t anvkr48twsigahkguashleawjieg
Set Up the Egress Gateway
An “egress gateway” is Netmaker terminology for a “node” (machine in the network) which routes traffic to a particular set of local addresses, for instance, a VPC, or a single machine inside a VPC. In this case, the egress gateway will route traffic to the managed database.
-
Make the Egress Node a trusted source for the managed server (managed DB server, settings tab, trusted sources)
-
Get the private subdomain for the database by looking at the connection details on the DO control panel
-
Get the private IP of the database using nslookup from the Egress Node: nslookup <subdomain>
-
Determine the interface used for the private address: ip route get < private address>
-
Go to your Nodes In the Netmaker dashboard
-
Click “Create Egress Gateway” on the Egress Node
- For interface, enter the interface from above
- For Range, enter the private IP + /32 (e.g. 172.17.0.5/32)
(side note) Rather than use the database address, you can use the entire region subnet, which will make this a Gateway to the entire region. This is useful for remote access to Regions generally.
-
Confirm that the Egress Node can connect to database normally:
sudo apt install postgresql-client-commonsudo apt install postgresql-clientpsql “< connection string from VPC tab connection string dropdown on DigitalOcean managed DB server>”
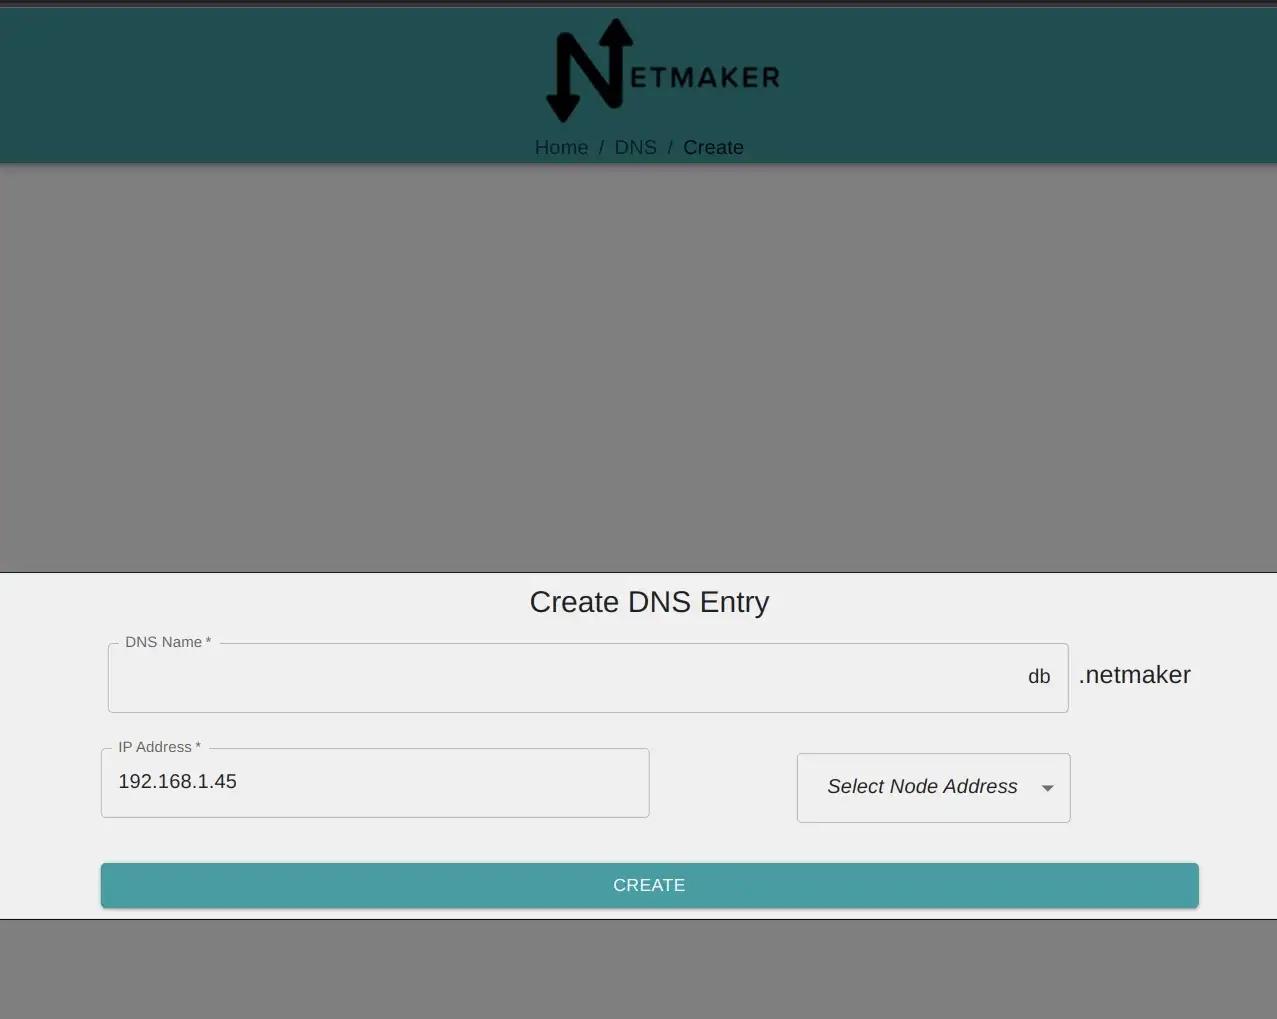
[Optional] Private DNS
If you want the Database to be accessible over Private DNS, rather than an IP address, go to the DNS tab of your Netmaker server, and add an entry, pointing it to the private IP address of the database. For instance: db.netmaker.
Access the DB from a Droplet In a Different VPC
- In a different VPC, SSH to the target droplet
- Install the Netclient using the same instructions from Create Egress Node.
- Confirm that the new droplet can now connect to the DB
sudo apt install postgresql-client-commonsudo apt install postgresql-client- Use a modified connection string, replacing the DB’s private address with it’s IP address or DNS name, for instance:
psql postgresql://doadmin:<password>@db.netmaker:25060/defaultdb
Access the DB from a Machine Outside of DigitalOcean
To access the database from anywhere in the world, follow the same steps as above; just SSH to a machine, install the Netclient, and join the network!
Thanks for learning with the DigitalOcean Community. Check out our offerings for compute, storage, networking, and managed databases.
About the author
Still looking for an answer?
This textbox defaults to using Markdown to format your answer.
You can type !ref in this text area to quickly search our full set of tutorials, documentation & marketplace offerings and insert the link!
 This work is licensed under a Creative Commons Attribution-NonCommercial- ShareAlike 4.0 International License.
Become a contributor for community
Get paid to write technical tutorials and select a tech-focused charity to receive a matching donation.

DigitalOcean Documentation
Full documentation for every DigitalOcean product.

Resources for startups and AI-native businesses
The Wave has everything you need to know about building a business, from raising funding to marketing your product.
The developer cloud
Scale up as you grow — whether you're running one virtual machine or ten thousand.

Start building today
From GPU-powered inference and Kubernetes to managed databases and storage, get everything you need to build, scale, and deploy intelligent applications.
