By Ian Mcxa and Hazel Virdó

Introduction
FreeIPA is an open-source security solution for Linux which provides account management and centralized authentication, similar to Microsoft’s Active Directory. FreeIPA is built on top of multiple open source projects including the 389 Directory Server, MIT Kerberos, and SSSD.
FreeIPA has clients for CentOS 7, Fedora, and Ubuntu 14.04/16.04. These clients make it fairly straightforward to add machines into your IPA domain. Other operating systems can authenticate against FreeIPA using SSSD or LDAP.
In this tutorial, we will be configuring a CentOS 7 machine to authenticate against an existing FreeIPA server. Once your client is configured, you will be able to manage which users and groups of users may log into the machine. In addition you will be able to set which users may use sudo.
Prerequisites
To follow this tutorial, you will need:
- One CentOS 7 server with the FreeIPA server software installed, which you can set up by following this FreeIPA on CentOS 7 tutorial.
- Another CentOS 7 server, which will be used as the FreeIPA client, set up by following this CentOS 7 setup guide, including a firewall. However, because we will be using FreeIPA to manage users, it’s not necessary to manually add a sudo non-root user. You can simply follow this tutorial as root.
- The following DNS records set up for your IPA client. You can follow this hostname tutorial for details on how to add them.
- An A record with your server name (e.g.
ipa-client.example.com) pointing to your client server’s IPv4 address. - An AAAA record with your server name pointing to your client server’s IPv6 address, if you want your server reachable via IPv6.
- An A record with your server name (e.g.
- Optionally, the
nanotext editor installed withyum install nano. CentOS comes with thevitext editor by default, butnanocan be more user friendly.
Throughout this tutorial, we’ll be using ipa-client.example.com as the example domain for your IPA client, and ipa.example.com for your IPA server (to match the prerequisite tutorial).
Step 1 — Preparing the IPA Client
Before we start installing anything, we need to do a few things to make sure your client machine is ready to run the FreeIPA client. Specifically, we’ll set the server hostname, update the system packages, and check that the DNS records from the prerequisites have propagated.
To begin, the hostname of your client will need to match your fully qualified domain name (FQDN) for the FreeIPA client to work correctly. We’ll be using ipa-client.example.com as the FQDN throughout this tutorial.
If this is a new server, you can set the hostname when you create the server.
If you already have a server, you can use the hostname command instead, as below. Note that you must be root to change the hostname of an existing system because the hostname is a system parameter and cannot be changed by regular users.
- hostname ipa-client.example.com
If you are changing your server’s hostname with the hostname command, it is a good idea to also change it manually in the /etc/hostname file as well.
- nano /etc/hostname
There should only be one line in the file with your server’s original hostname:
your_original_hostname
Change it to the full FQDN of your client.
ipa-client.example.com
Then save and close the file.
Once the hostname of your server is set correctly, update the system.
- yum update
Finally, we need to verify that the DNS names resolve properly. We can use the dig command for this. CentOS 7 does not come with any DNS utilities out of the box. We need to install them from the bind-utils package.
- yum install bind-utils
First, use dig to check the A record.
- dig +short ipa-client.example.com A
This should return your_server_ipv4.
If you have IPv6 enabled, you can test the AAAA record the same way.
- dig +short ipa-client.example.com AAAA
This should return your_server_ipv6.
We can also test the reverse lookup. This tests whether we can resolve the hostname from the IP address.
- dig +short -x your_server_ipv4
- dig +short -x your_server_ipv6
These should both return ipa-client.example.com.
Now that the server is prepared, we can install and configure the FreeIPA client package.
Step 2 — Installing the FreeIPA Client
In CentOS 7, the FreeIPA client is included in the default repositories.
- yum install freeipa-client
Next, run the FreeIPA installation command. This will run a script that guides you through configuring FreeIPA to authenticate against your CentOS FreeIPA server.
- ipa-client-install --mkhomedir
The --mkhomedir flag tells FreeIPA to create home directories for IPA users when they log in to the machine for the first time. If you do not want this behavior, you can omit this flag.
The installer will first prompt you for the IPA domain. It is set when you configure the server.
Provide the domain name of your IPA server (ex: example.com): ipa.example.com
Next, you’ll need to enter the domain name of the IPA server. This should be the same as the URL that you use to access the IPA web UI. If you followed the server tutorial in the prerequisites, it will be the same as the IPA domain.
Provide your IPA server name (ex: ipa.example.com): ipa.example.com
Note: Systems with redundant IPA servers will most likely have a different IPA domain and IPA server name.
With a single server, failover will not work. FreeIPA will warn you about this, and you should enter yes to proceed.
Autodiscovery of servers for failover cannot work with this configuration.
If you proceed with the installation, services will be configured to always access the discovered server for all operations and will not fail over to other servers in case of failure.
Proceed with fixed values and no DNS discovery? [no]: yes
Confirm that all the options are correct, and continue.
Continue to configure the system with these values? [no]: yes
Next, enter an admin username. Here, we’ll just use the default IPA admin user that was created when the server was installed.
User authorized to enroll computers: admin
Finally, enter the password for your IPA admin user. This was set during the FreeIPA server configuration.
After you enter the password, the FreeIPA client will configure the system. The last line of output will be Client configuration complete. This indicates a successful install.
Now, we need to verify that our system shows up in the IPA web interface.
Step 3 — Verifying Authentication
Navigate to your IPA web UI, which is https://ipa.example.com. Log in to the web UI with the IPA admin account you used earlier. You will see the following screen:
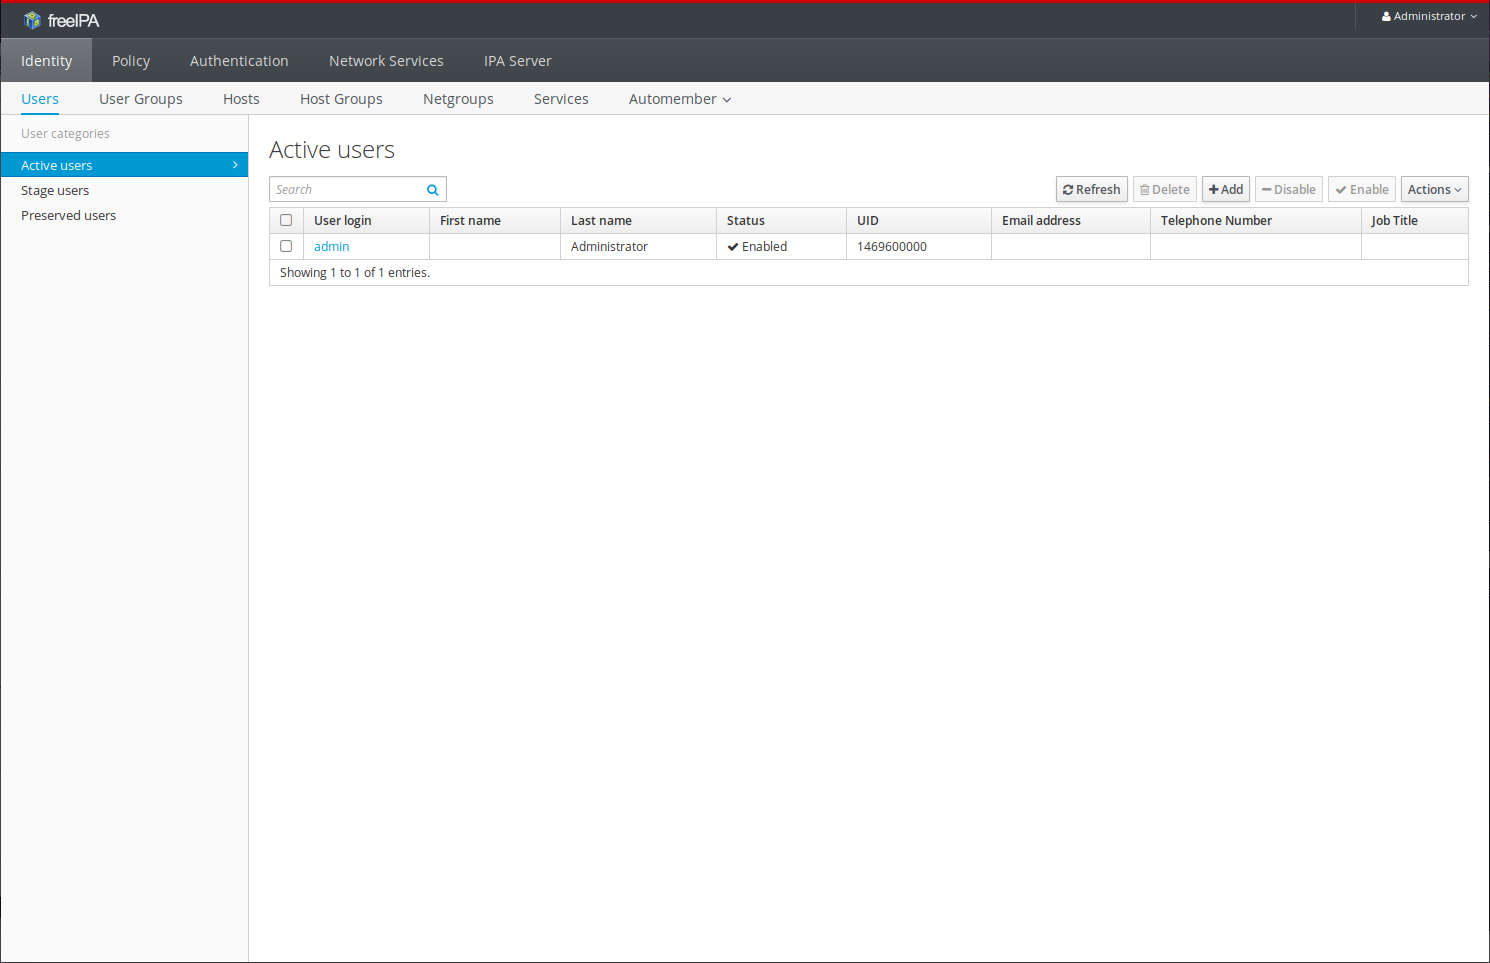
Navigate to the Hosts tab. You should see your IPA server listed as well as the client you just configured. Click on the entry for your IPA client. This will take you to an overview of the host.
From this screen, you can enter information about the client machine as well as managing groups and roles for the machine.
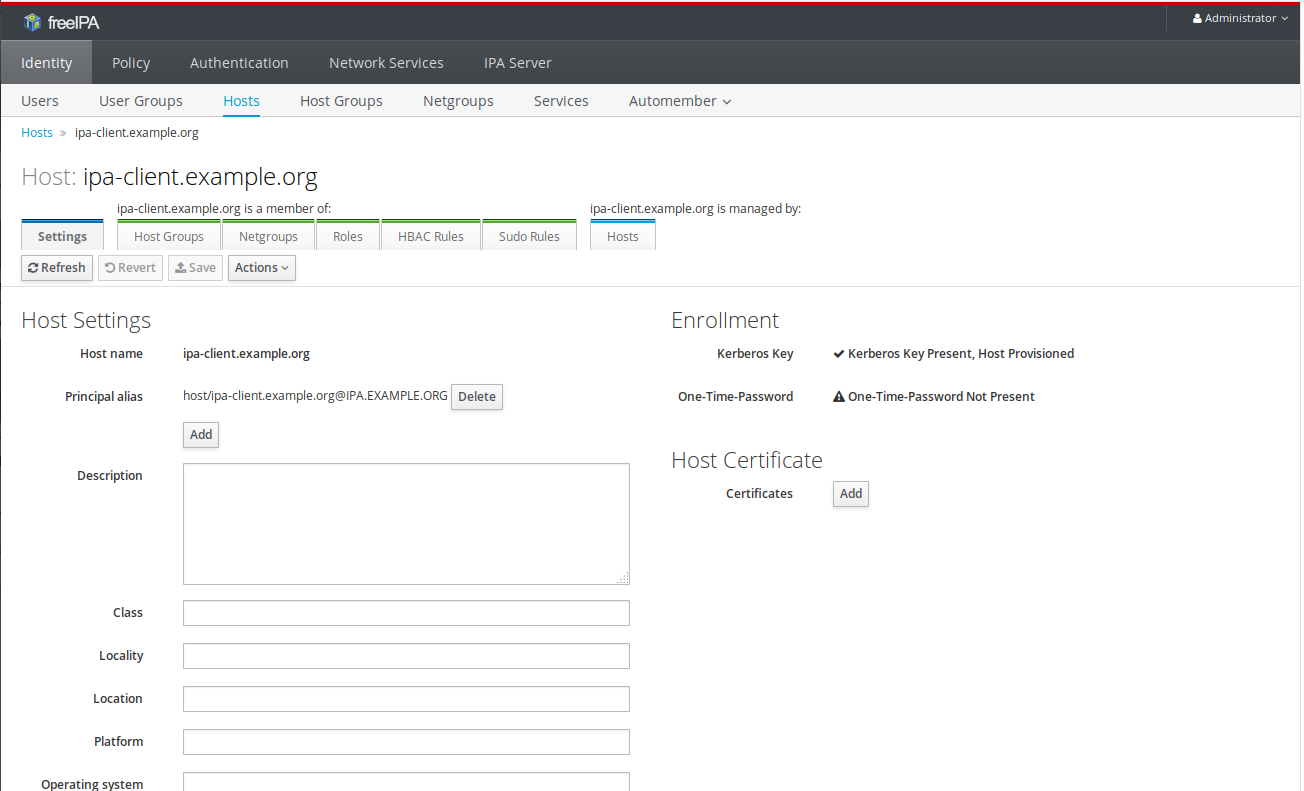
Note: By default, all IPA users may login to all machines within the IPA domain.
You can also try logging in to the machine with an IPA user from your local terminal.
- ssh admin@ipa-client.example.com
You will log into your machine as an IPA user. You can exit back out of this connection once it’s successful.
IPA users will have basic access, but sudo is disabled. In the next step, we’ll enable sudo.
Step 4 — Enabling and Verifying sudo Rules (Optional)
It is not necessary to modify the client configuration files to get enable sudo access; however, if you want to, you must configure sudo rules in the IPA web UI to allow access.
FreeIPA allows you to specify which users and user groups may run sudo commands on which machines. It is also possible to limit the commands a user may run with sudo, and which users they may impersonate.
In this tutorial, we will cover adding a simple rule that allows the admin group full sudo access to all machines. Note that the admin group, along with the other groups displayed below, exist by default in FreeIPA.
- From the IPA web UI, click on Services and then click sudo. A dropdown menu should appear.
- In the dropdown menu, click sudo rules, then click add and enter a name for the rule in the Rule name field. Here, we’ll use admin because we’re allowing sudo for the admin group.
- Next, click add and edit. This will bring up the full set of options for the rule.
- Under Who and User groups click + add. Select the admins group and click the arrow to move it from Available to Prospective. Then click Add.
- Under Access this host, select Any host. Under Run Commands, select Any Command. Under As Whom, select Anyone and Any Group. This is where you could restrict these machines sudo is enabled on, the commands that can be run with sudo, and which users can be impersonated.
- Finally, scoll to the top of the page and click Save.
Your rule should now be active; however, it may take some time to propogate, and you may have to restart the sshd service for sudo rules to take affect. To do this, you can run systemctl restart sshd.service on the IPA client.
Once that’s done, let’s verify that we do have sudo access on the client machine. From your local machine, try logging in to the client with the IPA admin user. This user is by default in the admins group.
- ssh admin@ipa-client.example.com
Once you’ve logged in, attempt to start an interactive sudo prompt.
- sudo -i
The prompt should now change to root@ipa-client. You can simply type exit to return to the regular prompt.
If you are denied sudo access, you may want to reboot the machine and make sure that your sudo rule is configured properly.
Conclusion
With your machine configured to authenticate against FreeIPA, you can configure user and group access to your system from the IPA web UI or from its command line interface. FreeIPA has advanced functionality available, but for simpler configurations, you can simply add users and hosts providing a straightforward centralized authentication system.
FreeIPA is an extremely versatile authentication tool, and what you will need to do next depends largely on how you intend to use it. For further information, the FreeIPA website has a list of documentation resources.
Thanks for learning with the DigitalOcean Community. Check out our offerings for compute, storage, networking, and managed databases.
About the author(s)
former DO tech editor publishing articles here with the community, then founded the DO product docs team (https://do.co/docs). to all of my authors: you are incredible. working with you was a gift. love is what makes us great.
Still looking for an answer?
This textbox defaults to using Markdown to format your answer.
You can type !ref in this text area to quickly search our full set of tutorials, documentation & marketplace offerings and insert the link!
Just a small nit; Since this is based on CentOS 7, which uses systemd:
instead of using hostname to set the machine name and then editing /etc/hostname as separate steps, you can run
hostnamectl set-hostname ipa-client.example.com
which will perform both actions.
great tutorial, I just have a slight issue. when setting up the install. I’m receiving a network error in the logs, Can’t connect to ‘ldap://<my server hosting the freenom domain>:389’:
This is a very helpful tutorial! One little correction tough: The service you nee to restart to make propagation immediate is not sshd but sssd. The command is therefore:
systemctl restart sssd
 This work is licensed under a Creative Commons Attribution-NonCommercial- ShareAlike 4.0 International License.
Become a contributor for community
Get paid to write technical tutorials and select a tech-focused charity to receive a matching donation.

DigitalOcean Documentation
Full documentation for every DigitalOcean product.

Resources for startups and AI-native businesses
The Wave has everything you need to know about building a business, from raising funding to marketing your product.
The developer cloud
Scale up as you grow — whether you're running one virtual machine or ten thousand.

Start building today
From GPU-powered inference and Kubernetes to managed databases and storage, get everything you need to build, scale, and deploy intelligent applications.
