Sr Technical Content Strategist and Team Lead

Introduction
Using Kubernetes to deploy your application can provide significant infrastructural advantages, such as flexible scaling, management of distributed components, and control over different versions of your application. However, with that increased control comes increased complexity. Continuous Integration and Continuous Deployment (CI/CD) systems usually work at a high level of abstraction in order to provide version control, change logging, and rollback functionality. A popular approach to this abstraction layer is called GitOps.
GitOps uses Git as a “single source of truth” for CI/CD processes, integrating code changes in a single, shared repository per project and using pull requests to manage infrastructure and deployment. The concept was originally proposed by Weaveworks in 2017, and has since been formalized by the OpenGitOps project under the Cloud Native Computing Foundation (CNCF).
There are several tools that use Git as a focal point for DevOps processes on Kubernetes. In this tutorial, you will learn to use Argo CD, a declarative Continuous Delivery tool. Argo CD provides Continuous Delivery tooling that automatically synchronizes and deploys your application whenever a change is made in your GitHub repository. By managing the deployment and lifecycle of an application, it provides solutions for version control, configurations, and application definitions in Kubernetes environments, organizing complex data with an easy-to-understand user interface. It can handle several types of Kubernetes manifests, including Jsonnet, Kustomize applications, Helm charts, and YAML/json files, and supports webhook notifications from GitHub, GitLab, and Bitbucket.
In this article, you will use Argo CD to synchronize and deploy an application from a GitHub repository.
If you’re looking for a managed Kubernetes hosting service, check out our simple, managed Kubernetes service built for growth.
Key Takeaways
- GitOps uses Git as the single source of truth for both application code and infrastructure configuration, enabling pull-based deployments to Kubernetes.
- Argo CD is a declarative, GitOps-native continuous delivery tool that runs inside your cluster and continuously monitors your Git repositories for changes.
- Argo CD supports Helm charts, Kustomize, Jsonnet, and plain YAML manifests, which gives you flexibility in how you define your applications.
- The reconciliation loop in Argo CD automatically detects drift between the desired state in Git and the live state in your cluster, then syncs them.
- You can manage deployments across multiple Kubernetes clusters from a single Argo CD instance.
Core GitOps Principles
Before diving into the installation steps, it helps to understand the core principles behind GitOps that make it effective for Kubernetes deployments.
Declarative infrastructure. The entire desired state of your system is described declaratively. Instead of writing scripts that say “do this, then do that,” you define what the end result should look like. Kubernetes already works this way through YAML manifests, making it a natural fit for GitOps.
Git as the single source of truth. All changes to the desired state are stored as commits in a Git repository. This means every change is versioned, auditable, and reversible. If something goes wrong, you can roll back to a previous commit.
Pull-based deployment. Traditional CI/CD pipelines push changes to your cluster. GitOps flips this model. An agent running inside your cluster (like Argo CD) pulls changes from Git and applies them. This reduces the need to grant external systems direct access to your cluster.
Continuous reconciliation. The GitOps agent continuously compares the desired state in Git with the actual state in the cluster. If someone manually changes a resource in the cluster, the agent detects this drift and can automatically correct it. This is what Argo CD calls its reconciliation loop.
For a deeper understanding of Kubernetes concepts, refer to An Introduction to Kubernetes.
GitOps vs Traditional CI/CD
If you’ve used traditional CI/CD pipelines before, understanding how GitOps differs can help clarify why tools like Argo CD exist.
| Feature | Traditional CI/CD | GitOps with Argo CD |
|---|---|---|
| Deployment model | Push-based | Pull-based |
| Source of truth | CI pipeline config | Git repository |
| Drift detection | Manual or none | Automatic reconciliation loop |
| Rollback | Re-run pipeline or scripts | Revert Git commit |
| Cluster access | CI system needs credentials | Agent runs inside the cluster |
| Audit trail | Pipeline logs | Git commit history |
| Multi-cluster support | Requires custom scripting | Built-in |
In a traditional CI/CD workflow, your Jenkins, GitHub Actions, or similar pipeline builds the application and then pushes the deployment to your cluster using kubectl apply or Helm commands. This means your CI system needs direct access to your Kubernetes API, which creates a security surface you have to manage.
With GitOps, the CI pipeline handles building and testing the code and then pushes the new configuration (such as an updated image tag) to a Git repository. Argo CD, running inside the cluster, detects the change and pulls the new state. The cluster effectively manages its own deployments.
For an overview of CI/CD concepts and best practices, see An Introduction to CI/CD Best Practices.
Prerequisites
To follow this tutorial, you will need:
-
An SSH key pair on your local Linux/MacOS/BSD machine. If you haven’t used SSH keys before, you can learn how to set them up by following this explanation of how to set up SSH keys on your local machine. If you are using Windows, you should be working in the Windows Subsystem for Linux environment.
-
An existing Kubernetes cluster comprising at least one worker node. kubectl should be installed in your work environment and able to connect to your cluster. DigitalOcean’s Managed Kubernetes will provide you with a configuration like this by default. If you are using DigitalOcean’s Managed Kubernetes, you should review How to connect to the Cluster. For a comparison of cluster management approaches, see Unmanaged vs Managed Kubernetes.
-
Familiarity with Kubernetes concepts. Please refer to the article An Introduction to Kubernetes for more details.
Step 1 - Installing Argo CD on Your Cluster
In order to install Argo CD, you should first have a valid Kubernetes configuration set up with kubectl, from which you can ping your worker nodes. You can test this by running kubectl get nodes:
- kubectl get nodes
This command should return a list of nodes with the Ready status:
OutputNAME                   STATUS   ROLES    AGE   VERSION
pool-uqv8a47h0-ul5a7   Ready    <none>   22m   v1.21.5
pool-uqv8a47h0-ul5am   Ready    <none>   21m   v1.21.5
pool-uqv8a47h0-ul5aq   Ready    <none>   21m   v1.21.5
If kubectl does not return a set of nodes with the Ready status, you should review your cluster configuration and the Kubernetes documentation.
Next, create the argocd namespace in your cluster, which will contain Argo CD and its associated services:
- kubectl create namespace argocd
After that, you can run the Argo CD install script provided by the project maintainers.
- kubectl apply -n argocd -f https://raw.githubusercontent.com/argoproj/argo-cd/stable/manifests/install.yaml
Once the installation completes successfully, you can use the watch command to check the status of your Kubernetes pods:
- watch kubectl get pods -n argocd
By default, there should be five pods that eventually receive the Running status as part of a stock Argo CD installation.
OutputNAME                                  READY   STATUS    RESTARTS   AGE
argocd-application-controller-0       1/1     Running   0          2m28s
argocd-dex-server-66f865ffb4-chwwg    1/1     Running   0          2m30s
argocd-redis-5b6967fdfc-q4klp         1/1     Running   0          2m30s
argocd-repo-server-656c76778f-vsn7l   1/1     Running   0          2m29s
argocd-server-cd68f46f8-zg7hq         1/1     Running   0          2m28s
You can press Ctrl+C to exit the watch interface. You now have Argo CD running in your Kubernetes cluster! However, because of the way Kubernetes creates abstractions around your network interfaces, you won’t be able to access it directly without forwarding ports from inside your cluster. You’ll learn how to handle that in the next step.
Step 2 - Forwarding Ports to Access Argo CD
Because Kubernetes deploys services to arbitrary network addresses inside your cluster, you’ll need to forward the relevant ports in order to access them from your local machine. Argo CD sets up a service named argocd-server on port 443 internally. Because port 443 is the default HTTPS port, and you may be running some other HTTP/HTTPS services, it’s common practice to forward those to arbitrarily chosen other ports, like 8080, like so:
- kubectl port-forward svc/argocd-server -n argocd 8080:443
Port forwarding will block the terminal it’s running in as long as it’s active, so you’ll probably want to run this in a new terminal window while you continue to work. You can press Ctrl+C to gracefully quit a blocking process such as this one when you want to stop forwarding the port.
In the meantime, you should be able to access Argo CD in a web browser by navigating to localhost:8080. However, you’ll be prompted for a login password which you’ll need to use the command line to retrieve in the next step. You’ll probably need to click through a security warning because Argo CD has not yet been configured with a valid SSL certificate.
Note: Using LetsEncrypt HTTPS certificates with Kubernetes is best accomplished with the use of additional tooling like Cert-Manager.
Step 3 - Working with Argo CD from the Command Line
For the next steps, you’ll want to have the argocd command installed locally for interfacing with and changing settings in your Argo CD instance. Argo CD’s official documentation recommends that you install it via the Homebrew package manager. Homebrew is very popular for managing command line tools on MacOS, and has more recently been ported to Linux to facilitate maintaining tools like this one.
If you don’t already have Homebrew installed, you can retrieve and install it with a one-line command:
- /bin/bash -c "$(curl -fsSL https://raw.githubusercontent.com/Homebrew/install/HEAD/install.sh)"
You may be prompted for your password during the installation process. Afterward, you should have the brew command available in your terminal. You can use it to install Argo CD:
- brew install argocd
This in turn provides the argocd command. Before using it, you’ll want to use kubectl again to retrieve the admin password which was automatically generated during your installation, so that you can use it to log in. You’ll pass it a path to a particular JSON file that’s stored using Kubernetes secrets, and extract the relevant value:
- kubectl -n argocd get secret argocd-initial-admin-secret -o jsonpath="{.data.password}" | base64 -d; echo
OutputfbP20pvw-o-D5uxH
You can then log into your Argo CD dashboard by going back to localhost:8080 in a browser and logging in as the admin user with your own password:

Once everything is working, you can use the same credentials to log in to Argo CD via the command line, by running argocd login. This will be necessary for deploying from the command line later on:
- argocd login localhost:8080
You’ll receive the equivalent certificate warning again on the command line here, and should enter y to proceed when prompted. If desired, you can then change your password to something more secure or more memorable by running argocd account update-password. After that, you’ll have a fully working Argo CD configuration. In the final steps of this tutorial, you’ll learn how to use it to actually deploy some example applications.
Step 4 - Handling Multiple Clusters (Optional)
Before deploying an application, you should review where you actually want to deploy it. By default, Argo CD will deploy applications to the same cluster that Argo CD itself is running in, which is fine for a demo, but is probably not what you’ll want in production. In order to list all of the clusters known to your current machine, you can use kubectl config:
- kubectl config get-contexts -o name
Outputtest-deploy-cluster
test-target-cluster
Assuming that you’ve installed Argo CD into test-deploy-cluster, and you wanted to use it to deploy applications onto test-target-cluster, you could register test-target-cluster with Argo CD by running argocd cluster add:
- argocd cluster add target-k8s
This will add the additional cluster’s login details to Argo CD, and enable Argo CD to deploy services on the cluster.
Step 5 - Deploying an Example Application (Optional)
Now that you have Argo CD running and you have an understanding of how to deploy applications to different Kubernetes clusters, it’s time to put it into practice. The Argo CD project maintains a repository of example applications that have been architected to showcase GitOps fundamentals. Many of these examples are ports of the same guestbook demo app to different kinds of Kubernetes manifests, such as Jsonnet. In this case, you’ll be deploying the helm-guestbook example, which uses a Helm chart, one of the most durable Kubernetes management solutions.
For an introduction to Helm and how it manages Kubernetes packages, see An Introduction to Helm, the Package Manager for Kubernetes.
In order to do that, you’ll use the argocd app create command, providing the path to the Git repository, the specific helm-guestbook example, and passing your default destination and namespace:
- argocd app create helm-guestbook --repo https://github.com/argoproj/argocd-example-apps.git --path helm-guestbook --dest-server https://kubernetes.default.svc --dest-namespace default
After “creating” the application inside of Argo CD, you can check its status with argocd app get:
- argocd app get helm-guestbook
OutputName:               helm-guestbook
Project:            default
Server:             https://kubernetes.default.svc
Namespace:          default
URL:                https://localhost:8080/applications/helm-guestbook
Repo:               https://github.com/argoproj/argocd-example-apps.git
Target:
Path:               helm-guestbook
SyncWindow:         Sync Allowed
Sync Policy:        <none>
Sync Status:        OutOfSync from  (53e28ff)
Health Status:      Missing

GROUP  KIND        NAMESPACE  NAME            STATUS     HEALTH   HOOK  MESSAGE
       Service     default    helm-guestbook  OutOfSync  Missing
apps   Deployment  default    helm-guestbook  OutOfSync  Missing
The OutOfSync application status is normal. You’ve retrieved the application’s helm chart from Github and created an entry for it in Argo CD, but you haven’t actually spun up any Kubernetes resources for it yet. In order to actually deploy the application you’ll run argocd app sync:
- argocd app sync helm-guestbook
sync is synonymous with deployment here in keeping with the principles of GitOps. The goal when using Argo CD is for your application to always track 1:1 with its upstream configuration.
OutputTIMESTAMP                  GROUP        KIND   NAMESPACE                  NAME    STATUS    HEALTH        HOOK  MESSAGE
2022-01-19T11:01:48-08:00            Service     default        helm-guestbook  OutOfSync  Missing
2022-01-19T11:01:48-08:00   apps  Deployment     default        helm-guestbook  OutOfSync  Missing
2022-01-19T11:01:48-08:00            Service     default        helm-guestbook    Synced  Healthy
2022-01-19T11:01:48-08:00            Service     default        helm-guestbook    Synced   Healthy              service/helm-guestbook created
2022-01-19T11:01:48-08:00   apps  Deployment     default        helm-guestbook  OutOfSync  Missing              deployment.apps/helm-guestbook created
2022-01-19T11:01:49-08:00   apps  Deployment     default        helm-guestbook    Synced  Progressing              deployment.apps/helm-guestbook created

Name:               helm-guestbook
Project:            default
Server:             https://kubernetes.default.svc
Namespace:          default
URL:                https://localhost:8080/applications/helm-guestbook
Repo:               https://github.com/argoproj/argocd-example-apps.git
Target:
Path:               helm-guestbook
SyncWindow:         Sync Allowed
Sync Policy:        <none>
Sync Status:        Synced to  (53e28ff)
Health Status:      Progressing

Operation:          Sync
Sync Revision:      53e28ff20cc530b9ada2173fbbd64d48338583ba
Phase:              Succeeded
Start:              2022-01-19 11:01:49 -0800 PST
Finished:           2022-01-19 11:01:50 -0800 PST
Duration:           1s
Message:            successfully synced (all tasks run)

GROUP  KIND        NAMESPACE  NAME            STATUS  HEALTH       HOOK  MESSAGE
       Service     default    helm-guestbook  Synced  Healthy            service/helm-guestbook created
apps   Deployment  default    helm-guestbook  Synced  Progressing        deployment.apps/helm-guestbook created
You have now successfully deployed an application using Argo CD! It is possible to accomplish the same thing from the Argo CD web interface, but it is usually quicker and more reproducible to deploy via the command line. However, it is very helpful to check on your Argo CD web dashboard after deployment in order to verify that your applications are running properly. You can see that by opening localhost:8080 in a browser:

At this point, the last thing to do is to ensure you can access your new deployment in a browser. To do that, you’ll forward another port, the way you did for Argo CD itself. Internally, the helm-guestbook app runs on the regular HTTP port 80, and in order to avoid conflicting with anything that might be running on your own port 80 or on the port 8080 you’re using for Argo CD, you can forward it to port 9090:
- kubectl port-forward svc/helm-guestbook 9090:80
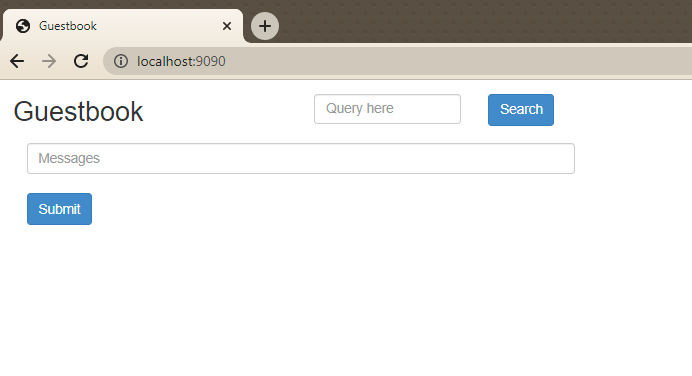
As before, you’ll probably want to do this in another terminal, because it will block that terminal until you press Ctrl+C to stop forwarding the port. You can then open localhost:9090 in a browser window to see your example guestbook app:
Any further pushes to this Github repository will automatically be reflected in ArgoCD, which will resync your deployment while providing continuous availability.
Managing Deployments with Helm and Kustomize
Argo CD natively supports multiple manifest formats for defining Kubernetes applications. The two most widely used are Helm and Kustomize.
Helm Charts with Argo CD
Helm is a package manager for Kubernetes that bundles related resources into a chart. When you point Argo CD at a Helm chart in a Git repository, it renders the chart’s templates using the values you provide and applies the resulting manifests to your cluster.
You can override Helm values directly in your Argo CD Application manifest:
apiVersion: argoproj.io/v1alpha1
kind: Application
metadata:
  name: my-app
  namespace: argocd
spec:
  project: default
  source:
    repoURL: https://github.com/your-org/your-repo.git
    targetRevision: main
    path: charts/my-app
    helm:
      valueFiles:
        - values-production.yaml
  destination:
    server: https://kubernetes.default.svc
    namespace: production
This declarative approach means your Helm releases are tracked in Git and automatically reconciled by Argo CD. For more details on working with Helm, see An Introduction to Helm, the Package Manager for Kubernetes.
Kustomize with Argo CD
Kustomize lets you customize Kubernetes manifests without modifying the original YAML files. It uses overlays to patch base configurations for different environments. Argo CD detects kustomization.yaml files automatically and applies them using the built-in Kustomize support.
A typical Kustomize directory structure for multiple environments looks like this:
base/
  deployment.yaml
  service.yaml
  kustomization.yaml
overlays/
  staging/
    kustomization.yaml
  production/
    kustomization.yaml
Each overlay references the base and adds environment-specific patches, such as different replica counts, resource limits, or image tags.
Multi-Environment GitOps Strategy
In production, you typically deploy to multiple environments such as development, staging, and production. Argo CD supports several strategies for managing this:
Separate directories per environment. Store your manifests in environment-specific directories within a single repository. Each Argo CD Application points to the relevant directory path.
Separate branches per environment. Use Git branches like develop, staging, and main to represent different environments. Argo CD can track a specific branch in the targetRevision field.
Separate repositories per environment. For larger organizations, you might keep a dedicated Git repository for each environment’s configuration. This provides the strongest isolation.
The choice depends on your team size and security requirements. For most teams, the directory-based approach provides a good balance of simplicity and separation.
Security Best Practices for Argo CD
When running Argo CD in production, consider these security measures:
Change the default admin password immediately. The auto-generated password retrieved in Step 3 is intended for initial setup only. Run argocd account update-password right after your first login.
Enable RBAC. Argo CD supports Role-Based Access Control (RBAC) to restrict which users can deploy to which projects and clusters. You can define policies in the argocd-rbac-cm ConfigMap.
Use SSO authentication. Argo CD integrates with identity providers through OIDC, SAML 2.0, and LDAP. This allows you to use your organization’s existing authentication system instead of managing local accounts.
Restrict network access. Instead of exposing the Argo CD server directly, use a Kubernetes Ingress controller with TLS termination. You can set up HTTPS certificates with Cert-Manager on DigitalOcean Kubernetes.
Enable audit logging. Argo CD logs all application sync operations, which provides an audit trail. Forward these logs to a centralized logging system for long-term retention.
Use Git signed commits. Require GPG-signed commits in your GitOps repository to verify that only authorized team members can change the desired cluster state.
Argo CD vs Flux: Choosing a GitOps Tool
Argo CD and Flux are the two most popular GitOps tools for Kubernetes. Both are CNCF projects and follow the same core GitOps principles. Here’s how they compare:
| Feature | Argo CD | Flux |
|---|---|---|
| User interface | Built-in web UI and CLI | CLI only (third-party UIs exist) |
| Multi-tenancy | AppProject-based isolation | Namespace-based isolation |
| Manifest support | Helm, Kustomize, Jsonnet, YAML | Helm, Kustomize, YAML |
| Sync approach | Manual or automatic | Automatic by default |
| Multi-cluster | Native support | Supported through Cluster API |
| RBAC | Built-in policy engine | Kubernetes-native RBAC |
| Architecture | Centralized server | Distributed controllers |
Choose Argo CD when you need a visual dashboard, want fine-grained access control with its built-in RBAC system, or manage multiple clusters from a central control plane.
Choose Flux when you prefer a lightweight, controller-based approach that integrates tightly with Kubernetes-native patterns, or when you want each team to manage their own GitOps configuration independently.
Both tools work well for GitOps on Kubernetes, and the best choice depends on your team’s workflow preferences and infrastructure requirements.
Troubleshooting Common Issues
Here are common problems you might encounter when working with Argo CD and how to resolve them.
| Issue | Cause | Solution |
|---|---|---|
Application stuck on OutOfSync |
Sync policy not set or resource mismatch | Run argocd app sync <app-name> or enable auto-sync |
ComparisonError in app status |
Invalid manifests or missing Helm values | Check argocd app get <app-name> for error details |
| Cannot connect to Argo CD UI | Port forwarding not active or wrong port | Restart kubectl port-forward command |
Unknown health status |
Custom resource without health check defined | Add a custom health check in the argocd-cm ConfigMap |
| Sync succeeds but pods crash | Application configuration error | Check pod logs with kubectl logs <pod-name> |
| Permission denied on sync | Missing RBAC roles or cluster access | Verify argocd cluster list and RBAC settings |
For detailed error information on any application, run:
- argocd app get <app-name> --show-operation
This shows the most recent sync operation and any error messages associated with it.
FAQs
1. What is GitOps in Kubernetes?
GitOps is a deployment methodology that uses a Git repository as the single source of truth for your Kubernetes cluster’s desired state. An agent running inside the cluster continuously compares the live state against what’s defined in Git and automatically reconciles any differences. This approach provides version-controlled deployments, easy rollbacks through Git reverts, and a clear audit trail of every change.
2. Is Argo CD a CI or CD tool?
Argo CD is a Continuous Delivery (CD) tool, not a Continuous Integration tool. It handles the deployment side of the pipeline by syncing your Kubernetes cluster with the desired state stored in a Git repository. For the CI side, which covers building code, running tests, and creating container images, you would use a separate tool like GitHub Actions, Jenkins, or GitLab CI and integrate it with Argo CD.
3. How does Argo CD detect drift?
Argo CD runs a reconciliation loop that periodically compares the desired state defined in your Git repository with the live state in your Kubernetes cluster. By default, this check runs every three minutes, though you can configure the interval. If someone makes a manual change to a resource in the cluster using kubectl edit or another tool, Argo CD marks the application as OutOfSync and can optionally revert the change automatically if you enable the self-heal option in the sync policy.
4. Can Argo CD deploy Helm charts?
Yes. Argo CD has native support for Helm charts. When you point an Argo CD Application at a directory containing a Chart.yaml file, it automatically renders the Helm templates and applies the resulting manifests. You can specify custom values files, set individual parameters, and track specific chart versions, all declaratively in the Application spec.
5. What is the difference between Argo CD and Flux?
Both Argo CD and Flux are CNCF-backed GitOps tools for Kubernetes. Argo CD provides a built-in web UI, a CLI, fine-grained RBAC, and a centralized architecture that makes it well suited for managing multiple clusters from one control plane. Flux takes a more distributed, controller-based approach that integrates closely with Kubernetes-native patterns. Flux does not include a built-in UI but is generally lighter in resource usage.
Conclusion
You’ve now seen the fundamentals of installing and deploying applications using Argo CD and the GitOps methodology. Because Kubernetes requires so many layers of abstraction, it’s important to ensure that your deployments are as maintainable as possible, and the GitOps philosophy is a good solution. With Argo CD handling continuous reconciliation, drift detection, and automated syncing from Git, you can focus on writing code while your deployments stay consistent and auditable.
Next, you may want to explore these related tutorials:
- How to Set Up TOBS, The Observability Stack, for Kubernetes Monitoring for monitoring the uptime, health, and logging of your Kubernetes cluster
- Streamline Deployment Through CI/CD on DigitalOcean’s App Platform for a different approach to continuous delivery
- How to Create a Kubernetes Cluster Using Kubeadm for setting up clusters from scratch
If you’re ready to deploy your Kubernetes workloads, try DigitalOcean’s Managed Kubernetes to get a production-ready cluster in minutes without managing the control plane yourself.
Thanks for learning with the DigitalOcean Community. Check out our offerings for compute, storage, networking, and managed databases.
About the author
Anish is a Sr Technical Content Strategist and Team Lead at DigitalOcean with 7+ years of experience as an DevOps SRE at Nutanix and Cloud consultant at AMEX, and technical writing at DOCN, and shipping deep infra and AI inference tutorials that help developers deploy production‑ready applications on DigitalOcean.
Still looking for an answer?
This textbox defaults to using Markdown to format your answer.
You can type !ref in this text area to quickly search our full set of tutorials, documentation & marketplace offerings and insert the link!
Hi! When I follow this tutorial I receive a broken pipe error in argocd command line tool when doing ‘argocd app create helm-guestbook --repo https://github.com/argoproj/argocd-example-apps.git --path helm-guestbook --dest-server https://kubernetes.default.svc --dest-namespace default’.
When using the second cluster it won’t work as well. Even though when trying to do it via the web UI.
Have you any clue what I might do wrong? :)
Many thanks!
 This work is licensed under a Creative Commons Attribution-NonCommercial- ShareAlike 4.0 International License.
Become a contributor for community
Get paid to write technical tutorials and select a tech-focused charity to receive a matching donation.

DigitalOcean Documentation
Full documentation for every DigitalOcean product.

Resources for startups and AI-native businesses
The Wave has everything you need to know about building a business, from raising funding to marketing your product.
The developer cloud
Scale up as you grow — whether you're running one virtual machine or ten thousand.

Start building today
From GPU-powered inference and Kubernetes to managed databases and storage, get everything you need to build, scale, and deploy intelligent applications.
