
Introduction
LDAP, or Lightweight Directory Access Protocol, is a protocol designed to manage and access related information in a centralized, hierarchical file and directory structure.
In some ways, it operates similarly to a relational database, but this does not hold true for everything. The hierarchical structure is the main difference in how the data is related. It can be used to store any kind of information and it is often used as one component of a centralized authentication system.
In this guide, we will discuss how to install and configure an OpenLDAP server on an Ubuntu 14.04 server. We will then install and secure a phpLDAPadmin interface to provide an easy web interface.
Install LDAP and Helper Utilities
Before we begin, we must install the necessary software. Luckily, the packages are all available in Ubuntu’s default repositories.
This is our first time using apt in this session, so we’ll refresh our local package index. Afterwards we can install the packages we want:
sudo apt-get update
sudo apt-get install slapd ldap-utils
During the installation, you will be asked to select and confirm an administrator password for LDAP. You can actually put anything here because you’ll have the opportunity to change it in just a moment.
Reconfigure slapd to Select Better Settings
Even though the package was just installed, we’re going to go right ahead and reconfigure the defaults that Ubuntu installs with.
The reason for this is that while the package has the ability to ask a lot of important configuration questions, these are skipped over in the installation process. We can gain access to all of the prompts though by telling our system to reconfigure the package:
sudo dpkg-reconfigure slapd
There are quite a few new questions that will be asked as you go through this process. Let’s go over these now:
- Omit OpenLDAP server configuration? No
- DNS domain name?
- This option will determine the base structure of your directory path. Read the message to understand exactly how this will be implemented.
- This is actually a rather open option. You can select whatever “domain name” value you’d like, even if you don’t own the actual domain. However, if you have a domain name for the server, it’s probably wise to use that.
- For this guide, we’re going to select test.com for our configuration.
- Organization name?
- This is, again, pretty much entirely up to your preferences.
- For this guide, we will be using example as the name of our organization.
- Administrator password?
- As I mentioned in the installation section, this is your real opportunity to select an administrator password. Anything you select here will overwrite the previous password you used.
- Database backend? HDB
- Remove the database when slapd is purged? No
- Move old database? Yes
- Allow LDAPv2 protocol? No
At this point, your LDAP should be configured in a fairly reasonable way.
Install phpLDAPadmin to Manage LDAP with a Web Interface
Although it is very possible to administer LDAP through the command line, most users will find it easier to use a web interface. We’re going to install phpLDAPadmin, which provides this functionality, to help remove some of the friction of learning the LDAP tools.
The Ubuntu repositories contain the phpLDAPadmin package. You can install it by typing:
sudo apt-get install phpldapadmin
This should install the administration interface, enable the necessary Apache virtual hosts files, and reload Apache.
The web server is now configured to serve your application, but we will make some additional changes. We need to configure phpLDAPadmin to use the domain schema we configured for LDAP, and we are also going to make some adjustments to secure our configuration a little bit.
Configure phpLDAPadmin
Now that the package is installed, we need to configure a few things so that it can connect with the LDAP directory structure that was created during the OpenLDAP configuration stage.
Begin by opening the main configuration file with root privileges in your text editor:
sudo nano /etc/phpldapadmin/config.php
In this file, we need to add the configuration details that we set up for our LDAP server. Start by looking for the host parameter and setting it to your server’s domain name or public IP address. This parameter should reflect the way you plan on accessing the web interface:
<pre> $servers->setValue(‘server’,‘host’,‘<span class=“highlight”>server_domain_name_or_IP</span>’); </pre>
Next up, you’ll need to configure the domain name you selected for your LDAP server. Remember, in our example we selected test.com. We need to translate this into LDAP syntax by replacing each domain component (everything not a dot) into the value of a dc specification.
All this means is that instead of writing test.com, we will write something like dc=test,dc=com. We should find the parameter that sets the server base parameter and use the format we just discussed to reference the domain we decided on:
<pre> $servers->setValue(‘server’,‘base’,array(‘dc=<span class=“highlight”>test</span>,dc=<span class=“highlight”>com</span>’)); </pre>
We need to adjust this same thing in our login bind_id parameter. The cn parameter is already set as “admin”. This is correct. We just need to adjust the dc portions again, just as we did above:
<pre> $servers->setValue(‘login’,‘bind_id’,‘cn=admin,dc=<span class=“highlight”>test</span>,dc=<span class=“highlight”>com</span>’); </pre>
The last thing that we need to adjust is a setting that control the visibility of warning messages. By default phpLDAPadmin will throw quite a few annoying warning messages in its web interface about the template files that have no impact on the functionality.
We can hide these by searching for the hide_template_warning parameter, uncommenting the line that contains it, and setting it to “true”:
<pre> $config->custom->appearance[‘hide_template_warning’] = <span class=“highlight”>true</span>; </pre>
This is the last thing that we need to adjust. You can save and close the file when you are finished.
Create an SSL Certificate
We want to secure our connection to the LDAP server with SSL so that outside parties cannot intercept our communications.
Since the admin interface is talking to the LDAP server itself on the local network, we do not need to use SSL for that connection. We just need to secure the external connection to our browser when we connect.
To do this, we just need to set up a self-signed SSL certificate that our server can use. This will not help us validate the identity of the server, but it will allow us to encrypt our messages.
The OpenSSL packages should be installed on your system by default. First, we should create a directory to hold our certificate and key:
sudo mkdir /etc/apache2/ssl
Next, we can create the key and certificate in one movement by typing:
sudo openssl req -x509 -nodes -days 365 -newkey rsa:2048 -keyout /etc/apache2/ssl/apache.key -out /etc/apache2/ssl/apache.crt
You will have to answer some questions in order for the utility to fill out the fields in the certificate correctly. The only one that really matters is the prompt that says Common Name (e.g. server FQDN or YOUR name). Enter your server’s domain name or IP address.
When you are finished, your certificate and key will be written to the /etc/apache2/ssl directory.
Create a Password Authentication File
We also want to password protect our phpLDAPadmin location. Even though phpLDAPadmin has password authentication, this will provide an extra level of protection.
The utility that we need is contained in an Apache utility package. Get it by typing:
sudo apt-get install apache2-utils
Now that you have the utility available, you can create a password file that will contain a username that you choose and the associated hashed password.
We will keep this in the /etc/apache2 directory. Create the file and specify the username you want to use by typing:
<pre> sudo htpasswd -c /etc/apache2/htpasswd <span class=“highlight”>demo_user</span> </pre>
Now, we are ready to modify Apache to take advantage of our security upgrades.
Secure Apache
The first thing we should do is enable the SSL module in Apache. We can do this by typing:
sudo a2enmod ssl
This will enable the module, allowing us to use it. We still need to configure Apache to take advantage of this though.
Currently, Apache is reading a file called 000-default.conf for regular, unencrypted HTTP connections. We need to tell it to redirect requests for our phpLDAPadmin interface to our HTTPS interface so that the connection is encrypted.
When we redirect traffic to use our SSL certificates, we’ll also implement the password file to authenticate users. While we’re modifying things, we’ll also change the location of the phpLDAPadmin interface itself to minimize targeted attacks.
Modify the phpLDAPadmin Apache Configuration
The first thing we will do is modify the alias that is set up to serve our phpLDAPadmin files.
Open the file with root privileges in your text editor:
sudo nano /etc/phpldapadmin/apache.conf
This is the place where we need to decide on the URL location where we want to access our interface. The default is /phpldapadmin, but we want to change this to cut down on random login attempts by bots and malicious parties.
For this guide, we’re going to use the location /superldap, but you should choose your own value.
We need to modify the line that specifies the Alias. This should be in an IfModule mod_alias.c block. When you are finished, it should look like this:
<pre> <IfModule mod_alias.c> Alias <span class=“highlight”>/superldap</span> /usr/share/phpldapadmin/htdocs </IfModule> </pre>
When you are finished, safe and close the file.
Configure the HTTP Virtual Host
Next, we need to modify our current Virtual Hosts file. Open it with root privileges in your editor:
sudo nano /etc/apache2/sites-enabled/000-default.conf
Inside, you’ll see a rather bare configuration file that looks like this:
<pre> <VirtualHost *:80> ServerAdmin webmaster@localhost DocumentRoot /var/www/html ErrorLog ${APACHE_LOG_DIR}/error.log CustomLog ${APACHE_LOG_DIR}/access.log combined </VirtualHost> </pre>
We want to add information about our domain name or IP address to define our server name and we want to set up our redirect to point all HTTP requests to the HTTPS interface. This will match the alias we configured in the last section.
The changes we discussed will end up looking like this. Modify the items in red with your own values:
<pre> <VirtualHost *:80> ServerAdmin webmaster@<span class=“highlight”>server_domain_or_IP</span> DocumentRoot /var/www/html <span class=“highlight”>ServerName server_domain_or_IP</span> <span class=“highlight”>Redirect permanent /superldap https://server_domain_or_IP/superldap</span> ErrorLog ${APACHE_LOG_DIR}/error.log CustomLog ${APACHE_LOG_DIR}/access.log combined </VirtualHost> </pre>
Save and close the file when you are finished.
Configure the HTTPS Virtual Host File
Apache includes a default SSL Virtual Host file. However, it is not enabled by default.
We can enable it by typing:
sudo a2ensite default-ssl.conf
This will link the file from the sites-available directory into the sites-enabled directory. We can edit this file now by typing:
sudo nano /etc/apache2/sites-enabled/default-ssl.conf
This file is a bit more involved than the last one, so we will only discuss the changes that we have to make. All of the changes below should go within the Virtual Host block in the file.
First of all, set the ServerName value to your server’s domain name or IP address again and change the ServerAdmin directive as well:
<pre> ServerAdmin webmaster@<span class=“highlight”>server_domain_or_IP</span> <span class=“highlight”>ServerName server_domain_or_IP</span> </pre>
Next, we need to set the SSL certificate directives to point to the key and certificate that we created. The directives should already exist in your file, so just modify the files they point to:
<pre> SSLCertificateFile <span class=“highlight”>/etc/apache2/ssl/apache.crt</span> SSLCertificateKeyFile <span class=“highlight”>/etc/apache2/ssl/apache.key</span> </pre>
The last thing we need to do is set up the location block that will implement our password protection for the entire phpLDAPadmin installation.
We do this by referencing the location where we are serving the phpLDAPadmin and setting up authentication using the file we generated. We will require anyone attempting to access this content to authenticate as a valid user:
<pre> <span class=“highlight”><Location /superldap></span> <span class=“highlight”>AuthType Basic</span> <span class=“highlight”>AuthName “Restricted Files”</span> <span class=“highlight”>AuthUserFile /etc/apache2/htpasswd</span> <span class=“highlight”>Require valid-user</span> <span class=“highlight”></Location> </pre>
Save and close the file when you are finished.
Restart Apache to implement all of the changes that we have made:
sudo service apache2 restart
We can now move on to the actual interface.
Log into the phpLDAPadmin Web Interface
We have made the configuration changes we need to the phpLDAPadmin software. We can now begin to use it.
We can access the web interface by visiting our server’s domain name or public IP address followed by the alias we configured. In our case, this was /superldap:
<pre> http://<span class=“highlight”>server_domain_name_or_IP</span>/<span class=“highlight”>superldap</span> </pre>
The first time you visit, you will probably see a warning about the site’s SSL certificate:
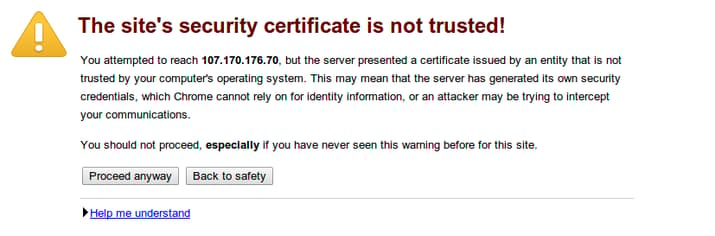
The warning is just here to let you know that the browser does not recognize the certificate authority that signed your certificate. Since we signed our own certificate, this is expected and not a problem.
Click the “Proceed anyway” button or whatever similar option your browser gives you.
Next, you will see the password prompt that you configured for Apache:
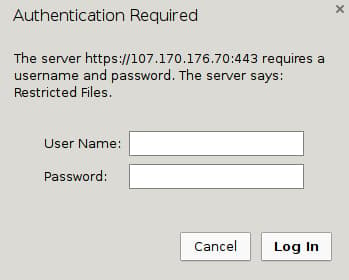
Fill in the account credentials you created with the htpasswd command. You will see the main phpLDAPadmin landing page:
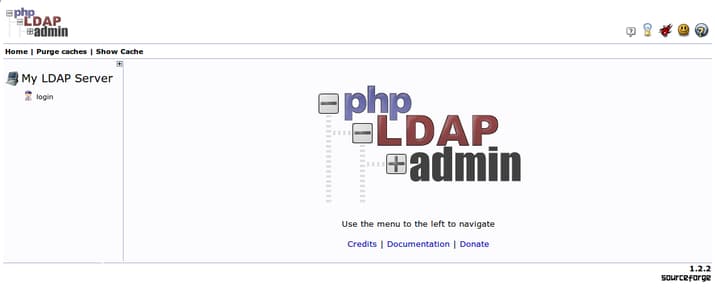
Click on the “login” link that you can see on the left-hand side of the page.
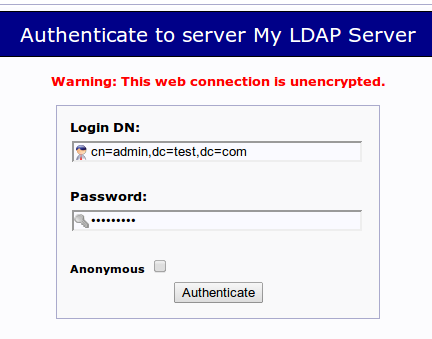
You will be taken to a login prompt. The login “DN” is like the username that you will be using. It contains the account name under “cn” and the domain name you selected for the server broken into “dc” sections as we described above.
It should be pre-populated with the correct value for the admin account if you configured phpLDAPadmin correctly. In our case, this looks like this:
cn=admin,dc=test,dc=com
For the password, enter the administrator password that you configured during the LDAP configuration.
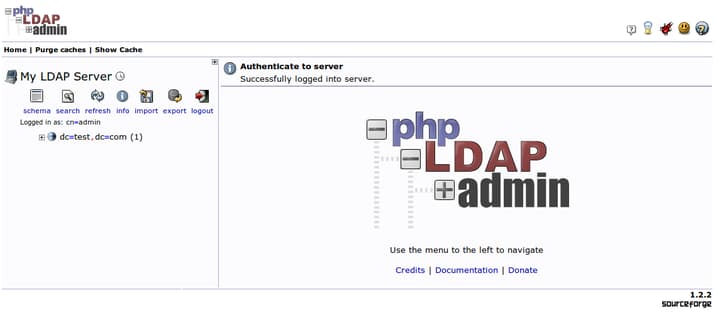
You will be taken to the main interface:
Add Organizational Units, Groups, and Users
At this point, you are logged into the phpLDAPadmin interface. You have the ability to add users, organizational units, groups, and relationships.
LDAP is flexible in how you wish to structure your data and directory hierarchies. You can basically create whatever kind of structure you’d like and create rules for how they interact.
Since this process is the same on Ubuntu 14.04 as it was on Ubuntu 12.04, you can follow the steps laid out in the “Add Organizational Units, Groups, and Users” section of the LDAP installation article for Ubuntu 12.04.
The steps will be entirely the same on this installation, so follow along to get some practice working with the interface and learn about how to structure your units.
Conclusion
You should now have OpenLDAP installed and configured on your Ubuntu 14.04 server. You have also installed and configured a web interface to manage your structure through the phpLDAPadmin program. You have configured some basic security for the application by forcing SSL and password protecting the entire application.
The system that we have set up is quite flexible and you should be able to design your own organizational schema and manage groups of resources as your needs demand. In the next guide, we’ll discuss how to configure your networked machines to use this LDAP server for system authentication.
<div class=“author”>By Justin Ellingwood</div>
Thanks for learning with the DigitalOcean Community. Check out our offerings for compute, storage, networking, and managed databases.
About the author
Former Senior Technical Writer at DigitalOcean, specializing in DevOps topics across multiple Linux distributions, including Ubuntu 18.04, 20.04, 22.04, as well as Debian 10 and 11.
Still looking for an answer?
This textbox defaults to using Markdown to format your answer.
You can type !ref in this text area to quickly search our full set of tutorials, documentation & marketplace offerings and insert the link!
Like others tutorials from DigitalOcean incredibly clean and optimally written. Well done!!!
How can I make this work on port 636 with a Certificate? Everything that I’ve found on google shows to modify a slapd.conf file but the newer versions of openldap do not use that process.
Can you give me some points, what I have to do to store PGP keys on LDAP server.
Thank you for the great article. I have followed it through but when it comes to logging into the phpAdmin server it does not accept my username or password, I have tired installing it several times with different credentials but I always get the same result do you know what could be causing this?
Thank you so much for this great article. It helped me a lot understanding LDAP using the client phpLdapAdmin.
Hi, please help me, I was tried to configure my server with phpladapadin, I followed this instruction, and . . . I got problem, phpldapadmin not appear, but error log appear, seem like mine missing PCRE php-session GETTEXT LDAP XML, and . . . I tried to install that missing packages, but not found,
#Sorry for bad english
Hi friends, I have installed Ldap and configured in 14.04 LTS OS just like this article, everthing is working fine i have logged in i have created OU’s but while creating the users i cant find the submit or save button. The template is reflected in the bottom also… can any one help out this…
Thank you…
Thank you for this amazing tutorial, but could you write another one about ways of replication and achieving high availability in OpenLDAP.
 This work is licensed under a Creative Commons Attribution-NonCommercial- ShareAlike 4.0 International License.
Become a contributor for community
Get paid to write technical tutorials and select a tech-focused charity to receive a matching donation.

DigitalOcean Documentation
Full documentation for every DigitalOcean product.

Resources for startups and AI-native businesses
The Wave has everything you need to know about building a business, from raising funding to marketing your product.
The developer cloud
Scale up as you grow — whether you're running one virtual machine or ten thousand.

Start building today
From GPU-powered inference and Kubernetes to managed databases and storage, get everything you need to build, scale, and deploy intelligent applications.
