Not using Debian 10?
Choose a different version or distribution.
Introduction
Docker is an application that simplifies the process of managing application processes in containers. Containers let you run your applications in resource-isolated processes. They’re similar to virtual machines, but containers are more portable, more resource-friendly, and more dependent on the host operating system.
For a detailed introduction to the different components of a Docker container, check out The Docker Ecosystem: An Introduction to Common Components.
In this tutorial, you’ll install and use Docker Community Edition (CE) on Debian 10. You’ll install Docker itself, work with containers and images, and push an image to a Docker Repository.
Prerequisites
To follow this tutorial, you will need the following:
- One Debian 10 server set up by following the Debian 10 initial server setup guide, including a sudo non-root user and a firewall.
- An account on Docker Hub if you wish to create your own images and push them to Docker Hub, as shown in Steps 7 and 8.
Step 1 — Installing Docker
The Docker installation package available in the official Debian repository may not be the latest version. To ensure we get the latest version, we’ll install Docker from the official Docker repository. To do that, we’ll add a new package source, add the GPG key from Docker to ensure the downloads are valid, and then install the package.
First, update your existing list of packages:
- sudo apt update
Next, install a few prerequisite packages which let apt use packages over HTTPS:
- sudo apt install apt-transport-https ca-certificates curl gnupg2 software-properties-common
Then add the GPG key for the official Docker repository to your system:
- curl -fsSL https://download.docker.com/linux/debian/gpg | sudo apt-key add -
Add the Docker repository to APT sources:
- sudo add-apt-repository "deb [arch=amd64] https://download.docker.com/linux/debian $(lsb_release -cs) stable"
Next, update the package database with the Docker packages from the newly added repo:
- sudo apt update
Make sure you are about to install from the Docker repo instead of the default Debian repo:
- apt-cache policy docker-ce
You’ll see output like this, although the version number for Docker may be different:
docker-ce:
  Installed: (none)
  Candidate: 5:20.10.12~3-0~debian-buster
  Version table:
     5:20.10.12~3-0~debian-buster 500
        500 https://download.docker.com/linux/debian buster/stable amd64 Packages
Notice that docker-ce is not installed, but the candidate for installation is from the Docker repository for Debian 10 (buster).
Finally, install Docker:
- sudo apt install docker-ce
Docker is now installed, the daemon started, and the process enabled to start on boot. Check that it’s running:
- sudo systemctl status docker
The output will be similar to the following, showing that the service is active and running:
Output● docker.service - Docker Application Container Engine
   Loaded: loaded (/lib/systemd/system/docker.service; enabled; vendor preset: enabled)
   Active: active (running) since Mon 2019-07-08 15:11:19 UTC; 58s ago
     Docs: https://docs.docker.com
 Main PID: 5709 (dockerd)
    Tasks: 8
   Memory: 31.6M
   CGroup: /system.slice/docker.service
           └─5709 /usr/bin/dockerd -H fd:// --containerd=/run/containerd/containerd.sock
Installing Docker gives you not just the Docker service (daemon) but also the docker command line utility, or the Docker client. We’ll explore how to use the docker command later in this tutorial.
Step 2 — Executing the Docker Command Without Sudo (Optional)
By default, the docker command can only be run the root user or by a user in the docker group, which is automatically created during Docker’s installation process. If you attempt to run the docker command without prefixing it with sudo or without being in the docker group, you’ll get an output like this:
Outputdocker: Cannot connect to the Docker daemon. Is the docker daemon running on this host?.
See 'docker run --help'.
If you want to avoid typing sudo whenever you run the docker command, add your username to the docker group:
- sudo usermod -aG docker ${USER}
To apply the new group membership, log out of the server and back in, or type the following:
- su - ${USER}
You will be prompted to enter your user’s password to continue.
Confirm that your user is now added to the docker group by typing:
- id -nG
Outputsammy sudo docker
If you need to add a user to the docker group that you’re not logged in as, declare that username explicitly using:
- sudo usermod -aG docker username
The rest of this article assumes you are running the docker command as a user in the docker group. If you choose not to, please prepend the commands with sudo.
Let’s explore the docker command next.
Step 3 — Using the Docker Command
Using docker consists of passing it a chain of options and commands followed by arguments. The syntax takes this form:
- docker [option] [command] [arguments]
To view all available subcommands, type:
- docker
As of Docker 18, the complete list of available subcommands includes:
Outputattach      Attach local standard input, output, and error streams to a running container
build       Build an image from a Dockerfile
commit      Create a new image from a container's changes
cp          Copy files/folders between a container and the local filesystem
create      Create a new container
diff        Inspect changes to files or directories on a container's filesystem
events      Get real time events from the server
exec        Run a command in a running container
export      Export a container's filesystem as a tar archive
history     Show the history of an image
images      List images
import      Import the contents from a tarball to create a filesystem image
info        Display system-wide information
inspect     Return low-level information on Docker objects
kill        Kill one or more running containers
load        Load an image from a tar archive or STDIN
login       Log in to a Docker registry
logout      Log out from a Docker registry
logs        Fetch the logs of a container
pause       Pause all processes within one or more containers
port        List port mappings or a specific mapping for the container
ps          List containers
pull        Pull an image or a repository from a registry
push        Push an image or a repository to a registry
rename      Rename a container
restart     Restart one or more containers
rm          Remove one or more containers
rmi         Remove one or more images
run         Run a command in a new container
save        Save one or more images to a tar archive (streamed to STDOUT by default)
search      Search the Docker Hub for images
start       Start one or more stopped containers
stats       Display a live stream of container(s) resource usage statistics
stop        Stop one or more running containers
tag         Create a tag TARGET_IMAGE that refers to SOURCE_IMAGE
top         Display the running processes of a container
unpause     Unpause all processes within one or more containers
update      Update configuration of one or more containers
version     Show the Docker version information
wait        Block until one or more containers stop, then print their exit codes
To view the options available to a specific command, type:
- docker docker-subcommand --help
To view system-wide information about Docker, use:
- docker info
Let’s explore some of these commands. We’ll start by working with images.
Step 4 — Working with Docker Images
Docker containers are built from Docker images. By default, Docker pulls these images from Docker Hub, a Docker registry managed by Docker, the company behind the Docker project. Anyone can host their Docker images on Docker Hub, so most applications and Linux distributions you’ll need will have images hosted there.
To check whether you can access and download images from Docker Hub, type:
- docker run hello-world
The output will indicate that Docker is working correctly:
OutputUnable to find image 'hello-world:latest' locally
latest: Pulling from library/hello-world
1b930d010525: Pull complete
Digest: sha256:41a65640635299bab090f783209c1e3a3f11934cf7756b09cb2f1e02147c6ed8
Status: Downloaded newer image for hello-world:latest

Hello from Docker!
This message shows that your installation appears to be working correctly.
...
Docker was initially unable to find the hello-world image locally, so it downloaded the image from Docker Hub, which is the default repository. Once the image downloaded, Docker created a container from the image and the application within the container executed, displaying the message.
You can search for images available on Docker Hub by using the docker command with the search subcommand. For example, to search for the Ubuntu image, type:
- docker search ubuntu
The script will crawl Docker Hub and return a listing of all images whose name match the search string. In this case, the output will be similar to this:
OutputNAME                                                      DESCRIPTION                                     STARS               OFFICIAL            AUTOMATED
ubuntu                                                    Ubuntu is a Debian-based Linux operating sys…   9704                [OK]
dorowu/ubuntu-desktop-lxde-vnc                            Docker image to provide HTML5 VNC interface …   319                                     [OK]
rastasheep/ubuntu-sshd                                    Dockerized SSH service, built on top of offi…   224                                     [OK]
consol/ubuntu-xfce-vnc                                    Ubuntu container with "headless" VNC session…   183                                     [OK]
ubuntu-upstart                                            Upstart is an event-based replacement for th…   99                  [OK]
ansible/ubuntu14.04-ansible                               Ubuntu 14.04 LTS with ansible                   97                                      [OK]
neurodebian                                               NeuroDebian provides neuroscience research s…   57                  [OK]
1and1internet/ubuntu-16-nginx-php-phpmyadmin-mysql-5      ubuntu-16-nginx-php-phpmyadmin-mysql-5          50                                      [OK]
ubuntu
...
In the OFFICIAL column, OK indicates an image built and supported by the company behind the project. Once you’ve identified the image that you would like to use, you can download it to your computer using the pull subcommand.
Execute the following command to download the official ubuntu image to your computer:
- docker pull ubuntu
You’ll see the following output:
OutputUsing default tag: latest
latest: Pulling from library/ubuntu
5b7339215d1d: Pull complete
14ca88e9f672: Pull complete
a31c3b1caad4: Pull complete
b054a26005b7: Pull complete
Digest: sha256:9b1702dcfe32c873a770a32cfd306dd7fc1c4fd134adfb783db68defc8894b3c
Status: Downloaded newer image for ubuntu:latest
After an image has been downloaded, you can then run a container using the downloaded image with the run subcommand. As you saw with the hello-world example, if an image has not been downloaded when docker is executed with the run subcommand, the Docker client will first download the image, then run a container using it.
To see the images that have been downloaded to your computer, type:
- docker images
The output should look similar to the following:
OutputREPOSITORY          TAG                 IMAGE ID            CREATED             SIZE
ubuntu              latest              4c108a37151f        2 weeks ago         64.2MB
hello-world         latest              fce289e99eb9        6 months ago        1.84kB
As you’ll see later in this tutorial, images that you use to run containers can be modified and used to generate new images, which may then be uploaded (pushed is the technical term) to Docker Hub or other Docker registries.
Let’s look at how to run containers in more detail.
Step 5 — Running a Docker Container
The hello-world container you ran in the previous step is an example of a container that runs and exits after emitting a test message. Containers can be much more useful than that, and they can be interactive. After all, they are similar to virtual machines, only more resource-friendly.
As an example, let’s run a container using the latest image of Ubuntu. The combination of the -i and -t switches gives you interactive shell access into the container:
- docker run -it ubuntu
Your command prompt should change to reflect the fact that you’re now working inside the container and should take this form:
Outputroot@d9b100f2f636:/#
Note the container id in the command prompt. In this example, it is d9b100f2f636. You’ll need that container ID later to identify the container when you want to remove it.
Now you can run any command inside the container. For example, let’s update the package database inside the container. You don’t need to prefix any command with sudo, because you’re operating inside the container as the root user:
- apt update
Then install any application in it. Let’s install Node.js:
- apt install nodejs
This installs Node.js in the container from the official Ubuntu repository. When the installation finishes, verify that Node.js is installed:
- node -v
You’ll see the version number displayed in your terminal:
Outputv10.19.0
Any changes you make inside the container only apply to that container.
To exit the container, type exit at the prompt.
Let’s look at managing the containers on our system next.
Step 6 — Managing Docker Containers
After using Docker for a while, you’ll have many active (running) and inactive containers on your computer. To view the active ones, use:
- docker ps
You will see output similar to the following:
OutputCONTAINER ID IMAGE COMMAND CREATED
In this tutorial, you started two containers; one from the hello-world image and another from the ubuntu image. Both containers are no longer running, but they still exist on your system.
To view all containers — active and inactive, run docker ps with the -a switch:
- docker ps -a
You’ll see output similar to this:
CONTAINER ID        IMAGE               COMMAND             CREATED              STATUS                      PORTS               NAMES
d42d0bbfbd35        ubuntu              "/bin/bash"         About a minute ago   Exited (0) 20 seconds ago                       friendly_volhard
0740844d024c        hello-world         "/hello"            3 minutes ago        Exited (0) 3 minutes ago                        elegant_neumann
To view the latest container you created, pass it the -l switch:
- docker ps -l
- CONTAINER ID IMAGE COMMAND CREATED STATUS PORTS NAMES
- d42d0bbfbd35 ubuntu "/bin/bash" About a minute ago Exited (0) 34 seconds ago friendly_volhard
To start a stopped container, use docker start, followed by the container ID or the container’s name. Let’s start the Ubuntu-based container with the ID of d9b100f2f636:
- docker start d42d0bbfbd35
The container will start, and you can use docker ps to see its status:
CONTAINER ID        IMAGE               COMMAND             CREATED              STATUS              PORTS               NAMES
d42d0bbfbd35        ubuntu              "/bin/bash"         About a minute ago   Up 8 seconds                            friendly_volhard
To stop a running container, use docker stop, followed by the container ID or name. This time, we’ll use the name that Docker assigned the container, which is friendly_volhard:
- docker stop friendly_volhard
Once you’ve decided you no longer need a container anymore, remove it with the docker rm command, again using either the container ID or the name. Use the docker ps -a command to find the container ID or name for the container associated with the hello-world image and remove it.
- docker rm elegant_neumann
You can start a new container and give it a name using the --name switch. You can also use the --rm switch to create a container that removes itself when it’s stopped. See the docker run help command for more information on these options and others.
Containers can be turned into images which you can use to build new containers. Let’s look at how that works.
Step 7 — Committing Changes in a Container to a Docker Image
When you start up a Docker image, you can create, modify, and delete files just like you can with a virtual machine. The changes that you make will only apply to that container. You can start and stop it, but once you destroy it with the docker rm command, the changes will be lost for good.
This section shows you how to save the state of a container as a new Docker image.
After installing Node.js inside the Ubuntu container, you now have a container running off an image, but the container is different from the image you used to create it. But you might want to reuse this Node.js container as the basis for new images later.
Then commit the changes to a new Docker image instance using the following command.
- docker commit -m "What you did to the image" -a "Author Name" container_id repository/new_image_name
The -m switch is for the commit message that helps you and others know what changes you made, while -a is used to specify the author. The container_id is the one you noted earlier in the tutorial when you started the interactive Docker session. Unless you created additional repositories on Docker Hub, the repository is usually your Docker Hub username.
For example, for the user sammy, with the container ID of d9b100f2f636, the command would be:
- docker commit -m "added Node.js" -a "sammy" d42d0bbfbd35 sammy/ubuntu-nodejs
When you commit an image, the new image is saved locally on your computer. Later in this tutorial, you’ll learn how to push an image to a Docker registry like Docker Hub so others can access it.
Listing the Docker images again will show the new image, as well as the old one that it was derived from:
- docker images
You’ll see output like this:
OutputREPOSITORY            TAG                 IMAGE ID            CREATED             SIZE
sammy/ubuntu-nodejs   latest              d441c62350b4        10 seconds ago      152MB
ubuntu                latest              4c108a37151f        2 weeks ago         64.2MB
hello-world           latest              fce289e99eb9        6 months ago        1.84kB
In this example, ubuntu-nodejs is the new image, which was derived from the existing ubuntu image from Docker Hub. The size difference reflects the changes that were made. And in this example, the change was that NodeJS was installed. So next time you need to run a container using Ubuntu with NodeJS pre-installed, you can just use the new image.
You can also build Images from a Dockerfile, which lets you automate the installation of software in a new image. However, that’s outside the scope of this tutorial.
Now let’s share the new image with others so they can create containers from it.
Step 8 — Pushing Docker Images to a Docker Repository
The next logical step after creating a new image from an existing image is to share it with a select few of your friends, the whole world on Docker Hub, or other Docker registry that you have access to. To push an image to Docker Hub or any other Docker registry, you must have an account there.
This section shows you how to push a Docker image to Docker Hub. To learn how to create your own private Docker registry, check out How To Set Up a Private Docker Registry on Ubuntu 18.04.
To push your image, first log into Docker Hub.
- docker login -u docker-registry-username
You’ll be prompted to authenticate using your Docker Hub password. If you specified the correct password, authentication should succeed.
Note: If your Docker registry username is different from the local username you used to create the image, you will have to tag your image with your registry username. For the example given in the last step, you would type:
- docker tag sammy/ubuntu-nodejs docker-registry-username/ubuntu-nodejs
Then you may push your own image using:
- docker push docker-registry-username/docker-image-name
To push the ubuntu-nodejs image to the sammy repository, the command would be:
- docker push sammy/ubuntu-nodejs
The process may take some time to complete as it uploads the images, but when completed, the output will look like this:
OutputThe push refers to a repository [docker.io/sammy/ubuntu-nodejs]
e3fbbfb44187: Pushed
5f70bf18a086: Pushed
a3b5c80a4eba: Pushed
7f18b442972b: Pushed
3ce512daaf78: Pushed
7aae4540b42d: Pushed

...
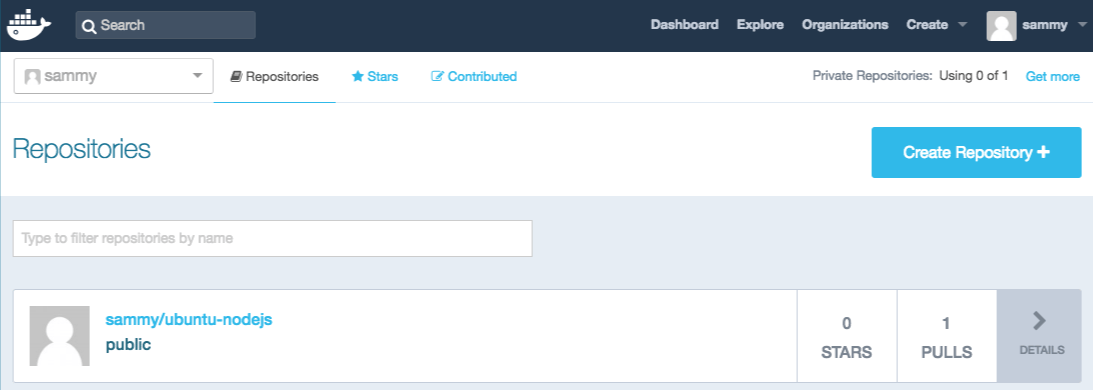
After pushing an image to a registry, it should be listed on your account’s dashboard, like that show in the image below.
If a push attempt results in an error of this sort, then you likely did not log in:
OutputThe push refers to a repository [docker.io/sammy/ubuntu-nodejs]
e3fbbfb44187: Preparing
5f70bf18a086: Preparing
a3b5c80a4eba: Preparing
7f18b442972b: Preparing
3ce512daaf78: Preparing
7aae4540b42d: Waiting
unauthorized: authentication required
Log in with docker login and repeat the push attempt. Then verify that it exists on your Docker Hub repository page.
You can now use docker pull sammy/ubuntu-nodejs to pull the image to a new machine and use it to run a new container.
Conclusion
In this tutorial you installed Docker, worked with images and containers, and pushed a modified image to Docker Hub. Now that you know the basics, explore the other Docker tutorials in the DigitalOcean Community.
Thanks for learning with the DigitalOcean Community. Check out our offerings for compute, storage, networking, and managed databases.
About the author
Managed the Write for DOnations program, wrote and edited community articles, and makes things on the Internet. Expertise in DevOps areas including Linux, Ubuntu, Debian, and more.
Still looking for an answer?
This textbox defaults to using Markdown to format your answer.
You can type !ref in this text area to quickly search our full set of tutorials, documentation & marketplace offerings and insert the link!
Hi, this no longer works. I get this error after adding the repos and doing apt update
W: Failed to fetch https://dl.yarnpkg.com/debian/dists/stable/main/binary-amd64/Packages  The HTTP server sent an invalid reply header

W: Failed to fetch https://download.docker.com/linux/debian/dists/buster/stable/binary-amd64/Packages  The HTTP server sent an invalid reply header

W: Failed to fetch https://download.docker.com/linux/debian/dists/jessie/stable/binary-amd64/Packages  The HTTP server sent an invalid reply header

E: Some index files failed to download. They have been ignored, or old ones used instead.
1.- Debian doesn’t have sudo by default. 2.- I don’t found usermod command on Buster.
This comment has been deleted
I get an error on Step: 4
~$ docker run hello-world Unable to find image ‘hello-world:latest’ locally latest: Pulling from library/hello-world 0e03bdcc26d7: Pull complete Digest: sha256:e7c70bb24b462baa86c102610182e3efcb12a04854e8c582838d92970a09f323 Status: Downloaded newer image for hello-world:latest docker: Error response from daemon: OCI runtime create failed: container_linux.go:349: starting container process caused “process_linux.go:449: container init caused "rootfs_linux.go:58: mounting \"proc\" to rootfs \"/var/lib/docker/overlay2/f3f1aa1f176cffa1c2d31a6204fcab1db585c74e47a9c854e9d306cb5b313141/merged\" at \"/proc\" caused \"permission denied\""”: unknown. ERRO[0002] error waiting for container: context canceled
A very nice tutorial.
Hint for all: before proceeding make sure no older version of docker is already installed on your system. In that case kindly uninstall the older version. For more information refer this link
Hi,
For Debian 11 (Bullseye) the handling of GPG keys for package repositories has changed. By combining the information here, with this page: https://www.linuxuprising.com/2021/01/apt-key-is-deprecated-how-to-add.html I came up with a solution.
Replace these commands:
curl -fsSL https://download.docker.com/linux/debian/gpg | sudo apt-key add -

sudo add-apt-repository "deb [arch=amd64] https://download.docker.com/linux/debian $(lsb_release -cs) stable"
with these (run them as root):
wget -O- https://download.docker.com/linux/debian/gpg | gpg --dearmor > /usr/share/keyrings/docker-archive-keyring.gpg

echo "deb [arch=amd64 signed-by=/usr/share/keyrings/docker-archive-keyring.gpg ] https://download.docker.com/linux/debian $(lsb_release -cs) stable" > /etc/apt/sources.list.d/docker.list
The rest of the (really good!) tutorial is the same.
For the initial set up of the environment follow:
Hi!
I tested on Debian 11 (Bangalore data center):
- I first used
apt upgrade(my added step to tutorial). - Everything else is totally fine!
Thanks Mr. Brian Hogan, best regards from Venezuela 🇻🇪.
Thank you very much for this tutorial.
I have a Debian server with ISP Config
Distributor ID: Debian Description: Debian GNU/Linux 10 (buster) Release: 10 Codename: buster
I’d like to know if I can install Docker on a server already running ISPConfig, without any risk to damage/break the existing ISPConfig install.
(NB : I don’t want to install ISPC in a Docker container, I’d like to run Docker and ISPC, in parallel)
 This work is licensed under a Creative Commons Attribution-NonCommercial- ShareAlike 4.0 International License.
Become a contributor for community
Get paid to write technical tutorials and select a tech-focused charity to receive a matching donation.

DigitalOcean Documentation
Full documentation for every DigitalOcean product.

Resources for startups and AI-native businesses
The Wave has everything you need to know about building a business, from raising funding to marketing your product.
The developer cloud
Scale up as you grow — whether you're running one virtual machine or ten thousand.

Start building today
From GPU-powered inference and Kubernetes to managed databases and storage, get everything you need to build, scale, and deploy intelligent applications.
