By Erin Glass
Senior Manager, DevEd

Introduction
In this guide, you will create an Ubuntu server through DigitalOcean’s administrative panel and configure it to work with your SSH keys. Once you have your server set up, you can deploy apps and websites on it.
This tutorial is part of the Introduction to the Cloud Curriculum, which guides users through all the steps of securely deploying an application to the cloud. If you are searching for general documentation on DigitalOcean Droplets, please visit our product documentation How to Create a Droplet from the DigitalOcean Control Panel.
How To Set Up an Ubuntu Server on a DigitalOcean Droplet
- Creating a DigitalOcean account
- Setting Up Your Droplet
- Choosing an Image
- Choosing a Plan
- Adding Block Storage (Optional)
- Choosing a Datacenter Region
- Selecting Additional Options
- Setting Up SSH Authentication
- Finalizing and Creating Droplet
Prerequisites
Before you begin this guide, you’ll need the following:
- Some familiarity with the command line. If you’d like an introduction or refresher to the command line, you can visit our Linux Command Line Primer.
- SSH keys to enable a secure connection with your server. To set up SSH keys via the command line, you can follow our guide How to Set Up SSH Keys on Ubuntu.
- A credit card or PayPal account to set up a DigitalOcean Droplet. Note that the smallest Droplet offering can be used for this tutorial, whose monthly subscription fee is available on our Pricing page. Users can cancel their Droplet service at any time.
Note: Eligible students can sign up to receive $50 in free credits for Digital Ocean through the GitHub Student Developer Pack.
Step 1 — Creating a DigitalOcean account
To access the DigitalOcean Control Panel and create a Droplet, you need a DigitalOcean account. To create a new account, navigate to the DigitalOcean new account registration page. You can choose to register through email, Google, or GitHub.
After you’ve confirmed your account, you will need to enter your credit card or Paypal information. This information is collected to verify identity and keep spammers out. You will not be charged until you choose a plan and confirm your subscription, which we will cover in Step 4. You may see a temporary pre-authorization charge to verify the card, which will be reversed within a week.
Once your information has been accepted, you will be taken to a window that says “Registration Complete”. You are now ready to proceed to the next step.
Step 2 — Setting Up Your Droplet
In the previous step, you should have been taken to a window that says “Registration Complete” with a “Let’s make something” button. Click on the “Let’s make something” button. The next window will display buttons for different Droplet options. Click on the “Go to Control Panel” link at the bottom:
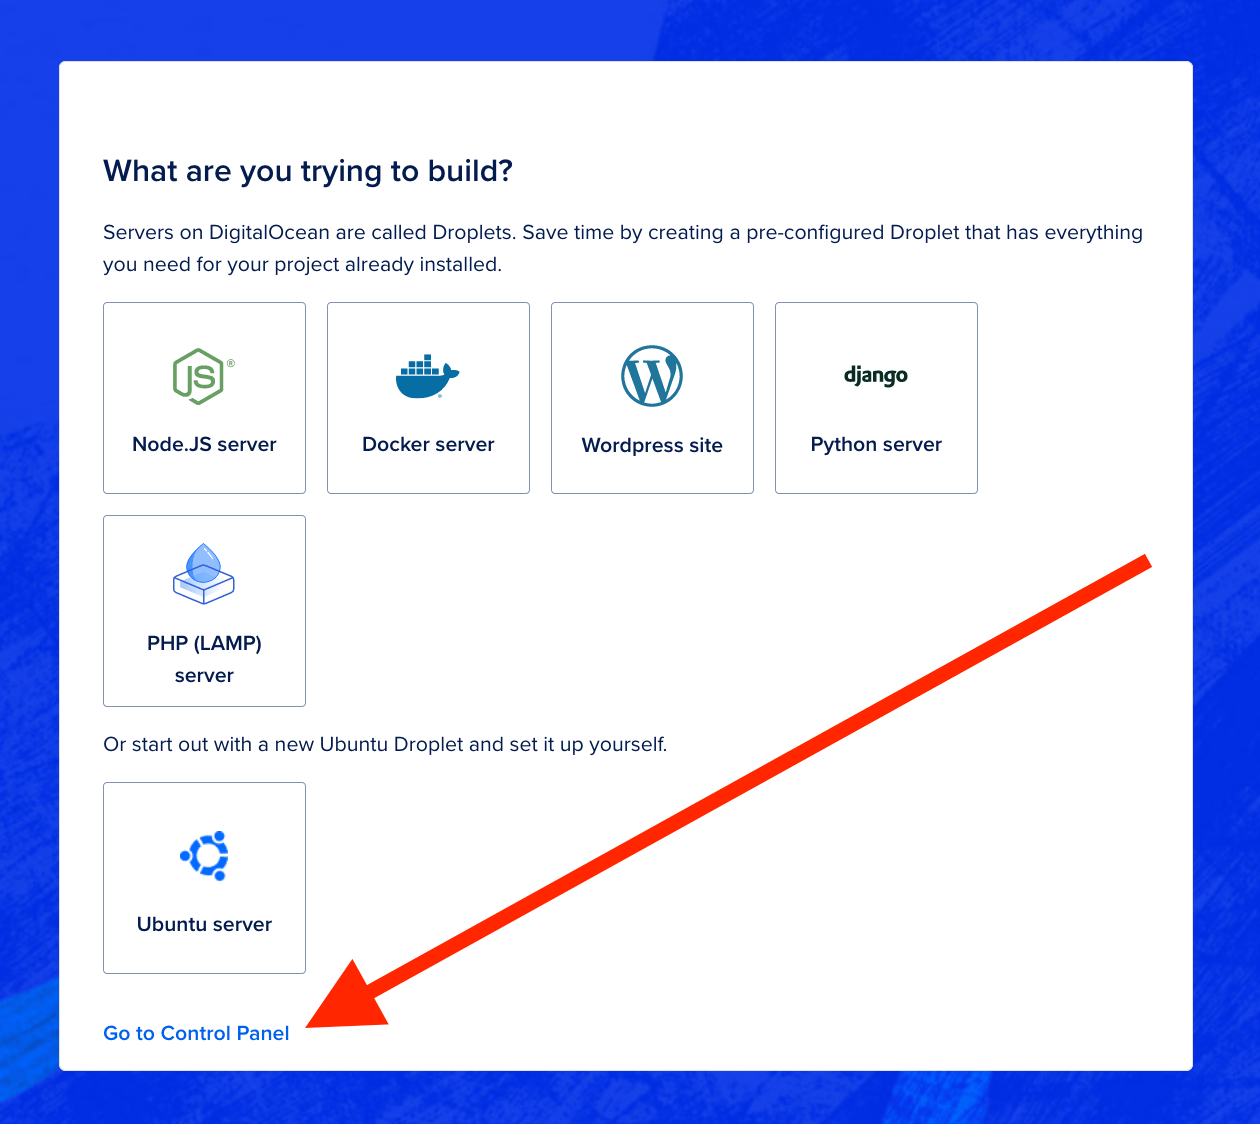
Once you click on the “Go to Control Panel” link, you will be taken to the control panel.
Navigate to the “Create” menu in the upper right corner and click “Droplets” to open the Droplet create page. If you don’t have any Droplets, the Resources tab displays a large, blue “Get Started with a Droplet” button, which takes you to the same Droplet create page.
The Droplet create page is where you choose your Droplet’s configuration, like its operating system, how much memory it has, and which features (like backups or monitoring) to enable.
In the next step, you will choose an image of the operating system to be installed on your Droplet.
Step 3 — Choosing an Image
An image is a copy of an operating system. To create a Droplet, users need to pick an image of an operating system to run their server. DigitalOcean offers five different Linux operating system distributions. As this tutorial is for setting up an Ubuntu, click on the option for Ubuntu(LTS) x 64:
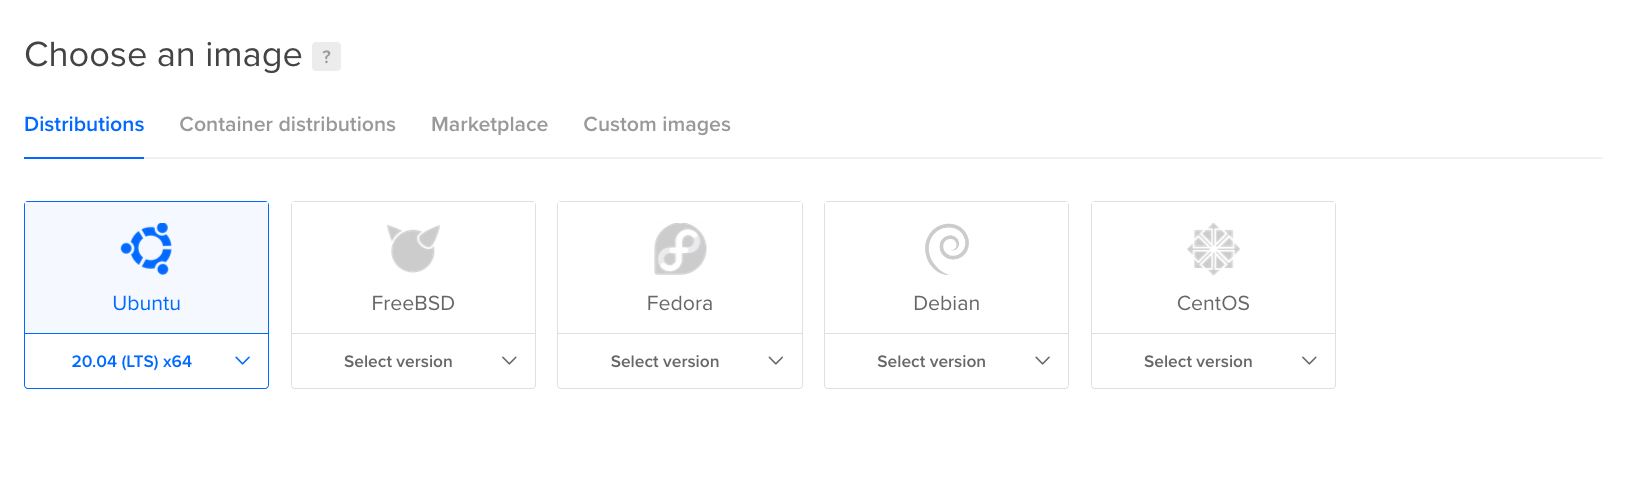
After selecting your operating system, you are ready to proceed to the next step.
Step 4 — Choosing a Plan
In the Choose a plan section, you can choose the amount of RAM, storage space, and CPU cores your Droplet will have. If you are following this tutorial for the Introduction to the Cloud Curriculum, the Basic $5 per month plan will work for the Curriculum’s hands-on tutorials and exercises.
Click on the option for the Basic $5/mo plan:
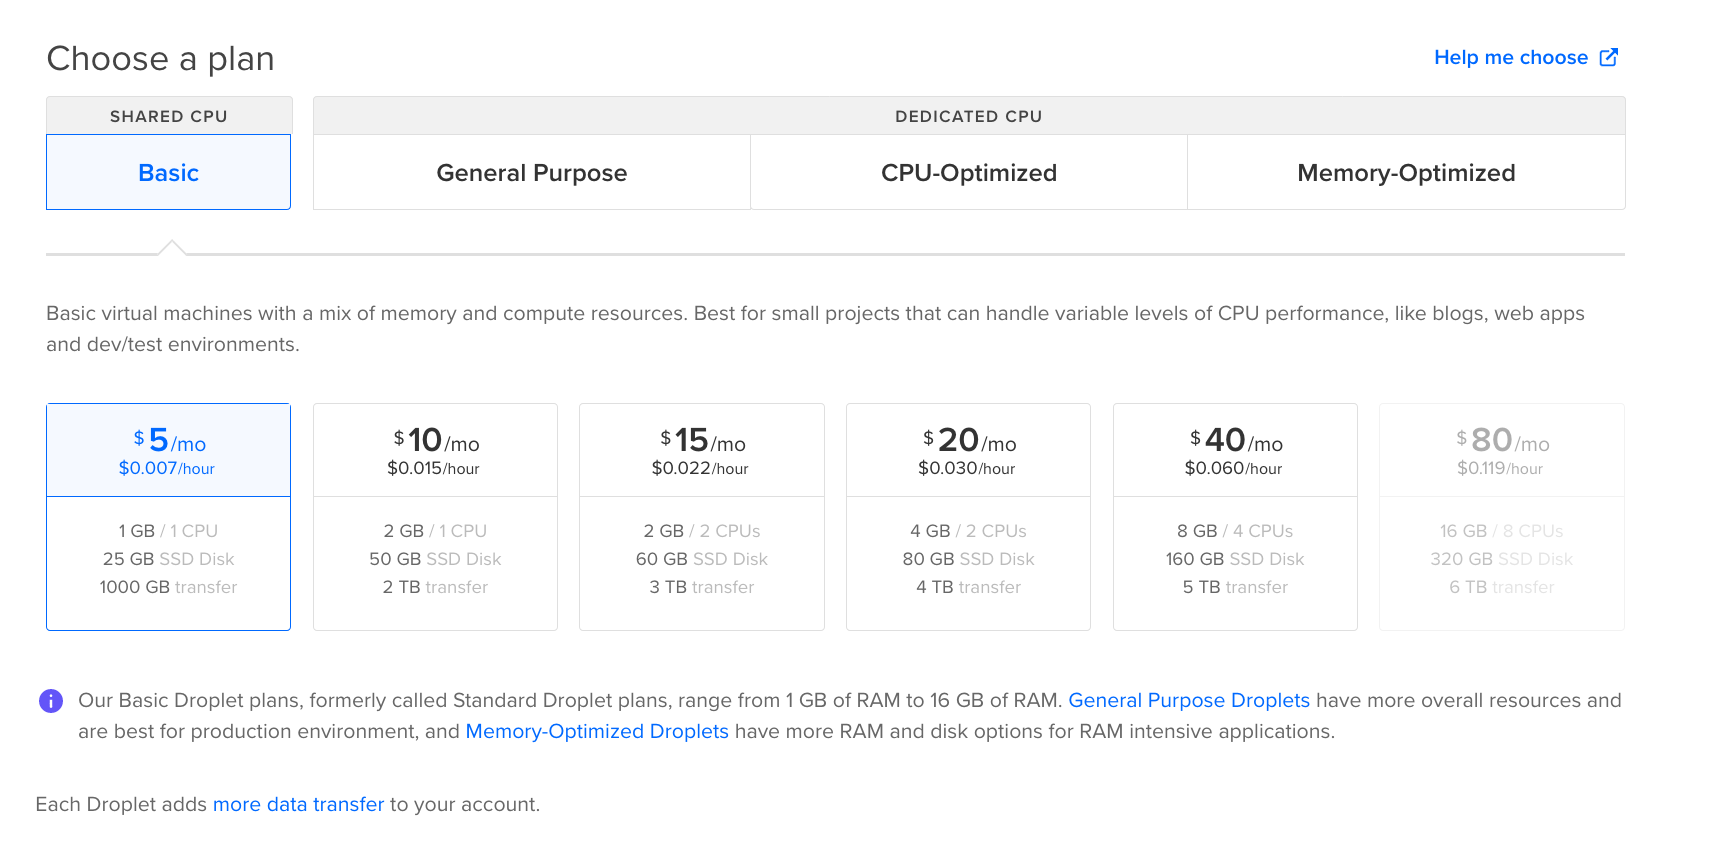
After selecting a plan, you are ready to proceed to the next step.
Step 5 — Adding Block Storage (Optional)
This option allows users to add block storage as independent volumes that can be moved from one Droplet to another within the same region. Block storage is useful when you need additional file storage space for your Droplet. If you are following this tutorial for the Introduction to the Cloud Curriculum, you do not need to add block storage. Leave this option unselected unless you want to add block storage.
You are now ready to proceed to the next step.
Step 6 — Choosing a Datacenter Region
In the Choose a datacenter region section, select the region where you want to create your Droplet.
A good default will be preselected for you, but for the best performance and minimal latency, choose the data center nearest to you and your users.
Once you have selected your data center, you are ready to proceed to the next step.
Step 7 — Selecting Additional Options
In the Select additional options section, you can enable several optional services that add functionality to your Droplet.
The three features available in this section are free, so enabling them does not increase the Droplet’s monthly cost. They can be understood as follows:
IPv6 enables IPv6 access for your Droplet. IPv6 is the most recent version of the Internet Protocol, which identifies computers on networks and routes traffic across the Internet. IPv6 addresses provide more address space than their IPv4 counterparts and are part of an effort to sustain the growth and deployment of Internet-ready devices.
User data is arbitrary data that you specify which is written to the user-data field of the DigitalOcean metadata service. To learn more about the purpose of user data, you can visit the User Data product documentation.
Monitoring adds the DigitalOcean agent to collect extended metrics and create alert policies. To learn more about monitoring, you can visit the Monitoring product documentation.
You can leave these options blank unless you’d like to enable them. Once you’ve selected your desired options, you are ready to proceed to the next step.
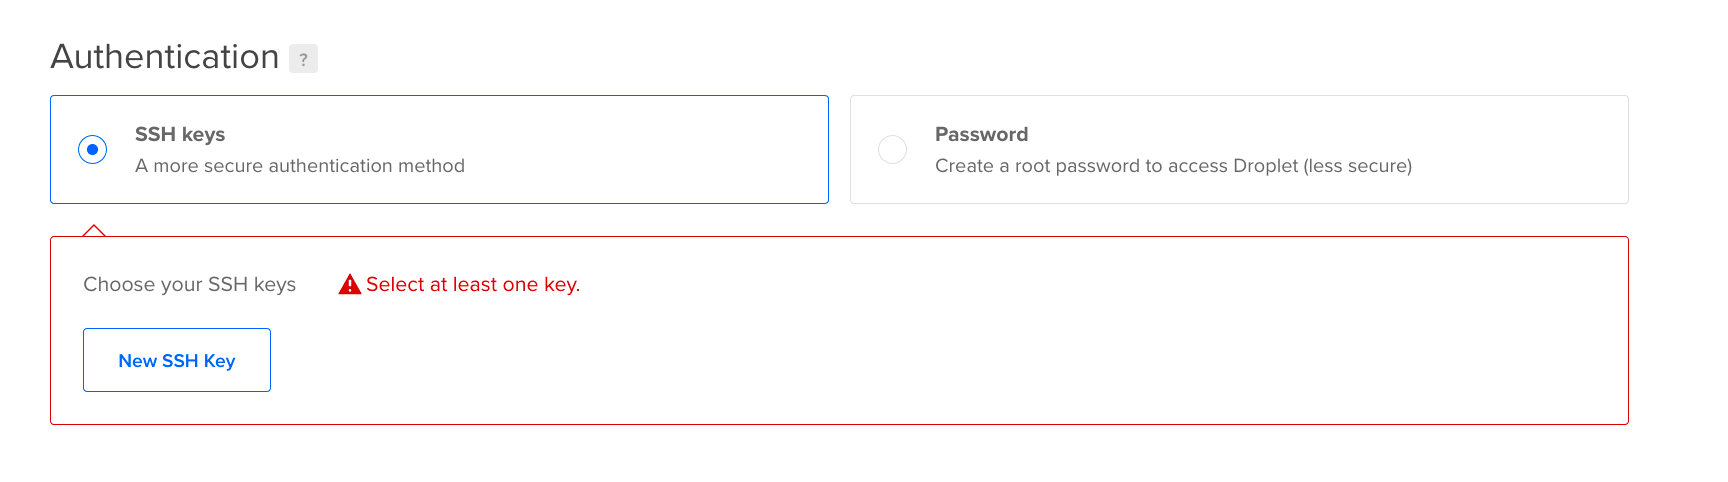
Step 8 — Setting Up SSH Authentication
In this section, you will set up SSH authentication for your Droplet using the pair of SSH keys you created as one of the prerequisites for this tutorial. If you did not already create SSH keys, you will be able to do so in just a few moments.
Click on the option to use SSH keys for authentication, which is more secure than a password. Then click on the “New SSH Key” button:
A pop-up window will appear, prompting you to copy your public SSH key and paste it into the provided space:
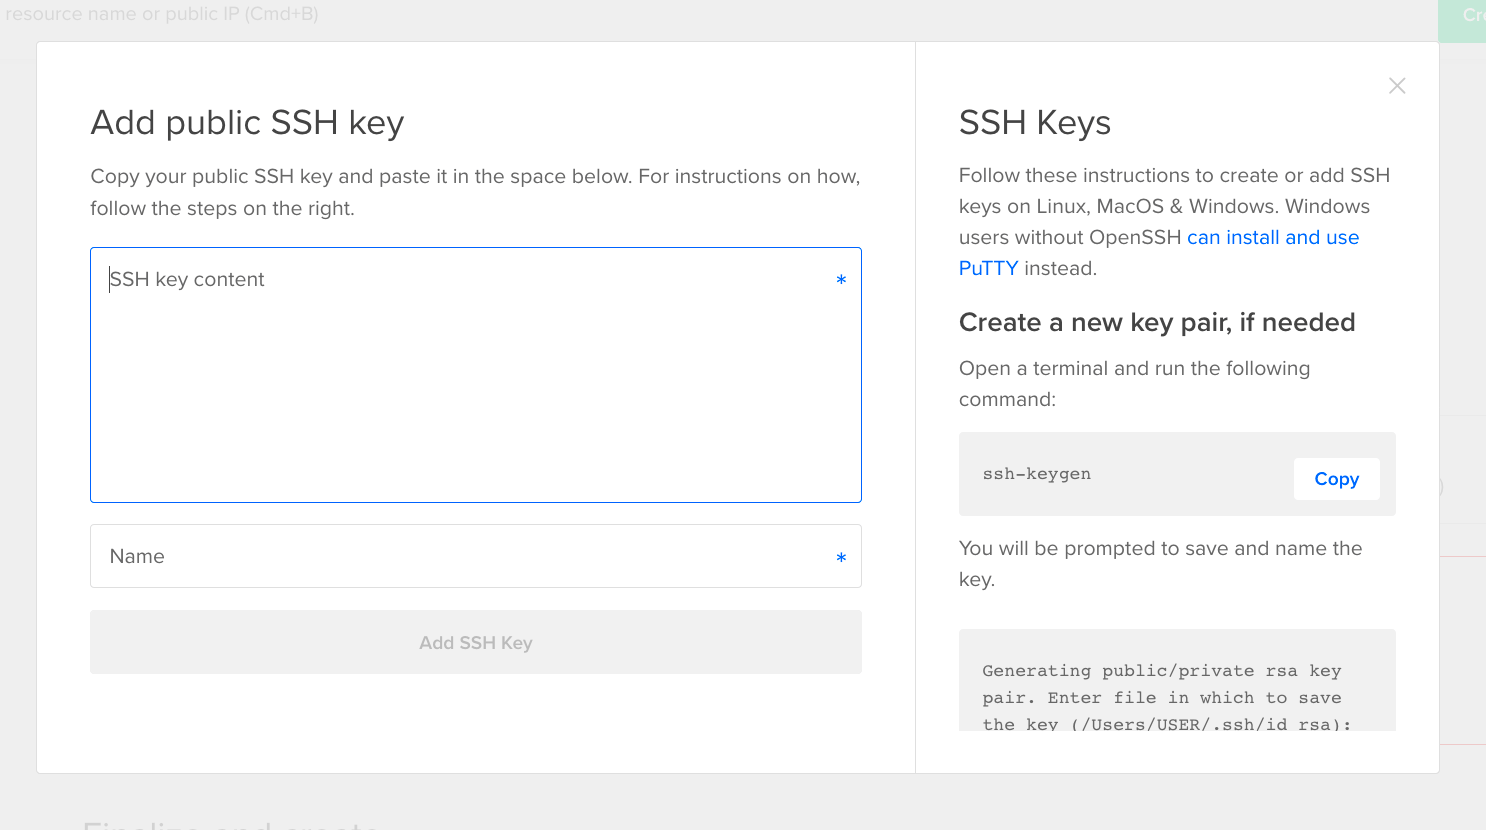
Note: If you have not created SSH keys, follow the directions on the right side of the pop-up window to create the keys or follow our guide How to Set Up SSH Keys on Ubuntu.
To copy your public key, run the following command in your terminal:
- cat ~/.ssh/id_rsa.pub
Copy the output from your terminal and paste it into the space provided by the cloud panel pop-up window. Then give your key a name so you can select it later on. When you have finished, click “Add new SSH key”. You will then return to the cloud panel where you can make sure your new key is selected.
When you have selected your new key, you are ready to proceed to the next step.
Step 9 — Finalizing and Creating Droplet
In this final section of the Droplet creation process, you have the option to:
- Select the number of Droplets you wish to create. If you are following this tutorial as part of the Introduction to the Cloud Curriculum, you need to only create one Droplet. Otherwise, select your desired amount of Droplets.
- Name the Droplet. You can use the automatically-generated name or create your own name.
- Add tags to help organize your Droplets. You can leave this option blank if you wish.
- Assign your Droplet to a project to help with organization. A default folder will be created and selected here. You can create new folders later if you wish.
- Add backups. This option enables a system-level backup of your Droplet to help prevent data loss. Note that choosing this option adds $1 to your cost per month. Choose this option if you wish.
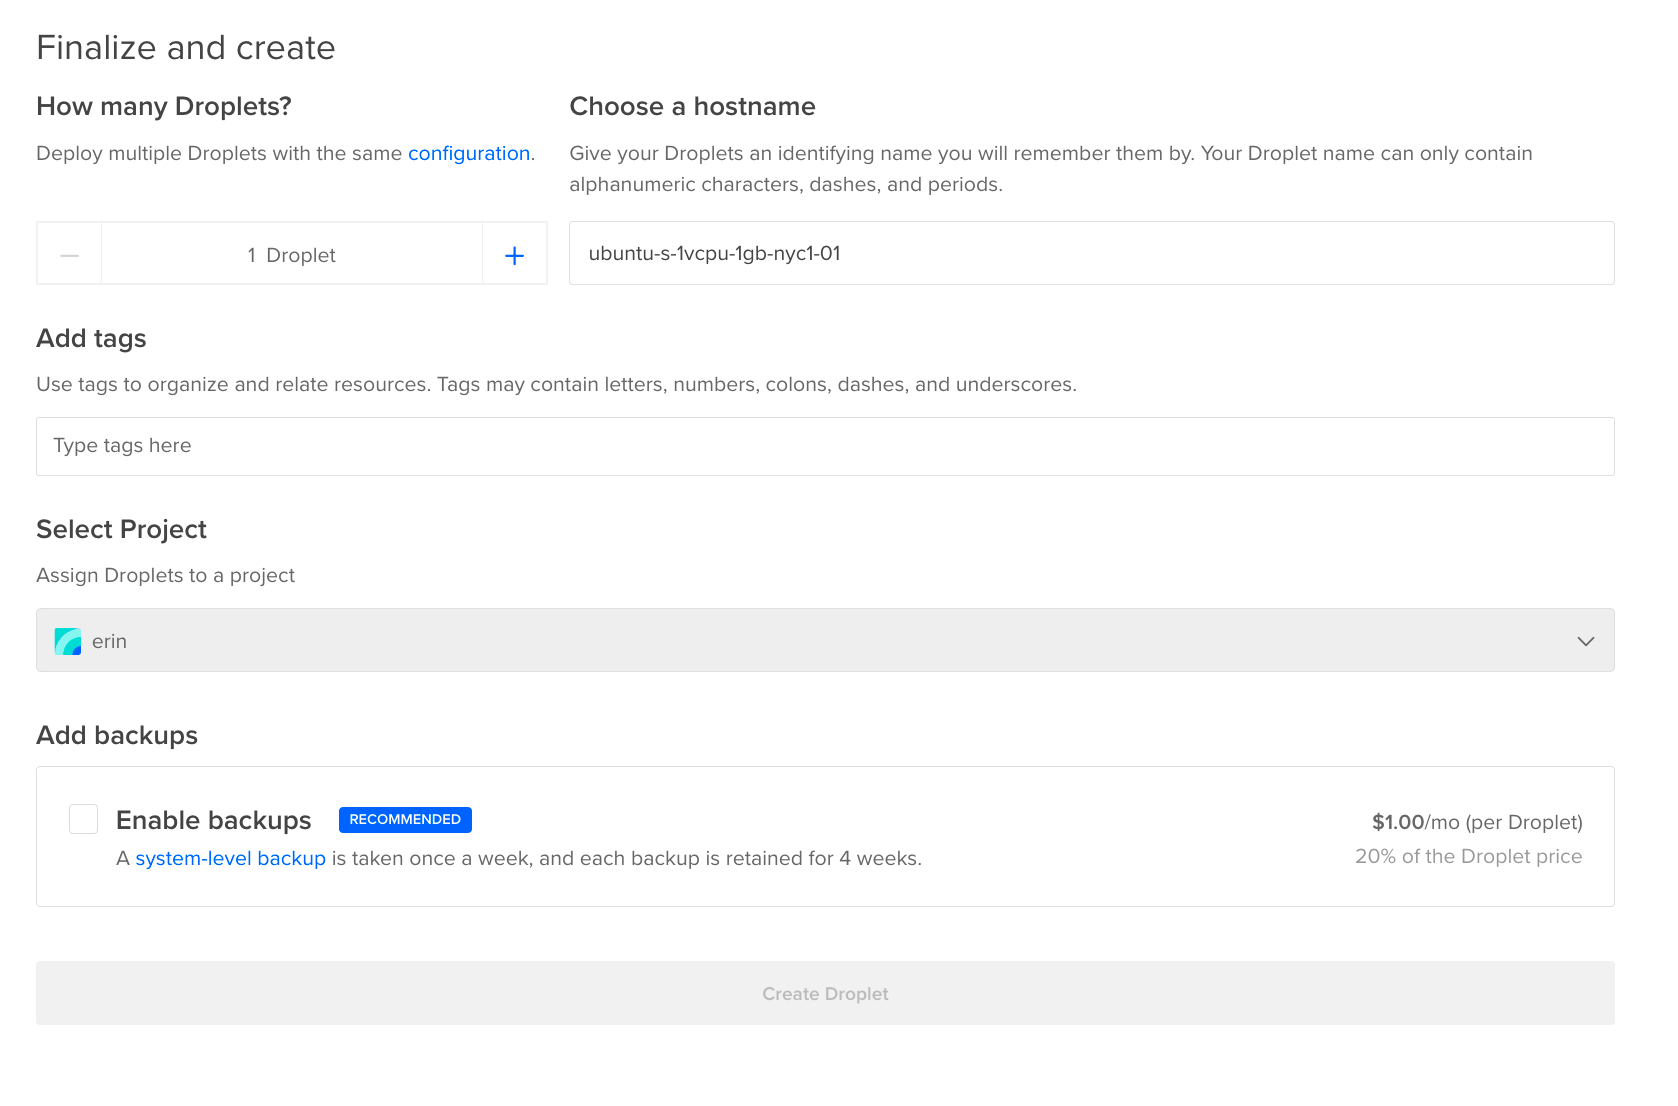
When you are finished making your choices, click “Create Droplet.” You will then be taken to a page showing a progress bar for the Droplet creation process. When the Droplet is ready, its IP address will be displayed:
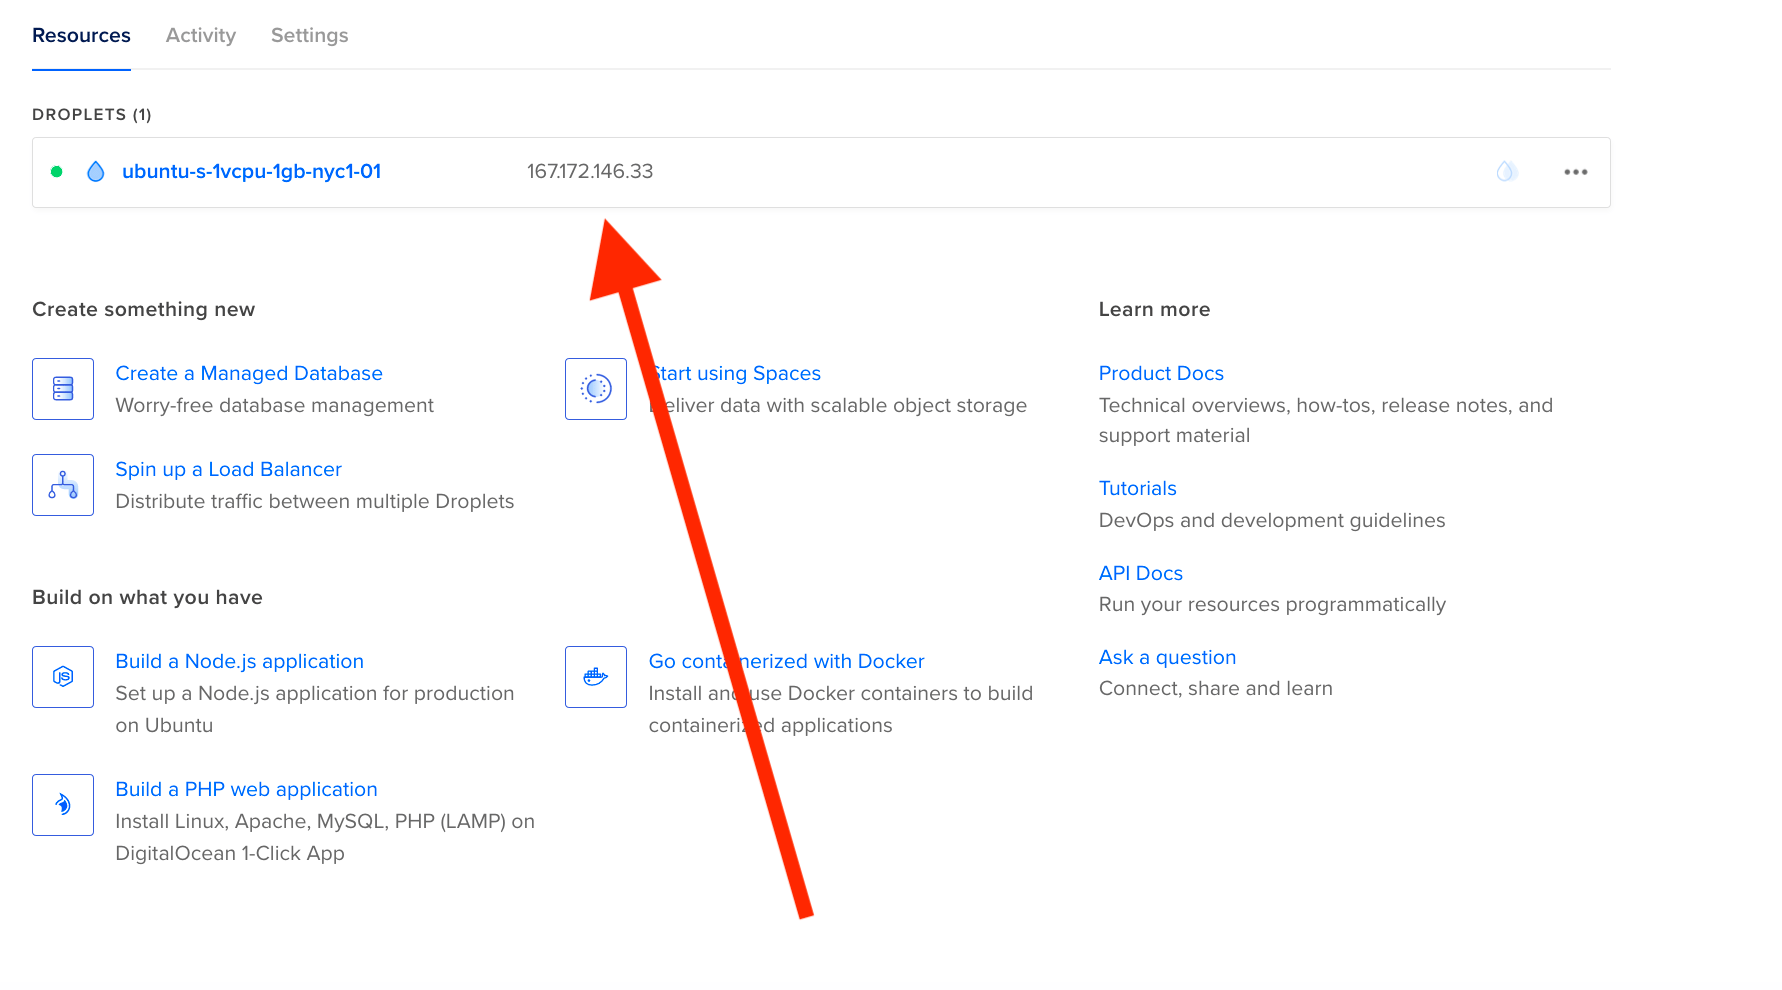
You will use this IP address to securely connect with the Droplet through your terminal. Copy the IP address and then run the following command in your terminal to securely connect with your Droplet via SSH as a root user.
- ssh root@your_IP_address
The terminal will then display a message like this:
OutputThe authenticity of host '167.172.146.33 (167.172.146.33)' can't be established.
ECDSA key fingerprint is SHA256:+Mx4ID5k4N8H7R24y+APZAoTe69hmAh9qMawyf/Lq9U.
Are you sure you want to continue connecting (yes/no/[fingerprint])?
Type yes. If you chose a passphrase when setting up SSH, you will be prompted to enter it here. If everything is working, you will then be logged into your Droplet as a root user. Note that it is strongly recommended to create a new user with fewer privileges for the day-to-day use of your Droplet to avoid making irreparable changes. To create a new user, you can follow our Initial Server Setup Guide guide, which is the next tutorial in the Introduction to the Cloud Curriculum.
Conclusion
In this tutorial, you have set up an Ubuntu server on a Droplet and enabled SSH access. To learn more about what you can do with this Droplet, you can visit our Introduction to the Cloud Curriculum.
If you wish to delete your Droplet, you can visit our product documentation on How To Destroy a Droplet. To cancel your account, please follow the instructions on our Account Cancellation page.
Thanks for learning with the DigitalOcean Community. Check out our offerings for compute, storage, networking, and managed databases.
About the author
Open source advocate and lover of education, culture, and community.
Still looking for an answer?
This textbox defaults to using Markdown to format your answer.
You can type !ref in this text area to quickly search our full set of tutorials, documentation & marketplace offerings and insert the link!
 This work is licensed under a Creative Commons Attribution-NonCommercial- ShareAlike 4.0 International License.
Become a contributor for community
Get paid to write technical tutorials and select a tech-focused charity to receive a matching donation.

DigitalOcean Documentation
Full documentation for every DigitalOcean product.

Resources for startups and AI-native businesses
The Wave has everything you need to know about building a business, from raising funding to marketing your product.
The developer cloud
Scale up as you grow — whether you're running one virtual machine or ten thousand.

Start building today
From GPU-powered inference and Kubernetes to managed databases and storage, get everything you need to build, scale, and deploy intelligent applications.
