By Tony Tran and Justin Ellingwood

Introduction
Version control has become a central requirement for modern software development. It allows projects to safely track changes and enable reversions, integrity checking, and collaboration among other benefits.
Through the use of a “hooks” system, git allows developers and administrators to extend functionality by specifying scripts that git will call based on different events and actions.
In this guide, you will explore the idea of git hooks and demonstrate how to implement code that can assist you in automating tasks in your own unique environment. You will be using an Ubuntu 20.04 server in this guide, but any system that can run git should work in a similar way.
Prerequisites
-
Before you get started, you must have
gitinstalled on your server. If you are following along on Ubuntu 20.04, you can check out our guide on how to install git on Ubuntu 20.04. -
You should be familiar with how to use git in a general sense. If you need an introduction, the series that the installation is a part of, called Introduction to Git: Installation, Usage, and Branches, is a good place to start.
Note: If you already feel comfortable with git and git hook concepts, and want to dive into practical examples, you can skip ahead to “Setting Up a Repository”.
When you are finished with the above requirements, continue on.
Basic Idea with Git Hooks
Git hooks are a rather simple concept that was implemented to address a need. When developing software on a shared project, maintaining style guide standards, or deploying software, there are often repetitive tasks that you will want to do each time an action is taken.
Git hooks are event-based. When you run certain git commands, the software will check the hooks directory within the git repository to see if there is an associated script to run.
Some scripts run prior to an action taking place, which can be used to ensure code compliance to standards, for sanity checking, or to set up an environment. Other scripts run after an event in order to deploy code, re-establish correct permissions (something git cannot track very well), and so forth.
Using these abilities, it is possible to enforce policies, ensure consistency, control your environment, and even handle deployment tasks.
Defining Categories of Hooks
The book Pro Git by Scott Chacon attempts to divide the different types of hooks into categories. He categorizes them as such:
- Client-Side Hooks: Hooks that are called and executed on the committer’s computer. These in turn are divided into a few separate categories:
- Committing-Workflow hooks: Committing hooks are used to dictate actions that should be taken around when a commit is being made. They are used to run sanity checks, pre-populate commit messages, and verify message details. You can also use this to provide notifications upon committing.
- Email Workflow hooks: This category of hooks encompasses actions that are taken when working with emailed patches. Projects like the Linux kernel submit and review patches using an email method. These are in a similar vein as the commit hooks, but can be used by maintainers who are responsible for applying submitted code.
- Other: Other client-side hooks include hooks that execute when merging, checking out code, rebasing, rewriting, and cleaning repos.
- Server-Side Hooks: These hooks are executed on servers that are used to receive pushes. Generally, that would be the main git repo for a project. Again, Chacon divided these into categories:
- Pre-receive and post-receive: These are executed on the server receiving a push to do things like check for project conformance and to deploy after a push.
- Update: This is like a pre-receive, but operates on a branch-by-branch basis to execute code prior to each branch being accepted.
These categorizations are helpful for getting a general idea of the events that you can optionally set up a hook for. But to actually understand how these items work, it is best to experiment and to find out what solutions you are trying to implement.
Looking at Hooks By Parameter
Certain hooks also take parameters. This means that when git calls the script for the hook, it will pass in some relevant data that the script can then use to complete tasks. In full, the hooks that are available are:
| Hook Name | Invoked By | Description | Parameters (Number and Description) |
|---|---|---|---|
| applypatch-msg | git am |
Can edit the commit message file and is often used to verify or actively format a patch’s message to a project’s standards. A non-zero exit status aborts the commit. | (1) name of the file containing the proposed commit message |
| pre-applypatch | git am |
This is actually called after the patch is applied, but before the changes are committed. Exiting with a non-zero status will leave the changes in an uncommitted state. Can be used to check the state of the tree before actually committing the changes. | (none) |
| post-applypatch | git am |
This hook is run after the patch is applied and committed. Because of this, it cannot abort the process, and is mainly used for creating notifications. | (none) |
| pre-commit | git commit |
This hook is called before obtaining the proposed commit message. Exiting with anything other than zero will abort the commit. It is used to check the commit itself (rather than the message). | (none) |
| prepare-commit-msg | git commit |
Called after receiving the default commit message, just prior to firing up the commit message editor. A non-zero exit aborts the commit. This is used to edit the message in a way that cannot be suppressed. | (1 to 3) Name of the file with the commit message, the source of the commit message (message, template, merge, squash, or commit), and the commit SHA-1 (when operating on an existing commit). |
| commit-msg | git commit |
Can be used to adjust the message after it has been edited in order to ensure conformity to a standard or to reject based on any criteria. It can abort the commit if it exits with a non-zero value. | (1) The file that holds the proposed message. |
| post-commit | git commit |
Called after the actual commit is made. Because of this, it cannot disrupt the commit. It is mainly used to allow notifications. | (none) |
| pre-rebase | git rebase |
Called when rebasing a branch. Mainly used to halt the rebase if it is not desirable. | (1 or 2) The upstream from where it was forked, the branch being rebased (not set when rebasing current) |
| post-checkout | git checkout and git clone |
Run when a checkout is called after updating the worktree or after git clone. It is mainly used to verify conditions, display differences, and configure the environment if necessary. |
(3) Ref of the previous HEAD, ref of the new HEAD, flag indicating whether it was a branch checkout (1) or a file checkout (0) |
| post-merge | git merge or git pull |
Called after a merge. Because of this, it cannot abort a merge. Can be used to save or apply permissions or other kinds of data that git does not handle. | (1) Flag indicating whether the merge was a squash. |
| pre-push | git push |
Called prior to a push to a remote. In addition to the parameters, additional information, separated by a space is passed in through stdin in the form of “<local ref> <local sha1> <remote ref> <remote sha1>”. Parsing the input can get you additional information that you can use to check. For instance, if the local sha1 is 40 zeros long, the push is a delete and if the remote sha1 is 40 zeros, it is a new branch. This can be used to do many comparisons of the pushed ref to what is currently there. A non-zero exit status aborts the push. | (2) Name of the destination remote, location of the destination remote |
| pre-receive | git-receive-pack on the remote repo |
This is called on the remote repo just before updating the pushed refs. A non-zero status will abort the process. Although it receives no parameters, it is passed a string through stdin in the form of “<old-value> <new-value> <ref-name>” for each ref. | (none) |
| update | git-receive-pack on the remote repo |
This is run on the remote repo once for each ref being pushed instead of once for each push. A non-zero status will abort the process. This can be used to make sure all commits are only fast-forward, for instance. | (3) The name of the ref being updated, the old object name, the new object name |
| post-receive | git-receive-pack on the remote repo |
This is run on the remote when pushing after all refs have been updated. It does not take parameters, but receives info through stdin in the form of “<old-value> <new-value> <ref-name>”. Because it is called after the updates, it cannot abort the process. | (none) |
| post-update | git-receive-pack on the remote repo |
This is run only once after all of the refs have been pushed. It is similar to the post-receive hook in that regard, but does not receive the old or new values. It is used mostly to implement notifications for the pushed refs. | (?) A parameter for each of the pushed refs containing its name |
| pre-auto-gc | git gc --auto |
Is used to do some checks before automatically cleaning repos. | (none) |
| post-rewrite | git commit --amend, git-rebase |
This is called when git commands are rewriting already committed data. In addition to the parameters, it receives strings in stdin in the form of “<old-sha1> <new-sha1>”. | (1) Name of the command that invoked it (amend or rebase) |
An Aside about Environmental Variables with Git Hooks
Before you can begin your script, you’ll need to learn a bit about what environmental variables git sets when calling hooks. To get your script to function, you will eventually need to unset an environmental variable that git sets when calling the post-commit hook.
This is a very important point to internalize if you hope to write git hooks that function in a reliable way. Git sets different environmental variables depending on which hook is being called. This means that the environment that git is pulling information from will be different depending on the hook.
The first issue with this is that it can make your scripting environment very unpredictable if you are not aware of what variables are being set automatically. The second issue is that the variables that are set are almost completely absent in git’s own documentation.
Fortunately, Mark Longair developed a method for testing each of the variables that git sets when running these hooks. It involves putting the following contents in various git hook scripts:
#!/bin/bash
echo Running $BASH_SOURCE
set | egrep GIT
echo PWD is $PWD
The information on his site is from 2011 working with git version 1.7.1, so there have been a few changes. This guide is using Ubuntu 20.04 with git 2.25.1.
The results of the tests on this version of git are below (including the working directory as seen by git when running each hook). The local working directory for the test was /home/sammy/test_hooks and the bare remote (where necessary) was /home/sammy/origin/test_hooks.git:
- Hooks:
applypatch-msg,pre-applypatch,post-applypatch- Environmental Variables:
GIT_AUTHOR_DATE='Mon, 11 Aug 2014 11:25:16 -0400'GIT_AUTHOR_EMAIL=sammy@example.comGIT_AUTHOR_NAME=Sammy User'GIT_INTERNAL_GETTEXT_SH_SCHEME=gnuGIT_REFLOG_ACTION=am- Working Directory:
/home/sammy/test_hooks
- Hooks:
pre-commit,prepare-commit-msg,commit-msg,post-commit- Environmental Variables:
GIT_AUTHOR_DATE='@1407774159 -0400'GIT_AUTHOR_EMAIL=sammy@example.comGIT_AUTHOR_NAME=Sammy User'GIT_DIR=.gitGIT_EDITOR=:GIT_INDEX_FILE=.git/indexGIT_PREFIX=- Working Directory:
/home/sammy/test_hooks
- Hooks:
pre-rebase- Environmental Variables:
GIT_INTERNAL_GETTEXT_SH_SCHEME=gnuGIT_REFLOG_ACTION=rebase- Working Directory:
/home/sammy/test_hooks
- Hooks:
post-checkout- Environmental Variables:
GIT_DIR=.gitGIT_PREFIX=- Working Directory:
/home/sammy/test_hooks
- Hooks:
post-merge- Environmental Variables:
GITHEAD_4b407c...GIT_DIR=.gitGIT_INTERNAL_GETTEXT_SH_SCHEME=gnuGIT_PREFIX=GIT_REFLOG_ACTION='pull other master'- Working Directory:
/home/sammy/test_hooks
- Hooks:
pre-push- Environmental Variables:
GIT_PREFIX=- Working Directory:
/home/sammy/test_hooks
- Hooks:
pre-receive,update,post-receive,post-update- Environmental Variables:
GIT_DIR=.- Working Directory:
/home/sammy/origin/test_hooks.git
- Hooks:
pre-auto-gc- (unknown because this is difficult to trigger reliably)
- Hooks:
post-rewrite- Environmental Variables:
GIT_AUTHOR_DATE='@1407773551 -0400'GIT_AUTHOR_EMAIL=sammy@example.comGIT_AUTHOR_NAME=Sammy User'GIT_DIR=.gitGIT_PREFIX=- Working Directory:
/home/sammy/test_hooks
These variables have implications on how git sees its environment. You will use the above information about variables to ensure that your script takes its environment into account correctly.
Now that you have all of this general information, you can demonstrate how to implement these in a few scenarios.
Setting Up a Repository
To get started, you’ll create a new, empty repository in your home directory. You can call this proj.
- mkdir ~/proj
- cd ~/proj
- git init
OutputInitialized empty Git repository in /home/sammy/proj/.git/
For the rest of this guide, replace sammy with your username as needed.
Now, you are in the empty working directory of a git-controlled directory. Before you do anything else, jump into the repository that is stored in the hidden file called .git within this directory:
- cd .git
- ls -F
Outputbranches/ config description HEAD hooks/ info/ objects/ refs/
You’ll see a number of files and directories. The one you’re interested in is the hooks directory:
- cd hooks
- ls -l
Outputtotal 40
-rwxrwxr-x 1 sammy sammy  452 Aug  8 16:50 applypatch-msg.sample
-rwxrwxr-x 1 sammy sammy  896 Aug  8 16:50 commit-msg.sample
-rwxrwxr-x 1 sammy sammy  189 Aug  8 16:50 post-update.sample
-rwxrwxr-x 1 sammy sammy  398 Aug  8 16:50 pre-applypatch.sample
-rwxrwxr-x 1 sammy sammy 1642 Aug  8 16:50 pre-commit.sample
-rwxrwxr-x 1 sammy sammy 1239 Aug  8 16:50 prepare-commit-msg.sample
-rwxrwxr-x 1 sammy sammy 1352 Aug  8 16:50 pre-push.sample
-rwxrwxr-x 1 sammy sammy 4898 Aug  8 16:50 pre-rebase.sample
-rwxrwxr-x 1 sammy sammy 3611 Aug  8 16:50 update.sample
You can see a few things here. First, you can see that each of these files are marked executable. Since these scripts are just called by name, they must be executable and their first line must be a shebang magic number reference to call the correct script interpreter. Most commonly, these are scripting languages like bash, perl, python, etc.
The second thing you may notice is that all of the files end in .sample. That is because git simply looks at the filename when trying to find the hook files to execute. Deviating from the name of the script git is looking for basically disables the script. In order to enable any of the scripts in this directory, you would have to remove the .sample suffix.
First Example: Deploying to a Local Web Server with a Post-Commit Hook
Your first example will use the post-commit hook to show you how to deploy to a local web server whenever a commit is made. This is not the hook you would use for a production environment, but it lets us demonstrate some important, barely-documented items that you should know about when using hooks.
First, you will install the Apache web server to demonstrate:
- sudo apt-get update
- sudo apt-get install apache2
In order for your script to modify the web root at /var/www/html (this is the document root on Ubuntu 20.04. Modify as needed), you need to have write permission. First, give your normal user ownership of this directory. You can do this by typing:
- sudo chown -R `whoami`:`id -gn` /var/www/html
Now, in your project directory, create an index.html file:
- cd ~/proj
- nano index.html
Inside, you can add a little bit of HTML just to demonstrate the idea. It doesn’t have to be complicated:
<h1>Here is a title!</h1>

<p>Please deploy me!</p>
Add the new file to tell git to track the file:
- git add .
Now, before you commit, you are going to set up your post-commit hook for the repository. Create this file within the .git/hooks directory for the project:
- nano .git/hooks/post-commit
Since git hooks are standard scripts, you need to tell git to use bash by starting with a shebang:
#!/bin/bash
unset GIT_INDEX_FILE
git --work-tree=/var/www/html --git-dir=$HOME/proj/.git checkout -f
In the following line, you need to look closely at the environmental variables that are set each time the post-commit hook is called. In particular, the GIT_INDEX_FILE is set to .git/index.
This path is in relation to the working directory, which in this case is /var/www/html. Since the git index does not exist at this location, the script will fail if you leave it as-is. To avoid this situation, you can manually unset the variable.
After that, you are just going to use git itself to unpack the newest version of the repository after the commit, into your web directory. You will want to force this transaction to make sure this is successful each time.
When you are finished with these changes, save and close the file.
Because this is a regular script file, you need to make it executable:
- chmod +x .git/hooks/post-commit
Now, you are finally ready to commit the changes you made in your git repo. Ensure that you are back in the correct directory and then commit the changes:
- cd ~/proj
- git commit -m "here we go..."
Now, if you visit your server’s domain name or IP address in your browser, you should see the index.html file you created:
http://server_domain_or_IP
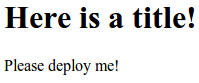
As you can see, your most recent changes have been automatically pushed to the document root of your web server upon commit. You can make some additional changes to show that it works on each commit:
- echo "<p>Here is a change.</p>" >> index.html
- git add .
- git commit -m "First change"
When you refresh your browser, you should immediately see the new changes that you applied:
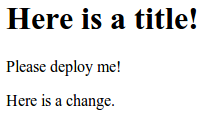
As you can see, this type of set up can make things easier for testing changes locally. However, you’d almost never want to publish on commit in a production environment. It is much safer to push after you’ve tested your code and are sure it is ready.
Using Git Hooks to Deploy to a Separate Production Server
In this next example, you’ll demonstrate a better way to update a production server. You can do this by using the push-to-deploy model in order to update your web server whenever you push to a bare git repository. You can use the same server you’ve set up as your development machine.
On your production machine, you will be setting up another web server, a bare git repository that you will push changes to, and a git hook that will execute whenever a push is received.
Complete the steps below as a normal user with sudo privileges.
Set Up the Production Server Post-Receive Hook
On the production server, start off by installing the web server:
- sudo apt-get update
- sudo apt-get install apache2
Again, you should give ownership of the document root to the user you are operating as:
- sudo chown -R `whoami`:`id -gn` /var/www/html
You need to install git on this machine as well:
- sudo apt-get install git
Now, you can create a directory within your user’s home directory to hold the repository. You can then move into that directory and initialize a bare repository. A bare repository does not have a working directory and is better for servers that you will not be working with much directly:
- mkdir ~/proj
- cd ~/proj
- git init --bare
Since this is a bare repository, there is no working directory and all of the files that are usually located in .git are now in the main directory itself.
Next, you need to create another git hook. This time, you are interested in the post-receive hook, which is run on the server receiving a git push. Open this file in your editor:
- nano hooks/post-receive
Again, you need to start off by identifying the type of script you are writing. After that, you can type out the same checkout command that you used in your post-commit file, modified to use the paths on this machine:
#!/bin/bash
while read oldrev newrev ref
do
if [[ $ref =~ .*/master$ ]];
then
echo "Master ref received.  Deploying master branch to production..."
git --work-tree=/var/www/html --git-dir=$HOME/proj checkout -f
else
echo "Ref $ref successfully received.  Doing nothing: only the master branch may be deployed on this server."
fi
done
Since this is a bare repository, the --git-dir should point to the top-level directory of that repo.
However, you need to add some additional logic to this script. If you accidentally push a test-feature branch to this server, you do not want that to be deployed. You want to make sure that you are only going to be deploying the master branch.
First, you need to read the standard input. For each ref being pushed, the three pieces of info (old rev, new rev, ref) will be fed to the script, separated by white space, as standard input. You can read this with a while loop to surround the git command.
So now, you will have three variables set based on what is being pushed. For a master branch push, the ref object will contain something that looks like refs/heads/master. You can check to see if the ref the server is receiving has this format by using an if construct.
Finally, add some text describing what situation was detected, and what action was taken. You should add an else block to notify the user when a non-master branch was successfully received, even though the action won’t trigger a deployment.
When you are finished, save and close the file. But remember, you must make the script executable for the hook to work:
- chmod +x hooks/post-receive
Now, you can set up access to this remote server on your client.
Configure the Remote Server on your Client Machine
Back on your client (development) machine, go back into the working directory of your project:
- cd ~/proj
Inside, add the remote server as a remote called production. The command you type should look something like this:
- git remote add production sammy@remote_server_domain_or_IP:proj
Now push your current master branch to your production server:
- git push production master
If you do not have SSH keys configured, you may have to enter the password of your production server user. You should see something that looks like this:
Output]Counting objects: 8, done.
Delta compression using up to 2 threads.
Compressing objects: 100% (3/3), done.
Writing objects: 100% (4/4), 473 bytes | 0 bytes/s, done.
Total 4 (delta 0), reused 0 (delta 0)
remote: Master ref received.  Deploying master branch...
To sammy@107.170.14.32:proj
   009183f..f1b9027  master -> master
As you can see, the text from your post-receive hook is in the output of the command. If you visit your production server’s domain name or IP address in your web browser, you should see the current version of your project:
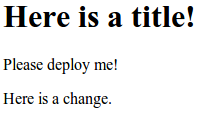
It looks like the hook has successfully pushed your code to production once it received the information.
Now, time to test out some new code. Back on the development machine, you will create a new branch to hold your changes. Make a new branch called test_feature and check the new branch out by typing:
- git checkout -b test_feature
You are now working in the test_feature branch. Try making a change that you might want to move to production. You will commit it to this branch:
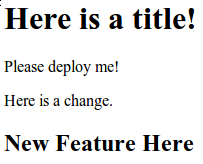
- echo "<h2>New Feature Here</h2>" >> index.html
- git add .
- git commit -m "Trying out new feature"
At this point, if you go to your development machine’s IP address or domain name, you should see your changes displayed:
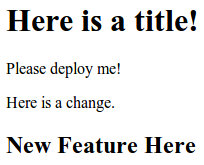
This is because your development machine is still being re-deployed at each commit. This work-flow is great for testing out changes prior to moving them to production.
You can push your test_feature branch to your remote production server:
- git push production test_feature
You should see the other message from your post-receive hook in the output:
OutputCounting objects: 5, done.
Delta compression using up to 2 threads.
Compressing objects: 100% (2/2), done.
Writing objects: 100% (3/3), 301 bytes | 0 bytes/s, done.
Total 3 (delta 1), reused 0 (delta 0)
remote: Ref refs/heads/test_feature successfully received.  Doing nothing: only the master branch may be deployed on this server
To sammy@107.170.14.32:proj
   83e9dc4..5617b50  test_feature -> test_feature
If you check out the production server in your browser again, you should see that nothing has changed. This is what you expect, since the change that you pushed was not in the master branch.
Now that you have tested your changes on your development machine, you are sure that you want to incorporate this feature into your master branch. You can checkout your master branch and merge in your test_feature branch on your development machine:
- git checkout master
- git merge test_feature
Now, you have merged the new feature into the master branch. Pushing to the production server will deploy your changes:
- git push production master
If you check out your production server’s domain name or IP address, you will see your changes:
Using this workflow, you can have a development machine that will immediately show any committed changes. The production machine will be updated whenever you push the master branch.
Conclusion
If you’ve followed along this far, you should be able to see the different ways that git hooks can help automate some of your tasks. They can help you deploy your code, or help you maintain quality standards by rejecting non-conformant changes or commit messages.
While the utility of git hooks is hard to argue, the actual implementation can be rather difficult to grasp and frustrating to troubleshoot. Practicing implementing various configurations, experimenting with parsing arguments and standard input, and keeping track of how git constructs the hooks’ environment will go a long way in teaching you how to write effective hooks. In the long run, the time investment is usually worth it, as it can easily save you and your team loads of manual work over the course of your project’s life.
To start using git to contribute to projects, check out How To Contribute to Open Source: Getting Started with Git. Or if you’re interested in more ways to use git, try How To Use Git: A Reference Guide.
Thanks for learning with the DigitalOcean Community. Check out our offerings for compute, storage, networking, and managed databases.
About the author(s)
Former Senior Technical Writer at DigitalOcean, specializing in DevOps topics across multiple Linux distributions, including Ubuntu 18.04, 20.04, 22.04, as well as Debian 10 and 11.
Still looking for an answer?
This textbox defaults to using Markdown to format your answer.
You can type !ref in this text area to quickly search our full set of tutorials, documentation & marketplace offerings and insert the link!
Great read, thank you.
I recently wrote an article about automatically testing Rails code using git hooks - might be of interest for some people who made it through your article.
Justin,
Thank you very much for this post. It was just the right info at the right time to move me forward against this specific problem. You saved me tons of time, and I am grateful. Thank you again!
Brian.
Great article, thank you for taking the time to put this together its really useful.
We have our web servers setup so that only port 80 is public, all other services are only accessible via a VPN. Is it still possible to push to production master with an external git repo?
Thanks a lot!
Your article helps me a lot. The problem nagged me for days. Great anticle!
Hello Justin, your article is very complete and really clear, it helped me a lot ;) thanks
sudo chown -R `whoami`:`groups` /var/www/html
This is horrible advice. Don’t ever do this.
I know how hard it is to write technical documentation, and how error prone instructions like “replace x with username, but without the quotes, .etc.” are. People will get it wrong, and it’s tempting (and good!) to provide instructions that always work when copy and pasted. However, this example takes it too far, it is fragile and outright dangerous. In case the problem is not clear, the groups command (Hint: it’s in plural) can return any number of names.
Is it safe to extend the hook for next branch and use different working three ?
#!/bin/bash
while read oldrev newrev ref
do
    if [[ $ref =~ .*/master$ ]];
    then
        echo "Master ref received.  Deploying master branch to production..."
        git --work-tree=/var/www/production/html --git-dir=/home/demo/proj checkout -f master
    elif [[ $ref =~ .*/dev$ ]];
    then
        echo "Development ref received.  Deploying master branch to staging..."
        git --work-tree=/var/www/staging/html --git-dir=/home/demo/proj checkout -f dev
    else
        echo "Ref $ref successfully received.  Doing nothing: only the master branch may be deployed on this server."
    fi
done
 This work is licensed under a Creative Commons Attribution-NonCommercial- ShareAlike 4.0 International License.
Become a contributor for community
Get paid to write technical tutorials and select a tech-focused charity to receive a matching donation.

DigitalOcean Documentation
Full documentation for every DigitalOcean product.

Resources for startups and AI-native businesses
The Wave has everything you need to know about building a business, from raising funding to marketing your product.
The developer cloud
Scale up as you grow — whether you're running one virtual machine or ten thousand.

Start building today
From GPU-powered inference and Kubernetes to managed databases and storage, get everything you need to build, scale, and deploy intelligent applications.
