By Chris Nwamba and Bradley Kouchi

Introduction
cron provides a way to repeat a task at a specific time interval. There may be repetitive tasks such as logging and performing backups that need to occur on a daily or weekly or monthly basis.
One method for implementing cron on a Node.js server is by using the node-cron module. This library uses the crontab syntax, which may be familiar to users with previous experience with using cron in Unix-like operating systems.
In this article, you will use node-cron to periodically delete log files from the server. You will also be presented with two other common use cases - backing up a database and sending scheduled emails.
Simplify deploying cron jobs using DigitalOcean App Platform. Deploy directly from GitHub in minutes and manage your cron jobs with DigitalOcean’s App Platform Job Scheduler.
Prerequisites
To follow through this tutorial, you’ll need:
- A local development environment for Node.js. Follow How to Install Node.js and Create a Local Development Environment.
This tutorial was verified with Node v17.2.0, npm v8.1.4, node-cron v2.0.3, shelljs v0.8.4, and nodemailer v6.7.2.
Step 1 — Creating a Node Application and Installing Dependencies
To get started, create a new Node application by opening your terminal and creating a new folder for your project:
- mkdir node-cron-example
Next, change into the new project directory:
- cd node-cron-example
Then initialize it, which creates a package.json file which you will use to track dependencies:
- npm init --yes
Add the node-cron module by running the following command:
- npm install node-cron@3.0.0
The node-cron module is the task scheduler.
The project dependencies are installed. Let’s build the server.
Step 2 — Scheduling a Task
Now, you can build the server and use node-cron to schedule a task to run every minute.
Create a new cron-ping.js file:
- nano cron-ping.js
Then, require node-cron:
const cron = require('node-cron');
Next, add the following lines of code to cron-ping.js:
// ...

// Schedule tasks to be run on the server.
cron.schedule('* * * * *', function() {
  console.log('running a task every minute');
});
These asterisks are part of the crontab syntax to represent different units of time:
  * * * * * *
  | | | | | |
  | | | | | day of week
  | | | | month
  | | | day of month
  | | hour
  | minute
  second ( optional )
A single asterisk behaves like a wildcard. Meaning the task will be run for every instance of that unit of time. Five asterisks ('* * * * *') represents the crontab default of running every minute.
Numbers in the place of asterisks will be treated as values for that unit of time. Allowing you to schedule tasks to occur daily and weekly or in more complex.
Note: Learn more about how this notation works in How To Use Cron to Automate Tasks on a VPS.
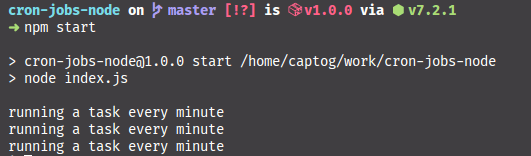
Now, run the script:
- node cron-ping.js
After several minutes, you will get the following result:
Outputrunning a task every minute
running a task every minute
running a task every minute
...
You have an example task running every minute. You can stop the server with CTRL+C (CONTROL+C).
Now, let’s look at how to run tasks in more detail.
Step 3 — Deleting an Error Log
Consider a scenario where you need to routinely delete the log file from the server on the twenty-first day of every month. You can accomplish this with node-cron.
Create an example log file named error.log:
- nano error.log
Then, add a test message:
This is an example error message that in a log file that will be removed on the twenty-first day of the month.
Create a new cron-delete.js file:
- nano cron-delete.js
This task will use fs to unlink a file. Add it to the top of the file:
const cron = require('node-cron');
const fs = require('fs');
Next, add the following lines of code:
// ...

// Remove the error.log file every twenty-first day of the month.
cron.schedule('0 0 21 * *', function() {
  console.log('---------------------');
  console.log('Running Cron Job');
  fs.unlink('./error.log', err => {
    if (err) throw err;
    console.log('Error file successfully deleted');
  });
});
Notice the pattern: 0 0 21 * *.
- It defines a value for minutes and hours as
0and0(“00:00” - the start of the day). - It defines a value for day as
21. - It does not define a month or day of the week.
Now, run the script:
- node cron-delete.js
On the twenty-first of the month, you will get the following output:
Output---------------------
Running Cron Job
Error file successfully deleted
You probably do not want to wait for the twenty-first of the month to verify the task has been executed. You can modify the scheduler to run in a shorter time interval - like every minute.
Check your server directory. The error.log file will be deleted.
You can run any actions inside the scheduler. Actions ranging from creating a file to sending emails and running scripts. Let’s take a look at more use cases.
Step 4 — Exploring Using node-cron to Back Up Databases
node-cron to Back Up DatabasesEnsuring the preservation of user data is key to any business. If an unforeseen event happens and your database becomes corrupted or damaged, you will need to restore your database from a backup. You will be in serious trouble if you do not have any form of existing backup for your business.
Consider a scenario where you need to routinely back up a dump of the database at 11:59 PM every day. You can accomplish this with node-cron.
Note: This use case entails setting up a local SQLite database. The finer details of the installation and creation of a database are not covered here. Feel free to substitute with another shell command.
Assume that you have SQLite installed and running on your environment. Given a database named database.sqlite, your shell command for making a database backup may resemble this:
- sqlite3 database.sqlite .dump > data_dump.sql
This command takes the database, database.sqlite, and runs the .dump command, and outputs the result as a file named data_dump.sql
Next, install shelljs, a Node module that will allow you to run the previous shell command:
- npm install shelljs@0.8.4
Create a new cron-dump.js file:
- nano cron-dump.js
Then, require shelljs:
const cron = require('node-cron');
const shell = require('shelljs');
Next, add the following lines of code:
// ...

// Backup a database at 11:59 PM every day.
cron.schedule('59 23 * * *', function() {
  console.log('---------------------');
  console.log('Running Cron Job');
  if (shell.exec('sqlite3 database.sqlite .dump > data_dump.sql').code !== 0) {
    shell.exit(1);
  }
  else {
    shell.echo('Database backup complete');
  }
});
Notice the pattern: 59 23 * * *.
- It defines a value for minute as
59. - It defines a value for hour as
23(or11 PMin a 24-hour clock). - It does not define a day, a month, or day of the week.
This code will run the backup shell command. If it is successful, it will echo a message. Otherwise, if there is an error, it will exit.
Now, run the script:
- node cron-dump.js
At 11:59 PM, you will get the following output:
Output---------------------
Running Cron Job
Database backup complete
You probably do not want to wait for 11:59 PM to verify the task has been executed. You can modify the scheduler to run in a shorter time interval.
Check your server directory. A data_dump.sql file will be present.
Next, let’s look at sending periodic emails.
Step 5 — Exploring Using node-cron to Send Scheduled Emails
node-cron to Send Scheduled EmailsConsider a scenario where you curate a list of interesting links and then email them to subscribers every Wednesday. You can accomplish this with node-cron.
Nodemailer supports test accounts provided by Ethereal Email. Create an Ethereal Account and use the username and password generated for you.
Warning: It is highly recommended that you do not use your personal email account for this step. Consider using a new separate test account to avoid any risk to your personal email account.
Next, install nodemailer, a Node module that will allow you to send emails:
- npm install nodemailer@6.7.2
Create a new cron-mail.js file:
- nano cron-mail.js
Then, require nodemailer:
const cron = require('node-cron');>
const nodemailer = require('nodemailer');
Add a section that defines the mailer and sets the username and password for an email account:
// ...

// Create mail transporter.
let transporter = nodemailer.createTransport({
  host: 'your_demo_email_smtp_host.example.com',
  port: your_demo_email_port,
  auth: {
    user: 'your_demo_email_address@example.com',
    pass: 'your_demo_email_password'
  }
});
Warning: This step is presented for example purposes only. In a production environment, you would use environment variables to keep your password a secret. Do not save your password (credentials) in any code you are uploading to code repositories like GitHub.
Next, add the following lines of code:
// ...

// Sending emails every Wednesday.
cron.schedule('0 0 * * 3', function() {
  console.log('---------------------');
  console.log('Running Cron Job');

  let messageOptions = {
    from: 'your_demo_email_address@example.com',
    to: 'your_demo_email_address@example.com',
    subject: 'Scheduled Email',
    text: 'Hi there. This email was automatically sent by us.'
  };

  transporter.sendMail(messageOptions, function(error, info) {
    if (error) {
      throw error;
    } else {
      console.log('Email successfully sent!');
    }
  });
});
Notice the pattern: 0 0 * * 3.
- It defines a value for minutes and hours as
0and0(“00:00” - the start of the day). - It does not define a day of the month or a month.
- It defines a value for day of the week as
'3'(Wednesday).
This code will use the credentials provided to send an email to yourself. With the subject line: 'Scheduled Email' and the body text: 'Hi there. This email was automatically sent by us.'. Otherwise, if it fails, it will log an error.
Now, run the script:
- node cron-mail.js
On Wednesday, you will get the following output:
Output---------------------
Running Cron Job
Email successfully sent!
You probably do not want to wait for Wednesday to verify the task has been executed. You can modify the scheduler to run in a shorter time interval.
Open the Ethereal Email mailbox. There will be a new 'Scheduled Email' in the inbox.
Conclusion
In this article, you learned how to use node-cron to schedule jobs on a Node.js server. You were introduced to the broader concept of automating repetitive tasks in a consistent and predictable manner. This concept can be applied to your current and future projects.
There are other task scheduler tools available. Be sure to evaluate them to identify which tool is best suited for your particular project.
If you’d like to learn more about Node.js, check out our Node.js topic page for exercises and programming projects.
Thanks for learning with the DigitalOcean Community. Check out our offerings for compute, storage, networking, and managed databases.
About the author(s)
Former Technical Editor at DigitalOcean. Expertise in areas including Vue.js, CSS, React, and more.
Still looking for an answer?
This textbox defaults to using Markdown to format your answer.
You can type !ref in this text area to quickly search our full set of tutorials, documentation & marketplace offerings and insert the link!
hi. I have a question. why should I use node-cron package until I can use setInterval or some kind? thanks for your answer
I have a question.
Sorry for my poor English.
If we restart the server, it also restart the cron, right? If I am running a task in every four hours, will the restart affect my task running intervals. Specifically, If I restart the server after passing 2 hours from the execution of first cron, then will it take 6 hours to run the next task?
It is much better to use OS capabilities to schedule tasks, there is a convenient tool to schedule, run and log tasks: https://github.com/atmajs/cronbee It is designed for nodejs projects, but can be used in any stack.
Can’t use: const cron = require(‘node-cron’);
ECMA6 - your post is a bit outdated
 This work is licensed under a Creative Commons Attribution-NonCommercial- ShareAlike 4.0 International License.
Become a contributor for community
Get paid to write technical tutorials and select a tech-focused charity to receive a matching donation.

DigitalOcean Documentation
Full documentation for every DigitalOcean product.

Resources for startups and AI-native businesses
The Wave has everything you need to know about building a business, from raising funding to marketing your product.
The developer cloud
Scale up as you grow — whether you're running one virtual machine or ten thousand.

Start building today
From GPU-powered inference and Kubernetes to managed databases and storage, get everything you need to build, scale, and deploy intelligent applications.
