By Harry Gonzalez and Anish Singh Walia
 as VPN / NAT Gateway on DigitalOcean")
Disclaimer: Instructions are accurate as of 05/30/2024. Mikrotik is not a product or partner of DigitalOcean. Users are responsible for verifying if all settings are correct.
Introduction
Using a NAT Gateway to provide a single egress IP for all your deployments in DigitalOcean eliminates the need to allow-list multiple IP addresses for the end-users. This detailed tutorial will teach you how to configure Mikrotik’s Cloud Hosted Router as a NAT Gateway in DigitalOcean. You can leverage this setup to configure the IPSec tunnel between DigitalOcean and other clouds.
Prerequisites
You will need the following:
- A DigitalOcean account.
- Access to Mikrotik’s Cloud-Hosted Router Image (Tested on Ver 7.14.3. For other versions, exact steps may vary depending on the release)
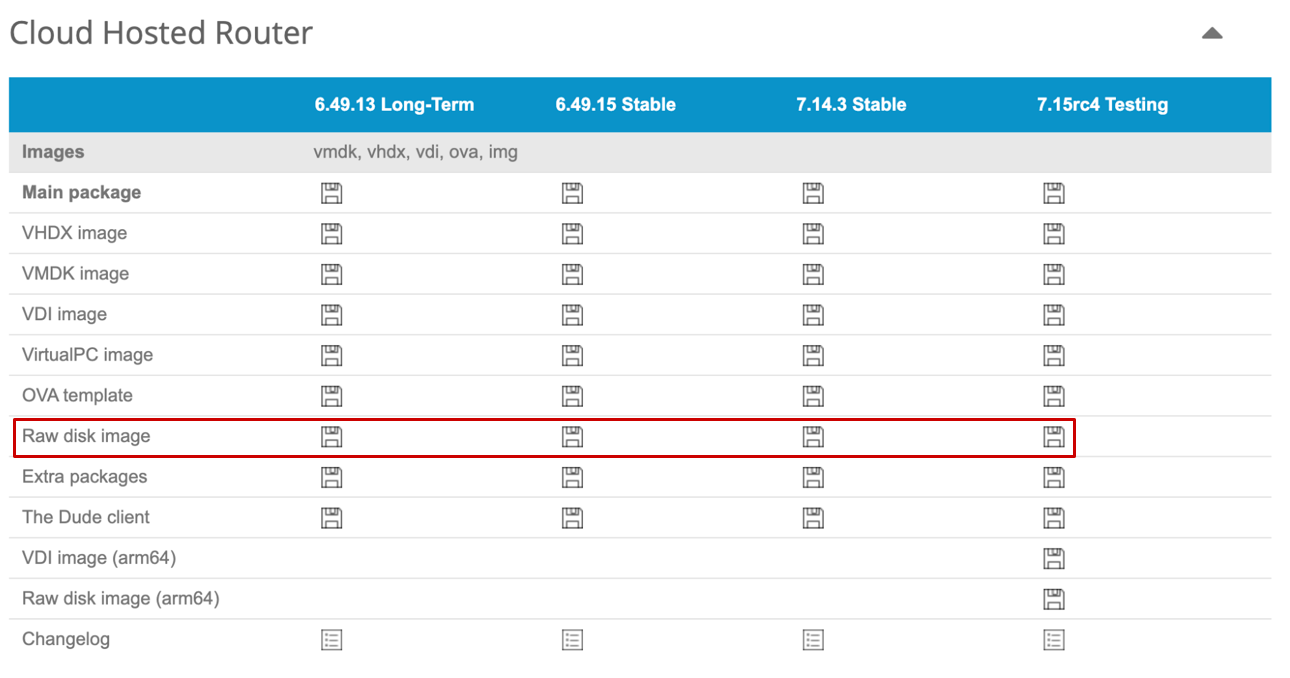
Step 1 - Download and Prepare the CHR Image
Download the Cloud Hosted Router(CHR) from https://mikrotik.com/download. Select the “Raw disk image” for the latest Stable release and unzip the image to a local folder on your system. You should end up with a .img extension file, for example-chr-7.14.3.img
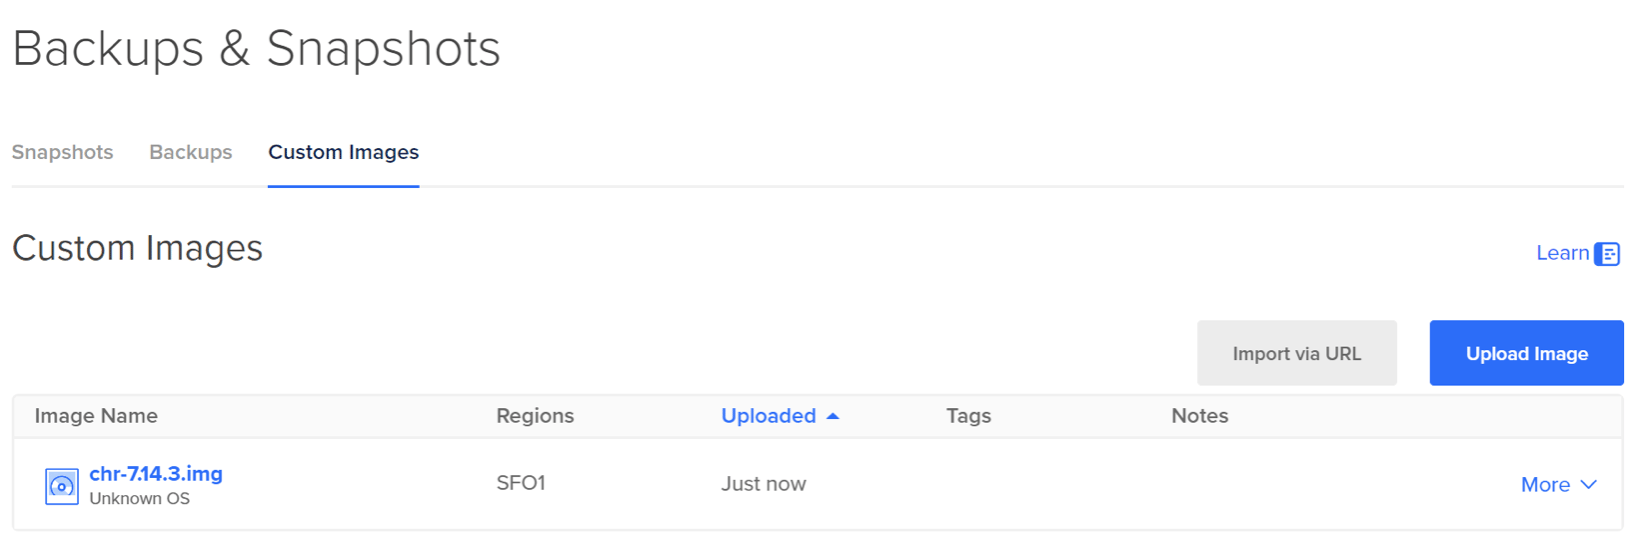
Step 2 - Upload the CHR Image to DigitalOcean
Log in to your DigitalOcean Control Panel
Navigate to Backups & Snapshots -> Custom Images.
Upload the CHR image as a custom image. Select “Unknown” for the distribution type and select the region where you would like to deploy the droplet.
The image importer will not display a progress bar during this process. Please allow at least 20 minutes for the CHR image to be imported, validated, and made available for the region selected on the platform.
Step 3 - Create a Droplet from the uploaded custom image
Mikrotik recommends a minimum of 1GB of RAM. For this example, you can use a $6 Droplet (s-1vcpu-1gb).
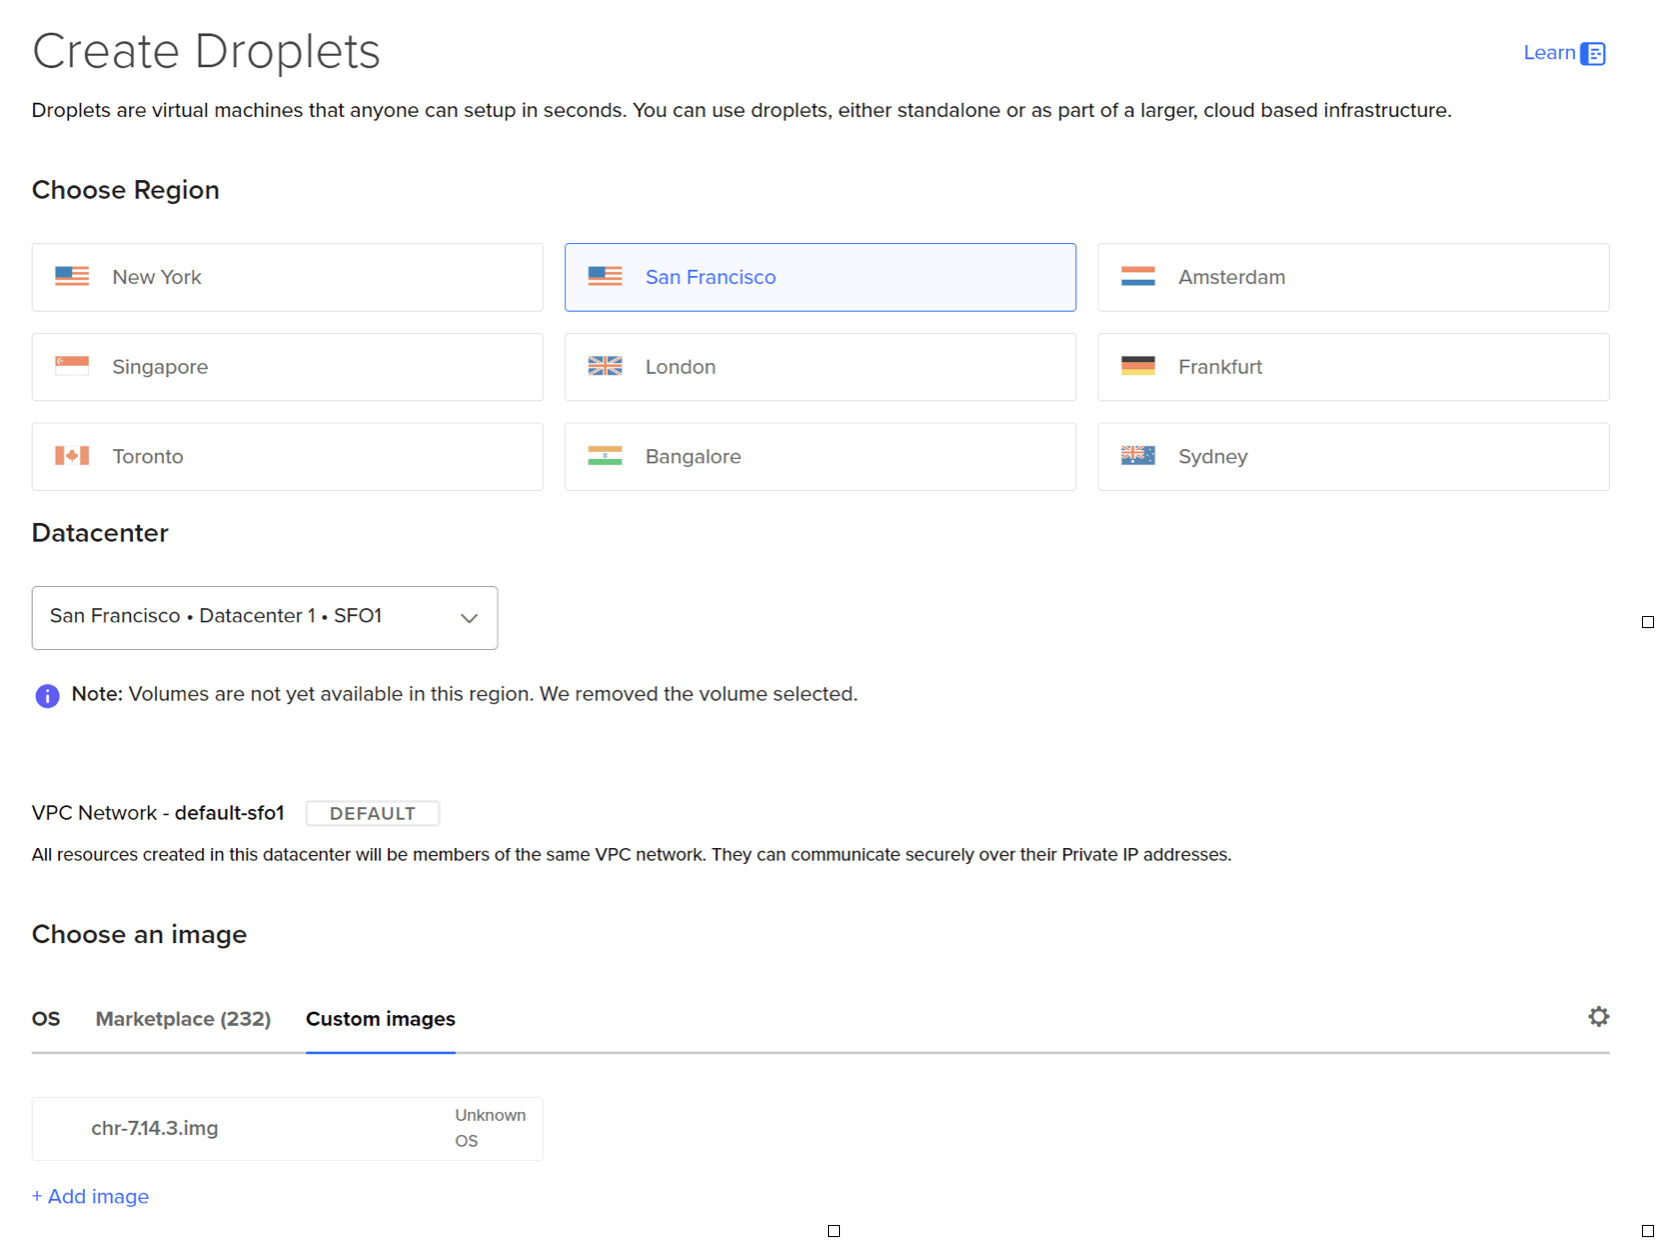
When creating the droplet, select an SSH key to allow the customer image to be created. This SSH key will not be added to the Mikrotik configuration, but it’s required for droplet creation.
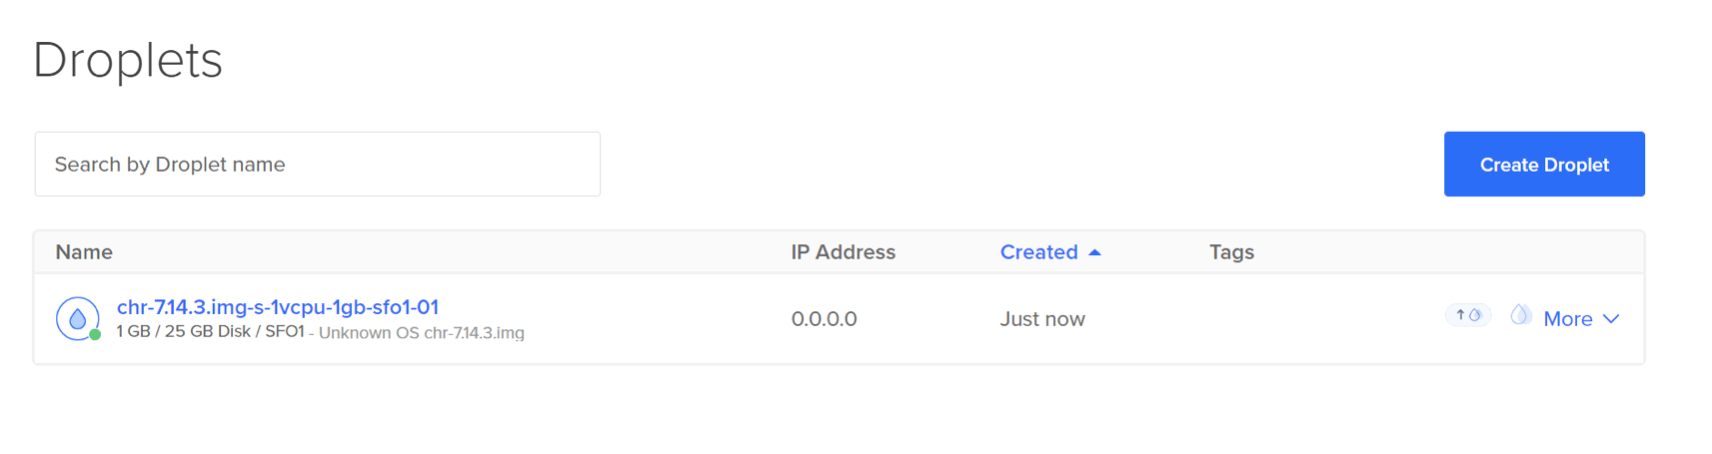
Step 4 - Secure the Image
Once the CHR Droplet is created, it will enable a completely unsecured firewall instance for easy access. You must secure this image by logging into the newly created droplet and configuring a password and basic security settings. Use SSH to configure the initial setup. There are multiple ways to log in for the initial setup (SSH, Web UI, Winbox [Desktop App]).
For this tutorial, you will use SSH to configure the initial configuration.
a. Login with your favorite SSH client as the username “admin” for example, using openssh:
ssh admin@<droplet_ip_address>
b. Accept the Mikrotik License from the SSH and configure a secure password for access to the firewall.
outputDo you want to see the software license? [Y/n]: n

Press F1 for help

Change your password
new password> **********
repeat new password> **********
c. Once the password is configured, you will see the “Password changed” confirmation and have access to the Mikrotik command line :
outputPassword changed
[admin@MikroTik] >
d. Let’s configure a secure account and disable the default admin account. After login in with the new account and making sure it has full access then, disable the default admin account:
/user
add name=<user> password=<pass> group=full
disable admin
e. Let’s configure the interface names:
/interface ethernet
set [ find default-name=ether2 ] disable-running-check=no name=vpc
set [ find default-name=ether1 ] disable-running-check=no name=wan

/interface list
add name=WAN
add name=VPC

/interface list member
add interface=wan list=WAN
add interface=vpc list=VPC
f. By default, CHR images come with no firewall rules. To secure the firewall, you need to add some basic rules and rename interfaces for ease of use, adding the droplet’s public IP address to the firewall’s allow-list.
/ip firewall address-list
add address=<Your_IP_Address> list=allowed_to_router

/ip firewall filter
add action=accept chain=input comment="default configuration" connection-state=established,related
add action=accept chain=input src-address-list=allowed_to_router
add action=accept chain=input comment="Allow ICMP" protocol=icmp
add action=drop chain=input
add action=accept chain=forward comment="Established, Related" connection-state=established,related
add action=drop chain=forward comment="Drop invalid" connection-state=invalid log=yes log-prefix=invalid
add action=accept chain=forward in-interface=vpc
add action=drop chain=forward
g. Let’s configure the firewall DNS to use DigitalOcean DNS resolvers:
/ip dns
set servers=67.207.67.3,67.207.67.2
h. You also need to configure the droplet VPC IP address on the firewall. This can be retrieved from the droplet networking panel. You can use the following commands from the firewall console to do so.
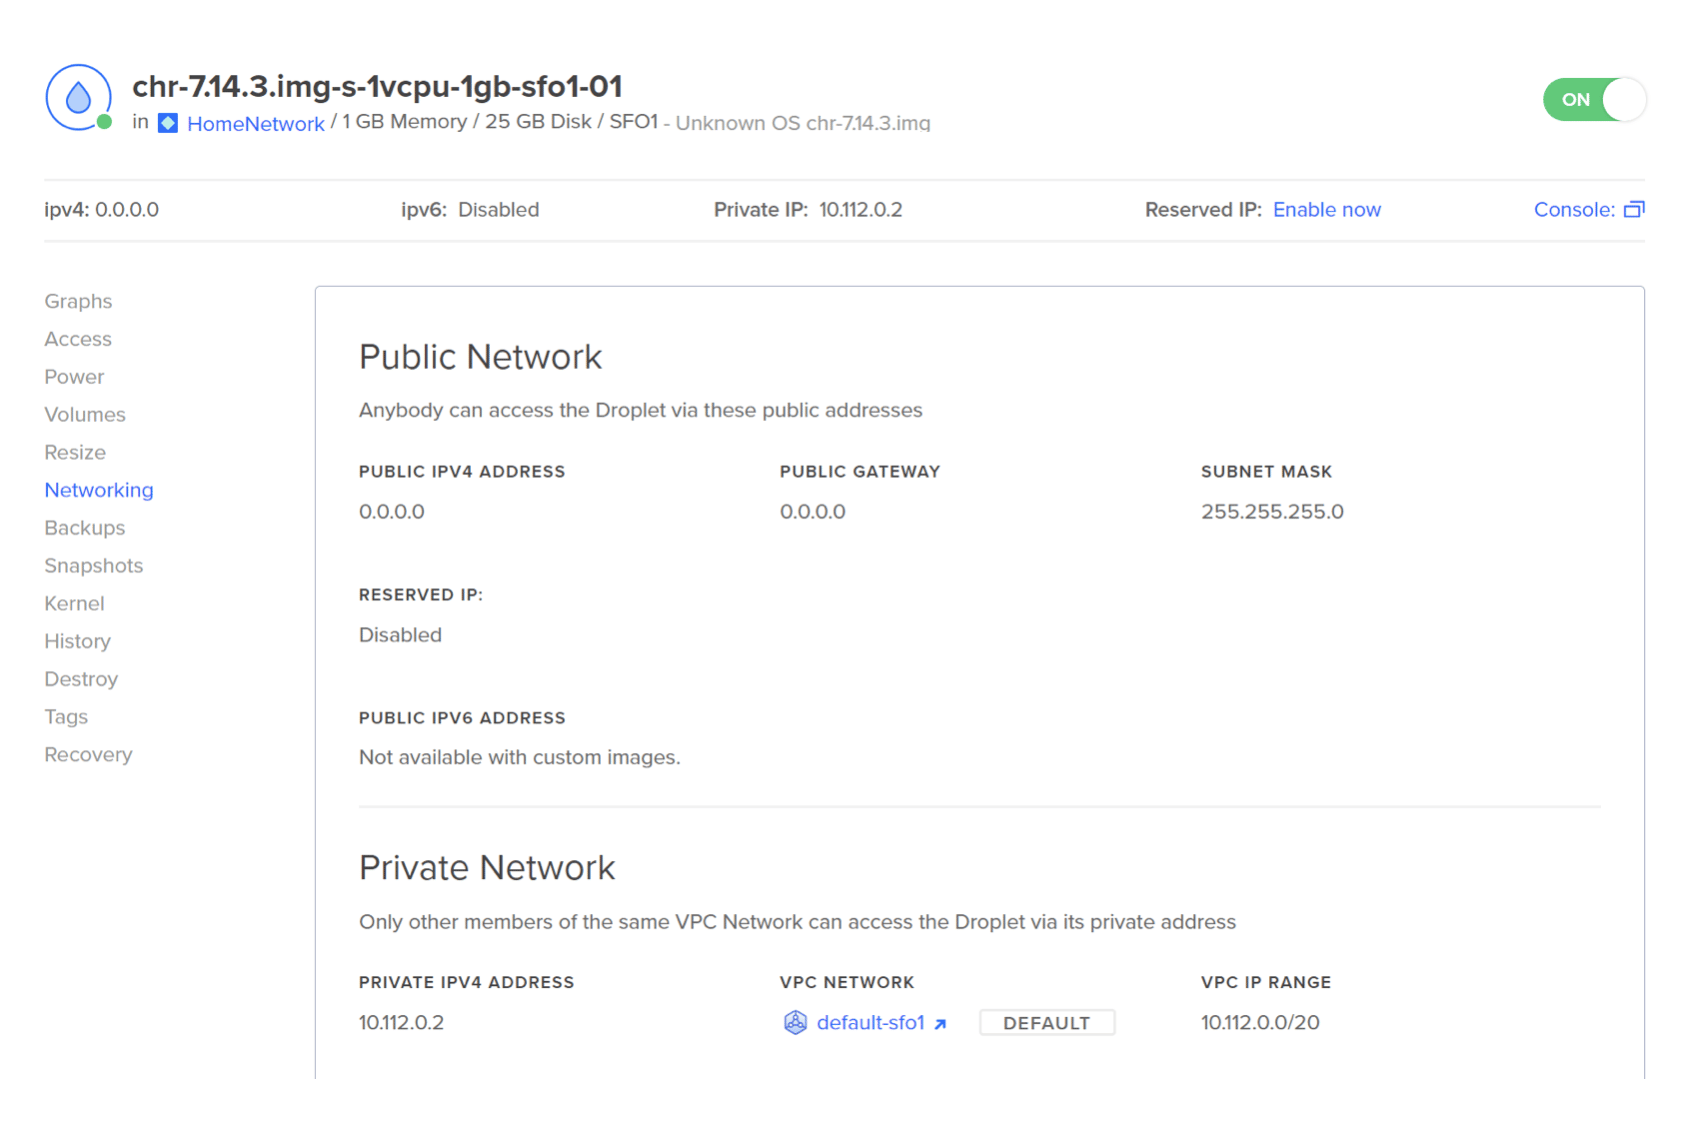
/ip address
add address=<DROPLET_VPC_IP/Subnet> interface=vpc

/ip firewall address-list
add address=<VPC_SUBNET/Subnet> list=allowed_to_router
i. To allow VPC traffic to access the internet, enable NAT:
/ip firewall nat
add action=masquerade chain=srcnat out-interface-list=WAN
j. To make our installation more secure, let’s disable some services that are usually not required in the cloud for a more secure droplet:
/ip service
set telnet disabled=yes
set ftp disabled=yes
set www disabled=yes
set api disabled=yes
set api-ssl disabled=yes
k. By default, the CHR router comes with a free trial License; once you have your gateway fully working to activate an already purchased license, you will need to log in with your Mikrotik Portal credentials to activate it:
/system license
renew account=<loginname> password=<pass> level=p1
Step 5 - Configure the Backend droplets to set the static route
Once you configure the Droplet as NAT Gateway using Mikrotik’s CHR, configure the backend droplets to set the static route pointing to the NAT Gateway and verify the NAT Gateway setup as detailed in the How to Configure a Droplet as a VPC Gateway guide.
Conclusion
In this tutorial, you learned how to use Mikrotik’s Cloud Hosted Router image to configure a DigitalOcean Droplet as a NAT Gateway. By leveraging this setup, you can utilize a single egress NAT Gateway for all your resources in DigitalOcean, thus avoiding the need to allow-list multiple egress IPs. As detailed here, this setup can be extended to establish IPsec tunnels between clouds, providing a secure connection for inter-cloud communications.
Thanks for learning with the DigitalOcean Community. Check out our offerings for compute, storage, networking, and managed databases.
About the author(s)
I help Businesses scale with AI x SEO x (authentic) Content that revives traffic and keeps leads flowing | 3,000,000+ Average monthly readers on Medium | Sr Technical Writer(Team Lead) @ DigitalOcean | Ex-Cloud Consultant @ AMEX | Ex-Site Reliability Engineer(DevOps)@Nutanix
Still looking for an answer?
This textbox defaults to using Markdown to format your answer.
You can type !ref in this text area to quickly search our full set of tutorials, documentation & marketplace offerings and insert the link!
 This work is licensed under a Creative Commons Attribution-NonCommercial- ShareAlike 4.0 International License.
Become a contributor for community
Get paid to write technical tutorials and select a tech-focused charity to receive a matching donation.

DigitalOcean Documentation
Full documentation for every DigitalOcean product.

Resources for startups and AI-native businesses
The Wave has everything you need to know about building a business, from raising funding to marketing your product.
The developer cloud
Scale up as you grow — whether you're running one virtual machine or ten thousand.

Start building today
From GPU-powered inference and Kubernetes to managed databases and storage, get everything you need to build, scale, and deploy intelligent applications.
