
NocoDB is an open-source no-code database platform that allows you to work with databases in the form of intelligent, intuitive spreadsheets. It connects to relational databases and turns them into easily configurable interfaces, enabling you to build no-code applications easily with teams.
NocoDB currently works with relational databases like MySQL and PostgreSQL. Its App Store lets you connect to third-party tools like Slack, and Discord amongst a couple of other messaging platforms to automate workflows. NocoDB also facilitates programmatic access to APIs so you can build integrations with Zapier and any other custom applications.
In this tutorial, we’ll explore how you can use NocoDB’s self-hosted option deployed on DigitalOcean with Managed Databases and App Platform.
Getting Started
To kickstart deployment first make sure you have the following things in place:
- Any code editor of your liking (I highly recommend VS Code)
- Node installed on your system (Head over to this link if you don’t have it)
- A GitHub Account
- A DigitalOcean Account (if you don’t have one yet, visit this link and create one for free)
Do follow the steps below in the order that they are mentioned so you don’t run into issues.
Creating a Database
We will be using MySQL as our database of choice to be the base of NocoDB. Head to Managed Databases on DigitalOcean and click “Create Database Cluster”. In the new window, select the data center region that’s closest to you. In the prompt that reads “Choose a database engine”, select “MySQL”.
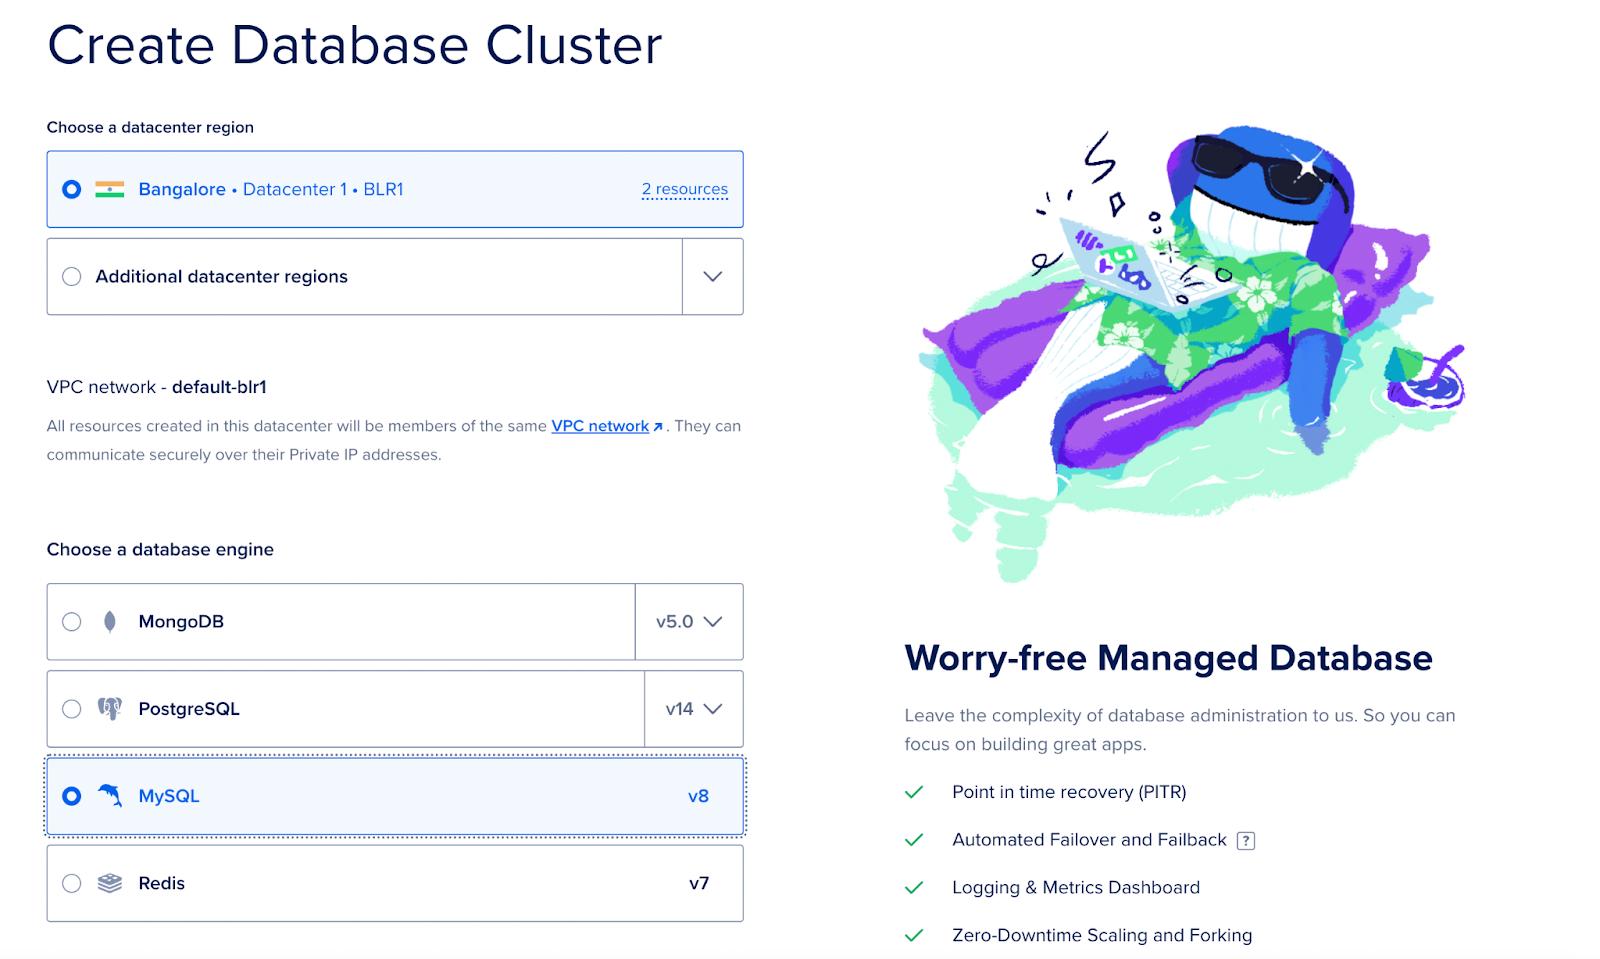
Once you are through with this, choose the database configuration that works best for you, give your cluster a unique name or let it stay as is and then select the project under which you would like to house this deployment. With these you are all set, simply click on “Create Database Cluster”. Wait for the cluster to be fully provisioned to proceed further.
Modifying the Cluster
By default, you would be unable to create or change any tables without a primary key on Managed Databases, which might be an issue with NocoDB, so in order to change this setting you need to configure the database just provisioned by making a request to DigitalOcean’s API.
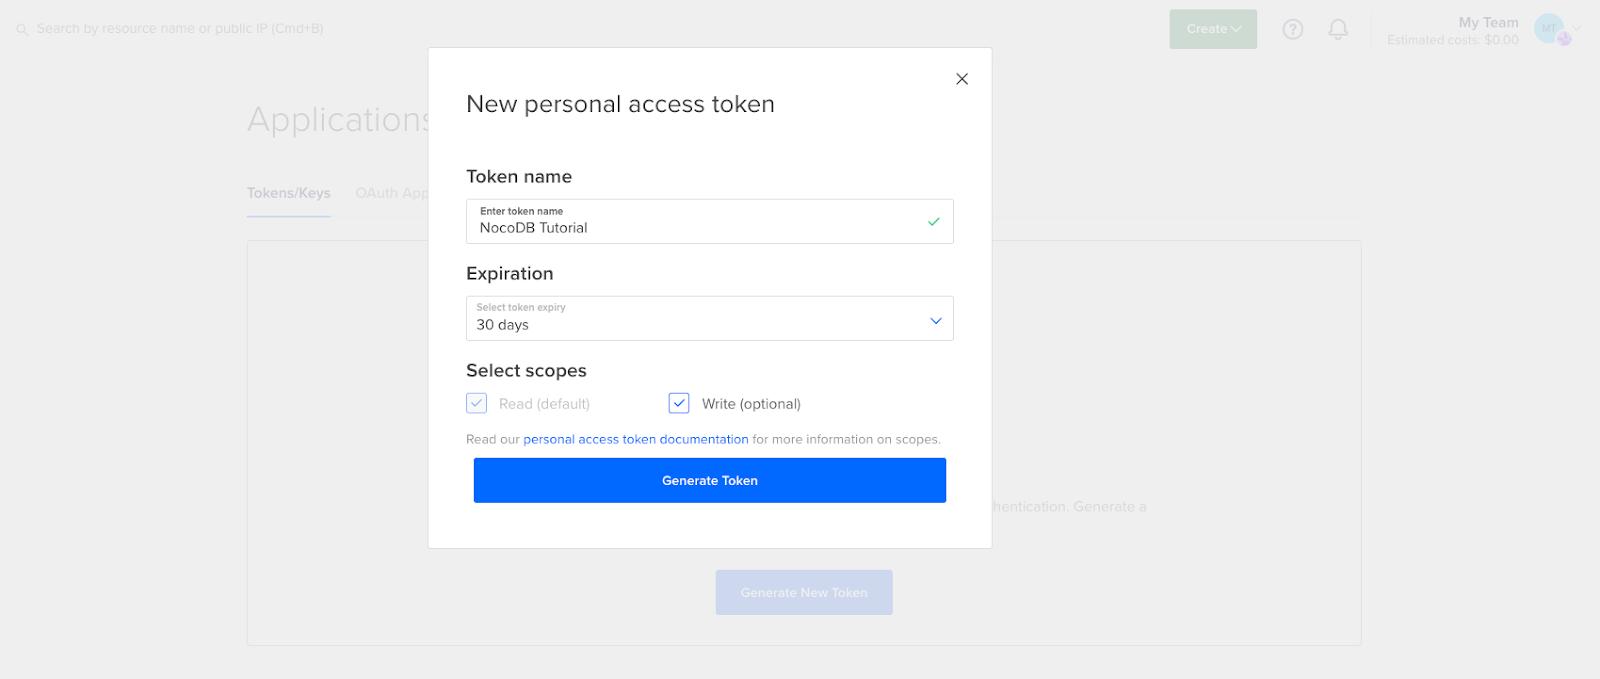
Head over to https://cloud.digitalocean.com/account/api/tokens and create a Personal Access Token to access the API. Click on “Generate New Token”, enter a name for the said token and then select an expiration period. We highly recommend setting it to the lowest option, which is 30 days. Once done, click on “Generate Token”.
Now copy the generated token and make a GET request to https://api.digitalocean.com/v2/databases using any API Platform of your choice. We have used Thunder Client which is an excellent VS Code API Client Extension. Add the AUTH Token you just copied as a Bearer, which you can find under the “Auth” tab on the extension. Make sure you have selected GET as the type of request and hit “Send”.
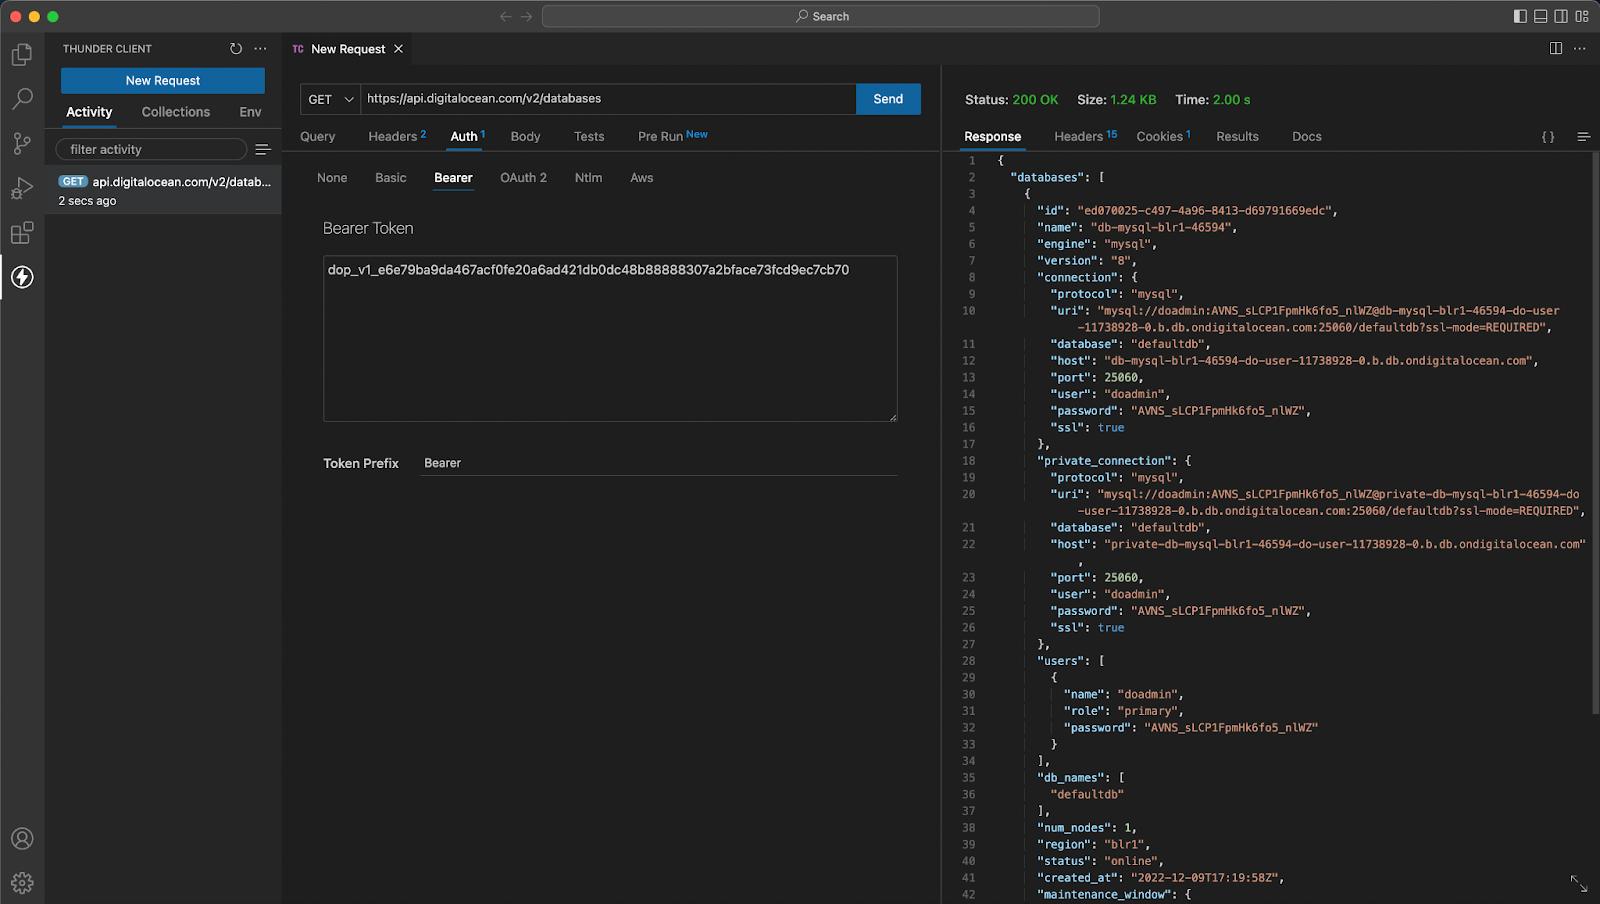
Now check the “Response” Tab towards your left to find the Database Cluster ID for the Managed Database you created earlier. Ideally, it should be on Line 4 unless you have some other databases on your account, in which case you’d have to hunt for this ID using the cluster name (Hint: Use the Find Command). Copy this ID.
Now you need to send a PATCH Request using the same Bearer AUTH Token. Add https://api.digitalocean.com/v2/databases/{YOUR_DATABASE_CLUSER_ID}/config as the required URL and replace {YOUR_DATABASE_CLUSTER_ID} with the ID you copied earlier. Now click on the “Body” tab and under “Json”, enter the following Payload:
{"config": { "sql_require_primary_key": false }}
Hit “Send” and you should now receive a response code/Status 200 or OK. You have successfully removed the constraint.

Installing NocoDB
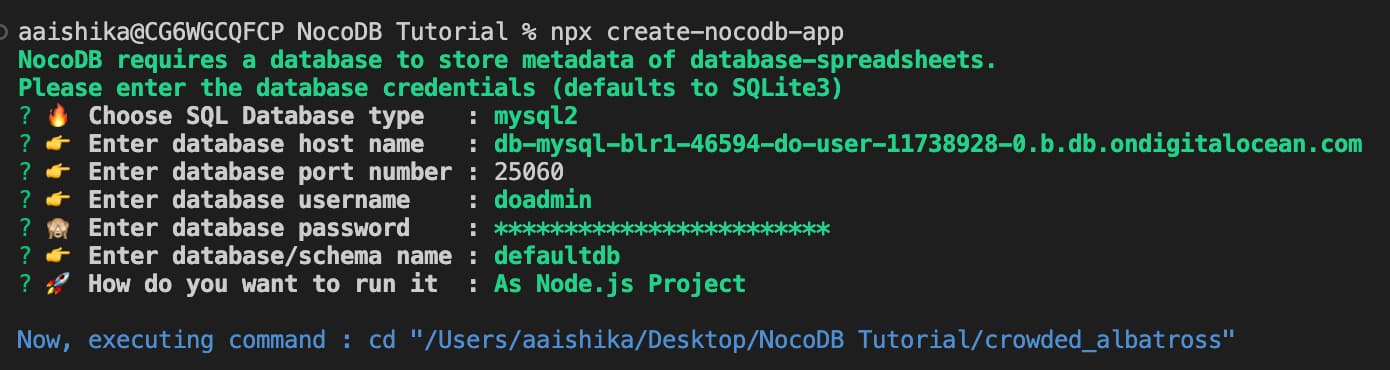
Considering you already have Node installed, open your terminal and enter the following command:
npx create-nocodb-app
If you receive a notification similar to this, press y and continue.

You should now be greeted by an interactive configuration console, here’s how to fill out the details:
- Choose SQL Database type: Select “mysql2” using arrow keys
- Enter database host name: Head over to your Database Cluster Console. Under Connection Details, select “Public Networks” and from the adjacent dropdown, choose “Connection Parameters”.

From here, copy the “Host” details and enter the same in the terminal.
- Enter database port number: From the same Connection Parameters, copy and paste the port number.
- Enter database username: Find the username towards the bottom of the Parameters. By default it is set to “doadmin”.
- Enter database/schema name: You can find this right next to User, named Database. By default, it is “defaultdb”.
- How do you want to run it: Using the arrow keys, select “As Node.js Project”.
Your configuration console should look like this:
Hit enter and let NocoDB execute a couple of commands. If everything works, you would be able to see this in the terminal.
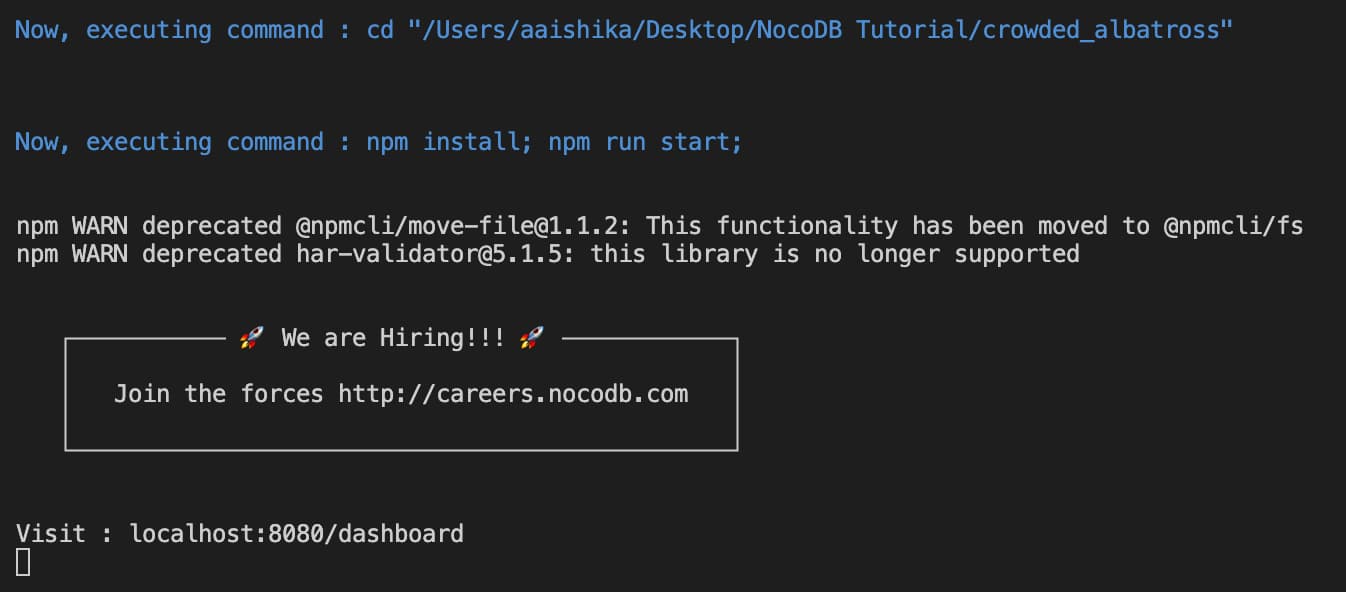
To check this visually, head over to localhost:8080/dashboard. You should be greeted by the following dashboard:
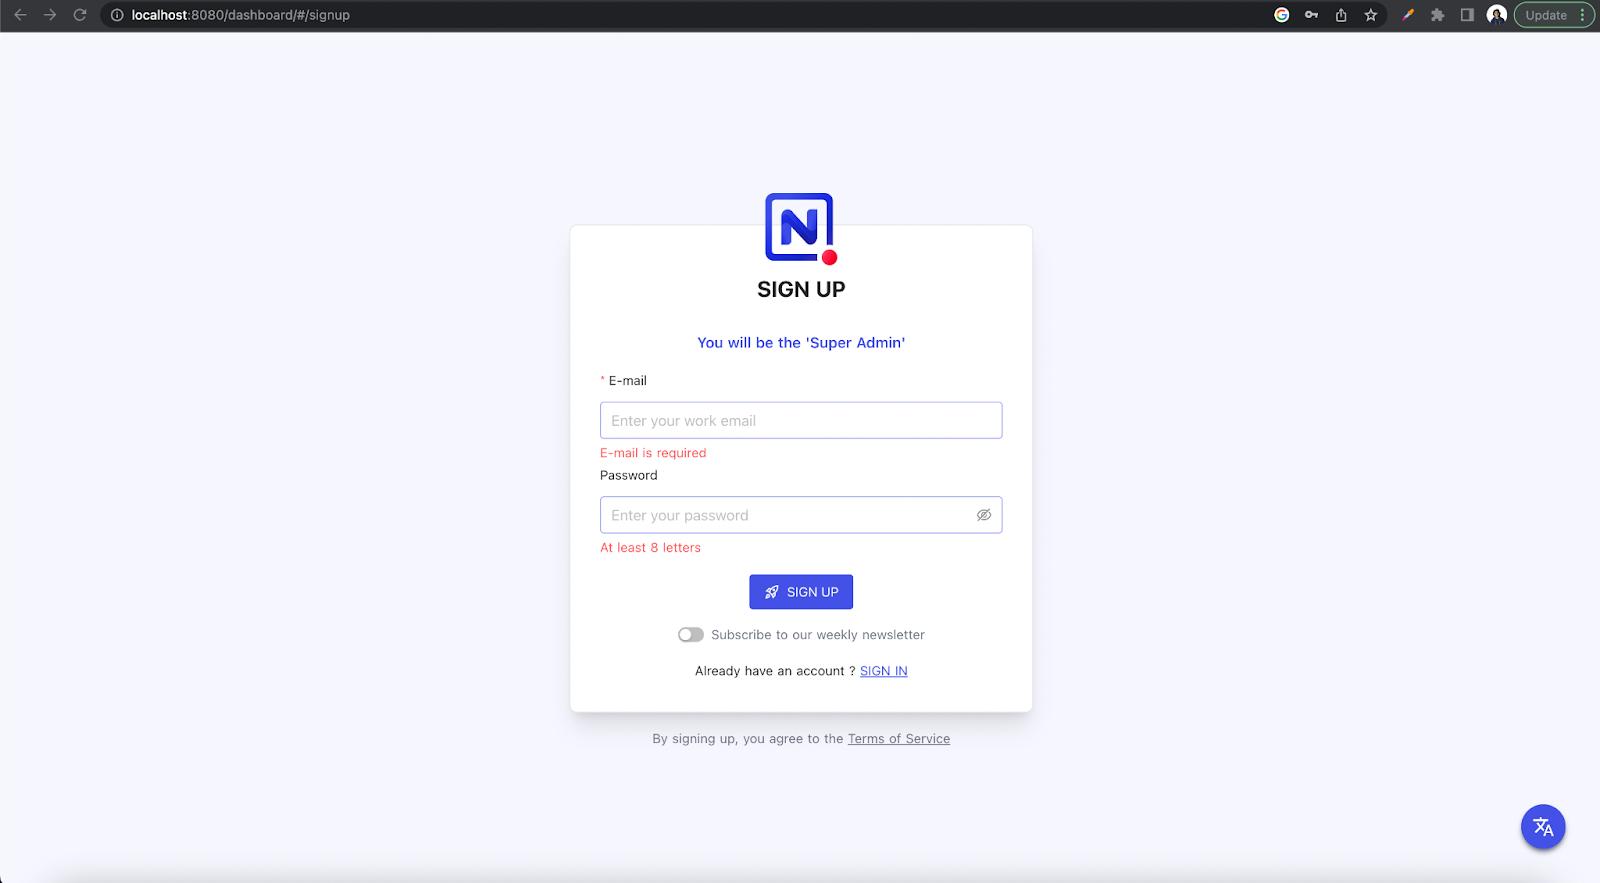
With this, you have successfully created an implementation of NocoDB locally. Now let’s deploy this on the App Platform.
Uploading the Codebase on GitHub
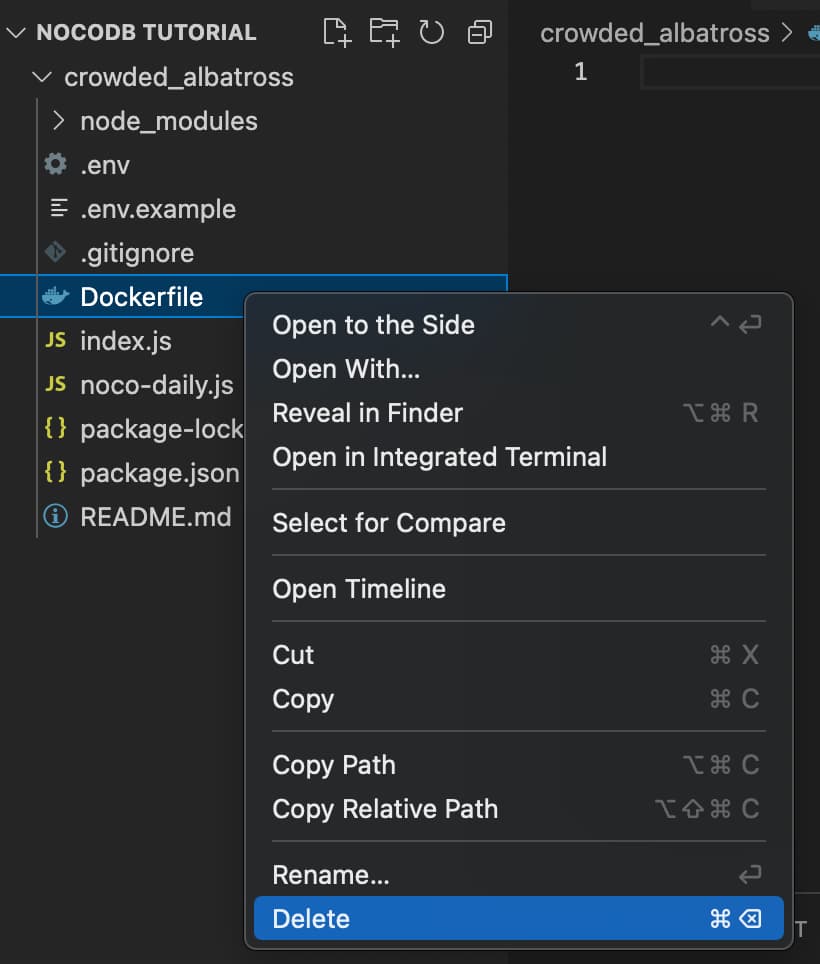
We will be deploying NocoDB on DigitalOcean App Platform by connecting a GitHub repository housing our codebase. Before you host your code on GitHub, make sure you remove the Dockerfile from the root directory as we are not using Docker. This simplifies the process.
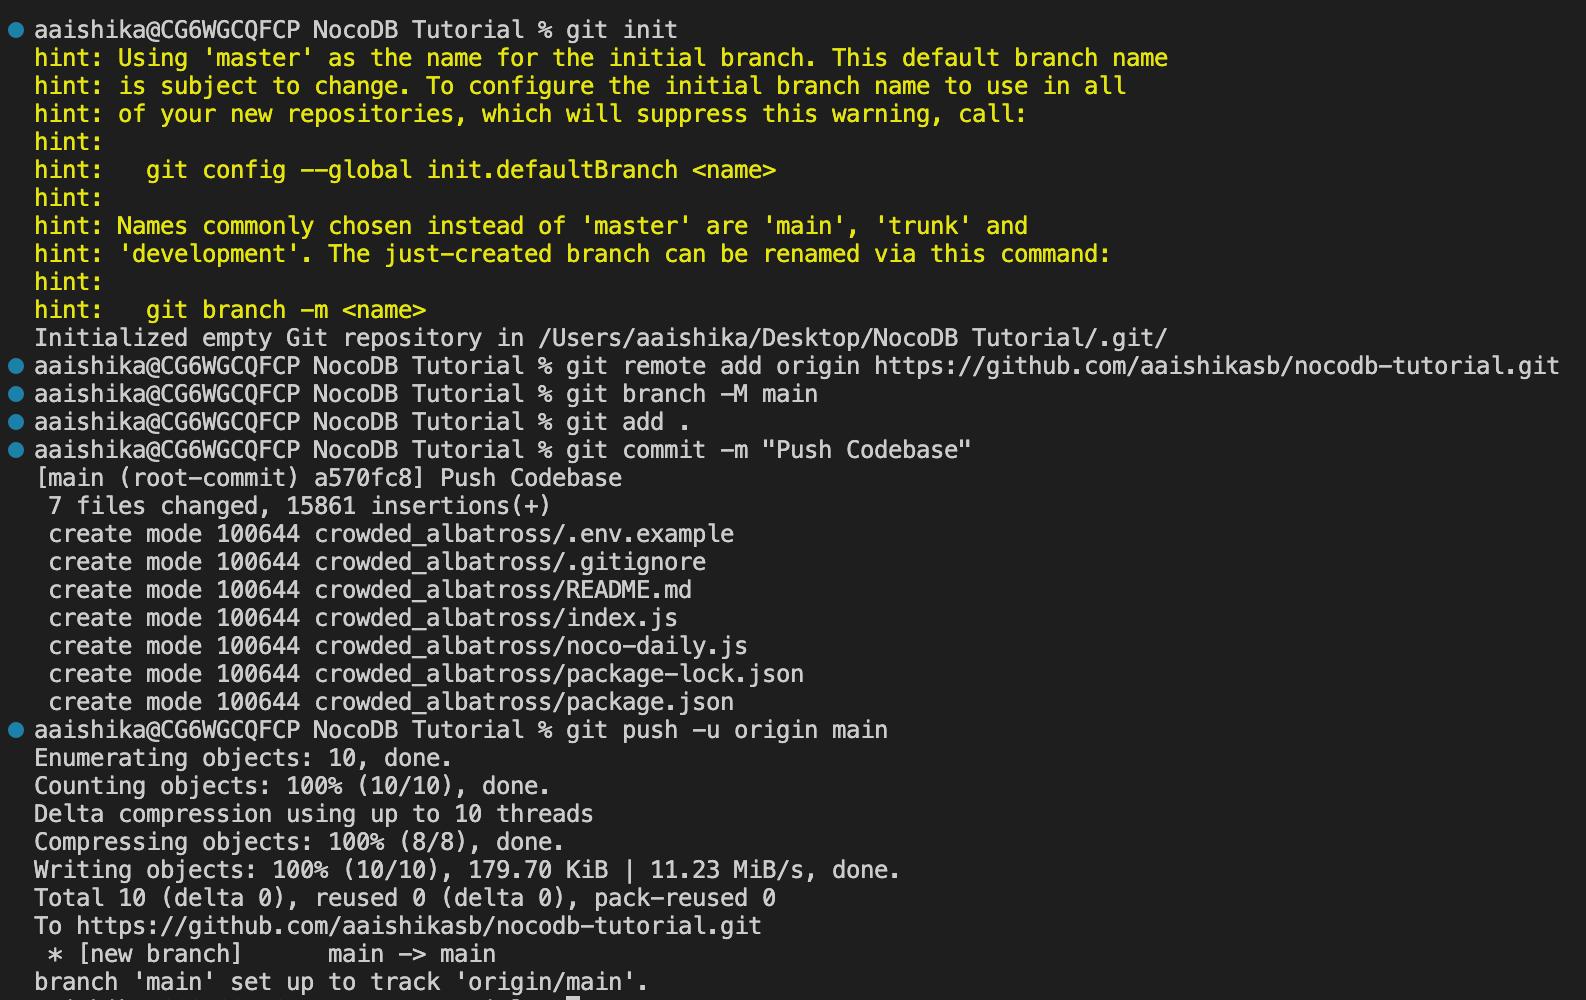
Head over to GitHub and create a new empty repository. Open a new terminal tab and enter the following commands, replacing {USERNAME} and {REPOSITORY} with your details:
git init
git remote add origin https://github.com/{USERNAME}/{REPOSITORY}.git
git branch -M main
Go to the .gitignore file in the root directory and make sure you remove “package-lock.json” from the file. Now execute the following commands:
git add .
git commit -m “Push Codebase”
git push -u origin main
Your terminal should resemble this:
You can now go back to your GitHub repository and check if it is populated with all the required files.
Deploying on App Platform
Head over to DigitalOcean App Platform and select “GitHub” as the Service Provider. Connect your GitHub Account to DigitalOcean if you haven’t done so already and then select the repository that you just created and pushed your code to. Select the Branch as main, which should be populated by default. You can choose to uncheck “Autodeploy”, which is a helpful feature that re-deploys your applications whenever there are new updates on the repository. Once done, select “Next”.
In the next window “Environment Variables”, add a Global Variable “NC_DB” and add the content from the .env file from your repository as the Value to the Key.
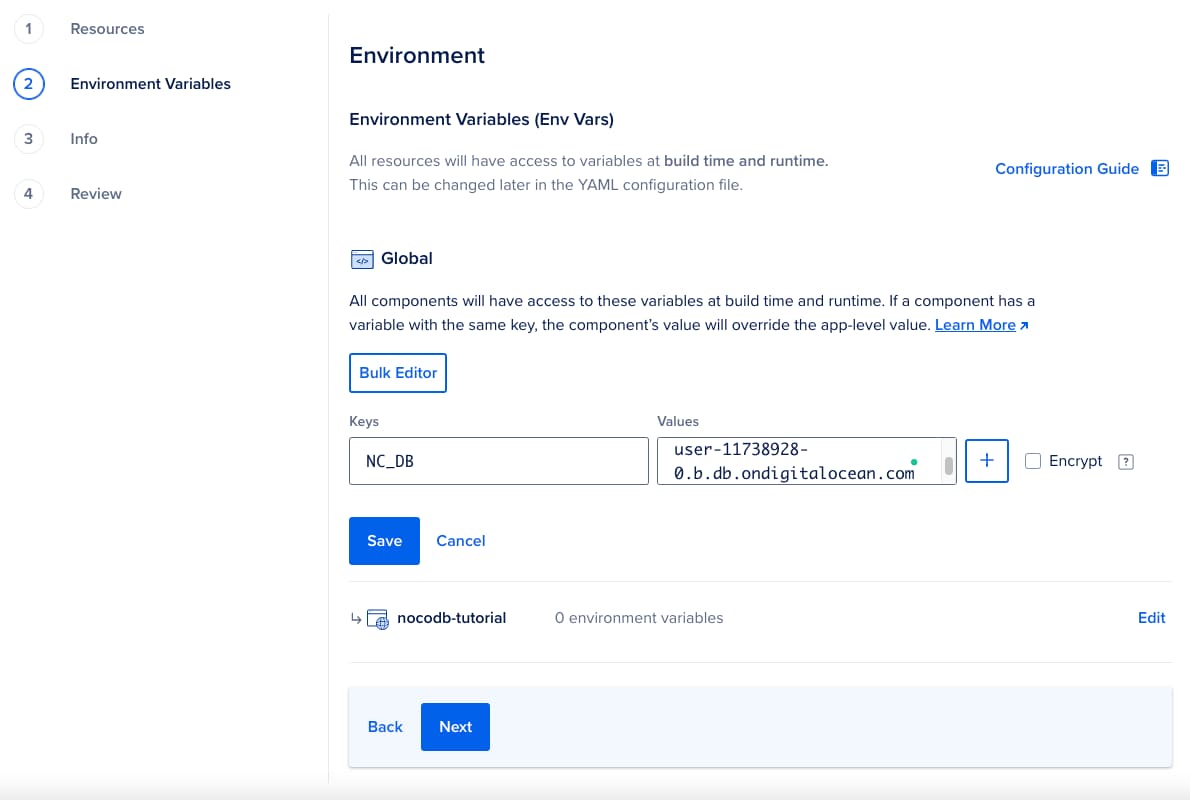
Click on “Save” and then “Next”. This is because .env files are generally included in the .gitignore file and are not available on the GitHub repository by default and instead of exposing the environment variables, it is a better practice to add them here.
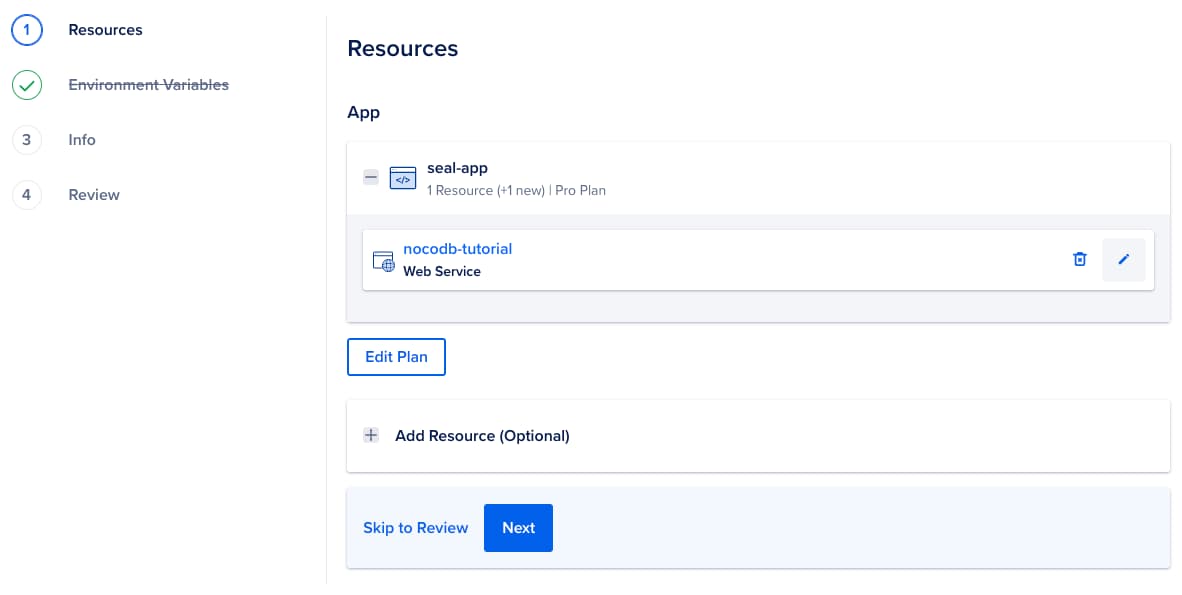
Go back to “Resources”, housed above “Environment Variables” and click on the Edit icon, denoted by a Pencil next to Web Services.
Scroll down to find the option that reads “HTTP Request Routes” and make sure that there are no additional routes added. It should be similar to this:

You can choose “Skip to Review” to expedite the process or check out the “Info” tab to rename the app, or change the Project or the region. Once done, go through all the details in the “Review” tab.
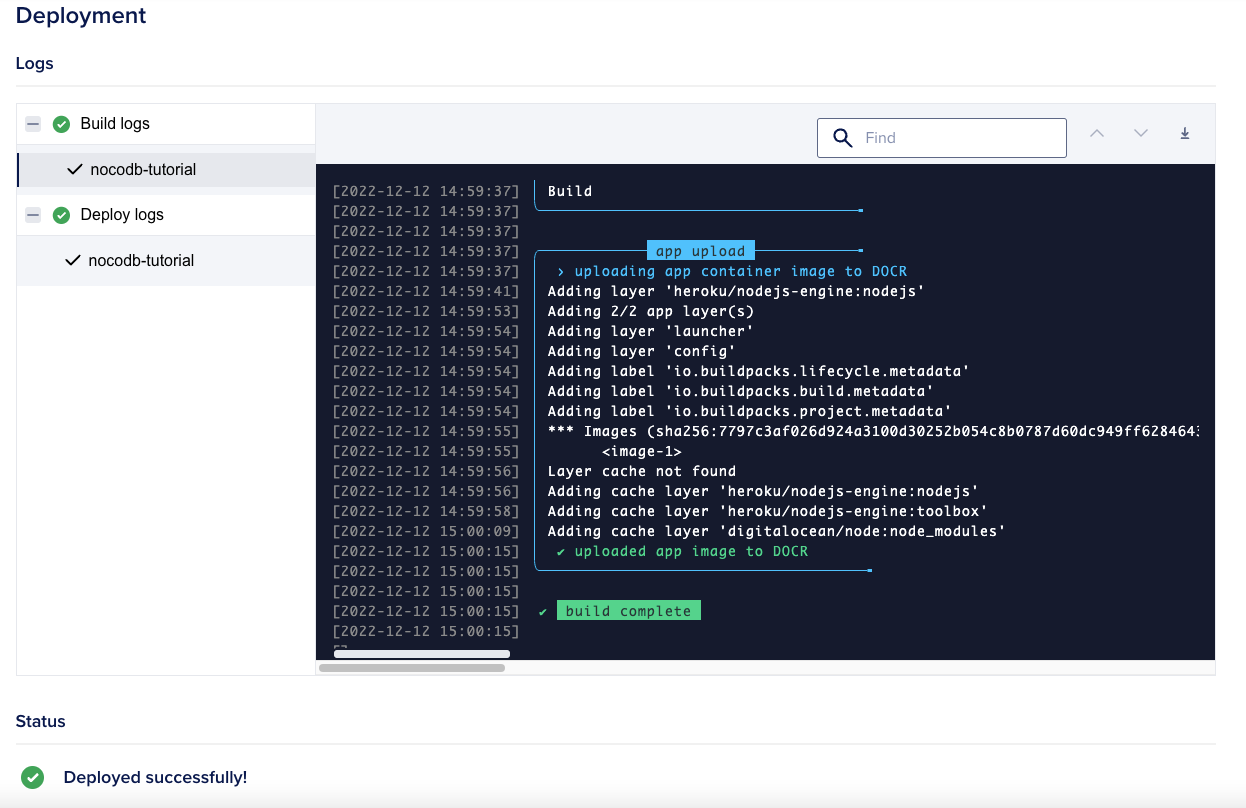
You can also choose to Edit your Plan for cost-effective options at this step and if they look good to you, click on “Create Resources”. This should trigger manual deployment of the app. You can see all the details under “Build Logs” in the “Activity” Tab. You’ll see the following if the build is successful:
To check your deployment, scroll above and click on “Live App”. You should once again be able to see the NocoDB Dashboard Login.

All done! You have successfully deployed your implementation of NocoDB using DigitalOcean Managed Databases and App Platform!
Using NocoDB
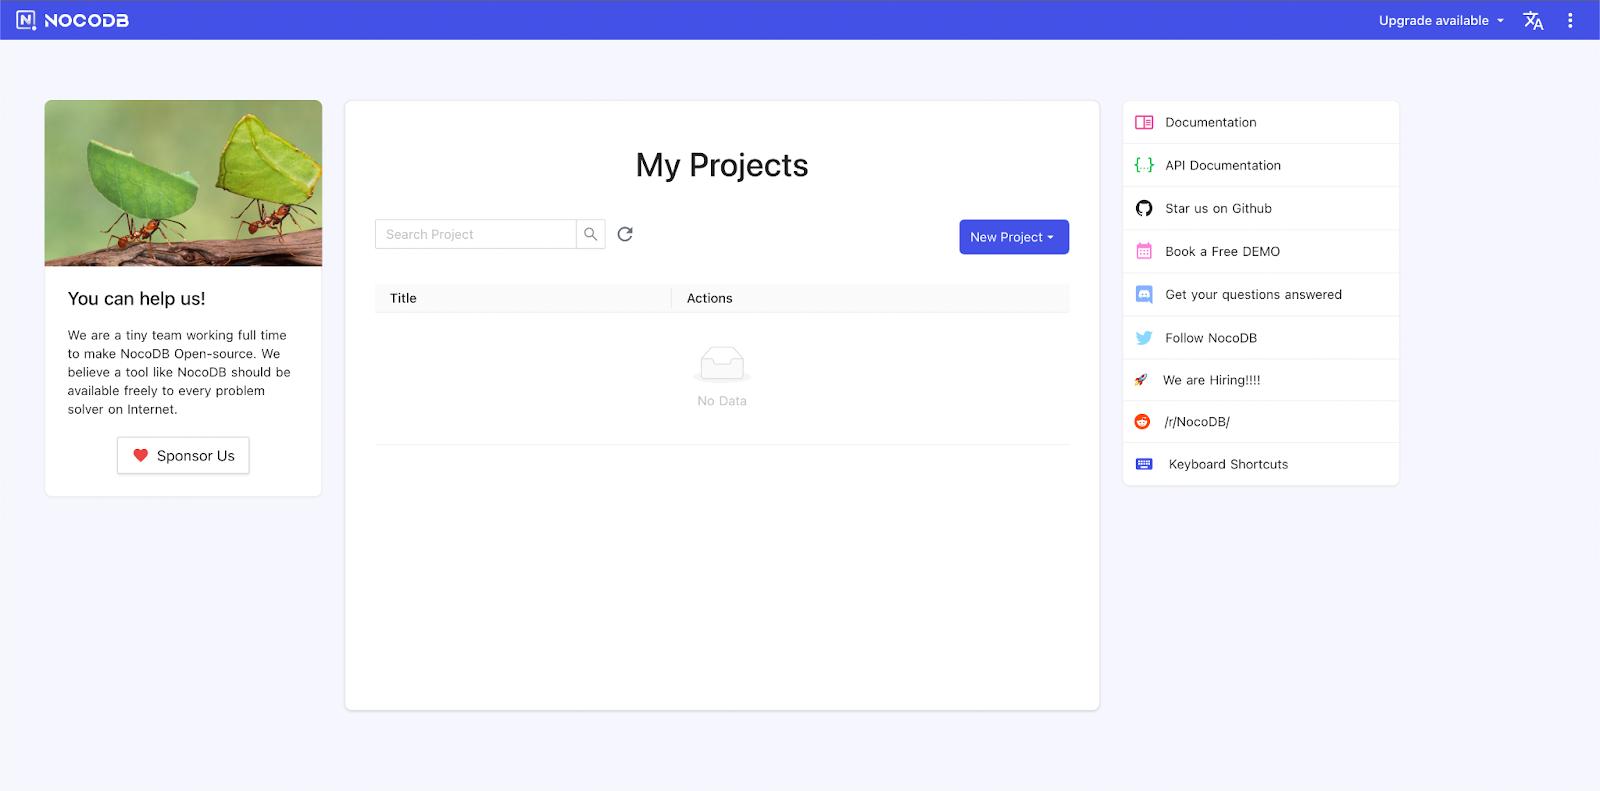
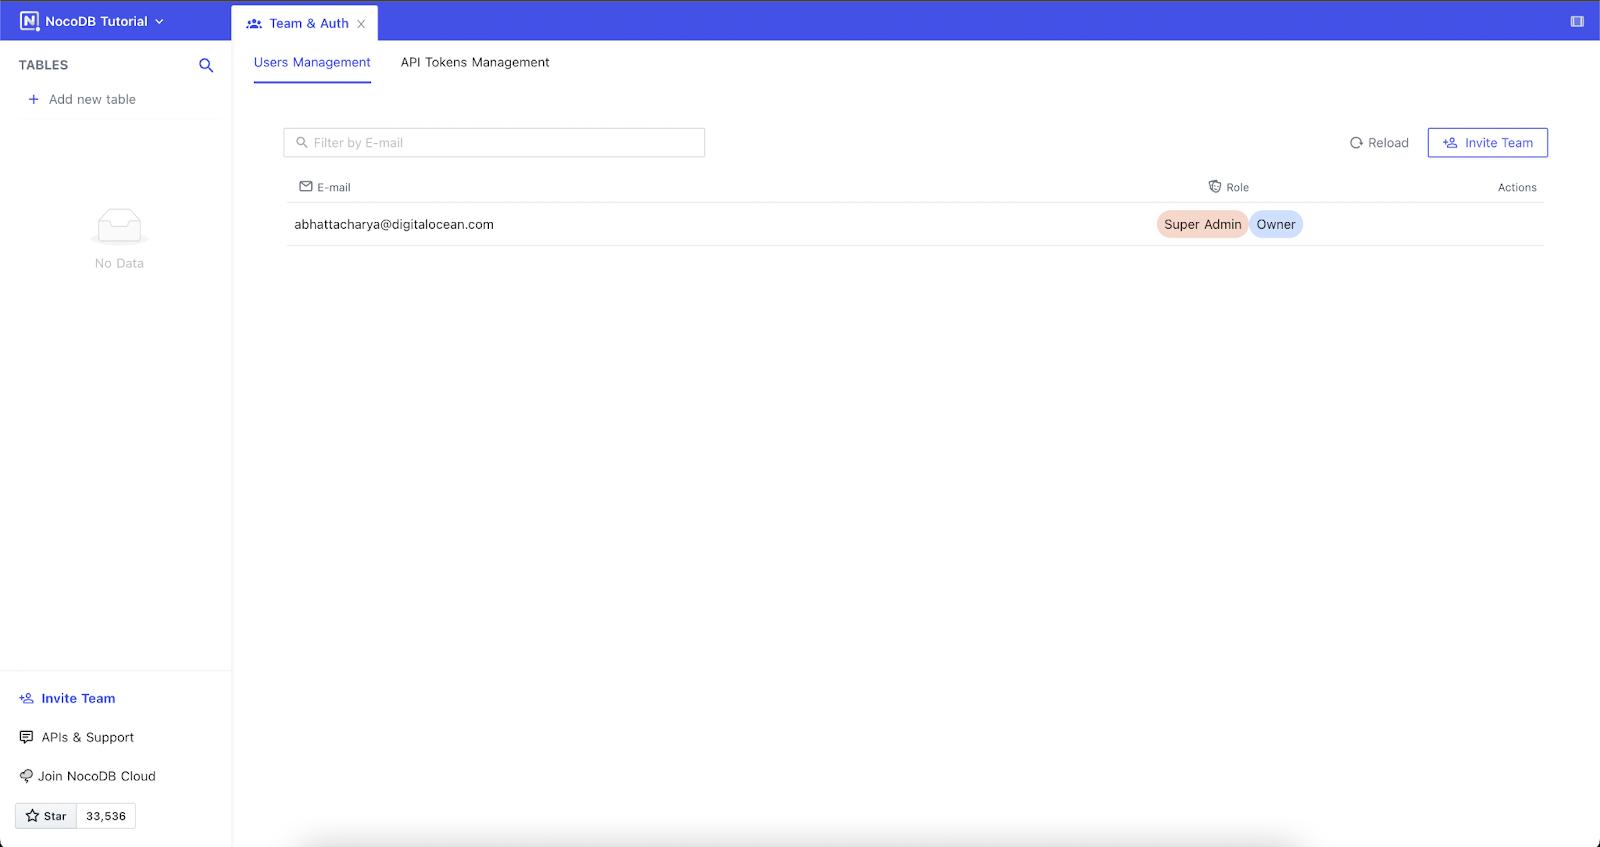
Once you log in to NocoDB after creating an account, you’ll see the following screen:
To start a new project, click on the button that says “New Project” and choose “Create Project” from the dropdown. Give the project a name in the next window and that should be it. You will be redirected to the newly created project’s dashboard wherein you can add new users and add new tables.
To create a new table, click on the “Add New Table” button towards the top left corner of the screen. In the pop-up, add the name of the table and click on the “Show more” button to choose the default columns you wish to have in the table.
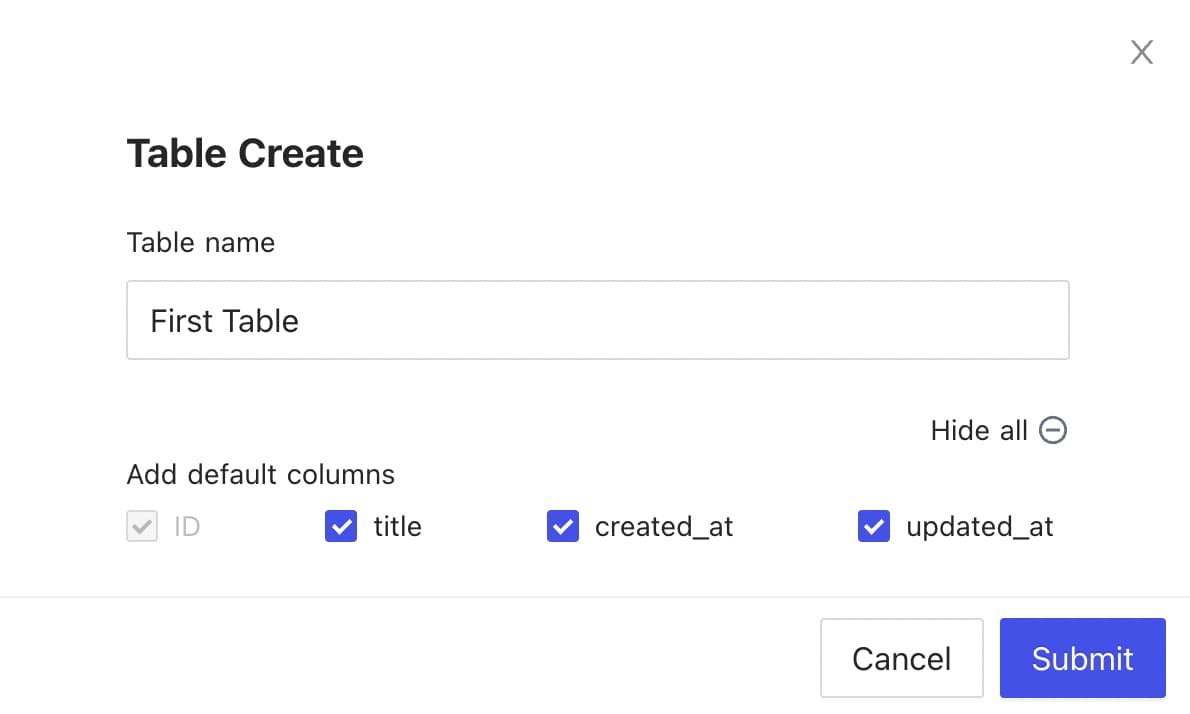
To proceed further, click on “Submit” and you should be taken to a new Table tab. Notice the bottom right corner of the screen, which allows you to create different views in the form of Grid, Gallery, Kanban, or Form.
To create a new Form view of the table, simply click on the option that reads “Form” from the list, give it a name and you’d be able to see a form editor which looks like this:
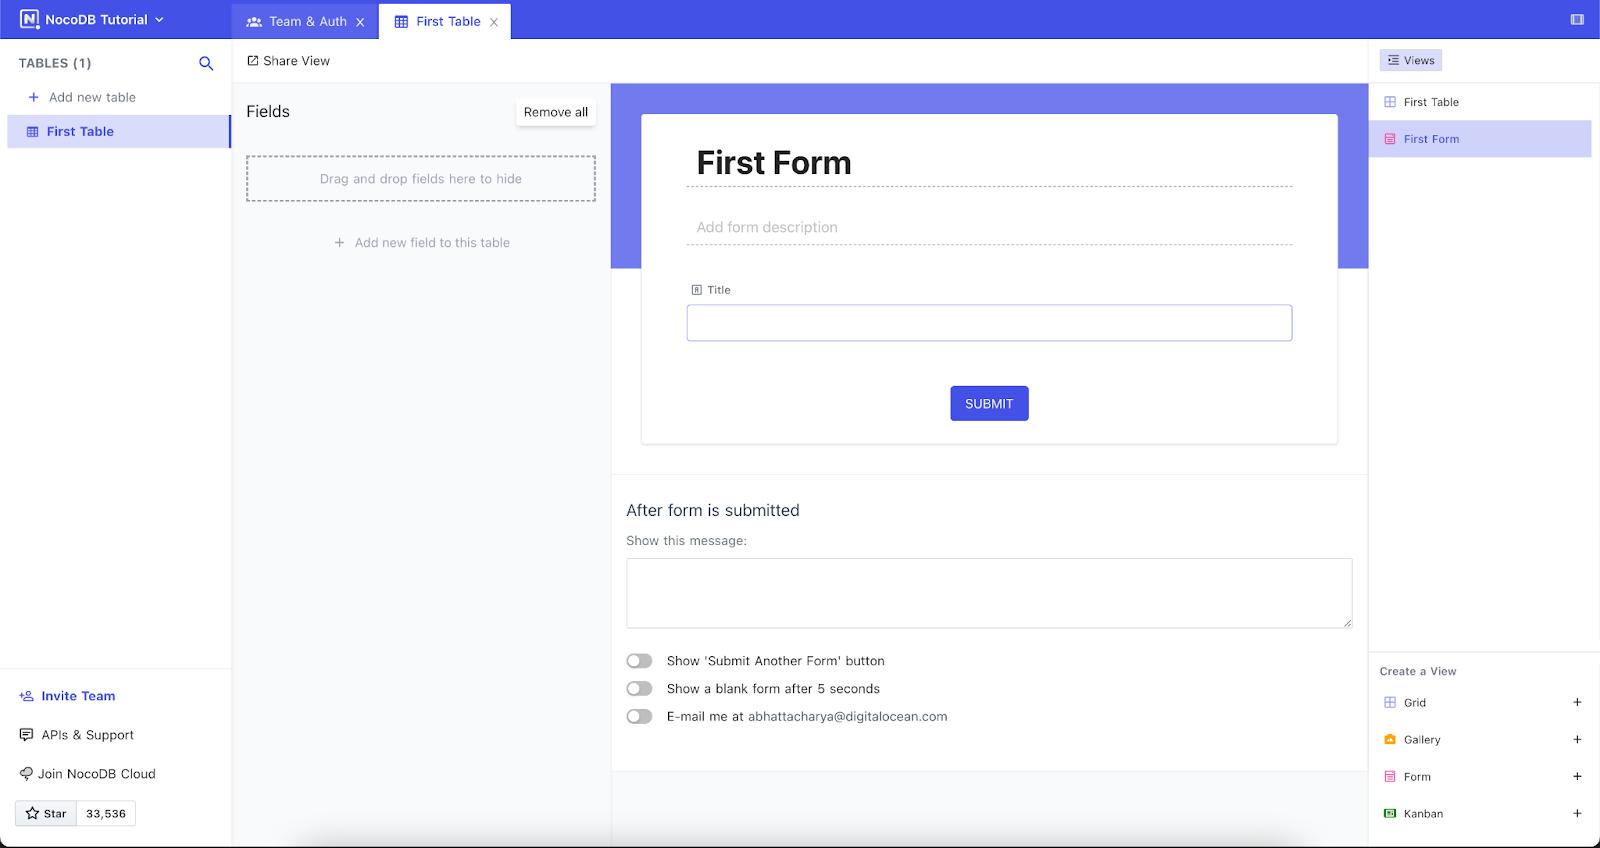
To add new fields to the form, make changes to the table from within the same interface. Forms are easily customizable and once you’re ready to share the form, click on “Share View”.
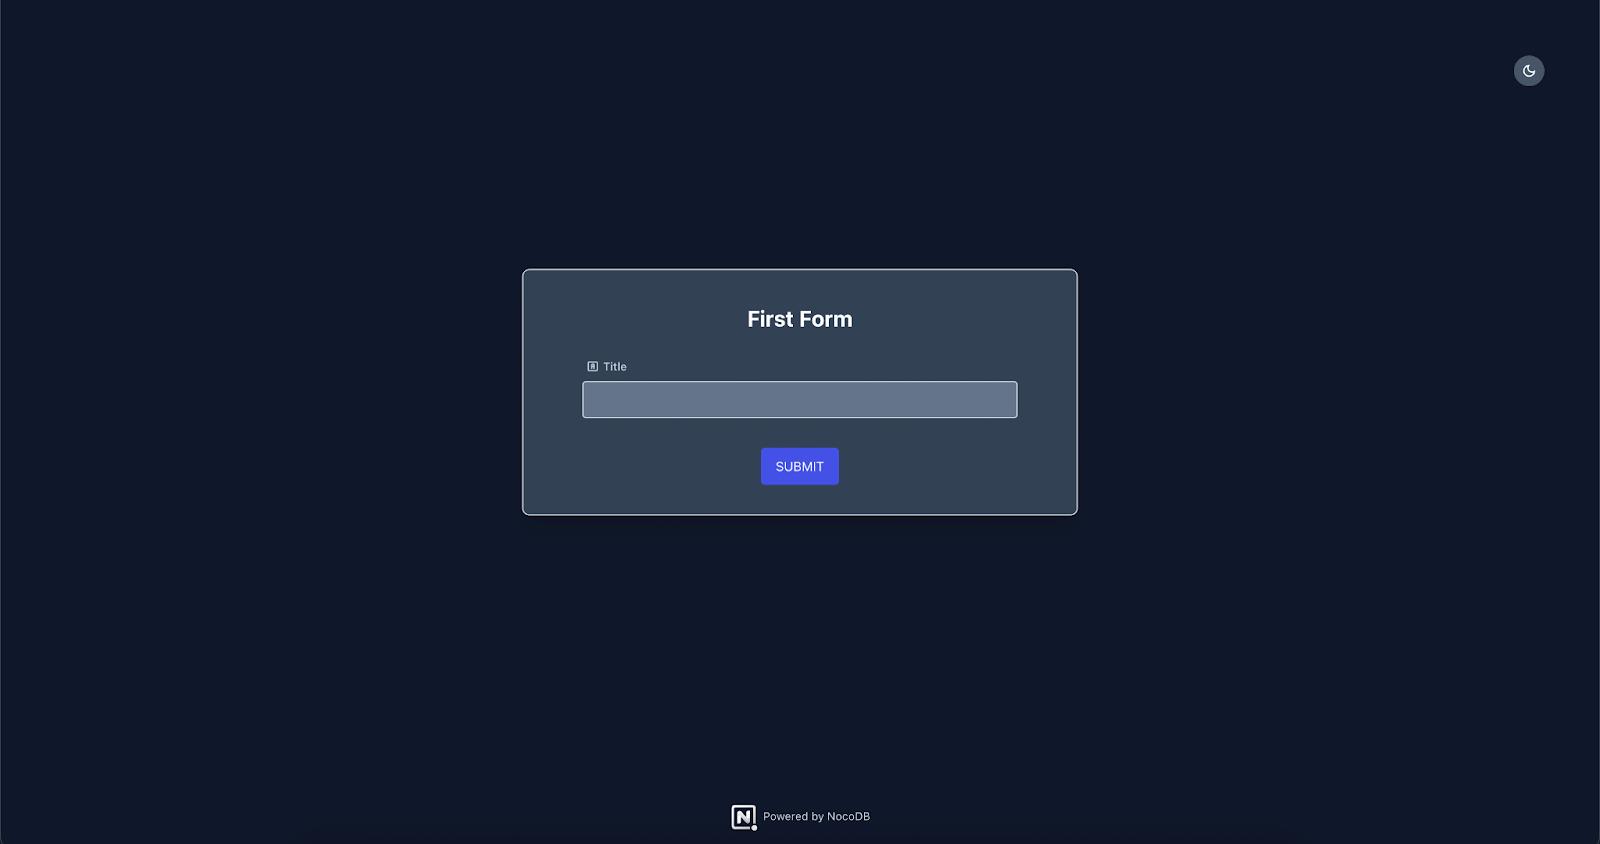
You can choose to share the form as a survey and even restrict access with a password. This is how the forms look like when shared with the default theme:
Ending Notes
NocoDB is an excellent tool for creating visually appealing smart forms and managing data efficiently.
You can also create a deployment using Docker Hub as well by following NocoDB Official Installation for DigitalOcean depending on your use case.
Shoutout to Gita Alekhya Paul for helping run the implementation!
Thanks for learning with the DigitalOcean Community. Check out our offerings for compute, storage, networking, and managed databases.
About the author
Still looking for an answer?
This textbox defaults to using Markdown to format your answer.
You can type !ref in this text area to quickly search our full set of tutorials, documentation & marketplace offerings and insert the link!
 This work is licensed under a Creative Commons Attribution-NonCommercial- ShareAlike 4.0 International License.
Become a contributor for community
Get paid to write technical tutorials and select a tech-focused charity to receive a matching donation.

DigitalOcean Documentation
Full documentation for every DigitalOcean product.

Resources for startups and AI-native businesses
The Wave has everything you need to know about building a business, from raising funding to marketing your product.
The developer cloud
Scale up as you grow — whether you're running one virtual machine or ten thousand.

Start building today
From GPU-powered inference and Kubernetes to managed databases and storage, get everything you need to build, scale, and deploy intelligent applications.
