By Ado Kukic
Director of Developer Advocacy

What is better than Factorio? Factorio with friends. Multiplayer in Factorio allows you to team up with friends to grow, defend, and scale your factory to new heights. While you can host a multiplayer game on your local machine, your friends and collaborators will rely on that local machine running to access the game and with everyone’s busy lives, this may not be ideal. Today I’m going to show you how you can host an ongoing Factorio multiplayer game on DigitalOcean that anyone can access whenever they want.
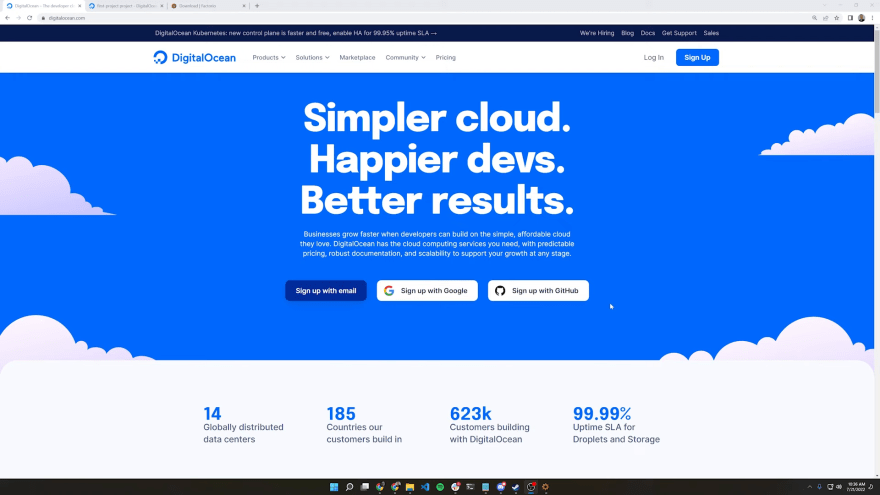
DigitalOcean simplifies cloud computing so builders can spend more time creating software that changes the world. In our case today, that means deploying a Factorio headless server so that we can get help from other people in building the world’s biggest factory. The way that we’re going to accomplish this is by deploying a DigitalOcean droplet to host our multiplayer Factorio game. To get started with this, we’re first going to log in or sign up for a Digital Ocean account.
If you prefer a video version of this tutorial, you can watch it here:
https://www.youtube.com/watch?v=VaJaLrxudWk
Creating a Droplet on DigitalOcean
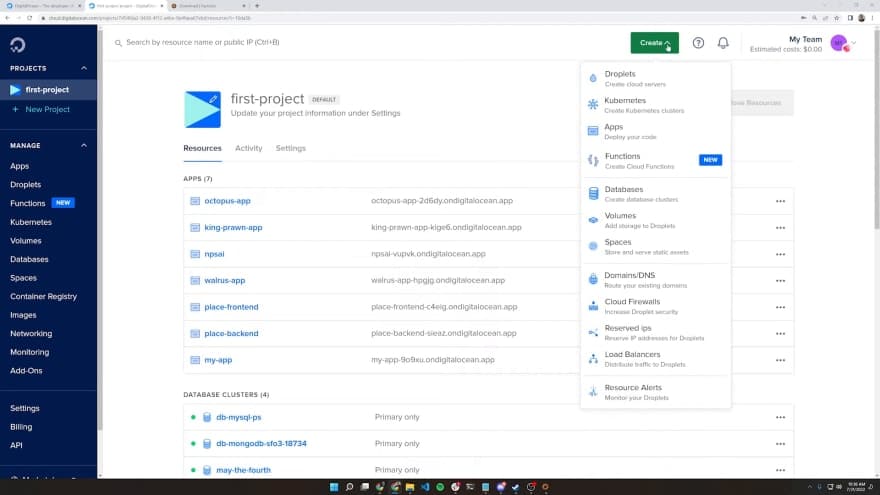
Since I already have an account, I’ll just hit the login button, which is going to take me to my DigitalOcean dashboard. Next, what we want to do is create a new droplet. I’m going to hit the green Create button in the top right and select droplets.
This is going to take me to the wizard for deploying our droplet, and from here we can decide what type of operating system, how many resources we want to grant the droplet, and so on and so forth. We’ll keep Ubuntu as the operating system, and for our plan, we have various different options, ranging from a shared to dedicated CPU, Intel or AMD, workload type, size, and so on.
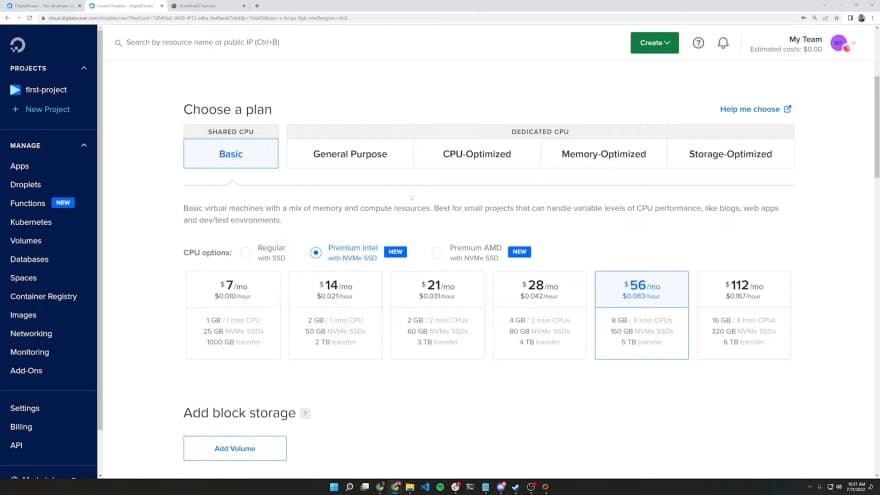
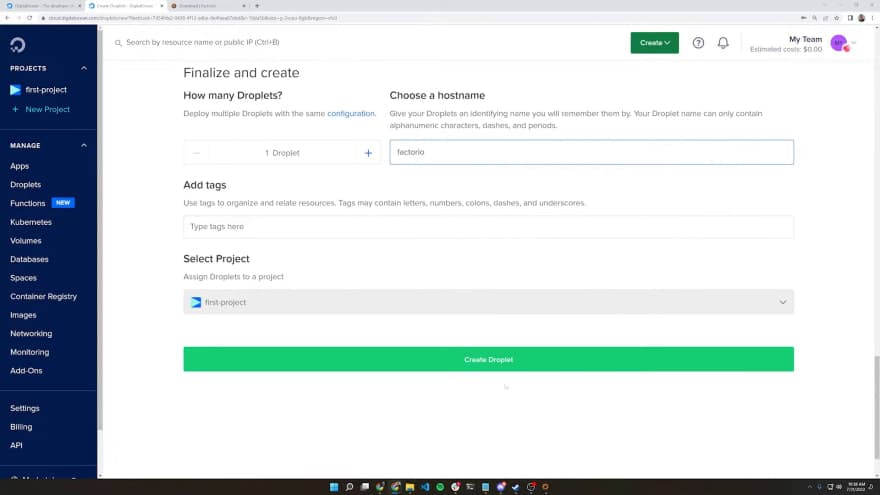
For the purpose of this tutorial, I’ll select a general purpose dedicated CPU but you can host Factorio on the basic $7 per month plan just as easily. With our plan selected, the last thing we’ll need to do is select our data center region. Since I’m located in Las Vegas, I’ll pick the one closest to me, which will be San Francisco. Finally, we’ll need to set a password or an SSH key to be able to connect to this droplet once it’s created.
To keep it simple, let’s use password and add the password that we want to use. With all of our options selected, let’s hit the Create Droplet button, and we’ll be off to the races.
In about a minute or so, our droplet will be created and deployed, and we’ll be ready to go. When our droplet has finished deploying, the first thing we’ll need to do is connect to it.
Open up the terminal of your choice as we’ll SSH into the machine. Make note of the Droplet IPv4 address as that’s where our Ubuntu server is.
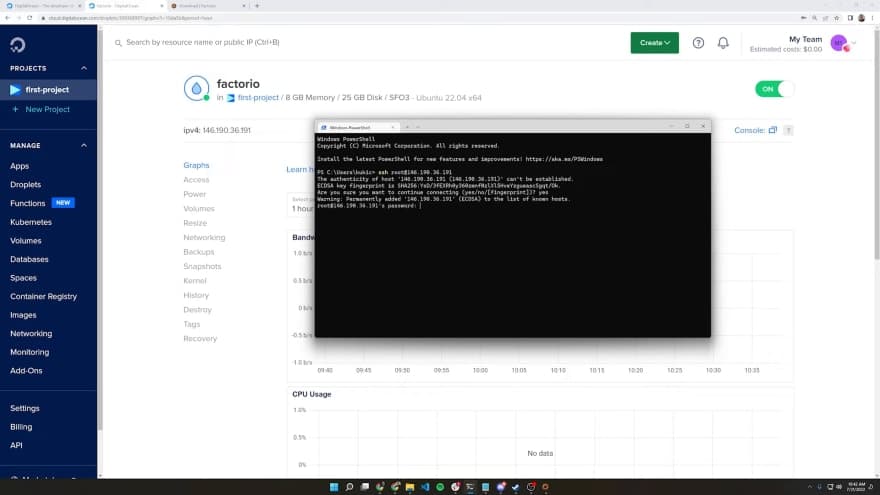
To SSH into our server we’ll connect as the root user at the IP address of our droplet, and use our password we set earlier. And we’re in and ready to install our Factorio headless server. The headless version of Factorio does not download any of the games graphic assets so you can’t play the game on the server, but you can run all of the logic needed for the game.
Downloading and Installing Headless Factorio
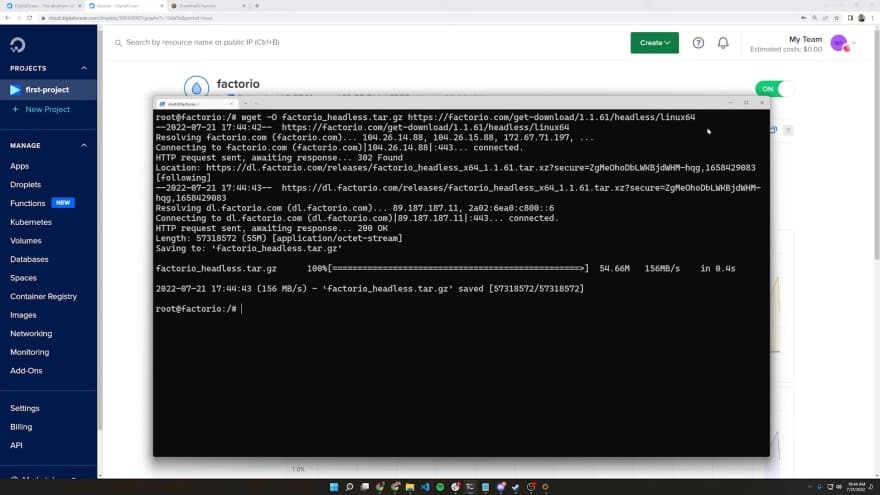
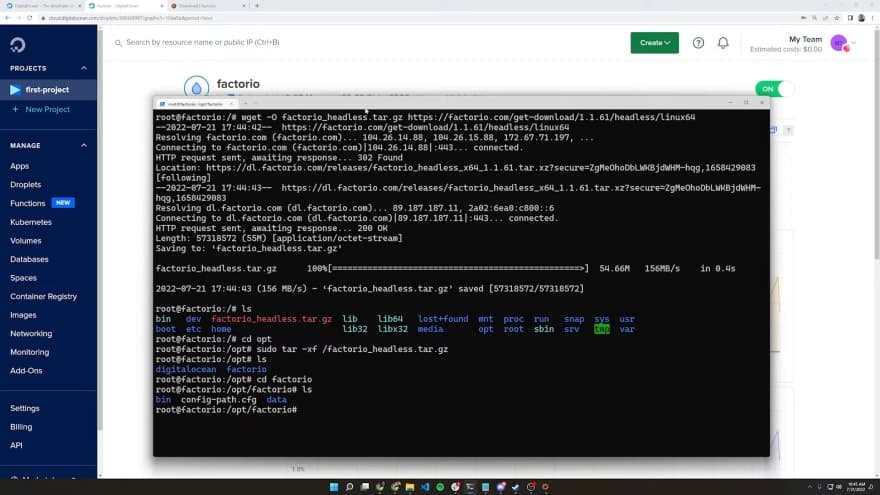
We can download the headless version Factorio directly from the Factorio website. To do this, execute the following command in your terminal:
wget -O factorio_headless.tar.gz https://factorio.com/get-download/1.1.61/headless/linux64
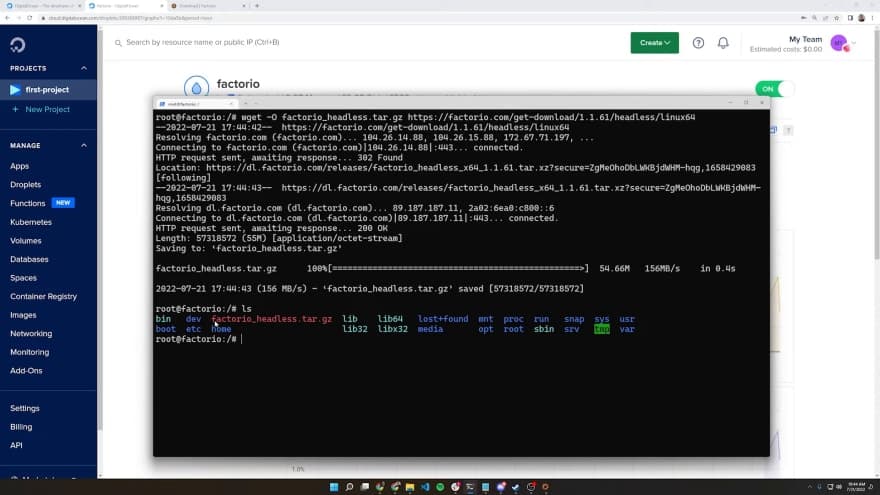
Running this command will download the headless version of Factorio and store it in a file called factorio_headless.tar.gz. You can confirm this by running the ls command.
The next thing we’re going to do is go into our opt directory by running cd opt. Our Factorio headless server will run out of this directory. Unzip the file we downloaded above by running
sudo tar -xf /factorio_headless.tar.gz
After this command has finished executing we’ll have a new directory in our opt folder called factorio. Let’s navigate to it by running cd factorio. Then, run ls to see the files and folders within.
To enable our headless server to work, the next thing we’ll need to do is create a saves folder. I will make a new directory called saves by running mkdir saves. If you run ls again, you’ll see that now we have the bin directory, our data directory, and now a saves directory where our game progress is going to be saved. The next thing we’ll do is create a save zip file.
The way to do this is we’re going to go into our bin directory, into the x64 directory and call the factorio executable and pass in the create command which is going to create a new save file in the saves directory. Let’s do that and call it digitalocean.zip.
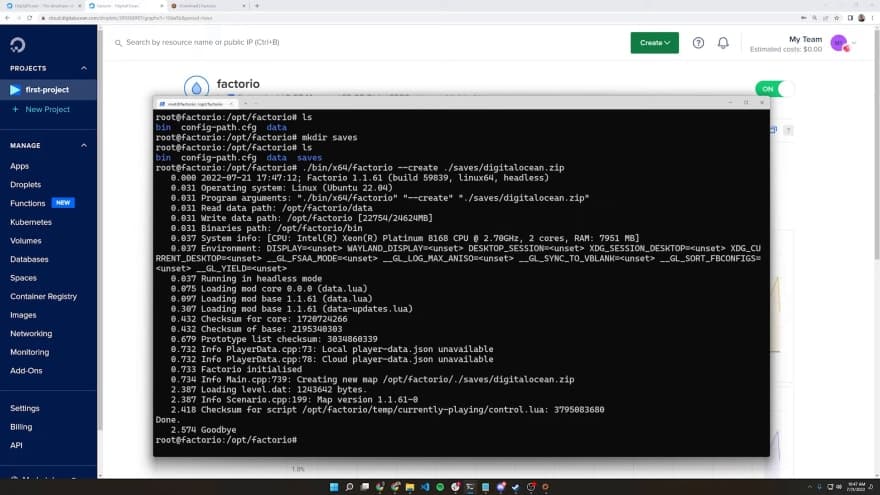
So our command will look like:
./bin/x64/factorio --create ./saves/digitalocean.zip
Now we have a save file and we are good to go. At this point we can actually start the game and connect to it and play.
Connecting to your Factorio Server
Now that we have our headless version of Factorio on our Droplet and a save file ready to go, the next step is to actually boot up and start the Factorio server. The easiest way to do this is go back into our x64 directory, run the factorio executable and pass in the start server command, passing in our digitaocean.zip save file.
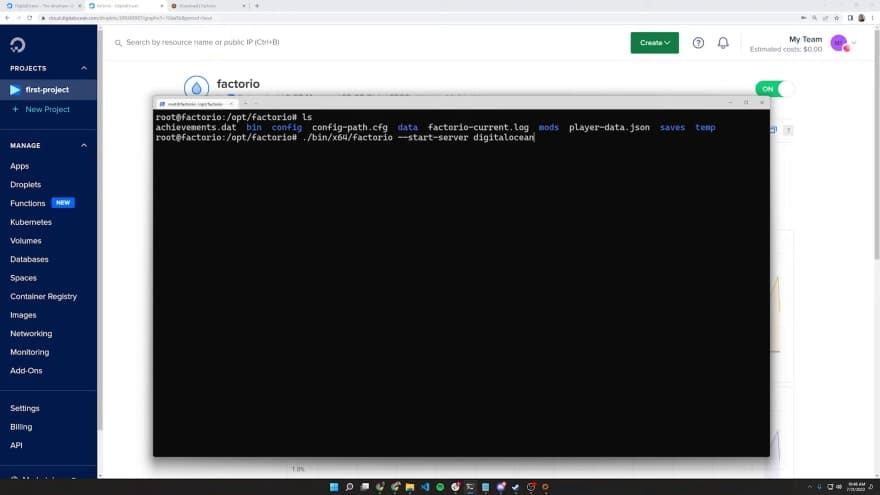
./bin/x64/factorio --start-server digitalocean.zip
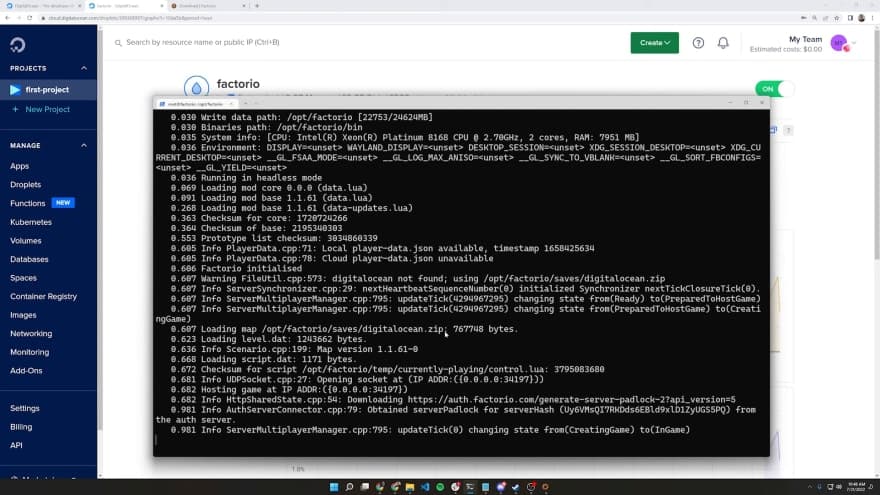
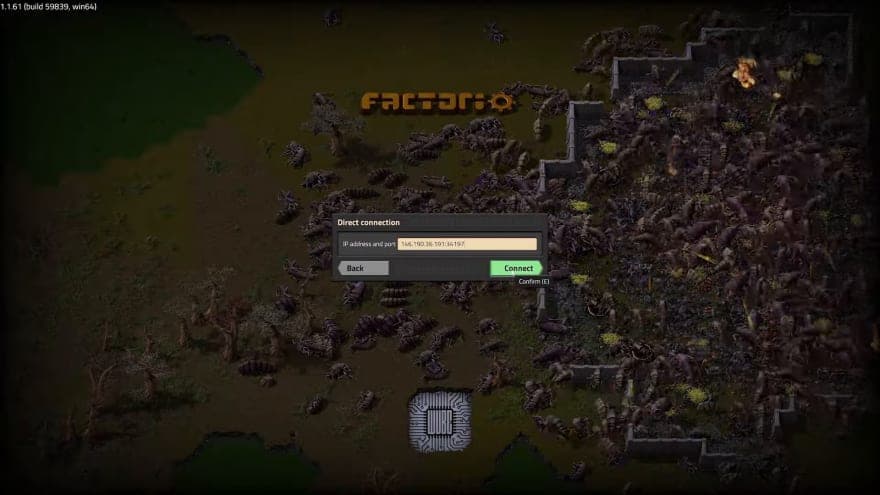
Running this command will start up our server. Make a note of the IP address that the server is running on as well as the port the Factorio headless server is running on, in my case it’s :34197. Let’s go into our Factorio game, select multiplayer, click the “connect to an address” option and we’ll paste in the our IP address and port and hit Connect.
Within a few seconds we’ll be in the game, running at 60 frames per second and able to play the game.

As I play the game, the state is being saved on the server in that digitalocean.zip file, so if I disconnect and reconnect, I’ll be able to pick things back up where I last left off. Our server is now running and anybody that has the IP address and port can connect.
While this is one way to deploy a Factorio headless server, I want to show you another. The second way involves setting up a service to run our Factorio headless instance.
To do this, let’s navigate to the data directory in our factorio directory and take a look at this server-settings.example.json file. This file is going to enable us to control various settings of our Factorio server. To utilize this file, we’re first going to make a copy of it and remove the .example extension. Do this by running:
cp server-settings.example.json server-settings.json
We won’t make any changes to the file itself for now. Next, you probably don’t want your root user running the factorio service, so let’s create a new user that only has access to run the Factorio headless server. To do this, run:
useradd factorio
chown -R facotrio:factorio /opt/factorio
Creating a Headless Factorio Service
Finally, let’s go ahead and create a service that we can turn on or off depending on if we want the server to be running or not. To do this, execute the following command:
sudo nano /etc/systemd/system/factorio.service
And what this is going to look like is this:
[Unit]
Description=Factorio Headless Server
[Service]
Type=simple
User=factorio
ExecStart=/opt/factorio/bin/x64/factorio --start-server /opt/factorio/svaes/digitalocean.zip --server-settings /opt/factorio/data/server-settings.json
This simple service when run is going to start up our server and will use the digitalocean.zip save file we created as well as load up the server-settings.json file we created earlier. Save and exit this file. To start this service, we’ll have to restart our service daemon by running:
systemctl daemon-reload
systemctl start factorio
To ensure that our service is running we can run the systemctl status factorio command.

And as you can see, it is active, running and good to go. Let’s make sure the server is in-fact running by reconnecting to it in our Factorio game.

Conclusion
In this tutorial, we deployed and connected to a remotely hosted headless version of Factorio. Anybody that we share the IP and port can now connect and join our game. We could modify the server-settings.json file to password-protect our game, enable mods, and other settings. The best part about having a headless server running is that the game state is saved on our remote server, so our friends can play even when we aren’t available. I hope you enjoyed this tutorial and good luck building and expanding your factory.
Happy coding. :)
Thanks for learning with the DigitalOcean Community. Check out our offerings for compute, storage, networking, and managed databases.
About the author
Still looking for an answer?
This textbox defaults to using Markdown to format your answer.
You can type !ref in this text area to quickly search our full set of tutorials, documentation & marketplace offerings and insert the link!
Thanks, pretty useful. But it appears to be a bit out of date, and there are some mistakes like svaes and
facotrio:factorio
The latest server is hosted at https://factorio.com/get-download/stable/headless/linux64 now
 This work is licensed under a Creative Commons Attribution-NonCommercial- ShareAlike 4.0 International License.
Become a contributor for community
Get paid to write technical tutorials and select a tech-focused charity to receive a matching donation.

DigitalOcean Documentation
Full documentation for every DigitalOcean product.

Resources for startups and AI-native businesses
The Wave has everything you need to know about building a business, from raising funding to marketing your product.
The developer cloud
Scale up as you grow — whether you're running one virtual machine or ten thousand.

Start building today
From GPU-powered inference and Kubernetes to managed databases and storage, get everything you need to build, scale, and deploy intelligent applications.
