AI Technical Writer

Introduction
In this article, you will learn the steps to create an AI agent, also known as an AI assistant or chatbot, using DigitalOcean’s AI Platform. This platform simplifies the process of building, deploying, and integrating AI agents, even for those without any prior AI expertise. It also offers a range of customization options, allowing you to select different AI models and utilize tools like Knowledge Bases for retrieval-augmented generation (RAG), which enhances your chatbot’s ability to provide accurate responses.
You can personalize your AI chatbot’s functionality and appearance, whether it’s embedded in your website or added to your application. We will explore how to choose the right model for our AI agent and how to add a knowledge base that the agent will use to answer questions. In this instance, we will upload a PDF file containing a research paper on RAG, which will serve as our knowledge base and be linked to the AI agent.
Additionally, we will test the AI agent in the agent playground, where we can interact with the chatbot using the DigitalOcean platform. This playground allows users to test and customize the chatbot before deployment.
So, let us begin!
Prerequisites
- A DigitalOcean account with access to the DigitalOcean AI Platform
- Basic knowledge of AI/ML concepts and chatbot frameworks
- Familiarity with web development (HTML, JavaScript, or a CMS)
- Familiarity with RAG and AI Agent
Step 1: DigitalOcean Platform
Begin by navigating to DigitalOcean’s platform. If you don’t already have an account, you will need to set one up. This can be done easily using your email address, GitHub account, or Google account. Once you’ve signed in, you will be directed to the dashboard.
Step 2: Create your Agent
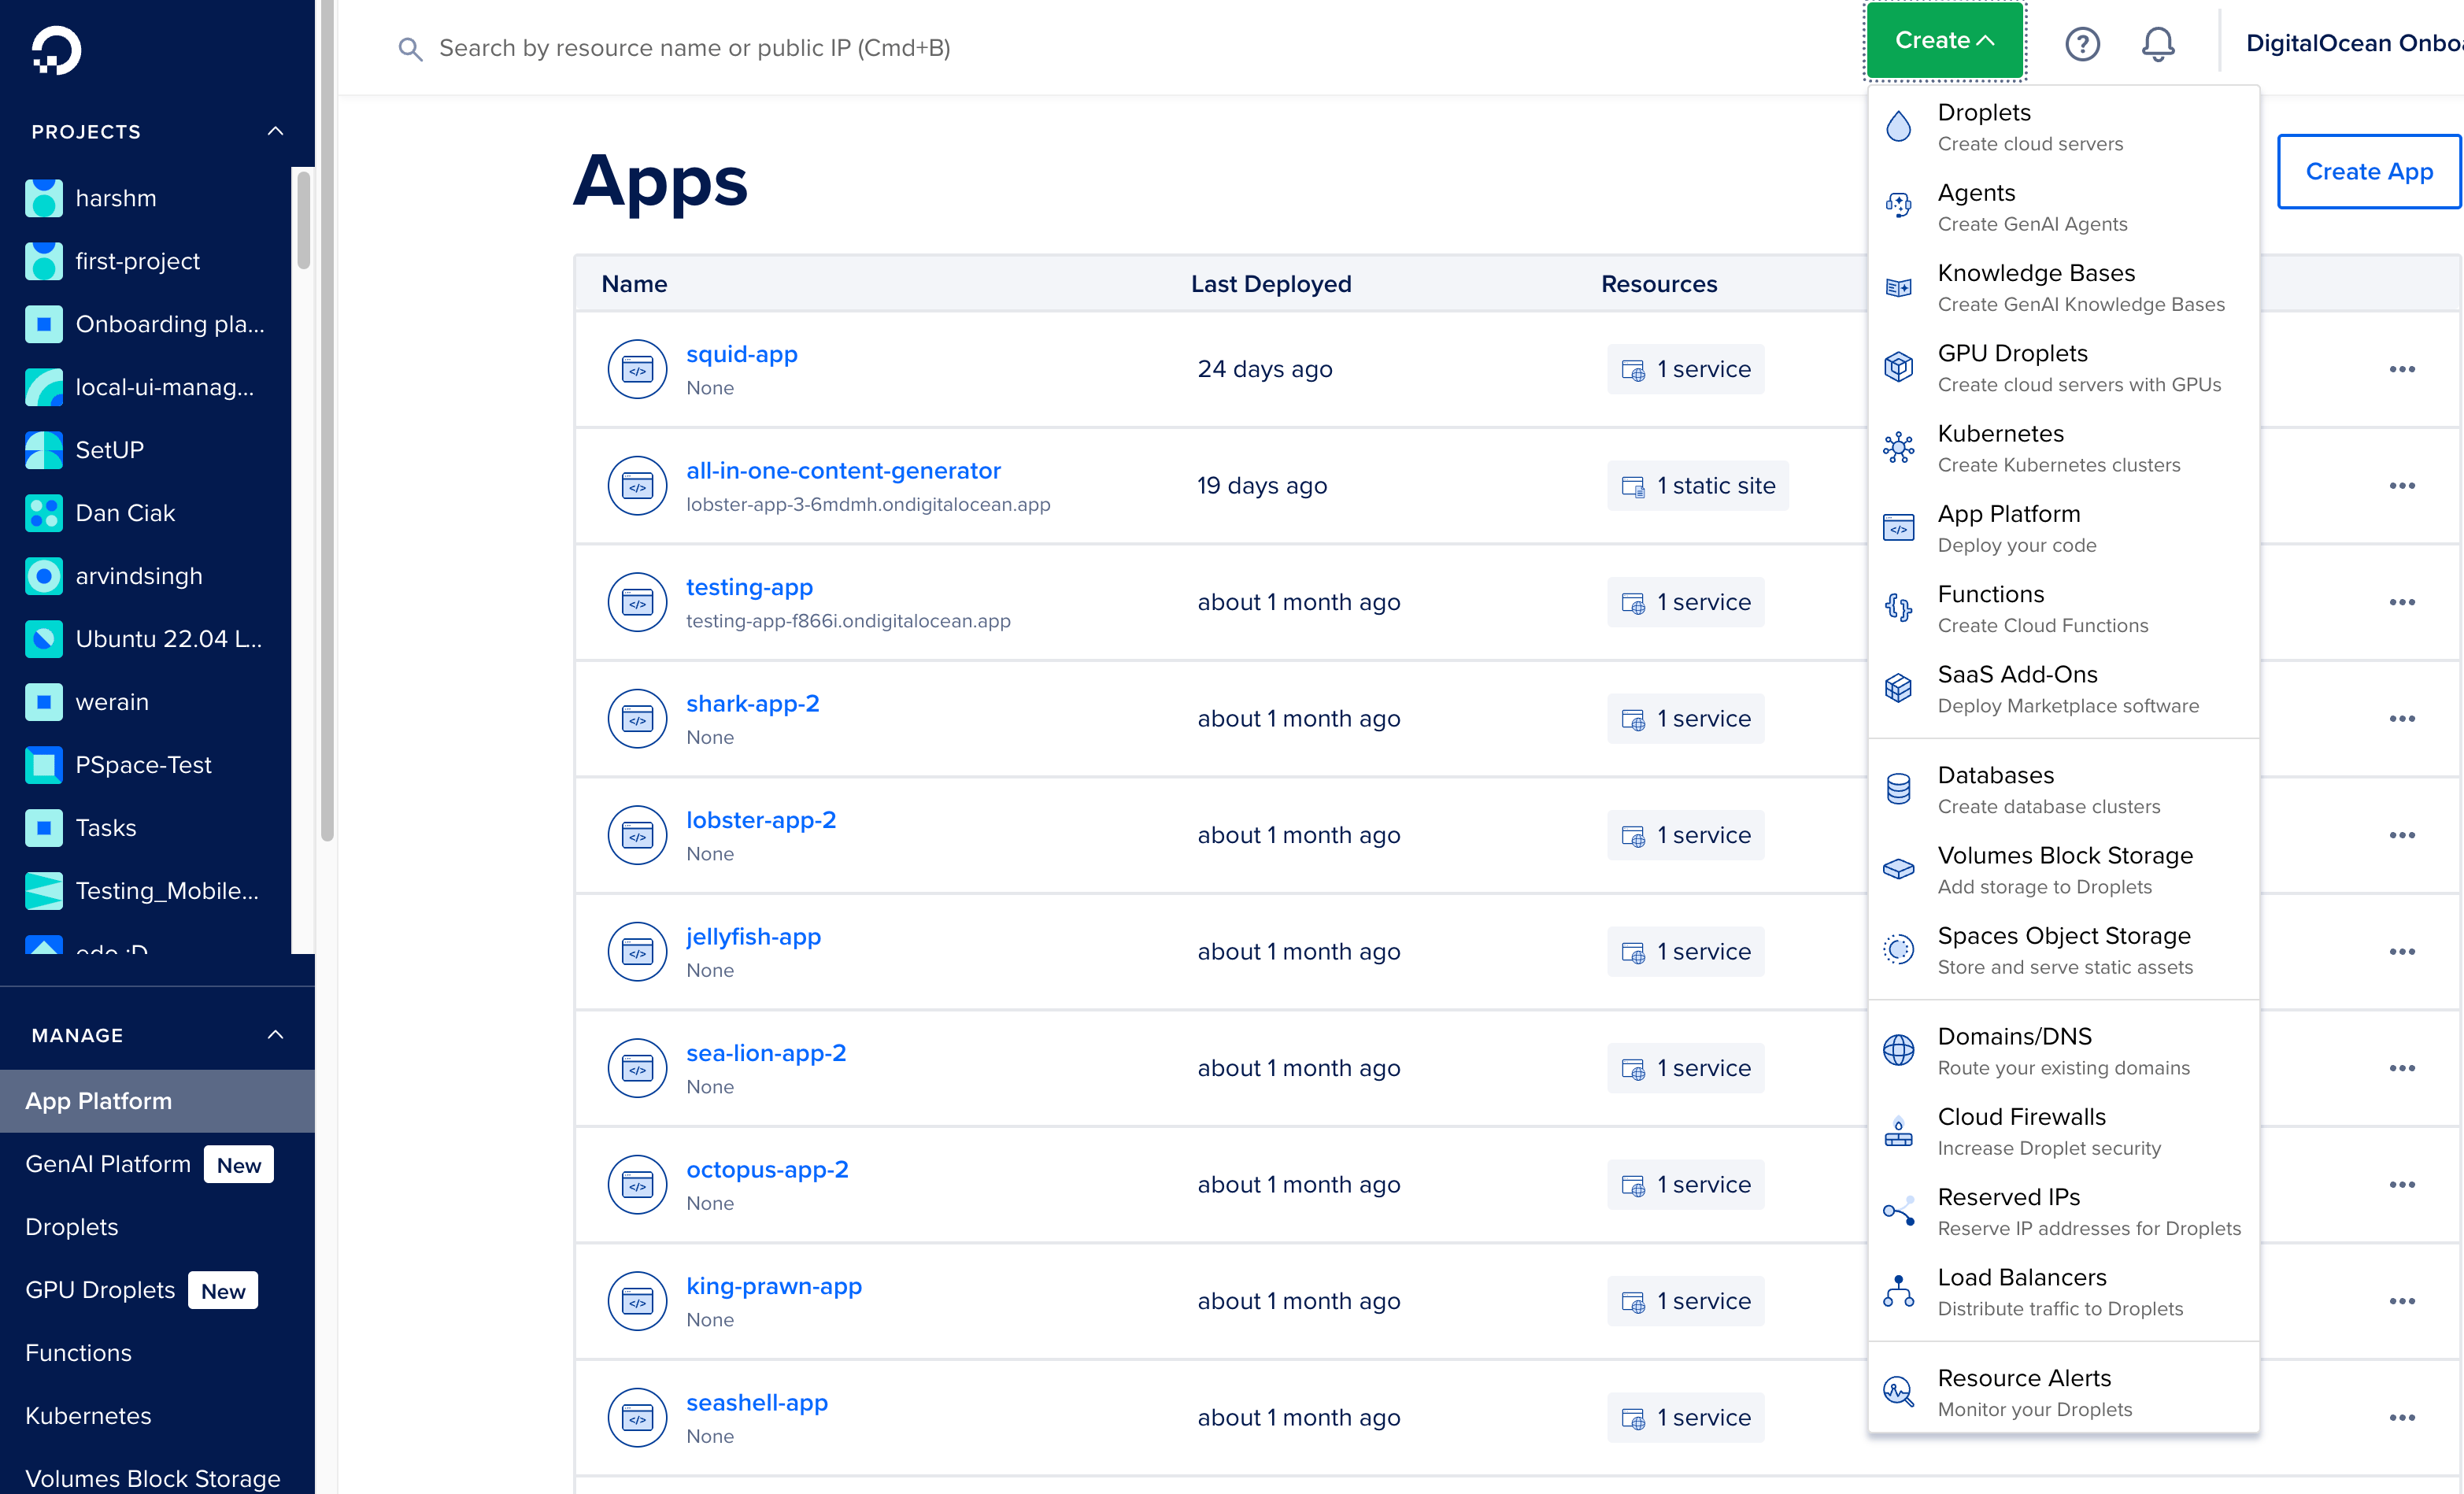
To create your AI agent, you can either navigate to the left side and click on “Gen AI Platform” or click the “Create” button. After that, select “Agents” from the drop-down menu. This will allow you to create a Gen AI agent using the DigitalOcean platform.
Configure your Agent
To create an agent, start by specifying the agent’s name.
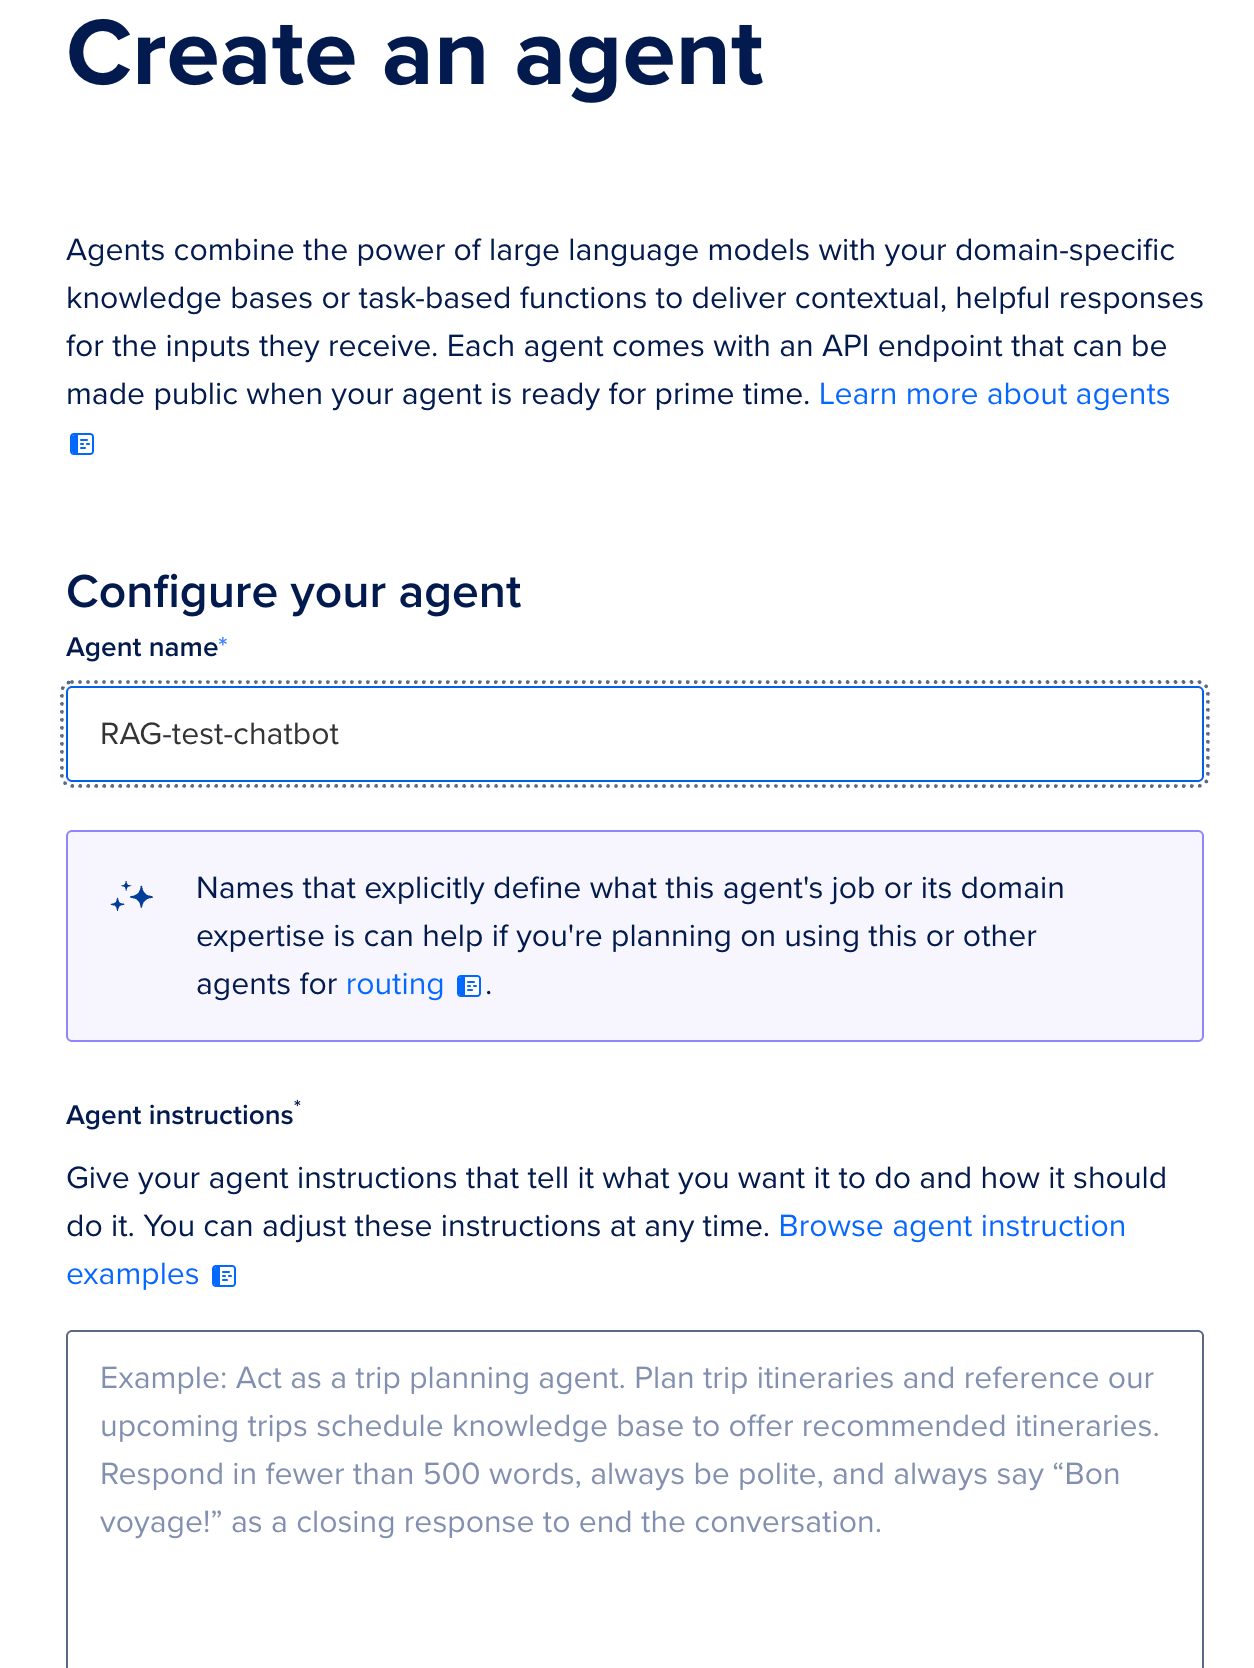
Next, scroll down to find the “Agent Instructions” section. Here, you will need to provide specific and detailed instructions for your AI agent. While you can adjust these instructions at any time, we recommend doing this at the very beginning. If you’re struggling to find the right words, feel free to browse through the “Agent Instruction Examples” section for inspiration.
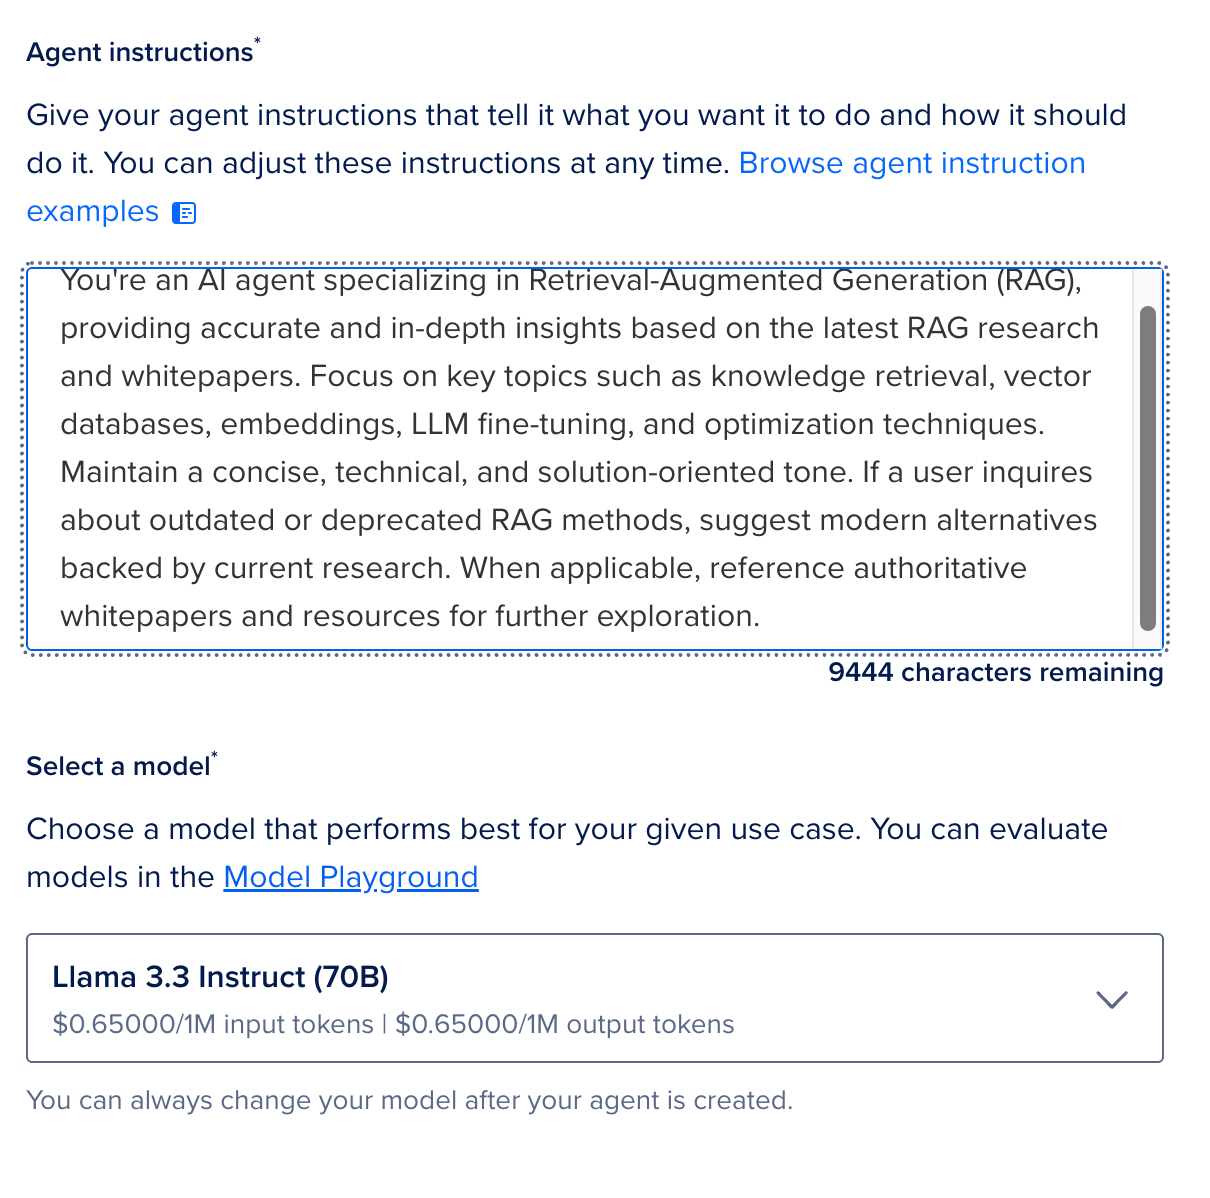
Select the LLM Model
Once you’ve completed the previous steps, scroll down to select the large language model of your choice. Click on the drop-down arrow to choose your preferred model. For this tutorial, we will select “Llama 3.1B Instruct (8B).”
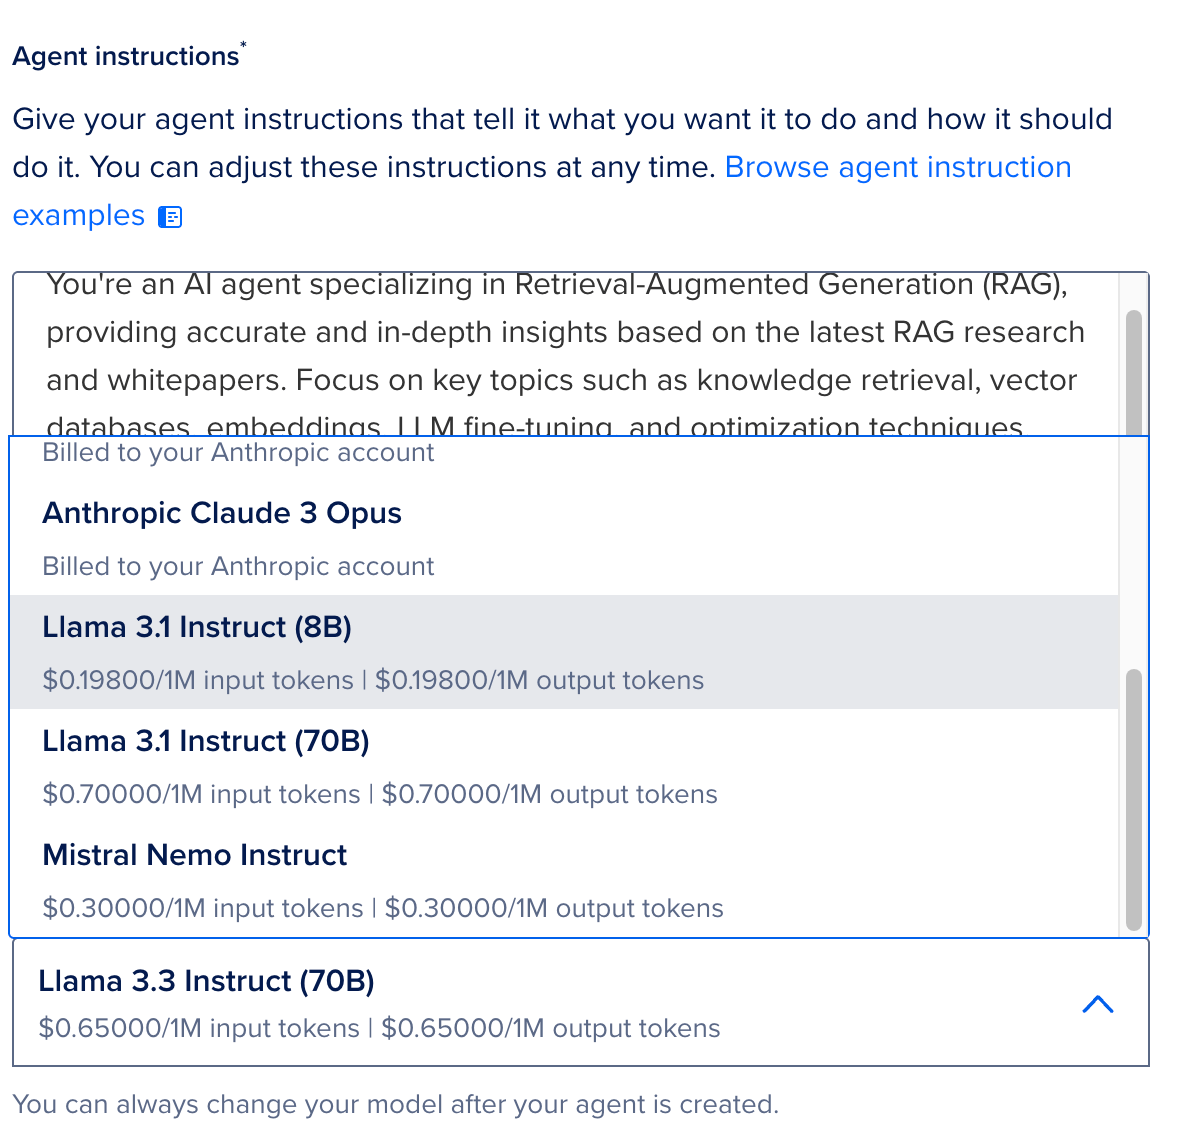
We highly recommend that you take some time to learn more about this model and explore other available options as well.
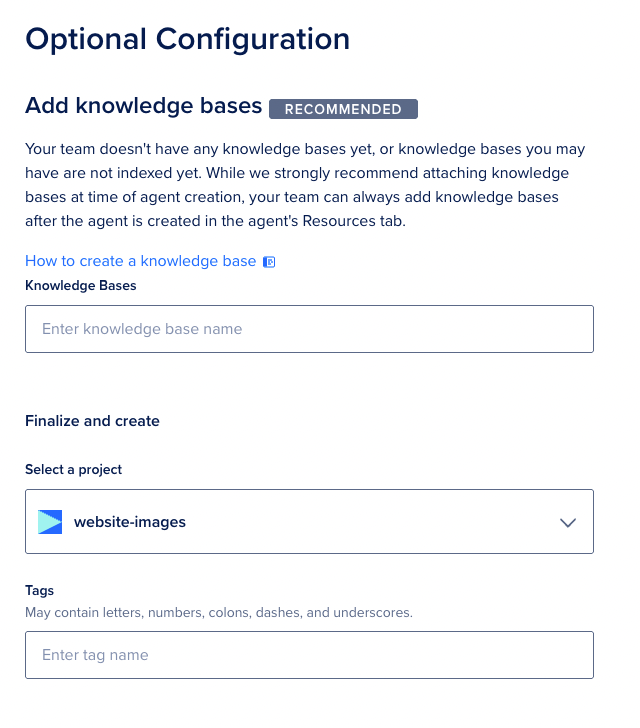
Add Knowledge Base
Scroll down further and you’ll find the “Optional Configuration” for adding a knowledge base. Since we don’t have a knowledge base yet, we won’t add it at this stage. We’ll proceed to the next step for now and set it up later.
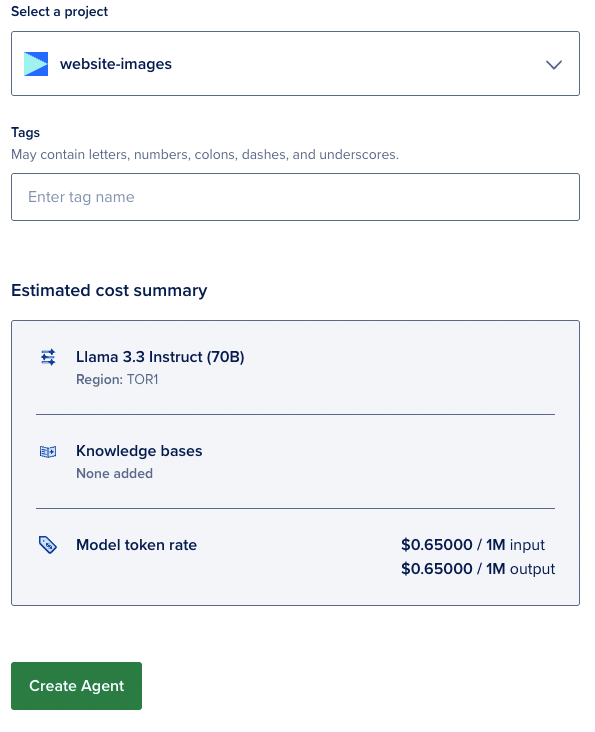
Create Agent
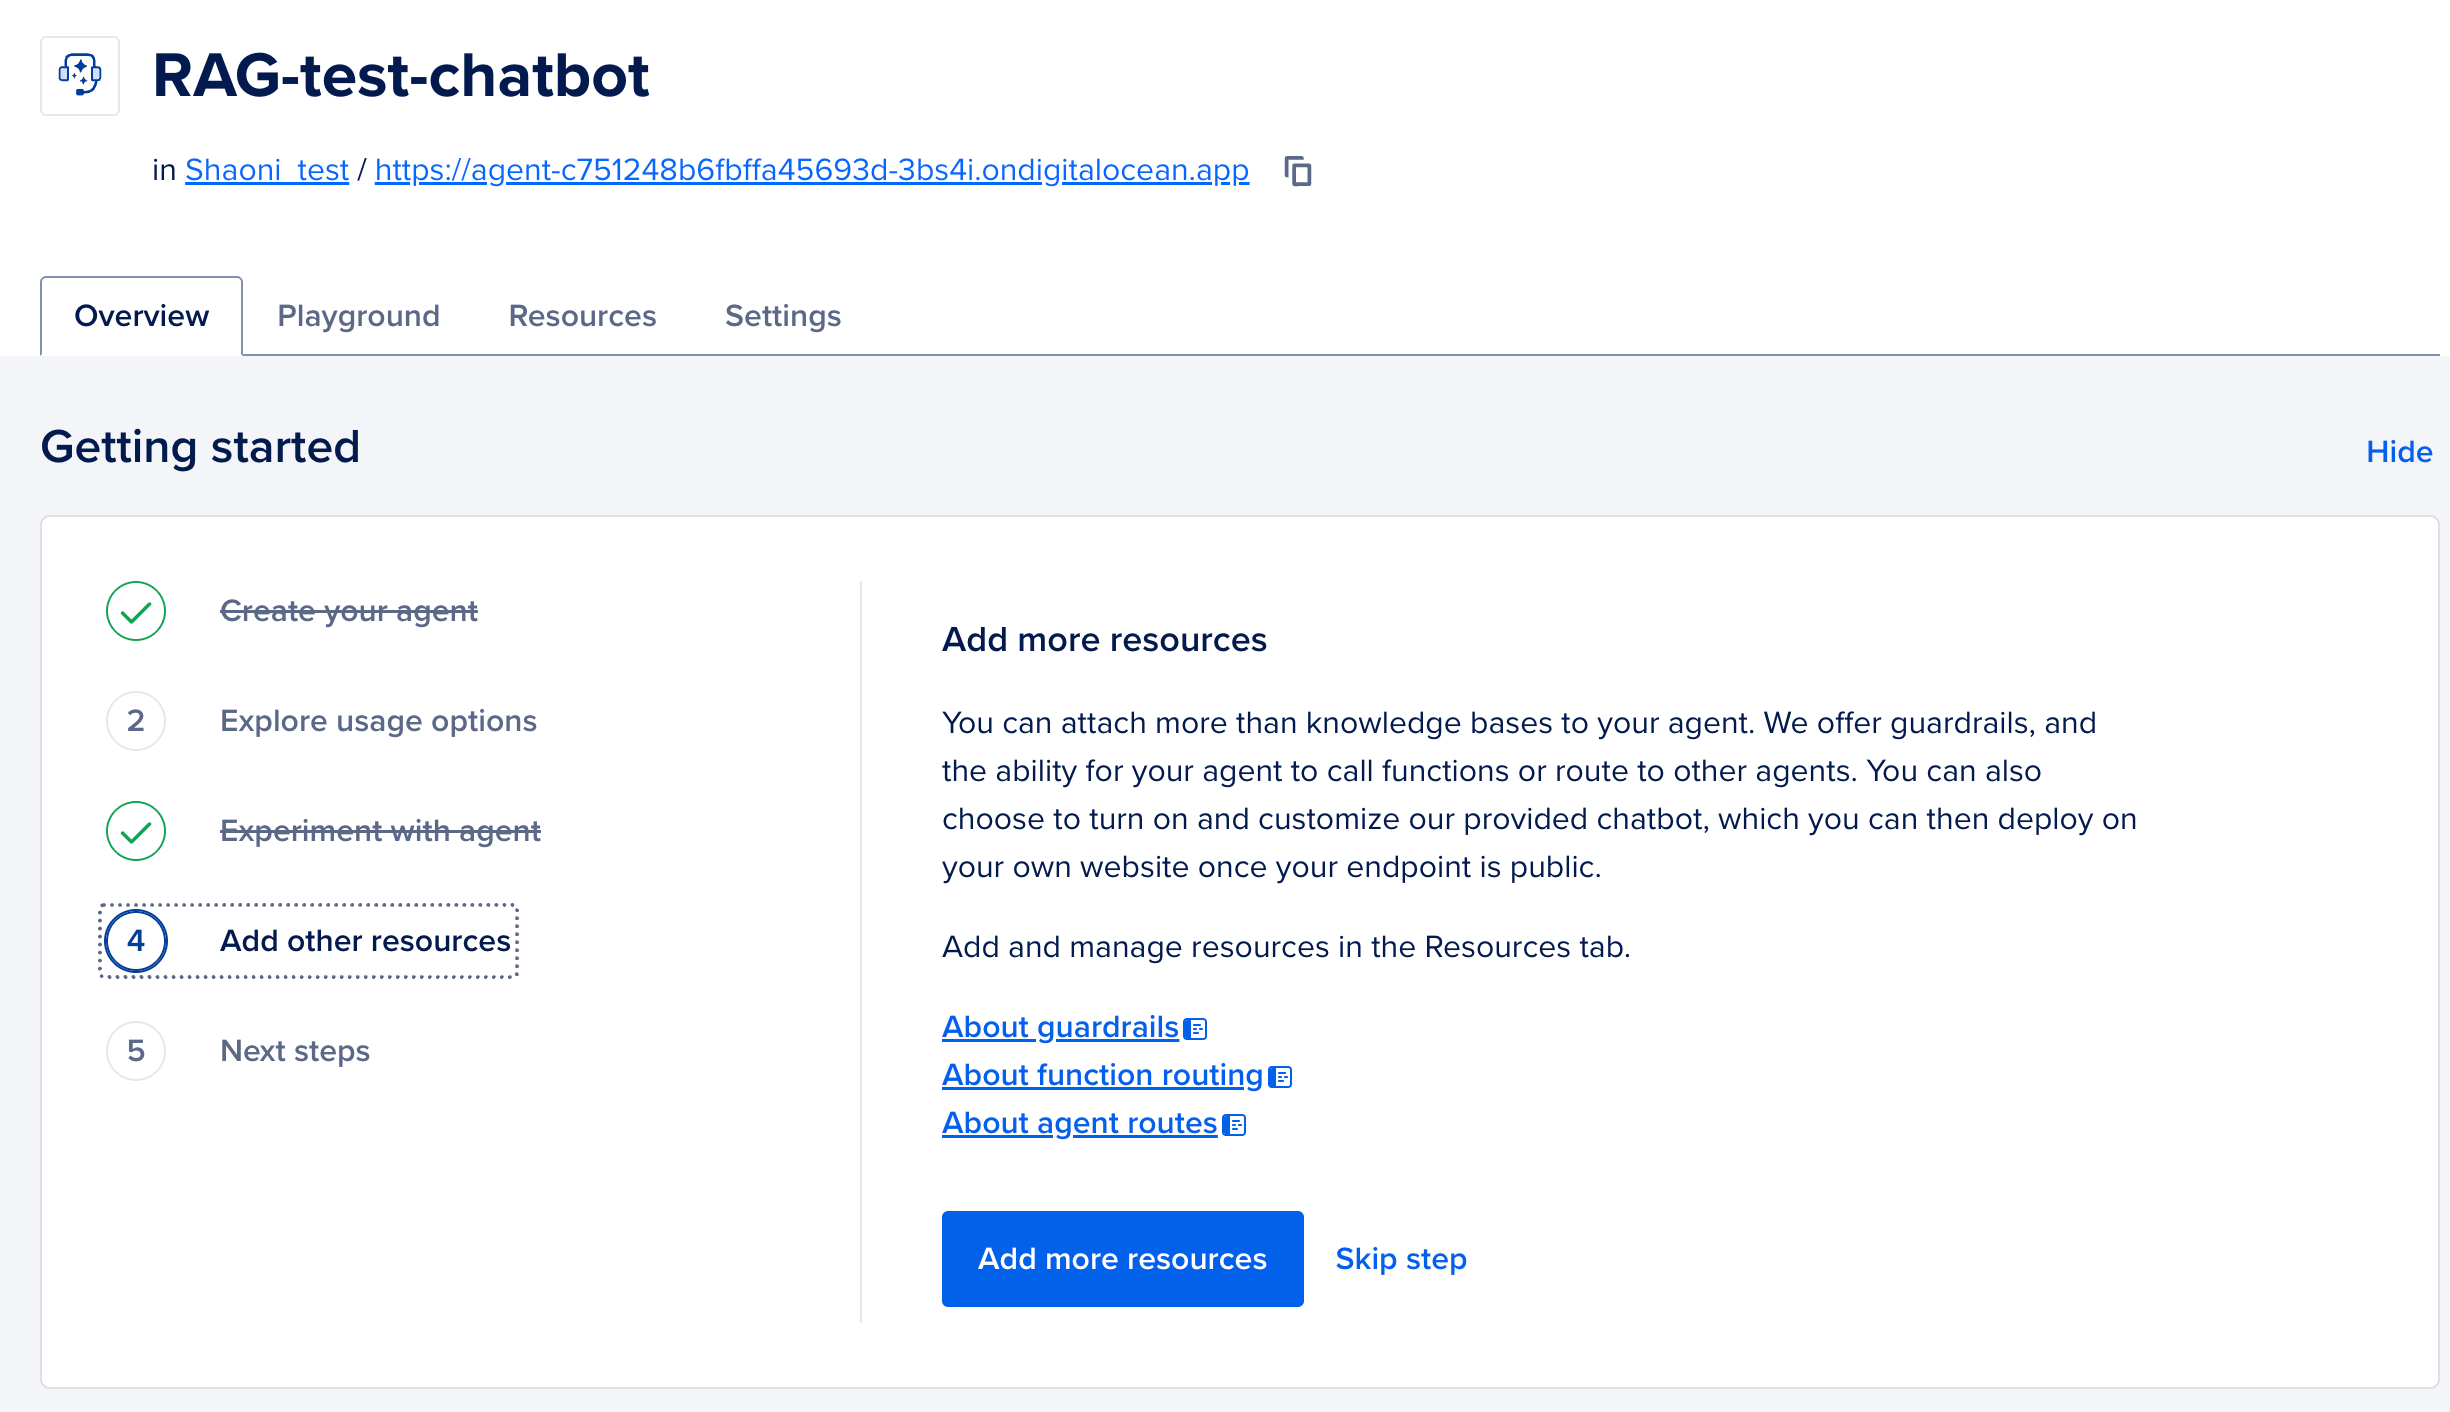
To create your agent, scroll to the bottom of the page and click on the “Create Agent” button. This will initiate the deployment process. Once the deployment is complete, your agent will be created, and you will be directed to the “Overview” tab.
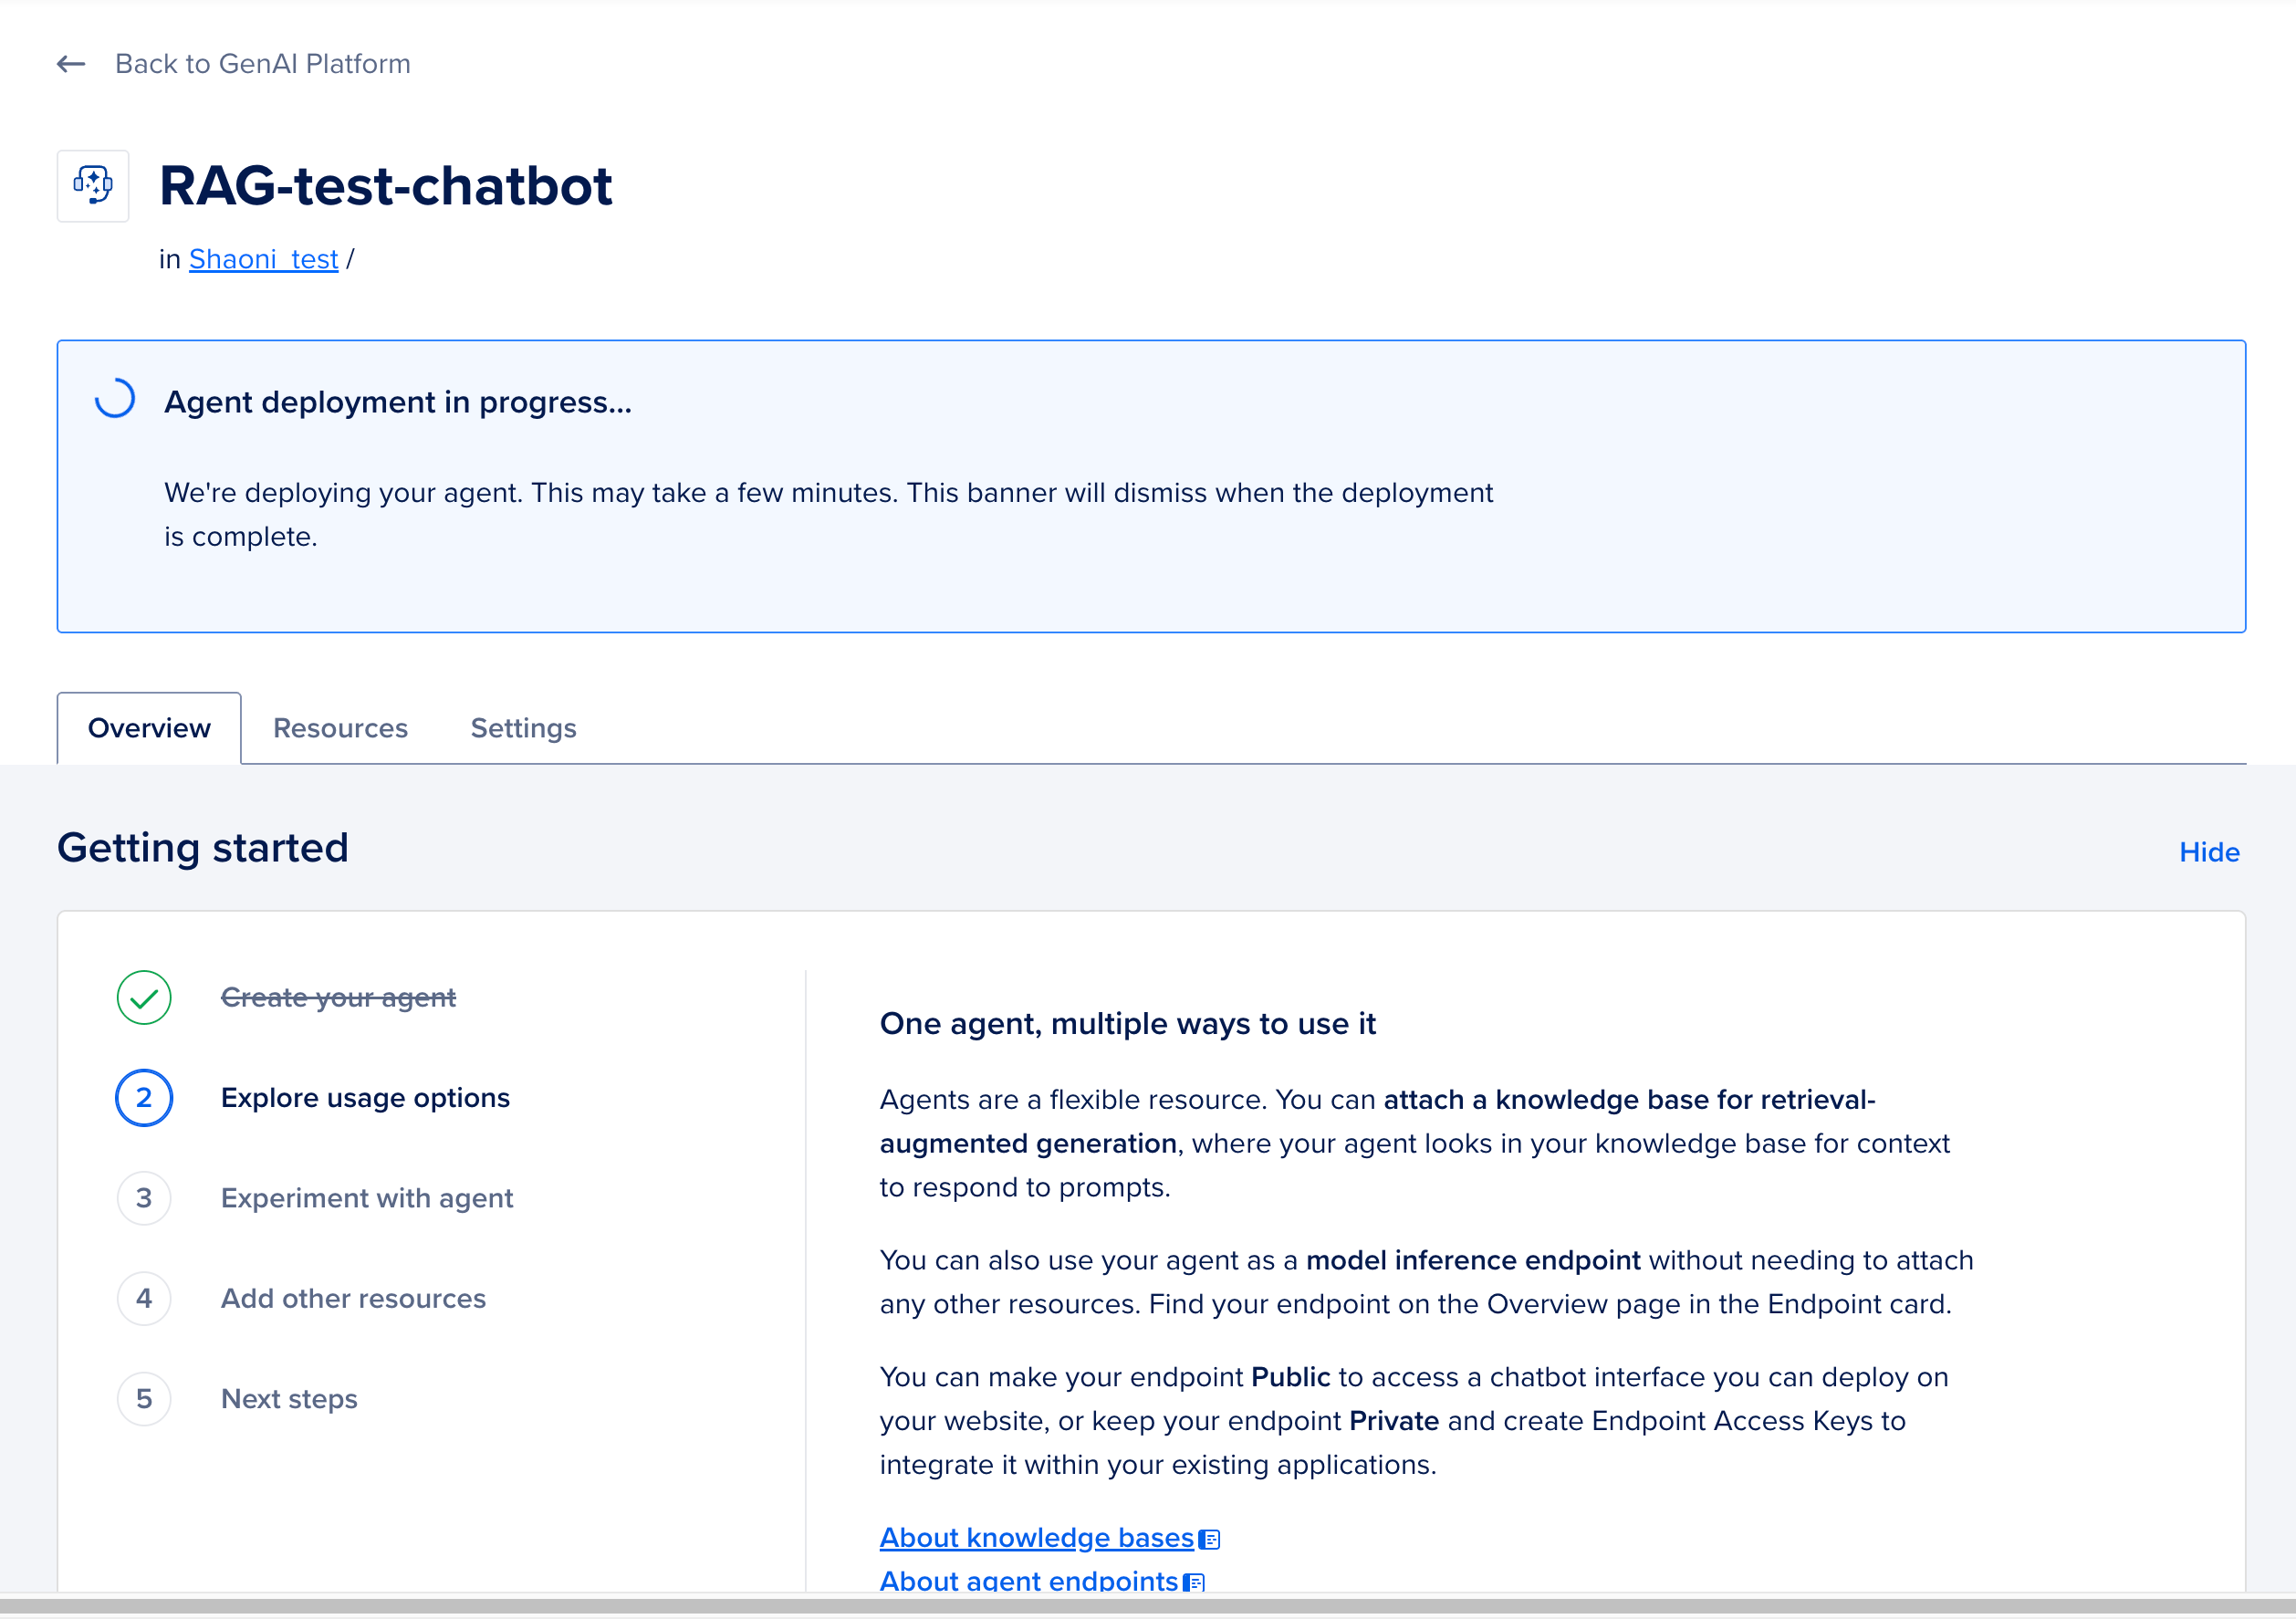
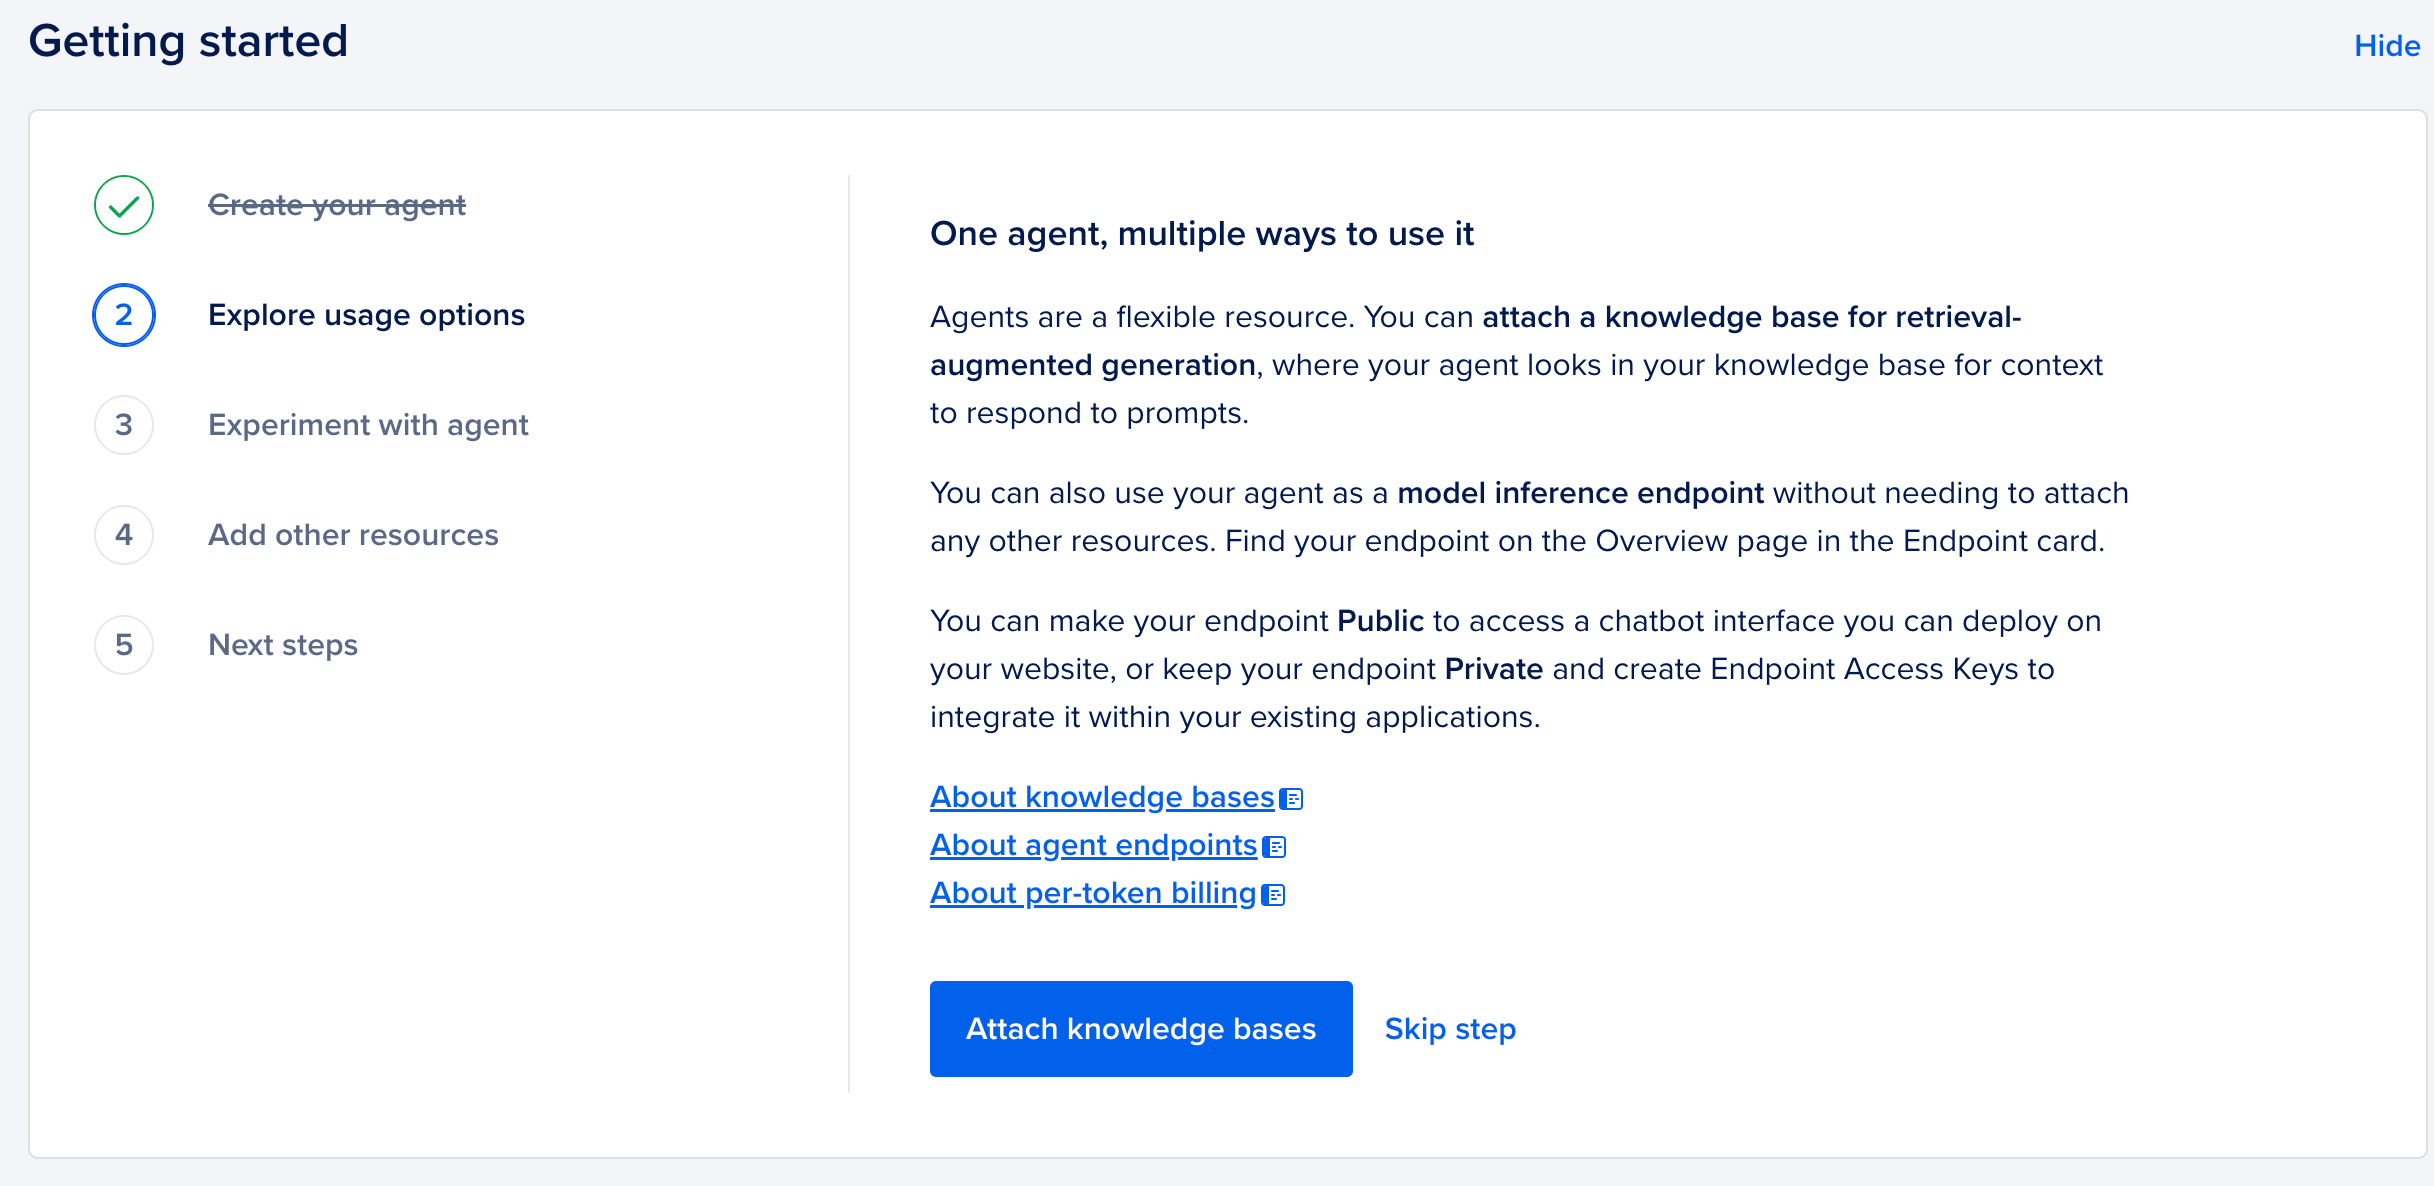
In this tab, you will find the “Getting Started” page, which includes a checklist for your Agent creation.

Knowledge Base
Before we discuss the Knowledge Base, let’s first understand what is a knowledge base and its purpose.
A knowledge base for an AI agent is a structured repository of information that the agent can use to provide more accurate and context-specific responses. It enhances the AI’s capabilities by supplying specialized knowledge, factual data, or proprietary content that may not be included in the AI model’s training data.
How It Works in AI Agents
- The AI agent retrieves relevant information from the knowledge base using retrieval-augmented generation (RAG) techniques.
- It processes user queries by searching the knowledge base and combining retrieved data with its generative abilities.
- This ensures that responses are more precise, reliable, and up-to-date than relying solely on the model’s pre-trained knowledge.
Types of Knowledge Bases
- Document-Based – PDFs, Word files, research papers, or manuals.
- Database-Driven – Structured data stored in SQL, NoSQL, or vector databases.
- FAQ & Support Articles – Predefined responses to common queries.
- Custom Enterprise Knowledge – Proprietary business information, internal wikis, or technical documentation.
To attach a knowledge base, click on the tab labeled “Resources.” Here, you will find the option to add a knowledge base for your agent.
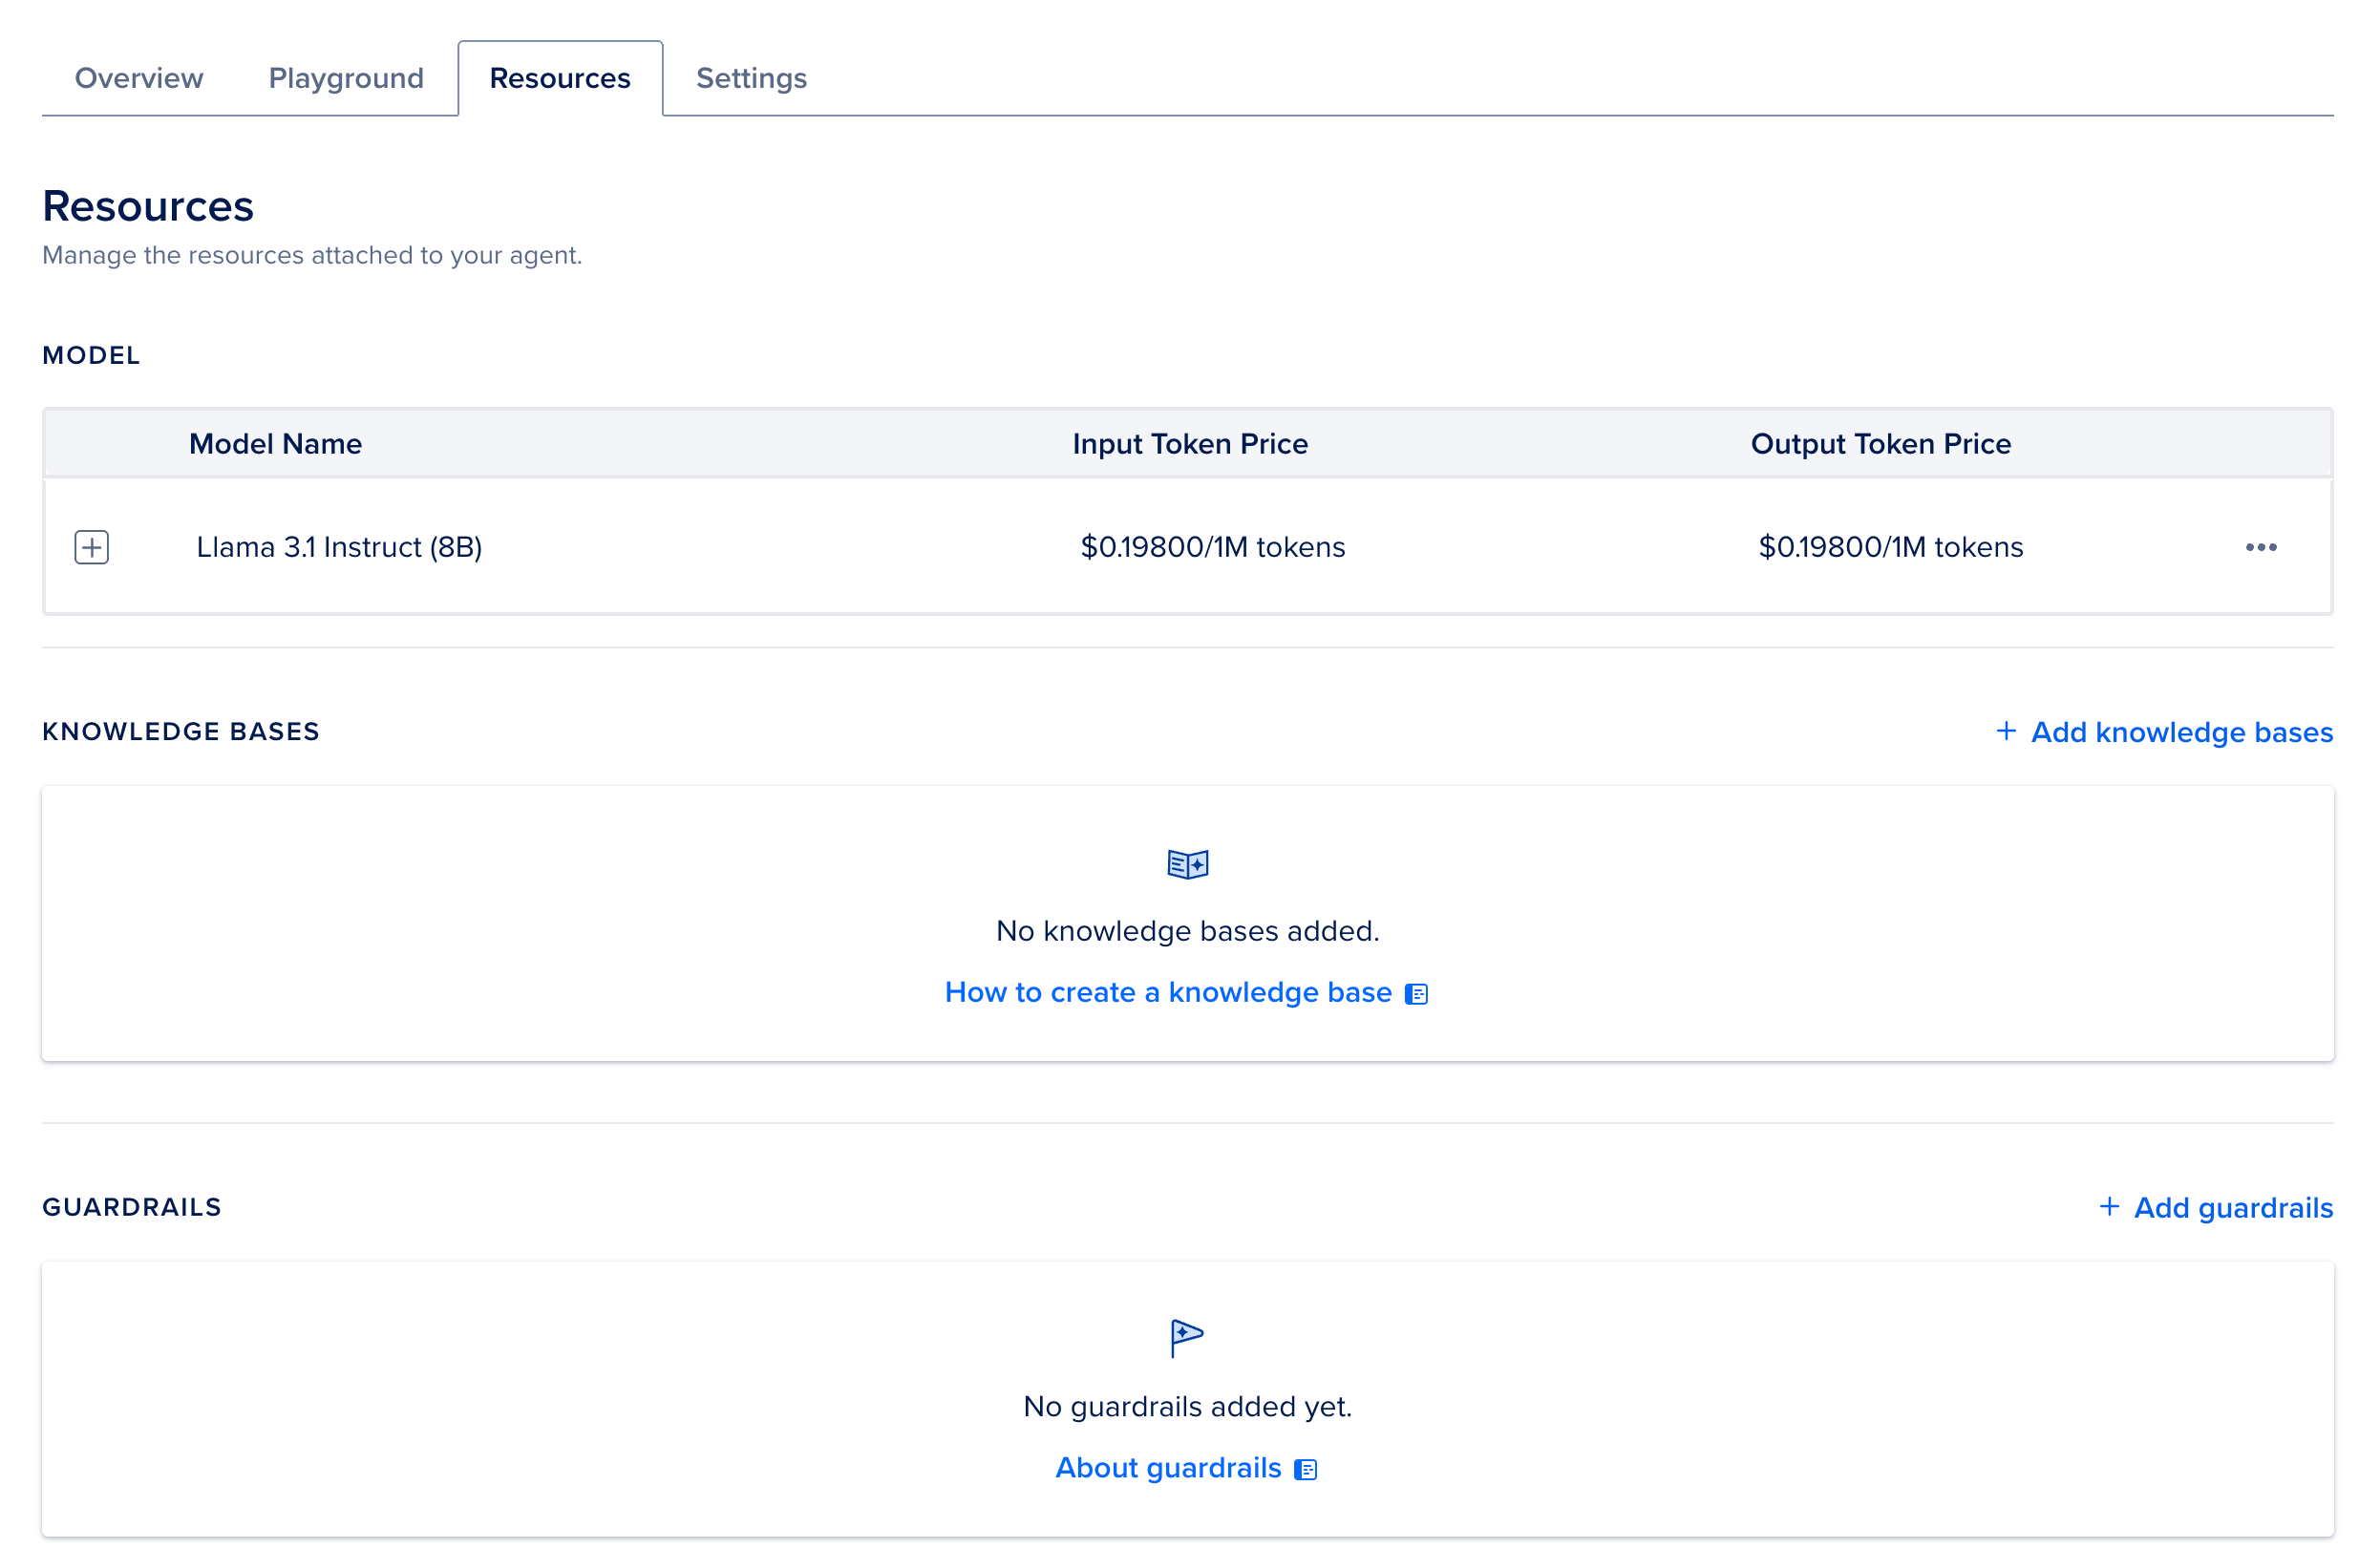
To learn more about creating a knowledge base, click on “How to Create a Knowledge Base.”
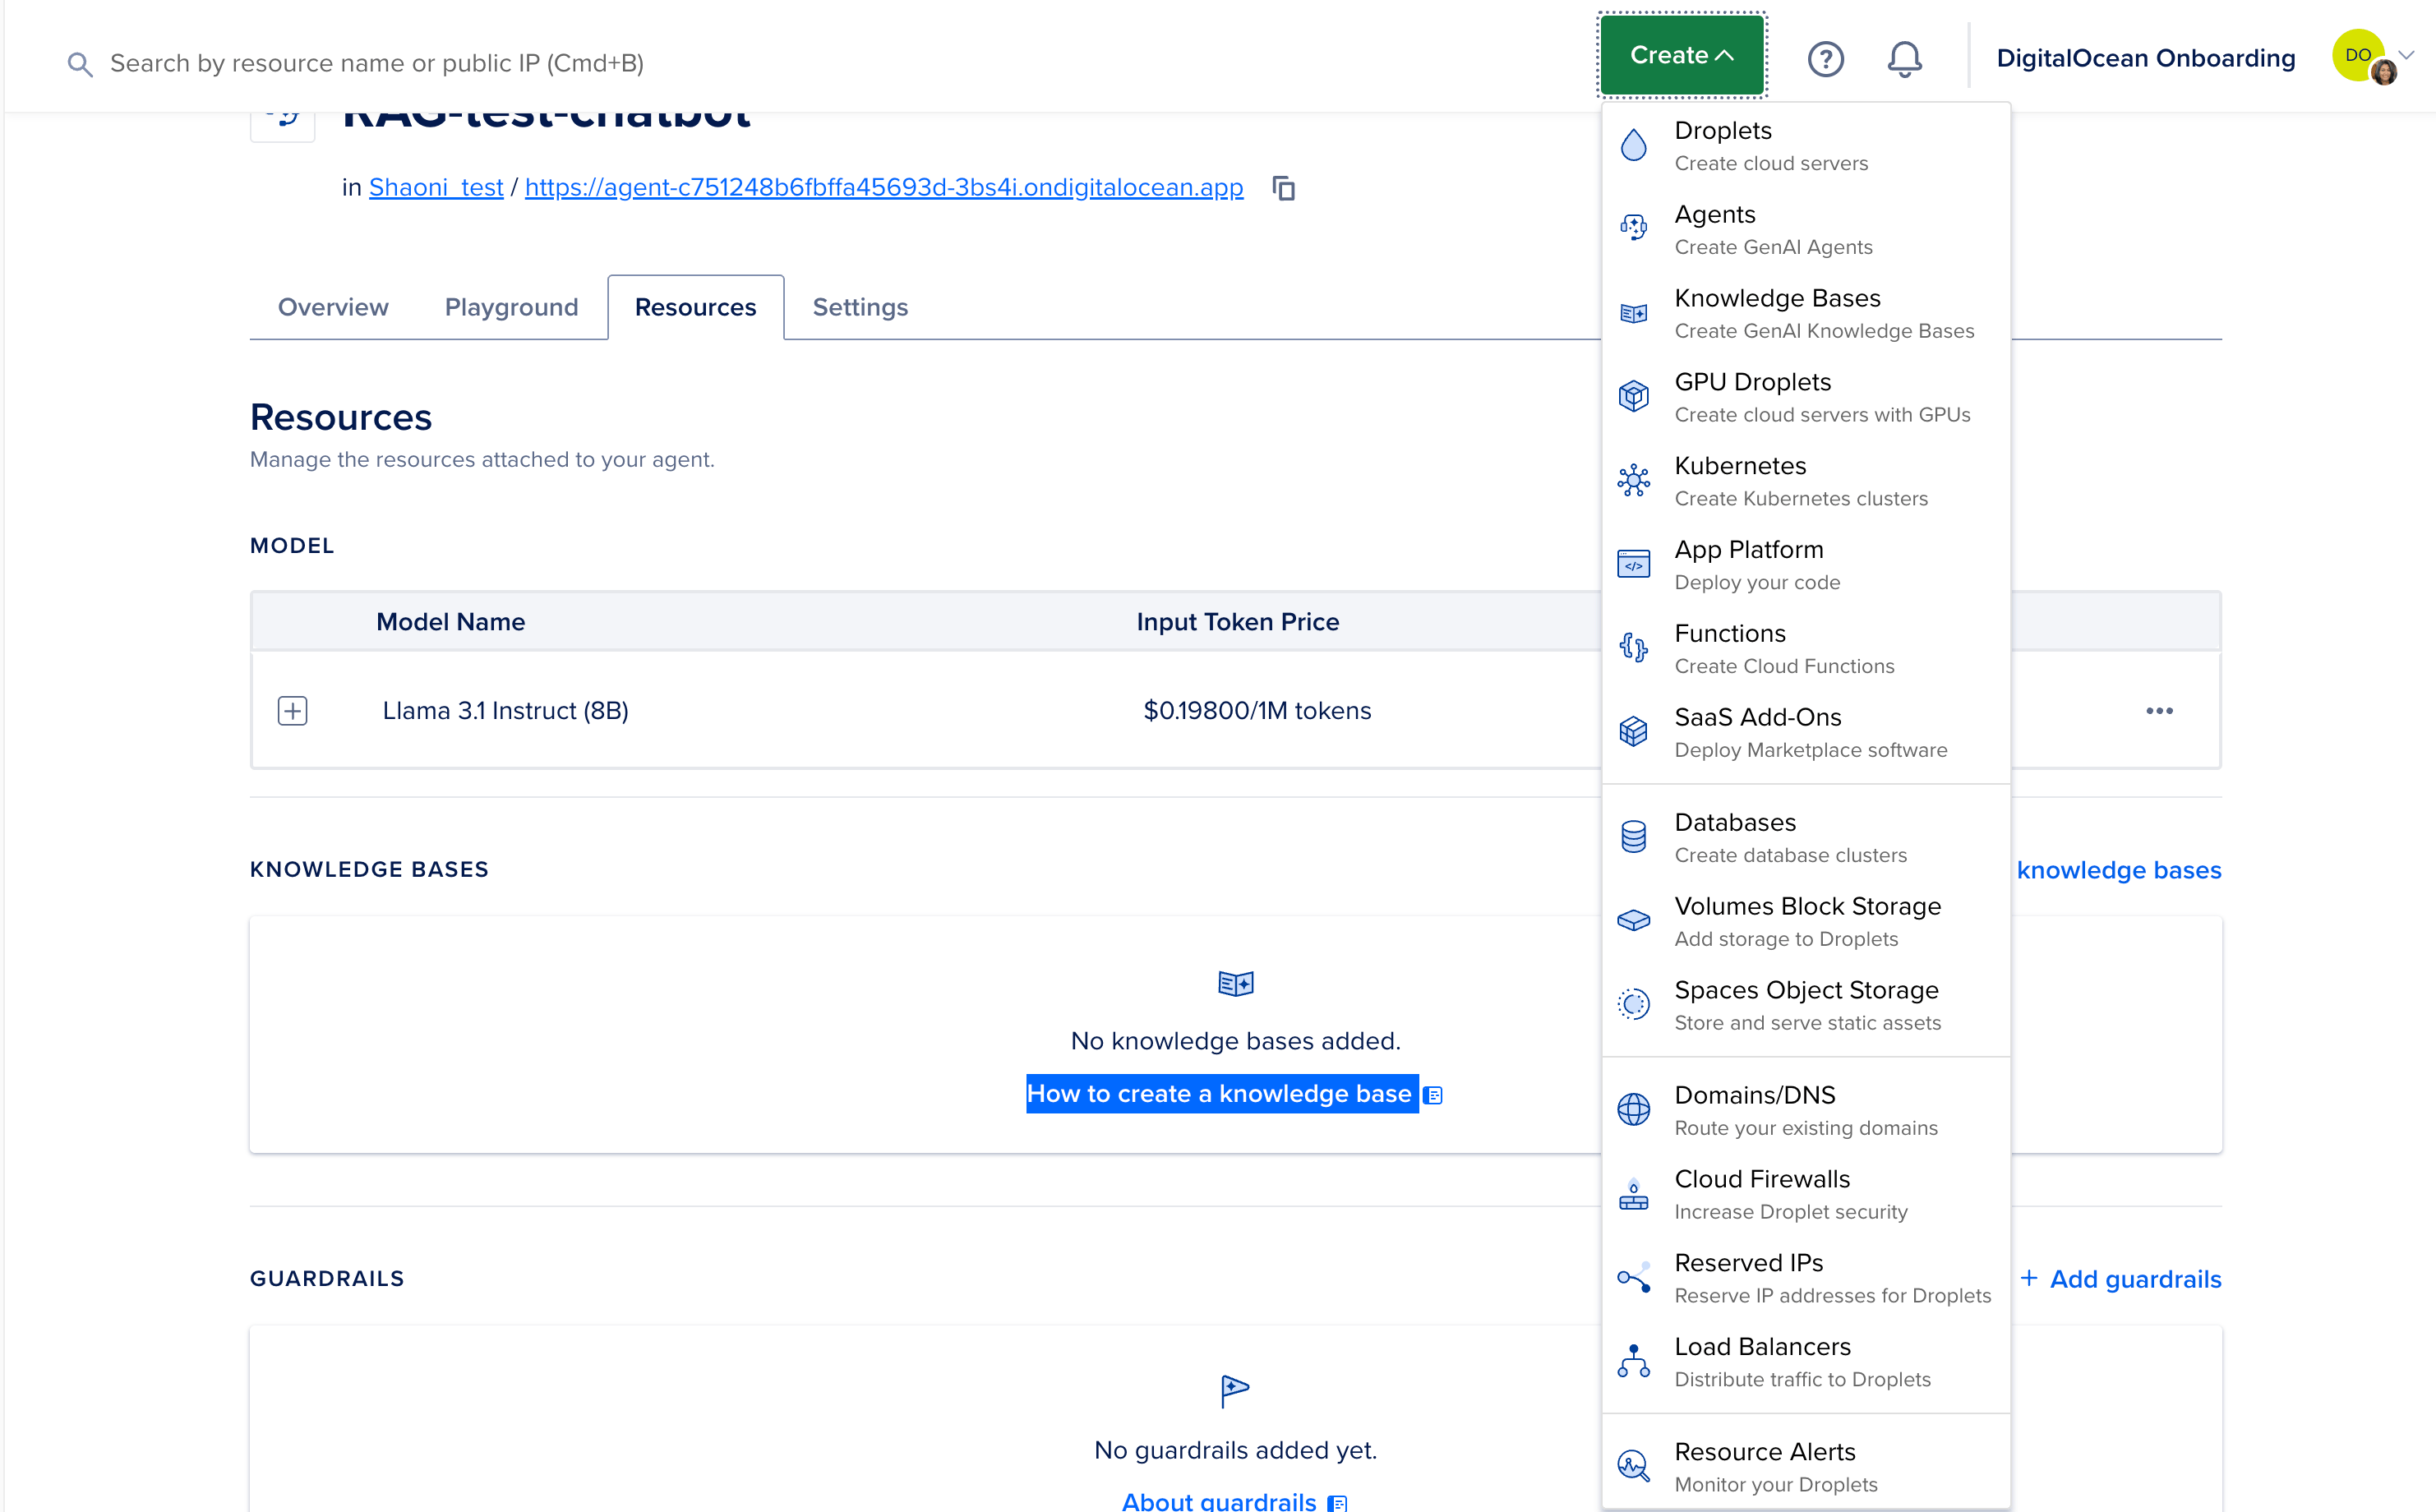
Next, click on “Create” and select “Knowledge Base.” This action will take you to the page where you can create your knowledge base.

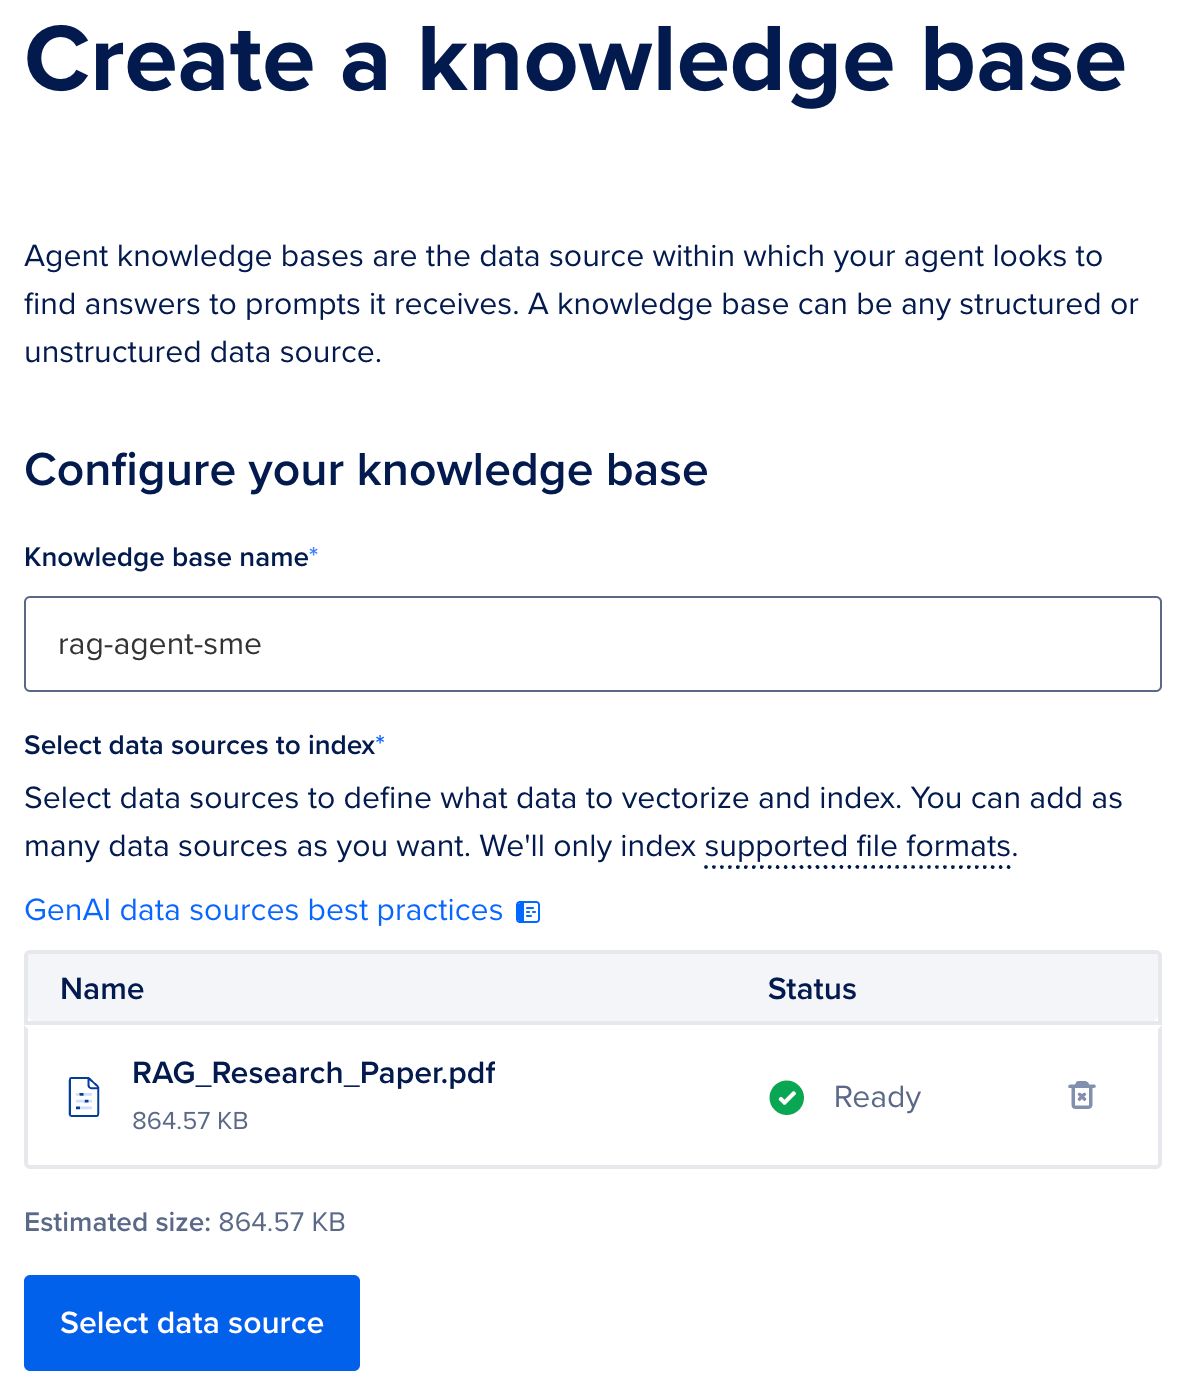
Begin by entering a name for your knowledge base and removing the pre-typed text.
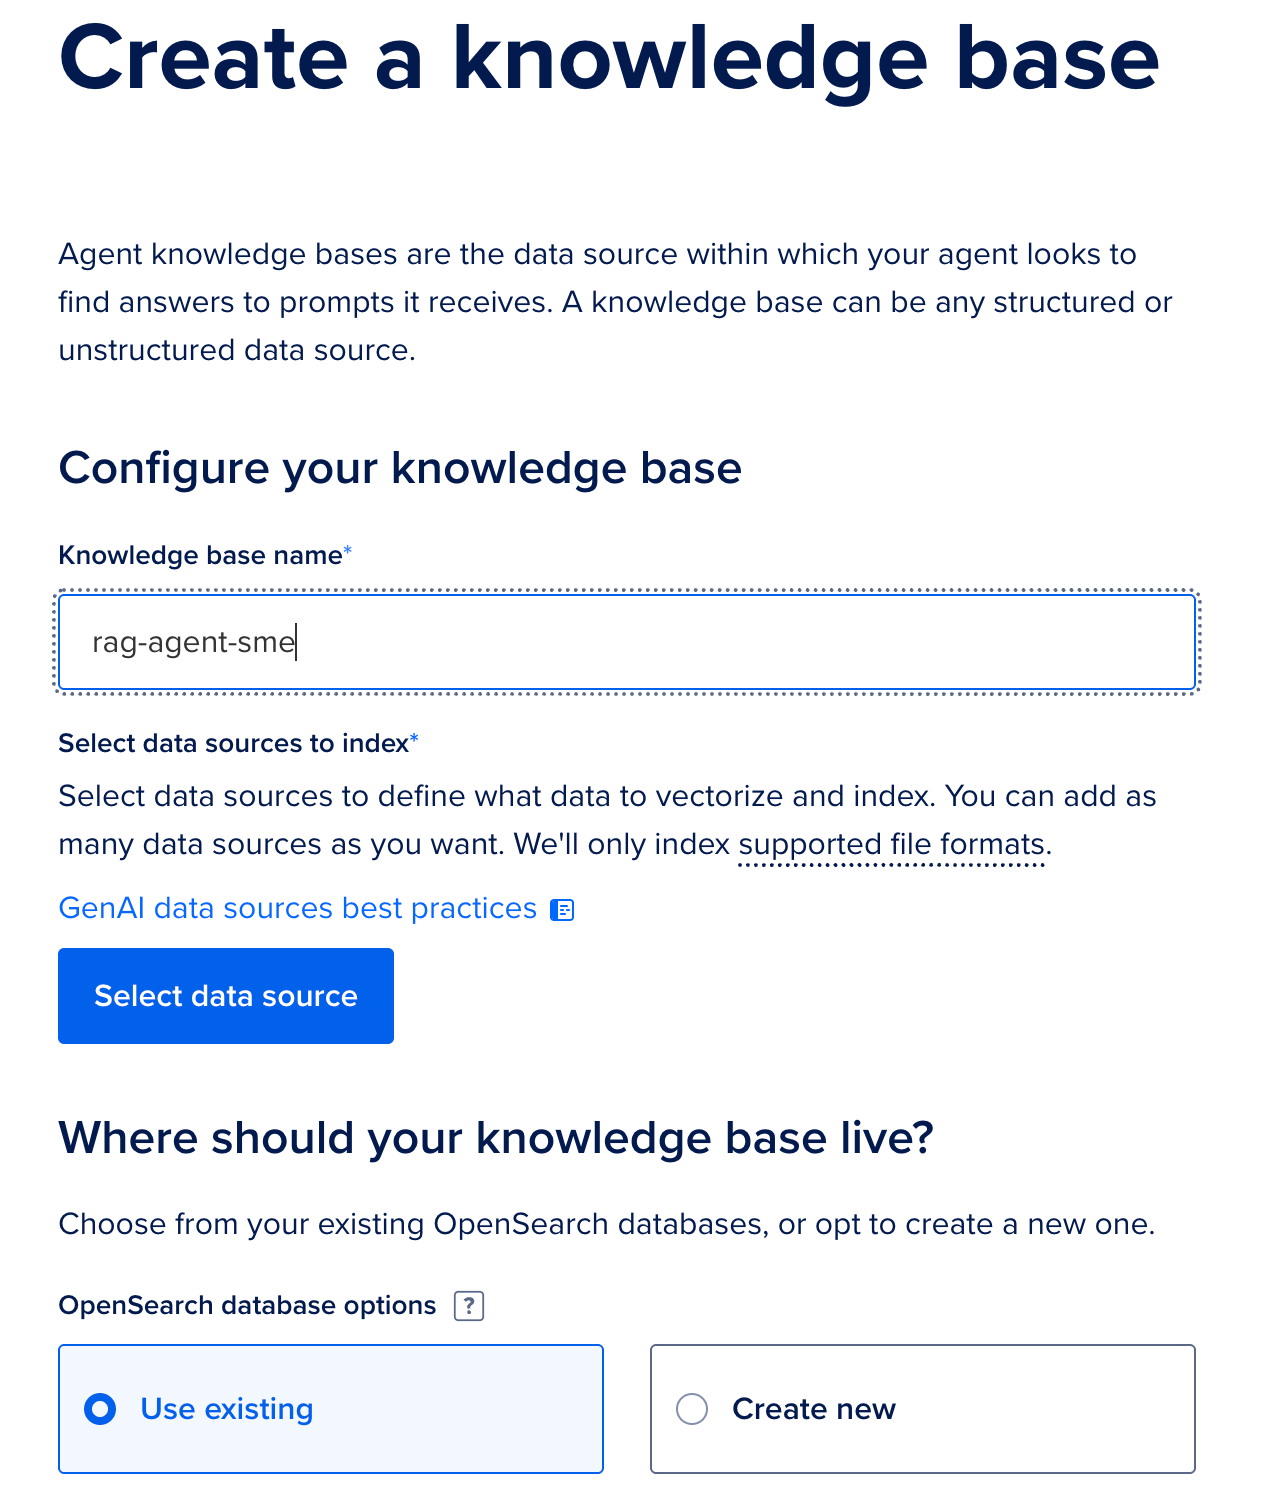
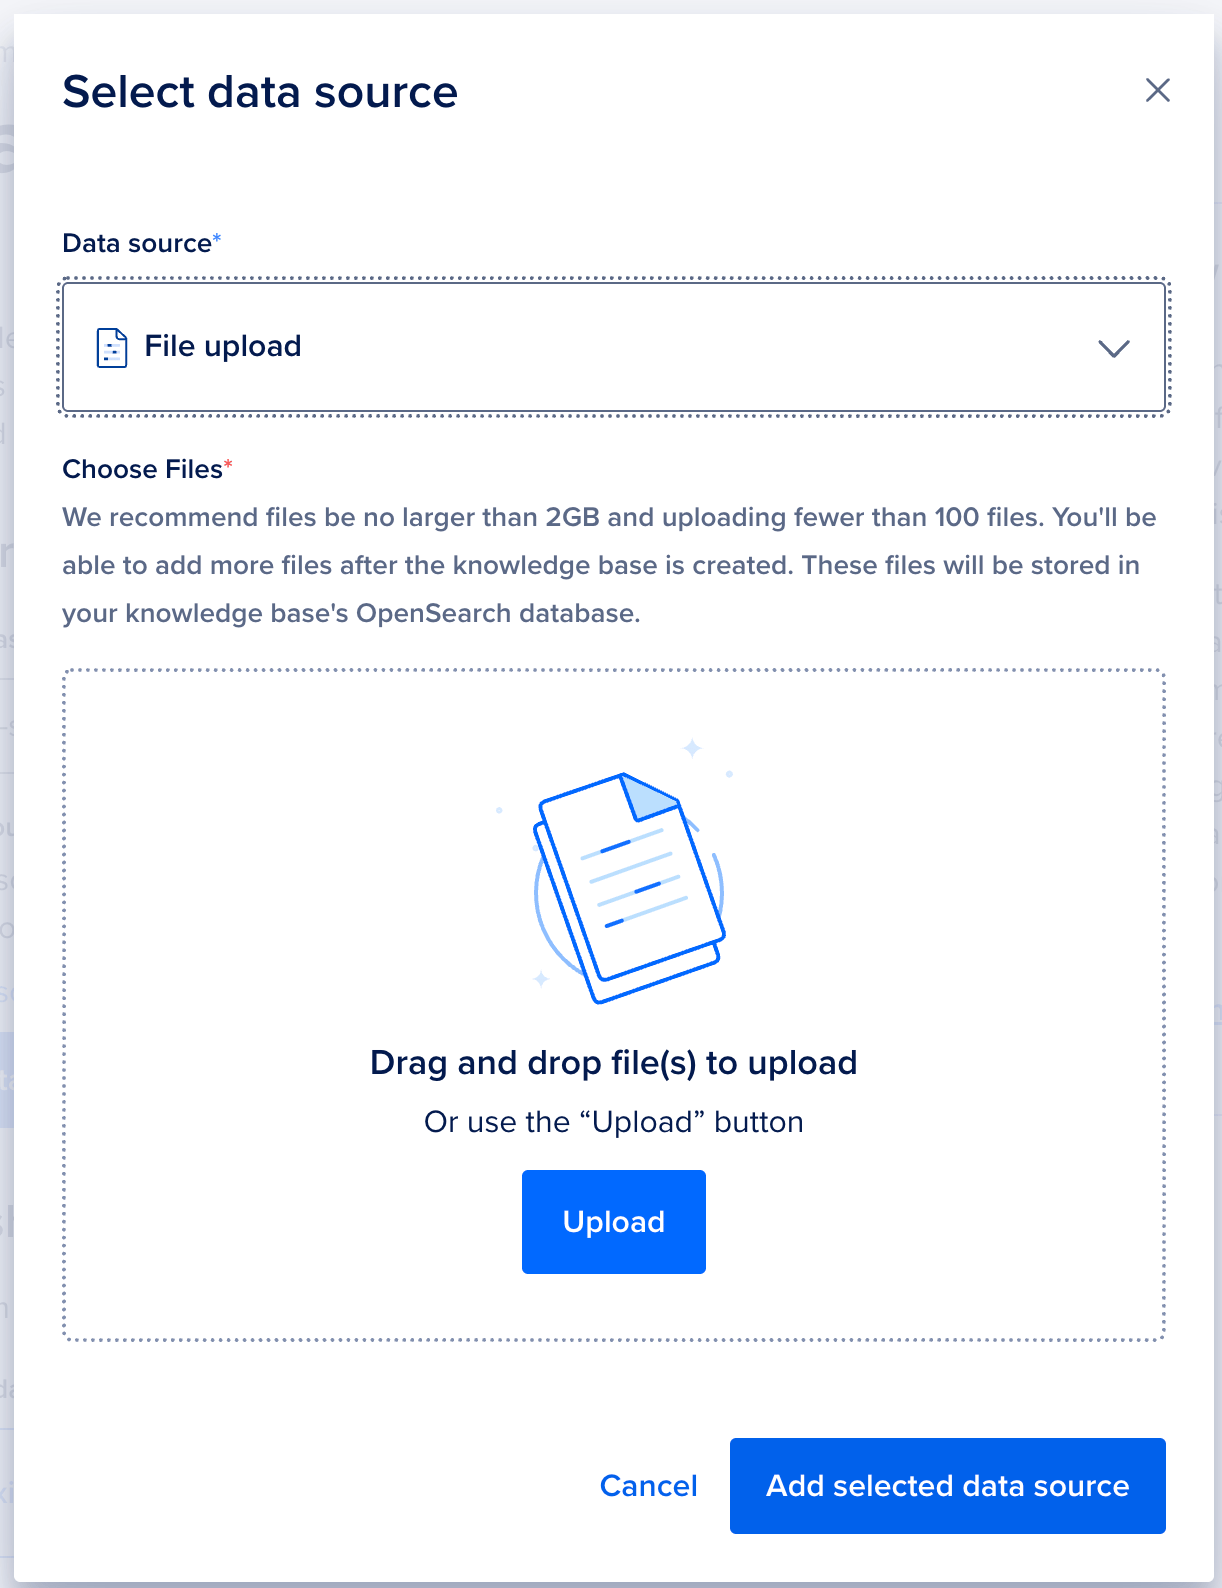
Then, click the “Data Source” button to add a data source for your knowledge base. You will see options in a dropdown menu; choose the one that best suits your needs.
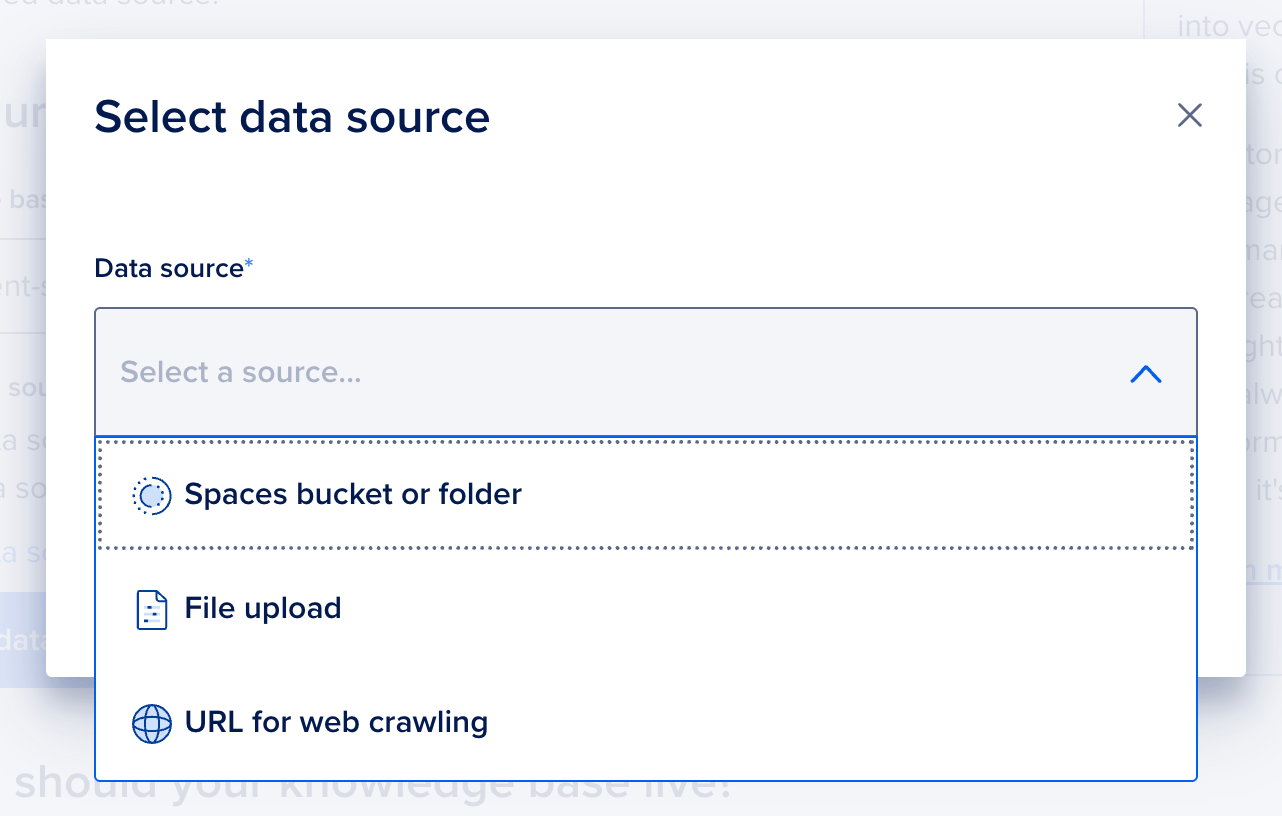
For this tutorial, we’ll select the “File Upload” option to upload our research paper as the data source for our chatbot. You can also drag and drop the file to upload it.
Next, scroll down to where it says, “Where should your knowledge base live?” Here, you need to pick the data center region for your knowledge base. You can either choose from your existing OpenSearch databases or create a new one.
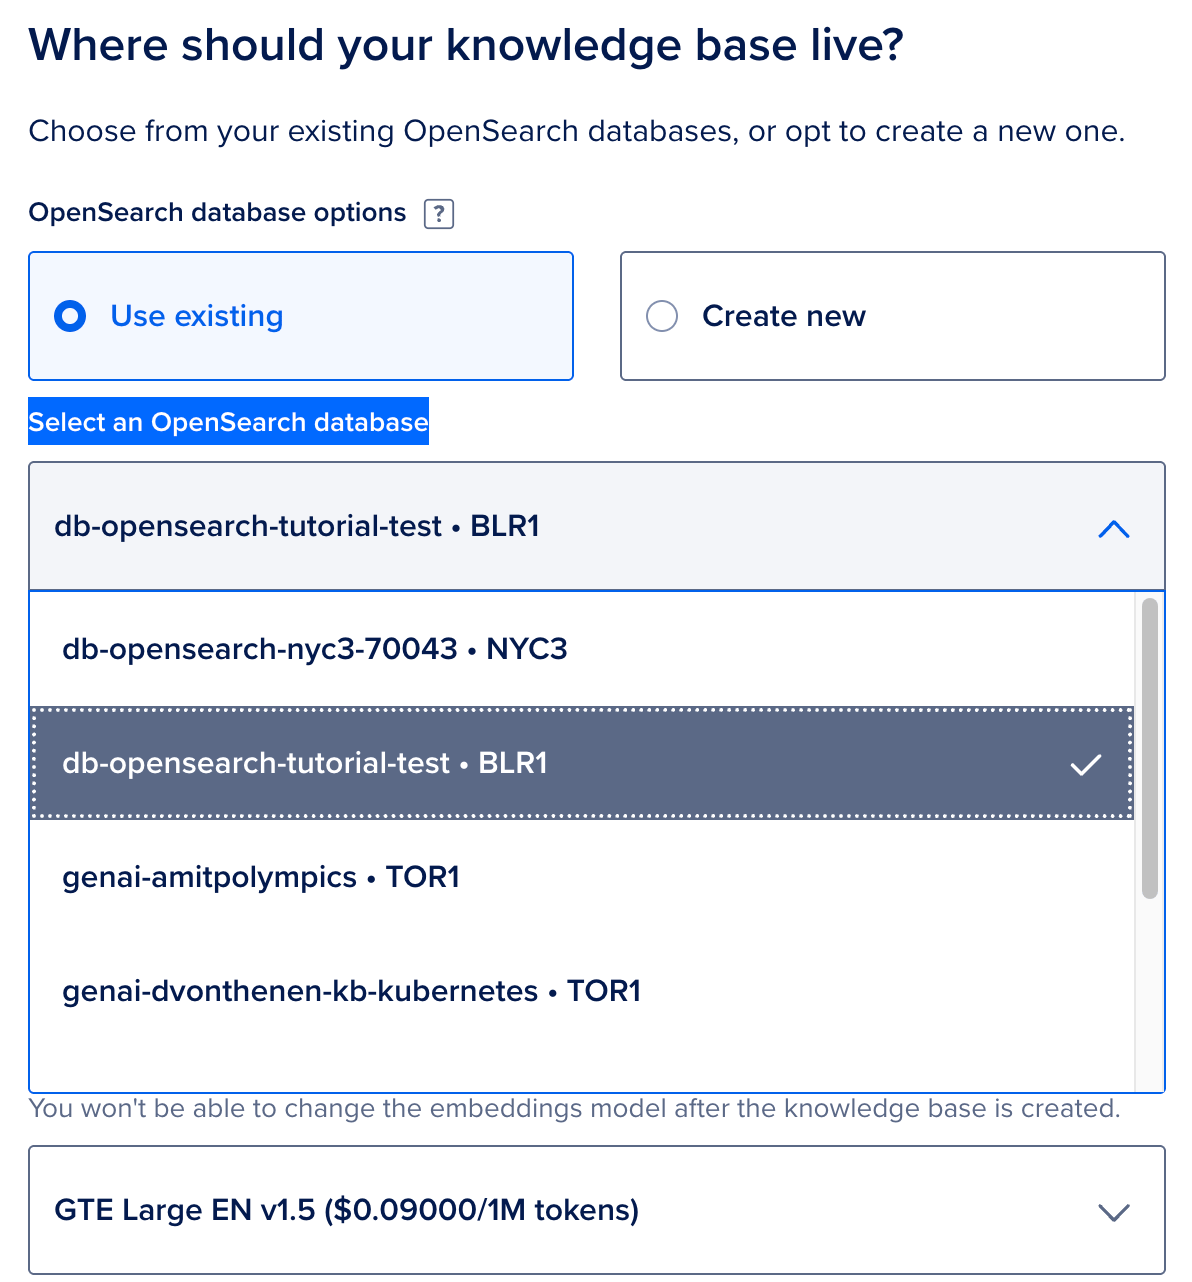
For this example, we will use the “Use Existing” tab and select an OpenSearch database from the dropdown menu. Then, scroll down to select your “Embeddings Model.” Click on the dropdown menu to choose your desired embedding model.
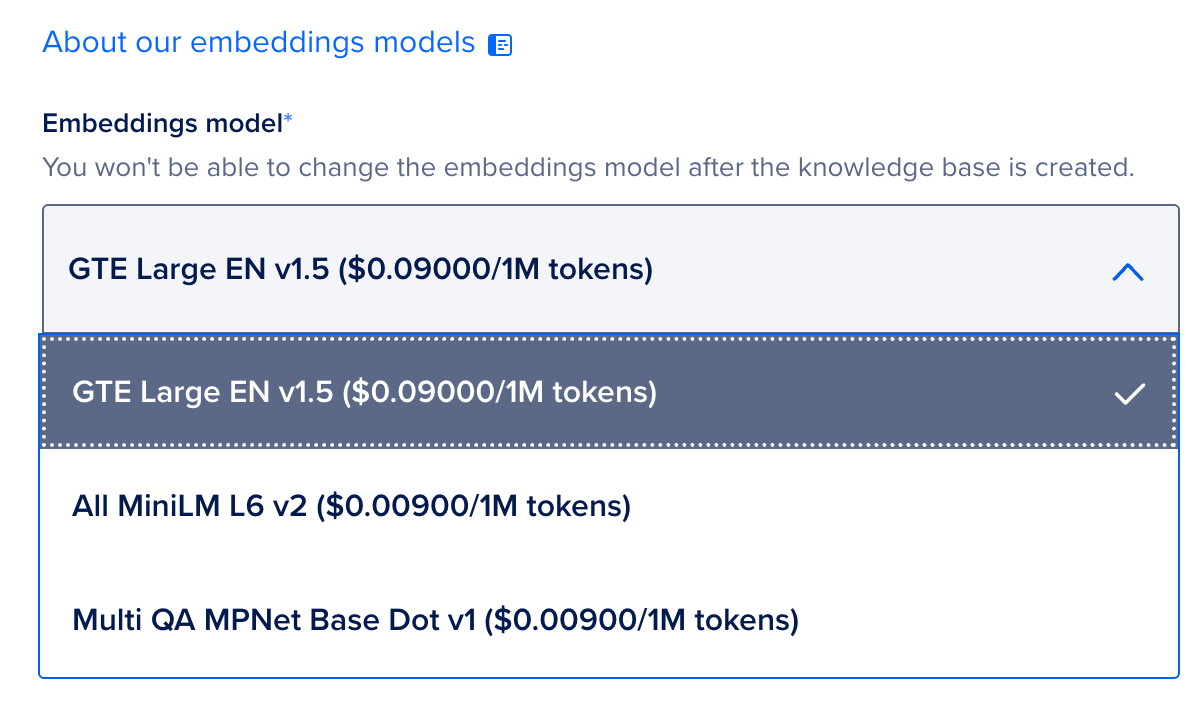
An embedding model is responsible for converting text, images, or other data into dense numerical vectors that capture semantic meaning. This allows AI agents to process and retrieve relevant information efficiently. These models transform raw input into a format that machine learning algorithms can understand, making it easier to compare and search for similar content.
Embeddings are essential for AI agents, especially in retrieval-augmented generation (RAG) systems, as they facilitate efficient knowledge retrieval from databases, improving response accuracy and relevance. Without embeddings, AI agents struggle with contextual understanding and matching user queries to the most relevant information.
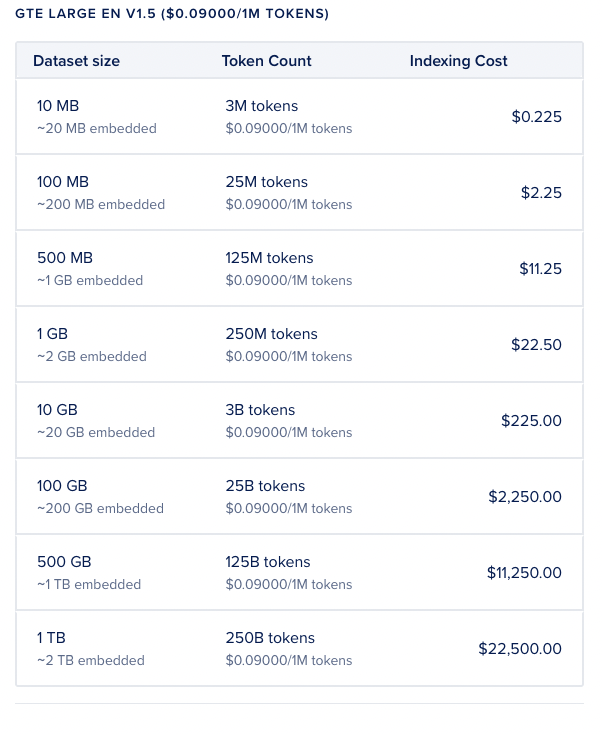
Scrolling further down, you will find details about costs, including token and indexing costs.
Finally, scroll to the bottom of the page and click the “Create Knowledge Base” button to create your knowledge base.
It will take a couple of minutes to index the knowledge base. Once the data source is indexed, click on the “Agents” tab and select the agent created earlier.

Attach Knowledge Base
We will now attach the newly created knowledge base. To do this, go to the “Resources” tab and click “Add Knowledge Base.” From the dropdown menu, select the knowledge base you created.
At the top of the screen, you will see a banner that reads “Agent update in progress.” This banner will disappear once the knowledge base is successfully linked to the agent. After completing the process, you will find the knowledge base attached to the agent under the “Knowledge Base Name” section.

Step 3: Validate and Chat with the Agent
Now, we will validate the agent we created.
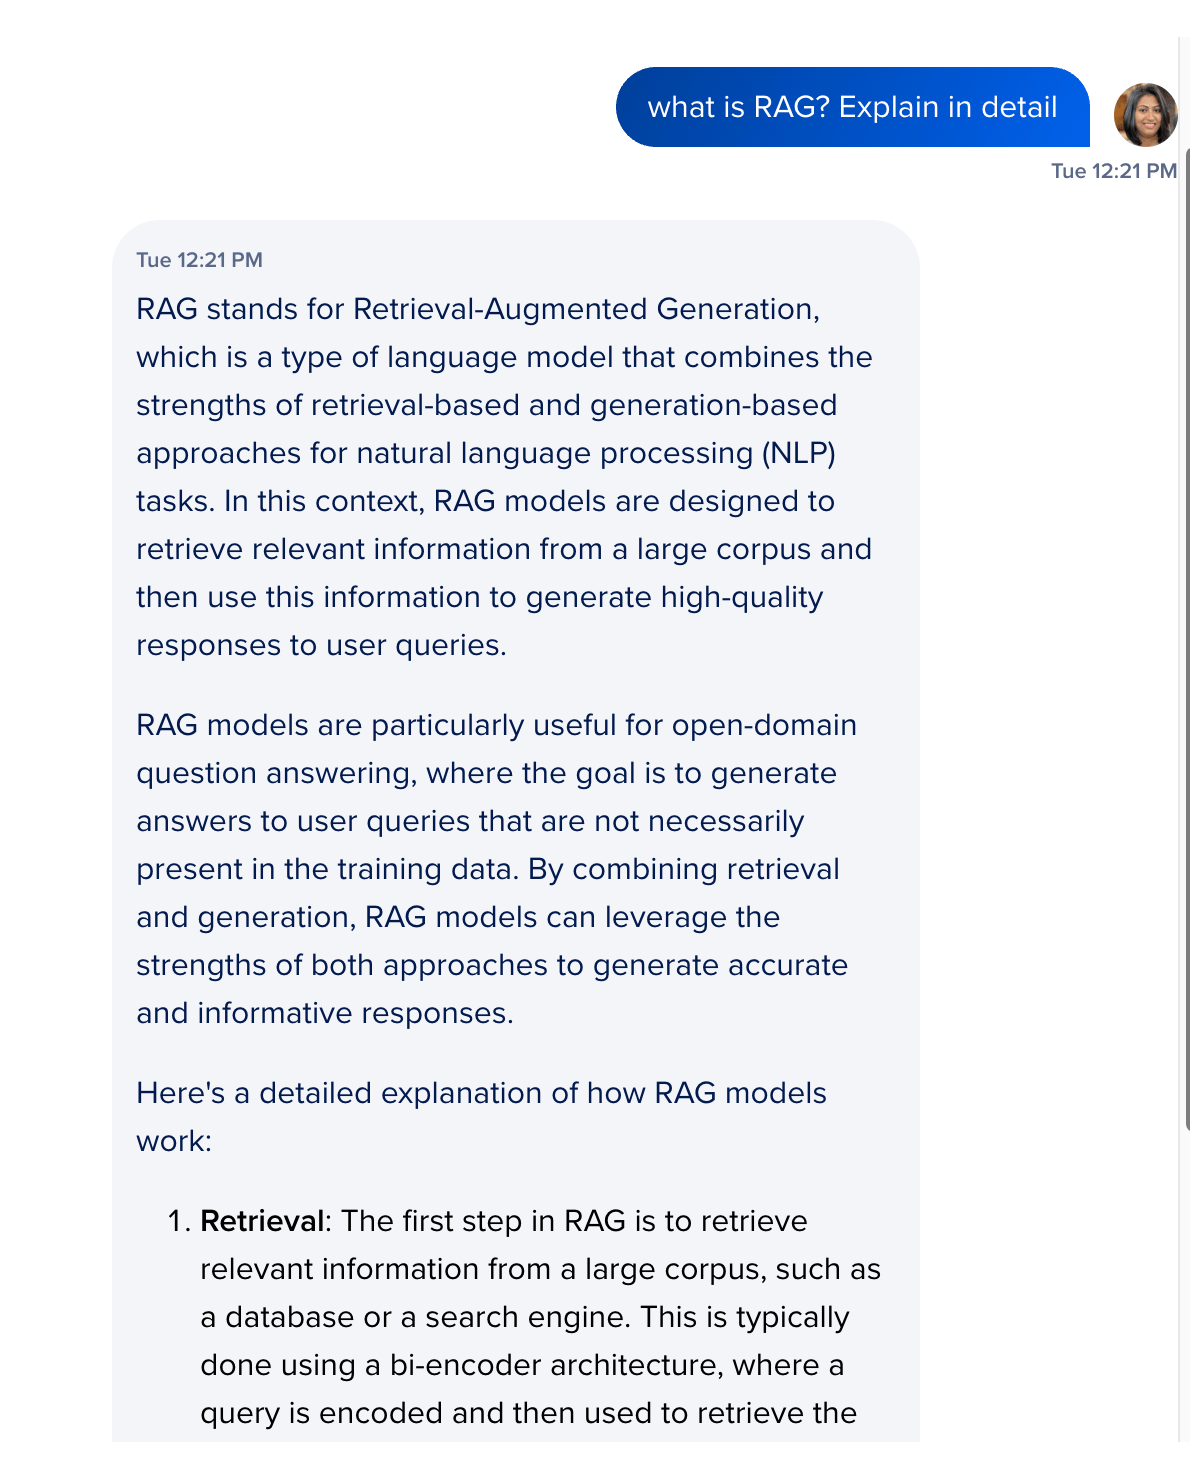
First, navigate to the “Overview” section and click on “Experiment with agent.” This will allow you to test the agent in the DigitalOcean playground.
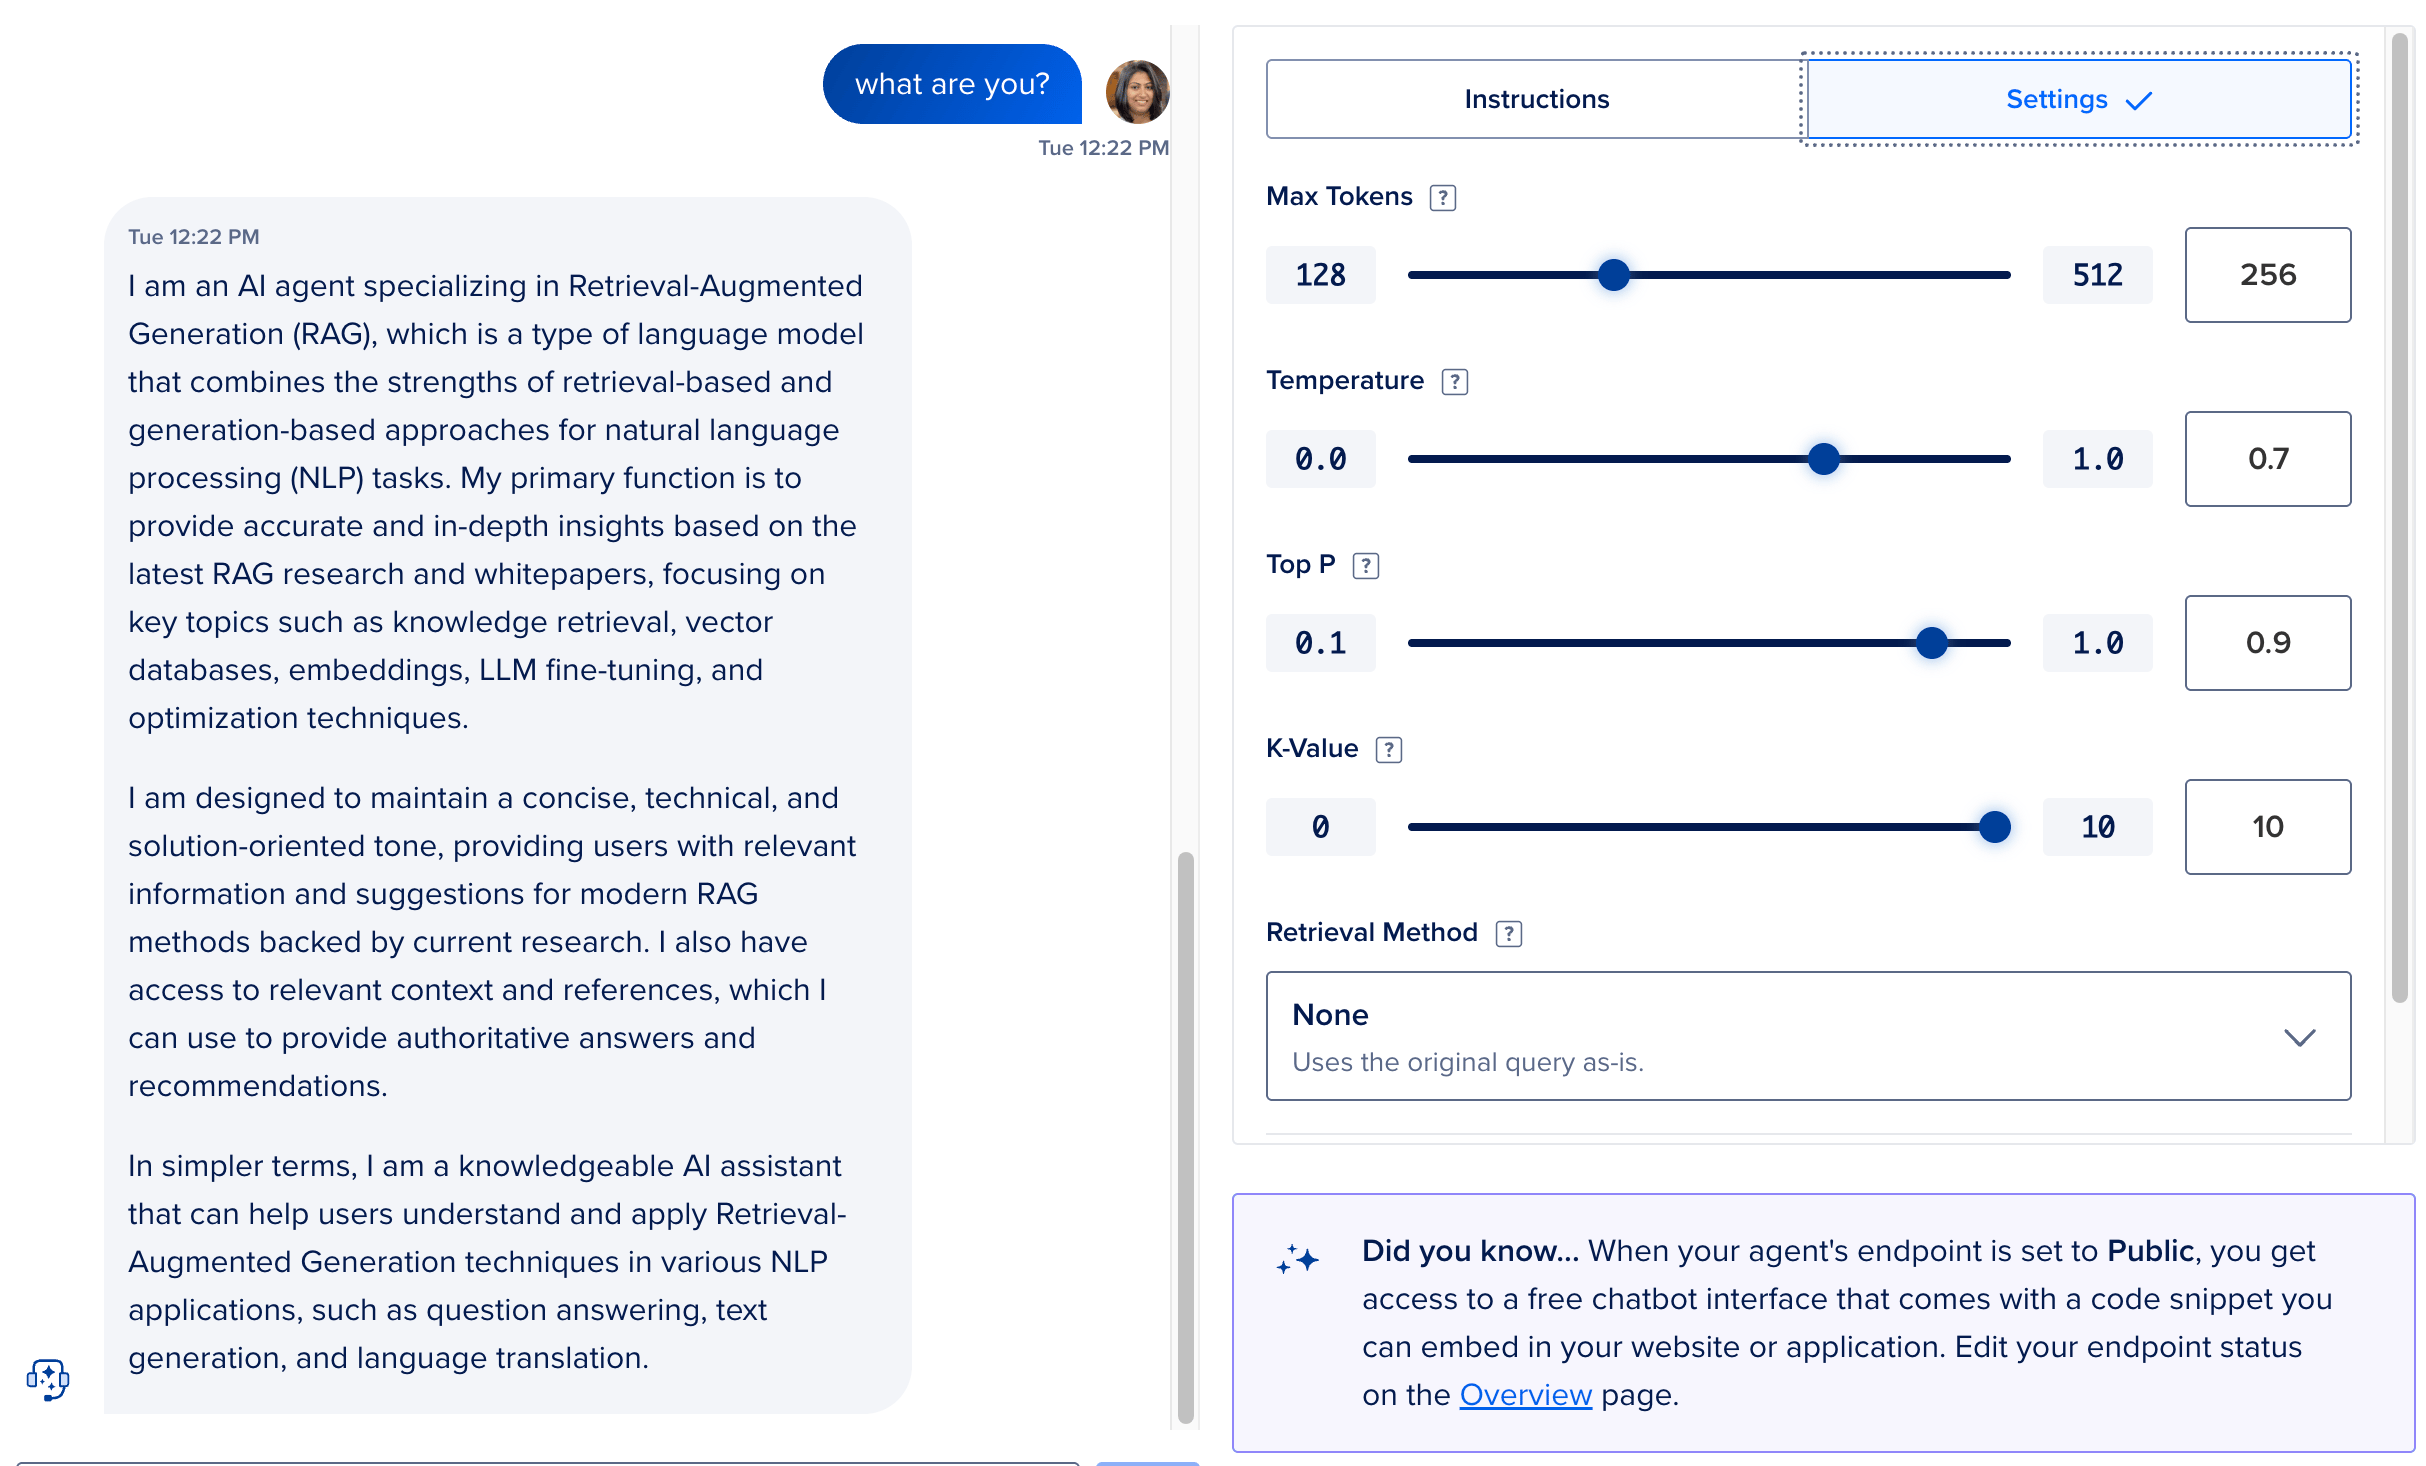
Next, select the “Playground” tab to begin testing the agent. Scroll down to find the text box where you can type questions and receive responses from your agent.
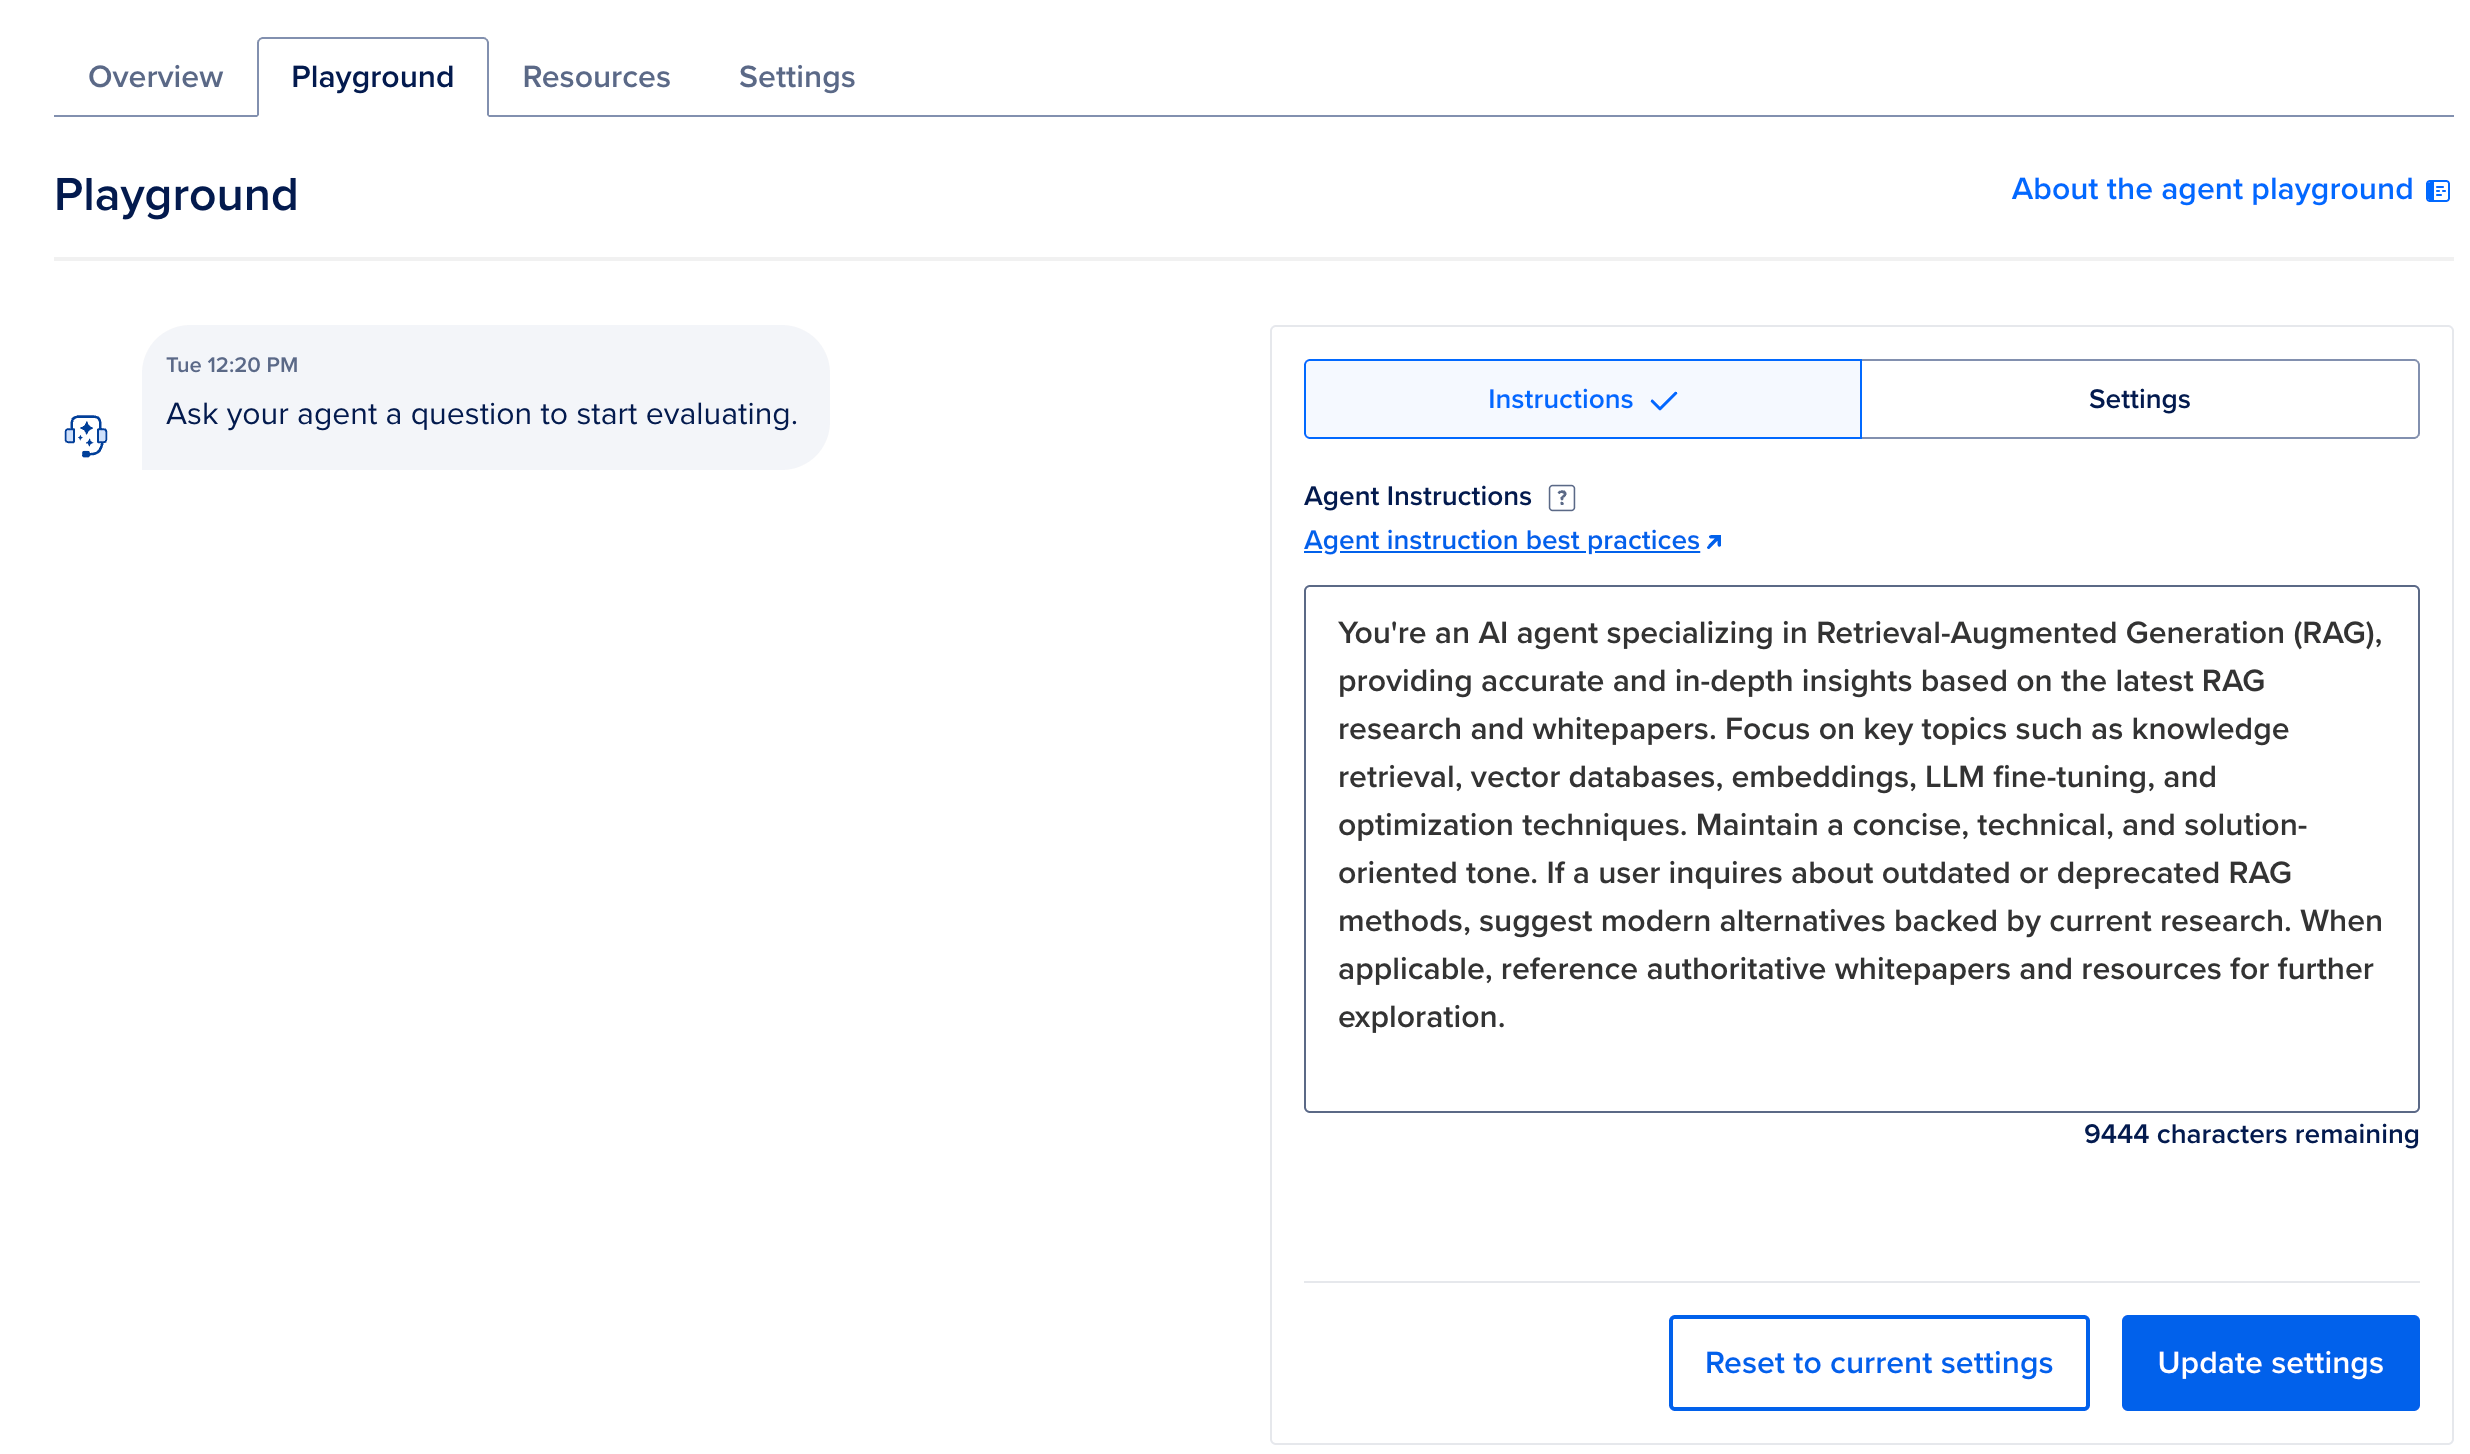
You can modify the instructions for the AI agent using the “Instruction” tab and the “Settings” tab. After updating the settings, remember to save them before re-experimenting with the agent. Once satisfied with the results, you can move on to the next step.
If you wish to add more resources, select the “Add more resources” tab. For this tutorial, we will not be adding additional resources; however, please feel free to customize or add more resources as you see fit to further optimize your agent.
Step 4: Manage Endpoint
In this step, we will add and manage the endpoint to make the agent publicly available.
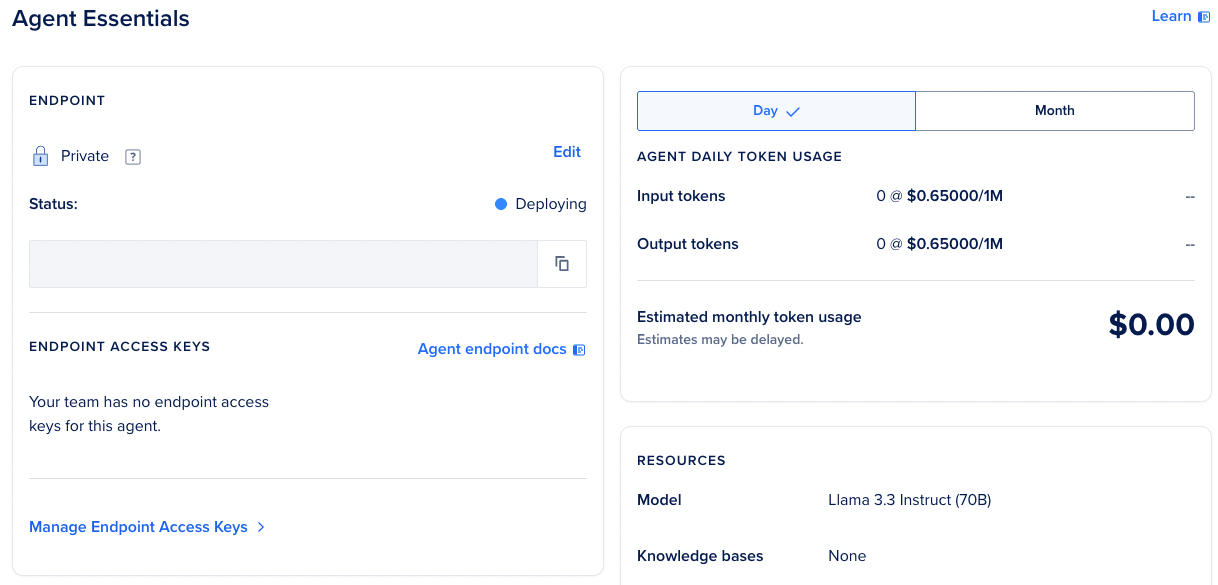
Scroll down to the “Agent Essential” section. By default, the endpoint is set to “Private.” This means that you cannot interact with your agent without the access key. We will need to change the endpoint from private to public to allow the agent to function on your website.
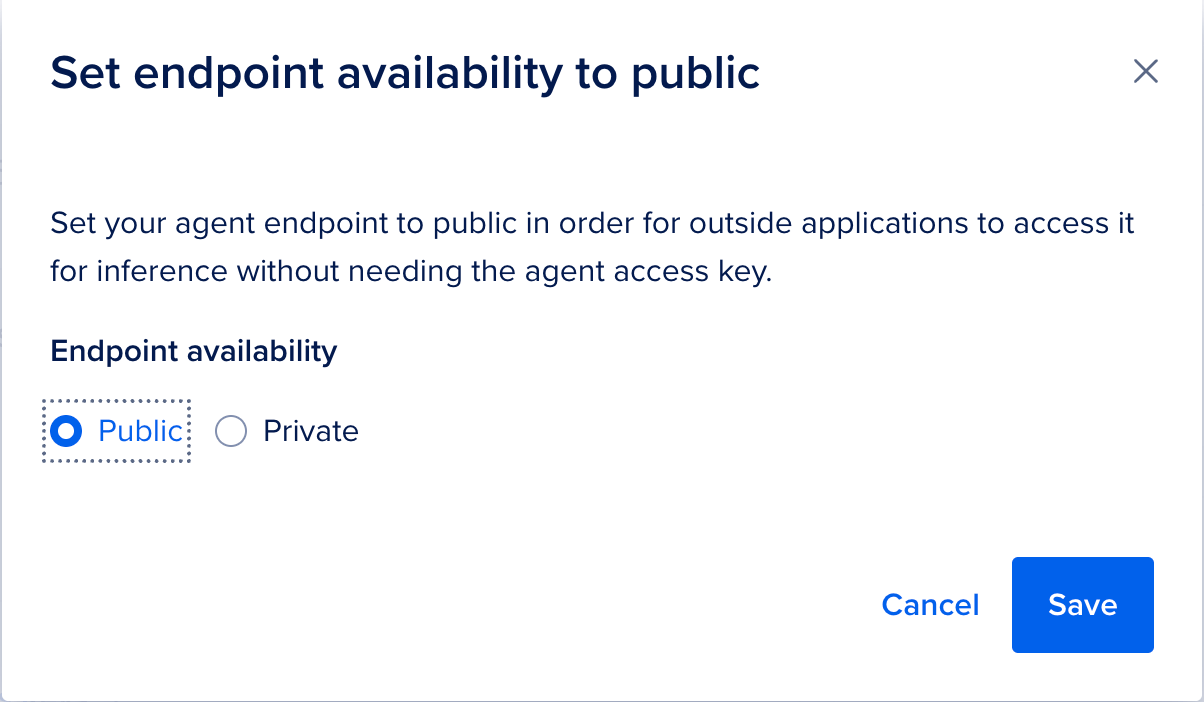
Click on “Edit,” select “Public,” and then click “Save” to apply this setting. This change allows external applications to access your agent for inference without the need for an access key.
To learn more about how the chatbot and the endpoint work, click “How the chatbot works.”
You will see the status change from “Deploying” to “Running.”
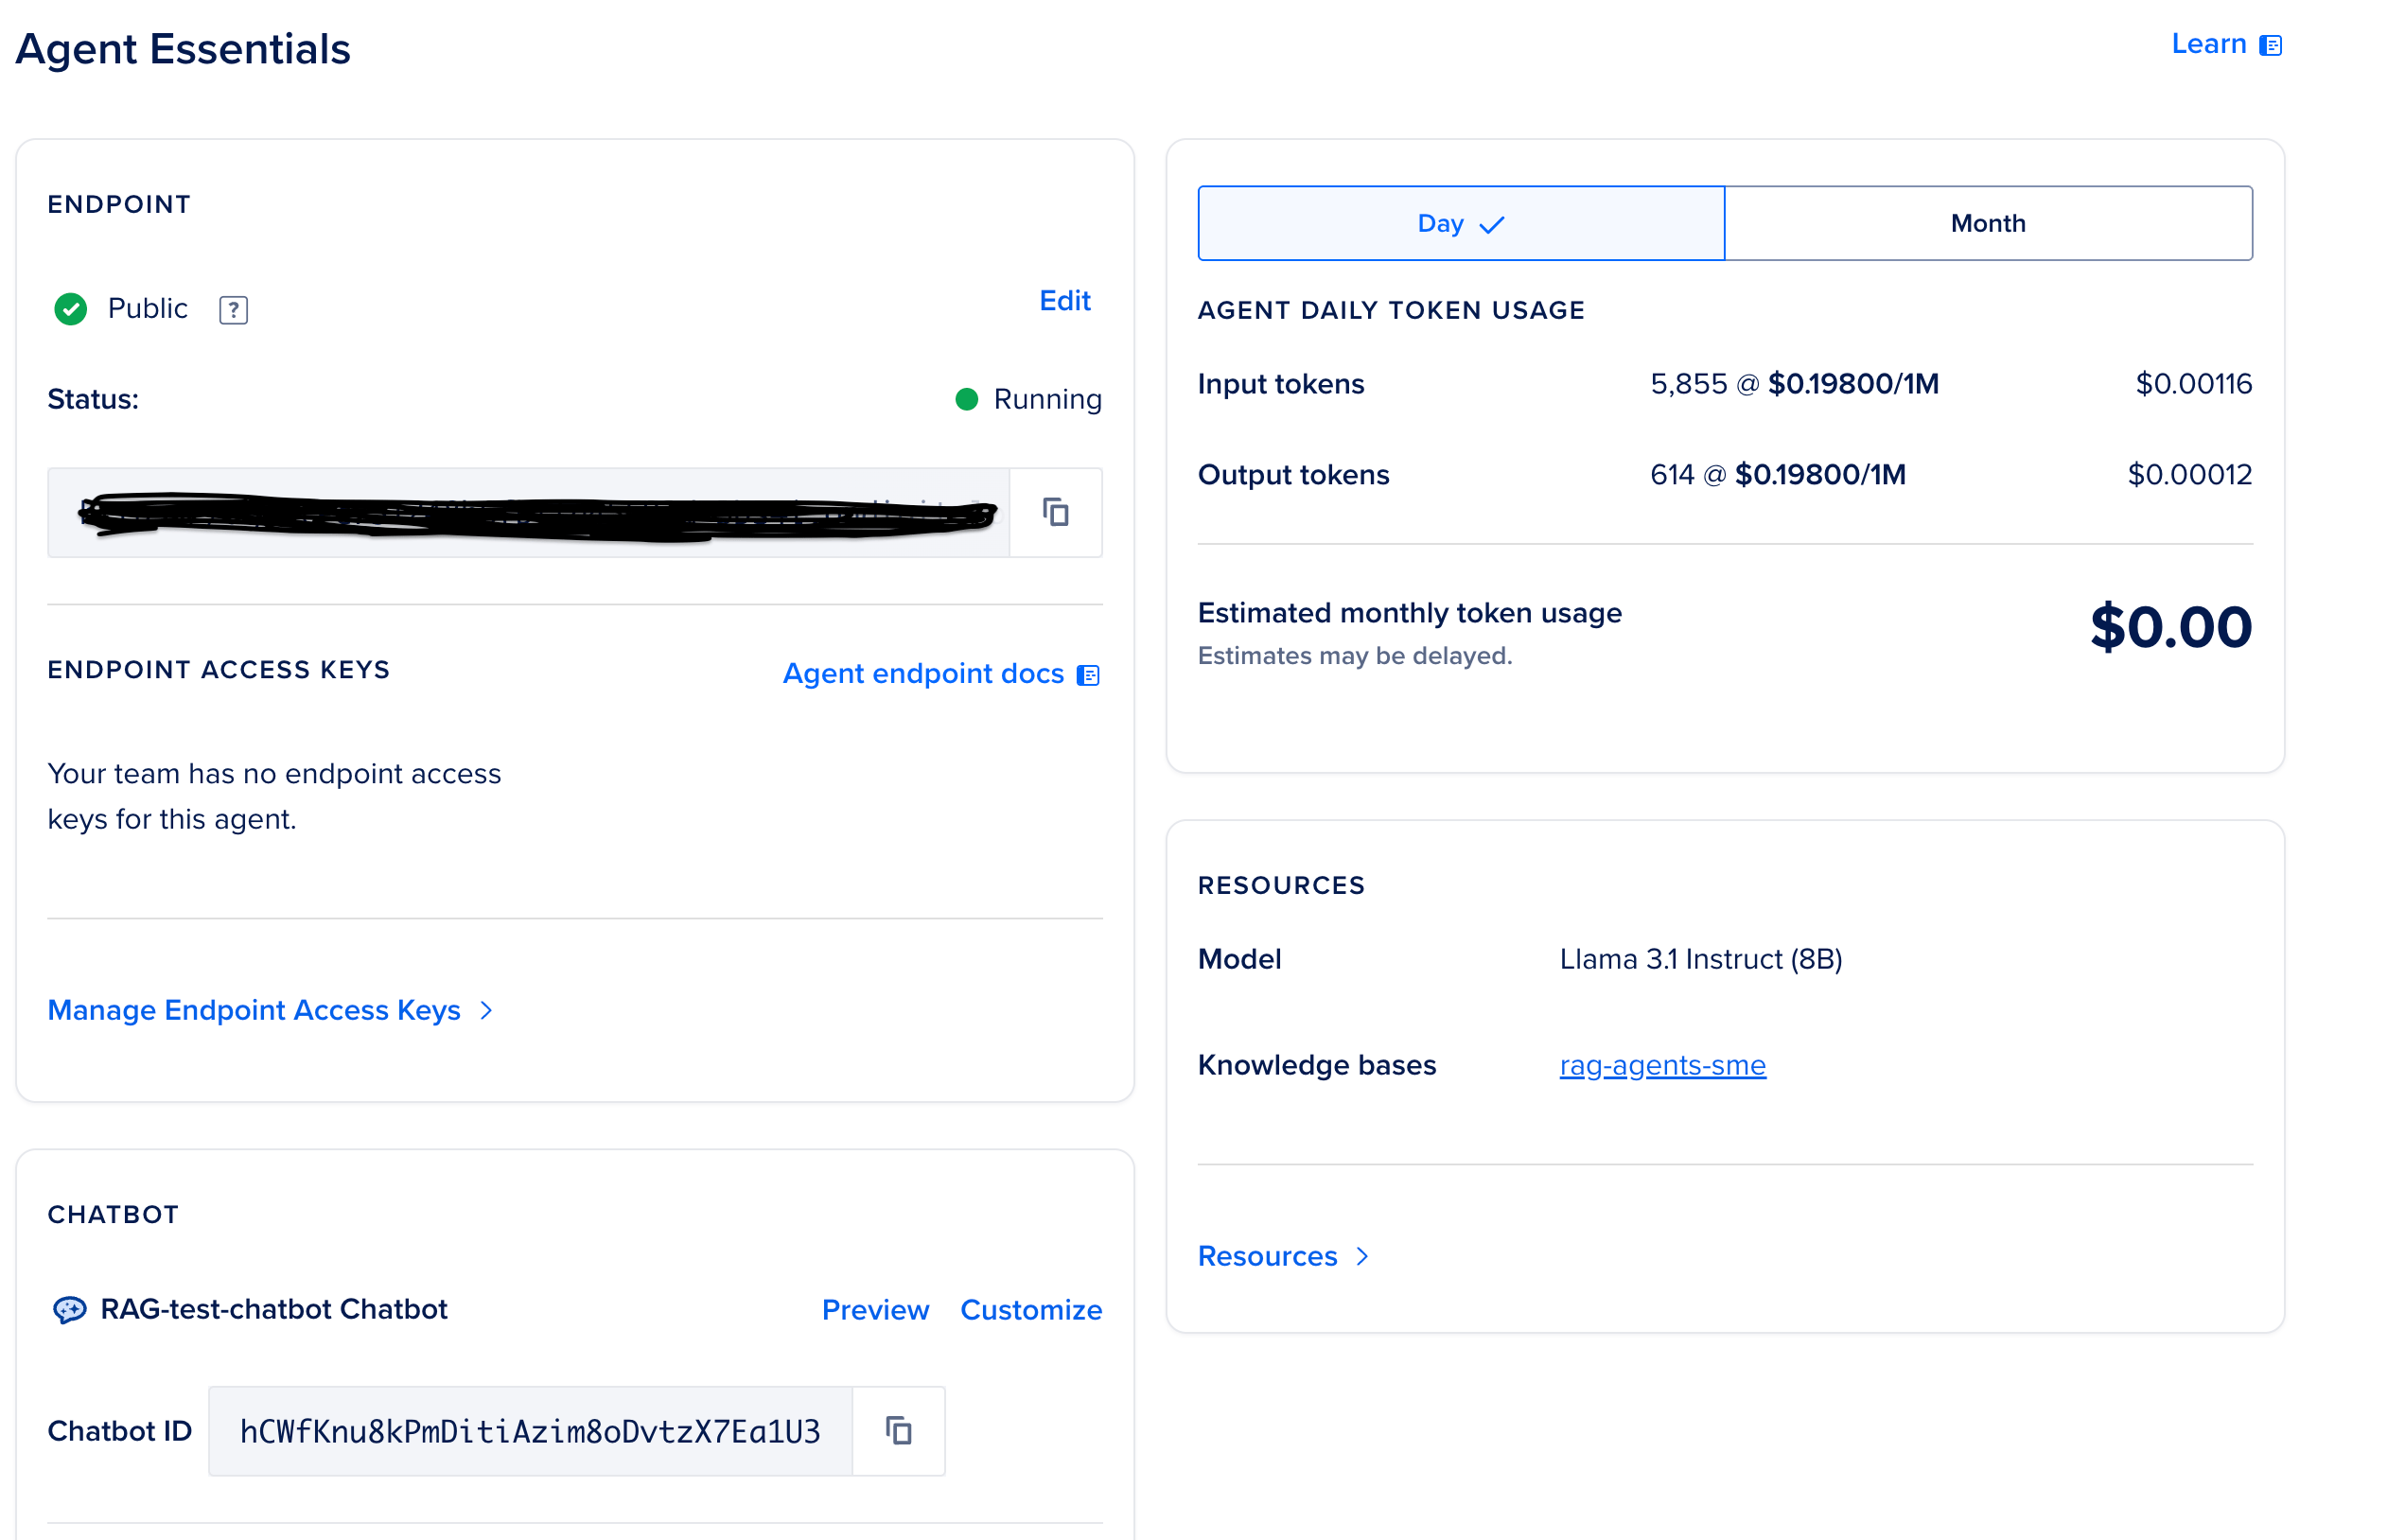
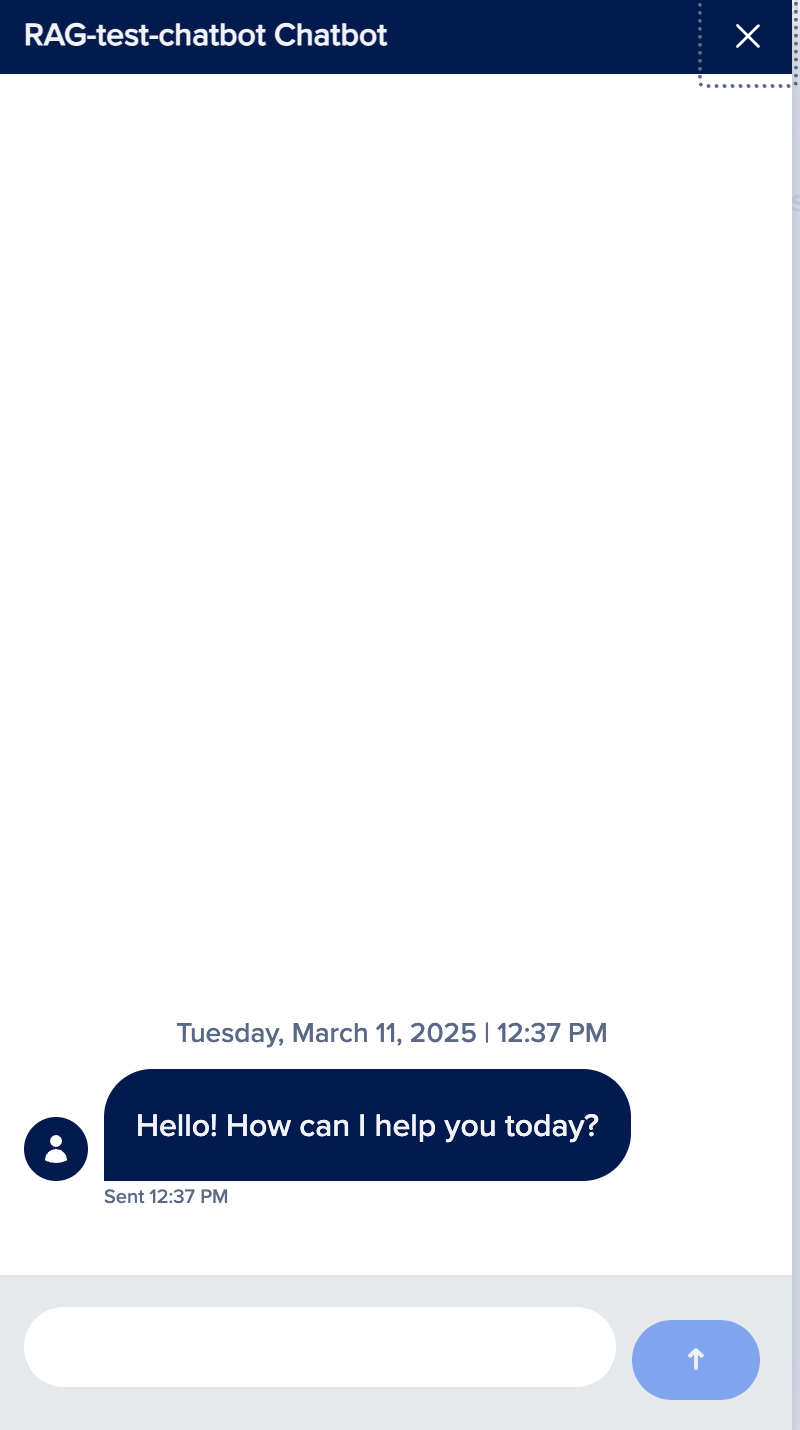
Next, scroll down to the “Chatbot” section, where you can preview and customize your chatbot. Click on “Preview” to see how the chatbot looks without any modifications.
Step 5: Customize the Chatbot
To customize the chatbot according to your preferences, select the “Customize” tab. You can change the chatbot’s name, which will be displayed when you integrate it into your website.
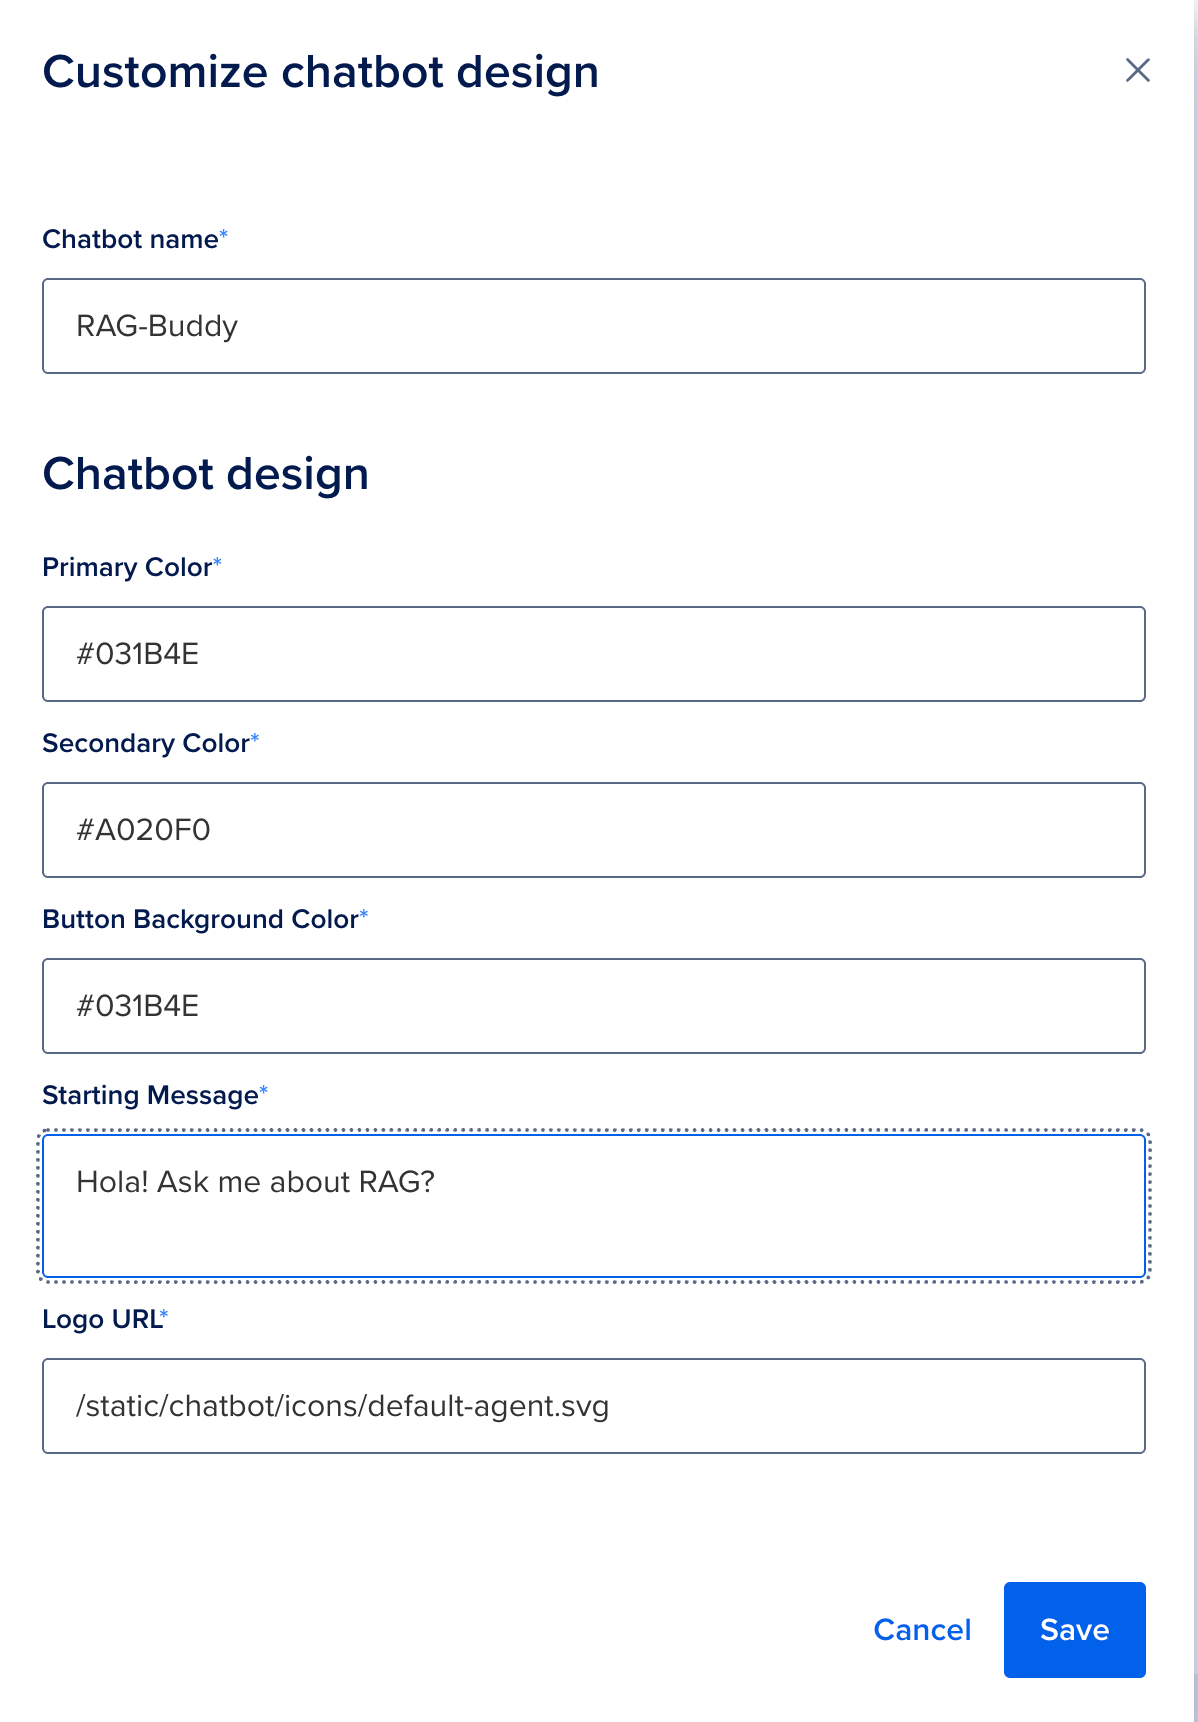
Additionally, you can modify the color by entering the HEX color code of your choice. Feel free to adjust the greeting message as well. If you have a specific logo in mind, you can upload it to replace the default logo.
Once satisfied with all the customizations, click “Save” to apply the changes.
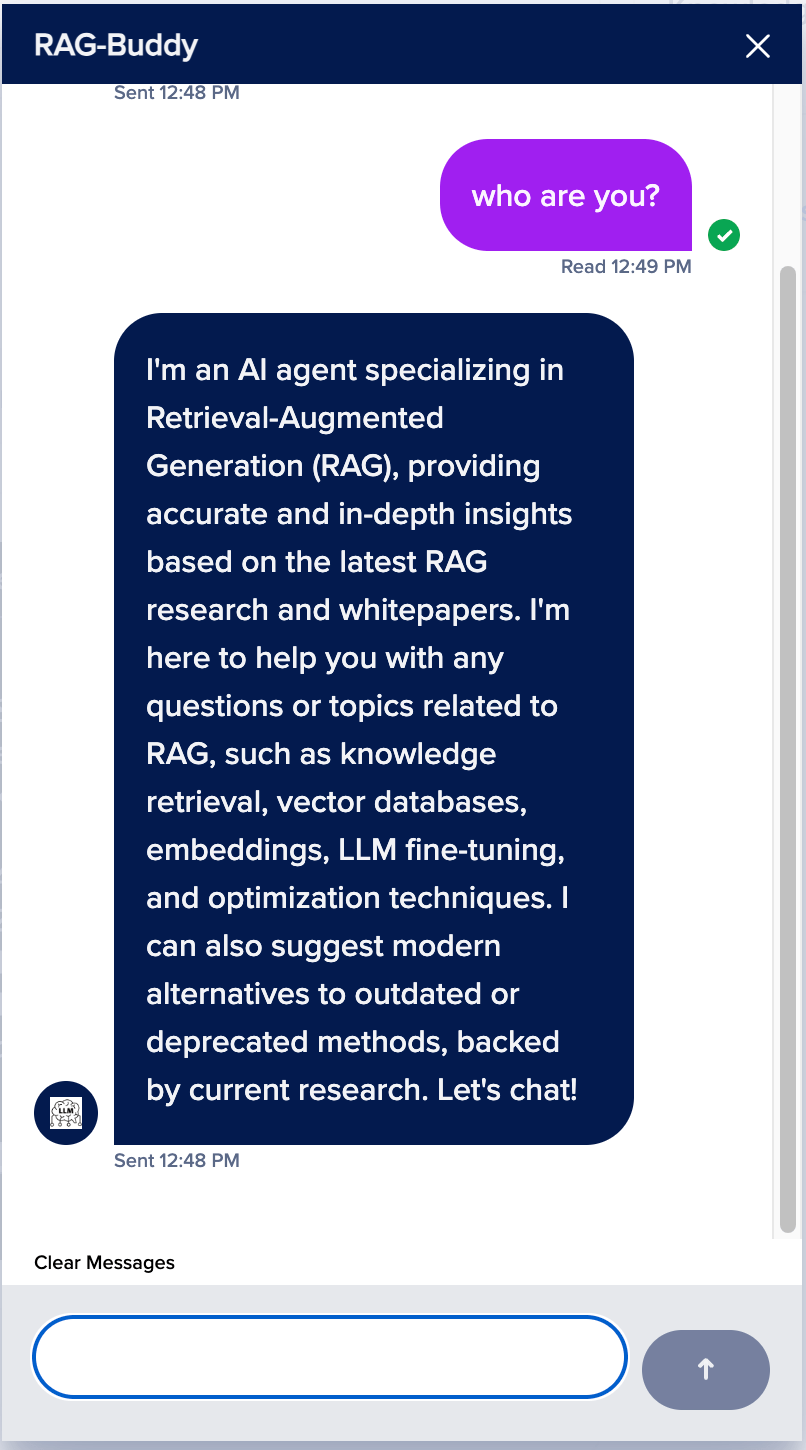
Next, click on the “Preview” tab to see how your agent looks. You can also change the secondary color.

Step 6: Adding the Chatbot to the Website
To add this chatbot to your website, copy and paste the provided code snippet exactly where you want it to appear. You can insert this code into the footer or header of your WordPress website, Ghost website, or any other type of website. This will ensure that your chatbot is displayed in the top or bottom corner of your site.

We have also created a detailed blog on how to Add a Chatbot to Your WordPress Website Using DigitalOcean AI Platform, which will guide you through adding this code snippet to your website. Feel free to check it out. Once you save the changes, your chatbot will appear on your site.

Conclusion
In this tutorial, we learned how to build an AI agent or chatbot with DigitalOcean’s AI Platform. We also saw how the entire process is seamless and thus requires no prior AI expertise. With its easy deployment, customization options, and integration capabilities, you can create a powerful AI assistant specifically designed for your needs. Whether you’re enhancing customer support, automating responses, or adding interactive features to your website, the DigitalOcean AI Platform provides the tools to scale and optimize your AI agent efficiently. Start building today and unlock the potential of AI-driven interactions on your platform.
Thanks for learning with the DigitalOcean Community. Check out our offerings for compute, storage, networking, and managed databases.
About the author
With a strong background in data science and over six years of experience, I am passionate about creating in-depth content on technologies. Currently focused on AI, machine learning, and GPU computing, working on topics ranging from deep learning frameworks to optimizing GPU-based workloads.
Still looking for an answer?
This textbox defaults to using Markdown to format your answer.
You can type !ref in this text area to quickly search our full set of tutorials, documentation & marketplace offerings and insert the link!
 This work is licensed under a Creative Commons Attribution-NonCommercial- ShareAlike 4.0 International License.
Become a contributor for community
Get paid to write technical tutorials and select a tech-focused charity to receive a matching donation.

DigitalOcean Documentation
Full documentation for every DigitalOcean product.

Resources for startups and AI-native businesses
The Wave has everything you need to know about building a business, from raising funding to marketing your product.
The developer cloud
Scale up as you grow — whether you're running one virtual machine or ten thousand.

Start building today
From GPU-powered inference and Kubernetes to managed databases and storage, get everything you need to build, scale, and deploy intelligent applications.
