Engineer & Writer

Introduction
Any SaaS application is incomplete without a billing and invoicing feature. While Stripe makes billing easy, invoicing with your own branding is still a task. We built an open-source starter kit that can help you spin up your own SaaS in minutes, and it includes an invoicing feature.
SeaNotes is an open-source SaaS starter kit that gives you a production-ready foundation for building real applications quickly. At its core, it is a full-stack notes app, that comes preconfigured with services that most SaaS products need: authentication with NextAuth.js, billing with Stripe, transactional email through Resend, file uploads with DigitalOcean Spaces, a PostgreSQL database on DigitalOcean, AI features powered by DigitalOcean Gradient Platform, and one-click deployment to DigitalOcean App Platform.
Using this starter kit, you can either build on top of it, or build your own applications using parts of it. In this article, you will learn how to build an AI-powered invoicing system tailored to your brand’s needs using DigitalOcean’s Gradient Platform, Resend and Stripe.
Key-takeaways
After reading this article, you will be able to:
- Understand how you can use the DigitalOcean’s Gradient Platform to build an invoicing service using its serverless inference feature.
- Understand how you can expand the SeaNotes starter kit to build the AI-powered features using the existing integrations (Stripe and Resend in this example).
Here’s a demo of the invoicing service:

Pre-requisites
- A DigitalOcean account
- Working knowledge of Next.js
- An already existing billing feature (in this example we will use SeaNotes starter kit, that already has Stripe integration)
How the invoicing service works
The invoicing service is built to generate invoices with your own branding. It uses the following four layers in an orchestrated microservices architecture:
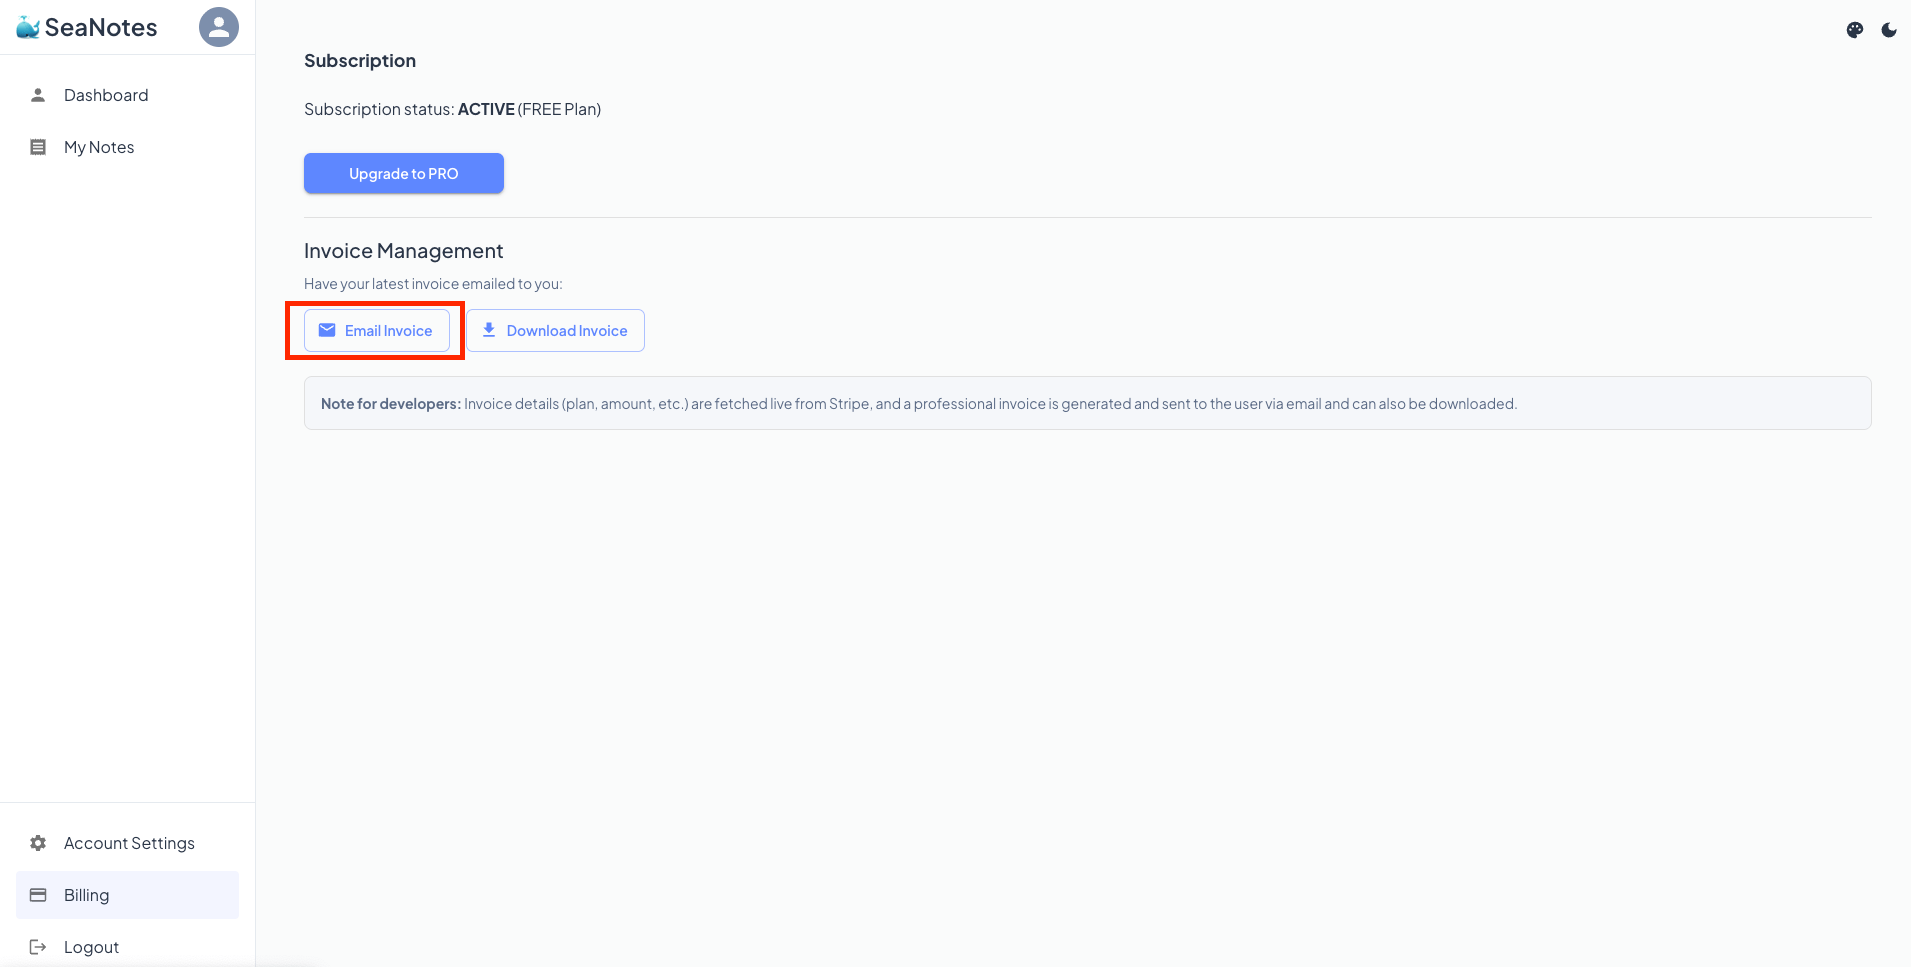
When someone clicks the “Email Invoice” button, here’s what happens:
- Billing integration layer: Makes a call to Stripe to get the user’s subscription details, plan information, and billing data
- AI service layer: Takes the billing data and sends it to DigitalOcean’s Gradient Platform which returns a HTML invoice.
- PDF generation layer: Receives the HTML invoice and uses Puppeteer to convert it into a high-quality PDF document. (Puppeteer is a Node.js library that controls headless Chrome, and we use it for PDF generation as it renders web pages exactly like Chrome does, ensuring accurate, styled, and pixel-perfect PDFs from HTML and CSS)
- Email delivery layer: Takes the PDF buffer and sends it as an email attachment using the Resend API.
.png)
Building the Invoice Generator
As shown in the diagram above, the invoice generator is built using four major components:
- AI service
- Billing service
- PDF generation
- Email delivery service
The billing and email delivery layers already exist in the starter kit. The main component for the invoice generator is the AI layer, and in the next step, we will see how to build it.
Step 1 - Building the invoice with serverless inferencing
To build the invoice, we will be using the serverless inference feature of the DigitalOcean Gradient Platform.
Why serverless inferencing?
By using DigitalOcean’s Serverless Inferencing feature for this demo, we get direct API access to models from OpenAI, Anthropic, and Llama. It also lets us use open-source models without handling infra ourselves, and makes it easy to swap out LLMs through a single API and billing system instead of juggling multiple keys. Since it follows a stateless approach it integrates easily with our application logic, giving us complete control over prompts while removing the overhead of scaling and managing model access across providers. This gives us full control over how we connect the AI models to our application and helps us focus only on the AI application logic and model performance.
Here’s how we provision the endpoint from DigitalOcean’s control panel:
- Log in to DigitalOcean Control Panel
- Navigate to Agent Platform in the left sidebar and click on Serverless Inference.
- Then click on Create model access key, give it a name and click on
Create. - It will give you the endpoint key, paste it to your
.envfile underDO_INFERENCE_API_KEY=your-do-inference-key
Step 2 - Processing the invoice
When you click on the Email invoice button:
- The request hits the serverless inference service
- Loads the llama3-8b-instruct model
- Runs the model with the invoice prompt
- Generates the invoice for you
- Sends the result back as structured JSON
The code below is what does the above process:
export class InvoiceService implements ConfigurableService {
  async generateInvoice(invoiceData: InvoiceData): Promise<GeneratedInvoice> {
    const prompt = this.buildInvoicePrompt(invoiceData);

    const response = await this.client.chat.completions.create({
      model: 'llama3-8b-instruct',
      messages: [
        {
          role: "system",
          content: "You are a professional invoice generator. Create beautiful, professional invoices in HTML format."
        },
        {
          role: "user",
          content: prompt
        }
      ],
      max_tokens: 2000,
      temperature: 0.1
    });

    return this.parseInvoiceResponse(response);
  }
}
Here’s how the invoiceData gets populated with data from Stripe:
// 1. Fetch plan details from Stripe API
const billingService = await createBillingService();
const plans = await billingService.getProducts(); // Calls Stripe API

// 2. Find the user's specific plan
const selectedPlan = plans.find(plan =>
  plan.priceId === process.env.STRIPE_PRO_PRICE_ID
);

// 3. Assemble invoice data from Stripe + database
const invoiceData = prepareInvoiceData(userDetails, selectedPlan, subscription.id);
The getProducts() method calls Stripe’s API to retrieve:
- Product details (name, description, features)
- Price information (amount in cents, billing interval)
- Feature entitlements from Stripe’s product features
Then prepareInvoiceData() combines this Stripe data with user info from the database to create the complete invoiceData object that gets sent to the serverless endpoint.
You can find the entire code in the `invoiceService.ts` file.
What happens next is, the endpoint returns a JSON response with:
- HTML: Professional invoice markup with styling and company branding
- Text: Plain text version for email fallbacks and accessibility
- Subject: Email subject line for automated delivery
Here’s an example of how the JSON response looks like:
{
  "html": "<!DOCTYPE html><html><head><meta charset=\"utf-8\"><meta name=\"viewport\" content=\"width=device-width, initial-scale=1.0\"><title>Invoice - INV-20241201-0001</title><style>* { box-sizing: border-box; } body { font-family: -apple-system, BlinkMacSystemFont, 'Segoe UI', Roboto, Arial, sans-serif; margin: 0; padding: 10px; background-color: #f5f5f5; line-height: 1.6; } .container { max-width: 600px; margin: 0 auto; background: white; border-radius: 8px; box-shadow: 0 2px 10px rgba(0,0,0,0.1); overflow: hidden; } .header { background: #0061EB; color: white; padding: 30px 20px; text-align: center; } .header h1 { margin: 0 0 10px 0; font-size: 28px; font-weight: 600; } .header h2 { margin: 0; font-size: 20px; font-weight: 400; opacity: 0.9; } .content { padding: 30px 20px; } .invoice-details { display: flex; flex-direction: column; gap: 20px; margin-bottom: 30px; } @media (min-width: 600px) { .invoice-details { flex-direction: row; justify-content: space-between; } } .customer-info, .invoice-info { flex: 1; } .invoice-info { text-align: left; } @media (min-width: 600px) { .invoice-info { text-align: right; } } .customer-info h3, .invoice-info h3 { margin: 0 0 10px 0; font-size: 16px; color: #333; } .customer-info p, .invoice-info p { margin: 0; font-size: 14px; color: #666; } .item { border-bottom: 1px solid #eee; padding: 20px 0; } .item h3 { margin: 0 0 10px 0; font-size: 18px; color: #333; } .item p { margin: 0 0 15px 0; color: #666; } .total { font-size: 18px; font-weight: bold; margin-top: 20px; padding-top: 20px; border-top: 2px solid #0061EB; color: #333; } .features { margin-top: 15px; } .features strong { display: block; margin-bottom: 8px; color: #333; } .features li { margin-bottom: 4px; } .support-section { margin-top: 30px; text-align: center; padding: 20px; background-color: #f8f9fa; border-radius: 8px; } .support-section p { margin: 0 0 15px 0; color: #666; font-size: 14px; } .contact-button { display: inline-block; background: #0061EB; color: white !important; text-decoration: none; padding: 12px 24px; border-radius: 6px; font-weight: 500; font-size: 14px; transition: background-color 0.2s; min-width: 140px; text-align: center; border: none; cursor: pointer; } .contact-button:hover { background: #0051c3; } .contact-button:active { background: #004094; } .footer { margin-top: 20px; text-align: center; color: #666; font-size: 12px; } .footer p { margin: 5px 0; } @media (max-width: 480px) { body { padding: 5px; } .header { padding: 20px 15px; } .header h1 { font-size: 24px; } .header h2 { font-size: 18px; } .content { padding: 20px 15px; } .contact-button { display: block !important; width: 100% !important; text-align: center !important; margin-top: 10px !important; box-sizing: border-box !important; } .support-section { padding: 15px !important; } }</style></head><body><div class=\"container\"><div class=\"header\"><h1>SeaNotes</h1><h2>Invoice</h2></div><div class=\"content\"><div class=\"invoice-details\"><div class=\"customer-info\"><h3>Bill To:</h3><p><strong>John Doe</strong><br>john@example.com</p></div><div class=\"invoice-info\"><h3>Invoice Details:</h3><p><strong>Invoice #:</strong> INV-20241201-0001<br><strong>Date:</strong> 8/25/2025<br><strong>Subscription ID:</strong> sub_123</p></div></div><div class=\"item\"><h3>Pro Plan</h3><p>Advanced features for power users</p><div class=\"features\"><strong>Features included:</strong><ul><li>Unlimited notes</li><li>Real-time sync</li><li>Priority support</li></ul></div><div class=\"total\"><strong>Total: $12</strong><br><small>Billed monthly</small></div></div><div class=\"support-section\"><p>Thank you for your subscription!</p><p>If you have any questions about this invoice, please contact our support team.</p><a href=\"mailto:support@seanotes.com\" class=\"contact-button\">Contact Support</a></div><div class=\"footer\"><p>SeaNotes</p><p>This is an automatically generated invoice.</p></div></div></div></body></html>",
  "text": "INVOICE - INV-20241201-0001\n\nSeaNotes\nInvoice Date: 8/25/2025\n\nBill To:\nJohn Doe\njohn@example.com\n\nSubscription ID: sub_123\n\nITEM:\nPro Plan\nAdvanced features for power users\n\nFeatures included:\n- Unlimited notes\n- Real-time sync\n- Priority support\n\nTOTAL: $12\nBilled monthly\n\nThank you for your subscription!\nIf you have any questions, please contact our support team at support@seanotes.com",
  "subject": "Invoice #INV-20241201-0001 - Pro Plan Subscription"
}
This structured response is then passed to the PDF generation service to create the final invoice document that users can receive via email.
Step 3 - Understanding how the PDF is generated
The PDF service converts the AI-generated HTML invoice into a professional PDF document by:
- Loading Puppeteer with headless Chrome.
- Wrapping the AI-generated HTML from the above step with custom styling. You can customize this part according to your own company branding and guidelines.
- Rendering the page with proper formatting and finally generating high-quality PDF output
Here’s how the implementation works:
export class PDFService {
  async generateInvoicePDF(html: string): Promise<Buffer> {
    const browser = await this.getBrowser();
    const page = await browser.newPage();

    // Inject professional styling and responsive design
    const completeHTML = this.injectInvoiceStyles(html);

    await page.setContent(completeHTML, {
      waitUntil: ['networkidle0', 'domcontentloaded'],
      timeout: 30000
    });

    const pdfBuffer = await page.pdf({
      format: 'A4',
      margin: { top: '20mm', right: '20mm', bottom: '20mm', left: '20mm' },
      printBackground: true,
      deviceScaleFactor: 2
    });

    return Buffer.from(pdfBuffer);
  }
}
You can find the entire code on GitHub.
This PDF buffer is then passed to Resend email service for delivery to users.
Step 4 - Email delivery with existing Resend integration
The final part is to make this invoice available via email and for that we will be using the existing Resend integration that the starter kit already has.
The code to email integration with Resend can be found in the `generate-invoice/route.tsx` file. What the service does is:
- Uses existing Resend API integration
- Creates React-based email templates
- Attaches the PDF buffer as multipart/mixed MIME and sends the emails
The code below is responsible for sending the AI generated invoice in a PDF format via email:
// Send invoice via email with PDF attachment
const emailService = await createEmailService();

if (emailService.isEmailEnabled()) {
  // Prepare email attachments
  const attachments = [];

  if (pdfBuffer && pdfFilename) {
    attachments.push({
      filename: pdfFilename,
      content: pdfBuffer,
      contentType: 'application/pdf'
    });
  }

  await emailService.sendReactEmail(
    userDetails.email,
    generatedInvoice.subject,
    <InvoiceEmail
      invoiceHtml={generatedInvoice.html}
      customerName={userDetails.name}
      planName={selectedPlan.name}
      amount={selectedPlan.amount}
      invoiceNumber={invoiceData.invoiceNumber}
      fromEmail={serverConfig.Resend.fromEmail || 'support@seanotes.com'}
    />,
    attachments
  );
}
And that’s how you can simply make your application be AI-enabled.
What’s next
This article can be considered as:
- A tutorial on how to build your own invoicing service.
- Tutorial on how you can extend the existing starter kit to build any AI-powered feature. Since we are using serverless inferencing, you do not have to worry about creating a new agent, write your prompts and let the models do the work for you.
- An easy way to set up an invoicing service for your application. For that, all you need to do is follow the steps mentioned in the documentation and you are good to go.
With the starter kit as your foundation, you can move from simple inference tasks to full AI agents that handle more complex, context-aware workflows. For example:
- A customer support agent that answers queries by retrieving context from your knowledge base.
- A sales assistant that drafts personalized outreach emails using past CRM data.
- A content agent that generates summaries or blog drafts while keeping track of your brand’s tone and guidelines.
- A data assistant that analyzes uploaded files, stores embeddings in OpenSearch, and answers user questions about them.
With the starter kit, you can start small like with invoice generation and grow into any of these use cases as your product matures.
Here are some resources related to the starter kit that can help you learn more:
Thanks for learning with the DigitalOcean Community. Check out our offerings for compute, storage, networking, and managed databases.
About the author
A Developer Advocate by profession. I like to build with Cloud, GenAI and can build beautiful websites using JavaScript.
Still looking for an answer?
This textbox defaults to using Markdown to format your answer.
You can type !ref in this text area to quickly search our full set of tutorials, documentation & marketplace offerings and insert the link!
 This work is licensed under a Creative Commons Attribution-NonCommercial- ShareAlike 4.0 International License.
Become a contributor for community
Get paid to write technical tutorials and select a tech-focused charity to receive a matching donation.

DigitalOcean Documentation
Full documentation for every DigitalOcean product.

Resources for startups and AI-native businesses
The Wave has everything you need to know about building a business, from raising funding to marketing your product.
The developer cloud
Scale up as you grow — whether you're running one virtual machine or ten thousand.

Start building today
From GPU-powered inference and Kubernetes to managed databases and storage, get everything you need to build, scale, and deploy intelligent applications.
