Technical Writer II

Introduction
Coolify is an open-source, self-hosted Platform as a Service (PaaS) that gives you a Heroku-style developer experience on your own infrastructure. Instead of configuring Docker, reverse proxies, databases, and CI/CD manually on every server, you can install Coolify once, connect additional machines over SSH, and deploy containerized apps through a single web dashboard.
This tutorial provides a beginner-friendly walkthrough for installing and configuring Coolify on a self-hosted Ubuntu server. You’ll learn how to connect additional servers, deploy your first containerized application, provision a database, secure everything with HTTPS, and troubleshoot common issues so you can run modern workloads on DigitalOcean Droplets without taking on the operational overhead of a full Kubernetes cluster.
Key Takeaways
- Self-hosted PaaS for modern Workloads: Easily deploy and manage Docker-based apps like Node.js, Laravel, Go, and Next.js with automatic HTTPS, secure secrets management, and logs out of the box.
- Quick install, quick launch: Get started with a single command that installs Docker, Traefik, and Coolify’s dashboard, streamlining setup so you spend less time on infrastructure.
- Effortless multi-server management: Add additional servers via SSH to host your apps, databases, and background jobs, all controlled from a centralized Coolify dashboard.
- Seamless Git integration: Link your GitHub, GitLab, or other repos to trigger builds and deployments on every push, with built-in health checks for reliability.
- Built for production: Benefit from centralized logging, encrypted secrets, environment-specific variables, persistent volumes, and automated job scheduling for robust, always-on services.
By following this guide, you’ll learn how to deploy, secure, and operate Coolify as a flexible, self-hosted PaaS for anything from side projects to serious production workloads.
What Is Coolify and Why Should You Use It?
Coolify wraps Docker, reverse proxying, and multi-node orchestration behind a web interface so you can:
- Deploy containerized applications without writing raw Docker Compose or Traefik configs.
- Group applications, databases, and background workers into projects and environments.
- Onboard new servers using SSH keys instead of manual package installs.
- Standardize deployments across local and cloud infrastructure.
Coolify offers a compelling middle ground for those who have moved beyond simple single Droplet environments, custom Nginx proxies, or basic shell scripts, but aren’t ready for the overhead of maintaining a full Kubernetes cluster. It’s a self-hosted Platform-as-a-Service (PaaS) that provides powerful abstractions built upon familiar components.
Key Features of Coolify
Coolify is designed to feel familiar to developers coming from managed PaaS platforms:
- Unified dashboard: Manage applications, databases, queues, storage, and jobs from one UI.
- Projects and environments: Organize resources into projects with production, staging, and preview environments.
- Multi-server support: Connect multiple VMs as managed servers; pin apps and databases to specific nodes.
- Git integration: Deploy directly from Git repositories, using Dockerfiles or framework presets.
- Built-in reverse proxy and HTTPS: Traefik automatically handles routing and Let’s Encrypt certificates.
- Secrets and configuration: Store per-project environment variables and secrets securely, and inject them into services at deploy time.
- Volumes and storage: Attach persistent volumes or network storage to stateful services like PostgreSQL or Jenkins.
- Scheduled tasks: Run cron-like jobs inside containers for backups, cleanup tasks, or periodic scripts.
Choosing the Right Deployment: Local vs. Cloud and Multi-Server
Like other modern platforms, you can run Coolify in several ways:
| Option | Pros | Cons | Recommended For |
|---|---|---|---|
| Single local server | Fast to set up, no cloud cost | No redundancy, limited resources | Personal projects, local labs |
| Single cloud Coolify server | Simple architecture, easy DNS + HTTPS | Apps and DBs share resources | Small teams, prototypes |
| Coolify server + app servers | Isolated workloads, better scaling & resilience | Requires networking and node planning | Production apps, multi-team environments |
| Hybrid (local + cloud) | Mix of on-prem and cloud resources | More complex to reason about | Organizations with existing on-prem footprint |
For most developers and small teams, a single Coolify server plus one or more app/database servers in the same region strikes the right balance between simplicity and resilience.
Prerequisites
Before you deploy Coolify, make sure you have:
- An Ubuntu 22.04 LTS (or newer) server for the Coolify server
- At least 4 CPU cores, 4 GB RAM, and 80 GB disk space on your server
- A domain name pointing to the Coolify server (for the dashboard and HTTPS)
- Root or
sudoaccess via SSH - An SSH key pair to authenticate against managed servers
- Optional but recommended: an additional Droplet for databases or CPU-heavy workloads
Although Coolify installs Docker itself, it’s helpful to be familiar with basic Docker commands. If you haven’t worked with Docker on Ubuntu before, review:
Step 1 — Setting Up Coolify
To begin, connect to the server that will act as your Coolify server. This is the main node that manages your applications and infrastructure.
Replace 192.168.2.2 with your actual server’s domain name or IP address. If it’s a newly provisioned server, ensure that your SSH key has been added either via your cloud provider’s dashboard or manual configuration.
For example, connect as the root user:
ssh root@192.168.2.2
Update the package index and install security patches:
sudo apt update && sudo apt upgrade -y
Ensure the Hostname Resolves Correctly
Coolify relies on the server’s hostname resolving to a non-loopback IP. If the hostname points to 127.0.0.1 or multiple IPs, some operations may fail or show confusing addresses.
Check how the hostname resolves:
hostname --ip-address
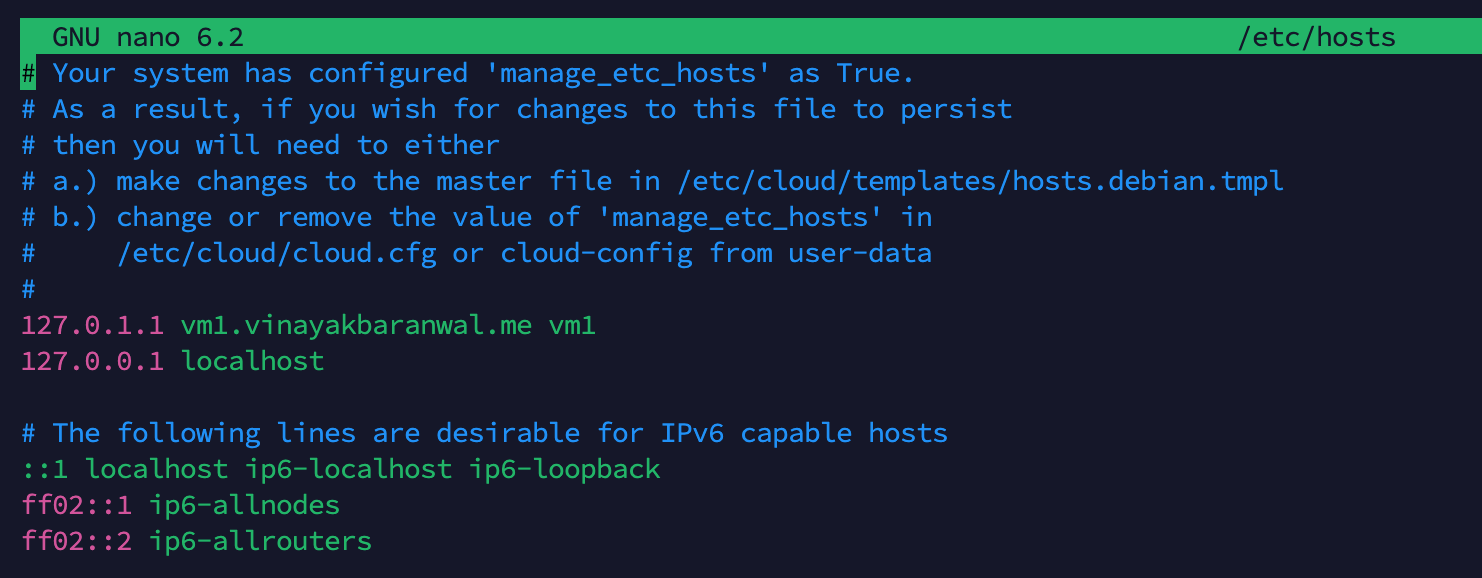
If you see only loopback addresses (like 127.0.0.1), update /etc/hosts:
sudo nano /etc/hosts
Example:
127.0.0.1   localhost
192.0.2.10  coolify-server.example.com coolify-server
::1         localhost ip6-localhost ip6-loopback
ff02::1     ip6-allnodes
ff02::2     ip6-allrouters
Save the file and re-run:
hostname --ip-address
You should now see your Coolify server’s routable IP.
Step 2 — Install Coolify
Coolify provides a one-command installer that sets up Docker, Traefik, the core services, and the dashboard.
Run:
curl -fsSL https://cdn.coollabs.io/coolify/install.sh | sudo bash
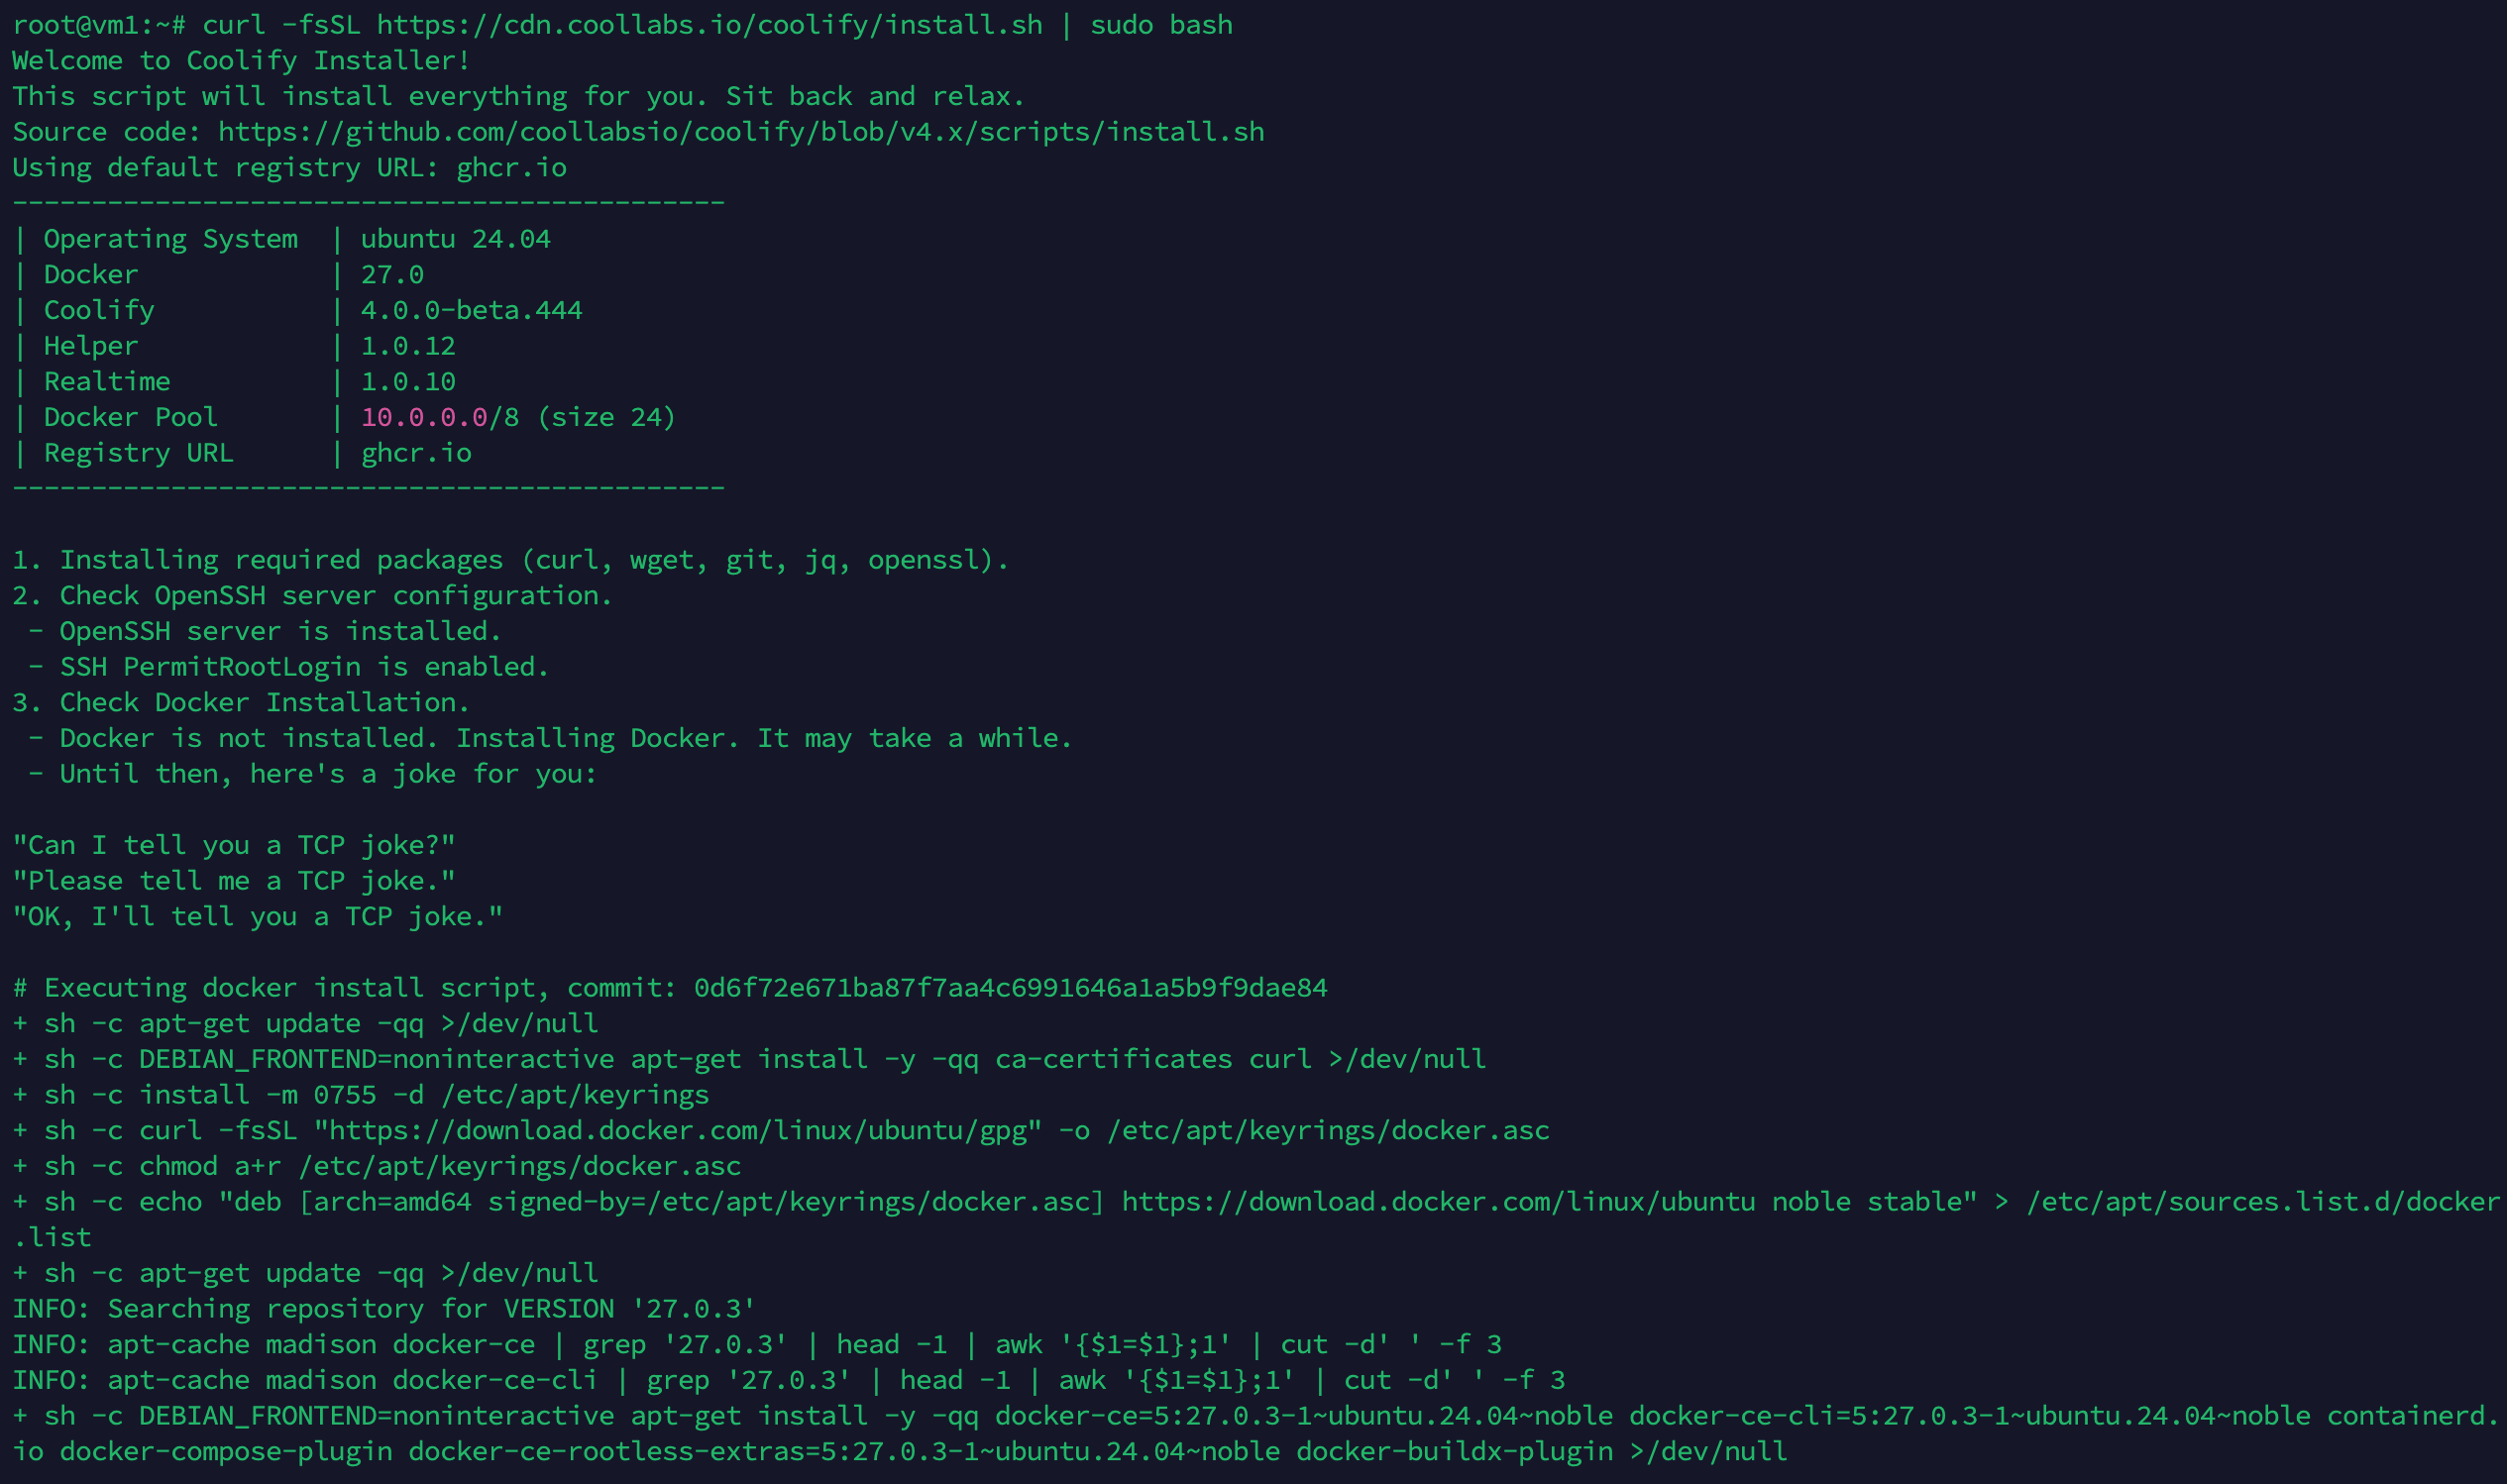
The script will:
- Validate the OS and dependencies
- Install Docker and supporting packages if needed
- Deploy Coolify and its internal services
- Print the URL for the dashboard once everything is up
When the install completes (typically 3-5 minutes), you’ll see output similar to:
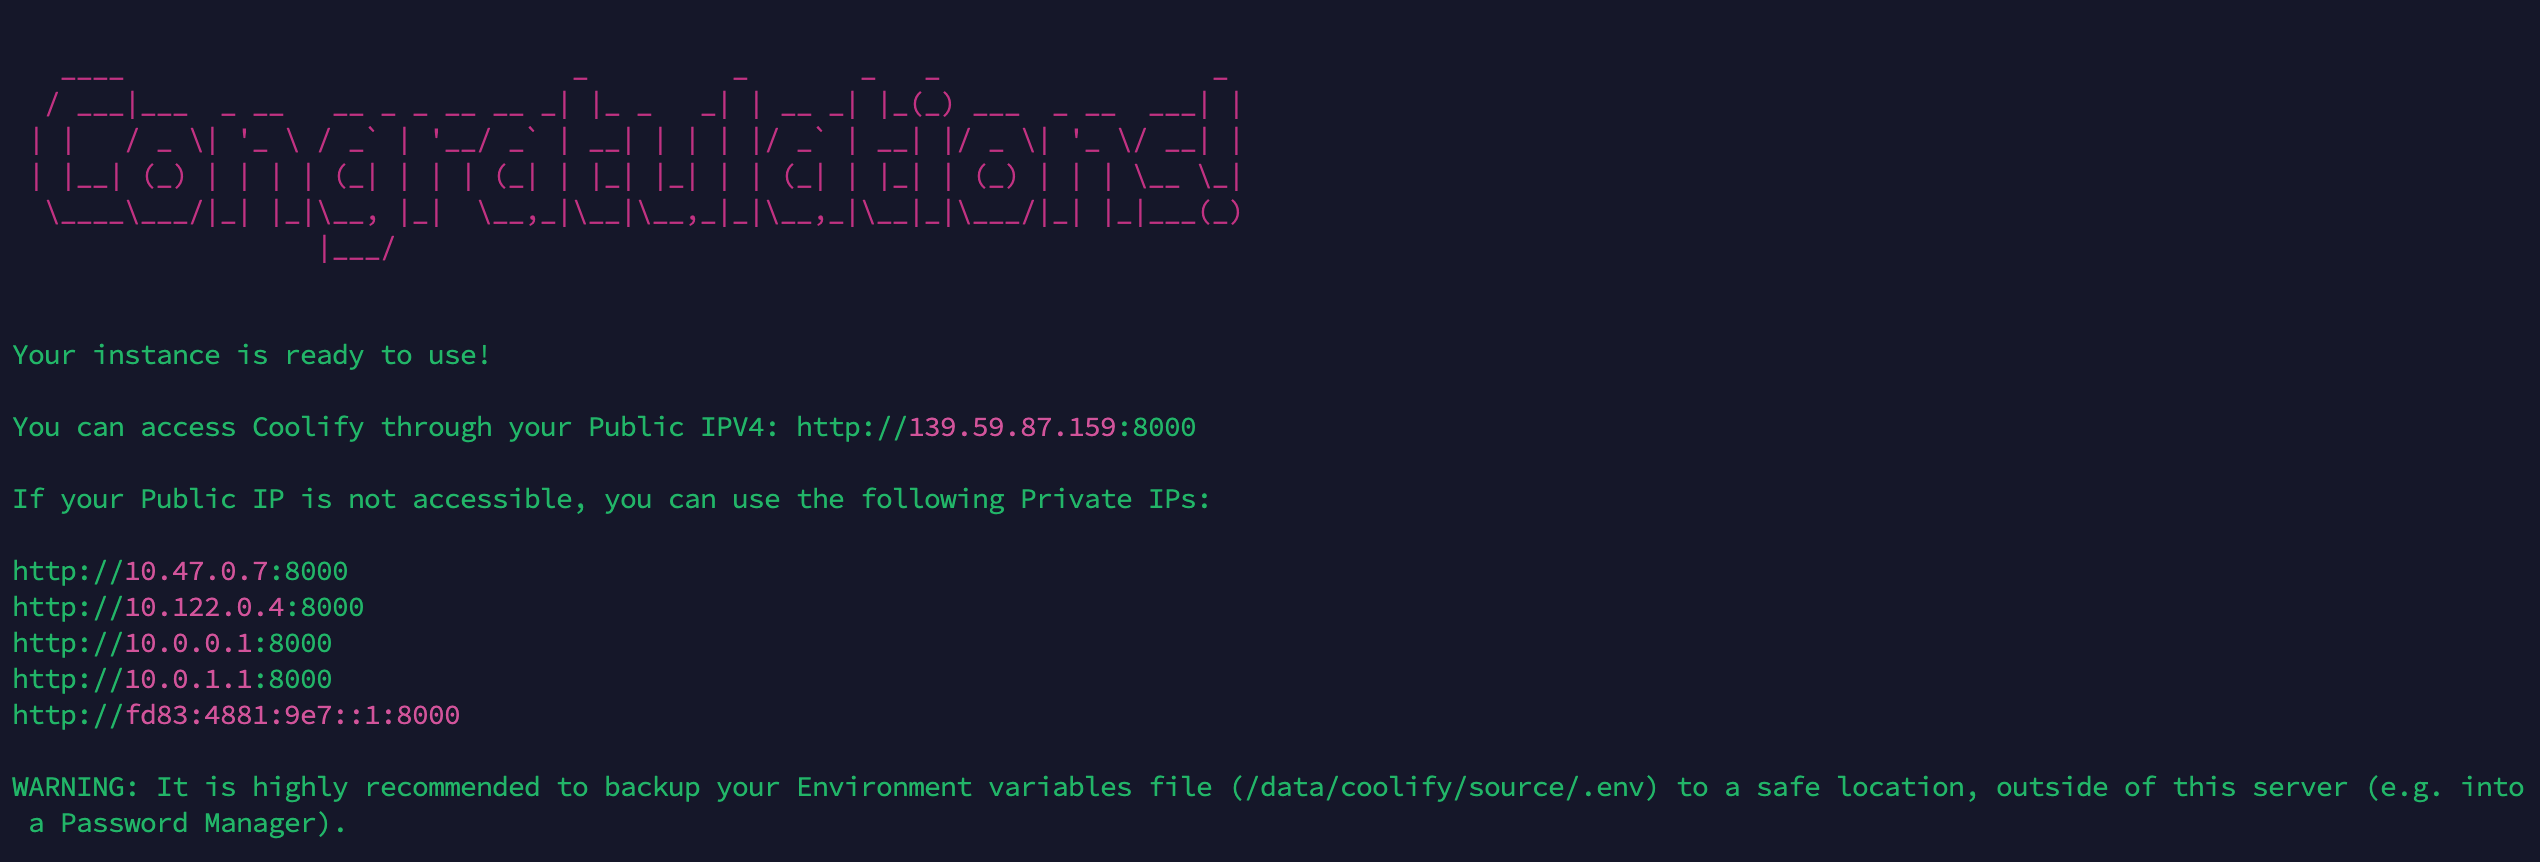
The installer will display the dashboard URL. Note any credentials or follow-up instructions shown in the terminal output.
Open the URL in your browser:
https://coolify-server.example.com
Note: If DNS is not fully propagated yet, you can temporarily use the Droplet IP.
Step 3 — Initial Coolify Web Interface Setup
On first visit, Coolify guides you through an onboarding flow to configure your instance:
-
Create the owner account
- Email address
- Name
- Strong password
-
Review basic configuration
- Instance name (optional)
- Default language and time zone
- Telemetry and update preferences
-
Create your first project
- Set a project name such as
My First Project - Keep the default
productionenvironment - Optionally plan for staging or preview environments later
- Set a project name such as
This initial setup bootstraps your control plane and gives you a dedicated space to start adding servers and applications.
Step 4 — Add Managed Servers
The Coolify server hosts the Coolify dashboard and some platform services. Your applications and databases can run on:
- the Coolify server itself, or
- Additional managed servers connected over SSH.
To add a new server from the dashboard:
-
Go to Servers → Add Server.
-
Choose Local (same machine) or SSH (remote server).
-
For SSH servers, provide:
- Hostname or IP (e.g.,
app-1.example.com) - SSH user (
rootor a sudo-capable user)
- Hostname or IP (e.g.,
-
Coolify will generate an SSH key and display it in the dashboard. Copy the entire public key (it will start with
ssh-ed25519orssh-rsa) and add it to the target server’s~/.ssh/authorized_keys:echo "ssh-ed25519 AAAA...your-actual-key-here... coolify" | sudo tee -a ~/.ssh/authorized_keysNote: Replace the placeholder
AAAA...your-actual-key-here...with the complete public key shown in the Coolify dashboard. -
Click Verify in the Coolify UI to confirm connectivity.
-
Once verified, Coolify installs Docker and its agent on the managed server (this typically takes 1-2 minutes). The dashboard will then report CPU, RAM, disk, and status metrics for the new server.
Repeat this process for:
Step 5 — Deploy an App from Git
Most production workloads will come from your own repositories. Coolify can build and deploy these directly from Git.
-
In the dashboard, connect your Git provider (GitHub, GitLab, Gitea, or others).
-
Add a new Application and select Git Repository as the source.
-
Choose the repo and branch (for example,
main). -
Provide a Dockerfile or use a preset for common frameworks.
-
Configure environment variables and secrets:
NODE_ENV=productionDATABASE_URL=postgres://user:password@db:5432/app- API keys for third-party services
Example Dockerfile for a Node.js/Next.js app:
FROM node:20-alpine AS builder WORKDIR /app COPY package*.json ./ RUN npm ci COPY . . RUN npm run build FROM node:20-alpine WORKDIR /app ENV NODE_ENV=production COPY /app/.next ./.next COPY package*.json ./ RUN npm ci --omit=dev EXPOSE 3000 CMD ["npm", "start"] -
Enable Auto-deploy on push if you want each commit to trigger a rebuild and rollout.
-
Click Deploy to perform the initial build and deployment.
Coolify will clone the repo, build the image with BuildKit caching (this typically takes 2-5 minutes depending on your Dockerfile complexity), start the container, and attach it to Traefik for HTTPS routing. Navigate to the application’s detail page and click the Logs tab to watch the build progress in real-time.
Note: For first-time deployments, watch the logs for any build errors. Common issues include missing dependencies, incorrect Dockerfile paths, or environment variable misconfigurations.
Step 6 — Provision Databases and Supporting Services
Coolify comes with recipes for common backing services:
- PostgreSQL
- MySQL / MariaDB
- Redis
- MongoDB
To create a PostgreSQL instance:
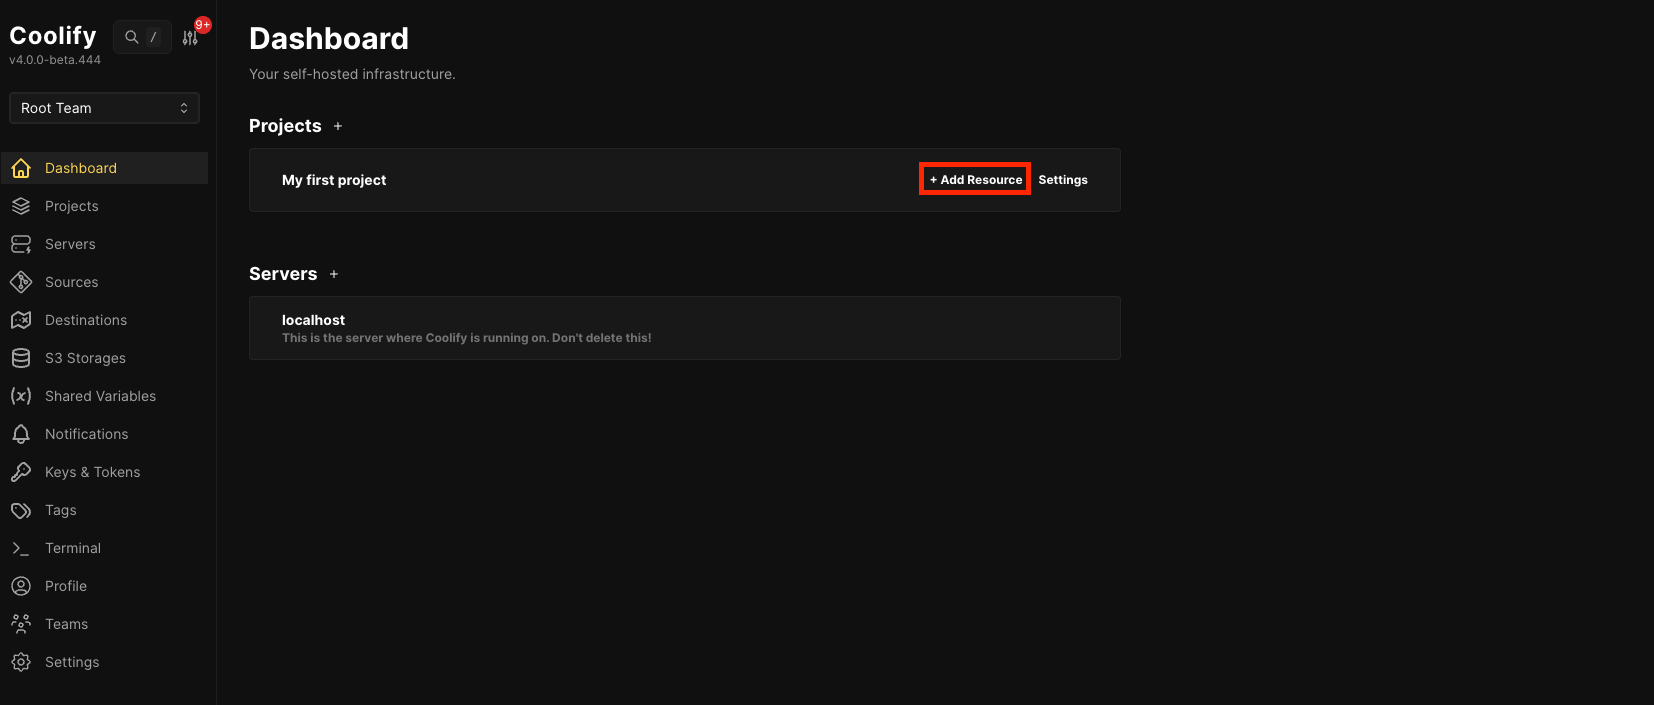
- In your project, click Add Resource → Databases → PostgreSQL.
- Choose:
- Target server
- Version (for example,
15) - Storage size and volume path
- Coolify will provision the container, set a database name, user, and password, and expose a connection URI. The credentials are displayed in the dashboard and automatically stored in your project’s secrets.
Copy the connection URI from the database resource page (found under “Connection Information”) and use it in your application’s environment variables. Example format:
DATABASE_URL=postgres://app_user:strongpassword@postgresql:5432/app_db
Note: Replace the example values above with the actual credentials generated by Coolify. The connection URI format may vary depending on your network configuration (use the service name postgresql for same-project containers, or the full domain for external connections).
You can also manage:
- Database backups using scheduled jobs
- Read replicas by provisioning additional instances and updating your app configuration
Example: Deploying Jenkins with Coolify
To validate your Coolify setup and see how containerized applications work in practice, you can deploy a well-known service like Jenkins. This example demonstrates deploying a pre-built Docker image from Docker Hub.
Use Case
Jenkins is a popular CI/CD automation server that many teams use for building, testing, and deploying applications. By deploying it through Coolify, you can manage Jenkins alongside your other applications, benefit from automatic HTTPS, and easily scale or migrate it to different servers.
Deployment Steps
-
In your project, click Add Resource → Applications.
-
Pick a template or choose Docker Hub / Container Registry and search for
jenkins/jenkins:lts. -
Configure the application:
- Name:
jenkins-ci - Server: Select the managed server that should run Jenkins
- Domain:
jenkins.example.com - Port:
8080(Jenkins default) - Volumes: Map
/var/jenkins_hometo a named volume, or to an attached disk path like/mnt/data/jenkins_hometo persist Jenkins configuration and job data.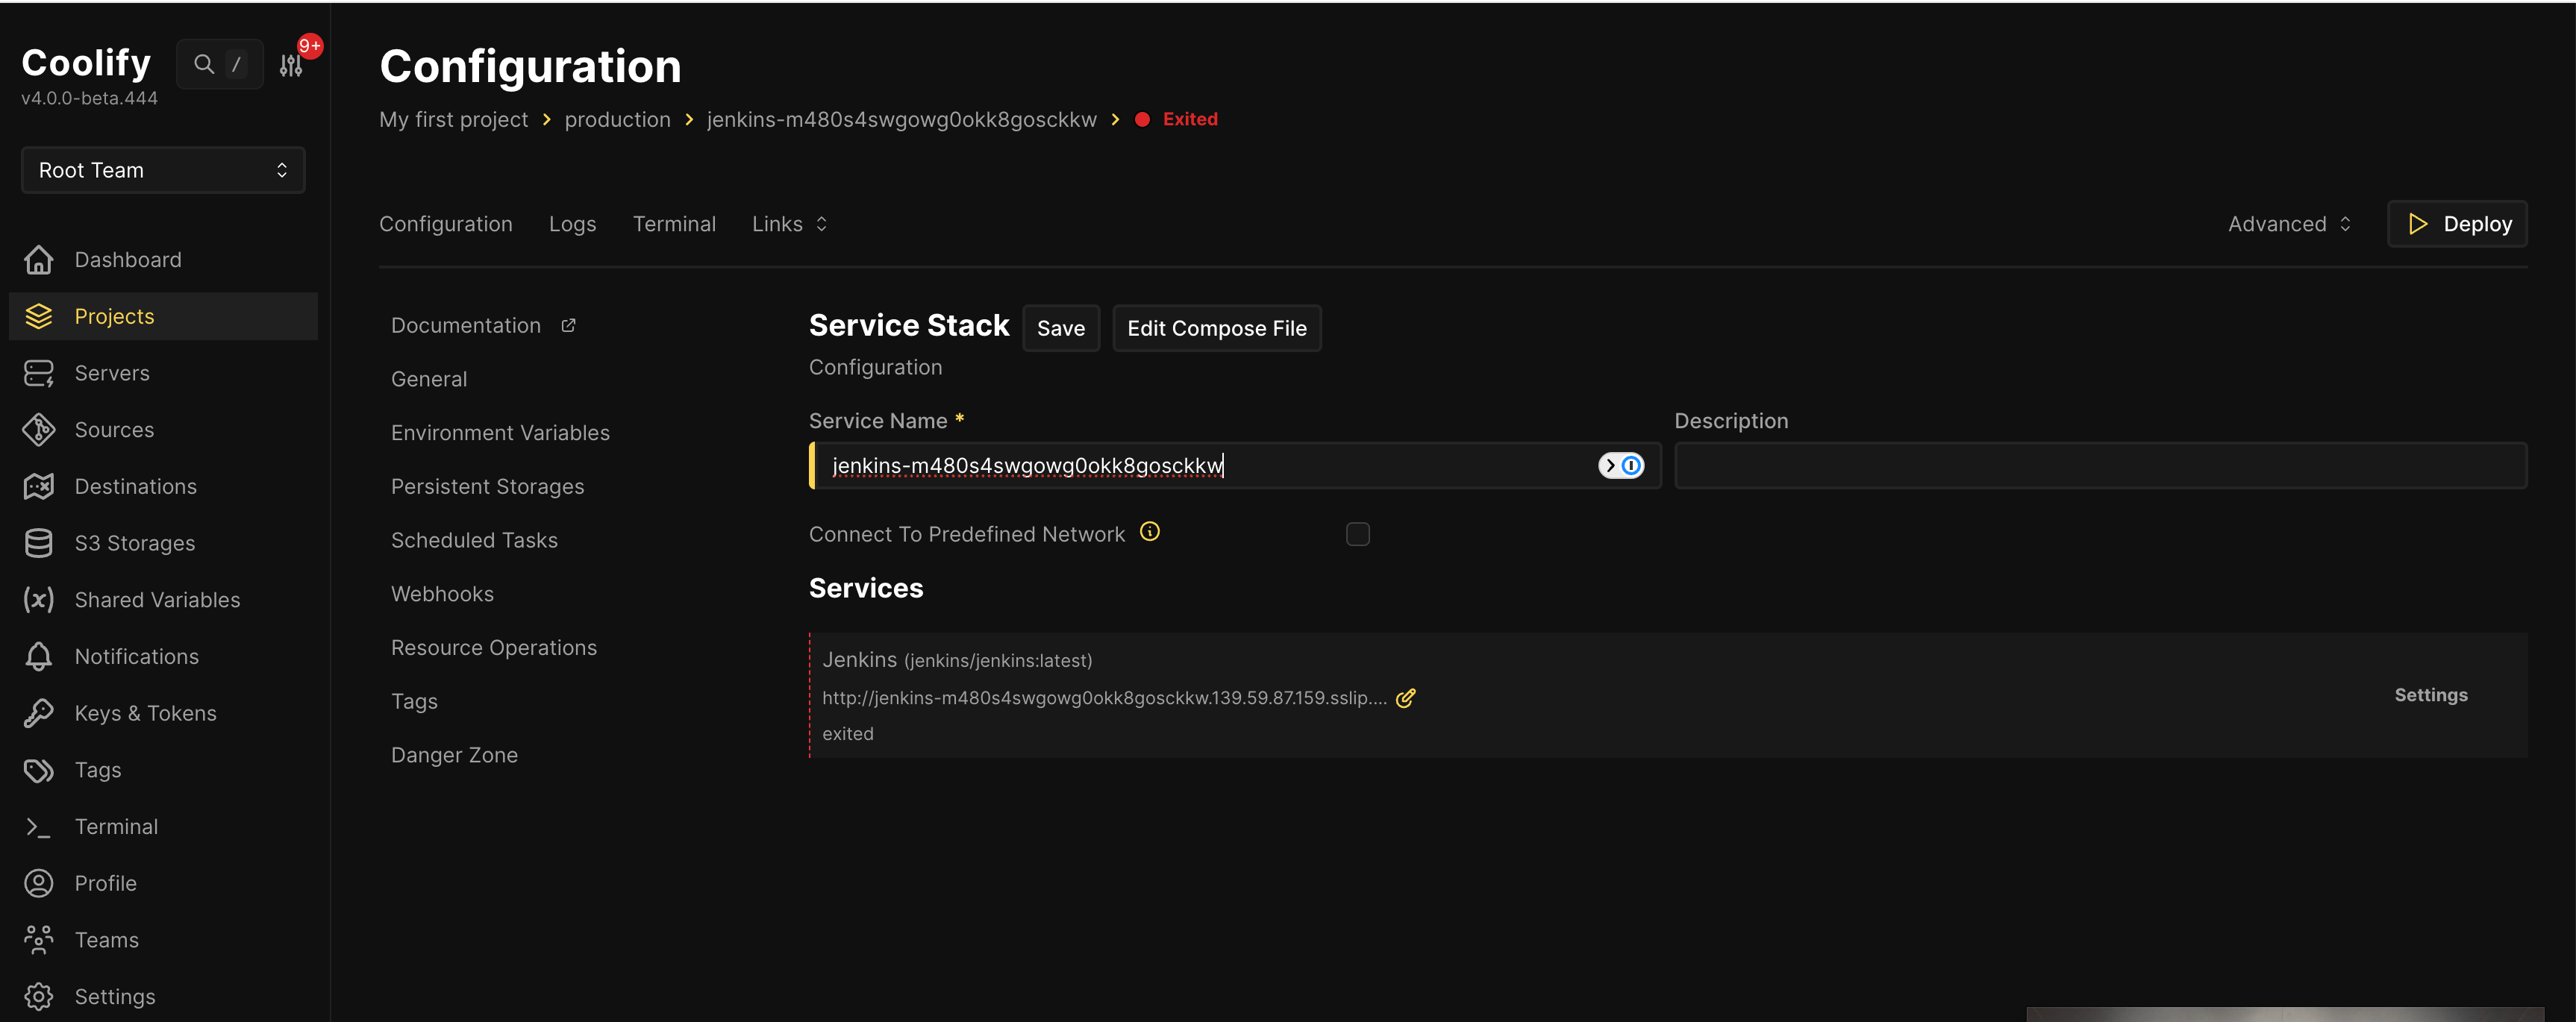
- Name:
-
Save and click Deploy.
Coolify will:
- Pull the Jenkins image from Docker Hub
- Create the Docker network and volume
- Start the container
- Stream logs during startup
 Jenkins container being deployed in Coolify dashboard.
Once the status changes to Running (as shown below):
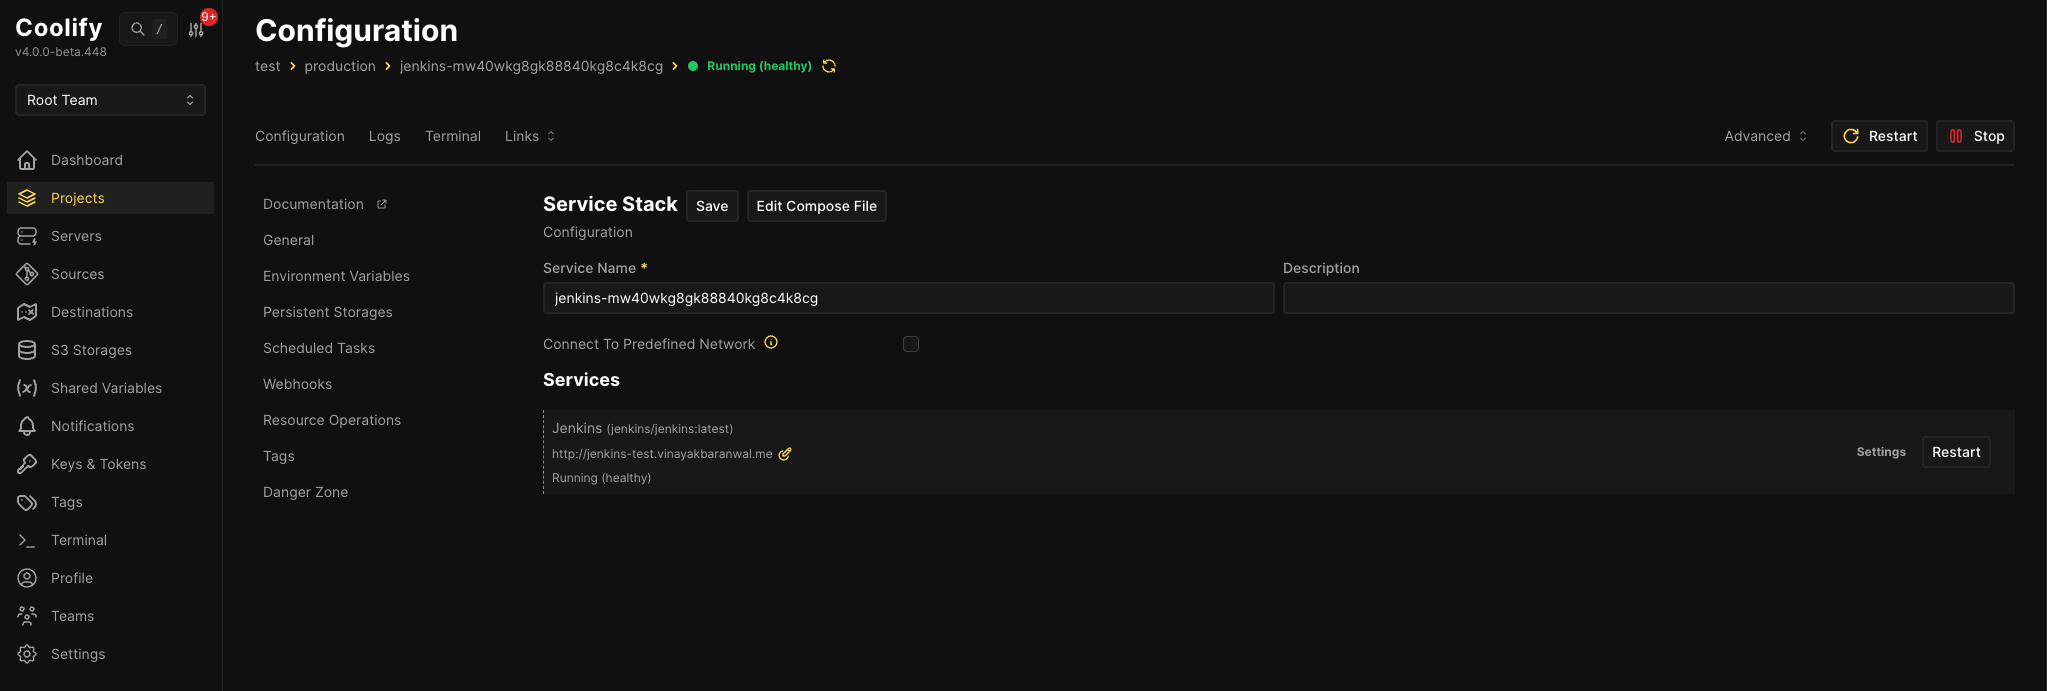
open https://jenkins.example.com in your browser to begin Jenkins’ built-in onboarding.
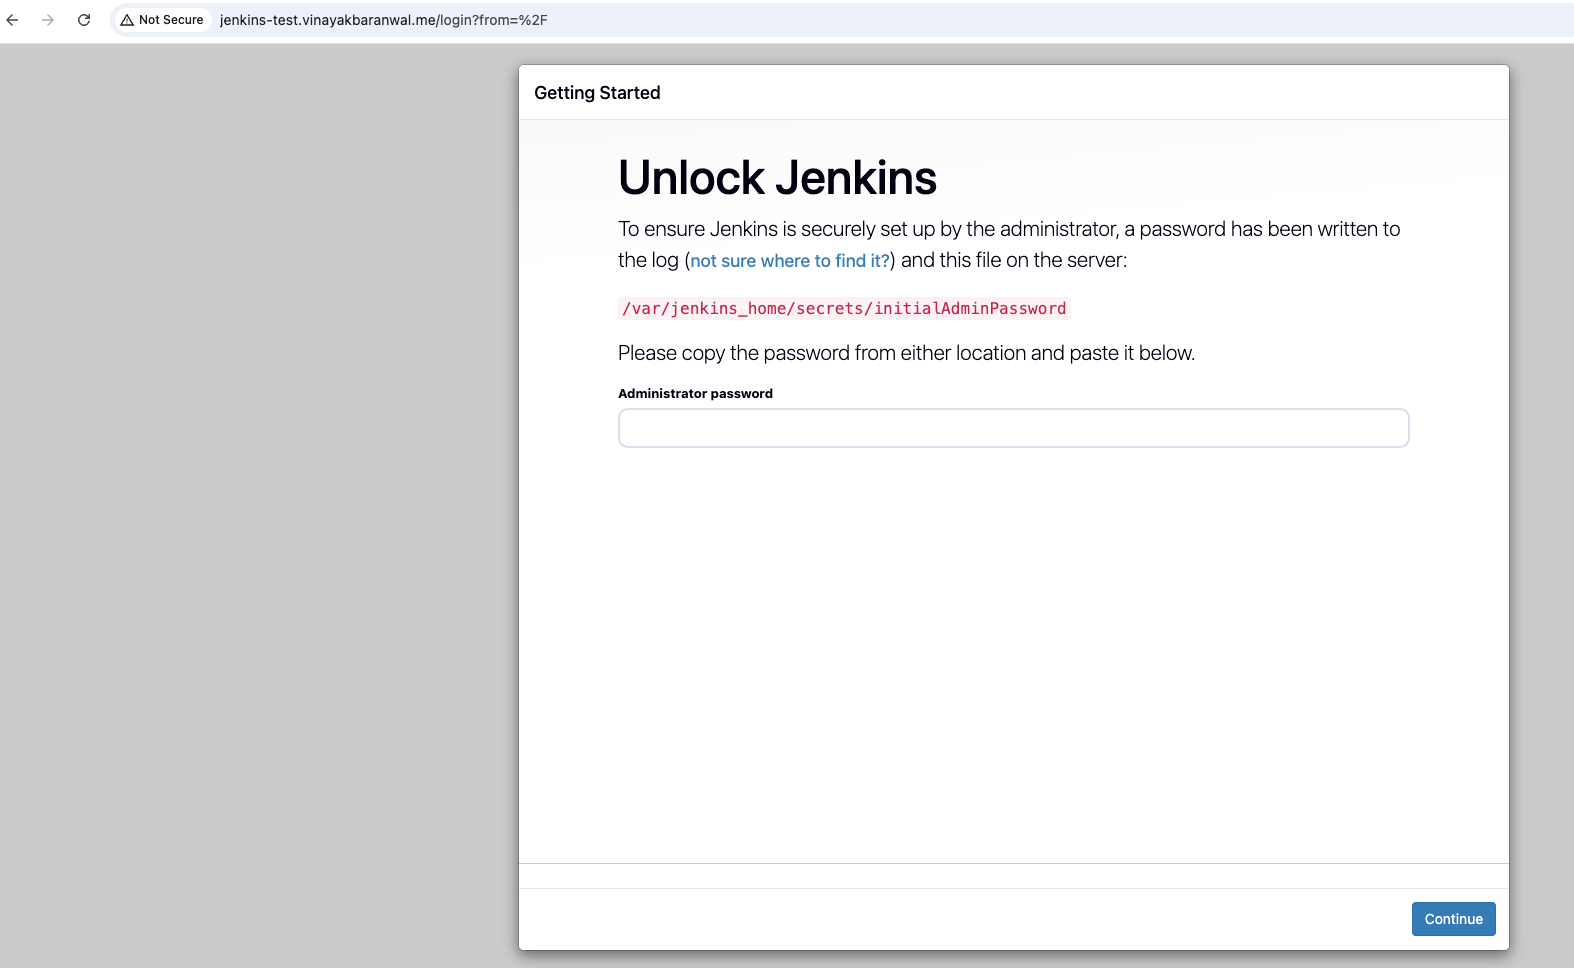
After a few moments, you should see Jenkins fully installed and operational.
You’ll be able to install plugins, create jobs, and configure Jenkins just as you would in a traditional installation, but now with the added benefits of Coolify’s management interface, automatic HTTPS, and easy backup/restore through volume management.
This example shows how Coolify simplifies deploying any containerized application, whether it’s a pre-built image from a registry or a custom application built from your Git repositories.
Troubleshooting Common Errors
| Error or Symptom | Possible Cause | Suggested Fix |
|---|---|---|
| Hostname resolves to 127.0.0.1 only | Incorrect /etc/hosts configuration |
Map hostname to public IP, re-check hostname --ip-address. |
| Server fails to register over SSH | Missing SSH key or locked-down firewall | Add Coolify’s public key to authorized_keys, open port 22 to the Coolify server IP. |
Application stuck in exited state |
Crash loop, port conflict, bad env vars | Check container logs, adjust port mapping, or correct environment vars. |
| HTTPS not issued for a domain | DNS not propagated or port 80 blocked | Confirm DNS A record, ensure ports 80/443 are open, retry certificate. |
| Database data not persisting | Volume not configured correctly | Attach a named volume or host path and redeploy the database service. |
Use Coolify’s logs and server metrics to zero in on issues. For deeper observability, forward logs to ELK or send metrics to a Prometheus/Grafana stack.
FAQs
Q1: Is Coolify secure enough for production?
Yes, Coolify runs applications in Docker containers, terminates HTTPS via Traefik, and stores secrets separately from code. You should still harden the OS with firewalls, regular patching, and SSH best practices.
Q2: Can I run multiple servers under a single Coolify instance?
Absolutely. You can register multiple servers, deploy different apps to each, and use projects/environments to keep resources organized.
Q3: Does Coolify only work with Docker-based apps?
Coolify is Docker-first. If your application can be containerized, it can run under Coolify. For non-containerized apps, you’ll typically create a Docker image as part of your migration.
Q4: How do auto-deploys from Git work?
After connecting your Git provider, Coolify sets up webhooks so that pushes to a branch (for example, main) trigger a new build and deployment. You can pause auto-deploys or keep them manual for critical services.
Q5: Can I back up my Coolify-managed databases?
Yes. You can run scheduled jobs inside Coolify to execute pg_dump or other backup commands and push artifacts to block storage or object stores such as DigitalOcean Spaces.
Q6: What happens if the Coolify server goes down?
Applications on managed servers continue running, but you lose the dashboard and orchestration temporarily. Keep backups of the Coolify server and consider running it on a more resilient VM class.
Conclusion
Coolify gives you a practical, self-hosted PaaS layer on top of Docker, helping you standardize deployments across Droplets and other VMs without jumping straight into Kubernetes. With a single Coolify server, a handful of managed servers, and Git-backed builds, you can run production applications with clear visibility into logs, resources, and failures.
Set up the Coolify server, add one or two app servers, deploy a test workload like Jenkins, and then move your real applications over incrementally. As you grow, you can add more servers, environments, and services without rebuilding your platform from scratch.
Further Reading
To deepen your understanding of the underlying technologies and deployment patterns, explore:
Thanks for learning with the DigitalOcean Community. Check out our offerings for compute, storage, networking, and managed databases.
About the author
Building future-ready infrastructure with Linux, Cloud, and DevOps. Full Stack Developer & System Administrator. Technical Writer @ DigitalOcean | GitHub Contributor | Passionate about Docker, PostgreSQL, and Open Source | Exploring NLP & AI-TensorFlow | Nailed over 50+ deployments across production environments.
Still looking for an answer?
This textbox defaults to using Markdown to format your answer.
You can type !ref in this text area to quickly search our full set of tutorials, documentation & marketplace offerings and insert the link!
 This work is licensed under a Creative Commons Attribution-NonCommercial- ShareAlike 4.0 International License.
Become a contributor for community
Get paid to write technical tutorials and select a tech-focused charity to receive a matching donation.

DigitalOcean Documentation
Full documentation for every DigitalOcean product.

Resources for startups and AI-native businesses
The Wave has everything you need to know about building a business, from raising funding to marketing your product.
The developer cloud
Scale up as you grow — whether you're running one virtual machine or ten thousand.

Start building today
From GPU-powered inference and Kubernetes to managed databases and storage, get everything you need to build, scale, and deploy intelligent applications.
