
Selenium provides its API implementation in multiple programming languages. However, Selenium API Java-based bindings are the most popular. In this tutorial, we will learn how to download Selenium JARs and configure Eclipse IDE to use them in writing test scripts. To configure Eclipse with Selenium WebDriver, we need to perform the following activities:
- Installing Java
- Installing Eclipse IDE
- Configure Eclipse IDE with WebDriver
Installing Java
- Step 1: Go to the official website (https://www.oracle.com/technetwork/java/javase/downloads) and click on the Download tab.
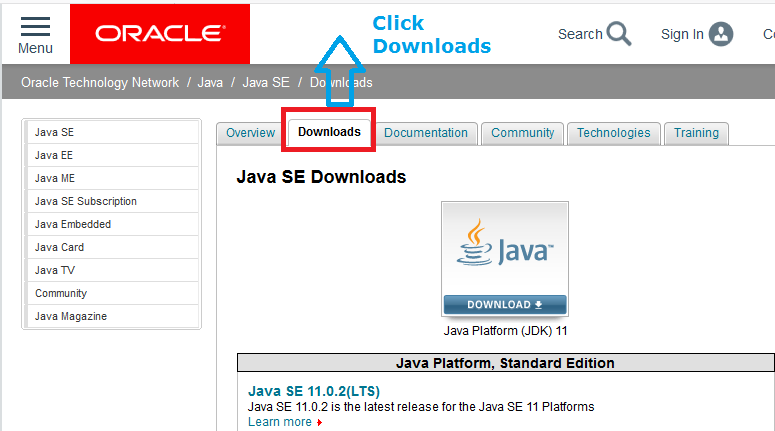
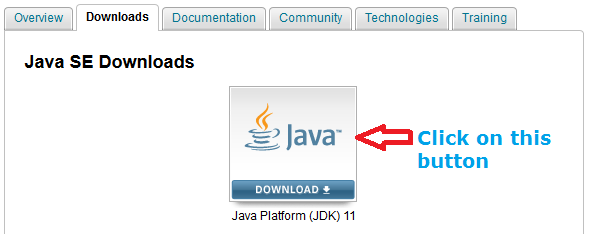
- Step 2: Click Icon under Java SE Downloads
- Step 3: Accept the License Agreement and choose the JDK that corresponds to your Operating System.
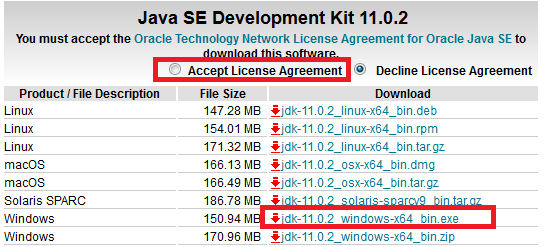
- Step 4: Once the download is complete, run the executable file to install JDK in Windows. Perform similar steps for Mac DMG file. For Linux, you just need to untar and set PATH variable to execute java commands.

There has been a major change in the Java Licensing from Java 11 onwards. For commercial purpose, Oracle JDK is not free anymore. However, you can use OpenJDK, which is absolutely free to use in production environment. Read more about it at Java 11 Features.
Installing Eclipse IDE
Let’s see how to install Eclipse IDE for Windows. The steps are almost similar for Mac and Linux operating systems too. You have to follow similar steps with the Eclipse installer files of the corresponding operating system.
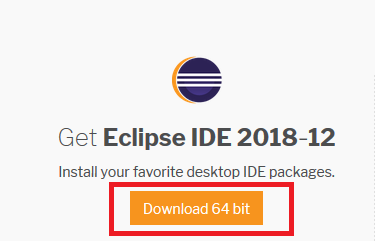
- Step 1: Go to the Eclipse official website and click Download button of Eclipse IDE icon.
- Step 2: Once the download is complete, run the exe file to start Eclipse installer application for Windows.

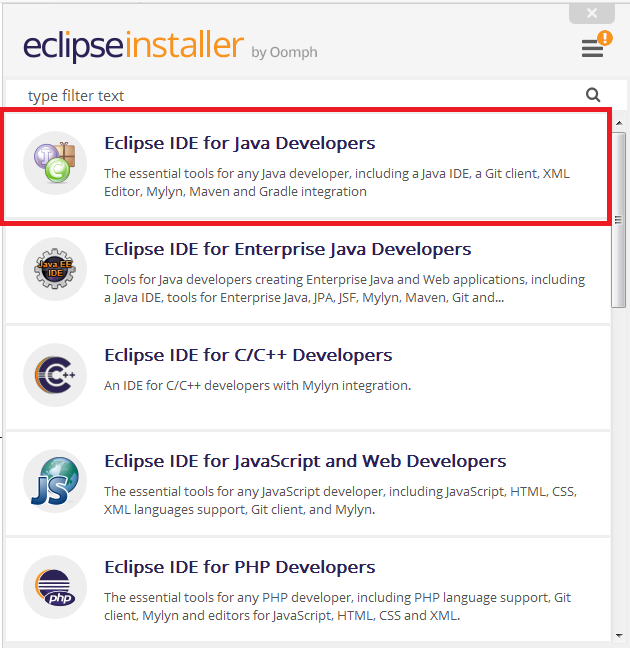
- Step 3: Click “Eclipse IDE for Java Developers” in the installer window.
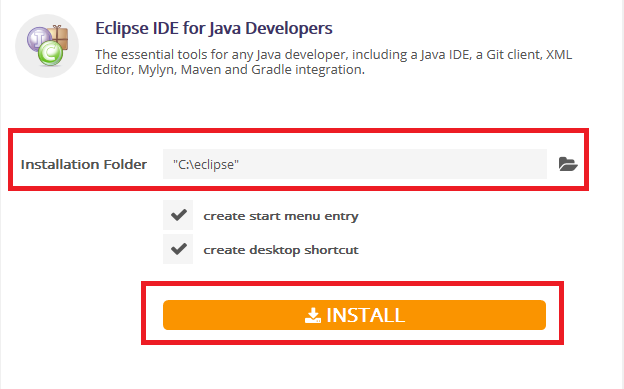
- Step 4: After that, a new window will open. Change the Installation Folder path to “C:\eclipse” and click on install button.
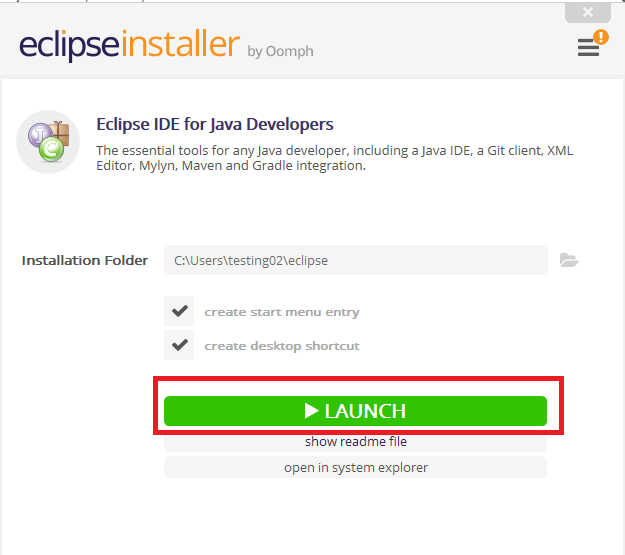
- Step 5: After successful completion of installation, a new window will open. Click on the Launch button in the new window.
- Step 6: This will launch Eclipse IDE for you. From next time onwards, you can start Eclipse from its installation folder.
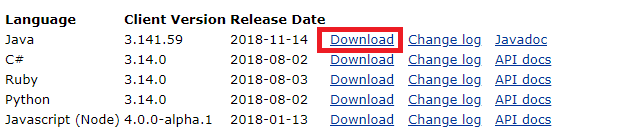
Selenium JARs Download
Basically, selenium is not installed, it is configured. We just need to download the jars and include in eclipse.
- Step 1: Go to the official website and click on Download tab.
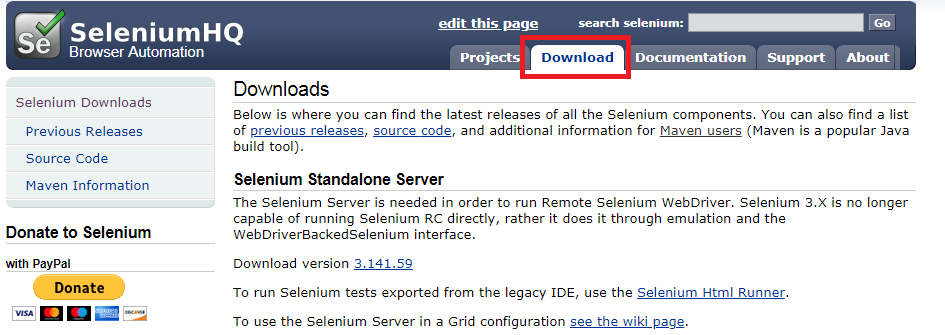
- Step 2: Click on Download link to download the jars for selenium.
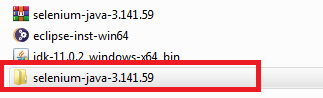
- Step 3: Extract the downloaded folder and we will get the folder like selenium-java-3.141.59.
Configure Eclipse IDE with Selenium WebDriver
- Step 1: Launch the “eclipse.exe” file inside the eclipse installation folder.
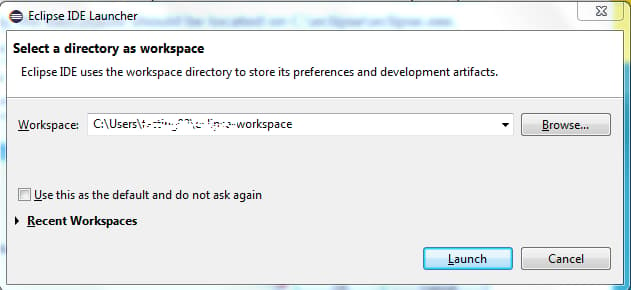
- Step 2: When asked to select for a workspace, just click Launch button to accept the default location.
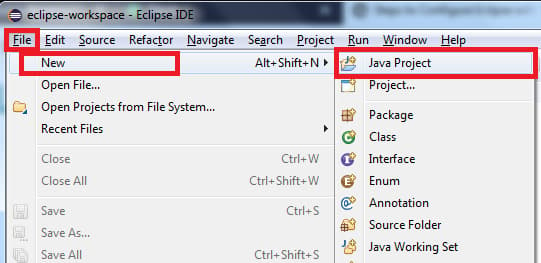
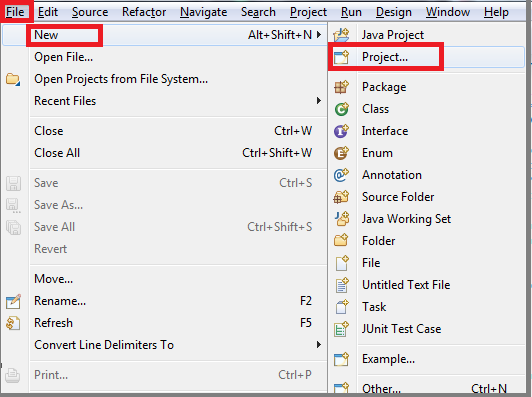
- Step 3: Create a new Java Project from File > New > Project.
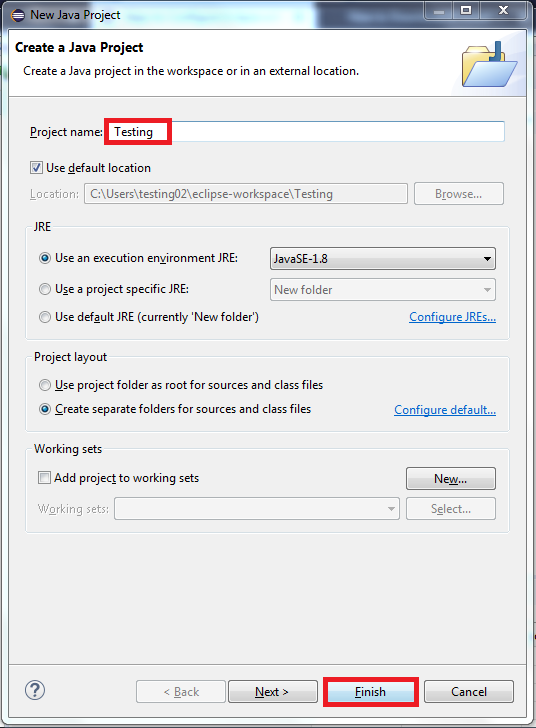
- Step 4: Give your Project name ‘Testing‘ as shown below. Click on Finish button.
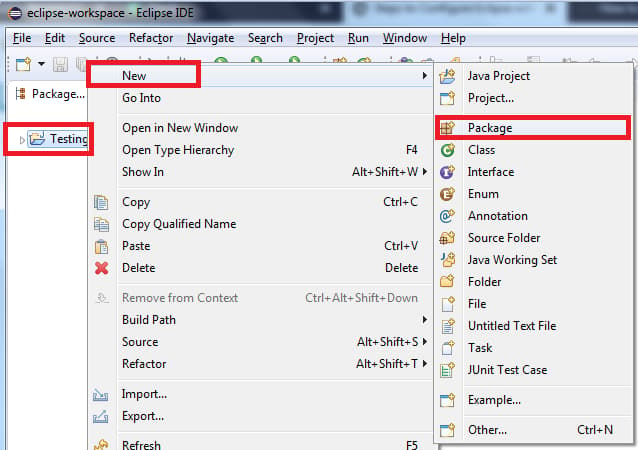
- Step 5: Right click on Project name Testing and select New > Package.
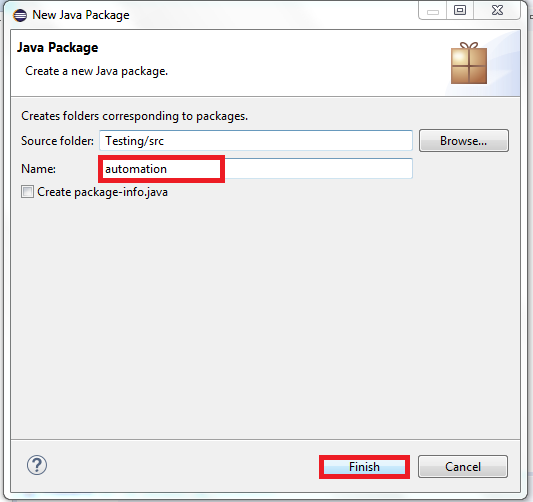
- Step 6: Give Package name automation and click on Finish button.
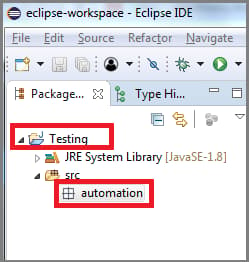
Now you can see a new package name automation under project name Testing.
- Step 7: Right click on package automation and select New > Class.
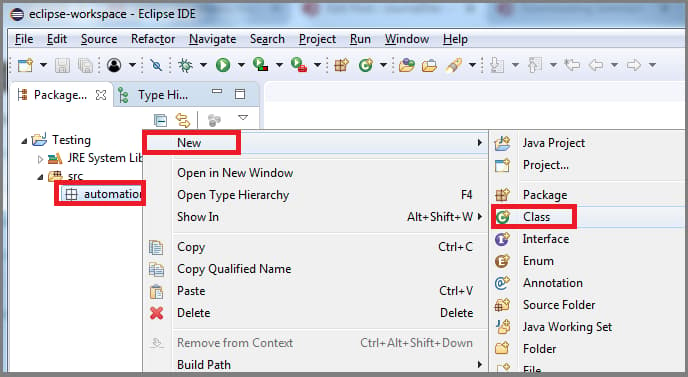
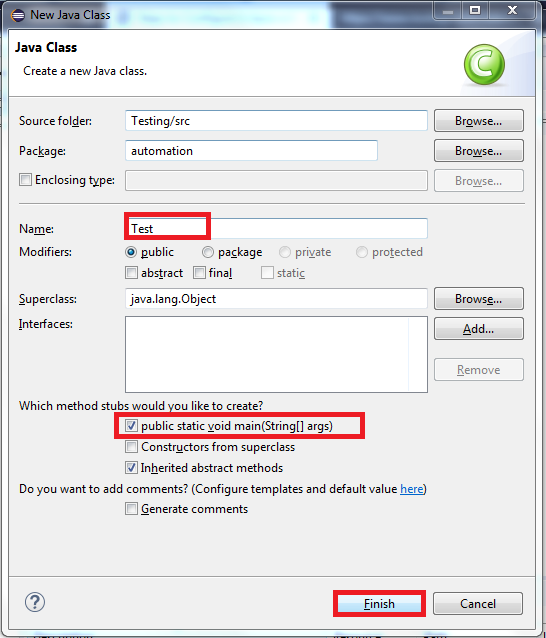
- Step 8: Give Class name Test, check the option checkbox public static void main and click on Finish button.
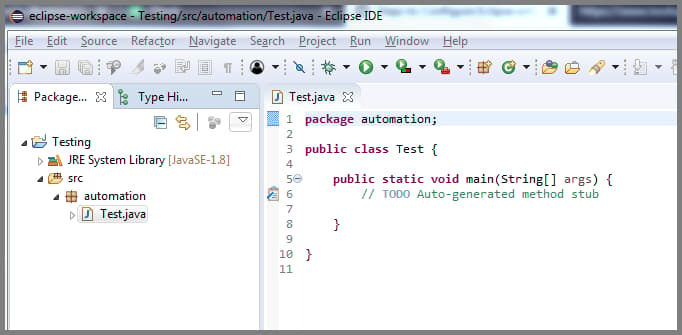
- Step 9: Now your Eclipse window will look something like below.
- Step 10: Now we add few lines of Selenium code without adding JAR files. Below image shows us the error message when we won’t add jar files.

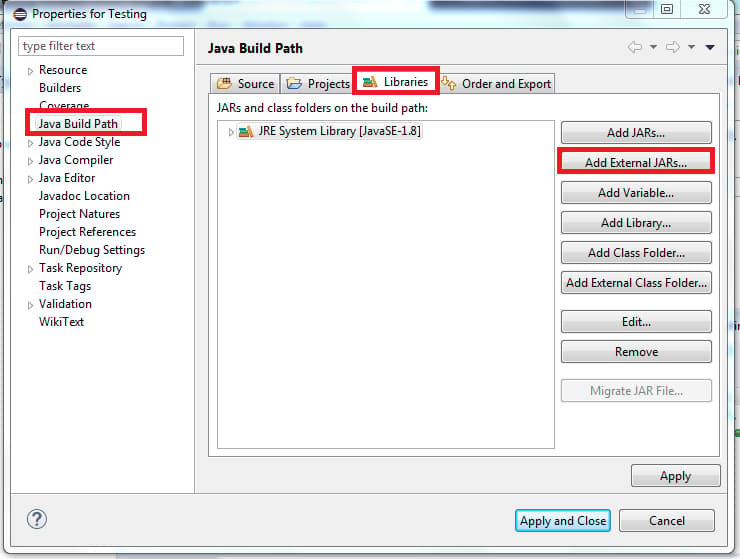
Let’s go ahead and add Selenium JAR files to our project to fix these errors.- Step 11: Right click on Project Testing. Select Properties > Java build Path. Then click on Libraries tab and click Add External JARs.
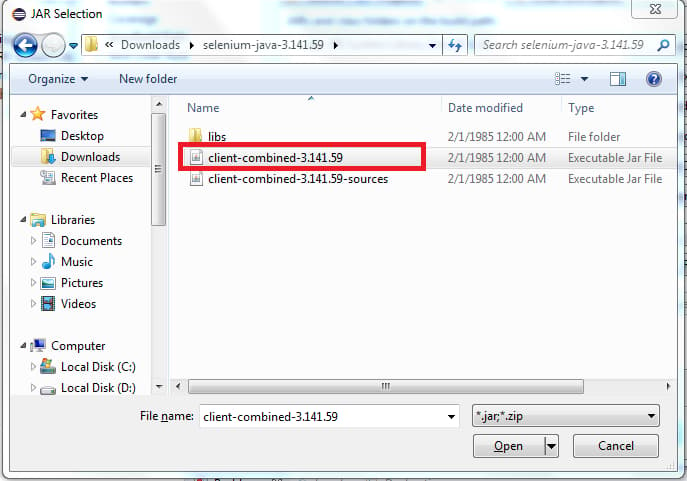
- Step 12: Add client-combined jar from the selenium jars folder.
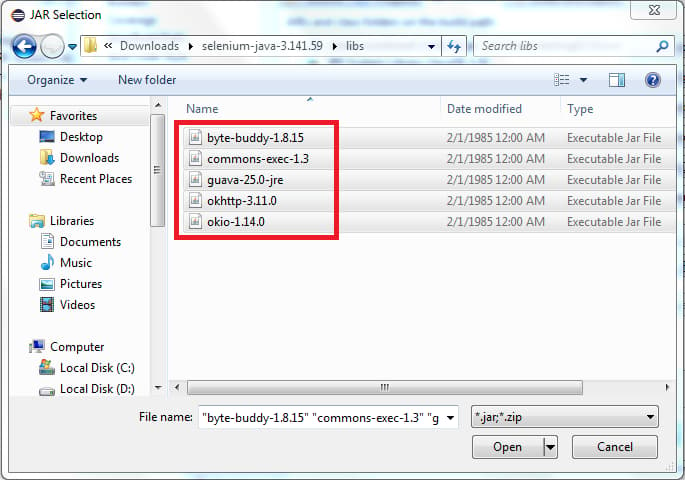
- Step 13: Add all the jars under libs folder.
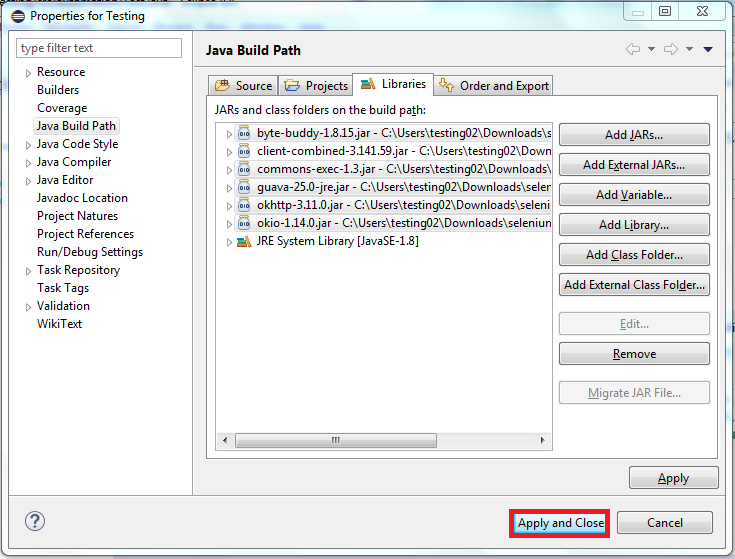
- Step 14: Click Apply and Close button.
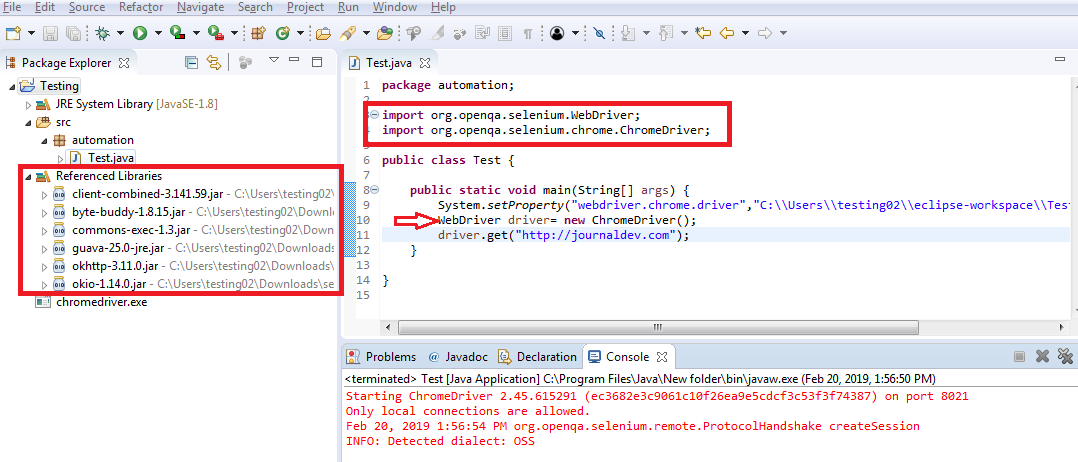
- Step 15: Now your Project Package Explorer window should look similar to the below image. Also, the errors related to Selenium classes would have been disappeared. Here we need to import WebDriver and ChromeDriver classes.
That’s it. Our Eclipse Java project is configured to use selenium classes.
Selenium Maven Dependencies
Most of the java project these days use Maven as the build tool. In that case, it’s very easy to import selenium jars into your project. Just add the following dependencies into your project pom.xml file.
<dependency>
    <groupId>org.seleniumhq.selenium</groupId>
    <artifactId>selenium-java</artifactId>
    <version>3.141.59</version>
</dependency>
If you are new to maven project, here are the steps to follow.
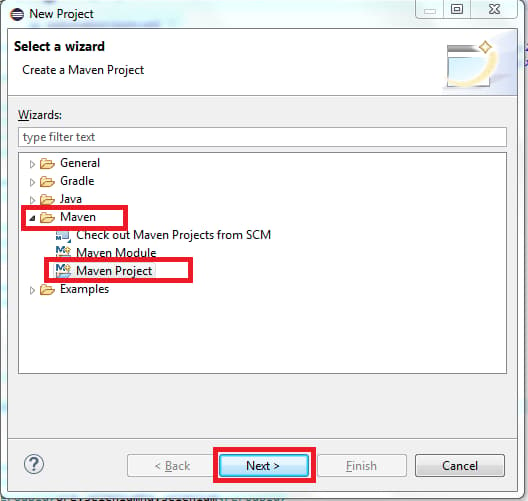
- Step 1: Open Eclipse then go to File > New > Project.
- Step 2: In the new project window, there are many wizard to choose. Select Maven Project under Maven category and click on Next button.
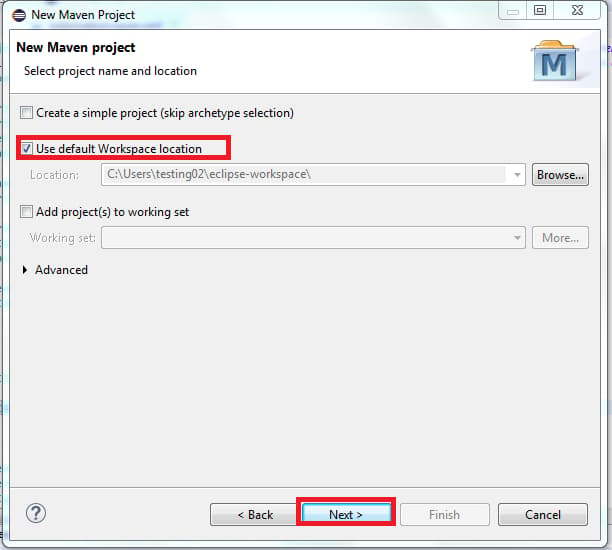
- Step 3: Click on Next button in the new screen. Don’t forget to select the “Use default Workspace location” option.
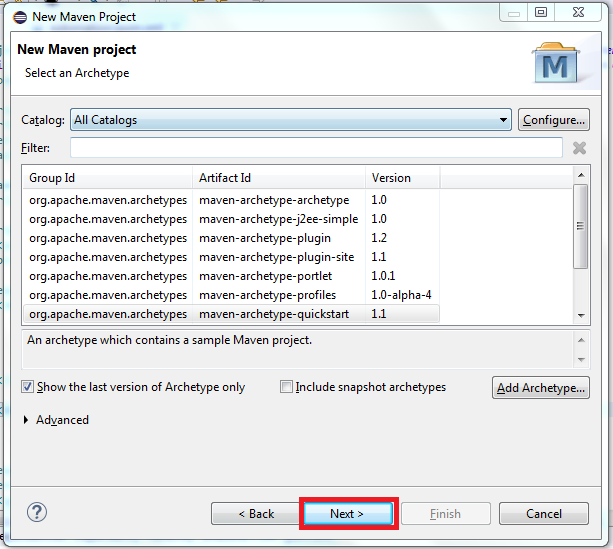
- Step 4: Select the maven-archetype-quickstart in the next screen and click on Next button.
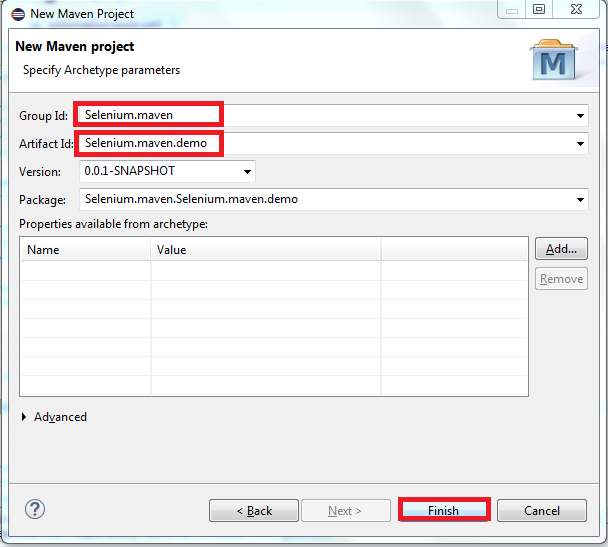
- Step 5: Enter Group Id, Artifact Id and click on Finish button.
- Step 6: Once the project is created you can see the maven project in the project explorer.
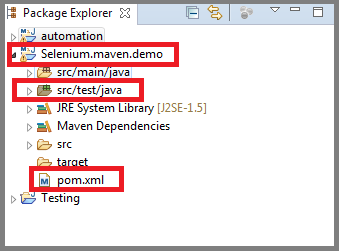
- Step 7: Double click on pom.xml and you will get the source code of pom.xml in the editor.
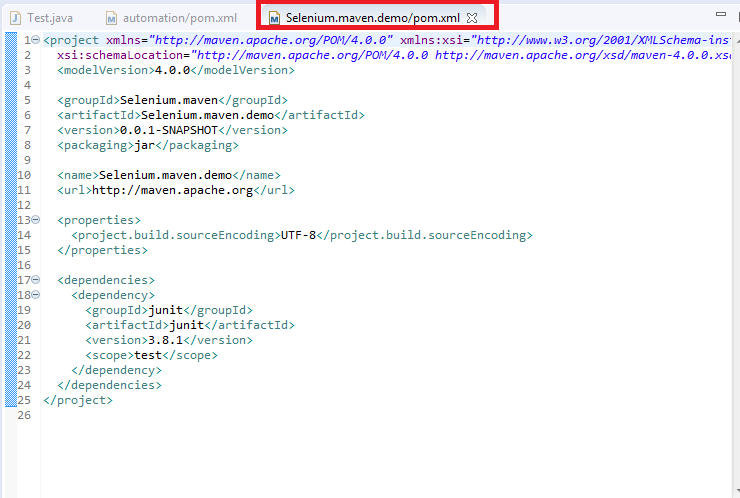
- Step 8: We need selenium maven dependencies configuration to add to our project. Head over to https://www.seleniumhq.org/download/maven.jsp. Here Selenium guys have provided maven dependency information. Just copy them as we need to paste it in pom.xml file.

- Step 9: Open pom.xml file and create <dependencies> tag and paste the dependency code inside it. Save the pom.xml file changes.
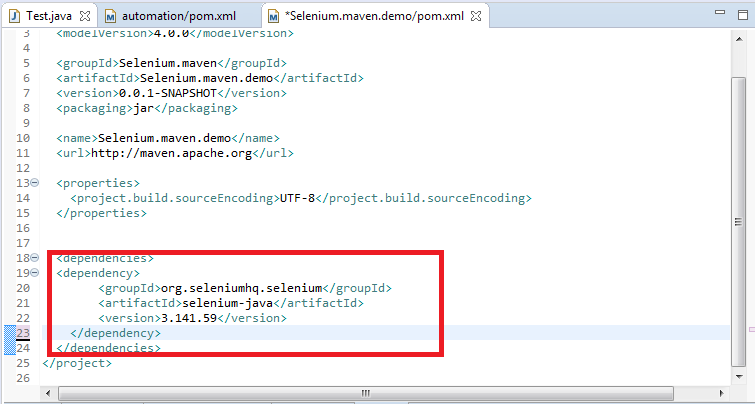 Selenium Maven Dependencies[/caption]- Step 10: Check your project “Maven Dependencies” to confirm that selenium jars has been downloaded and included in the project. [caption id=“attachment_26207” align=“aligncenter” width=“347”]
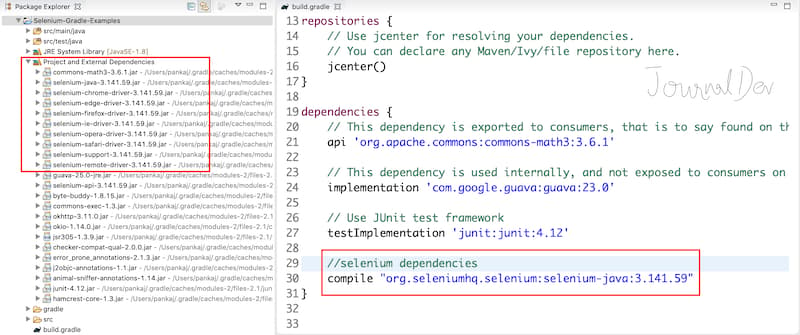
Selenium Gradle Dependencies
Gradle is also a popular build tool and used by a lot of projects. If you are using Gradle, then add below dependencies to your build.gradle file.
compile "org.seleniumhq.selenium:selenium-java:3.141.59"
Summary
We learned how to configure our system to start working with Selenium. We installed Java, Eclipse and created a new project and added selenium jars to it. However, it’s better to use Maven or Gradle build tools for our project, we also learned how to add Selenium jars using maven and Gradle script. References: Java SE Download, Eclipse Download,Selenium Jars
Thanks for learning with the DigitalOcean Community. Check out our offerings for compute, storage, networking, and managed databases.
About the author
Still looking for an answer?
This is a very helpful for beginners, especially the snaps are pretty good, Thanks for sharing this procedure
- Siva Kumar
This is wonderful guide to setup selenium. Thanks from bottom of my heart…
- Santhosh
Thanks for sharing the information. After following each and very step, I’m getting error : org.openqa.selenium.WebDriver is never used. org.openqa.selenium.firefox.FirefoxDriver is never used. Please help me.
- Sunny
I have installed newer version of Java, Eclipse. Have done exactly the same posted here, still unable to understand what value should be entered in “System.setProperty(key, value)” as I am unable to find the path to chrome or firefox driver. Please help me with this issue. I have installed Eclipse IDE for Java Developers Version: 2019-12 (4.14.0) on my Windows 10 64-Bit system with Java version 8 update 251(build 1.8.0_251-b08) Please help
- Rushikesh
Thanks so much for step by step help which resolved my selenium configuration issue.
- santosh
I import all Jar files into my project refrenecs but still i am getting error when trying to import in the project “import org.openqa.selenium.Webdriver;” The error in the test class is saying The package org.openqa.selenium is not accessible
- manpreet
 This work is licensed under a Creative Commons Attribution-NonCommercial- ShareAlike 4.0 International License.
Become a contributor for community
Get paid to write technical tutorials and select a tech-focused charity to receive a matching donation.

DigitalOcean Documentation
Full documentation for every DigitalOcean product.

Resources for startups and AI-native businesses
The Wave has everything you need to know about building a business, from raising funding to marketing your product.
The developer cloud
Scale up as you grow — whether you're running one virtual machine or ten thousand.

Start building today
From GPU-powered inference and Kubernetes to managed databases and storage, get everything you need to build, scale, and deploy intelligent applications.
