By Haiden Taylor and Kathryn Hancox

The author selected the Electronic Frontier Foundation to receive a donation as part of the Write for DOnations program.
Introduction
Shipit is a universal automation and deployment tool for Node.js developers. It features a task flow based on the popular Orchestrator package, login and interactive SSH commands through OpenSSH, and an extensible API. Developers can use Shipit to automate build and deployment workflows for a wide range of Node.js applications.
The Shipit workflow allows developers to not only configure tasks, but also to specify the order in which they are executed; whether they should be run synchronously or asynchronously and on which environment.
In this tutorial you will install and configure Shipit to deploy a Node.js application from your local development environment to your production environment. You’ll use Shipit to deploy your application and configure the remote server by:
- transferring your Node.js application’s files from your local environment to the production environment (using
rsync,git, andssh). - installing your application’s dependencies (node modules).
- configuring and managing the Node.js processes running on the remote server with PM2.
Prerequisites
Before you begin this tutorial you’ll need the following:
- Two CentOS 7 servers (in this tutorial they will be named app and web) configured with private networking by following the How To Set Up a Node.js Application for Production on CentOS 7 tutorial.
- Nginx (on your web server) secured with TLS/SSL as shown in the How To Secure Nginx with Let’s Encrypt on CentOS 7 tutorial. Note, if you are following the prerequisites chronologically, then you only need to complete steps 1, 4, and 6 on your web server.
- Node.js and npm installed on your development environment. This tutorial uses version 10.17.0. To install this on macOS or Ubuntu 18.04, follow the steps in How To Install Node.js and Create a Local Development Environment on macOS or the Installing Using a PPA section of How To Install Node.js on Ubuntu 18.04. By having Node.js installed you will also have npm installed; this tutorial uses version 6.11.3.
- A local development computer with
rsyncandgitinstalled.- On macOS you can install these with Homebrew.
- To install
giton Linux distributions, follow the How To Install Git tutorial.
- An account with GitHub or another hosted
gitservice provider. This tutorial will use GitHub.
Note: Windows users will need to install the Windows Subsystem for Linux to execute the commands in this guide.
Step 1 — Setting Up the Remote Repository
Shipit requires a Git repository to synchronize between the local development machine and the remote server. In this step you’ll create a remote repository on Github.com. While each provider is slightly different the commands are somewhat transferrable.
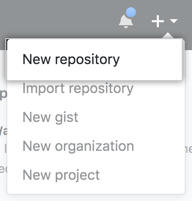
To create a repository, open Github.com in your web browser and log in. You will notice that in the upper-right corner of any page there is a + symbol. Click +, and then click New repository.
Type a short, memorable name for your repository, for example, hello-world. Note that whatever name you choose here will be replicated as the project folder that you’ll work from on your local machine.
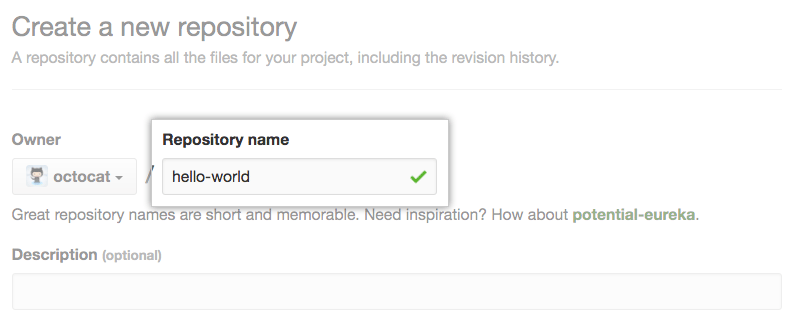
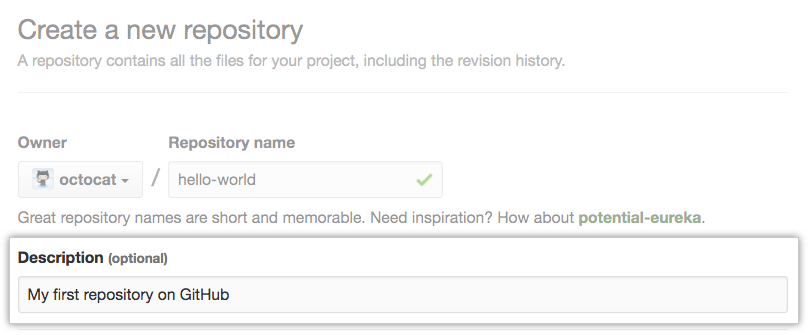
Optionally, add a description of your repository.
Set your repository’s visibility to your preference, either public or private.
Make sure the repository is initialized with a .gitignore, select Node from the Add .gitignore dropdown list. This step is important to avoid having unnecessary files (like the node_modules folder) being added to your repository.
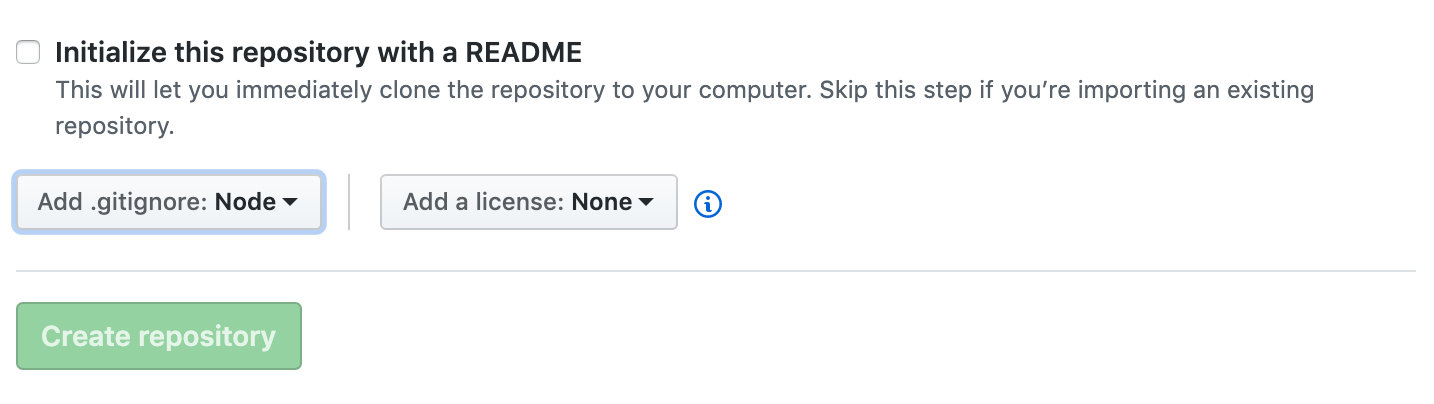
Click the Create repository button.
The repository now needs to be cloned from Github.com to your local machine.
Open your terminal and navigate to the location where you want to store all your Node.js project files. Note that this process will create a sub-folder within the current directory. To clone the repository to your local machine, run the following command:
- git clone https://github.com/your-github-username/your-github-repository-name.git
You will need to replace your-github-username and your-github-repository-name to reflect your Github username and the previously supplied repository name.
Note: If you have enabled two-factor authentication (2FA) on Github.com, you must use a personal access token or SSH key instead of your password when accessing Github on the command line. The Github Help page related to 2FA provides further information.
You’ll see output similar to:
OutputCloning into 'your-github-repository-name'...
remote: Enumerating objects: 3, done.
remote: Total 3 (delta 0), reused 0 (delta 0), pack-reused 3
Unpacking objects: 100% (3/3), done.
Move to the repository by running the following command:
- cd your-github-repository-name
Inside the repository is a single file and folder, both of which are files used by Git to manage the repository. You can verify this with:
- ls -la
You’ll see output similar to the following:
Outputtotal 8
0 drwxr-xr-x   4 asciant  staff  128 22 Apr 07:16 .
0 drwxr-xr-x   5 asciant  staff  160 22 Apr 07:16 ..
0 drwxr-xr-x  13 asciant  staff  416 22 Apr 07:16 .git
8 -rw-r--r--   1 asciant  staff  914 22 Apr 07:16 .gitignore
Now that you have configured a working git repository, you’ll create the shipit.js file that manages your deployment process.
Step 2 — Integrating Shipit into a Node.js Project
In this step, you’ll create an example Node.js project and then add the Shipit packages. This tutorial provides an example app—the Node.js web server that accepts HTTP requests and responds with Hello World in plain text. To create the application, run the following command:
- nano hello.js
Add the following example application code to hello.js (updating the APP_PRIVATE_IP_ADDRESS variable to your app server’s private network IP address):
var http = require('http');
http.createServer(function (req, res) {
  res.writeHead(200, {'Content-Type': 'text/plain'});
  res.end('Hello World\n');
}).listen(8080, 'APP_PRIVATE_IP_ADDRESS');
console.log('Server running at http://APP_PRIVATE_IP_ADDRESS:8080/');
Now create your package.json file for your application:
- npm init -y
This command creates a package.json file, which you’ll use to configure your Node.js application. In the next step, you’ll add dependencies to this file with the npm command line interface.
OutputWrote to ~/hello-world/package.json:
{
  "name": "hello-world",
  "version": "1.0.0",
  "description": "",
  "main": index.js",
  "scripts": {
    "test": "echo \"Error: no test specified\" && exit 1"
  },
  "keywords": [],
  "author": "",
  "license": "ISC"
}
Next, install the necessary npm packages with the following command:
- npm install --save-dev shipit-cli shipit-deploy shipit-shared
You use the --save-dev flag here as the Shipit packages are only required on your local machine. You’ll see output similar to the following:
Output+ shipit-shared@4.4.2
+ shipit-cli@4.2.0
+ shipit-deploy@4.1.4
updated 4 packages and audited 21356 packages in 11.671s
found 62 low severity vulnerabilities run `npm audit fix` to fix them, or `npm audit` for details
This also added the three packages to your package.json file as development dependencies:
. . .
  "devDependencies": {
    "shipit-cli": "^4.2.0",
    "shipit-deploy": "^4.1.4",
    "shipit-shared": "^4.4.2"
  },
. . .
With your local environment configured, you can now move on to preparing the remote app server for Shipit-based deployments.
Step 3 — Preparing the Remote App Server
In this step, you’ll use ssh to connect to your app server and install your remote dependency rsync. Rsync is a utility for efficiently transferring and synchronizing files between local computer drives and across networked computers by comparing the modification times and sizes of files.
Shipit uses rsync to transfer and synchronize files between your local computer and the remote app server. You won’t be issuing any commands to rsync directly; Shipit will handle it for you.
Note: How To Set Up a Node.js Application for Production on CentOS 7 left you with two servers app and web. These commands should be executed on app only.
Connect to your remote app server via ssh:
- ssh deployer@your_app_server_ip
Install rsync on your server by running the following command:
- sudo yum install rsync
Confirm the installation with:
- rsync --version
You’ll see a similar line within the output of this command:
Outputrsync  version 3.1.2  protocol version 31
. . .
You can end your ssh session by typing exit.
With rsync installed and available on the command line, you can move on to deployment tasks and their relationship with events.
Step 4 — Configuring and Executing Deployment Tasks
Both events and tasks are key components of Shipit deployments and it is important to understand how they complement the deployment of your application. The events triggered by Shipit represent specific points in the deployment lifecycle. Your tasks will execute in response to these events, based on the sequence of the Shipit lifecycle.
A common example of where this task/event system is useful in a Node.js application, is the installation of the app’s dependencies (node_modules) on the remote server. Later in this step you’ll have Shipit listen for the updated event (which is issued after the application’s files are transferred) and run a task to install the application’s dependencies (npm install) on the remote server.
To listen to events and execute tasks, Shipit needs a configuration file that holds information about your remote server (the app server) and registers event listeners and the commands to be executed by these tasks. This file lives on your local development computer, inside your Node.js application’s directory.
To get started, create this file, including information about your remote server, the event listeners you want to subscribe to, and some definitions of your tasks. Create shipitfile.js within your application root directory on your local machine by running the following command:
- nano shipitfile.js
Now that you’ve created a file, it needs to be populated with the initial environment information that Shipit needs. This is primarily the location of your remote Git repository and importantly, your app server’s public IP address and SSH user account.
Add this initial configuration and update the highlighted lines to match your environment:
module.exports = shipit => {
  require('shipit-deploy')(shipit);
  require('shipit-shared')(shipit);

  const appName = 'hello';

  shipit.initConfig({
    default: {
      deployTo: '/home/sammy/your-domain',
      repositoryUrl: 'https://git-provider.tld/YOUR_GIT_USERNAME/YOUR_GIT_REPO_NAME.git',
      keepReleases: 5,
      shared: {
        overwrite: true,
        dirs: ['node_modules']
      }
    },
    production: {
      servers: 'sammy@YOUR_APP_SERVER_PUBLIC_IP'
    }
  });

  const path = require('path');
  const ecosystemFilePath = path.join(
    shipit.config.deployTo,
    'shared',
    'ecosystem.config.js'
  );

  // Our listeners and tasks will go here

};
Updating the variables in your shipit.initConfig method provides Shipit with configuration specific to your deployment. These represent the following to Shipit:
deployTo:is the directory where Shipit will deploy your application’s code to on the remote server. Here you use the/home/folder for a non-root user withsudoprivileges (/home/sammy) as it is secure, and will avoid permission issues. The/your-domaincomponent is a naming convention to distinguish the folder from others in the user’s home folder.repositoryUrl:is the URL to the full Git repository, Shipit will use this URL to ensure the project files are in sync prior to deployment.keepReleases:is the number of releases to keep on the remote server. Areleaseis a date-stamped folder containing your application’s files at the time of release. These can be useful forrollbackof a deployment.shared:is configuration that corresponds withkeepReleasesthat allows directories to besharedbetween releases. In this instance, we have a singlenode_modulesfolder that is shared between all releases.production:represents a remote server to deploy your application to. In this instance, you have a single server (app server) that you nameproduction, with theservers:configuration matching your SSHuserandpublic ip address. The nameproduction, corresponds with the Shipit deploy command used toward the end of this tutorial (npx shipit server name deployor in your casenpx shipit production deploy).
Further information on the Shipit Deploy Configuration object can be found in the Shipit Github repository.
Before continuing to update your shipitfile.js, let’s review the following example code snippet to understand Shipit tasks:
Example event listenershipit.on('deploy', () => {
  shipit.start('say-hello');
});

shipit.blTask('say-hello', async () => {
  shipit.local('echo "hello from your local computer"')
});
This is an example task that uses the shipit.on method to subscribe to the deploy event. This task will wait for the deploy event to be emitted by the Shipit lifecycle, then when the event is received, the task executes the shipit.start method that tells Shipit to start the say-hello task.
The shipit.on method takes two parameters, the name of the event to listen for and the callback function to execute when the event is received.
Under the shipit.on method declaration, the task is defined with the shipit.blTask method. This creates a new Shipit task that will block other tasks during its execution (it is a synchronous task). The shipit.blTask method also takes two parameters, the name of the task it is defining and a callback function to execute when the task is triggered by shipit.start.
Within the callback function of this example task (say-hello), the shipit.local method executes a command on the local machine. The local command echos "hello from your local computer" into the terminal output.
If you wanted to execute a command on the remote server, you would use the shipit.remote method. The two methods, shipit.local and shipit.remote, provide an API to issue commands either locally, or remotely as part of a deployment.
Now update the shipitfile.js to include event listeners to subscribe to the Shipit lifecycle with shipit.on. Add the event listeners to your shipitfile.js, inserting them following the comment placeholder from the initial configuration // Our tasks will go here:
. . .
  shipit.on('updated', () => {
    shipit.start('npm-install', 'copy-config');
  });

  shipit.on('published', () => {
    shipit.start('pm2-server');
  });
These two methods are listening for the updated and the published events that are emitted as part of the Shipit deployment lifecycle. When the event is received, they will each initiate tasks using the shipit.start method, similarly to the example task.
Now that you’ve scheduled the listeners, you’ll add the corresponding task. Add the following task to your shipitfile.js, inserting them after your event listeners:
. . .
shipit.blTask('copy-config', async () => {

const fs = require('fs');

const ecosystem = `
module.exports = {
apps: [
  {
    name: '${appName}',
    script: '${shipit.releasePath}/hello.js',
    watch: true,
    autorestart: true,
    restart_delay: 1000,
    env: {
      NODE_ENV: 'development'
    },
    env_production: {
      NODE_ENV: 'production'
    }
  }
]
};`;

  fs.writeFileSync('ecosystem.config.js', ecosystem, function(err) {
    if (err) throw err;
    console.log('File created successfully.');
  });

  await shipit.copyToRemote('ecosystem.config.js', ecosystemFilePath);
});
You first declare a task called copy-config. This task creates a local file called ecosystem.config.js and then copies that file to your remote app server. PM2 uses this file to manage your Node.js application. It provides the necessary file path information to PM2 to ensure that it is running your latest deployed files. Later in the build process, you’ll create a task that runs PM2 with ecosystem.config.js as configuration.
If your application needs environment variables (like a database connection string) you can declare them either locally in env: or on the remote server in env_production: in the same manner that you set the NODE_ENV variable in these objects.
Add the next task to your shipitfile.js following the copy-config task:
. . .
shipit.blTask('npm-install', async () => {
  shipit.remote(`cd ${shipit.releasePath} && npm install --production`);
});
Next, you declare a task called npm-install. This task uses a remote bash terminal (via shipit.remote) to install the app’s dependencies (npm packages).
Add the last task to your shipitfile.js following the npm-install task:
. . .
shipit.blTask('pm2-server', async () => {
  await shipit.remote(`pm2 delete -s ${appName} || :`);
  await shipit.remote(
    `pm2 start ${ecosystemFilePath} --env production --watch true`
  );
});
Finally you declare a task called pm2-server. This task also uses a remote bash terminal to first stop PM2 from managing your previous deployment through the delete command and then start a new instance of your Node.js server providing the ecosystem.config.js file as a variable. You also let PM2 know that it should be using environment variables from the production block in your initial configuration and you ask PM2 to watch the application, restarting it if it crashes.
The complete shipitfile.js file:
module.exports = shipit => {
  require('shipit-deploy')(shipit);
  require('shipit-shared')(shipit);

  const appName = 'hello';

  shipit.initConfig({
    default: {
      deployTo: '/home/deployer/example.com',
      repositoryUrl: 'https://git-provider.tld/YOUR_GIT_USERNAME/YOUR_GIT_REPO_NAME.git',
      keepReleases: 5,
      shared: {
        overwrite: true,
        dirs: ['node_modules']
      }
    },
    production: {
      servers: 'deployer@YOUR_APP_SERVER_PUBLIC_IP'
    }
  });

  const path = require('path');
  const ecosystemFilePath = path.join(
    shipit.config.deployTo,
    'shared',
    'ecosystem.config.js'
  );

  // Our listeners and tasks will go here
  shipit.on('updated', async () => {
    shipit.start('npm-install', 'copy-config');
  });

  shipit.on('published', async () => {
    shipit.start('pm2-server');
  });

  shipit.blTask('copy-config', async () => {
    const fs = require('fs');
    const ecosystem = `
module.exports = {
  apps: [
    {
      name: '${appName}',
      script: '${shipit.releasePath}/hello.js',
      watch: true,
      autorestart: true,
      restart_delay: 1000,
      env: {
        NODE_ENV: 'development'
      },
      env_production: {
        NODE_ENV: 'production'
      }
    }
  ]
};`;

    fs.writeFileSync('ecosystem.config.js', ecosystem, function(err) {
      if (err) throw err;
      console.log('File created successfully.');
    });

    await shipit.copyToRemote('ecosystem.config.js', ecosystemFilePath);
  });

  shipit.blTask('npm-install', async () => {
    shipit.remote(`cd ${shipit.releasePath} && npm install --production`);
  });

  shipit.blTask('pm2-server', async () => {
    await shipit.remote(`pm2 delete -s ${appName} || :`);
    await shipit.remote(
      `pm2 start ${ecosystemFilePath} --env production --watch true`
    );
  });
};
Save and exit the file when you’re ready.
With your shipitfile.js configured, event listeners, and associated tasks finalized you can move on to deploying to the app server.
Step 5 — Deploying Your Application
In this step, you will deploy your application remotely and test that the deployment made your application available to the internet.
Because Shipit clones the project files from the remote Git repository, you need to push your local Node.js application files from your local machine to Github. Navigate to your Node.js project’s application directory (where your hello.js and shiptitfile.js are located) and run the following command:
- git status
The git status command displays the state of the working directory and the staging area. It lets you see which changes have been staged, which haven’t, and which files aren’t being tracked by Git. Your files are untracked and appear red in the output:
OutputOn branch master
Your branch is up to date with 'origin/master'.

Untracked files:
  (use "git add <file>..." to include in what will be committed)

	hello.js
	package-lock.json
	package.json
	shipitfile.js

nothing added to commit but untracked files present (use "git add" to track)
You can add these files to your repository with the following command:
- git add --all
This command does not produce any output, although if you were to run git status again, the files would appear green with a note that there are changes to be committed.
You can create a commit running the following command:
- git commit -m "Our first commit"
The output of this command provides some Git-specific information about the files.
Output[master c64ea03] Our first commit
 4 files changed, 1948 insertions(+)
 create mode 100644 hello.js
 create mode 100644 package-lock.json
 create mode 100644 package.json
 create mode 100644 shipitfile.js
All that is left now is to push your commit to the remote repository for Shipit to clone to your app server during deployment. Run the following command:
- git push origin master
The output includes information about the synchronization with the remote repository:
OutputEnumerating objects: 7, done.
Counting objects: 100% (7/7), done.
Delta compression using up to 8 threads
Compressing objects: 100% (6/6), done.
Writing objects: 100% (6/6), 15.27 KiB | 7.64 MiB/s, done.
Total 6 (delta 0), reused 0 (delta 0)
To github.com:Asciant/hello-world.git
   e274312..c64ea03  master -> master
To deploy your application, run the following command:
- npx shipit production deploy
The output of this command (which is too large to include in its entirety) provides detail on the tasks being executed and the result of the specific function. The output following for the pm2-server task shows the Node.js app has been launched:
OutputRunning 'deploy:init' task...
Finished 'deploy:init' after 432 μs
. . .
Running 'pm2-server' task...
Running "pm2 delete -s hello || :" on host "centos-ap-app.asciant.com".
Running "pm2 start /home/deployer/example.com/shared/ecosystem.config.js --env production --watch true" on host "centos-ap-app.asciant.com".
@centos-ap-app.asciant.com [PM2][WARN] Node 4 is deprecated, please upgrade to use pm2 to have all features
@centos-ap-app.asciant.com [PM2][WARN] Applications hello not running, starting...
@centos-ap-app.asciant.com [PM2] App [hello] launched (1 instances)
@centos-ap-app.asciant.com ┌──────────┬────┬─────────┬──────┬──────┬────────┬─────────┬────────┬─────┬──────────┬──────────┬──────────┐
@centos-ap-app.asciant.com │ App name │ id │ version │ mode │ pid  │ status │ restart │ uptime │ cpu │ mem      │ user     │ watching │
@centos-ap-app.asciant.com ├──────────┼────┼─────────┼──────┼──────┼────────┼─────────┼────────┼─────┼──────────┼──────────┼──────────┤
@centos-ap-app.asciant.com │ hello    │ 0  │ 1.0.0   │ fork │ 4177 │ online │ 0       │ 0s     │ 0%  │ 4.5 MB   │ deployer │ enabled  │
@centos-ap-app.asciant.com └──────────┴────┴─────────┴──────┴──────┴────────┴─────────┴────────┴─────┴──────────┴──────────┴──────────┘
@centos-ap-app.asciant.com  Use `pm2 show <id|name>` to get more details about an app
Finished 'pm2-server' after 5.27 s

Running 'deploy:clean' task...
Keeping "5" last releases, cleaning others
Running "(ls -rd /home/deployer/example.com/releases/*|head -n 5;ls -d /home/deployer/example.com/releases/*)|sort|uniq -u|xargs rm -rf" on host "centos-ap-app.asciant.com".
Finished 'deploy:clean' after 1.81 s

Running 'deploy:finish' task...
Finished 'deploy:finish' after 222 μs
Finished 'deploy' [ deploy:init, deploy:fetch, deploy:update, deploy:publish, deploy:clean, deploy:finish ]
To view your application as a user would, you can enter your website URL your-domain in your browser to access your web server. This will serve the Node.js Application, via reverse proxy, on the app server where your files were deployed.
You’ll see a Hello World greeting.
Note: After the first deployment, your Git repository will be tracking a newly created file named ecosystem.config.js. As this file will be rebuilt on each deploy, and may contain compiled application secrets it should be added to the .gitignore file in the application root directory on your local machine prior to your next git commit.
. . .
# ecosystem.config
ecosystem.config.js
You’ve deployed your Node.js application to your app server, that refers to your new deployment. With everything up and running, you can move on to monitoring your application processes.
Step 6 — Monitoring Your Application
PM2 is a great tool for managing your remote processes, but it also provides features to monitor the performance of these application processes.
Connect to your remote app server via SSH with this command:
- ssh deployer@your_app_server_ip
To obtain specific information related to your PM2 managed processes, run the following:
- pm2 list
You’ll see output similar to:
Output┌─────────────┬────┬─────────┬──────┬──────┬────────┬─────────┬────────┬──────┬───────────┬──────────┬──────────┐
│ App name    │ id │ version │ mode │ pid  │ status │ restart │ uptime │ cpu  │ mem       │ user     │ watching │
├─────────────┼────┼─────────┼──────┼──────┼────────┼─────────┼────────┼──────┼───────────┼──────────┼──────────┤
│ hello       │ 0  │ 0.0.1   │ fork │ 3212 │ online │ 0       │ 62m    │ 0.3% │ 45.2 MB   │ deployer │ enabled  │
└─────────────┴────┴─────────┴──────┴──────┴────────┴─────────┴────────┴──────┴───────────┴──────────┴──────────┘
You’ll see a summary of the information PM2 has collected. To see detailed information, you can run:
- pm2 show hello
The output expands on the summary information provided by the pm2 list command. It also provides information on a number of ancillary commands and provides log file locations:
Output  Describing process with id 0 - name hello
┌───────────────────┬─────────────────────────────────────────────────────────────┐
│ status            │ online                                                      │
│ name              │ hello                                                       │
│ version           │ 1.0.0                                                       │
│ restarts          │ 0                                                           │
│ uptime            │ 82s                                                         │
│ script path       │ /home/deployer/example.com/releases/20190531213027/hello.js │
│ script args       │ N/A                                                         │
│ error log path    │ /home/deployer/.pm2/logs/hello-error.log                    │
│ out log path      │ /home/deployer/.pm2/logs/hello-out.log                      │
│ pid path          │ /home/deployer/.pm2/pids/hello-0.pid                        │
│ interpreter       │ node                                                        │
│ interpreter args  │ N/A                                                         │
│ script id         │ 0                                                           │
│ exec cwd          │ /home/deployer                                              │
│ exec mode         │ fork_mode                                                   │
│ node.js version   │ 4.2.3                                                       │
│ node env          │ production                                                  │
│ watch & reload    │ ✔                                                           │
│ unstable restarts │ 0                                                           │
│ created at        │ 2019-05-31T21:30:48.334Z                                    │
└───────────────────┴─────────────────────────────────────────────────────────────┘
 Revision control metadata
┌──────────────────┬────────────────────────────────────────────────────┐
│ revision control │ git                                                │
│ remote url       │ N/A                                                │
│ repository root  │ /home/deployer/example.com/releases/20190531213027 │
│ last update      │ 2019-05-31T21:30:48.559Z                           │
│ revision         │ 62fba7c8c61c7769022484d0bfa46e756fac8099           │
│ comment          │ Our first commit                                   │
│ branch           │ master                                             │
└──────────────────┴────────────────────────────────────────────────────┘
 Divergent env variables from local env
┌───────────────────────────┬───────────────────────────────────────┐
│ XDG_SESSION_ID            │ 15                                    │
│ HOSTNAME                  │ N/A                                   │
│ SELINUX_ROLE_REQUESTED    │                                       │
│ TERM                      │ N/A                                   │
│ HISTSIZE                  │ N/A                                   │
│ SSH_CLIENT                │ 44.222.77.111 58545 22                │
│ SELINUX_USE_CURRENT_RANGE │                                       │
│ SSH_TTY                   │ N/A                                   │
│ LS_COLORS                 │ N/A                                   │
│ MAIL                      │ /var/mail/deployer                    │
│ PATH                      │ /usr/local/bin:/usr/bin               │
│ SELINUX_LEVEL_REQUESTED   │                                       │
│ HISTCONTROL               │ N/A                                   │
│ SSH_CONNECTION            │ 44.222.77.111 58545 209.97.167.252 22 │
└───────────────────────────┴───────────────────────────────────────┘
. . .
PM2 also provides an in-terminal monitoring tool, accessible with:
- pm2 monit
The output of this command is an interactive dashboard, where pm2 provides realtime process information, logs, metrics, and metadata. This dashboard may assist in monitoring resources and error logs:
Output┌─ Process list ────────────────┐┌─ Global Logs ─────────────────────────────────────────────────────────────┐
│[ 0] hello     Mem:  22 MB     ││                                                                           │
│                               ││                                                                           │
│                               ││                                                                           │
└───────────────────────────────┘└───────────────────────────────────────────────────────────────────────────┘
┌─ Custom metrics (http://bit.l─┐┌─ Metadata ────────────────────────────────────────────────────────────────┐
│ Heap Size              10.73  ││ App Name              hello                                               │
│ Heap Usage             66.14  ││ Version               N/A                                                 │
│ Used Heap Size          7.10  ││ Restarts              0                                                   │
│ Active requests            0  ││ Uptime                55s                                                 │
│ Active handles             4  ││ Script path           /home/asciant/hello.js                              │
│ Event Loop Latency      0.70  ││ Script args           N/A                                                 │
│ Event Loop Latency p95        ││ Interpreter           node                                                │
│                               ││ Interpreter args      N/A                                                 │
└───────────────────────────────┘└───────────────────────────────────────────────────────────────────────────┘
With an understanding of how you can monitor your processes with PM2, you can move on to how Shipit can assist in rolling back to a previous working deployment.
End your ssh session on your app server by running exit.
Step 7 — Rolling Back a Bugged Deployment
Deployments occasionally expose unforeseen bugs, or issues that cause your site to fail. The developers and maintainers of Shipit have anticipated this and have provided the ability for you to roll back to the previous (working) deployment of your application.
To ensure your PM2 configuration persists, add another event listener to shipitfile.js on the rollback event:
. . .
  shipit.on('rollback', () => {
    shipit.start('npm-install', 'copy-config');
  });
You add a listener to the rollback event to run your npm-install and copy-config tasks. This is needed because unlike the published event, the updated event is not run by the Shipit lifecycle when rolling back a deployment. Adding this event listener ensures your PM2 process manager points to the most recent deployment, even in the event of a rollback.
This process is similar to deploying, with a minor change in command. To try rolling back to a previous deployment you can execute the following:
- npx shipit production rollback
Like the deploy command, rollback provides details on the roll back process and the tasks being executed:
OutputRunning 'rollback:init' task...
Get current release dirname.
Running "if [ -h /home/deployer/example.com/current ]; then readlink /home/deployer/example.com/current; fi" on host "centos-ap-app.asciant.com".
@centos-ap-app.asciant.com releases/20190531213719
Current release dirname : 20190531213719.
Getting dist releases.
Running "ls -r1 /home/deployer/example.com/releases" on host "centos-ap-app.asciant.com".
@centos-ap-app.asciant.com 20190531213719
@centos-ap-app.asciant.com 20190531213519
@centos-ap-app.asciant.com 20190531213027
Dist releases : ["20190531213719","20190531213519","20190531213027"].
Will rollback to 20190531213519.
Finished 'rollback:init' after 3.96 s

Running 'deploy:publish' task...
Publishing release "/home/deployer/example.com/releases/20190531213519"
Running "cd /home/deployer/example.com && if [ -d current ] && [ ! -L current ]; then echo "ERR: could not make symlink"; else ln -nfs releases/20190531213519 current_tmp && mv -fT current_tmp current; fi" on host "centos-ap-app.asciant.com".
Release published.
Finished 'deploy:publish' after 1.8 s

Running 'pm2-server' task...
Running "pm2 delete -s hello || :" on host "centos-ap-app.asciant.com".
Running "pm2 start /home/deployer/example.com/shared/ecosystem.config.js --env production --watch true" on host "centos-ap-app.asciant.com".
@centos-ap-app.asciant.com [PM2][WARN] Node 4 is deprecated, please upgrade to use pm2 to have all features
@centos-ap-app.asciant.com [PM2][WARN] Applications hello not running, starting...
@centos-ap-app.asciant.com [PM2] App [hello] launched (1 instances)
@centos-ap-app.asciant.com ┌──────────┬────┬─────────┬──────┬──────┬────────┬─────────┬────────┬─────┬──────────┬──────────┬──────────┐
@centos-ap-app.asciant.com │ App name │ id │ version │ mode │ pid  │ status │ restart │ uptime │ cpu │ mem      │ user     │ watching │
@centos-ap-app.asciant.com ├──────────┼────┼─────────┼──────┼──────┼────────┼─────────┼────────┼─────┼──────────┼──────────┼──────────┤
@centos-ap-app.asciant.com │ hello    │ 0  │ 1.0.0   │ fork │ 4289 │ online │ 0       │ 0s     │ 0%  │ 4.5 MB   │ deployer │ enabled  │
@centos-ap-app.asciant.com └──────────┴────┴─────────┴──────┴──────┴────────┴─────────┴────────┴─────┴──────────┴──────────┴──────────┘
@centos-ap-app.asciant.com  Use `pm2 show <id|name>` to get more details about an app
Finished 'pm2-server' after 5.55 s

Running 'deploy:clean' task...
Keeping "5" last releases, cleaning others
Running "(ls -rd /home/deployer/example.com/releases/*|head -n 5;ls -d /home/deployer/example.com/releases/*)|sort|uniq -u|xargs rm -rf" on host "centos-ap-app.asciant.com".
Finished 'deploy:clean' after 1.82 s

Running 'rollback:finish' task...
Finished 'rollback:finish' after 615 μs
Finished 'rollback' [ rollback:init, deploy:publish, deploy:clean, rollback:finish ]
You have configured Shipit to keep 5 releases through the keepReleases: 5 configuration in shipitfile.js. Shipit keeps track of these releases internally to ensure it is able to roll back when required. Shipit also provides a handy way to identify the releases by creating a directory named as a timestamp (YYYYMMDDHHmmss - Example: /home/deployer/your-domain/releases/20190420210548).
If you wanted to further customize the roll back process, you can listen for events specific to the roll back operation. You can then use these events to execute tasks that will complement your roll back. You can refer to the event list provided in the breakdown of the Shipit lifecycle and configure the tasks/listeners within your shipitfile.js.
The ability to roll back means that you can always serve a functioning version of your application to your users even if a deployment introduces unexpected bugs/issues.
Conclusion
In this tutorial, you configured a workflow that allows you to create a highly customizable alternative to Platform as a Service, all from a couple of servers. This workflow allows for customized deployment and configuration, process monitoring with PM2, the potential to scale and add services, or additional servers or environments to the deployment when required.
If you are interested in continuing to develop your Node.js skills, check out the DigtalOcean Node.js content as well as the How To Code in Node.js Series.
Thanks for learning with the DigitalOcean Community. Check out our offerings for compute, storage, networking, and managed databases.
About the author(s)
Former Senior Technical Editor at DigitalOcean, with a strong focus on DevOps and System Administration content. Areas of expertise include Terraform, PyTorch, Python, and Django.
Still looking for an answer?
This textbox defaults to using Markdown to format your answer.
You can type !ref in this text area to quickly search our full set of tutorials, documentation & marketplace offerings and insert the link!
This comment has been deleted
 This work is licensed under a Creative Commons Attribution-NonCommercial- ShareAlike 4.0 International License.
Become a contributor for community
Get paid to write technical tutorials and select a tech-focused charity to receive a matching donation.

DigitalOcean Documentation
Full documentation for every DigitalOcean product.

Resources for startups and AI-native businesses
The Wave has everything you need to know about building a business, from raising funding to marketing your product.
The developer cloud
Scale up as you grow — whether you're running one virtual machine or ten thousand.

Start building today
From GPU-powered inference and Kubernetes to managed databases and storage, get everything you need to build, scale, and deploy intelligent applications.
