
Introduction
Jekyll is a static-site generator that provides some of the benefits of a Content Management System (CMS) while avoiding the performance and security issues introduced by such database-driven sites. It is “blog-aware” with special features to handle date-organized content, although its usefulness is not limited to blogging sites. Jekyll is well-suited for people who need to work off-line, who prefer to use a lightweight editor instead of web forms for maintaining content, and who wish to use version control to track changes to their website.
In this tutorial, we’ll focus on how Jekyll handles URLs and linking since changing URLs will break other people’s link to our pages, as well as links in the content of our own site. URLs are critical to how people find and use websites and warrant consideration before publishing a site for the first time.
We’ll look at how Jekyll creates URLs by default and show how to change the pattern for an individual file or the entire site. Then we’ll look a how to link to pages within our content. Finally, we’ll stage the site for testing.
Prerequisites
To follow this tutorial, you will need to complete the previous guides:
When you’ve completed these, you’re ready to begin.
The File Structure of the Static Site
In Part 2 of this series, we created scaffolding with the jekyll new command and focused on how the resulting site looked in a web browser. Now, let’s take a look at the file structure that was created when Jekyll created the static site.
Note: If you followed along with Part 2 of this series, you should have the extra assets directory and contact page. If you didn’t, or if you experimented by adding more pages, your structure may look somewhat different.
The _site directory and all the contents beneath it, highlighted below, comprise the static site.
.
├── 404.html
├── about.md
├── assets
│   └── postcard.jpg
├── _config.yml
├── contact.md
├── Gemfile
├── Gemfile.lock
├── index.md
├── _posts
│   └── 2017-09-04-welcome-to-jekyll.markdown
└── _site
    ├── 404.html
    ├── about
    │   └── index.html
    ├── assets
    │   ├── main.css
    │   └── postcard.jpg
    ├── contact.html
    ├── feed.xml
    ├── index.html
    └── jekyll
        └── update
            └── 2017
                └── 09
                    └── 04
                        └── welcome-to-jekyll.html
Unlike database-driven websites, URLs for a static website are literal representations of the directory structure on disk. Jekyll transformed the post’s categories into directories and exploded the date into the file structure, a pattern which is common for many blogs, so that the final URL pattern for this post is /category1/category2/YYYY/MM/DD/words-in-title.html, so the literal URL is http://203.0.113.0:4000/jekyll/update/2017/09/04/welcome-to-jekyll.html.
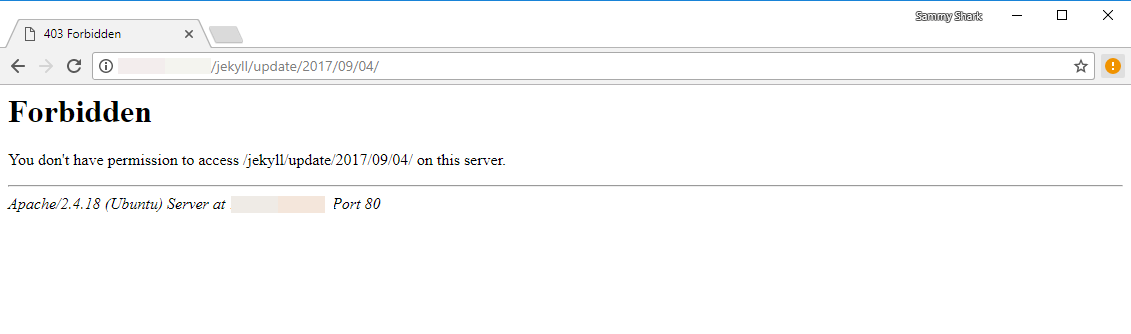
The scaffolding does not provide dynamic index pages for these directories, so one of two things will happen if a user deletes part of the URL to try to find all the posts from a particular category, year, month or day. If automatic directory indexing is allowed by the web server, they’ll see file and directory information:
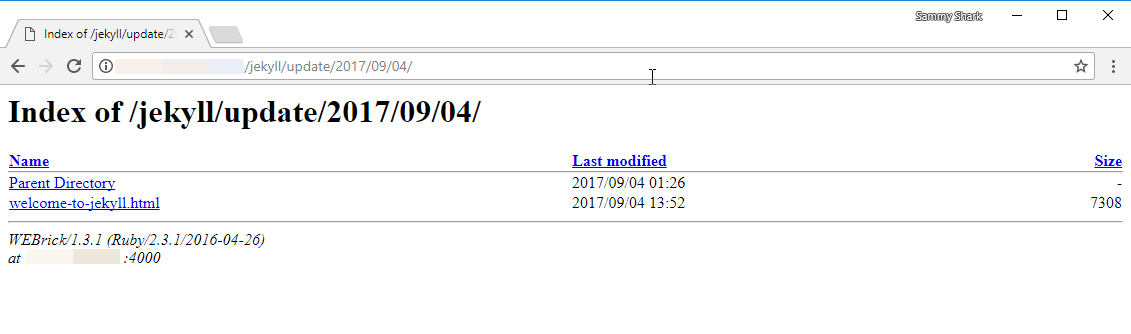
In the second case, if the administrator of the production site disabled the directory listings on the server, a user would be denied access:
The category and date-based structure is a common pattern for blog URLS, but how you decide to structure your URLs will depend on the needs of your particular site.
If you want to change the default, Jekyll makes it fairly straightforward to construct URLs. It’s useful to give this some thought before publishing the site for the first time, since changes to the URL patterns impacts how effectively people can find the content with search engines and affects links that others make to the site.
Understanding How URLs are Controlled
Jekyll’s system for creating URLs is both flexible and powerful. They can be influenced by where and how you name and store the source files, as well as dynamically overridden with a specific value or more general pattern.
Page Defaults
When we create a page in the root of our site like we did for our contact page, the file name, contact.md is transformed into contact.html, and the resulting URL is right off the document root, too: http://203.0.113.0:4000/contact.html. If we placed it in one or more subdirectories, those would become part of the URL, too. For example, if we put the page contact.md in a directory called main the URL would become http://203.0.113.0:4000/main/contact.html.
Post Defaults
Posts work differently than pages. First, they’re allowed to have categories, and those categories become directories on the static site as well as part of the URL. The default post pattern is a concatenation of its Front Matter:
title:  "Welcome to Jekyll!"
date:   2017-09-04 03:36:31 +0000
categories: jekyll update
In the _site directory, the subdirectory will be jekyll/update/2017/09/04/welcome-to-jekyll.html, following the pattern /:categories/:year/:month/:day/:title and resulting in the URL http://203.0.113.0:4000/jekyll/update/2017/09/04/welcome-to-jekyll.html.
If we removed a category from the Front Matter, the directory structure would change next time the site is generated and would no longer be part of the the URL.
The page and post defaults can be overridden in two ways.
Permalinks
Defining a Permalink in the Front Matter of an individual page will override the default for both pages and posts, allowing us to specify exactly what we want the link to be on a per-file basis. This was set in the default content of the About page, where the permalink value, /about/ resulted in the URL http://203.0.113.0:4000/about/ which in turn exists on disk as about/index.html
Permalink Patterns
Jekyll allows you to redefine the entire default pattern in the _config.yml This will affect both pages and posts with one important distinction: posts have access to categories and date and time elements from the Front Matter, while pages do not. Page URLs will follow the pattern, gracefully omitting any post-specific elements.
To see the permalink pattern override in action, we’ll create a pattern that retains the categories for posts, omits the date elements, and ends with the post or page title:
- nano ~/www/_config.yml
Add the following value to the bottom of the file:
. . .
permalink: /:categories/:title/
To see changes from editing the configuration file, we’ll need to stop the web server with CTRL-C, then restart it:
- jekyll serve --host=203.0.113.0
On disk, the file structure has changed:
├── about.md
├── assets
│   └── postcard.jpg
├── _config.yml
├── contact.md
├── css
│   └── main.scss
├── feed.xml
├── Gemfile
├── Gemfile.lock
├── index.html
├── _posts
│   ├── 2017-09-04-welcome-to-jekyll.markdown
│   └── 2017-09-04-link-test.md
└── _site
    ├── about
    │   └── index.html
    ├── assets
    │   └── postcard.jpg
    ├── contact # originally `contact.html`
    │   └── index.html
    ├── css
    │   └── main.css
    ├── feed.xml
    ├── Gemfile
    ├── Gemfile.lock
    └── index.html
    └── jekyll
        └── update
            └── welcome-to-jekyll
                └── index.html
These changes in the file structure translate into changes in the URLs. The About page is still at /about/ because its permalink was set on the individual file from the beginning. The Contact page has changed from /contact.html to /contact/, and the Link Test post is now at /jekyll/update/welcome-to-jekyll/ because of the site-wide change to the permalink pattern. You can learn more about what tokens are available for constructing URLs in the Jekyll Permalinks documentation.
Making Robust Links to Posts
Now that we know how to control the address where a page is located, there are few things to consider when linking to those addresses.
If we were making links in the body of a page for a completely static site, we would use the URL of the page to which we wanted to link in one of a few formats.
- An absolute link:
[Link Text]([http://203.0.113.0:4000/post-name)This is the right format for an off-site link, but inappropriate for our site since keeping the port number on the base URL would break our links in production and omitting it would break them on our development site. - A root-relative link:
[Link Text(/[post-name)Root-relative links only work for local links, and they follow the directory structure on the server starting from the web root because of the initial slash,/. - A relative link:
[Link Text](post-name)The relative link is also for local links and starts following the path from the same directory as the page that contains the link.
Both of the relative links have a similar problem. If we change our link format, we’d need to find all the links to the old URL in our content and update them. Jekyll’s Liquid templating provides a way to link to the posts that’s more flexible. Instead of using a literal link you can use the post_url variable with the name of the file so that instead of linking like this:
[Link Text](/jekyll/update/2016/09/08/welcome-to-jekyll.html)
we would link like this:
[Link Text]({% post_url 2010-09-08-welcome-to-jekyll %})
We only need to include the filename, and there’s no need to include the _posts directory or the file’s extension. A link to a post made this way will continue to work with any permalink settings you configure.
Note: Right now, this dynamic linking capability is available for Posts but not for Pages, although plans for Pages are in the works.
Create a New Post
We’ll create a new post to apply what we’ve learned about making links. Open a new file in your editor, setting the date in the filename as needed.:
- nano ~/www/_posts/2017-09-04-link-test.md
We’ll set up the Front Matter much like the example post, being sure the date in the here matches the filename in the previous step. Be sure to substitute the IP address or domain name of your site and the date in the name of your Link Test file.
---
layout: post
date: 2017-09-04 07:00
title: Link Test
---
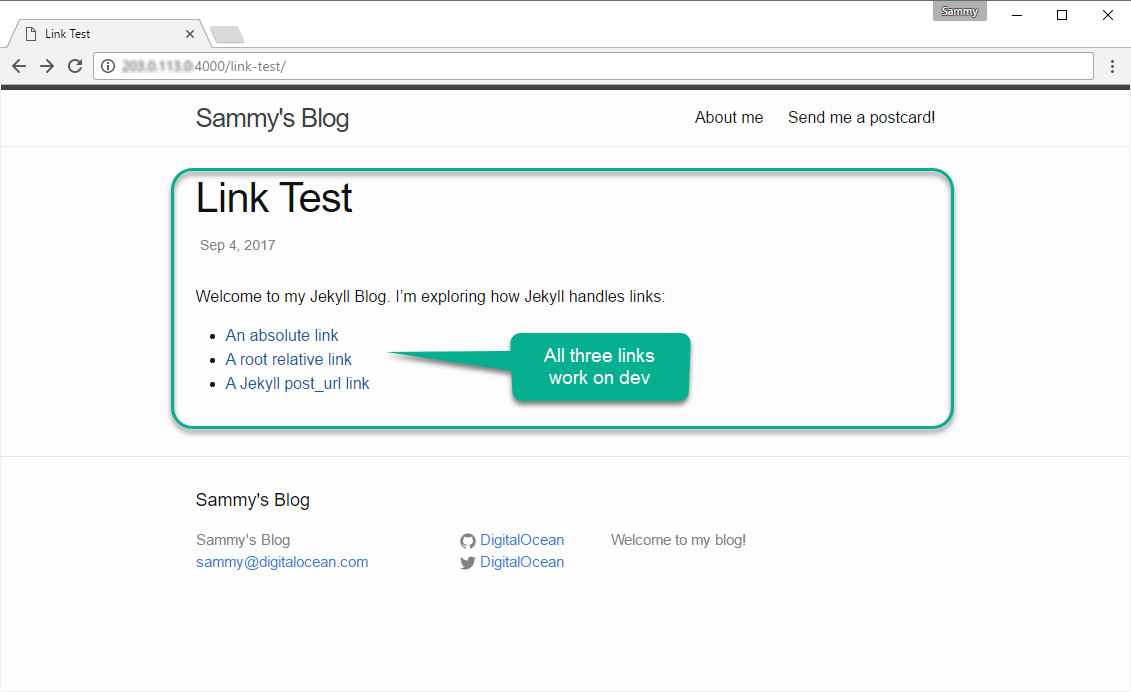
Welcome to my Jekyll Blog. I’m exploring how Jekyll handles links:
* [An absolute link](http://203.0.113.0:4000/about/)
* [A root relative link](/jekyll/update/welcome-to-jekyll/)
* [A Jekyll post_url link]({% post_url 2017-09-04-link-test %})
Save and exit. When you re-visit the homepage, the new post should appear automatically:
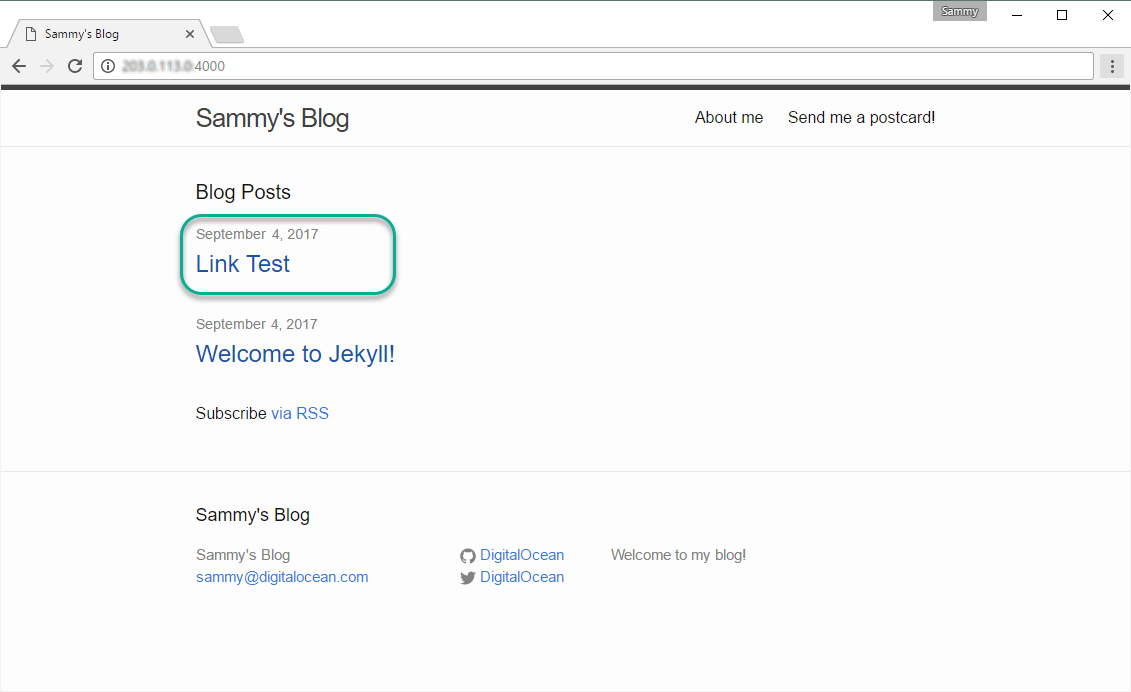
Follow the homepage link to the new post, and try out each one. All three should work on our dev site:
The absolute link will work on our development site, but it will break when we deploy to a site with a different URL or without the port number. The root-relative link will work in a new location as long as the permalink scheme stays the same. If a change gets made, however, this link won’t be updated and it will break on any of the sites. The Jekyll post_url link will create a root-relative link when the site is parsed. Not only will it work anywhere, but Jekyll will also ensure that the post you link to actually exists when it parses the site. If the post doesn’t, it will throw a “Liquid Exception” telling you which file contained the bad link and which link was the problem. For example, if we have mistakenly entered filename wrong on the third link:
Liquid Exception: Could not find post
"broken-name-welcome-to-jekyll" in tag 'post_url'.
Make sure the post exists and the name is correct.
in /home/sammy/www/_posts/2017-09-04-link-test.md
                ERROR: YOUR SITE COULD NOT BE BUILT:
               ------------------------------------
This is the last change to the site content. In the next step, we’ll copy our site to a new location so we can test our work.
Testing Links on a Staging Site
Jekyll’s Deployment methods page covers a variety of ways to move your content to its production location depending on your needs. This includes anything from FTP to sophisticated automated methods. For now, we’re going to set up a staging site on the same machine to illustrate how links behave.
Create a Test Site
We’ll install Nginx so that we can test how our linking works before we deploy it to production:
- sudo apt-get install nginx
When the installation is complete, we’ll allow HTTP traffic.
- sudo ufw allow http
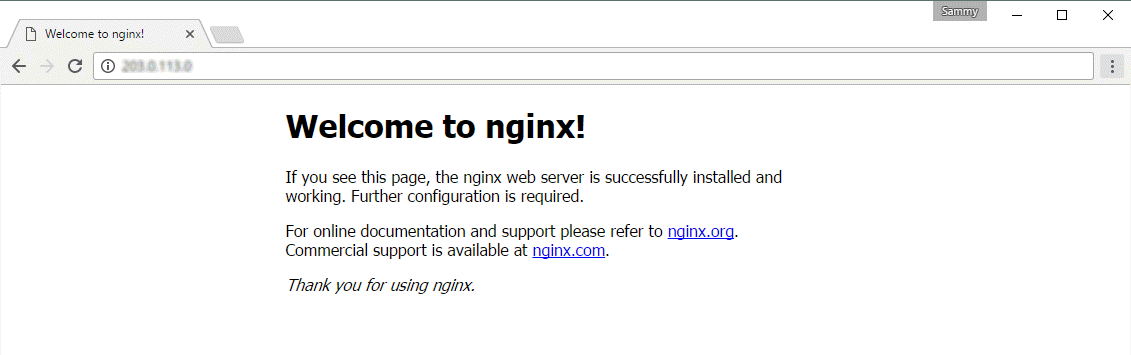
When we visit the address of the development machine, we should see:
Since we’re on the same file system, we’ll move the site with a basic rsync command.
To get the contents of _site into the Nginx document root, located at /var/www/html we’ll use the following command with -a to sync recursively and preserve most everything and the optional -v to provide verbose output:
- sudo rsync -av ~/www/_site/ /var/www/html/
Once the rsync is complete, we can visit our site, served by Nginx, without the port number http://203.0.113.0 and be sure you’ve exited your development web server before testing.
Testing the Site
Testing after a deployment to a new location helps us ensure that our readers have the experience we intend. Automated link checking can help make this an easy and routine part of the process, but for now, we’re going to look at it by hand.
The new blog post appears on the homepage automatically, ordered with the most recent at the top.

When we visit the “Link Test” post, we’ll see that both the absolute link and the root-relative link both break because the environment we deployed to doesn’t use port 4000, while the Jekyll post_url link works in both locations.
We’re done testing, so we’ll shut down nginx and close port 80 since we don’t intend to serve the site:
- sudo systemctl stop nginx
- sudo ufw delete allow http
We’ve finished our exploration of links and URLs, so we’ll exit the development server with CTRL+C as well.
If we combine carefully chosen, stable page names with linking to posts using the post_url tag, we shouldn’t have too much to worry about when linking to our own pages. Testing in a new location before deploying to production is still valuable for finding our own mistakes, and even more so for finding broken links to external sites.
##Conclusion In this series, we’ve installed and configured a development site. In this tutorial, we looked at how to control the web address of the pages and posts on our site, override the default patterns, create robust links to posts within our content, and deploy the site for testing. You might be interested in learning about customizing your site’s templates and theme or how to deploy your site to its production location.
Thanks for learning with the DigitalOcean Community. Check out our offerings for compute, storage, networking, and managed databases.
About the author
Still looking for an answer?
This textbox defaults to using Markdown to format your answer.
You can type !ref in this text area to quickly search our full set of tutorials, documentation & marketplace offerings and insert the link!
Hi, I installed nginx on ubuntu 16.04, I connected my domain name and I installed the let’s encrypt ssl certificate. You can access the website at https://victorrun.com
I would like to create a static jekyll website and I don’t know how to continue from here. Can jekyll be installed on top of nginx? How do I do that? Also, what’s the approach? Creating the jekyll website offline on my local machine and then deploying to nginx?
Thanks, Victor
I read through all 3 Jekyll tutorials you published and they were delightfully easy to follow. Although I have yet to put any of this content to practice (as I usually read through the tutorial and gauge the difficulty before deciding to actually perform the steps), my plan is to dive into these hands-on first thing in the morning. I also just finished (earlier today) the “Deploying A Website” course on CodeAcademy and realized your tutorials are the perfect supplement to their course. They use Jekyll to illustrate how to quickly deploy a site and after completion of their course, I was so intrigued by Jekyll’s simplicity that I felt compelled to look into it further. Being that most of the tutorials on Digital Ocean are typically well documented I looked here first and found your tutorials. Thank you for taking the time to write this tutorial series.
Hi, These are an excellent set of tutorials, and I have followed along nicely. Next steps for me will be to play around with some themes, and then to publish something online. All a lot less daunting thanks to this guide. Kudos!!
Jerry
Hi
When I create my blog site - in the header it adds an additional link to the homepage/index site. Where you have “Send me a Postcard!”. Can you please explain why this is happening or how I fix it. Great article and thanks for sharing.
Chris
 This work is licensed under a Creative Commons Attribution-NonCommercial- ShareAlike 4.0 International License.
Become a contributor for community
Get paid to write technical tutorials and select a tech-focused charity to receive a matching donation.

DigitalOcean Documentation
Full documentation for every DigitalOcean product.

Resources for startups and AI-native businesses
The Wave has everything you need to know about building a business, from raising funding to marketing your product.
The developer cloud
Scale up as you grow — whether you're running one virtual machine or ten thousand.

Start building today
From GPU-powered inference and Kubernetes to managed databases and storage, get everything you need to build, scale, and deploy intelligent applications.
