By Mason Egger and Alex Garnett
Not using Ubuntu 22.04?
Choose a different version or distribution.
Introduction
Minecraft is a popular sandbox video game. Originally released in 2009, it allows players to build, explore, craft, and survive in a block 3D generated world. As of early 2022, it was the best-selling video game of all time. In this tutorial, you will create your own Minecraft server so that you and your friends can play together. Specifically, you will install the necessary software packages to run Minecraft, configure the server to run, and then deploy the game.
Alternately, you can explore DigitalOcean’s One-Click Minecraft: Java Edition Server as another installation path.
This tutorial uses the Java version of Minecraft. If you purchased your version of Minecraft through the Microsoft App Store, you will be unable to connect to this server. Most versions of Minecraft purchased on gaming consoles such as the PlayStation 4, Xbox One, or Nintendo Switch are also the Microsoft version of Minecraft. These consoles are also unable to connect to the server built in this tutorial. You can obtain the Java version of Minecraft here.
Prerequisites
In order to follow this guide, you’ll need:
-
A server with a fresh installation of the latest Ubuntu version, a non-root user with
sudoprivileges, and SSH enabled. You can follow this guide to initialize your server and complete these steps. Minecraft can be resource-intensive, so keep that in mind when selecting your server size. If you are using DigitalOcean and need more resources, you can always resize your Droplet to add more CPUs and RAM. -
A copy of Minecraft Java Edition installed on a local Mac, Windows, or Linux machine.
Steps to Build your Own Minecraft Server
- Install Required Software Packages and Configure the Firewall
- Download Latest Version of Minecraft
- Configuring and Running the Minecraft Server
- How to Keep Minecraft Server Running
- Connecting to Your Server from the Minecraft Client
Step 1 — Install Required Software Packages and Configure the Firewall
With your server initialized, your first step is to install Java; you’ll need it to run Minecraft. By default, Ubuntu may not provide a recent enough version of Java in order to run the newest releases of Minecraft. Fortunately, there are third-party maintainers who continue to build newer Java packages for many Ubuntu releases, and you can install them by adding their PPA, or Personal Package Archives, to your own list of package sources. You can do that with the following command:
- sudo add-apt-repository ppa:openjdk-r/ppa
Next, update your package sources to reflect this addition:
- sudo apt update
Press Y when prompted to confirm. If you are prompted to restart any services, press ENTER to accept the defaults and continue.
Finally, install the OpenJDK version 17 of Java, specifically the headless JRE. This is a minimal version of Java that removes the support for GUI applications. This makes it ideal for running Java applications on a server:
- sudo apt install openjdk-17-jre-headless
You also need to use a software called screen to create detachable server sessions. screen allows you to create a terminal session and detach from it, leaving the process started on it running. This is important because if you were to start your server and then close your terminal, this would kill the session and stop your server. Install screen now:
- sudo apt install screen
Now that you have the packages installed we need to enable the firewall to allow traffic to come in to our Minecraft server. In the initial server setup that you performed you only allowed ssh traffic. Now you need to allow for traffic to come in via port 25565, which is the default port that Minecraft uses to allow connections. In some cases ufw will use named traffic rules, such as for ssh, which always uses port 22 by default, but in less common cases like this one, we’ll specify the port number manually. Add the necessary firewall rule by running the following command:
- sudo ufw allow 25565
Now that you have Java installed and your firewall properly configured, you will download the Minecraft server app from the Minecraft website.
Step 2 — Download Latest Version of Minecraft
Now you need to download the current version of the Minecraft server. You can do this by navigating to Minecraft’s Website and copying the link that says Download minecraft_server.X.X.X.jar, where the X’s are the latest version of the server.
You can now use wget and the copied link to download the server app to your server:
- wget https://launcher.mojang.com/v1/objects/c8f83c5655308435b3dcf03c06d9fe8740a77469/server.jar
The server app will be downloaded as server.jar. If you ever need to manage versions of Minecraft, or if you want to upgrade your Minecraft server, it may be helpful to rename the downloaded server.jar to minecraft_server_1.18.2.jar, matching the highlighted version numbers to whatever version you just downloaded:
- mv server.jar minecraft_server_1.18.2.jar
If you want to download an older version of Minecraft, you can find them archived at mcversions.net. But this tutorial will focus on the current latest release. Now that you have your download, let’s start configuring your Minecraft server.
Step 3 — Configuring and Running the Minecraft Server
Now that you have the Minecraft jar downloaded, you are ready to run it.
First, start a screen session by running the screen command:
- screen
Once you have read the banner that has appeared, press the Spacebar. screen will present you with a terminal session like normal. This session is now detachable, which means that you’ll be able to start a command here and leave it running.
You can now perform your initial configuration. Do not be alarmed when the next command throws an error. Minecraft has designed its installation this way so that users must first consent to the company’s licensing agreement. You will do this next:
- java -Xms1024M -Xmx1024M -jar minecraft_server_1.18.2.jar nogui
Before examining this command’s output, let’s take a closer look at all these command-line arguments, which are tuning your server:
-
Xms1024M- This configures the server to start running with 1024MB or 1GB of RAM running. You can raise this limit if you want your server to start with more RAM. Both M for megabytes and G for gigabytes are supported options. For example:Xms2Gwill start the server with 2 gigabytes of RAM. -
Xmx1024M- This configures the server to use, at most, 1024M of RAM. You can raise this limit if you want your server to run at a larger size, allow for more players, or if you feel that your server is running slowly. Java programs are unique in that they always require you to specify the maximum amount of memory they can use. -
jar- This flag specifies which server jar file to run. -
nogui- This tells the server not to launch a GUI since this is a server, and you don’t have a graphical user interface.
The first time you run this command, which normally starts your server, you will receive this output:
Output[22:05:31] [environment second]
[22:05:31] [main/ERROR]: Failed to load properties from file: server.properties
[22:05:31] [main/WARN]: Failed to load eula.txt
[22:05:31] [main/INFO]: You need to agree to the EULA in order to run the server. Go to eula.txt for more info.
These errors were generated because the server could not find two necessary files required for execution: the EULA (End User License Agreement), found in eula.txt, and the configuration file server.properties. Since the server was unable to find these files, it created them in your current working directory. Minecraft does this intentionally to ensure that you have read and consented to its EULA.
Open eula.txt in nano or your favorite text editor:
- nano eula.txt
Inside this file, you will see a link to the Minecraft EULA. Copy the URL:
#By changing the setting below to TRUE you are indicating your agreement to our EULA (https://minecraft.wiki/w/EULA).
#Tue Mar 24 22:05:31 UTC 2020
eula=false
Open the URL in your web browser and read the agreement. Then return to your text editor and find the last line in eula.txt. Here, change eula=false to eula=true. Then, save and close the file. In nano, this means pressing “Ctrl+X” to exit, then when prompted to save, “Y”, then Enter.
Now that you’ve accepted the EULA, you can configure the server to your specifications.
In your current working directory, you will also find the newly created server.properties file. This file contains all of the configuration options for your Minecraft server. You can find a detailed list of all server properties on the Official Minecraft Wiki. You should modify this file with your preferred settings before starting your server. This tutorial will cover some fundamental settings:
- nano server.properties
Your file will appear like this:
#Minecraft server properties
#Thu Apr 30 23:42:29 UTC 2020
spawn-protection=16
max-tick-time=60000
query.port=25565
generator-settings=
force-gamemode=false
allow-nether=true
enforce-whitelist=false
gamemode=survival
broadcast-console-to-ops=true
enable-query=false
player-idle-timeout=0
difficulty=easy
spawn-monsters=true
broadcast-rcon-to-ops=true
op-permission-level=4
pvp=true
snooper-enabled=true
level-type=default
hardcore=false
enable-command-block=false
max-players=20
network-compression-threshold=256
resource-pack-sha1=
max-world-size=29999984
function-permission-level=2
rcon.port=25575
server-port=25565
server-ip=
spawn-npcs=true
allow-flight=false
level-name=world
view-distance=10
resource-pack=
spawn-animals=true
white-list=false
rcon.password=
generate-structures=true
online-mode=true
max-build-height=256
level-seed=
prevent-proxy-connections=false
use-native-transport=true
motd=A Minecraft Server
enable-rcon=false
Let’s take a closer look at some of the most important properties in this list:
-
difficulty(defaulteasy) - This sets the difficulty of the game, such as how much damage is dealt and how the elements affect your player. The options arepeaceful,easy,normal, andhard. -
gamemode(defaultsurvival) - This sets the gameplay mode. The options aresurvival,creative,adventure, andspectator. -
level-name(defaultworld) - This sets the name of your server that will appear in the client. Special characters such as apostrophes may need to be preceded by a backslash. This is known is escaping characters, and is common practice when special characters may not otherwise be parsed correctly in context. -
motd(defaultA Minecraft Server) - The message that is displayed in the server list of the Minecraft client. -
pvp(defaulttrue) - Enables Player versus Player combat. If set totrue, players will be able to engage in combat and damage each other.
Once you have set the options that you want, save and close the file.
Now you can successfully start your server.
Like last time, let’s start your server with 1024M of RAM. This time, you should also grant Minecraft the ability to use up to 4G of RAM if necessary. Remember, you are welcome to adjust this number to fit your server limitations or user needs:
- java -Xms1024M -Xmx4G -jar minecraft_server_1.18.2.jar nogui
Give the initialization a few moments. Soon your new Minecraft server will start producing an output similar to this:
Output[21:08:14] [Server thread/INFO]: Starting minecraft server version 1.18.2
[21:08:14] [Server thread/INFO]: Loading properties
[21:08:14] [Server thread/INFO]: Default game type: SURVIVAL
[21:08:14] [Server thread/INFO]: Generating keypair
[21:08:15] [Server thread/INFO]: Starting minecraft server on *:25565
Once the server is up and running, you will see the following output:
Output[21:15:37] [Server thread/INFO]: Done (30.762s)! For help, type "help"
Your server is now running, and you have been presented with the server administrator control panel. Try typing help:
- help
Output like this will appear:
Output[21:15:37] [Server thread/INFO]: /advancement (grant|revoke)
[21:15:37] [Server thread/INFO]: /ban <targets> [<reason>]
[21:15:37] [Server thread/INFO]: /ban-ip <target> [<reason>]
[21:15:37] [Server thread/INFO]: /banlist [ips|players]
...
From this terminal you can run administrator commands and control your Minecraft server. Now you’ll learn to use screen to keep your Minecraft server running after you log out of the terminal. Then you can connect to your Minecraft client and start a new game.
Step 4 — How to Keep Minecraft Server Running
Now that you have your server up, you want it to remain running even after you disconnect from your SSH session. Since you used screen earlier, you can detach from this session by pressing Ctrl + A + D. You should see that you’re back in your original shell:
Outputubuntu@minecraft-server:~$ screen
[detached from 3626.pts-0.minecraft-server]
$
Run this command to see all of your screen sessions:
- screen -list
You’ll get an output with the ID of your session, which you’ll need to resume that session:
OutputThere is a screen on:
        3626.pts-0.minecraft-server (03/02/22 22:56:33) (Detached)
1 Socket in /run/screen/S-root.
To resume your session, pass the -r flag to the screen command and then enter your session ID:
- screen -r 3626
When you are ready to log out of the terminal again, be sure to detach from the session with Ctrl + A + D and then log out.
Step 5 — Connecting to Your Server from the Minecraft Client
Now that your server is up and running, let’s connect to it through the Minecraft client. Then you can play!
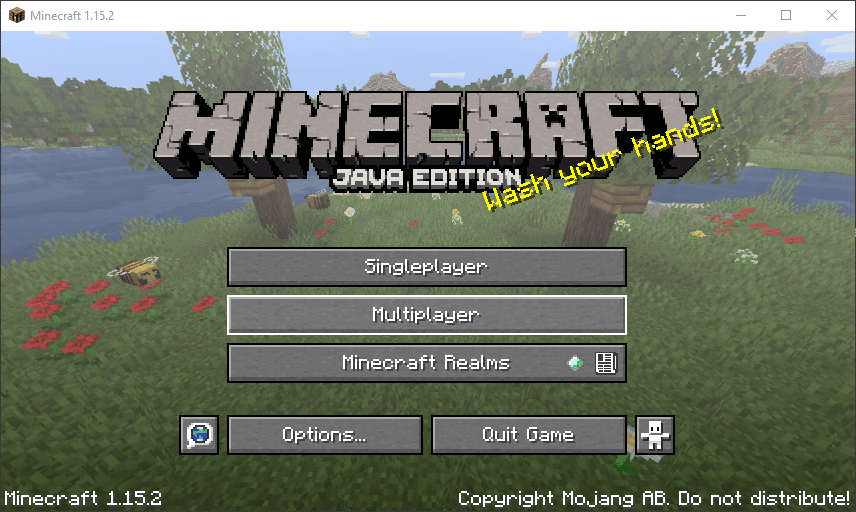
Launch your copy of Minecraft Java Edition and select Multiplayer in the menu.
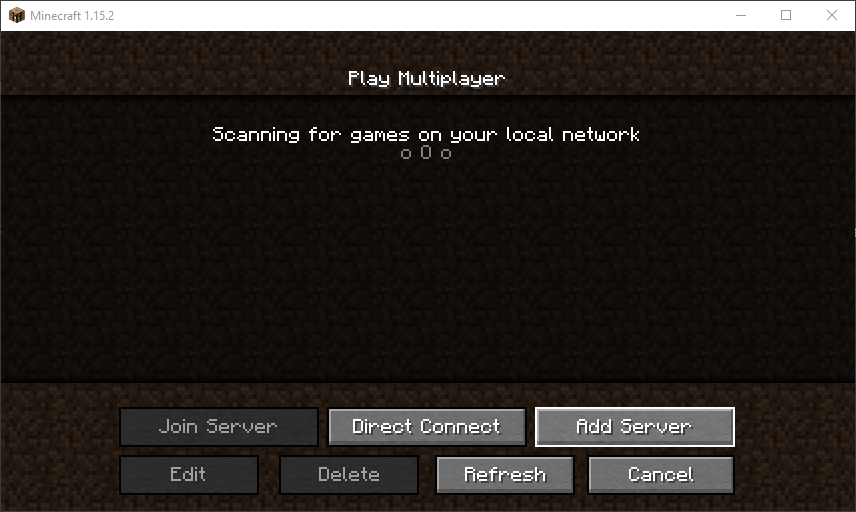
Next, you will need to add a server to connect to, so click on the Add Server button.
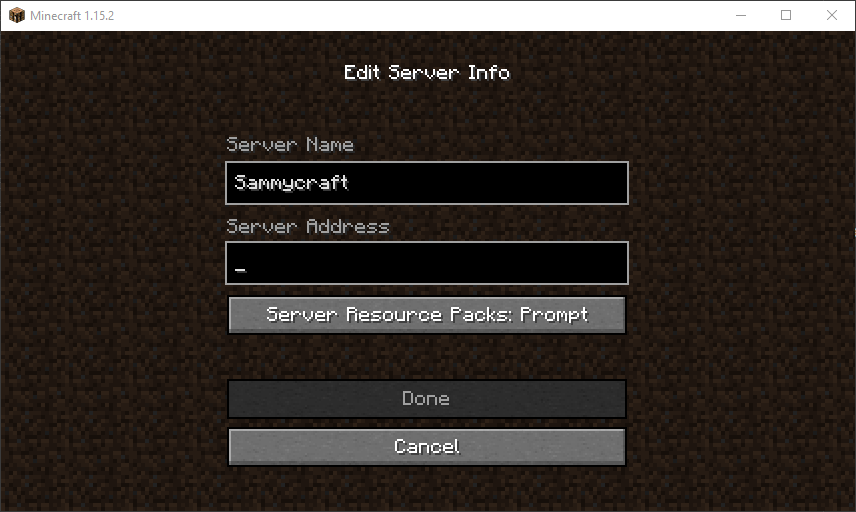
In the Edit Server Info screen that shows up, give your server a name and type in the IP address of your server. This is the same IP address that you used to connect through SSH.
Once you have entered your server name and IP address, you’ll be taken back to the Multiplayer screen where your server will now be listed.
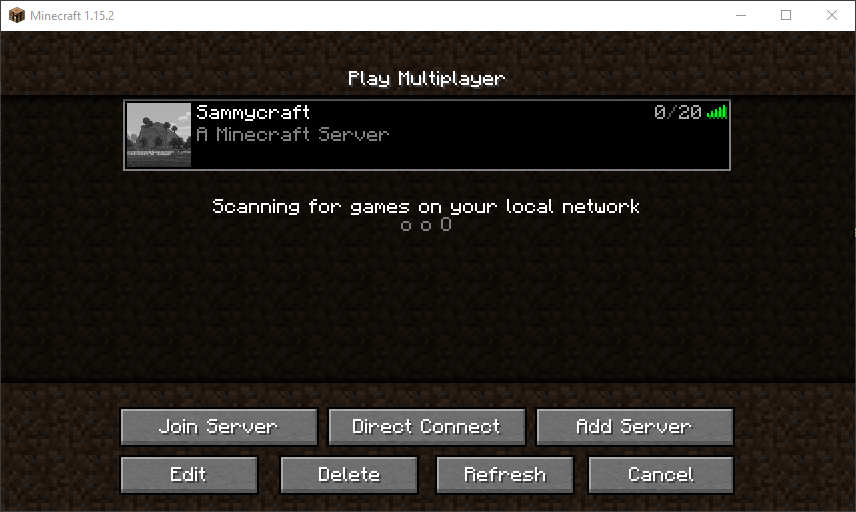
From now on, your server will always appear in this list. Select it and click Join Server.
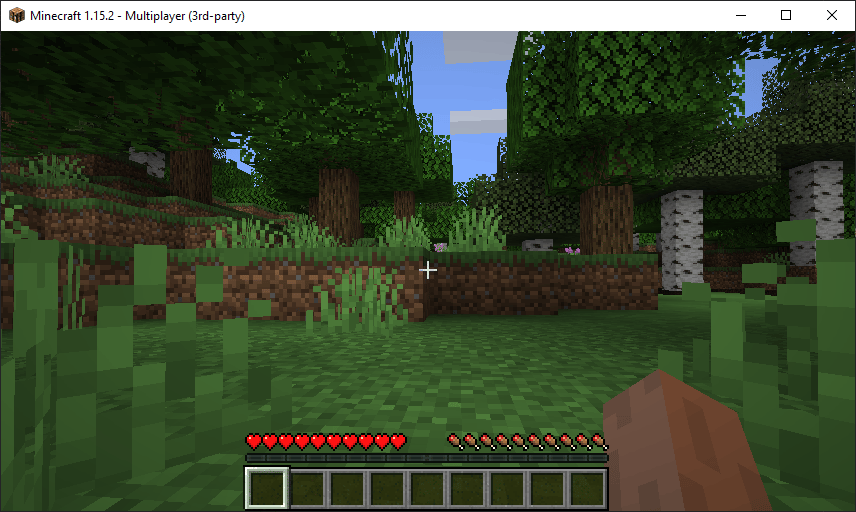
You are in your server and ready to play!
Conclusion
You now have a Minecraft server running on Ubuntu for you and all of your friends to play on! Have fun exploring, crafting, and surviving in a crude 3D world. And remember: watch out for griefers.
The author selected the Tech Education Fund to receive a donation as part of the Write for DOnations program.
Thanks for learning with the DigitalOcean Community. Check out our offerings for compute, storage, networking, and managed databases.
About the author(s)
Mason is currently a Sr. Developer Advocate at DigitalOcean who specializes in cloud infrastructure, distributed systems, and Python.
Former Senior DevOps Technical Writer at DigitalOcean. Expertise in topics including Ubuntu 22.04, Linux, Rocky Linux, Debian 11, and more.
Still looking for an answer?
This textbox defaults to using Markdown to format your answer.
You can type !ref in this text area to quickly search our full set of tutorials, documentation & marketplace offerings and insert the link!
Hello, Good night, my minecraft server on ubuntu sometimes crashes, I believe it is due to some MOD I’m using, it doesn’t happen often, but I don’t know which commands to use to restart it. Which commands to close or restart the server correctly should I use?
OBS: is there any setting for it to restart at specific times?
Thank you very much and your tutorial was excellent.
Luis Felipe Vidal
when I re-log, I cant get commands to work. does anyone know how to fix this?
Hi there, wonderfull tutorial. Creating an empty server now works like a charm. I already have a world on Minecraft Realms and now I want to pull the world files onto my new ubuntu Server. How can I start the server setup from my already existing world files?
Is there another step to allow connection from a different network? As it stands, I can only join the server when I’m on the same network, so my friends can’t join.
This guide was super helpful — everything worked exactly as described on Ubuntu 22.04. I especially appreciated the explanation of the screen command and how to keep the server running after disconnecting. Clear, concise, and perfect for beginners and experienced users alike!
This comment has been deleted
 This work is licensed under a Creative Commons Attribution-NonCommercial- ShareAlike 4.0 International License.
Become a contributor for community
Get paid to write technical tutorials and select a tech-focused charity to receive a matching donation.

DigitalOcean Documentation
Full documentation for every DigitalOcean product.

Resources for startups and AI-native businesses
The Wave has everything you need to know about building a business, from raising funding to marketing your product.
The developer cloud
Scale up as you grow — whether you're running one virtual machine or ten thousand.

Start building today
From GPU-powered inference and Kubernetes to managed databases and storage, get everything you need to build, scale, and deploy intelligent applications.
