By Hazel Virdó
staff technical writer
Not using Ubuntu 14.04?
Choose a different version or distribution.
Introduction
Configuration management systems are designed to make controlling large numbers of servers easy for administrators and operations teams. They allow you to control many different systems in an automated way from one central location.
While there are many popular configuration management systems available for Linux systems, such as Chef and Puppet, these are often more complex than many people want or need. Ansible is a great alternative to these options because it has a much smaller overhead to get started.
In this guide, we will discuss how to install Ansible on an Ubuntu 14.04 machine and go over some basics of how to use the software.
How Does Ansible Work?
Ansible works by configuring client machines from an computer with Ansible components installed and configured.
It communicates over normal SSH channels in order to retrieve information from remote machines, issue commands, and copy files. Because of this, an Ansible system does not require any additional software to be installed on the client computers.
This is one way that Ansible simplifies the administration of servers. Any server that has an SSH port exposed can be brought under Ansible’s configuration umbrella, regardless of what stage it is at in its life cycle.
Any computer that you can administer through SSH, you can also administer through Ansible.
Ansible takes on a modular approach, making it easy to extend to use the functionalities of the main system to deal with specific scenarios. Modules can be written in any language and communicate in standard JSON.
Configuration files are mainly written in the YAML data serialization format due to its expressive nature and its similarity to popular markup languages. Ansible can interact with clients through either command line tools or through its configuration scripts called Playbooks.
Install Ansible on Ubuntu 14.04
To begin exploring Ansible as a means of managing our various servers, we need to install the Ansible software on at least one machine. We will be using an Ubuntu 14.04 VPS instance for this section.
The best way to get Ansible for Ubuntu is to add the project’s PPA (personal package archive) to your system.
To do this effectively, we need to install the software-properties-common package, which will give us the ability to work with PPAs easily. (This package was called python-software-properties on older versions of Ubuntu.)
- sudo apt-get update
- sudo apt-get install software-properties-common
Once the package is installed, we can add the Ansible PPA by typing the following command:
- sudo apt-add-repository ppa:ansible/ansible
Press ENTER to accept the PPA addition.
Next, we need to refresh our system’s package index so that it is aware of the packages available in the PPA. Afterwards, we can install the software:
- sudo apt-get update
- sudo apt-get install ansible
We now have all of the software required to administer our servers through Ansible.
Set Up SSH Keys
As we mentioned above, Ansible primarily communicates with client computers through SSH. While it certainly has the ability to handle password-based SSH authentication, SSH keys help keep things simple.
We can set up SSH keys in two different ways depending on whether you already have a key you want to use. We will assume that the servers you want to be administering will be DigitalOcean droplets.
Create a New SSH Key Pair
If you do not already have an SSH key pair that you would like to use for Ansible administration, we can create one now on your Ansible VPS.
We will create an SSH key pair on our Ansible droplet to authenticate with the hosts that it will administer.
As the user you will be controlling Ansible with, create an RSA key-pair by typing:
- ssh-keygen
You will be asked to specify the file location of the created key pair, a passphrase, and the passphrase confirmation. Press ENTER through all of these to accept the default values.
Your new keys are available in your user’s ~/.ssh directory. The public key (the one you can share) is called id_rsa.pub. The private key (the one that you keep secure) is called id_rsa.
You can add them to your DigitalOcean control panel to allow you to embed your SSH key into newly created droplets. This will allow your Ansible droplet to SSH into your new droplets immediately, without any other authentication.
To do this, click on the “SSH Keys” link on the left-hand navigation menu. In the new screen, click on the “Add SSH Key” button in the top-right corner:

Enter the name you want associated with this key into the top field. On your Ansible VPS instance, type this to get the contents of your public key:
- cat ~/.ssh/id_rsa.pub
ssh-rsa AAAAB3NzaC1yc2EAAAADAQABAAABAQDzmGgsqjSFuOBbjZB1sgquKpp3Ty+FgqoLrzjKbbk9VGOH6kM37aAhyxxmTQfe69lhYi/WCai+mrXOyY9IiQbUfZ4jsfPE9DS3zHhmnGiBWA7pedCTJ/Nhf06dmhAJIbExW3uDghbPbzbSA5Ihn1x0F5FXtSMDoFtyjcwUwJxc2z/kk9TKcFSl8qqf4IYBYE7c+EKaYRBjjDP4AQmiwjTPuipsmub7C0OGF0dTMatIa0lok6rwy91nmhCQV6polG0+Fsk4YrY8Yh5xz6wE0lOvc8BwP9nL0zsnw6Ey0MHV9BbMqtyD6x/fCurpIkMHJK4nv79rToSWA0AwoP/bJXh7 demo@ansible0
The string that is given back to you is what you need to paste in the second field in the DigitalOcean control panel:
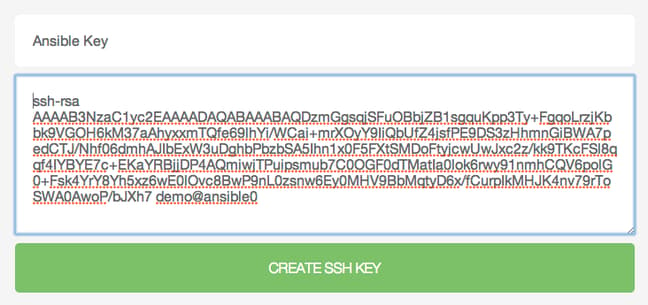
Click “Create SSH Key” to add your key to the control panel. Now, whenever you create a new droplet, you will be able to embed your public SSH key into the new server, allowing you to communicate with your Ansible instance. You just need to select the key in the “Add optional SSH Keys” section of the droplet creation process:

Transfer an Existing SSH Key Pair to Ansible
If you already have a SSH key pair that you are using to authenticate with your droplets, you can transfer the credentials to your new Ansible droplet instead of creating a new pair. This has the advantage of making it automatically work with any servers you have already configured to use the key.
On the computer where you have configured SSH key authentication for your droplets, get the public key by typing:
- cat ~/.ssh/id_rsa.pub
ssh-rsa AAAAB3NzaC1yc2EAAAADAQABAAABAQDzmGgsqjSFuOBbjZB1sgquKpp3Ty+FgqoLrzjKbbk9VGOH6kM37aAhyxxmTQfe69lhYi/WCai+mrXOyY9IiQbUfZ4jsfPE9DS3zHhmnGiBWA7pedCTJ/Nhf06dmhAJIbExW3uDghbPbzbSA5Ihn1x0F5FXtSMDoFtyjcwUwJxc2z/kk9TKcFSl8qqf4IYBYE7c+EKaYRBjjDP4AQmiwjTPuipsmub7C0OGF0dTMatIa0lok6rwy91nmhCQV6polG0+Fsk4YrY8Yh5xz6wE0lOvc8BwP9nL0zsnw6Ey0MHV9BbMqtyD6x/fCurpIkMHJK4nv79rToSWA0AwoP/bJXh7 demo@ansible0
On your Ansible server, you need to create a hidden directory to store your keys. Call it .ssh so that the SSH program knows where to find it:
- mkdir ~/.ssh
We should lock access to this directory down so that only you can enter or write to it:
- chmod 700 ~/.ssh
Now, move into the directory and open a file called id_rsa.pub in your text editor:
- cd ~/.ssh
- nano id_rsa.pub
Paste the output of your public key from your home computer into this file:
ssh-rsa AAAAB3NzaC1yc2EAAAADAQABAAABAQDzmGgsqjSFuOBbjZB1sgquKpp3Ty+FgqoLrzjKbbk9VGOH6kM37aAhyxxmTQfe69lhYi/WCai+mrXOyY9IiQbUfZ4jsfPE9DS3zHhmnGiBWA7pedCTJ/Nhf06dmhAJIbExW3uDghbPbzbSA5Ihn1x0F5FXtSMDoFtyjcwUwJxc2z/kk9TKcFSl8qqf4IYBYE7c+EKaYRBjjDP4AQmiwjTPuipsmub7C0OGF0dTMatIa0lok6rwy91nmhCQV6polG0+Fsk4YrY8Yh5xz6wE0lOvc8BwP9nL0zsnw6Ey0MHV9BbMqtyD6x/fCurpIkMHJK4nv79rToSWA0AwoP/bJXh7 demo@ansible0
Save and close the file. We will make sure that this file has the correct permissions by typing:
- chmod 644 id_rsa.pub
Now, back on your local computer that is configured for SSH key access, type:
- cat ~/.ssh/id_rsa
-----BEGIN RSA PRIVATE KEY-----
MIIEpgIBAAKCAQEA85hoLKo0hbjgW42QdbIKriqad08vhYKqC684ym25PVRjh+pD
N+2gIcl8Zk0H3uvZYWIv1gmsfpq1zsmPSIkG1H2eI7HzxPQ0qMx4ZpxogVgO6XnQ
kyfzYX9OnZoQCSGxMVt7g4IWz2820gOSIZ9cdBeRV7UjA6Bbco3MFMCcXNs/5JPU
ynBUpfKqn+CGAWBO3PhCmmEQY4wz+AEJosI0z7oqbJrm/AtDhhdHUzGrSGtJaJOq
. . .
. . .
cqsqOEzXAoGBAPMJJ8RrKUBuSjVNkzebst9sBgNadmaoQUoMHUDr8KpCZhWAoHB7
1VKmq7VSphQSruI31qy2M88Uue1knC/nQr1bE1DITZgezETSsDqsAMBo8bqDN6TT
qVJgG+TS9BRC+IowuzMVV5mzrfJjkrb+GG+xWSXrTLZMbeeTf+D0SfVo
-----END RSA PRIVATE KEY-----
The output will be quite long.
Back on your Ansible droplet, we need to create a new file in the ~/.ssh directory:
- nano id_rsa
Inside, paste the results of the previous command on your local computer:
-----BEGIN RSA PRIVATE KEY-----
MIIEpgIBAAKCAQEA85hoLKo0hbjgW42QdbIKriqad08vhYKqC684ym25PVRjh+pD
N+2gIcl8Zk0H3uvZYWIv1gmsfpq1zsmPSIkG1H2eI7HzxPQ0qMx4ZpxogVgO6XnQ
kyfzYX9OnZoQCSGxMVt7g4IWz2820gOSIZ9cdBeRV7UjA6Bbco3MFMCcXNs/5JPU
ynBUpfKqn+CGAWBO3PhCmmEQY4wz+AEJosI0z7oqbJrm/AtDhhdHUzGrSGtJaJOq
. . .
. . .
cqsqOEzXAoGBAPMJJ8RrKUBuSjVNkzebst9sBgNadmaoQUoMHUDr8KpCZhWAoHB7
1VKmq7VSphQSruI31qy2M88Uue1knC/nQr1bE1DITZgezETSsDqsAMBo8bqDN6TT
qVJgG+TS9BRC+IowuzMVV5mzrfJjkrb+GG+xWSXrTLZMbeeTf+D0SfVo
-----END RSA PRIVATE KEY-----
Make sure that you include the first and last marker lines. They are required in order for the key file to be valid. Save and close the file.
We need to change the permissions to keep this file secure:
- chmod 600 id_rsa
At this point, Ansible will be able to use these SSH keys to communicate with any servers that have the key embedded.
Configuring Ansible Hosts
Ansible keeps track of all of the servers that it knows about through a “hosts” file. We need to set up this file first before we can begin to communicate with our other computers.
Open the file with root privileges like this:
- sudo nano /etc/ansible/hosts
You will see a file that has a lot of example configurations, none of which will actually work for us since these hosts are made up. So to start, let’s comment out all of the lines in this file by adding a “#” before each line.
We will keep these examples in the file to help us with configuration if we want to implement more complex scenarios in the future.
Once all of the lines are commented out, we can begin adding our actual hosts.
The hosts file is fairly flexible and can be configured in a few different ways. The syntax we are going to use though looks something like this:
[group_name]
alias ansible_ssh_host=your_server_ip
The group_name is an organizational tag that lets you refer to any servers listed under it with one word. The alias is just a name to refer to that server.
So in our scenario, we are imagining that we have three servers we are going to control with Ansible. These servers are accessible from the Ansible droplet by typing:
- ssh root@your_server_ip
You should not be prompted for a password if you have set this up correctly. We will assume that our droplets’ IP addresses are 192.0.2.1, 192.0.2.2, and 192.0.2.3. We will set this up so that we can refer to these individually as host1, host2, and host3, or as a group as droplets.
This is the block that we should add to our hosts file to accomplish this:
[droplets]
host1 ansible_ssh_host=192.0.2.1
host2 ansible_ssh_host=192.0.2.2
host3 ansible_ssh_host=192.0.2.3
Hosts can be in multiple groups and groups can configure parameters for all of their members. Let’s try this out now.
With our current settings, if we tried to connect to any of these hosts with Ansible, the command would fail (assuming you are not operating as the root user). This is because your SSH key is embedded for the root user on the remote systems and Ansible will by default try to connect as your current user. A connection attempt will get this error:
host1 | FAILED => SSH encountered an unknown error during the connection. We recommend you re-run the command using -vvvv, which will enable SSH debugging output to help diagnose the issue
On my Ansible computer, I’m using a user called demo. Ansible will try to connect to each host with ssh demo@server. This will not work if the demo user is not on the remote system.
We can create a file that tells all of the servers in the “droplets” group to connect using the root user.
To do this, we will create a directory in the Ansible configuration structure called group_vars. Within this folder, we can create YAML-formatted files for each group we want to configure:
- sudo mkdir /etc/ansible/group_vars
- sudo nano /etc/ansible/group_vars/droplets
We can put our configuration in here. YAML files start with “—”, so make sure you don’t forget that part.
---
ansible_ssh_user: root
Save and close this file when you are finished.
If you want to specify configuration details for every server, regardless of group association, you can put those details in a file at /etc/ansible/group_vars/all. Individual hosts can be configured by creating files under a directory at /etc/ansible/host_vars.
Using Simple Ansible Commands
Now that we have our hosts set up and enough configuration details to allow us to successfully connect to our hosts, we can try out our very first command.
Ping all of the servers you configured by typing:
- ansible -m ping all
host1 | success >> {
    "changed": false,
    "ping": "pong"
}

host3 | success >> {
    "changed": false,
    "ping": "pong"
}

host2 | success >> {
    "changed": false,
    "ping": "pong"
}
This is a basic test to make sure that Ansible has a connection to all of its hosts.
The “all” means all hosts. We could just as easily specify a group:
- ansible -m ping droplets
We could also specify an individual host:
- ansible -m ping host1
We can specify multiple hosts by separating them with colons:
- ansible -m ping host1:host2
The -m ping portion of the command is an instruction to Ansible to use the “ping” module. These are basically commands that you can run on your remote hosts. The ping module operates in many ways like the normal ping utility in Linux, but instead it checks for Ansible connectivity.
The ping module doesn’t really take any arguments, but we can try another command to see how that works. We pass arguments into a script by typing -a.
The “shell” module lets us send a terminal command to the remote host and retrieve the results. For instance, to find out the memory usage on our host1 machine, we could use:
- ansible -m shell -a 'free -m' host1
host1 | success | rc=0 >>
             total       used       free     shared    buffers     cached
Mem:          3954        227       3726          0         14         93
-/+ buffers/cache:        119       3834
Swap:            0          0          0
Conclusion
By now, you should have your Ansible server configured to communicate with the servers that you would like to control. We have verified that Ansible can communicate with each host and we have used the ansible command to execute simple tasks remotely.
Although this is useful, we have not covered the most powerful feature of Ansible in this article: Playbooks. We have set up a great foundation for working with our servers through Ansible, but the heavy lifting will be done in a future article, when we cover how to use Playbooks to automate configuration of your remote computers.
Thanks for learning with the DigitalOcean Community. Check out our offerings for compute, storage, networking, and managed databases.
About the author
former DO tech editor publishing articles here with the community, then founded the DO product docs team (https://do.co/docs). to all of my authors: you are incredible. working with you was a gift. love is what makes us great.
Still looking for an answer?
This textbox defaults to using Markdown to format your answer.
You can type !ref in this text area to quickly search our full set of tutorials, documentation & marketplace offerings and insert the link!
Nice tutorial and I’ve got to say, you’ve got the most awesome personal website hahahahaha :D http://hazel.virdo.name/
Please fix the mistake in the document: // Back on your Ansible droplet, we need to create a new file in the ~/.ssh directory: id_rsa
You have mentioned to copy the public key in id_rsa file in destination. Please change it to /.ssh/authorized_keys.
"To do this, click on the “SSH Keys” link on the left-hand navigation menu. " i havent this link and button. Give me this link pls.
 This work is licensed under a Creative Commons Attribution-NonCommercial- ShareAlike 4.0 International License.
Become a contributor for community
Get paid to write technical tutorials and select a tech-focused charity to receive a matching donation.

DigitalOcean Documentation
Full documentation for every DigitalOcean product.

Resources for startups and AI-native businesses
The Wave has everything you need to know about building a business, from raising funding to marketing your product.
The developer cloud
Scale up as you grow — whether you're running one virtual machine or ten thousand.

Start building today
From GPU-powered inference and Kubernetes to managed databases and storage, get everything you need to build, scale, and deploy intelligent applications.
