
Introduction
Metabase is a Java-based open-source Business Intelligence (BI) tool. It can connect to a number of different databases and has a question builder tool that can hide the complexity of large SQL queries.
In this tutorial you will install Metabase using Docker Compose, then install Nginx to act as a reverse proxy for your Metabase site. Next, you will enable secure HTTPS connections by using Certbot to download and configure a TLS certificate from the Let’s Encrypt Certificate Authority. Finally, you will configure Metabase and load some sample data so that you can experiment with building your own questions and BI dashboards.
Prerequisites
To complete this tutorial, you will need:
- An Ubuntu 20.04 server with 2 or more CPUs, a non-root user with sudo access, and a firewall. To set this up, follow our Initial Server Setup with Ubuntu 20.04 tutorial.
- Docker installed. Follow Step 1 and Step 2 of How To Install and Use Docker on Ubuntu 20.04 to install it and configure your non-root user to be able to run
dockercommands.
Note: You can skip these prerequisites if you are using DigitalOcean’s One-Click Docker Image. This image is pre-configured with Docker, Docker Compose, and UFW.
Launch a new Docker image in the region of your choice, then log in as the root user and proceed with the tutorial.
Finally, to enable TLS you’ll need a domain name pointed at your server’s public IP address. This should be something like example.com or metabase.example.com. If you are using DigitalOcean, please see our DNS Quickstart for information on creating domain resources in your control panel.
Once you have all the prerequisites in place, proceed to Step 1, where you’ll install the docker-compose package.
Step 1 — Installing Docker Compose
To install the docker-compose command line tool, first refresh your package list:
- sudo apt update
Then install the package using apt:
- sudo apt install docker-compose
Note: You can also install a more recent Docker Compose package than the one that is included with Ubuntu 20.04. To do so, follow Step 1 of How To Install and Use Docker Compose on Ubuntu 20.04.
If you opt to use this version of Docker Compose, you will need to substitute docker compose as the command in place of docker-compose throughout this guide.
You can confirm that the package is installed by running the following command:
- docker-compose --version
You should receive output like the following:
Outputdocker-compose version 1.25.0, build unknown
docker-py version: 4.1.0
CPython version: 3.8.10
Once you have confirmed that Docker Compose is installed on your server, you will use it to configure and launch Metabase in the next step of this tutorial.
Step 2 — Running Metabase with Docker Compose
To get started creating your Metabase container, create a directory called metabase in your home directory to store the files that you will create in this tutorial. You’ll use this directory to store all the files that you need to run Metabase.
Run the following command to create the directory:
- mkdir ~/metabase
Then navigate into it:
- cd ~/metabase
Now open a new blank YAML file called docker-compose.yml using nano or your preferred editor:
- nano docker-compose.yml
You will use this file with the docker-compose command to start your Metabase container. Add the following lines to the file:
version: '3'
services:
  metabase:
    image: metabase/metabase:latest
    ports:
      - "127.0.0.1:3000:3000"
    volumes:
      - data:/metabase

volumes:
  data:
The file defines a service called metabase, which runs the Metabase application. The service also references a named volume, which it uses to store data outside of the running container instance. Finally, the metabase service exposes port 3000 on your server to the Metabase container that is running on the same port 3000.
Save and exit the file when you are done editing it. If you are using nano, press CTRL+O then RETURN to save, then CTRL+X to exit.
You’re now ready to start the metabase container with the docker-compose command:
- docker-compose up -d
The up sub-command tells docker-compose to start the container and the associated volume(s) and network(s) that are defined in your docker-compose.yml file. The -d flag (which stands for “daemonize”) tells docker-compose to run the container in the background so the command doesn’t take over your terminal. docker-compose will print some brief output as it downloads the required Docker image and then starts the container:
OutputCreating network "metabase_default" with the default driver
Creating volume "metabase_data" with default driver
Pulling metabase (metabase/metabase:latest)...
latest: Pulling from metabase/metabase
. . .
If you would like to stop your Metabase container at any time, run the following command in your ~/Metabase directory:
- docker-compose stop
The container will be stopped. The configuration and data in the volume will be preserved so that you can start the container again with the docker-compose up -d command.
When that’s done, Metabase should be running. You can test that a webserver is running at 127.0.0.1:3000 by fetching the homepage using the curl command:
- curl --head http://localhost:3000
This will print out only the HTTP headers from the response:
OutputHTTP/1.1 200 OK
Date: Tue, 15 Mar 2022 19:26:22 GMT
X-Frame-Options: DENY
X-XSS-Protection: 1; mode=block
Last-Modified: Tue, 15 Mar 2022 19:26:22 GMT
Strict-Transport-Security: max-age=31536000
Set-Cookie: metabase.DEVICE=3525ed6d-13e0-4ad0-8fdb-f1bc426706dc;HttpOnly;Path=/;Expires=Sat, 15 Mar 2042 19:26:22 GMT;SameSite=Lax
X-Permitted-Cross-Domain-Policies: none
Cache-Control: max-age=0, no-cache, must-revalidate, proxy-revalidate
X-Content-Type-Options: nosniff
Content-Security-Policy: default-src 'none'; script-src 'self' 'unsafe-eval' https://maps.google.com https://apis.google.com https://*.googleapis.com *.gstatic.com https://www.google-analytics.com   'sha256-lMAh4yjVuDkQ9NqkK4H+YHUga+anpFs5JAuj/uZh0Rs=' 'sha256-ib2/2v5zC6gGM6Ety7iYgBUvpy/caRX9xV/pzzV7hf0=' 'sha256-JJa56hyDfUbgNfq+0nq6Qs866JKgZ/+qCq2pkDJED8k='; child-src 'self' https://accounts.google.com; style-src 'self' 'unsafe-inline'; font-src 'self' ; img-src * 'self' data:; connect-src 'self' metabase.us10.list-manage.com www.google-analytics.com https://sp.metabase.com ; manifest-src 'self';  frame-ancestors 'none';
Content-Type: text/html;charset=utf-8
Expires: Tue, 03 Jul 2001 06:00:00 GMT
Content-Length: 0
Server: Jetty(9.4.43.v20210629)
The 200 OK response means that an application is responding on port 3000. The highlighted Set-Cookie and Server headers confirm that the application is Metabase running on the Jetty web server.
Next we’ll set up Nginx to proxy public traffic to the Metabase container.
Step 3 — Installing and Configuring Nginx
Putting a web server such as Nginx in front of your Metabase server can improve performance by offloading caching, compression, and static file serving to a more efficient process. We’re going to install Nginx and configure it to reverse proxy requests to Metabase, meaning it will take care of handling requests from your users to Metabase and back again. Using a non-containerized Nginx process will also make it easier to add Let’s Encrypt TLS certificates in the next step.
First, refresh your package list, then install Nginx using apt:
- sudo apt install nginx
Allow public traffic to ports 80 and 443 (HTTP and HTTPS) using the Nginx Full UFW application profile:
- sudo ufw allow "Nginx Full"
OutputRule added
Rule added (v6)
Next, open up a new Nginx configuration file in the /etc/nginx/sites-available directory. We’ll call ours metabase.conf but you could use a different name:
- sudo nano /etc/nginx/sites-available/metabase.conf
Paste the following into the new configuration file, being sure to replace your_domain_here with the domain that you’ve configured to point to your Metabase server. This should be something like metabase.example.com, for instance:
server {
    listen       80;
    listen       [::]:80;
    server_name  your_domain_here;

    access_log  /var/log/nginx/metabase.access.log;
    error_log   /var/log/nginx/metabase.error.log;

    location / {
      proxy_set_header X-Forwarded-For $proxy_add_x_forwarded_for;
      proxy_set_header X-Real-IP $remote_addr;
      proxy_set_header X-Forwarded-Host $host;
      proxy_set_header X-Forwarded-Proto https;
      proxy_pass http://localhost:3000;
  }
}
This configuration is HTTP-only for now, as we’ll let Certbot take care of configuring TLS in the next step. The rest of the configuration file sets up logging locations and then passes all traffic, as well as some important proxy headers, along to http://localhost:3000, the Metabase container that we started up in the previous step.
Save and close the file, then enable the configuration by linking it into /etc/nginx/sites-enabled/:
- sudo ln -s /etc/nginx/sites-available/metabase.conf /etc/nginx/sites-enabled/
Use nginx -t to verify that the configuration file syntax is correct:
- sudo nginx -t
Outputnginx: the configuration file /etc/nginx/nginx.conf syntax is ok
nginx: configuration file /etc/nginx/nginx.conf test is successful
And finally, reload the nginx service with the new configuration:
- sudo systemctl reload nginx.service
Your Metabase site should now be available on plain HTTP. Load http://your_domain_here (you may have to click through a security warning) and it will look like this:
Now that you have your site up and running over HTTP, it’s time to secure the connection with Certbot and Let’s Encrypt certificates. You should do this before going through Metabase’s web-based setup procedure.
Step 4 — Installing Certbot and Setting Up TLS Certificates
Thanks to Certbot and the Let’s Encrypt free certificate authority, adding TLS encryption to your Metabase app will take only two commands.
First, install Certbot and its Nginx plugin:
- sudo apt install certbot python3-certbot-nginx
Next, run certbot in --nginx mode, and specify the same domain that you used in the Nginx server_name configuration directive:
- sudo certbot --nginx -d your_domain_here
You’ll be prompted to agree to the Let’s Encrypt terms of service, and to enter an email address.
Afterwards, you’ll be asked if you want to redirect all HTTP traffic to HTTPS. It’s up to you, but this is generally recommended and safe to do.
After that, Let’s Encrypt will confirm your request and Certbot will download your certificate:
OutputCongratulations! You have successfully enabled https://metabase.example.com

You should test your configuration at:
https://www.ssllabs.com/ssltest/analyze.html?d=metabase.example.com
- - - - - - - - - - - - - - - - - - - - - - - - - - - - - - - - - - - - - - - -

IMPORTANT NOTES:
 - Congratulations! Your certificate and chain have been saved at:
   /etc/letsencrypt/live/metabase.example.com/fullchain.pem
   Your key file has been saved at:
   /etc/letsencrypt/live/metabase.example.com/privkey.pem
   Your cert will expire on 2022-05-09. To obtain a new or tweaked
   version of this certificate in the future, simply run certbot again
   with the "certonly" option. To non-interactively renew *all* of
   your certificates, run "certbot renew"
 - Your account credentials have been saved in your Certbot
   configuration directory at /etc/letsencrypt. You should make a
   secure backup of this folder now. This configuration directory will
   also contain certificates and private keys obtained by Certbot so
   making regular backups of this folder is ideal.
 - If you like Certbot, please consider supporting our work by:

   Donating to ISRG / Let's Encrypt:   https://letsencrypt.org/donate
   Donating to EFF:                    https://eff.org/donate-le
Certbot will automatically reload Nginx with the new configuration and certificates. Reload your site in your browser and it should switch you over to HTTPS automatically if you chose the redirect option.
Your site is now secure and it’s safe to continue with the web-based setup steps.
Step 5 — Setting Up Metabase
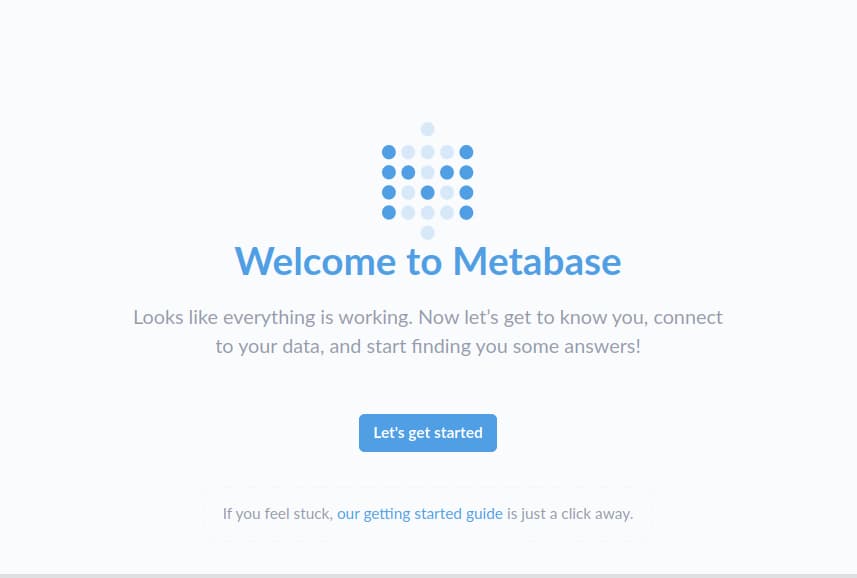
Back in your web browser, reload the page. You should now have Metabase’s database configuration page open via a secure https:// connection. Now you can complete the configuration process by clicking the Let’s get started button.
You will be prompted to enter the following details:
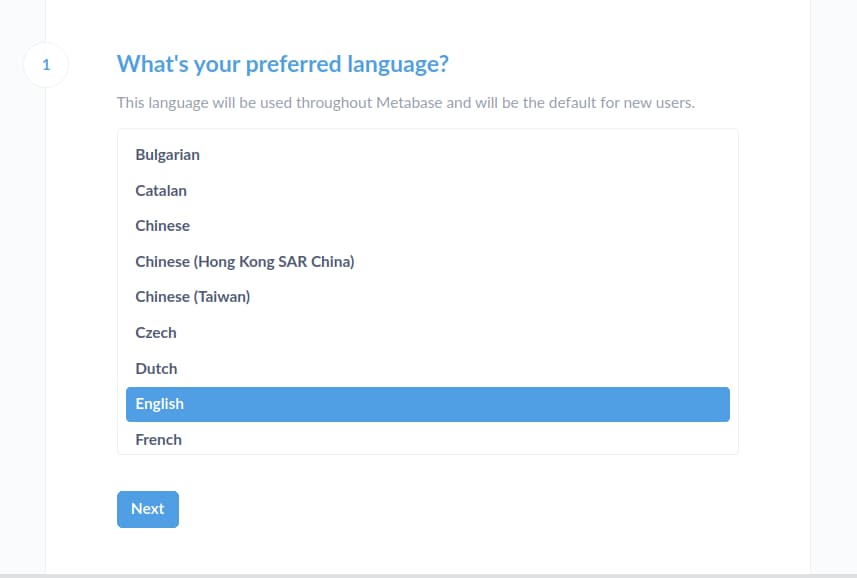
- What’s your preferred language? If your language is in the list, select it and click Next per the following screenshot:
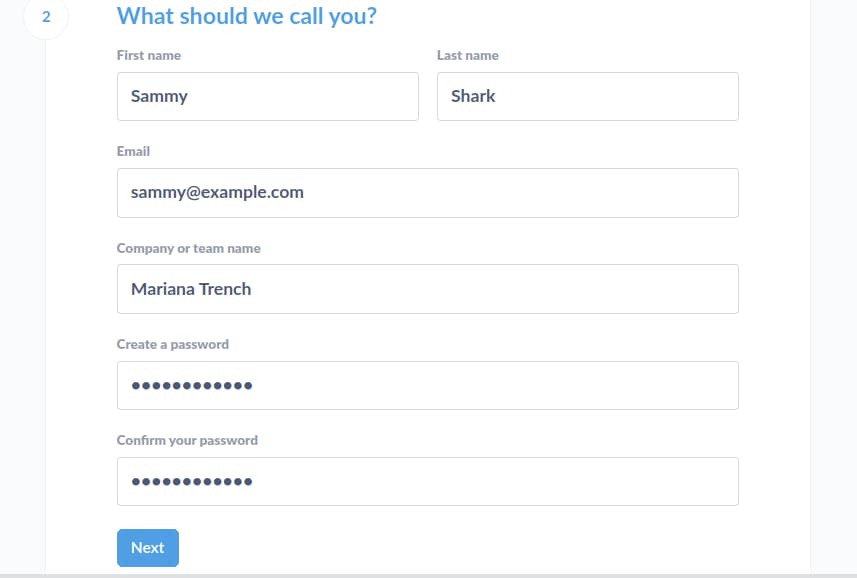
- What should we call you? Fill out all the fields and make sure to record your password somewhere secure.
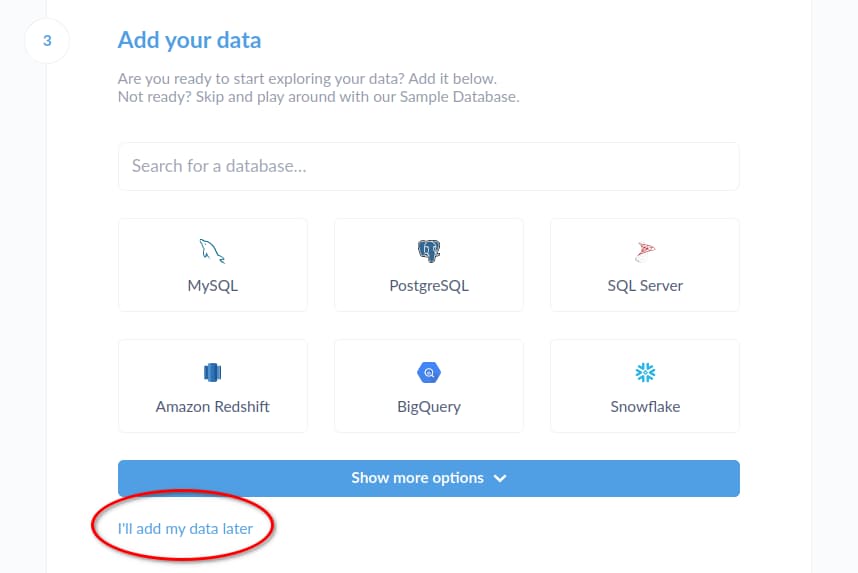
- Add your data: click the I’ll add my data later option at the bottom of the pane
-
Usage data preferences: Choose whether you would like to share usage data with Metabase to help improve the tool. Click Finish once you have made your choice.
-
You’re all set up! Add your email address if you would like to receive updates from the Metabase project, otherwise you can ignore this field.
Finally, click the Take me to Metabase button. You will arrive at a page that says “Greetings, Sammy” at the top, with a set of pre-configured X-Rays that you can click on to explore the sample data that you loaded.
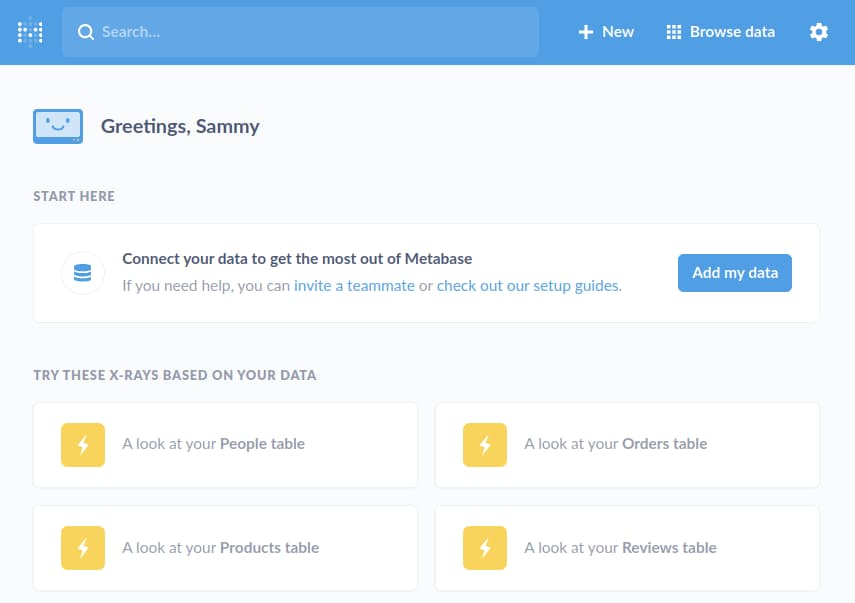
Click on any X-Ray to view details about the table in Metabase. You can use the controls on the X-Ray page to filter data, or explore related database fields and tables.
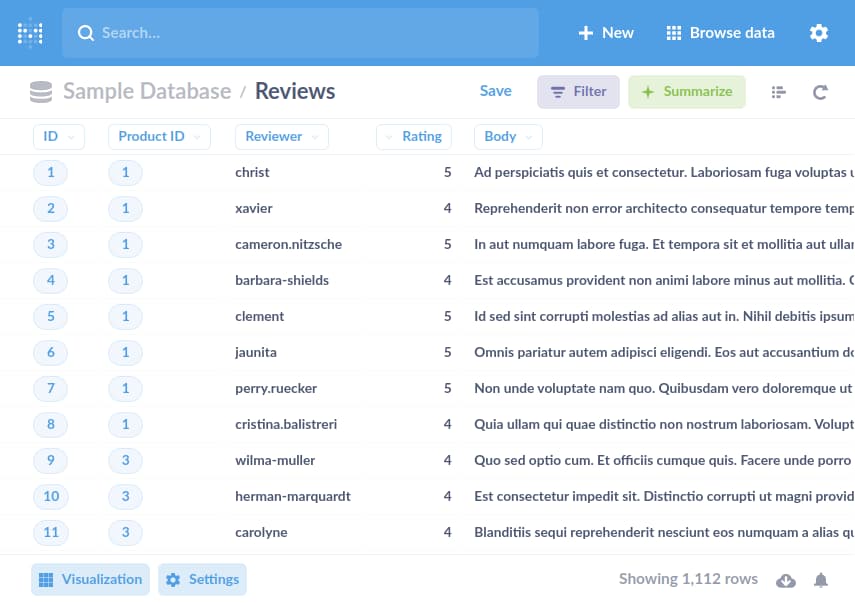
When you are ready to try creating your own Question (this is the term that Metabase uses to describe a query), click the Browse data grid icon at the top right of your page. The click the Sample Database tile, and then click on a table from the list. In this example we’ll use the Reviews table.
Your screen will resemble the following:
Now click the Summarize button at the top right of your page, and change the Summarize by field to Average of Rating. Metabase will calculate this value based on the data in the table in the Rating field. Also change the Group by field to Created At, since this field will allow Metabase to calculate the average product rating per month across all the example products and ratings.
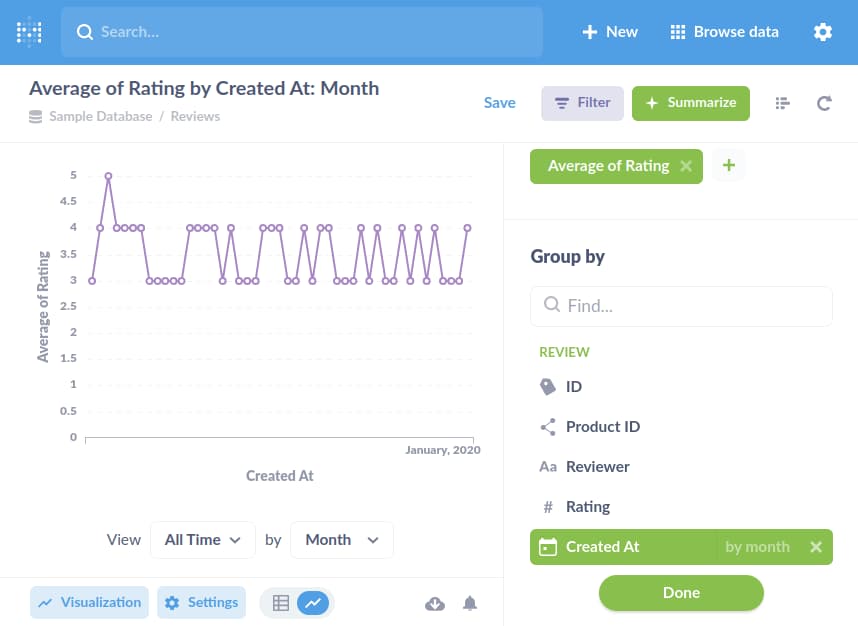
Click the Done button at the bottom right and you will be on a page that shows a graph of average product ratings like the following screenshot:
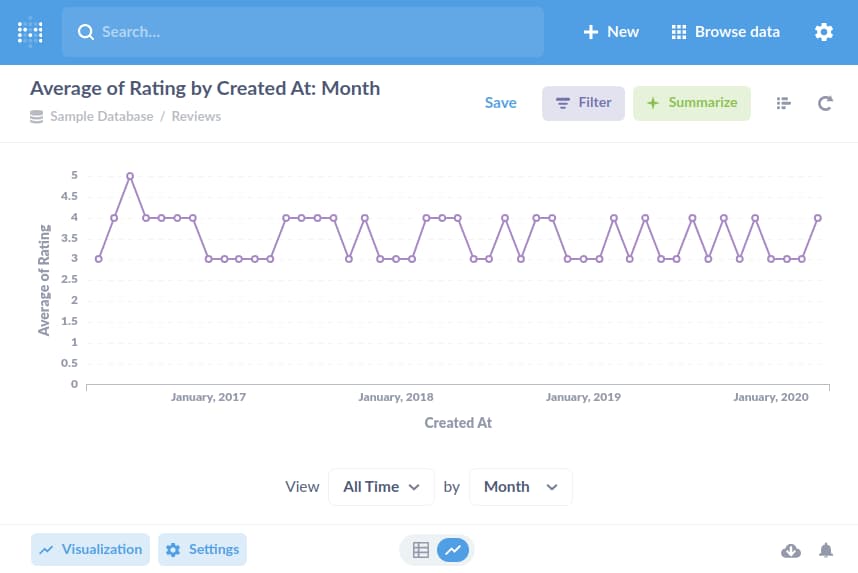
You can experiment with the Filter, Visualization, and Settings buttons to change the chart, data, and labels on the resulting graph.
Conclusion
In this tutorial, you launched the Metabase BI tool using Docker Compose, then set up an Nginx reverse proxy and secured it using Let’s Encrypt TLS certificates. You also added some sample data, and experimented with creating your own Questions in Metabase to query the data.
You’re now ready to start connecting Metabase to an external database to query your own data. Metabase supports a variety of data sources, including traditional SQL databases as well as analytics engines and document-oriented databases.
For more information about using Metabase please see the official Metabase documentation.
Thanks for learning with the DigitalOcean Community. Check out our offerings for compute, storage, networking, and managed databases.
About the author
Still looking for an answer?
This textbox defaults to using Markdown to format your answer.
You can type !ref in this text area to quickly search our full set of tutorials, documentation & marketplace offerings and insert the link!
Hi @jamonation - this is a really nicely done tutorial, thank you!
Just a couple of questions that could be really helpful:
- Is the storage volume persistent?
- What are the instructions to update the metabase version?
- How does one take a backup of their metabase instance/config
thanks!
 This work is licensed under a Creative Commons Attribution-NonCommercial- ShareAlike 4.0 International License.
Become a contributor for community
Get paid to write technical tutorials and select a tech-focused charity to receive a matching donation.

DigitalOcean Documentation
Full documentation for every DigitalOcean product.

Resources for startups and AI-native businesses
The Wave has everything you need to know about building a business, from raising funding to marketing your product.
The developer cloud
Scale up as you grow — whether you're running one virtual machine or ten thousand.

Start building today
From GPU-powered inference and Kubernetes to managed databases and storage, get everything you need to build, scale, and deploy intelligent applications.
