Tutorial

How To Install Squid Proxy on CentOS 6

Published on April 4, 2013
Default avatar

By Bulat Khamitov

How To Install Squid Proxy on CentOS 6
Not using CentOS 6?Choose a different version or distribution.
CentOS 6

Status: Deprecated

This article covers a version of CentOS that is no longer supported. If you are currently operating a server running CentOS 6, we highly recommend upgrading or migrating to a supported version of CentOS.

Reason: CentOS 6 reached end of life (EOL) on November 30th, 2020 and no longer receives security patches or updates. For this reason, this guide is no longer maintained.

See Instead:
This guide might still be useful as a reference, but may not work on other CentOS releases. If available, we strongly recommend using a guide written for the version of CentOS you are using.

Step 1 - Spin up a CentOS 6.3 x64 droplet

Step 2 - Install Squid

yum -y install squid
chkconfig squid on

Step 3 - Setup Access Restrictions

Since this Squid proxy would allow anyone using it to make connections from your droplet's IP address, you would want to restrict access to it.

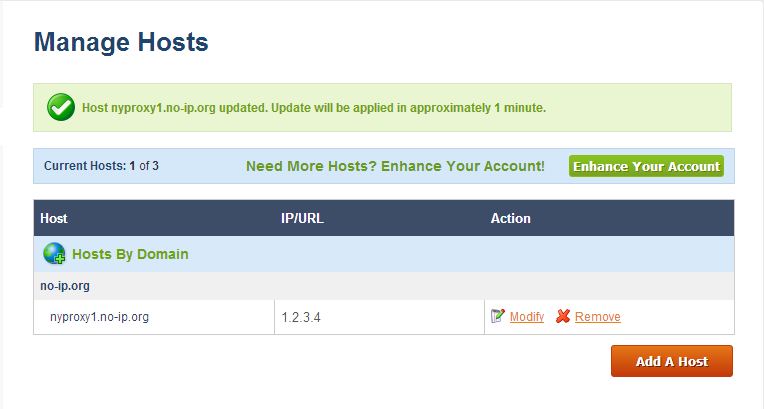
You can register a free dynamic IP from services like noip.com

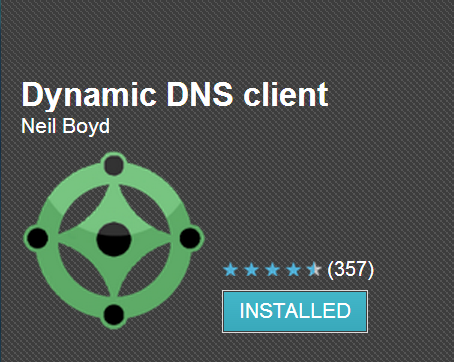
If you would like to use this Squid proxy from your phone, you would have to install a dynamic DNS update client.

You can use applications like Dynamic DNS Client for Android, or FreeDynPro for iOS.

Once you have a dynamic IP hostname, you can update it from your router at home, mobile device, or an API call.

This hostname should be added to /etc/squid/squid.conf. Edit the file and add your hostname (nyproxy1.no-ip.org in our case):

acl localnet src nyproxy1.no-ip.org

Setup a crontab that reloads Squid every hour, in case your IP address changes:

echo 0 */1 * * * service squid reload >> /var/spool/cron/root

Step 4 - Configure Squid Proxy

By default, Squid listens on port 3128. If you would like to use a different port, modify /etc/squid/squid.conf

http_port 3128

If you would like to browse through this Squid proxy and not have it detected as a proxy, setup anonymous settings by adding these lines to /etc/squid/squid.conf:

via off
forwarded_for off

request_header_access Allow allow all 
request_header_access Authorization allow all 
request_header_access WWW-Authenticate allow all 
request_header_access Proxy-Authorization allow all 
request_header_access Proxy-Authenticate allow all 
request_header_access Cache-Control allow all 
request_header_access Content-Encoding allow all 
request_header_access Content-Length allow all 
request_header_access Content-Type allow all 
request_header_access Date allow all 
request_header_access Expires allow all 
request_header_access Host allow all 
request_header_access If-Modified-Since allow all 
request_header_access Last-Modified allow all 
request_header_access Location allow all 
request_header_access Pragma allow all 
request_header_access Accept allow all 
request_header_access Accept-Charset allow all 
request_header_access Accept-Encoding allow all 
request_header_access Accept-Language allow all 
request_header_access Content-Language allow all 
request_header_access Mime-Version allow all 
request_header_access Retry-After allow all 
request_header_access Title allow all 
request_header_access Connection allow all 
request_header_access Proxy-Connection allow all 
request_header_access User-Agent allow all 
request_header_access Cookie allow all 
request_header_access All deny all

Step 5 - Start Squid proxy service

service squid start

Step 6 - Modify your browser's proxy settings

Add your droplet's IP address and port to your browser's proxy settings.

Step 7 - Verify Squid proxy works

Navigate over to whatismyip.com

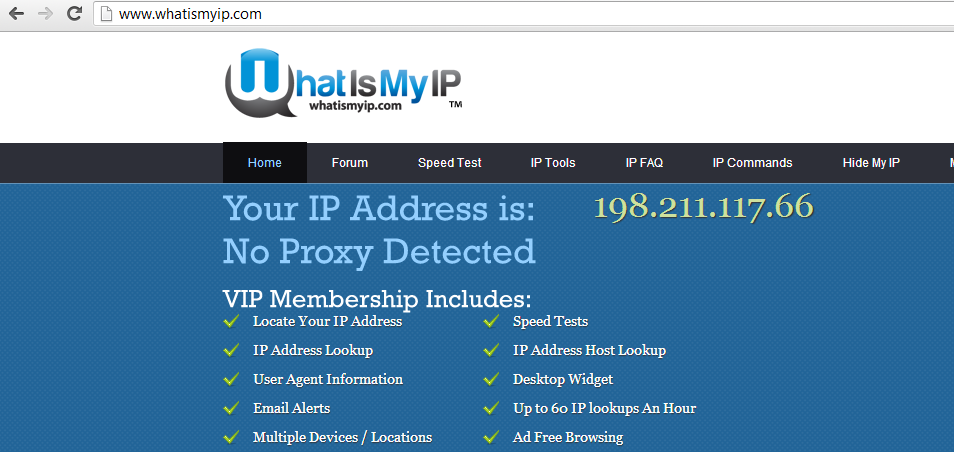
And you are all done!

By Bulat Khamitov

Thanks for learning with the DigitalOcean Community. Check out our offerings for compute, storage, networking, and managed databases.

Learn more about us


About the authors
Default avatar
Bulat Khamitov

author

Still looking for an answer?

Ask a questionSearch for more help

Was this helpful?
 
10 Comments


This textbox defaults to using Markdown to format your answer.

You can type !ref in this text area to quickly search our full set of tutorials, documentation & marketplace offerings and insert the link!

Hi there. Following these steps on Centos 6.8 x64 leads to error while trying to access sites through proxy.

At step when checking whatismyipaddress.com:

ERROR
The requested URL could not be retrieved

The following error was encountered while trying to retrieve the URL: http://whatismyipaddress.com/

    Access Denied.

Access control configuration prevents your request from being allowed at this time. Please contact your service provider if you feel this is incorrect.

Your cache administrator is root.

Output from /etc/squid/squid.conf is:

#
# Recommended minimum configuration:
#
acl manager proto cache_object
acl localhost src 127.0.0.1/32 ::1
acl to_localhost dst 127.0.0.0/8 0.0.0.0/32 ::1

# Example rule allowing access from your local networks.
# Adapt to list your (internal) IP networks from where browsing
# should be allowed
acl localnet src 10.0.0.0/8	# RFC1918 possible internal network
acl localnet src 172.16.0.0/12	# RFC1918 possible internal network
acl localnet src 192.168.0.0/16	# RFC1918 possible internal network
acl localnet src fc00::/7       # RFC 4193 local private network range
acl localnet src fe80::/10      # RFC 4291 link-local (directly plugged) machines

acl SSL_ports port 443
acl Safe_ports port 80		# http
acl Safe_ports port 21		# ftp
acl Safe_ports port 443		# https
acl Safe_ports port 70		# gopher
acl Safe_ports port 210		# wais
acl Safe_ports port 1025-65535	# unregistered ports
acl Safe_ports port 280		# http-mgmt
acl Safe_ports port 488		# gss-http
acl Safe_ports port 591		# filemaker
acl Safe_ports port 777		# multiling http
acl CONNECT method CONNECT

#
# Recommended minimum Access Permission configuration:
#
# Only allow cachemgr access from localhost
http_access allow manager localhost
http_access deny manager

# Deny requests to certain unsafe ports
http_access deny !Safe_ports

# Deny CONNECT to other than secure SSL ports
http_access deny CONNECT !SSL_ports

# We strongly recommend the following be uncommented to protect innocent
# web applications running on the proxy server who think the only
# one who can access services on "localhost" is a local user
http_access deny to_localhost

#
# INSERT YOUR OWN RULE(S) HERE TO ALLOW ACCESS FROM YOUR CLIENTS
#

# Example rule allowing access from your local networks.
# Adapt localnet in the ACL section to list your (internal) IP networks
# from where browsing should be allowed
http_access allow localnet
http_access allow localhost

# And finally deny all other access to this proxy

# Squid normally listens to port 3128
http_port 3128

# Uncomment and adjust the following to add a disk cache directory.
#cache_dir ufs /var/spool/squid 100 16 256

# Leave coredumps in the first cache dir
coredump_dir /var/spool/squid

# Add any of your own refresh_pattern entries above these.
refresh_pattern ^ftp:		1440	20%	10080
refresh_pattern ^gopher:	1440	0%	1440
refresh_pattern -i (/cgi-bin/|\?) 0	0%	0
refresh_pattern .		0	20%	4320

via off
forwarded_for off

request_header_access Allow allow all 
request_header_access Authorization allow all 
request_header_access WWW-Authenticate allow all 
request_header_access Proxy-Authorization allow all 
request_header_access Proxy-Authenticate allow all 
request_header_access Cache-Control allow all 
request_header_access Content-Encoding allow all 
request_header_access Content-Length allow all 
request_header_access Content-Type allow all 
request_header_access Date allow all 
request_header_access Expires allow all 
request_header_access Host allow all 
request_header_access If-Modified-Since allow all 
request_header_access Last-Modified allow all 
request_header_access Location allow all 
request_header_access Pragma allow all 
request_header_access Accept allow all 
request_header_access Accept-Charset allow all 
request_header_access Accept-Encoding allow all 
request_header_access Accept-Language allow all 
request_header_access Content-Language allow all 
request_header_access Mime-Version allow all 
request_header_access Retry-After allow all 
request_header_access Title allow all 
request_header_access Connection allow all 
request_header_access Proxy-Connection allow all 
request_header_access User-Agent allow all 
request_header_access Cookie allow all 

Any ideas?

The example crontab is every minute, not every hour (http://www.freebsd.org/cgi/man.cgi?crontab(5))

Just use ‘@hourly’ to get hourly runs, or ‘1 * * * *’ for timing

Perfect…!!

add this line to .conf file:

http_access allow all

i want site same like this Playit.pk what i do ?

Andrew SB
DigitalOcean Employee
DigitalOcean Employee badge
June 18, 2014

@alexanderraiback: At what point are you getting that error?

Error acces denied… please help me!

Restricting Access to specific Web sites -

Create below files. Use touch /usr/local/etc/allowed-sites.squid

Use nano to edit <pre>

File: /usr/local/etc/allowed-sites.squid

www.openfree.org linuxhomenetworking.com

File: /usr/local/etc/restricted-sites.squid

www.porn.com illegal.com </pre>

Once done <pre>

Add this to the bottom of the ACL section of squid.conf

acl home_network src 192.168.10.0/24 acl business_hours time M T W H F 9:00-17:00 acl GoodSites dstdomain “/usr/local/etc/allowed-sites.squid” acl BadSites dstdomain “/usr/local/etc/restricted-sites.squid”

Add this at the top of the http_access section of squid.conf

http_access deny BadSites http_access allow home_network business_hours GoodSites </pre> IN the ACL you definned the name what you wont to make.

Restricting Web Access By Time - <pre>

Add this to the bottom of the ACL section of squid.conf

acl home_network src 192.168.10.0/24 (replace this ip with your lan IP block) acl business_hours time M T W H F 9:00-17:00 acl RestrictedHost src 192.168.10.23

Add this at the top of the http_access section of squid.conf

http_access deny RestrictedHost http_access allow home_network business_hours </pre>

If you need to create ACL you have to do it in two places at Squid.

Kamal Nasser
DigitalOcean Employee
DigitalOcean Employee badge
March 4, 2014

@juvilyn.porol: Simply follow this article and it should work fine. Make sure you forward the port squid listens on to the host.

Try DigitalOcean for free

Click below to sign up and get $200 of credit to try our products over 60 days!

Sign up

Join the Tech Talk
Success! Thank you! Please check your email for further details.

Please complete your information!

Get our biweekly newsletter

Sign up for Infrastructure as a Newsletter.

Hollie's Hub for Good

Working on improving health and education, reducing inequality, and spurring economic growth? We'd like to help.

Become a contributor

Get paid to write technical tutorials and select a tech-focused charity to receive a matching donation.

Welcome to the developer cloud

DigitalOcean makes it simple to launch in the cloud and scale up as you grow — whether you're running one virtual machine or ten thousand.

Learn more
DigitalOcean Cloud Control Panel