By Renato Candido and Timothy Nolan

The author selected the Open Internet/Free Speech Fund to receive a donation as part of the Write for DOnations program.
Introduction
Private networks generally provide internet access to the hosts using NAT (network address translation), sharing a single public IP address with all hosts inside the private network. In NAT systems, the hosts inside the private network are not visible from outside the network. To expose services running on these hosts to the public internet, you would usually create NAT rules in the gateway, commonly called port forwarding rules. In several situations, though, you wouldn’t have access to the gateway to configure these rules. For situations such as this, tunneling solutions like PageKite come in handy.
PageKite is a fast and secure tunneling solution that can expose a service inside a private network to the public internet without the need for port forwarding. To do this, it relies on an external server, called the front-end server, to which the server behind NAT and the clients connect to allow communication between them. By default, PageKite uses its own commercial pagekite.net service, but as it is a completely open-source project, it allows you to set up a private frontend on a publicly accessible host, such as a DigitalOcean Droplet. With this setup, you can create a vendor-independent solution for remote access to hosts behind NAT. By configuring the remote hosts with the PageKite client to connect to the frontend and exposing the SSH port, it is possible to access them via the command line interface shell using SSH. It’s also possible to access a graphical user interface using a desktop sharing system such as VNC or RDP running over an SSH connection.
In this tutorial, you will install and set up a PageKite front-end service on a server running Debian 9. You will also set up two more Debian 9 servers to simulate a local and a remote environment. When you’re finished, you will have set up a server for multiple clients, and tested it with a practical solution for remote access using SSH and VNC.
Prerequisites
Before following this guide you’ll need the following:
- A DigitalOcean account to set up the Droplets that will be used in the tutorial.
- A server running Debian 9 with a public IP address to act as the front-end server, set up according to the Initial Server Setup with Debian 9 guide. A standard DigitalOcean Droplet with 1GB of memory is enough for testing purposes or for applications with a few connections. We’ll refer to this server by the host name
front-end-serverand its public IP address byFront_End_Public_IP. - Two hosts running Debian 9, which will play the role of a remote and local host that will connect using the PageKite service, set up according to the Initial Server Setup with Debian 9 guide. The remote host, with internet access through NAT, will be accessed by the local host using a PageKite tunnel. Remote and local hosts will be referred to by the host names
remote-hostandlocal-hostand their public IP addresses byRemote_Host_Public_IPandLocal_Host_Public_IPrespectively. This tutorial will use two standard DigitalOcean Droplets with 1GB of memory to represent them. Alternatively, two local or virtual machines could be used to represent these hosts. - A fully registered domain name. This tutorial will use
your_domainas an example throughout. You can purchase a domain name on Namecheap, get one for free on Freenom, or use the domain registrar of your choice. - Both of the following DNS records set up for your server. You can follow this introduction to DigitalOcean DNS for details on how to add them.
- An A record with
pagekite.your_domainpointing to the IP address of thefront-end-server. - We also need to set up DNS so that every domain ending with
pagekite.your_domainalso points out to ourfront-end-server. This can be set up using wildcard DNS entries. In this case, create an A record for the wildcard DNS entry*.pagekite.your_domainto point out to the same IP address,Front_End_Public_IP. This will be used to distinguish the clients that connect to our server by domain name (client-1.pagekite.your_domainandclient-2.pagekite.your_domain, for example) and tunnel the requisitions appropriately. - A local computer with a VNC client installed that supports VNC connections over SSH tunnels.
Step 1 — Setting Up the Servers
In this tutorial, we are going to use three DigitalOcean Droplets to play the role of front-end-server, local-host, and remote-host. To do this, we will first set the local-host and remote-host up to have access to the graphical environment and to mimic the behavior of a remote-host under NAT, so that PageKite can be used as a solution to access its services. Besides that, we also need to configure the front-end-server Droplet firewall rules to allow it to work with PageKite and intermediate the connection between local-host and remote-host.
As we are going to work with multiple servers, we’re going to use different colors in the command listings to identify which server we are using, as follows:
- # Commands and outputs in the front-end-server Droplet
- # Commands and outputs in the remote-host Droplet
- # Commands and outputs in the local-host Droplet
- # Commands and outputs in both the remote-host and local-host Droplets
Let’s first go through the steps for both remote-host and local-host Droplets, to install the dependencies and set up access to the graphical environment using VNC. After that, we will cover the firewall configuration in each of the three Droplets to allow the front-end-server to run PageKite and mimic a connection using NAT on remote-host.
Installing Dependencies
We will need access to the graphical interface on both local-host and remote-host hosts to run through this demonstration. On local-host, we will use a VNC session to access its graphical interface and test our setup using the browser. On remote-host, we will set up a VNC session that we will access from local-host.
To set up VNC, first we need to install some dependencies on local-host and remote-host. But before installing any package, we need to update the package list of the repositories, by running the following on both servers:
- sudo apt-get update
Next, we install the VNC server and a graphical user environment, which is needed to start a VNC session. We will use the Tight VNC server and the Xfce desktop environment, which can be installed by running:
- sudo apt-get install xfce4 xfce4-goodies tightvncserver
In the middle of the graphical environment installation, we’ll be asked about the keyboard layout we wish to use. For a QWERTY US keyboard, select English (US).
In addition to these, on local-host we’re going to need a VNC viewer and an internet browser to be able to perform the connection to remote-host. This tutorial will install the Firefox web browser and the xtightvncviewer. To install them, run:
- sudo apt-get install firefox-esr xtightvncviewer
When a graphical environment is installed, the system initializes in graphical mode by default. By using the DigitalOcean console, it is possible to visualize the graphical login manager, but it is not possible to log in or to use the command line interface. In our setup, we are mimicking the network behavior as if we were using NAT. To do this, we will need to use the DigitalOcean console, since we won’t be able to connect using SSH. Therefore, we need to disable the graphical user interface from automatically starting on boot. This can be done by disabling the login manager on both servers:
- sudo systemctl disable lightdm.service
After disabling the login manager, we can restart the Droplets and test if we can log in using the DigitalOcean console. To do that, run the following:
- sudo shutdown -r now
Next, access the DigitalOcean console by navigating to the Droplet page in the DigitalOcean Control Panel, selecting your local-host Droplet, and clicking on the word Console in the top right corner, near the switch to turn the Droplet on and off:
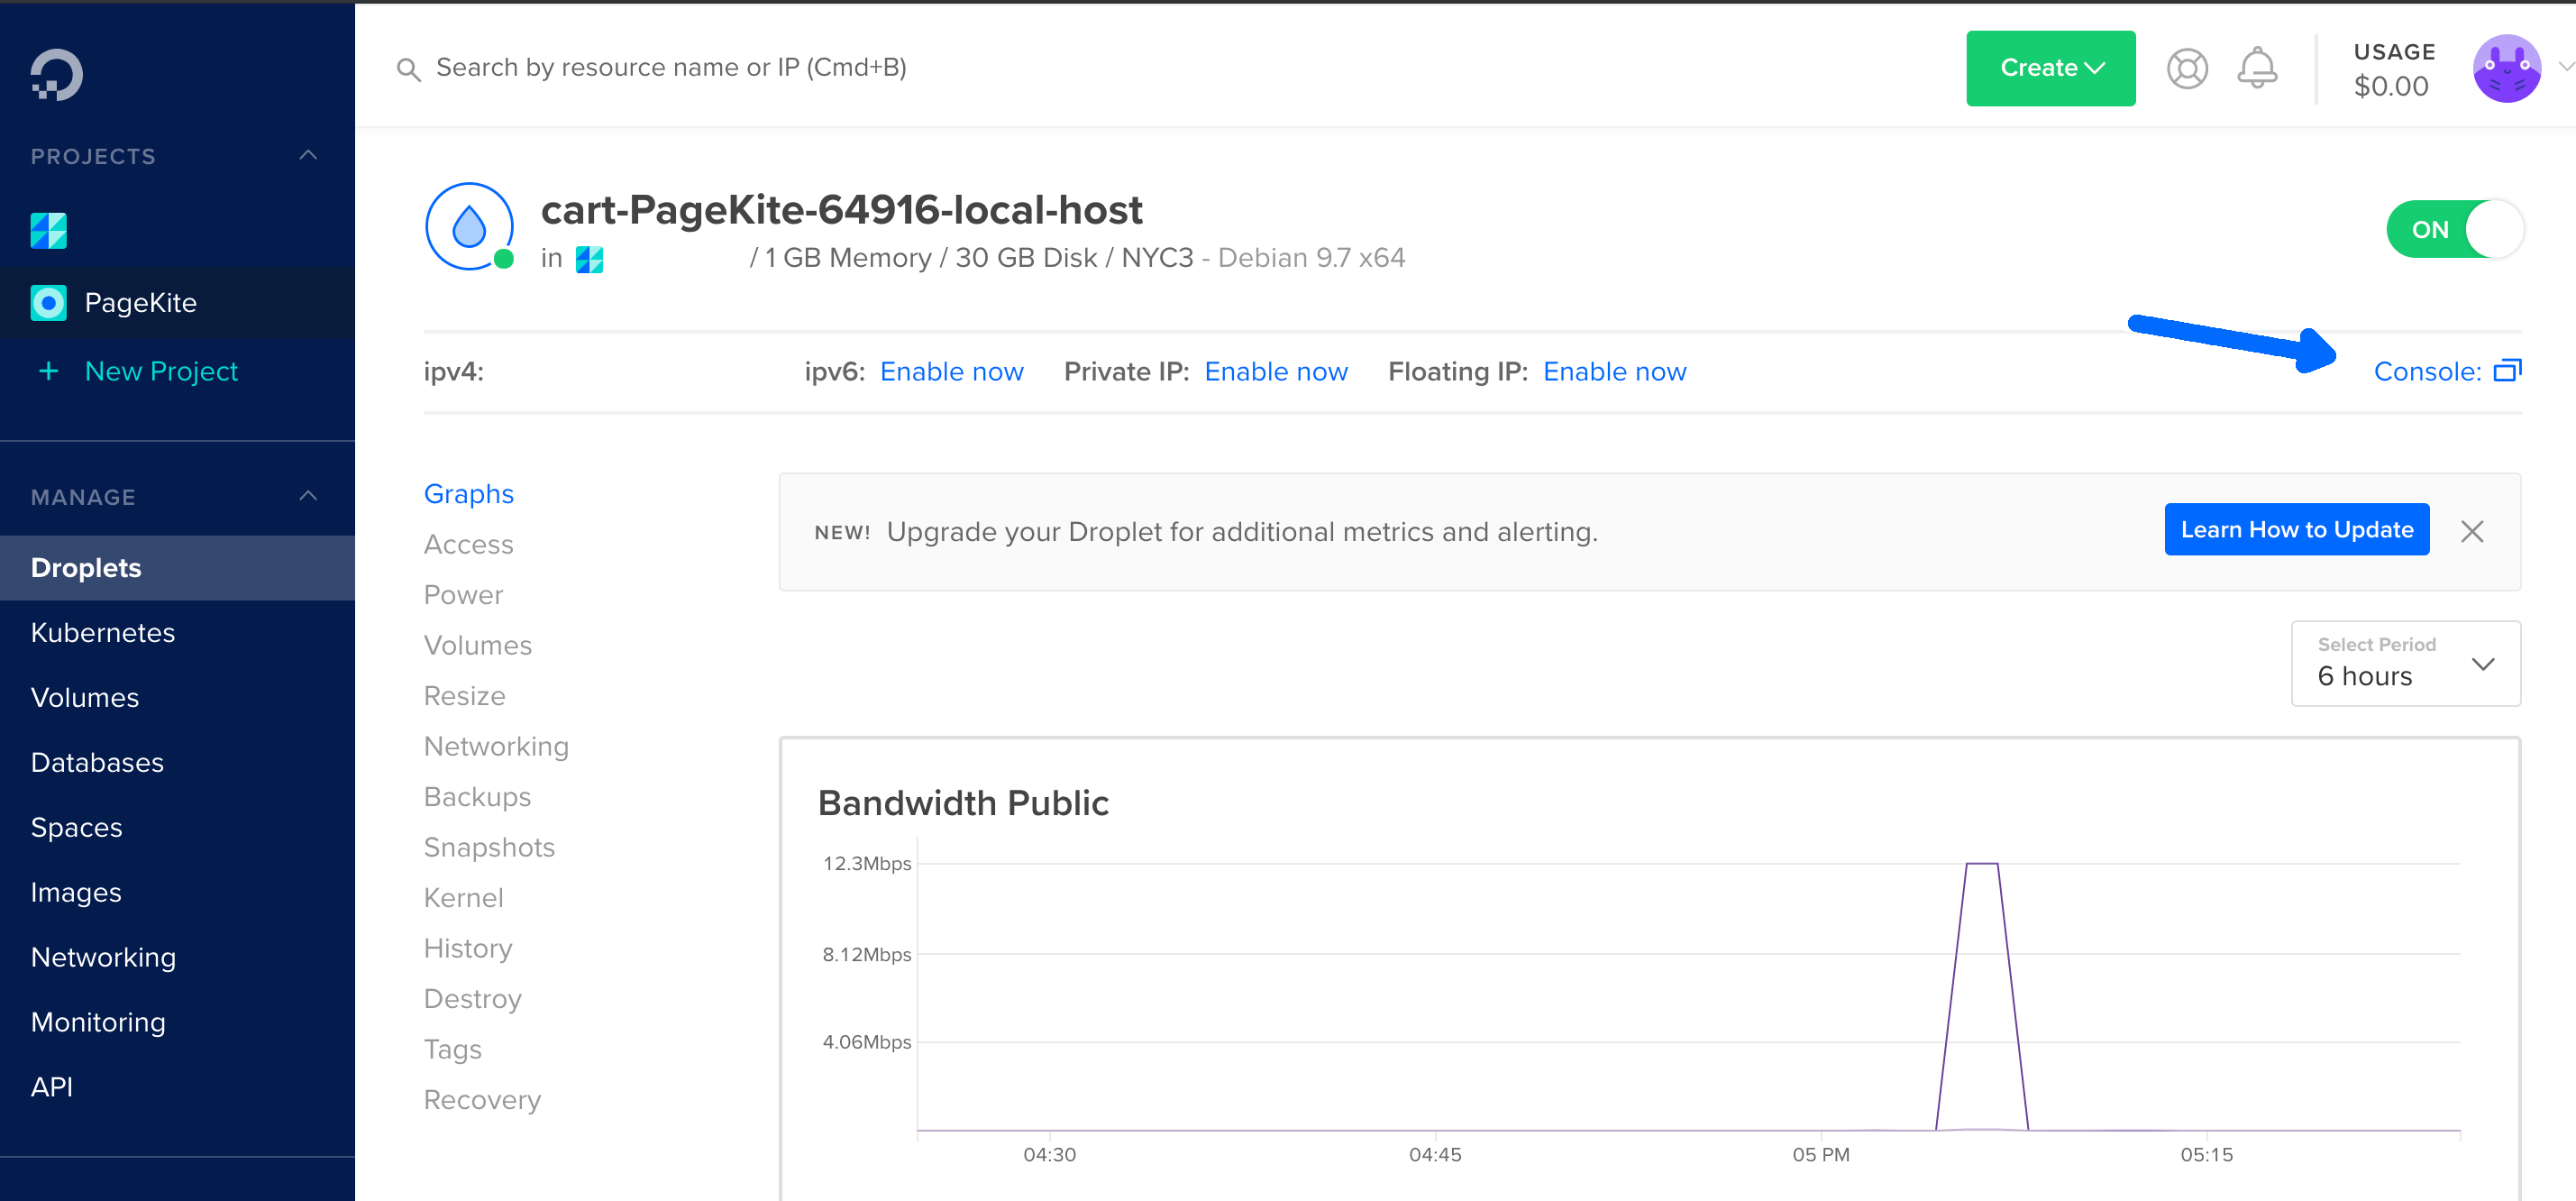
Once you press enter in the console, you will be prompted for your username and password. Enter these credentials to bring up the command line prompt:
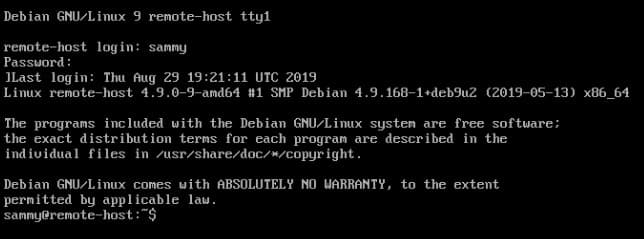
Once you have done this for the local-host, repeat for the remote-host.
With the console up for both Droplets, we can now set up the VNC.
Setting Up VNC
Here, we will put together a basic VNC setup. If you would like a more in-depth guide on how to set this up, check out our How to Install and Configure VNC on Debian 9 tutorial.
To start a VNC session, run the following on both local-host and remote-host Droplets:
- vncserver
On the first run, the system will create the configuration files and ask for the main password. Input your desired password, then verify it. The VNC server will also ask for a view-only password, used for viewing another user’s VNC session. As we won’t need a view-only VNC session, type n for this prompt.
The ouput will look similar to this:
Outputsammy@remote-host:/home/sammy$ vncserver

You will require a password to access your desktops.

Password:
Verify:
Would you like to enter a view-only password (y/n)? n
xauth:  file /home/sammy/.Xauthority does not exist

New 'X' desktop is remote-host:1

Creating default startup script /home/sammy/.vnc/xstartup
Starting applications specified in /home/sammy/.vnc/xstartup
Log file is /home/sammy/.vnc/remote-host:1.log
The :1 after the host name represents the number of the VNC session. By default, the session number 1 is run on port 5901, session number 2 on port 5902, and so on. Following the previous output, we can access remote-host by using a VNC client to connect to Remote_Host_Public_IP on port 5901.
One problem of the previous configuration is that it is not persistent, which means it won’t be started by default when the Droplet is restarted. To make it persistent, we can create a Systemd service and enable it. To do that, we will create the vncserver@.service file under /etc/systemd/system, which can be done using nano:
- sudo nano /etc/systemd/system/vncserver@.service
Place the following contents in the file, replacing sammy with your username:
[Unit]
Description=Start TightVNC server at startup
After=syslog.target network.target

[Service]
Type=forking
User=sammy
PAMName=login
PIDFile=/home/sammy/.vnc/%H:%i.pid
ExecStartPre=-/usr/bin/vncserver -kill :%i > /dev/null 2>&1
ExecStart=/usr/bin/vncserver -depth 24 -geometry 1280x800 :%i
ExecStop=/usr/bin/vncserver -kill :%i

[Install]
WantedBy=multi-user.target
This file creates a vncserver Systemd unit, which can be configured as a system service using the systemctl tool. In this case, when the service is started, it kills the VNC session if it is already running (line ExecStartPre) and starts a new session using the resolution set to 1280x800 (line ExecStart). When the service is stopped, it kills the VNC session (line ExecStop).
Save the file and quit nano. Next, we’ll make the system aware of the new unit file by running:
- sudo systemctl daemon-reload
Then, enable the service to be automatically started when the server is initialized by running:
- sudo systemctl enable vncserver@1.service
When we use the enable command with systemctl, symlinks are created so that the service is started automatically when the system is initialized, as informed by the output of the previous command:
OutputCreated symlink /etc/systemd/system/multi-user.target.wants/vncserver@1.service → /etc/systemd/system/vncserver@.service.
With the VNC server properly configured, we may restart the Droplets to test if the service is automatically started:
- sudo shutdown -r now
After the system initializes, log in using SSH and check if VNC is running with:
- sudo systemctl status vncserver@1.service
The output will indicate the service is running:
● vncserver@1.service - Start TightVNC server at startup
   Loaded: loaded (/etc/systemd/system/vncserver@.service; enabled; vendor preset: enabled)
   Active: active (running) since Thu 2019-08-29 19:21:12 UTC; 1h 22min ago
  Process: 848 ExecStart=/usr/bin/vncserver -depth 24 -geometry 1280x800 :1 (code=exited, status=0/SUCCESS)
  Process: 760 ExecStartPre=/usr/bin/vncserver -kill :1 > /dev/null 2>&1 (code=exited, status=2)
 Main PID: 874 (Xtightvnc)
    Tasks: 0 (limit: 4915)
   CGroup: /system.slice/system-vncserver.slice/vncserver@1.service
           ‣ 874 Xtightvnc :1 -desktop X -auth /home/sammy/.Xauthority -geometry 1280x800 -depth 24 -rfbwait

Aug 29 19:21:10 remote-host systemd[1]: Starting Start TightVNC server at startup...
Aug 29 19:21:10 remote-host systemd[760]: pam_unix(login:session): session opened for user sammy by (uid=0)
Aug 29 19:21:11 remote-host systemd[848]: pam_unix(login:session): session opened for user sammy by (uid=0)
Aug 29 19:21:12 remote-host systemd[1]: Started Start TightVNC server at startup.
~
This finishes the VNC configuration. Remember to follow the previous steps on both remote-host and local-host. Now let’s cover the firewall configurations for each host.
Configuring the Firewall
Starting with the remote-host, we will configure the firewall to deny external connections to the Droplets’ services to mimic the behavior from behind NAT. In this tutorial, we are going to use port 8000 for HTTP connections, 22 for SSH, and 5901 for VNC, so we will configure the firewall to deny external connections to these ports.
By following the initial setup for Debian 9, remote-host will have a firewall rule to allow connections to SSH. We can review this rule by running:
- sudo ufw status verbose
The output will be the following:
OutputStatus: active
Logging: on (low)
Default: deny (incoming), allow (outgoing), disabled (routed)
New profiles: skip

To                         Action      From
--                         ------      ----
22/tcp (OpenSSH)           ALLOW IN    Anywhere
22/tcp (OpenSSH (v6))      ALLOW IN    Anywhere (v6)
Remove these SSH rules to mimic the behavior behind NAT.
Warning: Closing port 22 means you will no longer be able to use SSH to remotely log in to your server. For Droplets, this is not a problem because you can access the server’s console via the DigitalOcean Control Panel, as we did at the end of the Installing Dependencies section of this step. However, if you are not using a Droplet, be careful: closing off port 22 could lock you out of your server if you have no other means of accessing it.
To deny SSH access, use ufw and run:
- sudo ufw delete allow OpenSSH
We can verify the SSH rules were removed by checking the status of the firewall again:
- sudo ufw status verbose
The output will show no firewall rules, as in the following:
OutputStatus: active
Logging: on (low)
Default: deny (incoming), allow (outgoing), disabled (routed)
New profiles: skip
Although the firewall is configured, the new configuration is not running until we enable it with:
- sudo ufw enable
After enabling it, note that we won’t be able to access remote-host via SSH anymore, as mentioned in the output of the command:
OutputCommand may disrupt existing ssh connections. Proceed with operation (y|n)? y
Firewall is active and enabled on system startup
Log out of the remote-host, then test the configuration by trying to establish an SSH or a VNC connection. It will not be possible. From now on, we may access remote-host exclusively by the DigitalOcean console.
On local-host, we will leave the SSH ports open. We only need one firewall rule to allow access to the VNC session:
- sudo ufw allow 5901
After modifying the firewall rules, enable it by running:
- sudo ufw enable
Now we may test the VNC connection using the prerequisite VNC client on your local machine to connect to local-host on port 5901 using the VNC password you’ve set up.
To do this, open up your VNC client and connect to Local_Host_Public_IP:5901. Once you enter the password, you will connect to the VNC session.
Note: If you have trouble connecting to the VNC session, restart the VNC service on local-host with sudo systemctl restart vncserver@1 and try to connect again.
On its first start, Xfce will ask about the initial setup of the environment:
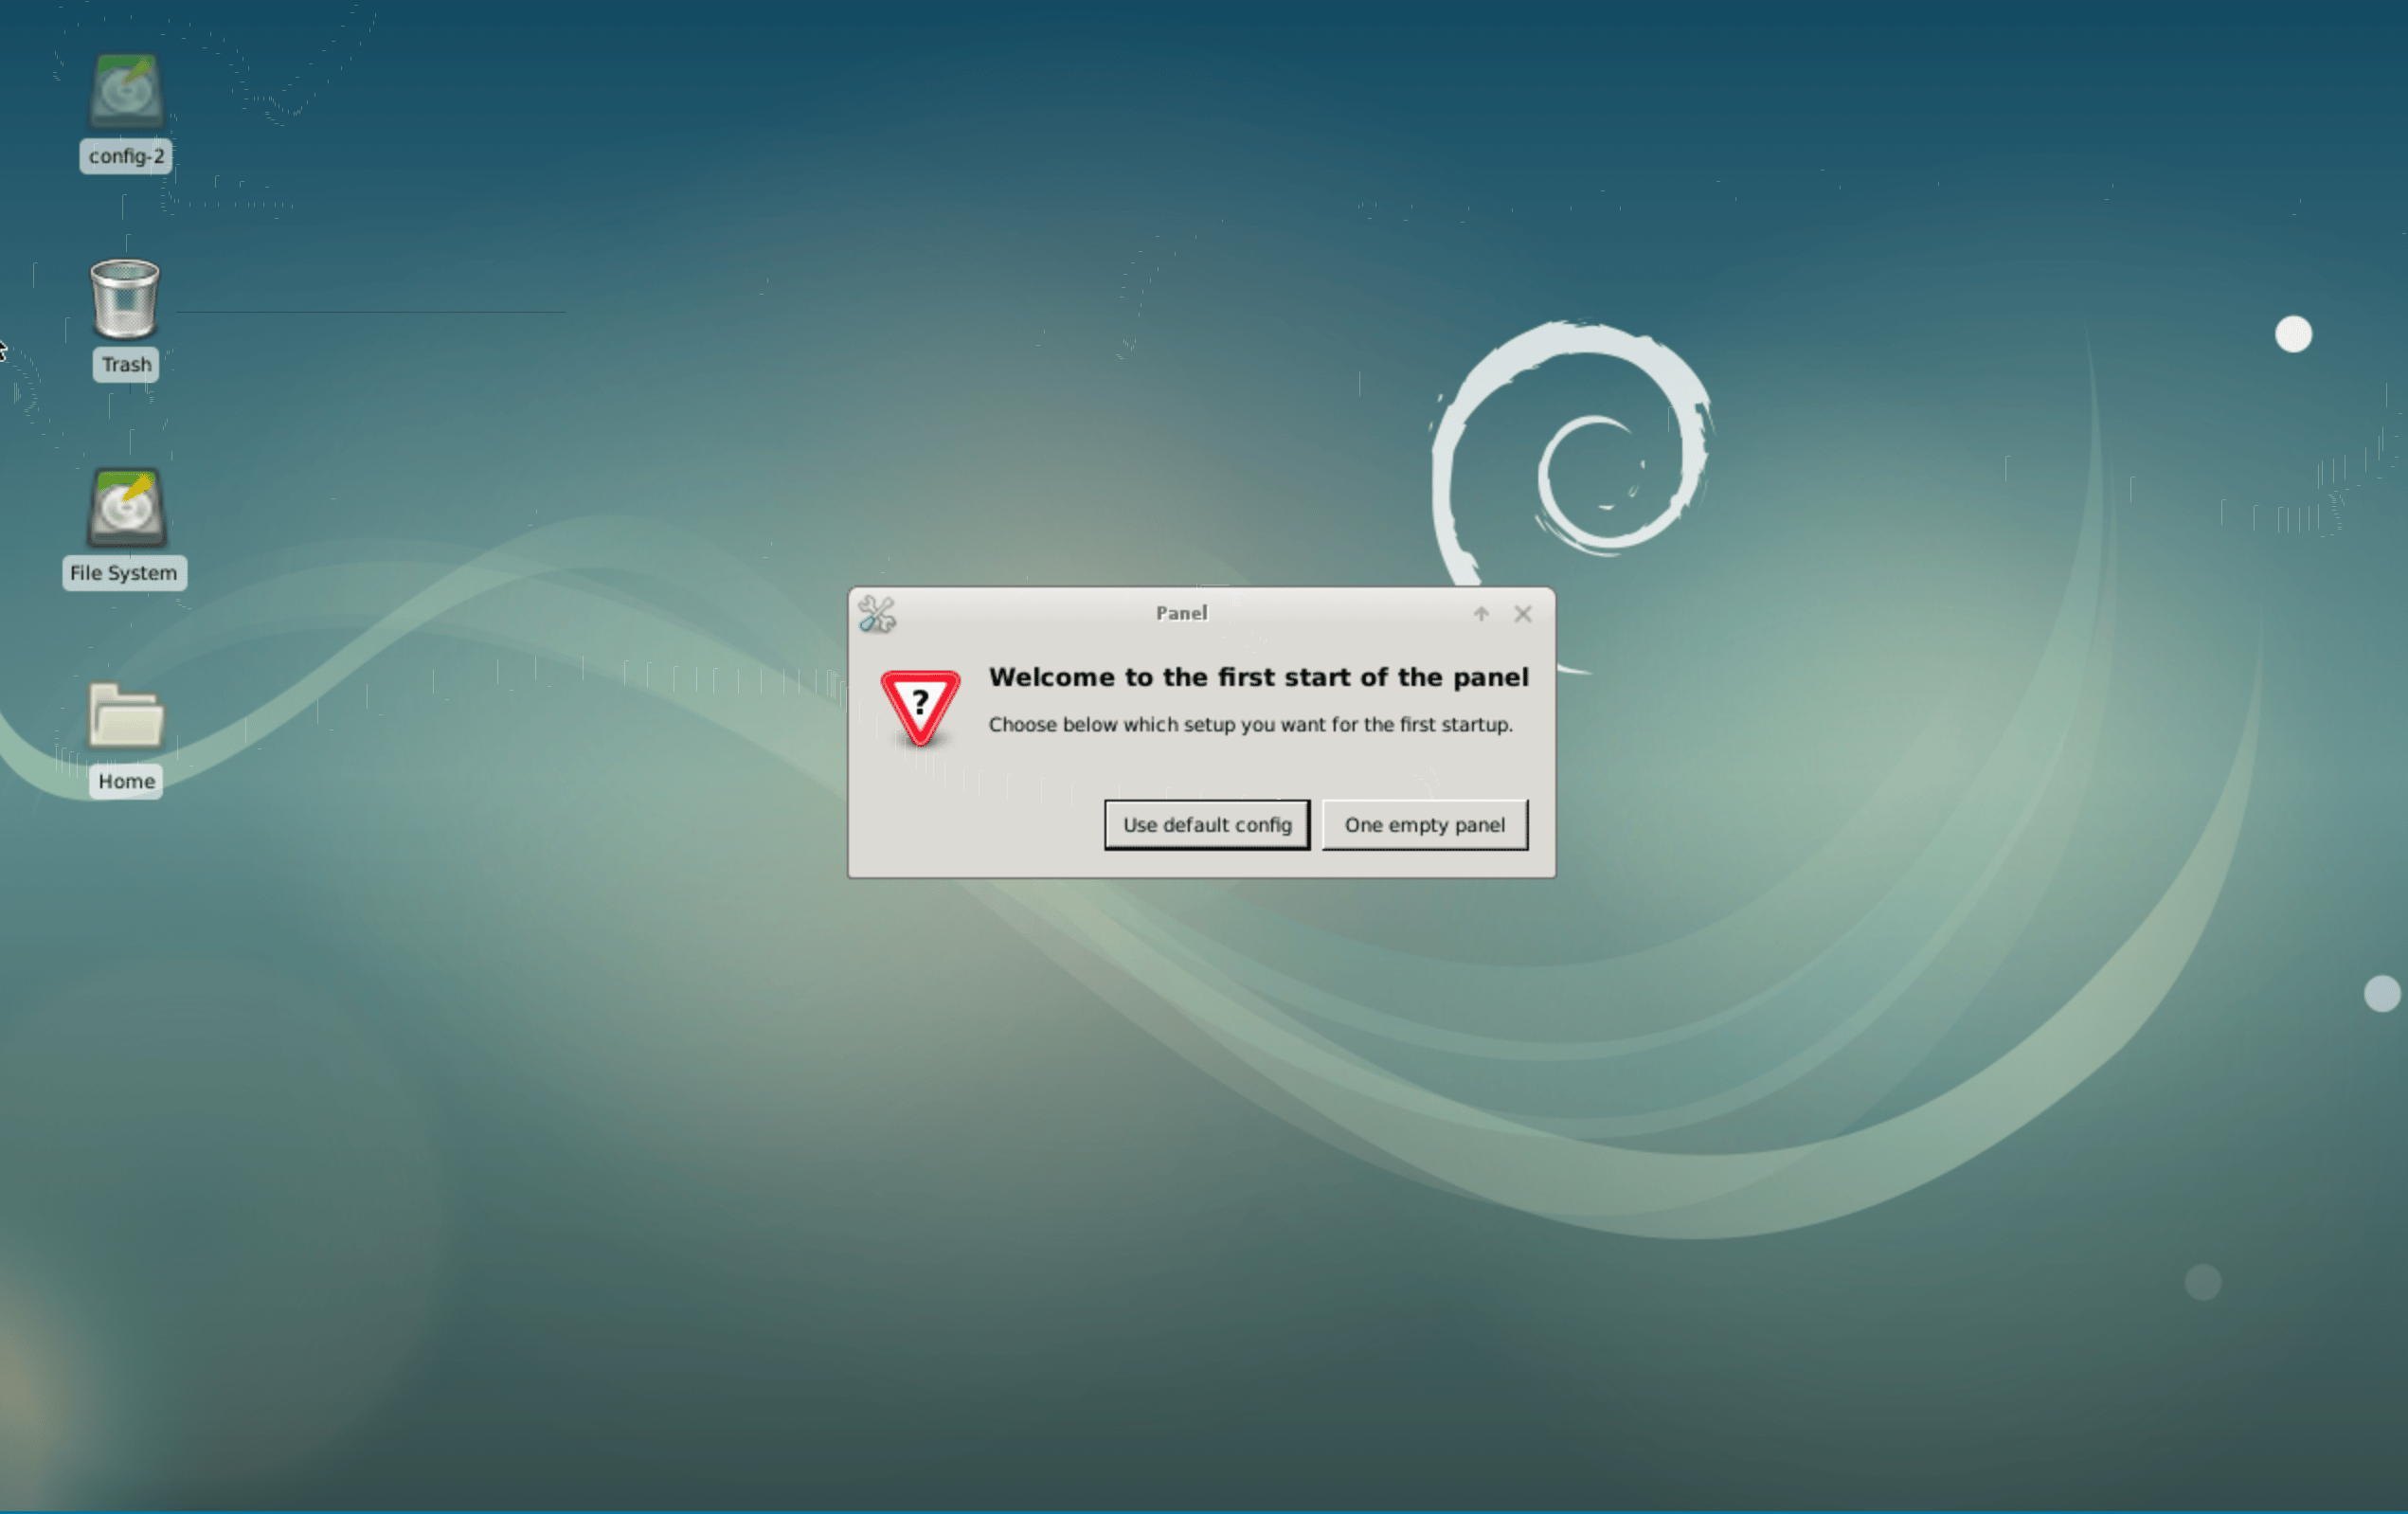
For this tutorial, select the Use default config option.
Finally, we need to allow connections to port 80 on the front-end-server, which will be used by PageKite. Open up a terminal on front-end-server and use the following command:
- sudo ufw allow 80
Additionally, allow traffic on port 443 for HTTPS:
- sudo ufw allow 443
To enable the new firewall configuration, run the following:
- sudo ufw enable
Now that we’ve set up the Droplets, let’s configure the PageKite front-end server.
Step 2 — Installing PageKite on the Front-End Server
Although it is possible to run PageKite using a Python script to set up the front-end server, it is more reliable to run it using a system service. To do so, we will need to install PageKite on the server.
The recommended way to install a service on a Debian server is to use a distribution package. This way, it is possible to obtain automated updates and configure the service to start up on boot.
First, we will configure the repository to install PageKite. To do that, update the package list of the repositories:
- sudo apt-get update
Once the update is done, install the package dirmngr, which is necessary to support the key-ring import from the PageKite repository to ensure a secure installation:
- sudo apt-get install dirmngr
Next, add the repository to the /etc/apt/sources.list file, by running:
- echo deb http://pagekite.net/pk/deb/ pagekite main | sudo tee -a /etc/apt/sources.list
After setting up the repository, import the PageKite packaging key to our trusted set of keys, so that we can install packages from this repository. Packaging key management is done with the apt-key utility. In this case, we have to import the key AED248B1C7B2CAC3 from the key server keys.gnupg.net, which can be done by running:
- sudo apt-key adv --recv-keys --keyserver keys.gnupg.net AED248B1C7B2CAC3
Next, update the package lists of the repositories again, so that the pagekite package gets indexed:
- sudo apt-get update
Finally, install it with:
- sudo apt-get install pagekite
Now that we have PageKite installed, let’s set up the front-end server and configure the service to run on boot.
Step 3 — Configuring the Front-End Server
The PageKite package we have just installed can be used to configure a connection to a PageKite front-end server. It can also be used to set up a front-end service to receive PageKite connections, which is what we want to do here. In order to do so, we have to edit PageKite’s configuration files.
PageKite stores its configuration files in the directory /etc/pagekite.d. The first change we have to do is disable all lines in the /etc/pagekite.d/10_account.rc file, since this file is only used when PageKite is set up as a client to connect to a front-end server. We can edit the file using nano:
- sudo nano /etc/pagekite.d/10_account.rc
To disable the lines, add a # to disable the active lines of the file:
#################################[ This file is placed in the Public Domain. ]#
# Replace the following with your account details.

# kitename   = NAME.pagekite.me
# kitesecret = YOURSECRET

# Delete this line!
# abort_not_configured
After making the changes, save them and quit nano. Next, edit the file /etc/pagekite.d/20_frontends.rc:
- sudo nano /etc/pagekite.d/20_frontends.rc
Add the following highlighted lines to the file and comment out the defaults line, making sure to replace your_domain with the domain name you are using and examplepassword with a password of your choice:
#################################[ This file is placed in the Public Domain. ]#
# Front-end selection
#
# Front-ends accept incoming requests on your behalf and forward them to
# your PageKite, which in turn forwards them to the actual server.  You
# probably need at least one, the service defaults will choose one for you.

# Use the pagekite.net service defaults.
# defaults

# If you want to use your own, use something like:
#     frontend = hostname:port
# or:
#     frontends = COUNT:dnsname:port

isfrontend
ports=80,443

protos=http,https,raw
domain=http,https,raw:*.pagekite.your_domain:examplepassword

rawports=virtual
Let’s explain these lines one by one. First, to configure PageKite as a front-end server, we added the line isfrontend. To configure the ports on which the server will be listening, we added ports=80,443. We also configured the protocols PageKite is going to proxy. To use HTTP, HTTPS, and RAW (which is used by SSH connections), we add the line protos=http,https,raw. We also disable the defaults settings so that there are no conflicting configurations for the server.
Besides that, we configured the domain we are going to use for the front-end-server. For each client, a subdomain will be used, which is why we needed the DNS configurations in the Prerequisites section. We also set up a password that will be used to authenticate the clients. Using the placeholder password examplepassword, these configurations were done by adding the line domain=http,https,raw:*.pagekite.your_domain:examplepassword. Finally, we added an extra line in order to connect using SSH (which is not documented, as discussed here): rawports=virtual.
Save the file and quit nano. Restart the PageKite service, by running:
- sudo systemctl restart pagekite.service
Then enable it to start on boot with:
- sudo systemctl enable pagekite.service
Now that we have front-end-server running, let’s test it by exposing an HTTP port on remote-host and connecting to it from local-host.
Step 4 — Connecting to the Host Behind NAT
To test the front-end-server, let’s start an HTTP service on remote-host and expose it to the internet using PageKite, so that we can connect to it from local-host. Remember, we have to connect to remote-host using the DigitalOcean console, since we have configured the firewall to deny incoming SSH connections.
To start up an HTTP server for testing, we can use the Python 3 http.server module. Since Python is already installed even on the minimal Debian installation and http.server is part of the standard Python library, to start the HTTP server using port 8000 on remote-host we’ll run:
- python3 -m http.server 8000 &
As Debian 9 still uses Python 2 by default, it is necessary to invoke Python by running python3 to start the server. The ending & character indicates for the command to run in the background, so that we can still use the shell terminal. The output will indicate that the server is running:
Outputsammy@remote-host:~$ python3 -m http.server 8000 &
[1] 1782
sammy@remote-host:~$ Serving HTTP on 0.0.0.0 port 8000 ...
Note: The number 1782 that appears in this output refers to the ID that was assigned to the process started with this command and may be different depending on the run. Since it is running in the background, we can use this ID to terminate (kill) the process by issuing kill -9 1782.
With the HTTP server running, we may establish the PageKite tunnel. A quick way to do this is by using the pagekite.py script. We can download it to remote-host running:
- wget https://pagekite.net/pk/pagekite.py
After downloading it, mark it as executable by running:
- chmod a+x pagekite.py
Note: Since PageKite is written in Python 2 and this is the current default version of Python in Debian 9, the proceeding command works without errors. However, since default Python is being progressively migrated to Python 3 in several Linux distributions, it may be necessary to alter the first line of the pagekite.py script to set it to run with Python 2 (setting it to #!/usr/bin/python2).
With pagekite.py available in the current directory, we can connect to front-end-server and expose the HTTP server on the domain remote-host.pagekite.your_domain by running the following, substituting your_domain and examplepassword with your own credentials:
- ./pagekite.py --clean --frontend=pagekite.your_domain:80 --service_on=http:remote-host.pagekite.your_domain:localhost:8000:examplepassword
Let’s take a look at the arguments in this command:
--cleanis used to ignore the default configuration.--frontend=pagekite.your_domain:80specifies the address of our frontend. Note we are using port80, since we have set the front end to run on this port in Step 3.- In the last argument,
--service_on=http:remote-host.pagekite.your_domain:localhost:8000:examplepassword, we set up the service we are going to expose (http), the domain we are going to use (remote-host.pagekite.your_domain), the local address and port where the service is running (localhost:8000since we are exposing a service on the same host we are using to connect to PageKite), and the password to connect to the frontend (examplepassword).
Once this command is run, we will see the message Kites are flying and all is well displayed in the console. After that, we may open a browser window in the local-host VNC session and use it to access the HTTP server on remote-host by accessing the address http://remote-host.pagekite.your_domain. This will display the file system for remote-host:

To stop PageKite’s connection on remote-host, hit CTRL+C in the remote-host console.
Now that we have tested front-end-server, let’s configure remote-host to make the connection with PageKite persistent and to start on boot.
Step 5 — Making the Host Configuration Persistent
The connection between the remote-host and the front-end-server we set up in Step 4 is not persistent, which means that the connection will not be re-established when the server is restarted. This will be a problem if you would like to use this solution long-term, so let’s make this setup persistent.
It is possible to set up PageKite to run as a service on remote-host, so that it is started on boot. To do this, we can use the same distribution packages we used for the front-end-server in Step 3. In the remote-host console accessed through the DigitalOcean control panel, run the following command to install dirmngr:
- sudo apt-get install dirmngr
Then to add the PageKite repository and import the GPG key, run:
- echo deb http://pagekite.net/pk/deb/ pagekite main | sudo tee -a /etc/apt/sources.list
- sudo apt-key adv --recv-keys --keyserver keys.gnupg.net AED248B1C7B2CAC3
To update the package list and install PageKite, run:
- sudo apt-get update
- sudo apt-get install pagekite
To set up PageKite as a client, we will configure the front-end-server address and port in the file /etc/pagekite.d/20_frontends.rc. We can edit it using nano:
- sudo nano /etc/pagekite.d/20_frontends.rc
In this file, comment the line with defaults to avoid using pagekite.net service defaults. Also, configure the front-end-server address and port by using the parameter frontend, adding the line frontend = pagekite.your_domain:80 to the end of the file. Be sure to replace your_domain with the domain you are using.
Here is the full file with the edited lines highlighted:
#################################[ This file is placed in the Public Domain. ]#
# Front-end selection
#
# Front-ends accept incoming requests on your behalf and forward them to
# your PageKite, which in turn forwards them to the actual server.  You
# probably need at least one, the service defaults will choose one for you.

# Use the pagekite.net service defaults.
# defaults

# If you want to use your own, use something like:
     frontend = pagekite.your_domain:80
# or:
#     frontends = COUNT:dnsname:port
After saving the modifications and quitting nano, continue the configuration by editing the file /etc/pagekite.d/10_account.rc and setting the credentials to connect to front-end-server. First, open up the file by running:
- sudo nano /etc/pagekite.d/10_account.rc
To set up the domain we are going to use the domain name and the password to connect to our front-end-server, editing the parameters kitename and kitesecret respectively. We also have to comment out the last line of the file to enable the configuration, as highlighted next:
#################################[ This file is placed in the Public Domain. ]#
# Replace the following with your account details.

kitename   = remote-host.pagekite.your_domain
kitesecret = examplepassword

# Delete this line!
# abort_not_configured
Save and quit from the text editor.
We will now configure our services that will be exposed to the internet. For HTTP and SSH services, PageKite includes sample configuration files with extensions ending in .sample in its configuration directory /etc/pagekite.d. Let’s start by copying the sample configuration file into a valid one for HTTP:
- cd /etc/pagekite.d
- sudo cp 80_httpd.rc.sample 80_httpd.rc
The HTTP configuration file is almost set up. We only have to adjust the HTTP port, which we can do by editing the file we just copied:
- sudo nano /etc/pagekite.d/80_httpd.rc
The parameter service_on defines the address and port of the service we wish to expose. By default, it exposes localhost:80. As our HTTP server will be running on port 8000, we just have to change the port number, as highlighted next:
#################################[ This file is placed in the Public Domain. ]#
# Expose the local HTTPD

service_on = http:@kitename : localhost:8000 : @kitesecret

# If you have TLS/SSL configured locally, uncomment this to enable end-to-end
# TLS encryption instead of relying on the wild-card certificate at the relay.

#service_on = https:@kitename : localhost:443 : @kitesecret

#
# Uncomment the following to globally DISABLE the request firewall.  Do this
# if you are sure you know what you are doing, for more details please see
#                <http://pagekite.net/support/security/>
#
#insecure
#
# To disable the firewall for one kite at a time, use lines like this::
#
#service_cfg = KITENAME.pagekite.me/80 : insecure : True
Note: The service_on parameter syntax is similar to the one used with the pagekite.py script. However, the domain name we are going to use and the password are obtained from the /etc/pagekite.d/10_account.rc file and inserted by the markers @kitename and @kitesecret respectively.
After saving the modifications to this configuration file, we have to restart the service so that the changes take effect:
- sudo systemctl restart pagekite.service
To start the service on boot, enable the service with:
- sudo systemctl enable pagekite.service
Just as we have done before, use the http.server Python module to emulate our HTTP server. It will be already running since we started it to run in the background in Step 4. However, if for some reason it is not running, we may start it again with:
- python3 -m http.server 8000 &
Now that we have the HTTP server and the PageKite service running, open a browser window in the local-host VNC session and use it to access remote-host by using the address http://remote-host.pagekite.your_domain. This will display the file system of remote-host in the browser.
We have seen how to configure a PageKite front-end server and a client to expose a local HTTP server. Next, we’ll set up remote-host to expose SSH and allow remote connections.
Step 6 — Exposing SSH with PageKite
Besides HTTP, PageKite can be used to proxy other services, such as SSH, which is useful to access hosts remotely behind NAT in environments where it is not possible to modify networking and a router’s configurations.
In this section, we are going to configure remote-host to expose its SSH service using PageKite, then open an SSH session from local-host.
Just like we have done to configure HTTP with PageKite, for SSH we will copy the sample configuration file into a valid one to expose the SSH service on remote-host:
- cd /etc/pagekite.d
- sudo cp 80_sshd.rc.sample 80_sshd.rc
This file is pre-configured to expose the SSH service running on port 22, which is the default configuration. Let’s take a look at its contents:
- nano 80_sshd.rc
This will show you the file:
#################################[ This file is placed in the Public Domain. ]#
# Expose the local SSH daemon

service_on = raw/22:@kitename : localhost:22 : @kitesecret
This file is very similar to the one used to expose HTTP. The only differences are the port number, which is 22 for SSH, and the protocol, which must be set to raw when exposing SSH.
Since we do not need to make any changes here, exit from the file.
Restart the PageKite service:
- sudo systemctl restart pagekite.service
Note: We could also expose SSH using the pagekite.py script if the PageKite service wasn’t installed. We would just have to use the --service-on argument, setting the protocol to raw with the proper domain name and password. For example, to expose it using the same parameters we have configured in the PageKite service, we would use the command ./pagekite.py --clean --frontend=pagekite.your_domain:80 --service_on=raw:remote-host.pagekite.your_domain:localhost:22:examplepassword.
On local-host, we will use the SSH client to connect to remote-host. PageKite tunnels the connections using HTTP, so that to use SSH over PageKite, we will need an HTTP proxy. There are several options of HTTP proxies we could use from the Debian repositories, such as Netcat(nc) and corkscrew. For this tutorial, we will use corkscrew, since it requires fewer arguments than nc.
To install corkscrew on local-host, use apt-get install with the package of the same name:
- sudo apt-get install corkscrew
Next, generate an SSH key on local-host and append the public key to the .ssh/authorized_keys file of remote-host. To do this, follow the How to Set Up SSH Keys on Debian 9 guide, including the Copying Public Key Manually section in Step 2.
To connect to an SSH server using a proxy, we will use ssh with the -o argument to pass in ProxyCommand and specify corkscrew as the HTTP proxy. This way, on local-host, we will run the following command to connect to remote-host through the PageKite tunnel:
- ssh sammy@remote-host.pagekite.your_domain -i ~/id_rsa -o "ProxyCommand corkscrew %h 80 %h %p"
Notice we provided some arguments to corkscrew. The %h and %p are tokens that the SSH client replaces by the remote host name (remote-host.pagekite.your_domain) and remote port (22, implicitly used by ssh) when it runs corkscrew. The 80 refers to the port on which PageKite is running. This port refers to the communication between the PageKite client and the front-end server.
Once you run this command on local-host, the command line prompt for remote-host will appear.
With our SSH connection working via PageKite, let’s next set a VNC session on remote_server and access it from local-host using VNC over SSH.
Step 7 — Using VNC Over SSH
Now we can access a remote host using a shell, which solves a lot of the problems that arise from servers hidden behind NAT. However, in some situations, we require access to the graphical user interface. SSH provides a way of tunneling any service in its connection, such as VNC, which can be used for graphical remote access.
With remote-host configured to expose SSH using our front-end server, let’s use an SSH connection to tunnel VNC and have access to the remote-host graphical interface.
Since we have already configured a VNC session to start automatically on remote-host, we will use local-host to connect to remote-host using ssh with the -L argument:
- ssh sammy@remote-host.pagekite.your_domain -i ~/id_rsa -o "ProxyCommand corkscrew %h 80 %h %p" -L5902:localhost:5901
The -L argument specifies that connections to a given local port should be forwarded to a remote host and port. Together with this argument, we provided a port number followed by a colon, then an IP address, domain, or host name, followed by another colon and a port number. Let’s take a look at this information in detail:
- The first port number refers to the one we are going to use on the host that is starting the SSH connection (in this case
local-host), to receive the tunneled connection from the remote host. In this case, from the point of view oflocal-host, the VNC Session fromremote-hostwill be available locally, on port5902. We could not use the port5901since it is already being used onlocal-hostfor its own VNC session. - After the first colon, we provide the host name (or IP address) of the device that is serving the VNC session we wish to tunnel. If we provide a host name, it will be resolved into an IP address by the host that is serving SSH. In this case, since
remote-hostis serving the SSH connection and the VNC session is also served by this same host, we can uselocalhost. - After the second colon, we provide the port in which the service to be tunneled is served. We use port
5901, since VNC is running on this port on theremote-host.
After the connection is established, we will be presented with a remote shell on remote-host.
Now we can reach the remote-host VNC session from local-host by connecting to port 5902 itself. To do so, open a shell from the local-host GUI in your VNC client, then run:
- vncviewer localhost:5902
Upon providing the remote-host VNC password, we will be able to access its graphical environment.
Note: If the VNC session has been running for too long, you may encounter an error in which the GUI on remote-host is replaced by a gray screen with an X for a cursor. If this happens, try restarting the VNC session on remote-host with sudo systemctl restart vncserver@1. Once the service is running, try connecting again.
This setup can be useful for support teams using remote access. It is possible to use SSH to tunnel any service that can be reached by remote-host. This way, we could set up remote-host as a gateway to a local attached network with many hosts, including some running Windows or another OS. As long as the hosts have a VNC server with a VNC session set up, it would be possible to access them with a graphical user interface through SSH tunneled by our PageKite front-end-server.
In the final step, we will configure the PageKite frontend to support more clients with different passwords.
Step 8 — Configuring the Front-End Server for Many Clients (Optional)
Suppose we are going to use our front-end-server to offer remote access to many clients. In this multi-user setup, it would be a best practice to isolate them, using a different domain name and password for each one to connect to our server. One way of doing this is by running several PageKite services on our server on different ports, each one configured with its own subdomain and password, but this can be difficult to keep organized.
Fortunately, the PageKite frontend supports the configuration of multiple clients itself, so that we can use the same service on a single port. To do this, we would configure the front end with the domain names and passwords.
As we have configured the wildcard DNS entry *.pagekite.your_domain pointing out to our front-end-server, DNS entries in subdomains like remote-host.client-1.pagekite.your_domain can also point out to our server, so that we could use domains ending in client1.pagekite.your_domain and client2.pagekite.your_domain to identify hosts of different clients with different passwords.
To do this on the front-end-server, open the /etc/pagekite.d/20_frontends.rc file:
- sudo nano /etc/pagekite.d/20_frontends.rc
Add the domains using the domain keyword and set different passwords for each one. To set up the domains we’ve mentioned, add:
#################################[ This file is placed in the Public Domain. ]#
# Front-end selection
#
# Front-ends accept incoming requests on your behalf and forward them to
# your PageKite, which in turn forwards them to the actual server.  You
# probably need at least one, the service defaults will choose one for you.

# Use the pagekite.net service defaults.
# defaults

# If you want to use your own, use something like:
#     frontend = hostname:port
# or:
#     frontends = COUNT:dnsname:port

isfrontend
ports=80,443

protos=http,https,raw
domain=http,https,raw:*.pagekite.your_domain:examplepassword
domain=http,https,raw:*.client-1.pagekite.your_domain:examplepassword2
domain=http,https,raw:*.client-2.pagekite.your_domain:examplepassword3

rawports=virtual
Save and exit the file.
After modifying the configuration files, restart PageKite:
- sudo systemctl restart pagekite.service
On the remote hosts, let’s configure the PageKite client to connect according to the new domains and passwords. For example, in remote-host, to connect using client-1.pagekite.your_domain, modify the file /etc/pagekite.d/10_account.rc, where the credentials to connect to front-end-server are stored:
- sudo nano /etc/pagekite.d/10_account.rc
Change kitename and kitesecret to the appropriate credentials. For the domain remote-host.client-1.pagekite.your_domain, the configuration would be:
#################################[ This file is placed in the Public Domain. ]#
# Replace the following with your account details.

kitename   = remote-host.client-1.pagekite.your_domain
kitesecret = examplepassword2

# Delete this line!
Save and exit the file.
After modifying the file, restart the PageKite service:
- sudo systemctl restart pagekite.service
Now, on local-host, we can connect to remote-host via SSH with:
- ssh sammy@remote-host.client-1.pagekite.your_domain -i ~/id_rsa -o "ProxyCommand corkscrew %h 80 %h %p"
We could use the domain client-2.pagekite.your-domain for another client. This way, we could administrate the services in an isolated way, with the possibility to change the password of one client or even disable one of them without affecting the other.
Conclusion
In this article, we set up a private PageKite front-end server on a Debian 9 Droplet and used it to expose HTTP and SSH services on a remote host behind NAT. We then connected to these services from a local-host server and verified the PageKite functionality. As we have mentioned, this could be an effective setup for remote access applications, since we can tunnel other services in the SSH connection, such as VNC.
If you’d like to learn more about PageKite, check out the PageKite Support Info. If you would like to dive deeper into networking with Droplets, take a look through DigitalOcean’s Networking Documentation.
Thanks for learning with the DigitalOcean Community. Check out our offerings for compute, storage, networking, and managed databases.
About the author(s)
Researcher in digital signal processing, telecommunications and machine learning. {free, libre, open source} {software, hardware} enthusiast.
Former Senior Technical Editor at DigitalOcean, fiction writer and podcaster elsewhere, always searching for the next good nautical pun! Areas of expertise include Node.js, PostgreSQL, CSS, JavaScript.
Still looking for an answer?
This textbox defaults to using Markdown to format your answer.
You can type !ref in this text area to quickly search our full set of tutorials, documentation & marketplace offerings and insert the link!
I don’t quite get how I can get one PageKite backend to to do multiple domains on 80/443, connecting to the front-end? Any help?
Step2: Update the key server location:
Add the PageKite packaging key to your key-ring
sudo apt-key adv --recv-keys --keyserver pgp.mit.edu AED248B1C7B2CAC3
 This work is licensed under a Creative Commons Attribution-NonCommercial- ShareAlike 4.0 International License.
Become a contributor for community
Get paid to write technical tutorials and select a tech-focused charity to receive a matching donation.

DigitalOcean Documentation
Full documentation for every DigitalOcean product.

Resources for startups and AI-native businesses
The Wave has everything you need to know about building a business, from raising funding to marketing your product.
The developer cloud
Scale up as you grow — whether you're running one virtual machine or ten thousand.

Start building today
From GPU-powered inference and Kubernetes to managed databases and storage, get everything you need to build, scale, and deploy intelligent applications.
