Sr Technical Content Strategist and Team Lead

Introduction
Django is a powerful web framework that can help you get your Python application or website off the ground. Django includes a simplified development server for testing your code locally, but for anything even slightly production related, a more secure and powerful web server is required.
In this tutorial, you will install and configure some components on Ubuntu to support and serve Django applications. You will be setting up a PostgreSQL database instead of using the default SQLite database. You’ll configure the Gunicorn application server to interface with your applications. You will then set up Nginx to reverse proxy to Gunicorn, giving you access to its security and performance features to serve your apps.
For a comprehensive comparison of database options, see our guide on SQLite vs MySQL vs PostgreSQL: A Comparison of Relational Database Management Systems.
Deploy your applications from GitHub using DigitalOcean App Platform. Let DigitalOcean focus on scaling your app.
You will be installing Django within a virtual environment. Installing Django into an environment specific to your project will allow your projects and their requirements to be handled separately. For more detailed information on working with PostgreSQL in Django, see our comprehensive guide on How to Use PostgreSQL with Your Django Application on Ubuntu 22.04.
Once you have your database and application up and running, you will install and configure the Gunicorn application server. This will serve as an interface to our application, translating client requests from HTTP to Python calls that our application can process. You will then set up Nginx in front of Gunicorn to take advantage of its high performance connection handling mechanisms and its easy-to-implement security features.
Let’s get started.
Key Takeaways
By the end of this comprehensive tutorial, you will have:
- Production-Ready Django Deployment: Set up a robust Django application with PostgreSQL, Nginx, and Gunicorn on Ubuntu.
- Advanced Performance Optimization: Configure Gunicorn with optimal worker processes, implement Nginx caching strategies, and tune PostgreSQL for high-performance database operations.
- Security Best Practices: Implement SSL/TLS encryption, configure firewall rules, and apply Django security settings for production environments
- AI Integration Capabilities: Learn how to integrate machine learning models, AI APIs, and modern deployment strategies for intelligent applications
- Monitoring and Troubleshooting: Set up comprehensive logging, performance monitoring, and debugging techniques for production environments
- Scalability Architecture: Understand how to scale your Django application horizontally and vertically for high-traffic scenarios
Prerequisites
If you are using Ubuntu version 16.04 or below, we recommend you upgrade to a more latest version since Ubuntu no longer supports these versions. This collection of guides will help you in upgrading your Ubuntu version.
In order to complete this guide, you need a server running Ubuntu, along with a non-root user with sudo privileges and an active firewall. For guidance on how to set these up, please choose your distribution from this list and follow our Initial Server Setup Guide.
Steps to Setup Django, Nginx & Gunicorn
- Install the Packages from the Ubuntu Repositories
- Creating the PostgreSQL Database and User
- Create a Python Virtual Environment for Project
- Create and Configure New Django Project
- Complete Django Project Setup
- Test Gunicorn’s Ability to Serve the Project
- Creating Gunicorn systemd Socket and Service Files
- Check Gunicorn Socket File
- Testing Socket Activation
- Configure Nginx to Proxy Pass to Gunicorn
- Troubleshooting Nginx and Gunicorn
Step 1 — Installing the Packages from the Ubuntu Repositories
To begin the process, you will download and install all of the items that you need from the Ubuntu repositories. Later you will use the Python package manager pip to install additional components.
First you need to update the local apt package index and then download and install the packages. The packages that you install depend on which version of Python your project will use.
If you are using Django with Python 3, type:
- sudo apt update
- sudo apt install python3-venv python3-dev libpq-dev postgresql postgresql-contrib nginx curl
This command will install a tool to create virtual environments for your Python projects, the Python development files needed to build Gunicorn later, the Postgres database system and the libraries needed to interact with it, and the Nginx web server.
Step 2 — Creating the PostgreSQL Database and User
Now you can jump right in and create a database and database user for our Django application.
By default, Postgres uses an authentication scheme called “peer authentication” for local connections. Basically, this means that if the user’s operating system username matches a valid Postgres username, that user can login with no further authentication.
During the Postgres installation, an operating system user named postgres was created to correspond to the postgres PostgreSQL administrative user. You need to use this user to perform administrative tasks. You can use sudo and pass in the username with the -u option.
Log into an interactive Postgres session by typing:
- sudo -u postgres psql
You will be given a PostgreSQL prompt where you can set up our requirements.
First, create a database for your project:
- CREATE DATABASE myproject;
Note: Every Postgres statement must end with a semi-colon, so make sure that your command ends with one if you are experiencing issues.
Next, create a database user for our project. Make sure to select a secure password:
- CREATE USER myprojectuser WITH PASSWORD 'password';
Afterwards, you’ll modify a few of the connection parameters for the user that you just created. This will speed up database operations so that the correct values do not have to be queried and set each time a connection is established.
You will set the default character encoding to UTF-8, which Django expects. You are also setting the default transaction isolation scheme to “read committed”, which blocks reads from uncommitted transactions. Lastly, you are setting the timezone. By default, Django projects will be set to use UTC. These are all recommendations from the Django project itself:
- ALTER ROLE myprojectuser SET client_encoding TO 'utf8';
- ALTER ROLE myprojectuser SET default_transaction_isolation TO 'read committed';
- ALTER ROLE myprojectuser SET timezone TO 'UTC';
Now, you can give the new user access to administer the new database:
- GRANT ALL PRIVILEGES ON DATABASE myproject TO myprojectuser;
When you are finished, exit out of the PostgreSQL prompt by typing:
- \q
Postgres is now set up so that Django can connect to and manage its database information.
Step 3 — Creating a Python Virtual Environment for your Project
Now that you have a database ready, you can begin getting the rest of your project requirements. You will install the Python requirements within a virtual environment for easier management.
First, create and change into a directory where your can keep your project files:
- mkdir ~/myprojectdir
- cd ~/myprojectdir
Within the project directory, create a Python virtual environment by typing:
- python3 -m venv myprojectenv
This will create a directory called myprojectenv within your myprojectdir directory. Inside, it will install a local version of Python and a local version of pip to manage packages. You can use this virtual environment structure to install and configure an isolated Python environment for any project that you want to create.
Before installing your project’s Python requirements, you will need to activate the virtual environment. You can do that by typing:
- source myprojectenv/bin/activate
Your prompt should change to indicate that you are now operating within a Python virtual environment. It will look something like this: (myprojectenv)user@host:~/myprojectdir$.
With your virtual environment active, install Django, Gunicorn, and the psycopg2 PostgreSQL adaptor with the local instance of pip:
Note: When the virtual environment is activated (when your prompt has (myprojectenv) preceding it), use pip instead of pip3, even if you are using Python 3. The virtual environment’s copy of the tool is always named pip, regardless of the Python version.
- pip install django gunicorn psycopg2-binary
You should now have all of the software needed to start a Django project.
Step 4 — Creating and Configuring a New Django Project
With your Python components installed, you can now create the actual Django project files.
Since you already have a project directory, you will tell Django to install the files here. It will create a second level directory with the actual code, which is normal, and place a management script in this directory. The key to this is that you are defining the directory explicitly instead of allowing Django to make decisions relative to our current directory:
- django-admin startproject myproject ~/myprojectdir
At this point, your project directory (~/myprojectdir in this example case) should have the following content:
~/myprojectdir/manage.py: A Django project management script.~/myprojectdir/myproject/: The Django project package. This should contain the__init__.py,settings.py,urls.py,asgi.py, andwsgi.pyfiles.~/myprojectdir/myprojectenv/: The virtual environment directory you created earlier.
The first thing you should do with your newly created project files is adjust the settings. Open the settings file in your text editor:
- nano ~/myprojectdir/myproject/settings.py
Start by locating the ALLOWED_HOSTS directive. This defines a list of the server’s addresses or domain names may be used to connect to the Django instance. Any incoming requests with a Host header that is not in this list will raise an exception. Django requires that you set this to prevent a certain class of security vulnerability.
In the square brackets, list the IP addresses or domain names that are associated with your Django server. Each item should be listed in quotations with entries separated by a comma. If you wish requests for an entire domain and any subdomains, prepend a period to the beginning of the entry. In the snippet below, there are a few commented out examples used to demonstrate:
Note: Be sure to include localhost as one of the options since you will be proxying connections through a local Nginx instance.
. . .
# The simplest case: just add the domain name(s) and IP addresses of your Django server
# ALLOWED_HOSTS = [ 'example.com', '203.0.113.5']
# To respond to 'example.com' and any subdomains, start the domain with a dot
# ALLOWED_HOSTS = ['.example.com', '203.0.113.5']
ALLOWED_HOSTS = ['your_server_domain_or_IP', 'second_domain_or_IP', . . ., 'localhost']
Next, find the section that configures database access. It will start with DATABASES. The configuration in the file is for a SQLite database. You already created a PostgreSQL database for our project, so you need to adjust the settings.
Change the settings with your PostgreSQL database information. You tell Django to use the psycopg2 adapter that you installed with pip. You need to give the database name, the database username, the database user’s password, and then specify that the database is located on the local computer. You can leave the PORT setting as an empty string:
. . .

DATABASES = {
    'default': {
        'ENGINE': 'django.db.backends.postgresql_psycopg2',
        'NAME': 'myproject',
        'USER': 'myprojectuser',
        'PASSWORD': 'password',
        'HOST': 'localhost',
        'PORT': '',
    }
}

. . .
Next, move down to the bottom of the file and add a setting indicating where the static files should be placed. This is necessary so that Nginx can handle requests for these items. The following line tells Django to place them in a directory called static in the base project directory:
. . .
STATIC_URL = 'static/'

# Default primary key field type
# https://docs.djangoproject.com/en/4.0/ref/settings/#default-auto-field

DEFAULT_AUTO_FIELD = 'django.db.models.BigAutoField'

import os
STATIC_ROOT = os.path.join(BASE_DIR, 'static/')
Save and close the file when you are finished.
Step 5 — Completing Initial Project Setup
Now, you can migrate the initial database schema to our PostgreSQL database using the management script:
- ~/myprojectdir/manage.py makemigrations
- ~/myprojectdir/manage.py migrate
Create an administrative user for the project by typing:
- ~/myprojectdir/manage.py createsuperuser
You will have to select a username, provide an email address, and choose and confirm a password.
You can collect all of the static content into the directory location that you configured by typing:
- ~/myprojectdir/manage.py collectstatic
You will have to confirm the operation. The static files will then be placed in a directory called static within your project directory.
If you followed the initial server setup guide, you should have a UFW firewall protecting your server. In order to test the development server, you need to allow access to the port you’ll be using.
Create an exception for port 8000 by typing:
- sudo ufw allow 8000
Finally, you can test out your project by starting up the Django development server with this command:
- ~/myprojectdir/manage.py runserver 0.0.0.0:8000
In your web browser, visit your server’s domain name or IP address followed by :8000:
http://server_domain_or_IP:8000
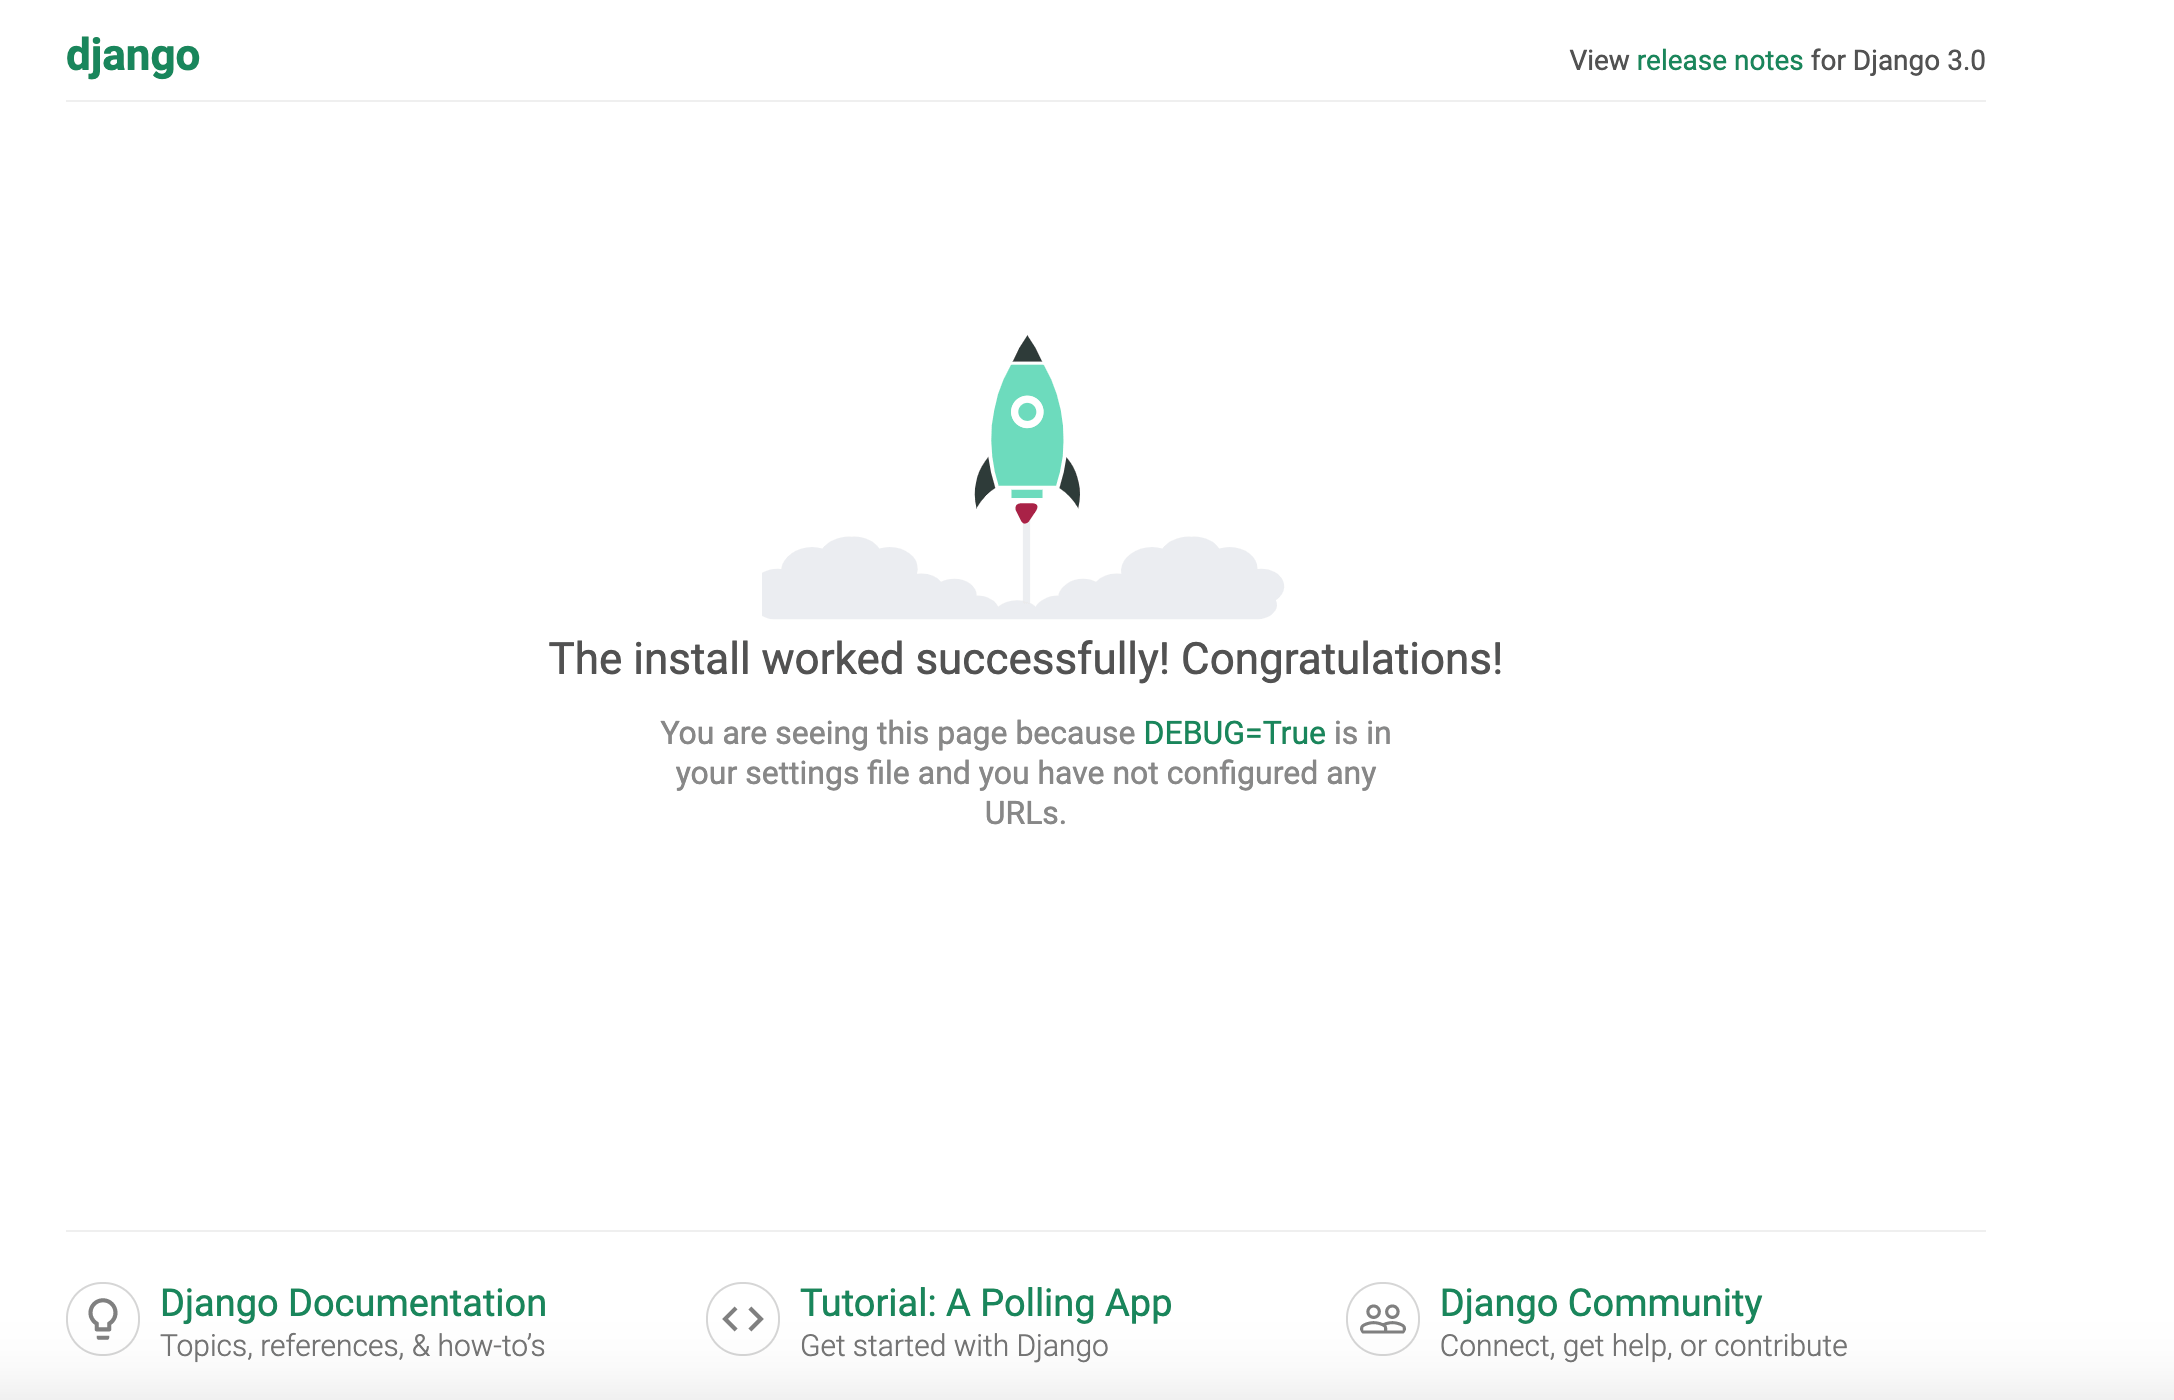
You should receive the default Django index page:
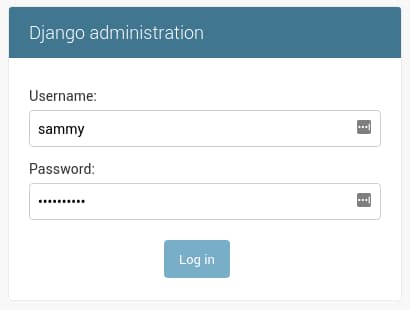
If you append /admin to the end of the URL in the address bar, you will be prompted for the administrative username and password you created with the createsuperuser command:
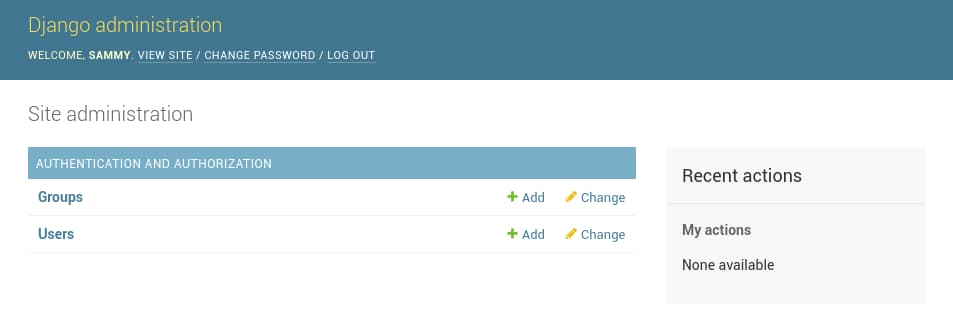
After authenticating, you can access the default Django admin interface:
When you are finished exploring, hit CTRL-C in the terminal window to shut down the development server.
Step 6 — Testing Gunicorn’s Ability to Serve the Project
The last thing you need to do before leaving your virtual environment is test Gunicorn to make sure that it can serve the application. You can do this by entering the project directory and using gunicorn to load the project’s WSGI module:
- cd ~/myprojectdir
- gunicorn --bind 0.0.0.0:8000 myproject.wsgi
This will start Gunicorn on the same interface that the Django development server was running on. You can go back and test the app again in your browser.
Note: The admin interface will not have any of the styling applied since Gunicorn does not know how to find the static CSS content responsible for this.
You passed Gunicorn a module by specifying the relative directory path to Django’s wsgi.py file, which is the entry point to your application, using Python’s module syntax. Inside of this file, a function called application is defined, which is used to communicate with the application.
When you are finished testing, hit CTRL-C in the terminal window to stop Gunicorn.
You’re now finished configuring your Django application. You can back out of our virtual environment by typing:
- deactivate
The virtual environment indicator in your prompt will be removed.
Step 7 — Creating systemd Socket and Service Files for Gunicorn
You have tested that Gunicorn can interact with our Django application, but you should now implement a more robust way of starting and stopping the application server. To accomplish this, you’ll make systemd service and socket files.
The Gunicorn socket will be created at boot and will listen for connections. When a connection occurs, systemd will automatically start the Gunicorn process to handle the connection.
Start by creating and opening a systemd socket file for Gunicorn with sudo privileges:
- sudo nano /etc/systemd/system/gunicorn.socket
Inside, you will create a [Unit] section to describe the socket, a [Socket] section to define the socket location, and an [Install] section to make sure the socket is created at the right time:
[Unit]
Description=gunicorn socket

[Socket]
ListenStream=/run/gunicorn.sock

[Install]
WantedBy=sockets.target
Save and close the file when you are finished.
Next, create and open a systemd service file for Gunicorn with sudo privileges in your text editor. The service filename should match the socket filename with the exception of the extension:
- sudo nano /etc/systemd/system/gunicorn.service
Start with the [Unit] section, which is used to specify metadata and dependencies. Put a description of the service here and tell the init system to only start this after the networking target has been reached. Because your service relies on the socket from the socket file, you need to include a Requires directive to indicate that relationship:
[Unit]
Description=gunicorn daemon
Requires=gunicorn.socket
After=network.target
Next, you’ll open up the [Service] section. Specify the user and group that you want to process to run under. You will give your regular user account ownership of the process since it owns all of the relevant files. You’ll give group ownership to the www-data group so that Nginx can communicate easily with Gunicorn.
Then you’ll map out the working directory and specify the command to use to start the service. In this case, you have to specify the full path to the Gunicorn executable, which is installed within our virtual environment. You will then bind the process to the Unix socket you created within the /run directory so that the process can communicate with Nginx. You log all data to standard output so that the journald process can collect the Gunicorn logs. You can also specify any optional Gunicorn tweaks here. For example, you specified 3 worker processes in this case:
[Unit]
Description=gunicorn daemon
Requires=gunicorn.socket
After=network.target

[Service]
User=sammy
Group=www-data
WorkingDirectory=/home/sammy/myprojectdir
ExecStart=/home/sammy/myprojectdir/myprojectenv/bin/gunicorn \
          --access-logfile - \
          --workers 3 \
          --bind unix:/run/gunicorn.sock \
          myproject.wsgi:application
Finally, you’ll add an [Install] section. This will tell systemd what to link this service to if you enable it to start at boot. You want this service to start when the regular multi-user system is up and running:
[Unit]
Description=gunicorn daemon
Requires=gunicorn.socket
After=network.target

[Service]
User=sammy
Group=www-data
WorkingDirectory=/home/sammy/myprojectdir
ExecStart=/home/sammy/myprojectdir/myprojectenv/bin/gunicorn \
          --access-logfile - \
          --workers 3 \
          --bind unix:/run/gunicorn.sock \
          myproject.wsgi:application

[Install]
WantedBy=multi-user.target
With that, your systemd service file is complete. Save and close it now.
You can now start and enable the Gunicorn socket. This will create the socket file at /run/gunicorn.sock now and at boot. When a connection is made to that socket, systemd will automatically start the gunicorn.service to handle it:
- sudo systemctl start gunicorn.socket
- sudo systemctl enable gunicorn.socket
You can confirm that the operation was successful by checking for the socket file.
Step 8 — Checking for the Gunicorn Socket File
Check the status of the process to find out whether it was able to start:
- sudo systemctl status gunicorn.socket
You should receive an output like this:
Output● gunicorn.socket - gunicorn socket
     Loaded: loaded (/etc/systemd/system/gunicorn.socket; enabled; vendor preset: enabled)
     Active: active (listening) since Mon 2022-04-18 17:53:25 UTC; 5s ago
   Triggers: ● gunicorn.service
     Listen: /run/gunicorn.sock (Stream)
     CGroup: /system.slice/gunicorn.socket

Apr 18 17:53:25 django systemd[1]: Listening on gunicorn socket.
Next, check for the existence of the gunicorn.sock file within the /run directory:
- file /run/gunicorn.sock
Output/run/gunicorn.sock: socket
If the systemctl status command indicated that an error occurred or if you do not find the gunicorn.sock file in the directory, it’s an indication that the Gunicorn socket was not able to be created correctly. Check the Gunicorn socket’s logs by typing:
- sudo journalctl -u gunicorn.socket
Take another look at your /etc/systemd/system/gunicorn.socket file to fix any problems before continuing.
Step 9 — Testing Socket Activation
Currently, if you’ve only started the gunicorn.socket unit, the gunicorn.service will not be active yet since the socket has not yet received any connections. You can check this by typing:
- sudo systemctl status gunicorn
Output○ gunicorn.service - gunicorn daemon
     Loaded: loaded (/etc/systemd/system/gunicorn.service; disabled; vendor preset: enabled)
     Active: inactive (dead)
TriggeredBy: ● gunicorn.socket
To test the socket activation mechanism, you can send a connection to the socket through curl by typing:
- curl --unix-socket /run/gunicorn.sock localhost
You should receive the HTML output from your application in the terminal. This indicates that Gunicorn was started and was able to serve your Django application. You can verify that the Gunicorn service is running by typing:
- sudo systemctl status gunicorn
Output● gunicorn.service - gunicorn daemon
     Loaded: loaded (/etc/systemd/system/gunicorn.service; disabled; vendor preset: enabled)
     Active: active (running) since Mon 2022-04-18 17:54:49 UTC; 5s ago
TriggeredBy: ● gunicorn.socket
   Main PID: 102674 (gunicorn)
      Tasks: 4 (limit: 4665)
     Memory: 94.2M
        CPU: 885ms
     CGroup: /system.slice/gunicorn.service
             ├─102674 /home/sammy/myprojectdir/myprojectenv/bin/python3 /home/sammy/myprojectdir/myprojectenv/bin/gunicorn --access-logfile - --workers 3 --bind unix:/run/gunicorn.sock myproject.wsgi:application
             ├─102675 /home/sammy/myprojectdir/myprojectenv/bin/python3 /home/sammy/myprojectdir/myprojectenv/bin/gunicorn --access-logfile - --workers 3 --bind unix:/run/gunicorn.sock myproject.wsgi:application
             ├─102676 /home/sammy/myprojectdir/myprojectenv/bin/python3 /home/sammy/myprojectdir/myprojectenv/bin/gunicorn --access-logfile - --workers 3 --bind unix:/run/gunicorn.sock myproject.wsgi:application
             └─102677 /home/sammy/myprojectdir/myprojectenv/bin/python3 /home/sammy/myprojectdir/myprojectenv/bin/gunicorn --access-logfile - --workers 3 --bind unix:/run/gunicorn.sock myproject.wsgi:application

Apr 18 17:54:49 django systemd[1]: Started gunicorn daemon.
Apr 18 17:54:49 django gunicorn[102674]: [2022-04-18 17:54:49 +0000] [102674] [INFO] Starting gunicorn 20.1.0
Apr 18 17:54:49 django gunicorn[102674]: [2022-04-18 17:54:49 +0000] [102674] [INFO] Listening at: unix:/run/gunicorn.sock (102674)
Apr 18 17:54:49 django gunicorn[102674]: [2022-04-18 17:54:49 +0000] [102674] [INFO] Using worker: sync
Apr 18 17:54:49 django gunicorn[102675]: [2022-04-18 17:54:49 +0000] [102675] [INFO] Booting worker with pid: 102675
Apr 18 17:54:49 django gunicorn[102676]: [2022-04-18 17:54:49 +0000] [102676] [INFO] Booting worker with pid: 102676
Apr 18 17:54:50 django gunicorn[102677]: [2022-04-18 17:54:50 +0000] [102677] [INFO] Booting worker with pid: 102677
Apr 18 17:54:50 django gunicorn[102675]:  - - [18/Apr/2022:17:54:50 +0000] "GET / HTTP/1.1" 200 10697 "-" "curl/7.81.0"
If the output from curl or the output of systemctl status indicates that a problem occurred, check the logs for additional details:
- sudo journalctl -u gunicorn
Check your /etc/systemd/system/gunicorn.service file for problems. If you make changes to the /etc/systemd/system/gunicorn.service file, reload the daemon to reread the service definition and restart the Gunicorn process by typing:
- sudo systemctl daemon-reload
- sudo systemctl restart gunicorn
Make sure you troubleshoot the above issues before continuing.
Step 10 — Configure Nginx to Proxy Pass to Gunicorn
Now that Gunicorn is set up, you need to configure Nginx to pass traffic to the process.
Start by creating and opening a new server block in Nginx’s sites-available directory:
- sudo nano /etc/nginx/sites-available/myproject
Inside, open up a new server block. You will start by specifying that this block should listen on the normal port 80 and that it should respond to your server’s domain name or IP address:
server {
    listen 80;
    server_name server_domain_or_IP;
}
Next, you will tell Nginx to ignore any problems with finding a favicon. You will also tell it where to find the static assets that you collected in your ~/myprojectdir/static directory. All of these files have a standard URI prefix of “/static”, so you can create a location block to match those requests:
server {
    listen 80;
    server_name server_domain_or_IP;

    location = /favicon.ico { access_log off; log_not_found off; }
    location /static/ {
        root /home/sammy/myprojectdir;
    }
}
Finally, create a location / {} block to match all other requests. Inside of this location, you’ll include the standard proxy_params file included with the Nginx installation and then pass the traffic directly to the Gunicorn socket:
server {
    listen 80;
    server_name server_domain_or_IP;

    location = /favicon.ico { access_log off; log_not_found off; }
    location /static/ {
        root /home/sammy/myprojectdir;
    }

    location / {
        include proxy_params;
        proxy_pass http://unix:/run/gunicorn.sock;
    }
}
Save and close the file when you are finished. Now, you can enable the file by linking it to the sites-enabled directory:
- sudo ln -s /etc/nginx/sites-available/myproject /etc/nginx/sites-enabled
Test your Nginx configuration for syntax errors by typing:
- sudo nginx -t
If no errors are reported, go ahead and restart Nginx by typing:
- sudo systemctl restart nginx
Finally, you need to open up your firewall to normal traffic on port 80. Since you no longer need access to the development server, you can remove the rule to open port 8000 as well:
- sudo ufw delete allow 8000
- sudo ufw allow 'Nginx Full'
You should now be able to go to your server’s domain or IP address to view your application.
Note: After configuring Nginx, the next step should be securing traffic to the server using SSL/TLS. This is important because without it, all information, including passwords are sent over the network in plain text.
If you have a domain name, the easiest way to get an SSL certificate to secure your traffic is using Let’s Encrypt. Follow this guide for Ubuntu 22.04 / Ubuntu 20.04 / Ubuntu 18.04 to set up Let’s Encrypt with Nginx on Ubuntu 22.04. Follow the procedure using the Nginx server block you created in this guide.
Step 11 — Troubleshooting Nginx and Gunicorn
If this last step does not show your application, you will need to troubleshoot your installation.
Nginx Is Showing the Default Page Instead of the Django Application
If Nginx displays the default page instead of proxying to your application, it usually means that you need to adjust the server_name within the /etc/nginx/sites-available/myproject file to point to your server’s IP address or domain name.
Nginx uses the server_name to determine which server block to use to respond to requests. If you receive the default Nginx page, it is a sign that Nginx wasn’t able to match the request to a sever block explicitly, so it’s falling back on the default block defined in /etc/nginx/sites-available/default.
The server_name in your project’s server block must be more specific than the one in the default server block to be selected.
Nginx Is Displaying a 502 Bad Gateway Error Instead of the Django Application
A 502 error indicates that Nginx is unable to successfully proxy the request. A wide range of configuration problems express themselves with a 502 error, so more information is required to troubleshoot properly.
The primary place to look for more information is in Nginx’s error logs. Generally, this will tell you what conditions caused problems during the proxying event. Follow the Nginx error logs by typing:
- sudo tail -F /var/log/nginx/error.log
Now, make another request in your browser to generate a fresh error (try refreshing the page). You should receive a fresh error message written to the log. If you look at the message, it should help you narrow down the problem.
You might receive the following message:
connect() to unix:/run/gunicorn.sock failed (2: No such file or directory)
This indicates that Nginx was unable to find the gunicorn.sock file at the given location. You should compare the proxy_pass location defined within /etc/nginx/sites-available/myproject file to the actual location of the gunicorn.sock file generated by the gunicorn.socket systemd unit.
If you cannot find a gunicorn.sock file within the /run directory, it generally means that the systemd socket file was unable to create it. Go back to the section on checking for the Gunicorn socket file to step through the troubleshooting steps for Gunicorn.
connect() to unix:/run/gunicorn.sock failed (13: Permission denied)
This indicates that Nginx was unable to connect to the Gunicorn socket because of permissions problems. This can happen when the procedure is followed using the root user instead of a sudo user. While systemd is able to create the Gunicorn socket file, Nginx is unable to access it.
This can happen if there are limited permissions at any point between the root directory (/) the gunicorn.sock file. You can review the permissions and ownership values of the socket file and each of its parent directories by passing the absolute path to your socket file to the namei command:
- namei -l /run/gunicorn.sock
Outputf: /run/gunicorn.sock
drwxr-xr-x root root /
drwxr-xr-x root root run
srw-rw-rw- root root gunicorn.sock
The output displays the permissions of each of the directory components. By looking at the permissions (first column), owner (second column) and group owner (third column), you can figure out what type of access is allowed to the socket file.
In the above example, the socket file and each of the directories leading up to the socket file have world read and execute permissions (the permissions column for the directories end with r-x instead of ---). The Nginx process should be able to access the socket successfully.
If any of the directories leading up to the socket do not have world read and execute permission, Nginx will not be able to access the socket without allowing world read and execute permissions or making sure group ownership is given to a group that Nginx is a part of.
Django Is Displaying: “could not connect to server: Connection refused”
One message that you may receive from Django when attempting to access parts of the application in the web browser is:
OperationalError at /admin/login/
could not connect to server: Connection refused
    Is the server running on host "localhost" (127.0.0.1) and accepting
    TCP/IP connections on port 5432?
This indicates that Django is unable to connect to the Postgres database. Make sure that the Postgres instance is running by typing:
- sudo systemctl status postgresql
If it is not, you can start it and enable it to start automatically at boot (if it is not already configured to do so) by typing:
- sudo systemctl start postgresql
- sudo systemctl enable postgresql
If you are still having issues, make sure the database settings defined in the ~/myprojectdir/myproject/settings.py file are correct.
Further Troubleshooting
For additional troubleshooting, the logs can help narrow down root causes. Check each of them in turn and look for messages indicating problem areas.
The following logs may be helpful:
- Check the Nginx process logs by typing:
sudo journalctl -u nginx - Check the Nginx access logs by typing:
sudo less /var/log/nginx/access.log - Check the Nginx error logs by typing:
sudo less /var/log/nginx/error.log - Check the Gunicorn application logs by typing:
sudo journalctl -u gunicorn - Check the Gunicorn socket logs by typing:
sudo journalctl -u gunicorn.socket
As you update your configuration or application, you will likely need to restart the processes to adjust to your changes.
If you update your Django application, you can restart the Gunicorn process to pick up the changes by typing:
- sudo systemctl restart gunicorn
If you change Gunicorn socket or service files, reload the daemon and restart the process by typing:
- sudo systemctl daemon-reload
- sudo systemctl restart gunicorn.socket gunicorn.service
If you change the Nginx server block configuration, test the configuration and then Nginx by typing:
- sudo nginx -t && sudo systemctl restart nginx
These commands are helpful for picking up changes as you adjust your configuration.
Advanced Performance Optimizations
Gunicorn Performance Tuning
The default Gunicorn configuration works for basic deployments, but production applications handling thousands of concurrent users require careful tuning. Here’s why each parameter matters and how to optimize for your specific workload:
Understanding Gunicorn Workers: Gunicorn uses a master-worker process model where the master process manages worker processes that handle actual requests. The number of workers directly impacts your application’s ability to handle concurrent requests, but more isn’t always better.
[Unit]
Description=gunicorn daemon
Requires=gunicorn.socket
After=network.target

[Service]
User=sammy
Group=www-data
WorkingDirectory=/home/sammy/myprojectdir
ExecStart=/home/sammy/myprojectdir/myprojectenv/bin/gunicorn \
          --access-logfile - \
          --error-logfile - \
          --workers 4 \
          --worker-class gevent \
          --worker-connections 1000 \
          --max-requests 1000 \
          --max-requests-jitter 100 \
          --timeout 30 \
          --keep-alive 2 \
          --bind unix:/run/gunicorn.sock \
          myproject.wsgi:application

[Install]
WantedBy=multi-user.target
Key Performance Parameters Explained:
-
--workers 4: The (2 × CPU cores) + 1 formula works well for CPU-bound applications, but Django apps are often I/O-bound (waiting for database queries, external APIs). For I/O-heavy applications, you can safely use 2-4x your CPU core count. Monitor your CPU usage to find the sweet spot. -
--worker-class gevent: This uses green threads (cooperative multitasking) instead of OS threads. Gevent is perfect for Django apps that make many database queries or API calls because it allows a single worker to handle multiple requests concurrently while waiting for I/O operations. This can increase throughput by 3-5x compared to synchronous workers. -
--worker-connections 1000: This limits how many concurrent connections each gevent worker can handle. With 4 workers and 1000 connections each, you can theoretically handle 4000 concurrent connections. Set this based on your expected traffic and available memory. -
--max-requests 1000: Memory leaks in long-running Python processes are common. This parameter restarts workers after 1000 requests to prevent memory accumulation. The jitter parameter (100) adds randomness so workers don’t all restart simultaneously, which would cause a brief service interruption. -
--timeout 30: This kills workers that take longer than 30 seconds to respond. Set this based on your slowest expected operation. For most Django apps, 30 seconds is reasonable, but adjust based on your specific use case. -
--keep-alive 2: This keeps HTTP connections alive for 2 seconds after sending a response, reducing connection overhead for clients making multiple requests.
Nginx Performance Optimization
Nginx acts as a reverse proxy and static file server, handling client connections and serving static assets directly. This configuration optimizes Nginx for high-performance Django applications:
Why These Optimizations Matter:
- Static file serving: Nginx serves static files (CSS, JS, images) much faster than Django
- Connection handling: Nginx can handle thousands of concurrent connections efficiently
- Caching: Reduces load on your Django application by serving cached content
- Compression: Reduces bandwidth usage and improves page load times
server {
    listen 80;
    server_name server_domain_or_IP;

    # Security headers
    add_header X-Frame-Options "SAMEORIGIN" always;
    add_header X-Content-Type-Options "nosniff" always;
    add_header X-XSS-Protection "1; mode=block" always;
    add_header Referrer-Policy "no-referrer-when-downgrade" always;

    # Gzip compression
    gzip on;
    gzip_vary on;
    gzip_min_length 1024;
    gzip_proxied any;
    gzip_comp_level 6;
    gzip_types
        text/plain
        text/css
        text/xml
        text/javascript
        application/json
        application/javascript
        application/xml+rss
        application/atom+xml
        image/svg+xml;

    # Static files with caching
    location = /favicon.ico {
        access_log off;
        log_not_found off;
        expires 1y;
        add_header Cache-Control "public, immutable";
    }

    location /static/ {
        root /home/sammy/myprojectdir;
        expires 1y;
        add_header Cache-Control "public, immutable";
        access_log off;
    }

    # Media files
    location /media/ {
        root /home/sammy/myprojectdir;
        expires 1M;
        add_header Cache-Control "public";
    }

    # Main application
    location / {
        include proxy_params;
        proxy_pass http://unix:/run/gunicorn.sock;
        proxy_set_header Host $host;
        proxy_set_header X-Real-IP $remote_addr;
        proxy_set_header X-Forwarded-For $proxy_add_x_forwarded_for;
        proxy_set_header X-Forwarded-Proto $scheme;
        proxy_connect_timeout 30s;
        proxy_send_timeout 30s;
        proxy_read_timeout 30s;
    }
}
Configuration Breakdown:
Security Headers:
X-Frame-Options "SAMEORIGIN": Prevents clickjacking attacks by controlling if your site can be embedded in framesX-Content-Type-Options "nosniff": Prevents browsers from MIME-sniffing responses, reducing XSS attack vectorsX-XSS-Protection "1; mode=block": Enables browser’s built-in XSS protectionReferrer-Policy "no-referrer-when-downgrade": Controls how much referrer information is sent with requests
Gzip Compression:
gzip on: Enables compression for text-based filesgzip_comp_level 6: Compression level (1-9, where 6 provides good balance between CPU usage and compression ratio)gzip_types: Specifies which file types to compress. Text files compress well (60-80% reduction), while images and videos are already compressed
Static File Caching:
expires 1y: Tells browsers to cache static files for 1 yearCache-Control "public, immutable": Indicates files won’t change, allowing aggressive cachingaccess_log off: Disables logging for static files to reduce I/O overhead
Proxy Configuration:
proxy_set_header: Forwards client information to Django for proper request handlingproxy_connect_timeout 30s: Maximum time to establish connection to Gunicornproxy_send_timeout 30s: Maximum time to send request to Gunicornproxy_read_timeout 30s: Maximum time to wait for response from Gunicorn
PostgreSQL Performance Tuning
PostgreSQL’s default configuration is conservative and designed to work on any hardware. For production Django applications, these optimizations can improve database performance by 2-5x:
Why Database Tuning Matters:
- Memory allocation: Proper memory settings reduce disk I/O by keeping frequently accessed data in RAM
- Connection management: Optimizing connection limits prevents resource exhaustion
- Query performance: Better logging helps identify slow queries that need optimization
# Memory settings
shared_buffers = 256MB
effective_cache_size = 1GB
work_mem = 4MB
maintenance_work_mem = 64MB

# Connection settings
max_connections = 100
listen_addresses = 'localhost'

# Logging
log_statement = 'mod'
log_min_duration_statement = 1000
log_line_prefix = '%t [%p]: [%l-1] user=%u,db=%d,app=%a,client=%h '

# Checkpoint settings
checkpoint_completion_target = 0.9
wal_buffers = 16MB
PostgreSQL Configuration Explained:
Memory Settings:
-
shared_buffers = 256MB: This is PostgreSQL’s main memory cache. Set to 25% of your total RAM for dedicated database servers, or 15% for shared servers. This cache stores frequently accessed data pages, reducing disk I/O. -
effective_cache_size = 1GB: Tells PostgreSQL how much memory is available for caching (including OS cache). Set to 75% of total RAM. This helps the query planner make better decisions about index usage. -
work_mem = 4MB: Memory used for sorting, hash joins, and other operations. Each connection can use this amount. For Django apps with complex queries, increase to 8-16MB, but monitor total usage (work_mem × max_connections). -
maintenance_work_mem = 64MB: Memory for maintenance operations like VACUUM, CREATE INDEX, and ALTER TABLE. Can be set much higher than work_mem (up to 2GB) since only one operation uses it at a time.
Connection Settings:
-
max_connections = 100: Maximum concurrent connections. Each connection uses memory, so balance this with your application’s needs. For Django apps, 50-100 connections is usually sufficient. -
listen_addresses = 'localhost': Only listen on localhost for security. Change to ‘*’ only if you need remote connections (not recommended for production).
Logging Settings:
-
log_statement = 'mod': Logs all data-modifying statements (INSERT, UPDATE, DELETE). Helps with debugging and performance analysis. -
log_min_duration_statement = 1000: Logs queries taking longer than 1 second. Essential for identifying slow queries that need optimization. -
log_line_prefix: Customizes log format to include timestamp, process ID, user, database, and client IP for better debugging.
Checkpoint Settings:
-
checkpoint_completion_target = 0.9: Spreads checkpoint I/O over 90% of the checkpoint interval, reducing I/O spikes. -
wal_buffers = 16MB: Write-ahead log buffers. Set to 16MB for better performance with high write loads.
AI Integration and Modern Deployment Strategies
Integrating AI Capabilities into Django
Modern Django applications can leverage AI and machine learning capabilities to provide intelligent features like content recommendations, automated customer support, and predictive analytics. Here’s how to integrate them effectively:
Why Integrate AI with Django:
- Enhanced User Experience: AI can personalize content, predict user behavior, and automate routine tasks
- Business Intelligence: Machine learning models can analyze data patterns and provide actionable insights
- Automation: AI can handle repetitive tasks like content moderation, customer support, and data processing
- Competitive Advantage: AI-powered features differentiate your application in the market
1. Setting Up AI Dependencies
Add AI libraries to your virtual environment:
- pip install tensorflow scikit-learn pandas numpy openai langchain
2. Creating an AI Service Layer
Create a new Django app for AI functionality:
- python manage.py startapp ai_services
Add to your settings.py:
INSTALLED_APPS = [
    # ... existing apps
    'ai_services',
]
3. Implementing AI Features
Create AI service models in ai_services/models.py:
from django.db import models
from django.contrib.auth.models import User

class AIModel(models.Model):
    name = models.CharField(max_length=100)
    model_type = models.CharField(max_length=50)
    version = models.CharField(max_length=20)
    created_at = models.DateTimeField(auto_now_add=True)
    is_active = models.BooleanField(default=True)

class PredictionLog(models.Model):
    user = models.ForeignKey(User, on_delete=models.CASCADE)
    model = models.ForeignKey(AIModel, on_delete=models.CASCADE)
    input_data = models.JSONField()
    prediction = models.JSONField()
    confidence = models.FloatField()
    created_at = models.DateTimeField(auto_now_add=True)
4. AI Service Implementation
The AI service layer acts as a bridge between your Django application and external AI services. This pattern keeps AI logic separate from your business logic, making it easier to test, maintain, and switch between different AI providers:
Why Use a Service Layer:
- Separation of Concerns: Keeps AI logic separate from Django views and models
- Testability: Easy to mock AI services for unit testing
- Flexibility: Can switch between different AI providers without changing your views
- Error Handling: Centralized error handling for AI service failures
- Caching: Can implement caching strategies for expensive AI operations
Create ai_services/services.py:
import openai
from django.conf import settings
import json

class AIService:
    def __init__(self):
        openai.api_key = settings.OPENAI_API_KEY

    def generate_text(self, prompt, max_tokens=150):
        """Generate text using OpenAI GPT"""
        try:
            response = openai.Completion.create(
                engine="text-davinci-003",
                prompt=prompt,
                max_tokens=max_tokens,
                temperature=0.7
            )
            return response.choices[0].text.strip()
        except Exception as e:
            return f"Error: {str(e)}"

    def analyze_sentiment(self, text):
        """Analyze text sentiment using a simple model"""
        # This is a placeholder - implement your actual sentiment analysis
        positive_words = ['good', 'great', 'excellent', 'amazing', 'wonderful']
        negative_words = ['bad', 'terrible', 'awful', 'horrible', 'disappointing']

        text_lower = text.lower()
        positive_count = sum(1 for word in positive_words if word in text_lower)
        negative_count = sum(1 for word in negative_words if word in text_lower)

        if positive_count > negative_count:
            return {'sentiment': 'positive', 'confidence': 0.8}
        elif negative_count > positive_count:
            return {'sentiment': 'negative', 'confidence': 0.8}
        else:
            return {'sentiment': 'neutral', 'confidence': 0.6}
5. Docker Deployment for AI Applications
Containerizing your Django application with AI capabilities provides several advantages for production deployment:
Why Use Docker for AI Applications:
- Consistency: Ensures your AI models work the same way across development, staging, and production
- Scalability: Easy to scale individual services (web app, AI models, databases) independently
- Dependency Management: Isolates AI library dependencies that might conflict with other applications
- Deployment Simplicity: One command deploys your entire application stack
- Resource Isolation: Prevents AI model memory usage from affecting other applications
Dockerfile Strategy: The multi-stage build approach optimizes the final image size by separating build dependencies from runtime requirements. This is especially important for AI applications that often have large Python packages.
Create a Dockerfile for containerized deployment:
FROM python:3.11-slim

# Set environment variables
ENV PYTHONDONTWRITEBYTECODE=1
ENV PYTHONUNBUFFERED=1

# Set work directory
WORKDIR /app

# Install system dependencies
RUN apt-get update \
    && apt-get install -y --no-install-recommends \
        postgresql-client \
        build-essential \
        libpq-dev \
    && rm -rf /var/lib/apt/lists/*

# Install Python dependencies
COPY requirements.txt .
RUN pip install --no-cache-dir -r requirements.txt

# Copy project
COPY . .

# Collect static files
RUN python manage.py collectstatic --noinput

# Expose port
EXPOSE 8000

# Run the application
CMD ["gunicorn", "--bind", "0.0.0.0:8000", "myproject.wsgi:application"]
Create docker-compose.yml:
version: '3.8'

services:
  db:
    image: postgres:15
    volumes:
      - postgres_data:/var/lib/postgresql/data/
    environment:
      - POSTGRES_DB=myproject
      - POSTGRES_USER=myprojectuser
      - POSTGRES_PASSWORD=password
    ports:
      - "5432:5432"

  web:
    build: .
    command: gunicorn --bind 0.0.0.0:8000 myproject.wsgi:application
    volumes:
      - .:/app
    ports:
      - "8000:8000"
    depends_on:
      - db
    environment:
      - DEBUG=0
      - DATABASE_URL=postgresql://myprojectuser:password@db:5432/myproject

  nginx:
    image: nginx:alpine
    ports:
      - "80:80"
      - "443:443"
    volumes:
      - ./nginx.conf:/etc/nginx/nginx.conf
      - ./static:/app/static
    depends_on:
      - web

volumes:
  postgres_data:
Monitoring and Observability
1. Application Performance Monitoring
Install monitoring tools:
- pip install django-extensions django-debug-toolbar django-silk
Add to settings.py:
INSTALLED_APPS = [
    # ... existing apps
    'django_extensions',
    'debug_toolbar',
    'silk',
]

MIDDLEWARE = [
    'silk.middleware.SilkyMiddleware',
    'debug_toolbar.middleware.DebugToolbarMiddleware',
    # ... existing middleware
]

# Silk configuration
SILKY_PYTHON_PROFILER = True
SILKY_PYTHON_PROFILER_BINARY = True
2. Logging Configuration
Enhanced logging setup in settings.py:
LOGGING = {
    'version': 1,
    'disable_existing_loggers': False,
    'formatters': {
        'verbose': {
            'format': '{levelname} {asctime} {module} {process:d} {thread:d} {message}',
            'style': '{',
        },
        'simple': {
            'format': '{levelname} {message}',
            'style': '{',
        },
    },
    'handlers': {
        'file': {
            'level': 'INFO',
            'class': 'logging.FileHandler',
            'filename': '/var/log/django/myproject.log',
            'formatter': 'verbose',
        },
        'console': {
            'level': 'DEBUG',
            'class': 'logging.StreamHandler',
            'formatter': 'simple',
        },
    },
    'root': {
        'handlers': ['console', 'file'],
        'level': 'INFO',
    },
    'loggers': {
        'django': {
            'handlers': ['console', 'file'],
            'level': 'INFO',
            'propagate': False,
        },
        'myproject': {
            'handlers': ['console', 'file'],
            'level': 'DEBUG',
            'propagate': False,
        },
    },
}
Scaling and High Availability
Horizontal Scaling with Load Balancing
As your Django application grows, you’ll need to scale beyond a single server to handle increased traffic. Horizontal scaling involves adding more application servers and distributing load among them:
Why Horizontal Scaling Matters:
- Traffic Handling: Multiple servers can handle more concurrent users than a single server
- Fault Tolerance: If one server fails, others continue serving requests
- Geographic Distribution: Servers in different regions reduce latency for global users
- Resource Optimization: Different servers can be optimized for different workloads
Load Balancing Strategies:
- Round Robin: Distributes requests evenly across servers
- Least Connections: Routes to the server with the fewest active connections
- Weighted: Gives more traffic to more powerful servers
- Health Checks: Automatically removes unhealthy servers from rotation
1. Multiple Gunicorn Instances
Create multiple Gunicorn services on different ports:
[Unit]
Description=gunicorn daemon instance 1
After=network.target

[Service]
User=sammy
Group=www-data
WorkingDirectory=/home/sammy/myprojectdir
ExecStart=/home/sammy/myprojectdir/myprojectenv/bin/gunicorn \
          --workers 2 \
          --bind 127.0.0.1:8001 \
          myproject.wsgi:application

[Install]
WantedBy=multi-user.target
2. Nginx Load Balancer Configuration
upstream django_backend {
    least_conn;
    server 127.0.0.1:8000 weight=3;
    server 127.0.0.1:8001 weight=3;
    server 127.0.0.1:8002 weight=2;
    keepalive 32;
}

server {
    listen 80;
    server_name server_domain_or_IP;

    location / {
        proxy_pass http://django_backend;
        proxy_set_header Host $host;
        proxy_set_header X-Real-IP $remote_addr;
        proxy_set_header X-Forwarded-For $proxy_add_x_forwarded_for;
        proxy_set_header X-Forwarded-Proto $scheme;
    }
}
Database Scaling Strategies
1. Read Replicas
Set up PostgreSQL read replicas for read-heavy workloads:
# On replica server
sudo -u postgres pg_basebackup -h primary_server -D /var/lib/postgresql/14/main -U replicator -v -P -W
2. Connection Pooling
Implement PgBouncer for connection pooling:
sudo apt install pgbouncer
Configure /etc/pgbouncer/pgbouncer.ini:
[databases]
myproject = host=localhost port=5432 dbname=myproject

[pgbouncer]
listen_port = 6432
listen_addr = 127.0.0.1
auth_type = md5
auth_file = /etc/pgbouncer/userlist.txt
pool_mode = transaction
max_client_conn = 100
default_pool_size = 20
Caching Strategies
Caching is crucial for high-performance Django applications. It reduces database load, improves response times, and allows your application to handle more concurrent users:
Why Caching Matters:
- Database Load Reduction: Cached data reduces expensive database queries
- Response Time Improvement: Cached responses are served 10-100x faster than database queries
- Cost Efficiency: Fewer database queries mean lower infrastructure costs
- User Experience: Faster page loads improve user satisfaction and SEO rankings
Caching Layers:
- Application-level caching: Django’s cache framework for view results and database queries
- Database query caching: PostgreSQL’s built-in query result caching
- Reverse proxy caching: Nginx caching for static and dynamic content
- CDN caching: Edge caching for global content delivery
1. Redis Caching
Redis is an in-memory data store that’s perfect for Django caching because it’s fast, supports complex data structures, and can handle high concurrency:
Why Redis for Django Caching:
- Speed: In-memory storage provides microsecond response times
- Persistence: Can persist data to disk for durability
- Data Structures: Supports strings, lists, sets, and hashes for complex caching needs
- Clustering: Can be clustered for high availability and scalability
- Memory Management: Automatic eviction policies prevent memory overflow
sudo apt install redis-server
pip install redis django-redis
Update settings.py:
CACHES = {
    'default': {
        'BACKEND': 'django_redis.cache.RedisCache',
        'LOCATION': 'redis://127.0.0.1:6379/1',
        'OPTIONS': {
            'CLIENT_CLASS': 'django_redis.client.DefaultClient',
        }
    }
}

# Session storage
SESSION_ENGINE = 'django.contrib.sessions.backends.cache'
SESSION_CACHE_ALIAS = 'default'
2. Nginx Caching
Implement Nginx caching for static and dynamic content:
# Cache zone definition
proxy_cache_path /var/cache/nginx levels=1:2 keys_zone=my_cache:10m max_size=10g inactive=60m use_temp_path=off;

server {
    # ... existing configuration

    location / {
        proxy_cache my_cache;
        proxy_cache_valid 200 302 10m;
        proxy_cache_valid 404 1m;
        proxy_cache_use_stale error timeout updating http_500 http_502 http_503 http_504;
        proxy_cache_lock on;

        proxy_pass http://django_backend;
        # ... other proxy settings
    }
}
Frequently Asked Questions (FAQs)
1. Why use Gunicorn with Django instead of Django’s built-in development server?
Django’s built-in development server is designed for development and testing only. It’s single-threaded, not optimized for performance, and lacks production-ready features. Gunicorn provides:
- Multi-worker process support: Handles multiple requests simultaneously
- Production-grade stability: Designed for 24/7 operation
- WSGI compliance: Standard interface for Python web applications
- Process management: Automatic worker restarts and load balancing
- Security features: Better handling of concurrent connections and request processing
For production environments, Gunicorn can handle thousands of concurrent requests while Django’s development server would struggle with even moderate traffic.
2. Can I use PostgreSQL instead of SQLite for Django production deployments?
Absolutely, and it’s highly recommended for production deployments. Here’s why PostgreSQL is superior to SQLite for production:
PostgreSQL Advantages:
- Concurrent connections: Supports multiple simultaneous database connections
- ACID compliance: Full transaction support with rollback capabilities
- Advanced data types: JSON, arrays, custom types, and full-text search
- Performance: Optimized for high-traffic applications with proper indexing
- Scalability: Can handle large datasets and complex queries efficiently
- Security: Advanced user management, row-level security, and encryption
SQLite Limitations:
- Single-writer limitation
- No concurrent write operations
- Limited scalability
- Basic data type support
For production Django applications, PostgreSQL provides the reliability, performance, and features necessary for enterprise-level deployments.
3. How do I configure Nginx for Django on Ubuntu for optimal performance?
Nginx configuration for Django involves several optimization strategies:
1. Static File Handling:
location /static/ {
    root /path/to/your/project;
    expires 1y;
    add_header Cache-Control "public, immutable";
    access_log off;
}
2. Gzip Compression:
gzip on;
gzip_vary on;
gzip_min_length 1024;
gzip_comp_level 6;
gzip_types text/plain text/css application/json application/javascript;
3. Proxy Configuration:
location / {
    proxy_pass http://unix:/run/gunicorn.sock;
    proxy_set_header Host $host;
    proxy_set_header X-Real-IP $remote_addr;
    proxy_set_header X-Forwarded-For $proxy_add_x_forwarded_for;
    proxy_connect_timeout 30s;
    proxy_send_timeout 30s;
    proxy_read_timeout 30s;
}
4. Security Headers:
add_header X-Frame-Options "SAMEORIGIN" always;
add_header X-Content-Type-Options "nosniff" always;
add_header X-XSS-Protection "1; mode=block" always;
4. What is the difference between Gunicorn and uWSGI for Django deployment?
Both are WSGI servers, but they have different strengths:
Gunicorn:
- Simplicity: Easy to configure and deploy
- Python-native: Written in Python, integrates well with Python ecosystem
- Worker management: Automatic worker process management
- Memory efficiency: Lower memory footprint
- Best for: Most Django applications, especially those with moderate traffic
uWSGI:
- Performance: Generally faster for high-traffic applications
- Language agnostic: Supports multiple languages (Python, Ruby, Perl, etc.)
- Advanced features: More configuration options and plugins
- Memory usage: Higher memory consumption but better performance
- Best for: High-traffic applications requiring maximum performance
Recommendation: Start with Gunicorn for most Django applications. Consider uWSGI only if you have specific performance requirements that Gunicorn cannot meet.
5. How do I secure my Django app with SSL on Ubuntu?
Securing your Django application with SSL involves several steps:
1. Install Certbot:
sudo apt install certbot python3-certbot-nginx
2. Obtain SSL Certificate:
sudo certbot --nginx -d yourdomain.com
3. Configure Django for HTTPS:
# settings.py
SECURE_SSL_REDIRECT = True
SECURE_HSTS_SECONDS = 31536000
SECURE_HSTS_INCLUDE_SUBDOMAINS = True
SECURE_HSTS_PRELOAD = True
SECURE_CONTENT_TYPE_NOSNIFF = True
SECURE_BROWSER_XSS_FILTER = True
SESSION_COOKIE_SECURE = True
CSRF_COOKIE_SECURE = True
4. Update Nginx Configuration:
server {
    listen 443 ssl http2;
    server_name yourdomain.com;

    ssl_certificate /etc/letsencrypt/live/yourdomain.com/fullchain.pem;
    ssl_certificate_key /etc/letsencrypt/live/yourdomain.com/privkey.pem;

    # SSL configuration
    ssl_protocols TLSv1.2 TLSv1.3;
    ssl_ciphers ECDHE-RSA-AES256-GCM-SHA512:DHE-RSA-AES256-GCM-SHA512;
    ssl_prefer_server_ciphers off;
}
5. Set up automatic renewal:
sudo crontab -e
# Add: 0 12 * * * /usr/bin/certbot renew --quiet
This ensures your Django application is properly secured with SSL/TLS encryption for all communications.
Conclusion
In this comprehensive tutorial, you’ve successfully set up a production-ready Django application with PostgreSQL, Nginx, and Gunicorn on Ubuntu. You’ve learned how to:
- Configure a robust database setup with PostgreSQL for production environments
- Implement advanced performance optimizations for Gunicorn and Nginx
- Integrate AI capabilities and modern deployment strategies using Docker
- Set up comprehensive monitoring and logging systems
- Secure your application with SSL/TLS encryption
- Scale your application for high-traffic scenarios
Django makes creating projects and applications simple by providing many of the common pieces, allowing you to focus on the unique elements. By leveraging the advanced tool chain and optimization techniques described in this article, you can deploy scalable, secure, and intelligent applications that can handle enterprise-level traffic.
Looking for more Django deployment strategies and advanced configurations? Check out these recommended tutorials:
- How to Use PostgreSQL with Your Django Application on Ubuntu 22.04
- How to Use PostgreSQL with Your Django Application on Ubuntu 20.04
- SQLite vs MySQL vs PostgreSQL: A Comparison of Relational Database Management Systems
Explore these tutorials for deeper insights and next steps in your Django deployment journey.
Thanks for learning with the DigitalOcean Community. Check out our offerings for compute, storage, networking, and managed databases.
About the author
Anish is a Sr Technical Content Strategist and Team Lead at DigitalOcean with 7+ years of experience as an DevOps SRE at Nutanix and Cloud consultant at AMEX, and technical writing at DOCN, and shipping deep infra and AI inference tutorials that help developers deploy production‑ready applications on DigitalOcean.
Still looking for an answer?
This textbox defaults to using Markdown to format your answer.
You can type !ref in this text area to quickly search our full set of tutorials, documentation & marketplace offerings and insert the link!
I have trouble loading my static files following this instruction. Am I the only one?
Great article! Lead me down the esoteric domain of unix sockets though, but I loved every bit.
Is it secure to have the user in ‘/etc/systemd/system/gunicorn.service’ the same as the system user with sudo privileges? Is it better to run gunicorn with a user that has fewer permissions? If so, could you provide some guidance on how to do so?
Is it secure to have the user in ‘/etc/systemd/system/gunicorn.service’ the same as the system user with sudo privileges? Is it better to run gunicorn with a user that has fewer permissions? If so, could you provide some guidance on how to do so?
I am getting 403 permission errors for the static folder. I can’t figure it out. From what I read, i have change the static folder to var/www/html/static. I have chowned the folder to the nginx user www-data. But none of it is working. This article does not mention any of this. Anyone know what I can do?
Solution to: Nginx not serving static files
Just want to leave this here because a lot of people run into this problem. This guide doesn’t seem to include the fact that nginx requires permission to the static folder and the parent folders. Through some tinkering this is what worked.
sudo chown -R www-data:www-data /home/myprojectuser/myproject/static/
sudo chmod -R 755 /home/myprojectuser/myproject/static/
sudo chmod 755 /home/myprojectuser/
sudo chmod 755 /home/myprojectuser/myproject/
I run into this problem every time I deploy a new server using this great guide hope this helps you.
I just wanted to express my appreciation to the author for this excellent article and to all the people who contributed solutions to the issues. After many years as a hobbyist teaching myself Django, SQL, CSS, javascript and more, I’ve finally got a working website on the internet.
Great Article. I am using this to setup my django application. Here is my first correction. There was error (django.db.migrations.exceptions.MigrationSchemaMissing: Unable to create the django_migrations table (permission denied for schema public LINE 1: CREATE TABLE “django_migrations” (“id” bigint NOT NULL PRIMA…)in running $python manage.py migrate (due to change postgress public schema rules), so i did following to resolve it.
- Connect to postgress:
$sudo -u postgres psql - Connect to your db (for Django project [‘myproject’ is used in this article): postgres=#
\connect myproject - Grant permission of public schema to your db user: myproject=#
GRANT ALL ON SCHEMA public TO myprojectuser; - Exit: \q
 This work is licensed under a Creative Commons Attribution-NonCommercial- ShareAlike 4.0 International License.
Become a contributor for community
Get paid to write technical tutorials and select a tech-focused charity to receive a matching donation.

DigitalOcean Documentation
Full documentation for every DigitalOcean product.

Resources for startups and AI-native businesses
The Wave has everything you need to know about building a business, from raising funding to marketing your product.
The developer cloud
Scale up as you grow — whether you're running one virtual machine or ten thousand.

Start building today
From GPU-powered inference and Kubernetes to managed databases and storage, get everything you need to build, scale, and deploy intelligent applications.
