By Meghna Gangwar

WordPress is one of the most popular and open source content management system (CMS) with a whopping 60% of market share as compared with other CMS like Drupal or Joomla. WordPress can be used to develop any kind of website, be it for a blog, a small business or for a large enterprise. With its free and premium plugins and themes, a WordPress site can be extended quickly to offer advanced functionalities. It is also possible to develop a custom theme and plugins from scratch that will embed unique functionalities to any WordPress site. In this tutorial, we will cover the installation of WordPress CMS using LEMP stack i.e with NGINX as a web server in Ubuntu 18.04.
Prerequisites
- You can open an SSH session in your Ubuntu 18.04 server using root or a sudo enabled user.
- A registered domain name or subdomain to point to the WordPress installation.
- Domain DNS A-record pointing to your server’s IP address.
This tutorial requires the use of domain names. Whenever you see either the SUBDOMAIN, DOMAIN, or TLD variables, replace them with your own domain name values.
Update your Ubuntu 18.04
Before you start installing NGINX, it is always recommended to upgrade your Ubuntu 18.04 to the latest. The following apt-get commands will do it for you.
# apt-get update
# apt-get upgrade
The first command will update the list of available packages and their versions and the second one will actually install the newer versions of the packages that you have. Once you are done with upgrading the system, check the release version of your Ubuntu system with the following command.
# lsb_release -a
No LSB modules are available.
Distributor ID: Ubuntu
Description:    Ubuntu 18.04.2 LTS
Release:        18.04
Codename:       bionic
Install WordPress with NGINX on Ubuntu
Follow the steps below to install the WordPress with NGINX on Ubuntu server.
Step 1: Install NGINX
NGINX is available in the default repositories of Ubuntu and can be installed with a single line command as shown below.
# apt-get install nginx
Once NGINX has been installed, it will run automatically. You can verify that by the following systemctl command.
 # systemctl status nginx
 ● nginx.service - A high-performance web server and a reverse proxy server
   Loaded: loaded (/lib/systemd/system/nginx.service; enabled; vendor preset: enabled)
   Active: active (running) since Tue 2019-02-12 09:12:08 UTC; 11s ago
     Docs: man:nginx(8)
  Process: 17726 ExecStart=/usr/sbin/nginx -g daemon on; master_process on; (code=exited, status=0/SUCCESS)
  Process: 17714 ExecStartPre=/usr/sbin/nginx -t -q -g daemon on; master_process on; (code=exited, status=0/SUCCESS)
 Main PID: 17729 (nginx)
    Tasks: 2 (limit: 1152)
   CGroup: /system.slice/nginx.service
           ├─17729 nginx: master process /usr/sbin/nginx -g daemon on; master_process on;
           └─17732 nginx: worker process
The output of the above command verifies that NGINX is loaded and active with PID of 17729.
Step 2: Install MariaDB
MariaDB is available in the default repository of Ubuntu. It is also possible to install it from the separate MariaDB repository. But we will stick to install it from default repository of Ubuntu. Issue the following commands from the terminal to install it and optionally you can run mysql_secure_installation to make it secure.
# apt-get install mariadb-server
# systemctl enable mariadb.service
# mysql_secure_installation
The default password for MariaDB root user is blank. To update the password of the root user, get the MySQL prompt and update the password by issuing following command from MySQL shell.
$ mysql -u root -p
MariaDB [(none)]> use mysql;
MariaDB [mysql]> update user SET PASSWORD=PASSWORD("Passw0rd!") WHERE USER='root';
The installation of MariaDB is complete in your Ubuntu 18.04 system. Now proceed with installing PHP in the next step.
Step 3: Install PHP
The latest version of PHP (7.2) is available in the repositories of Ubuntu 18.04 and is the default candidate for installation so simply run the following command in terminal to install it.
# apt-get install php7.2 php7.2-cli php7.2-fpm php7.2-mysql php7.2-json php7.2-opcache php7.2-mbstring php7.2-xml php7.2-gd php7.2-curl
Apart from installing php7.2, the above apt-get command also installs few other packages as well like MySQL, XML, Curl and GD packages and makes sure that your WordPress site can interact with the database, support for XMLRPC, and also to crop and resize images automatically. Further, the php-fpm (Fast process manager) package is needed by NGINX to process PHP pages of your WordPress installation. Remember that FPM service will run automatically once the installation of PHP is over.
Step 4: Create WordPress Database
Once the MariaDB is installed and configured in your server, create a user and a database especially for WordPress installation. To do that, log in to the MariaDB server using mysql -u root -p command and complete the steps as described below.
$ mysql -u root -p
Enter password:

MariaDB [mysql]> CREATE DATABASE wordpress_db;
Query OK, 1 row affected (0.00 sec)

MariaDB [mysql]> GRANT ALL ON wordpress_db.* TO 'wpuser'@'localhost' IDENTIFIED BY 'Passw0rd!' WITH GRANT OPTION;
Query OK, 0 rows affected (0.00 sec)

MariaDB [mysql]> FLUSH PRIVILEGES;
Query OK, 0 rows affected (0.00 sec)

MariaDB [mysql]> exit
Don’t get alarmed that there is no command to create ‘wpuser’ database user. It will get automatically created with the GRANT command above. I learned about this recently and thought to surprise anyone reading this tutorial. :)
Step 5: Configure NGINX for WordPress
Let us now proceed with configuring NGINX server blocks to serve your WordPress domain. To start with, create the root folder for your WordPress installation.
# mkdir -p /var/www/html/wordpress/public_html
To create NGINX server block for your WordPress domain, navigate to the /etc/nginx/sites-available folder. This is the default location for NGINX server blocks. Use your favorite editor to create a configuration file for NGINX server block and edit it like below.
# cd /etc/nginx/sites-available
# cat wordpress.conf
server {
            listen 80;
            root /var/www/html/wordpress/public_html;
            index index.php index.html;
            server_name SUBDOMAIN.DOMAIN.TLD;

	    access_log /var/log/nginx/SUBDOMAIN.access.log;
    	    error_log /var/log/nginx/SUBDOMAIN.error.log;

            location / {
                         try_files $uri $uri/ =404;
            }

            location ~ \.php$ {
                         include snippets/fastcgi-php.conf;
                         fastcgi_pass unix:/run/php/php7.2-fpm.sock;
            }

            location ~ /\.ht {
                         deny all;
            }

            location = /favicon.ico {
                         log_not_found off;
                         access_log off;
            }

            location = /robots.txt {
                         allow all;
                         log_not_found off;
                         access_log off;
           }

            location ~* \.(js|css|png|jpg|jpeg|gif|ico)$ {
                         expires max;
                         log_not_found off;
           }
}
Check the correctness of above configuration file using:
# nginx -t
nginx: the configuration file /etc/nginx/nginx.conf syntax is ok
nginx: configuration file /etc/nginx/nginx.conf test is successful
To activate the server block create a symbolic link of the above configuration file inside /etc/nginx/sites-enabled folder.
# cd /etc/nginx/sites-enabled
# ln -s ../sites-available/wordpress.conf .
Reload NGINX to apply the new WordPress domain settings.
# systemctl reload nginx
Step 6: Download and Configure WordPress
In this step, download the archived WordPress file using wget and unzip it to the root of the WordPress installation that we have created in the previous step. To accomplish it run the following commands from the terminal.
# cd /var/www/html/wordpress/public_html
# wget https://wordpress.org/latest.tar.gz
# tar -zxvf latest.tar.gz
# mv wordpress/* .
# rm -rf wordpress
Change the ownership and apply correct permissions to the extracted WordPress files and folders. To do that, use the following command from the terminal.
# cd /var/www/html/wordpress/public_html
# chown -R www-data:www-data *
# chmod -R 755 *
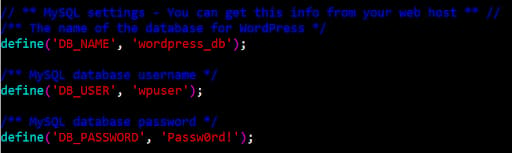
Now provide the database name, database user and the password in the WordPress config file so that it can connect to the MariaDB database that we had created earlier. By default, WordPress provides a sample configuration file and we will make use of it to create our own configuration file. To do that, first, rename the sample WordPress configuration file to wp-config.php and edit it with your own favorite editor.
# cd /var/www/html/wordpress/public_html
# mv wp-config-sample.php wp-config.php
# vi wp-config.php
 ...
 ...
 define('DB_NAME', 'wordpress_db');
 define('DB_USER', 'wpuser');
 define('DB_PASSWORD', 'Passw0rd!');
 ...
 ...
To secure your WordPress site, add the security key in the above WordPress config file just after database configuration options by generating it though this link.

You are now ready to install your WordPress site using your favorite browser.
Step 7: Install WordPress
To complete the installation of WordPress, point your favorite web browser to SUBDOMAIN.DOMAIN.TLD and follow the steps as described below.
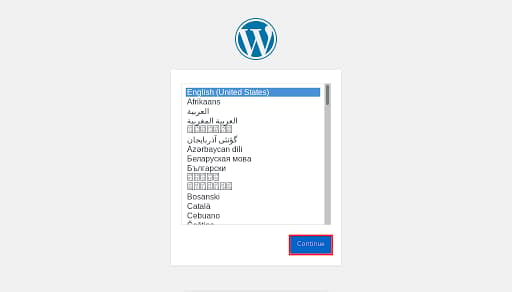
The installer will prompt you to choose a language. Choose a language and click ‘Continue’.
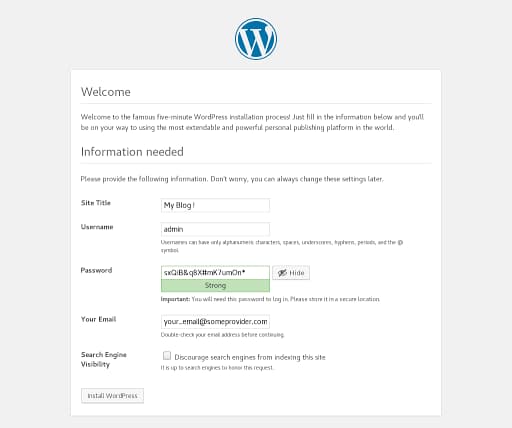
Now provide the site information like site title, username, password, email and click on ‘Install WordPress’ button.
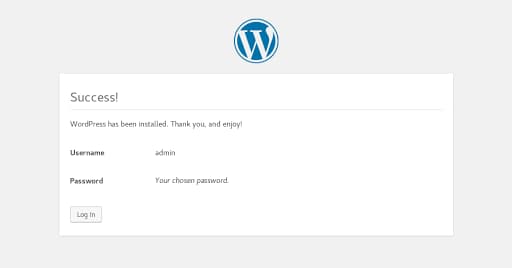
You are done with installing WordPress site. Click ‘Log In’ to login to Dashboard and proceed with configuring plugins and themes for your site.
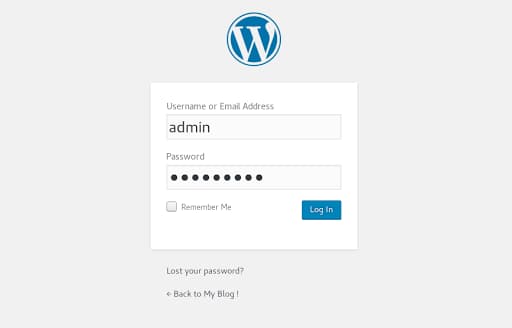
Provide the user name and password that we have entered previously to login for the first time.
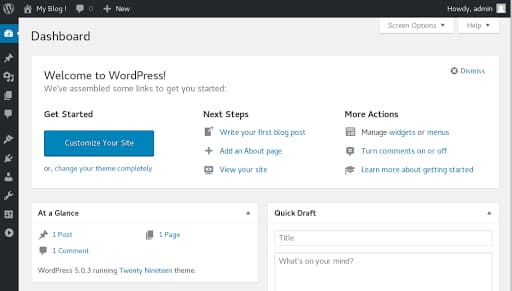
Congratulations! Your WordPress website is installed and ready for you to customize according to your requirements.
Conclusion
WordPress is the most popular CMS and we learned how to install it with NGINX on a Ubuntu server. You can now proceed further to create your website with it.
Thanks for learning with the DigitalOcean Community. Check out our offerings for compute, storage, networking, and managed databases.
About the author
Still looking for an answer?
Awesome content! very easy copy-paste guide and everything worked with minimal changes. Thank you!
- anonymouse
Hello bro can you make tut for the Slickstack installer using Nginx-extras?
- Ashar
 This work is licensed under a Creative Commons Attribution-NonCommercial- ShareAlike 4.0 International License.
Become a contributor for community
Get paid to write technical tutorials and select a tech-focused charity to receive a matching donation.

DigitalOcean Documentation
Full documentation for every DigitalOcean product.

Resources for startups and AI-native businesses
The Wave has everything you need to know about building a business, from raising funding to marketing your product.
The developer cloud
Scale up as you grow — whether you're running one virtual machine or ten thousand.

Start building today
From GPU-powered inference and Kubernetes to managed databases and storage, get everything you need to build, scale, and deploy intelligent applications.
