Technical Writer II

Introduction
OwnCloud is an open-source file synchronization and sharing platform that gives you complete control over your data. Unlike cloud storage services like Dropbox or Google Drive, OwnCloud runs on your own infrastructure, providing privacy, security, and the ability to customize every aspect of your file storage solution.
This tutorial provides a step-by-step guide for installing and configuring OwnCloud on Ubuntu using Apache, MySQL, and PHP. You’ll learn how to set up a secure, production-ready OwnCloud instance with HTTPS encryption, user management, and proper file permissions. We’ll also cover security hardening, troubleshooting common issues, and when to choose OwnCloud over alternatives like Nextcloud.
Key Takeaways
-
Self-hosting OwnCloud on Ubuntu gives you full control over data and access. You choose where files are stored, how sharing is governed, and which identities can log in. This setup is a strong fit for teams that need predictable data residency, custom retention, or tighter integration with internal infrastructure.
-
A classic Apache + PHP (mod_php) + MySQL stack is straightforward to run and debug. Apache serves the UI,
libapache2-mod-php7.4executes PHP, and MySQL or MariaDB stores metadata. Verifying loaded modules, includingmpm_prefork, helps confirm the runtime matches what OwnCloud expects. -
HTTPS and least-privilege permissions are baseline requirements for an internet-facing file server. TLS protects logins and file transfers, UFW limits network exposure, and correct ownership prevents write access where it is not needed. These steps reduce the risk from brute-force attempts, unsafe sharing, and accidental data leaks.
-
Use MySQL or MariaDB early for production reliability and maintainability. SQLite can work for quick testing, but MySQL or MariaDB handles concurrency better and simplifies routine operations like backups, restores, and integrity checks. A dedicated database user with scoped grants keeps the installation easier to manage.
-
The
occcommand-line tool is the safest way to verify state and run maintenance tasks. Use it to check health withocc status, enable maintenance mode before backups, and recover from common issues such as maintenance mode getting stuck. Command-line checks make troubleshooting repeatable and predictable. -
Storage planning matters more than most first-time installs expect. File data grows quickly, and moving it later is disruptive. Prefer SSD-backed storage for the data directory, monitor disk space and inodes, and consider external storage mounts when local disks are no longer sufficient.
-
Choosing between OwnCloud and Nextcloud is largely about support and ecosystem priorities. OwnCloud typically emphasizes stability and enterprise support options, while Nextcloud often provides a broader community app ecosystem and faster feature expansion. Select the platform that best fits your governance and collaboration needs.
By following this guide, you’ll have a fully functional, secure OwnCloud instance running on Ubuntu that can serve as a private alternative to commercial cloud storage services.
What Is OwnCloud and Why Should You Use It?
OwnCloud is a self-hosted file synchronization and sharing platform that provides Dropbox-like functionality on your own infrastructure. It allows users to upload, sync, and share files through a web interface, desktop clients, and mobile apps, all while maintaining complete control over where data is stored and who can access it.
Key Features of OwnCloud
OwnCloud provides a comprehensive set of features for file management and collaboration:
-
File Synchronization: Automatically sync files across devices using desktop clients (Windows, macOS, Linux) and mobile apps (iOS, Android). Changes made on one device propagate to all connected devices.
-
Web Interface: Access and manage files through a modern, responsive web interface that works in any browser. Upload, download, organize, and preview files without installing client software.
-
File Sharing: Share files and folders with other OwnCloud users or generate public links with password protection and expiration dates. Control who can view, download, or edit shared content.
-
Version Control: Track file versions and restore previous versions when needed. This protects against accidental deletions or unwanted changes.
-
Collaborative Editing: Edit documents collaboratively using integrated office suites or external editors. Multiple users can work on the same file simultaneously.
-
External Storage Integration: Connect external storage backends including S3-compatible object storage, FTP servers, WebDAV shares, and local filesystem mounts. This allows you to scale storage without moving data.
-
User and Group Management: Create multiple user accounts, organize users into groups, set storage quotas, and configure granular permissions. Essential for team deployments.
-
Security Features: Support for two-factor authentication, encryption at rest, audit logging, and compliance with data protection regulations. OwnCloud Enterprise includes additional security features like ransomware protection and advanced encryption.
-
App Ecosystem: Extend functionality through apps for calendar, contacts, document editing, video conferencing, and more. The app marketplace provides additional features beyond core file storage.
OwnCloud is particularly valuable for organizations that need to maintain data sovereignty, comply with regulations like GDPR or HIPAA, or integrate file storage with existing on-premises infrastructure. It’s also cost-effective for teams that would otherwise pay per-user fees for commercial cloud storage.
Manual Installation vs Docker: Which Way Should You Install OwnCloud?
When installing OwnCloud on Ubuntu, you can choose between two main approaches: a traditional manual installation using the LAMP stack, or deploying OwnCloud with Docker containers. Each method has its own benefits and limitations, depending on your goals and environment.
| Deployment method | Advantages | Drawbacks | Best suited for |
|---|---|---|---|
| Manual (LAMP stack) | Complete control over configuration; easier debugging; direct file and log access; predictable tuning | More setup steps; manual updates; requires Linux administration experience | Production use, custom setups, learning environments |
| Docker containers | Fast, reproducible deployments; simpler upgrades and rollbacks; isolated services | Requires Docker/Compose knowledge; slight resource overhead; container-level debugging | Development, testing, prototyping, containerized infrastructures |
Which Deployment Is Right For You?
Manual LAMP installation is typically preferred for those running production environments, require extensive customization, or want full transparency and control over the setup. This method is also a good fit for anyone learning the internals of OwnCloud or the LAMP stack.
Using Docker, on the other hand, is ideal for developers, testers, or teams already working with containerized architectures. Docker streamlines installation and upgrades, and enables a reproducible environment that can be easily reset or moved. However, it introduces an additional layer of abstraction, which may require extra familiarization.
Overall, if stability, customization, and manual tuning are your priorities, manual installation is often the better choice. For quick deployments, testing, or if you already use Docker elsewhere in your stack, the container-based approach is practical and efficient.
This guide will focus on the manual installation process to walk through each step in depth, but the core OwnCloud concepts are the same no matter which deployment style you choose.
Prerequisites
Before installing OwnCloud, ensure you have:
- An Ubuntu server (22.04 or later (LTS)) with root or
sudoprivileges - A registered domain name pointed to your server’s IP address (required for SSL certificates)
- At least 2GB RAM and 20GB free disk space (more for larger deployments)
- Basic familiarity with Linux command line and text editors
You’ll also need to have a LAMP stack installed. If you don’t have one yet, you can install it using our guide on installing the LAMP stack on Ubuntu. The installation includes:
- Apache web server
- MySQL database server
- PHP with required extensions
Important: OwnCloud currently requires PHP 7.4. However, Ubuntu 22.04 or later (LTS) ships with PHP 8.1 by default. You will need to install PHP 7.4 from a third-party repository, as shown in the steps below.
Install unzip, which is required to extract the OwnCloud package:
sudo apt install -y unzip
Architecture Overview
Understanding how OwnCloud components interact helps with troubleshooting and optimization:
Web Server (Apache): Serves the OwnCloud web interface and handles HTTP/HTTPS requests. Apache processes PHP files and serves static assets like CSS and JavaScript.
PHP (mod_php): Processes OwnCloud application logic via Apache’s PHP module. This tutorial uses Apache with libapache2-mod-php7.4, not PHP-FPM.
MySQL Database: Stores user accounts, file metadata, sharing information, and application settings. The database doesn’t store actual file contents, those live in the filesystem.
File Storage: User files are stored in /var/www/owncloud/data/ by default (or your chosen installation path). Each user has a directory containing their files. The database tracks which files belong to which users and their metadata.
Reverse Proxy (Optional): Nginx can be placed in front of Apache for load balancing or SSL termination, though Apache alone is sufficient for most deployments.
This architecture separates concerns: the web server handles requests, PHP processes application logic, MySQL manages metadata, and the filesystem stores actual file data. This separation makes it easier to scale, back up, and troubleshoot individual components.
Step 1 — Installing Required PHP Extensions
OwnCloud requires specific PHP extensions beyond the base installation. Install them before proceeding with OwnCloud setup.
First, add the PHP PPA repository for PHP 7.4 and update your package list:
sudo add-apt-repository ppa:ondrej/php -y
sudo apt update
Install the Apache PHP module and required PHP extensions:
sudo apt install -y libapache2-mod-php7.4 php7.4-gd php7.4-zip php7.4-intl php7.4-xml php7.4-mbstring php7.4-curl php7.4-mysql
The libapache2-mod-php7.4 package enables Apache to process PHP files using mod_php, which is required when using Apache’s prefork MPM.
Verify the extensions are installed:
php -m | grep -E 'gd|zip|intl|xml|mbstring|curl|mysql'
You should see all listed extensions in the output. If any are missing, install them individually using apt install.
Verifying PHP Version
Ensure PHP 7.4 is the active version. If you have multiple PHP versions installed, configure the system to use PHP 7.4:
sudo update-alternatives --config php
Select PHP 7.4 from the list if prompted. Verify the active version:
php -v
You should see output indicating PHP 7.4.x.
The update-alternatives command changes the PHP version used in the command line interface (CLI), but does not determine which PHP version is used by Apache for serving web pages.
Apache uses the PHP version that is enabled as an Apache module (for example, libapache2-mod-php7.4). To verify which PHP module and Multi-Processing Module (MPM) Apache is currently using, run:
apache2ctl -M | grep -E 'php7.4|mpm_prefork'
This ensures that OwnCloud uses the correct PHP version throughout the installation and operation.
Restart Apache to load the new extensions:
sudo systemctl restart apache2
Step 2 — Creating the MySQL Database and User
OwnCloud requires a MySQL database to store metadata. Create a dedicated database and user for security and isolation.
Log in to MySQL as root:
sudo mysql -u root -p
Create the database, user, and grant privileges:
CREATE DATABASE owncloud CHARACTER SET utf8mb4 COLLATE utf8mb4_general_ci;
CREATE USER 'owncloud'@'localhost' IDENTIFIED BY 'strong_password_here';
GRANT ALL PRIVILEGES ON owncloud.* TO 'owncloud'@'localhost';
FLUSH PRIVILEGES;
EXIT;
Replace strong_password_here with a secure password. Store this password securely, you’ll need it during OwnCloud installation.
Verify the database was created:
sudo mysql -u root -p -e "SHOW DATABASES;" | grep owncloud
You should see owncloud in the output.
Step 3 — Downloading and Installing OwnCloud
Download the latest OwnCloud Community Edition. Check the OwnCloud download page for the current version.
Create a temporary directory and download OwnCloud:
cd /tmp
wget https://download.owncloud.com/server/stable/owncloud-complete-latest.zip
unzip owncloud-complete-latest.zip
This package contains the complete OwnCloud server and bundled apps, reducing the risk of missing components during installation.
Installation Path: This tutorial uses /var/www/owncloud as the installation directory, which is the standard location for web applications on Ubuntu. You can choose any directory path that suits your server configuration (e.g., /www/wwwroot/owncloud.yourdomain.com or /opt/owncloud). If you choose a different path, replace /var/www/owncloud with your chosen path in all subsequent commands and configuration files.
Move OwnCloud to the web root:
sudo mv owncloud /var/www/
Set proper ownership and permissions. OwnCloud needs write access to specific directories:
sudo chown -R www-data:www-data /var/www/owncloud
sudo chmod -R 755 /var/www/owncloud
These commands set the web server user (www-data) as the owner of all OwnCloud files and grant read, write, and execute permissions to the owner, and read and execute permissions to group and others. This ensures Apache can serve files and OwnCloud can write to necessary directories.
Verify the permissions are set correctly:
ls -la /var/www/owncloud | head -5
You should see www-data as the owner and group for all files and directories.
Create the data directory with proper permissions:
sudo mkdir -p /var/www/owncloud/data
sudo chown -R www-data:www-data /var/www/owncloud/data
sudo chmod 750 /var/www/owncloud/data
Verify the OwnCloud Apache virtual host is recognized:
apache2ctl -S | grep -i owncloud
Step 4 — Configuring Apache Virtual Host
OwnCloud requires Apache’s prefork MPM (Multi-Processing Module) to work with PHP via mod_php. If your Apache installation uses the event MPM (common on newer Ubuntu versions), switch to prefork before configuring the virtual host.
Switching to Prefork MPM
Disable the event MPM and enable prefork:
sudo a2dismod mpm_event || true
sudo a2enmod mpm_prefork
sudo systemctl restart apache2
The || true ensures the command doesn’t fail if the event MPM isn’t enabled. Verify that prefork MPM and PHP 7.4 are loaded:
apache2ctl -M | grep -E 'php7.4|mpm_prefork'
You should see both mpm_prefork_module and php7_module in the output. This confirms Apache is using the correct MPM and PHP module for OwnCloud.
Creating the Virtual Host
Configure Apache to serve OwnCloud. Create a virtual host configuration file:
sudo nano /etc/apache2/sites-available/owncloud.conf
Add the following configuration, replacing your_domain.com with your actual domain:
<VirtualHost *:80>
    ServerName your_domain.com
    DocumentRoot /var/www/owncloud

    <Directory /var/www/owncloud>
        Options +FollowSymlinks
        AllowOverride All
        Require all granted

        <IfModule mod_dav.c>
            Dav off
        </IfModule>

        SetEnv HOME /var/www/owncloud
        SetEnv HTTP_HOME /var/www/owncloud
    </Directory>

    ErrorLog ${APACHE_LOG_DIR}/owncloud_error.log
    CustomLog ${APACHE_LOG_DIR}/owncloud_access.log combined
</VirtualHost>
Enable required Apache modules:
sudo a2enmod rewrite
sudo a2enmod headers
sudo a2enmod env
sudo a2enmod dir
sudo a2enmod mime
Enable the OwnCloud site:
sudo a2ensite owncloud.conf
Disable the default Apache site if it’s enabled:
sudo a2dissite 000-default.conf
Test the Apache configuration:
sudo apache2ctl configtest
If the test passes, reload Apache:
sudo systemctl reload apache2
Step 5 — Completing the Web-Based Installation
Open your browser and navigate to http://your_domain.com. You’ll see the OwnCloud installation wizard.
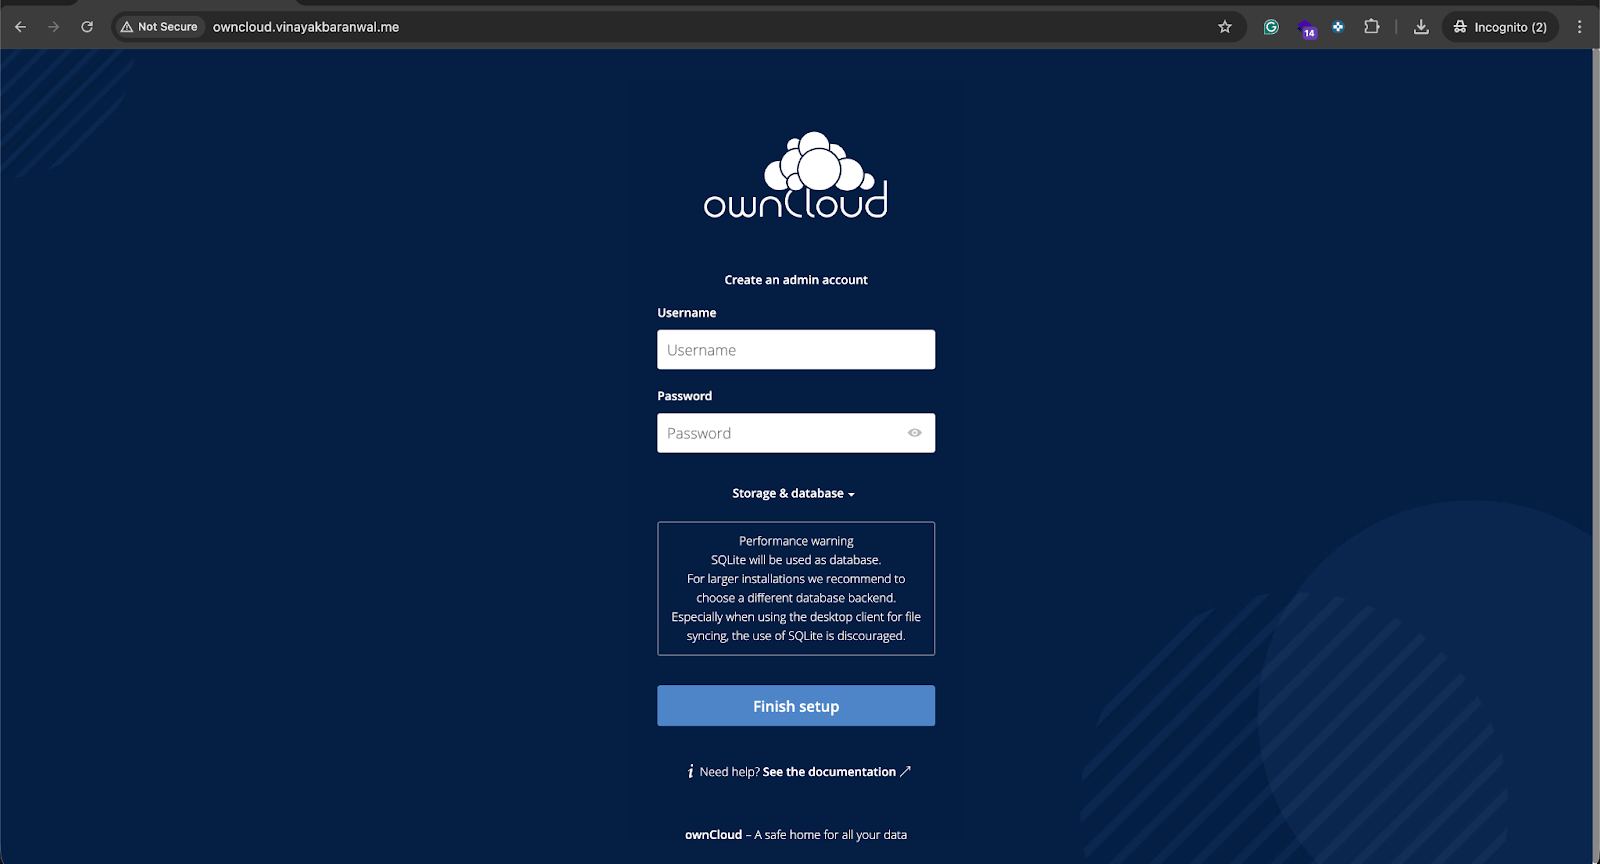
Create Admin Account
Enter the following information:
- Username: Choose an admin username (e.g.,
admin) - Password: Create a strong password
- Data folder: Leave as
/var/www/owncloud/data(default)
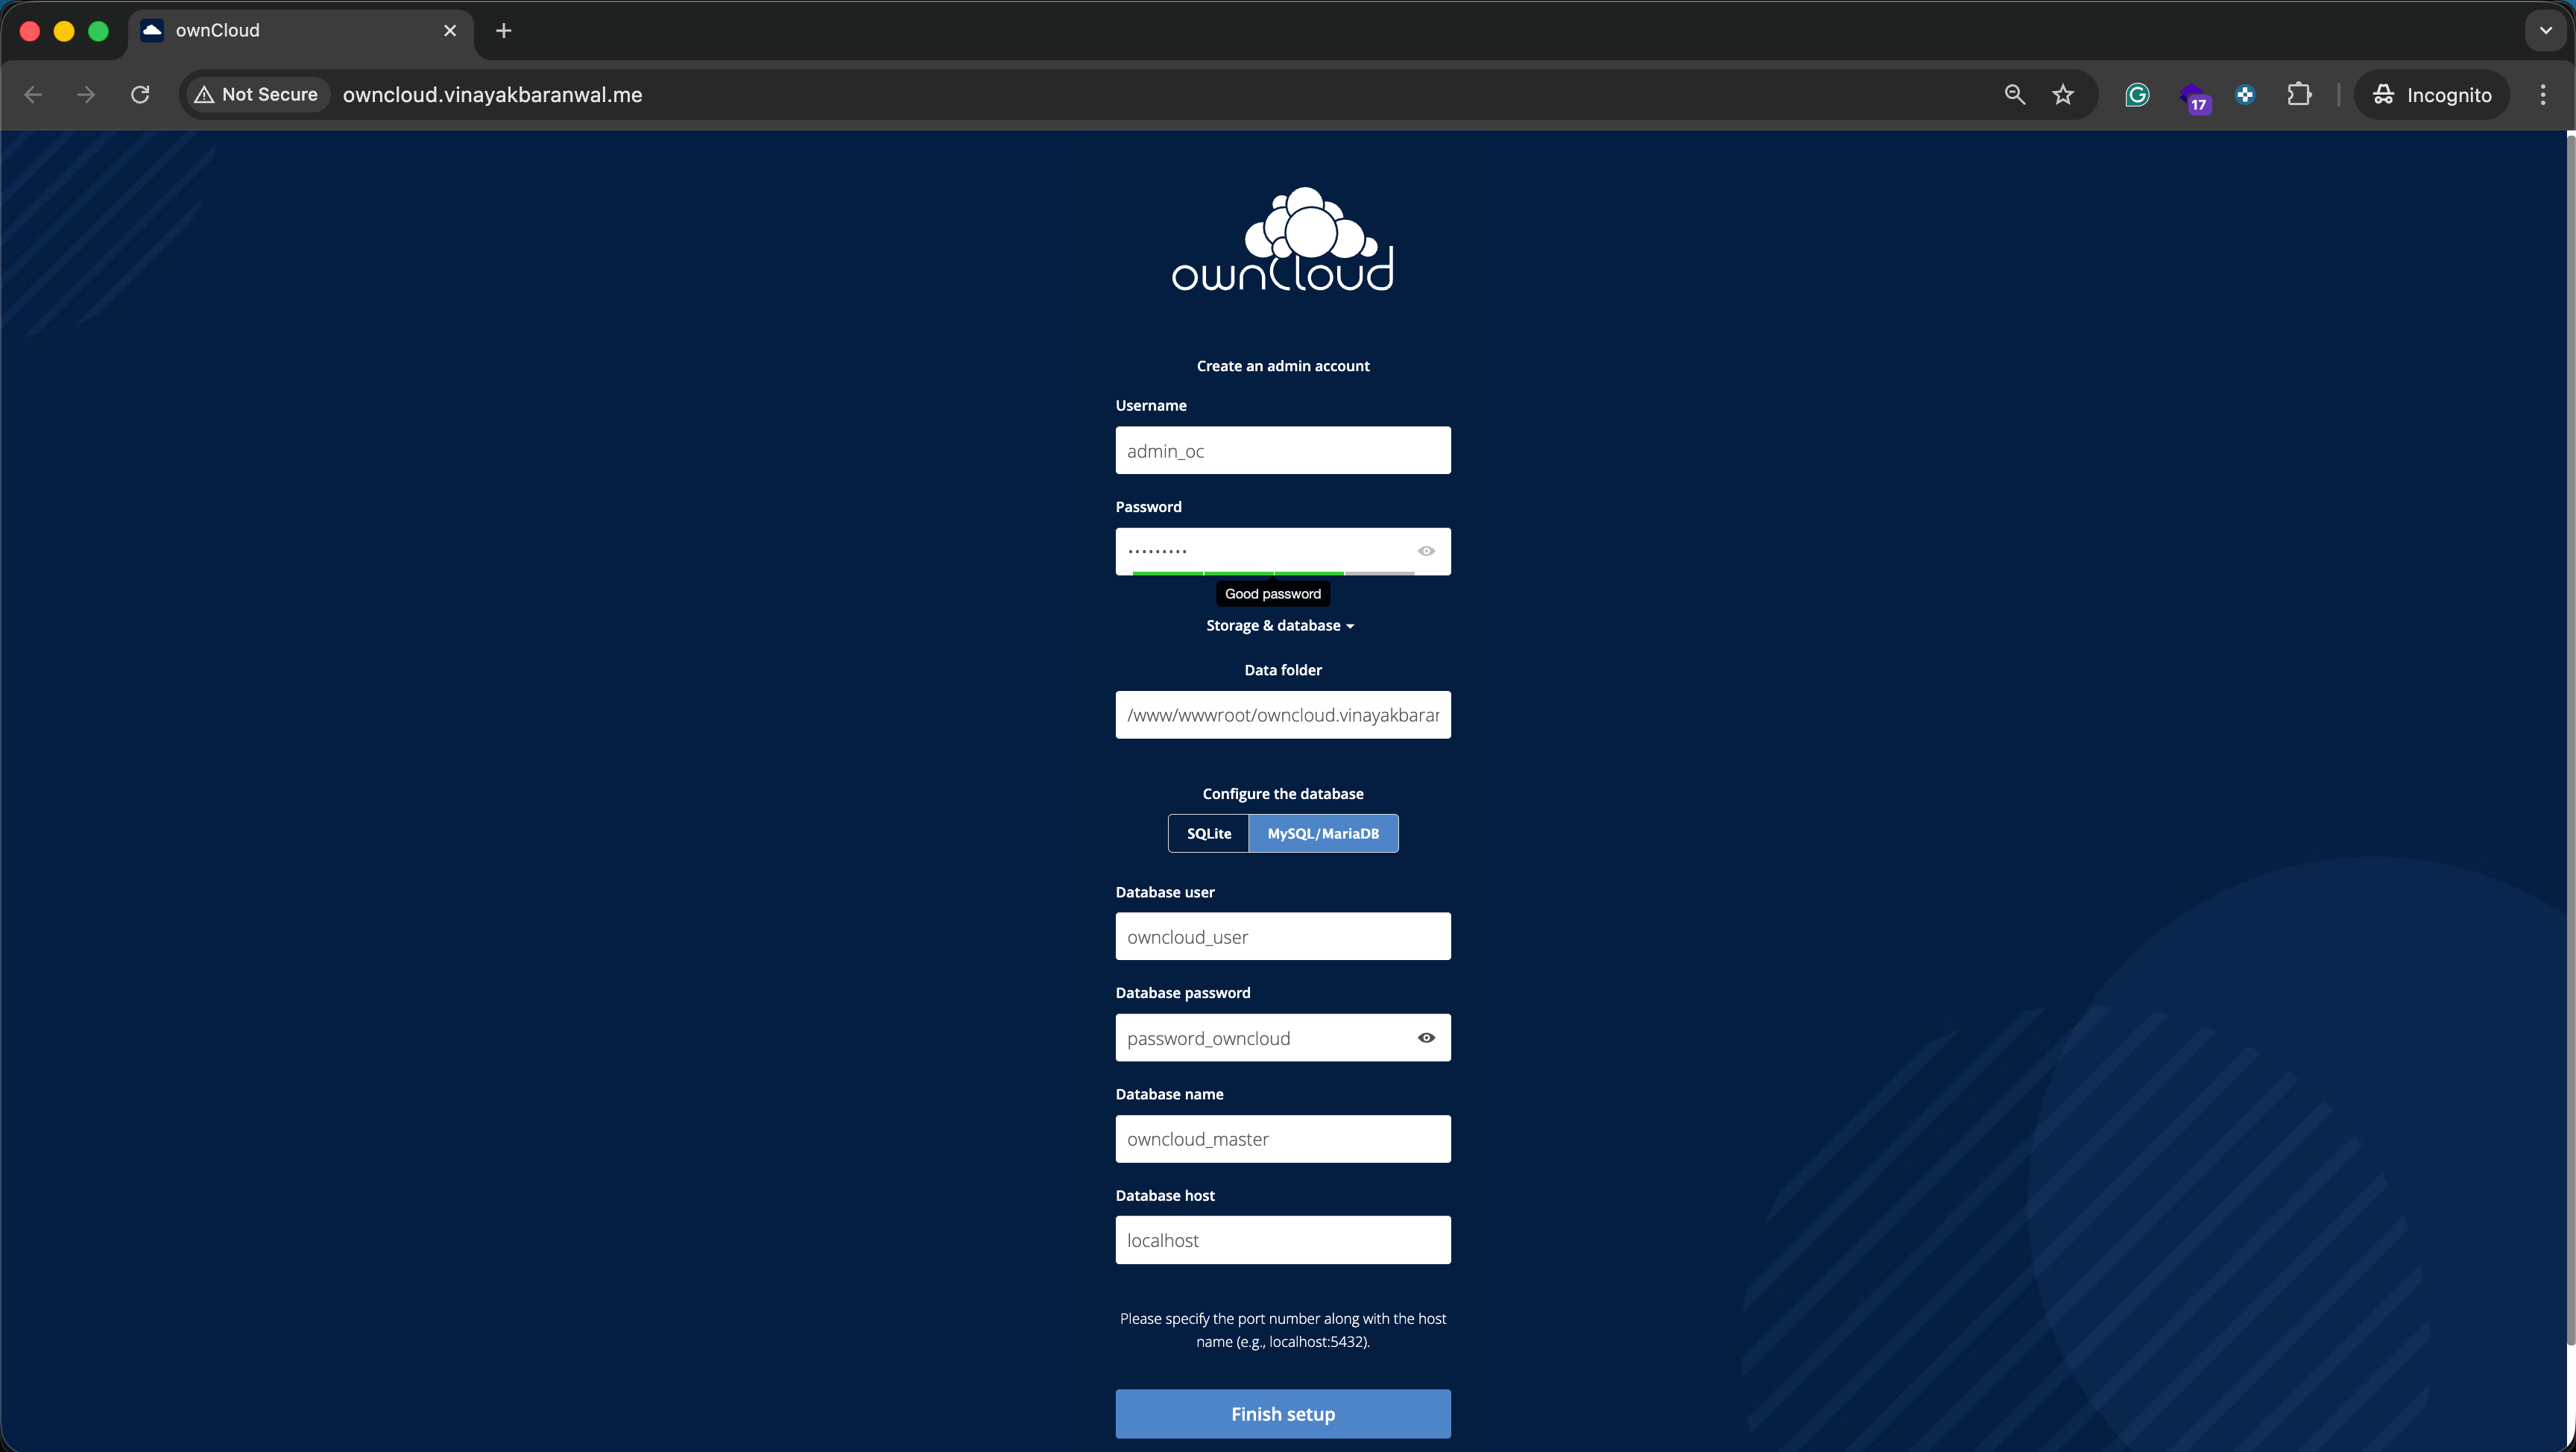
Configure Database
Select MySQL/MariaDB as the database type, then enter:
- Database user:
owncloud - Database password: The password you created in Step 2
- Database name:
owncloud - Database host:
localhost
Click Finish setup. OwnCloud will create the necessary database tables and complete the installation. This process may take a minute.
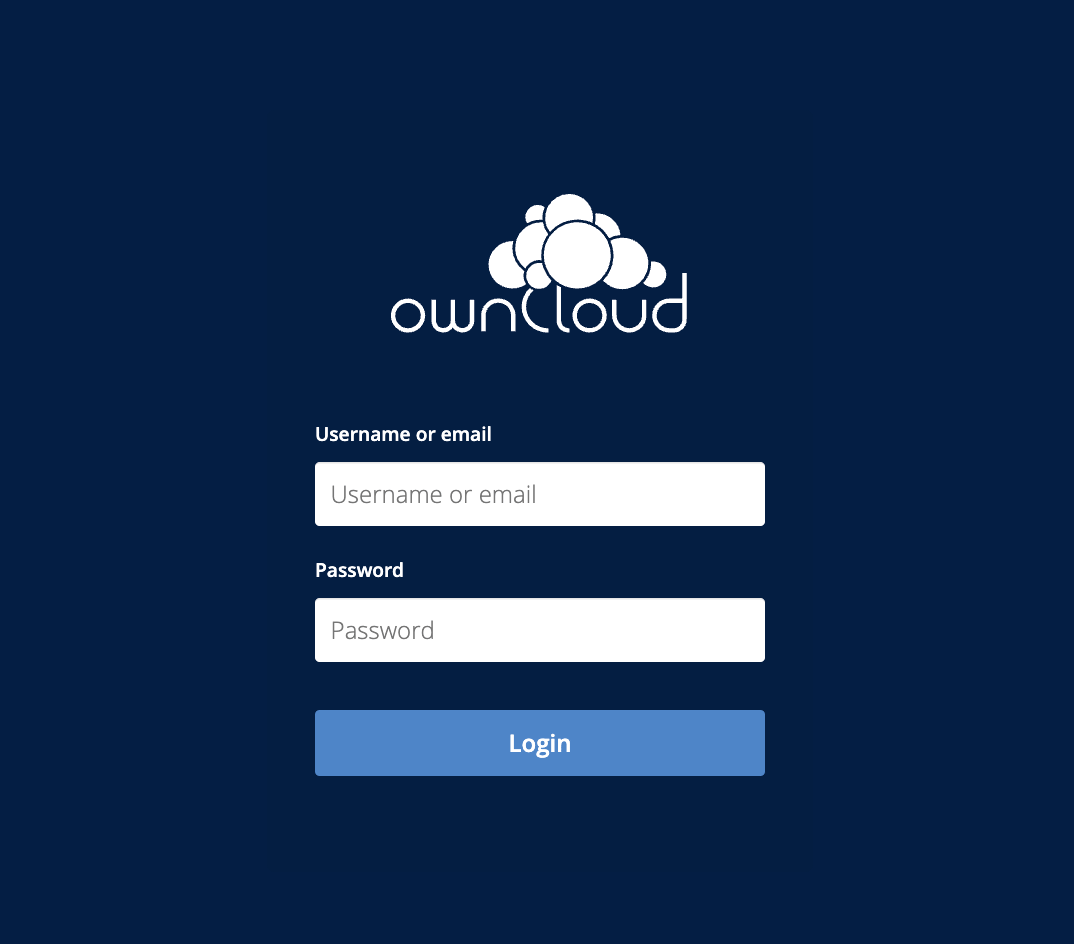
Once installation completes, you’ll be logged into the OwnCloud web interface.
You can verify the OwnCloud status using the OCC command-line tool:
sudo -u www-data php /var/www/owncloud/occ status
Step 6 — Securing OwnCloud with HTTPS
HTTPS encryption is essential for protecting file transfers and login credentials. We’ll use Let’s Encrypt to obtain a free SSL certificate.
Installing Certbot
Install Certbot and the Apache plugin:
sudo apt install -y certbot python3-certbot-apache
Obtaining SSL Certificate
Request a certificate for your domain:
sudo certbot --apache -d your_domain.com
Certbot will:
- Verify domain ownership
- Obtain the SSL certificate
- Configure Apache to use HTTPS
- Set up automatic renewal
Follow the prompts. Certbot will automatically configure Apache to redirect HTTP to HTTPS.
Verifying SSL Configuration
Test your SSL configuration:
sudo certbot certificates
You should see your certificate listed with expiration dates.
Access OwnCloud via HTTPS: https://your_domain.com. You should see a padlock icon in your browser, indicating the connection is encrypted.
Automatic Certificate Renewal
Let’s Encrypt certificates expire every 90 days. Certbot sets up automatic renewal, but verify it’s working:
sudo certbot renew --dry-run
If this command succeeds, automatic renewal is configured correctly.
For more detailed SSL configuration, see our guide on securing Apache with Let’s Encrypt.
Step 7 — Configuring Firewall Rules
Restrict access to your server using UFW (Uncomplicated Firewall). Allow only necessary ports.
Check UFW status:
sudo ufw status
If UFW is inactive, enable it and configure rules:
sudo ufw allow OpenSSH
sudo ufw allow 'Apache Full'
sudo ufw enable
Verify the rules:
sudo ufw status numbered
You should see rules allowing SSH (port 22) and Apache (ports 80 and 443).
For more comprehensive firewall configuration, see our guide on setting up UFW on Ubuntu.
Step 8 — Setting Up User Accounts and Groups
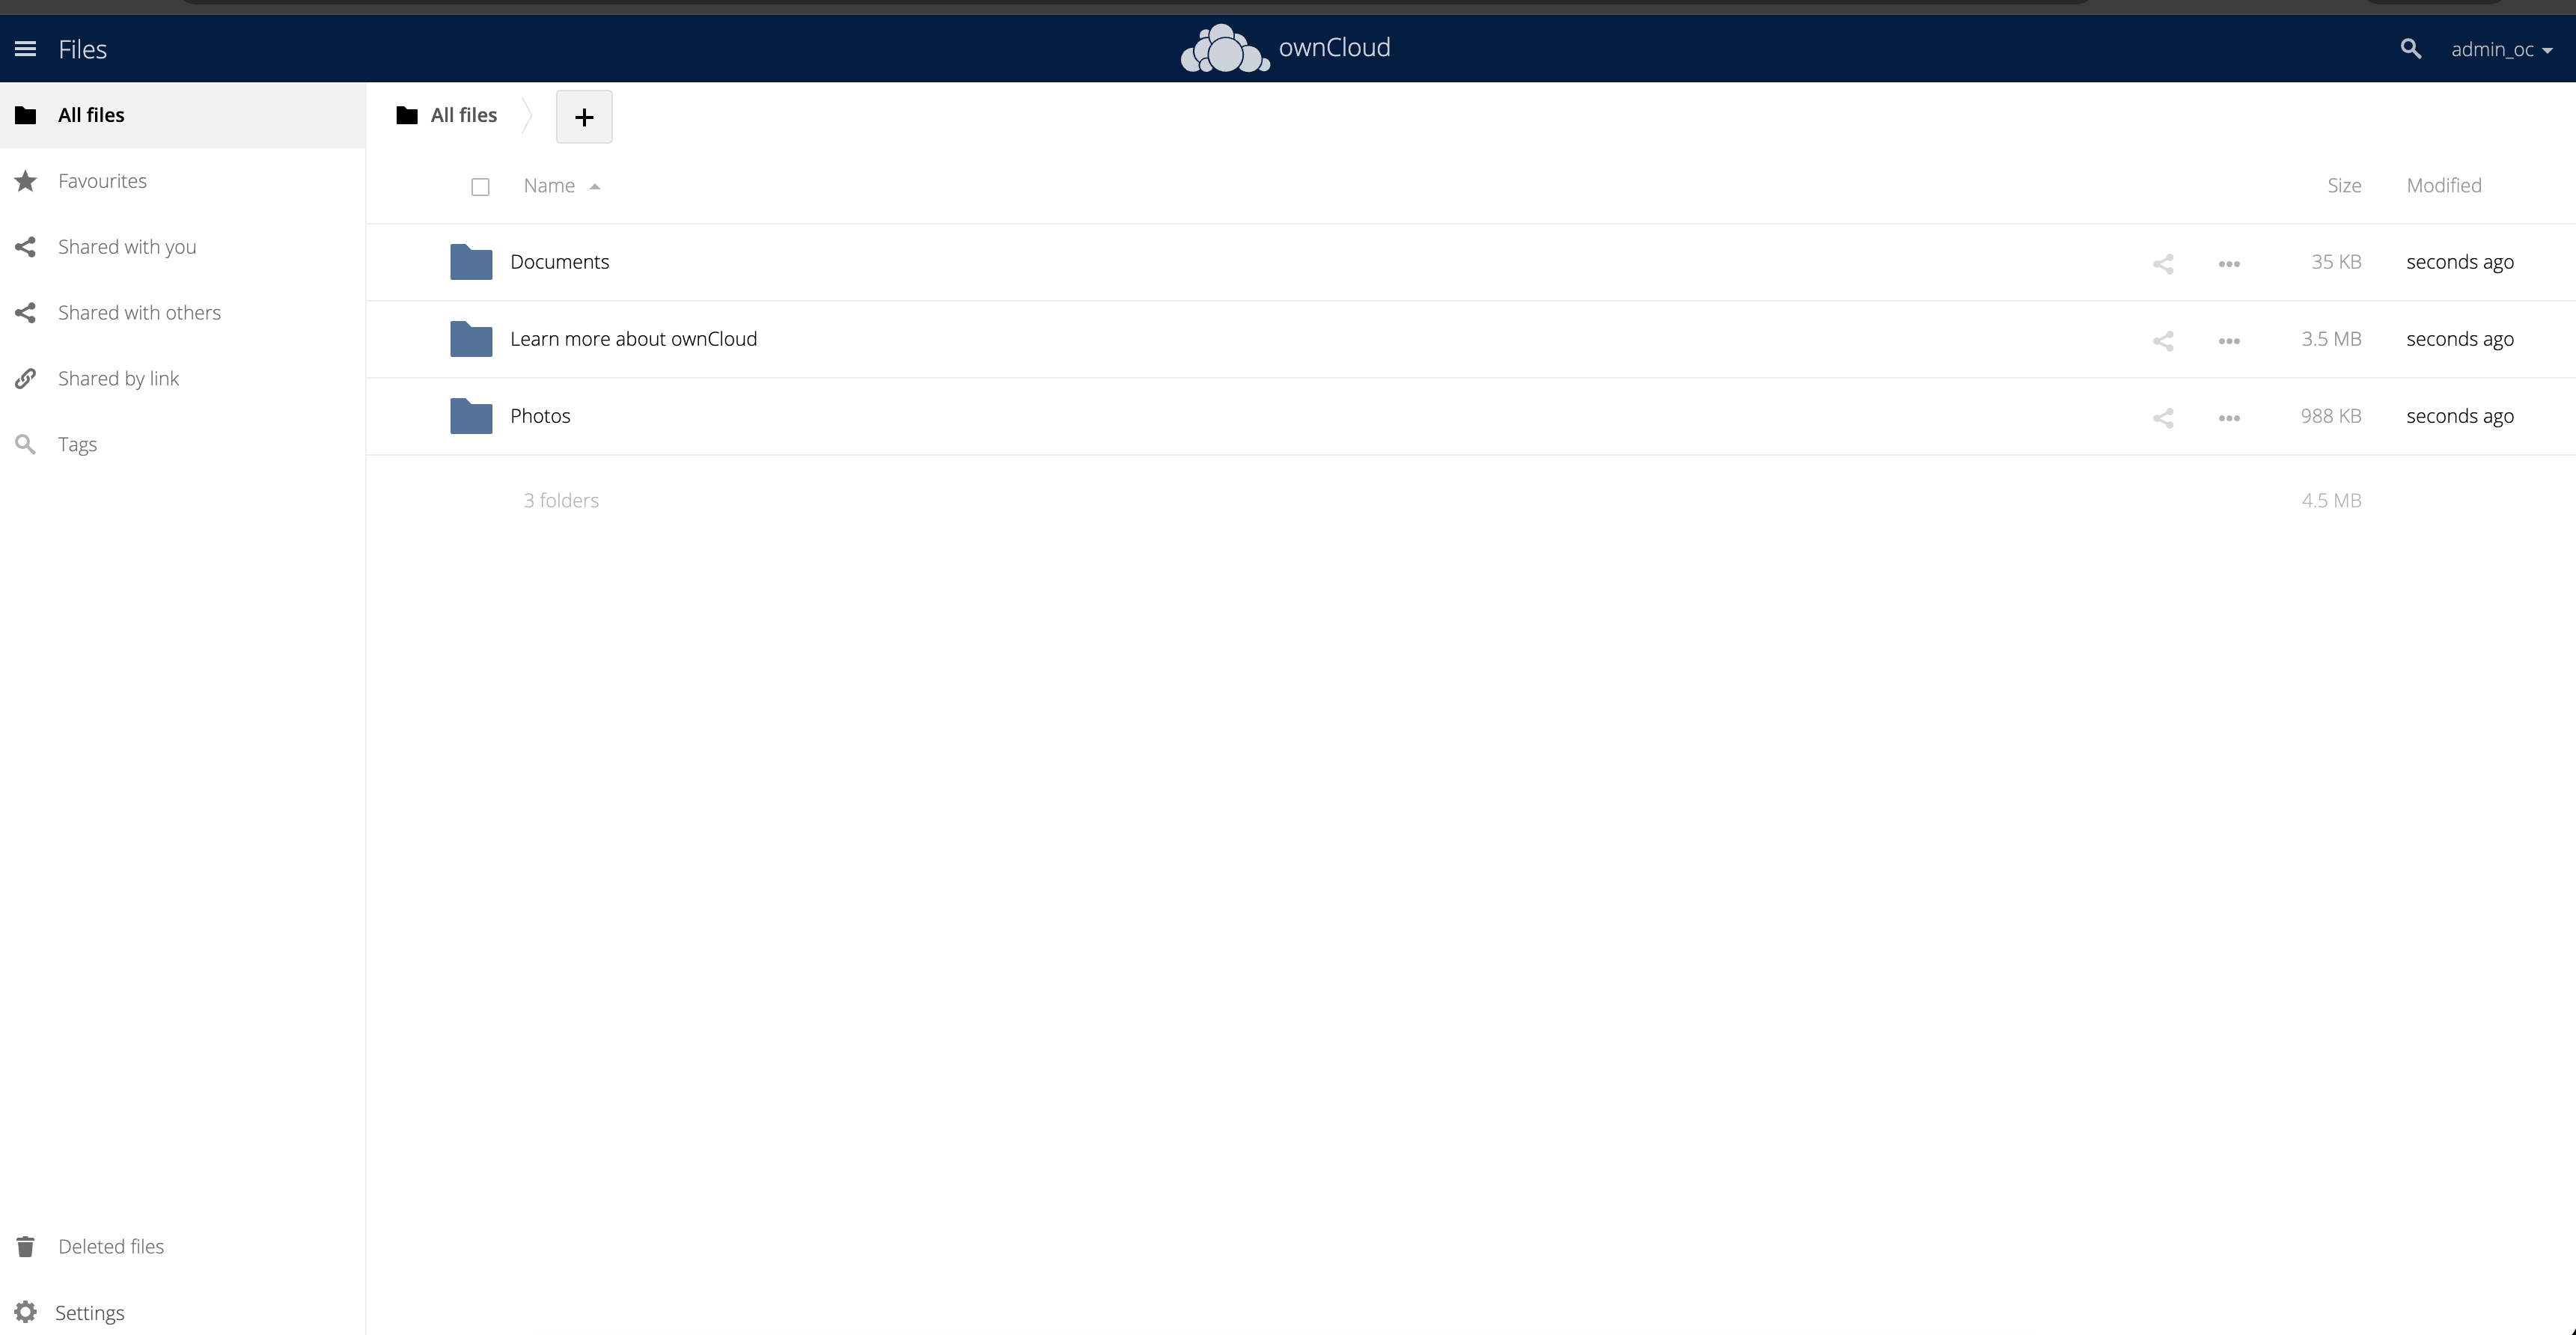
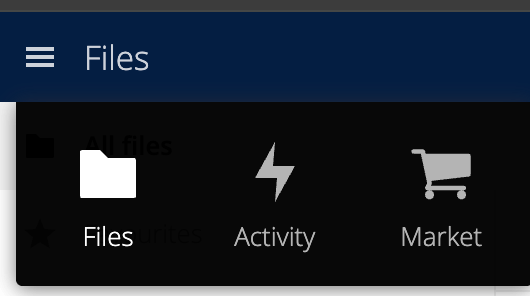
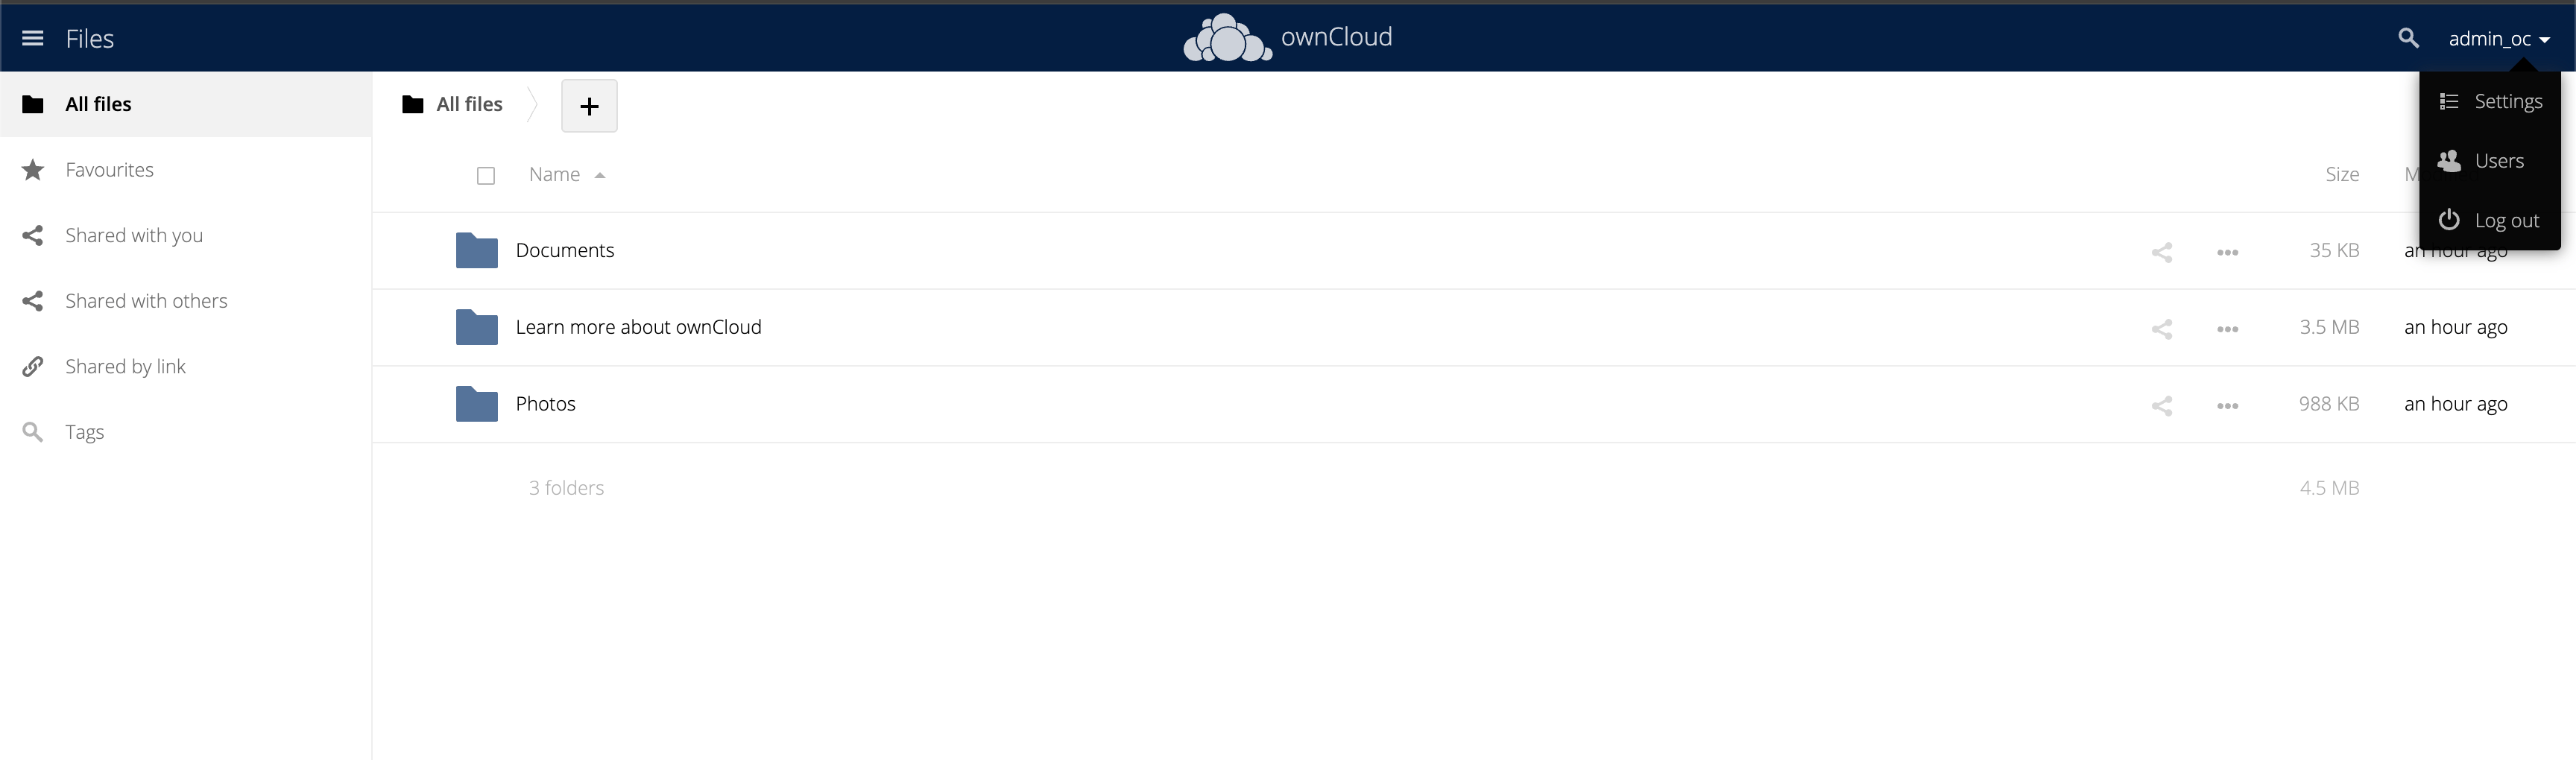
OwnCloud supports multiple users and groups for team deployments. The interface provides navigation through the top-left menu for accessing different sections, and the top-right menu for accessing your profile and administrative settings.
Creating Users
Navigate to Settings → Users in the OwnCloud web interface.
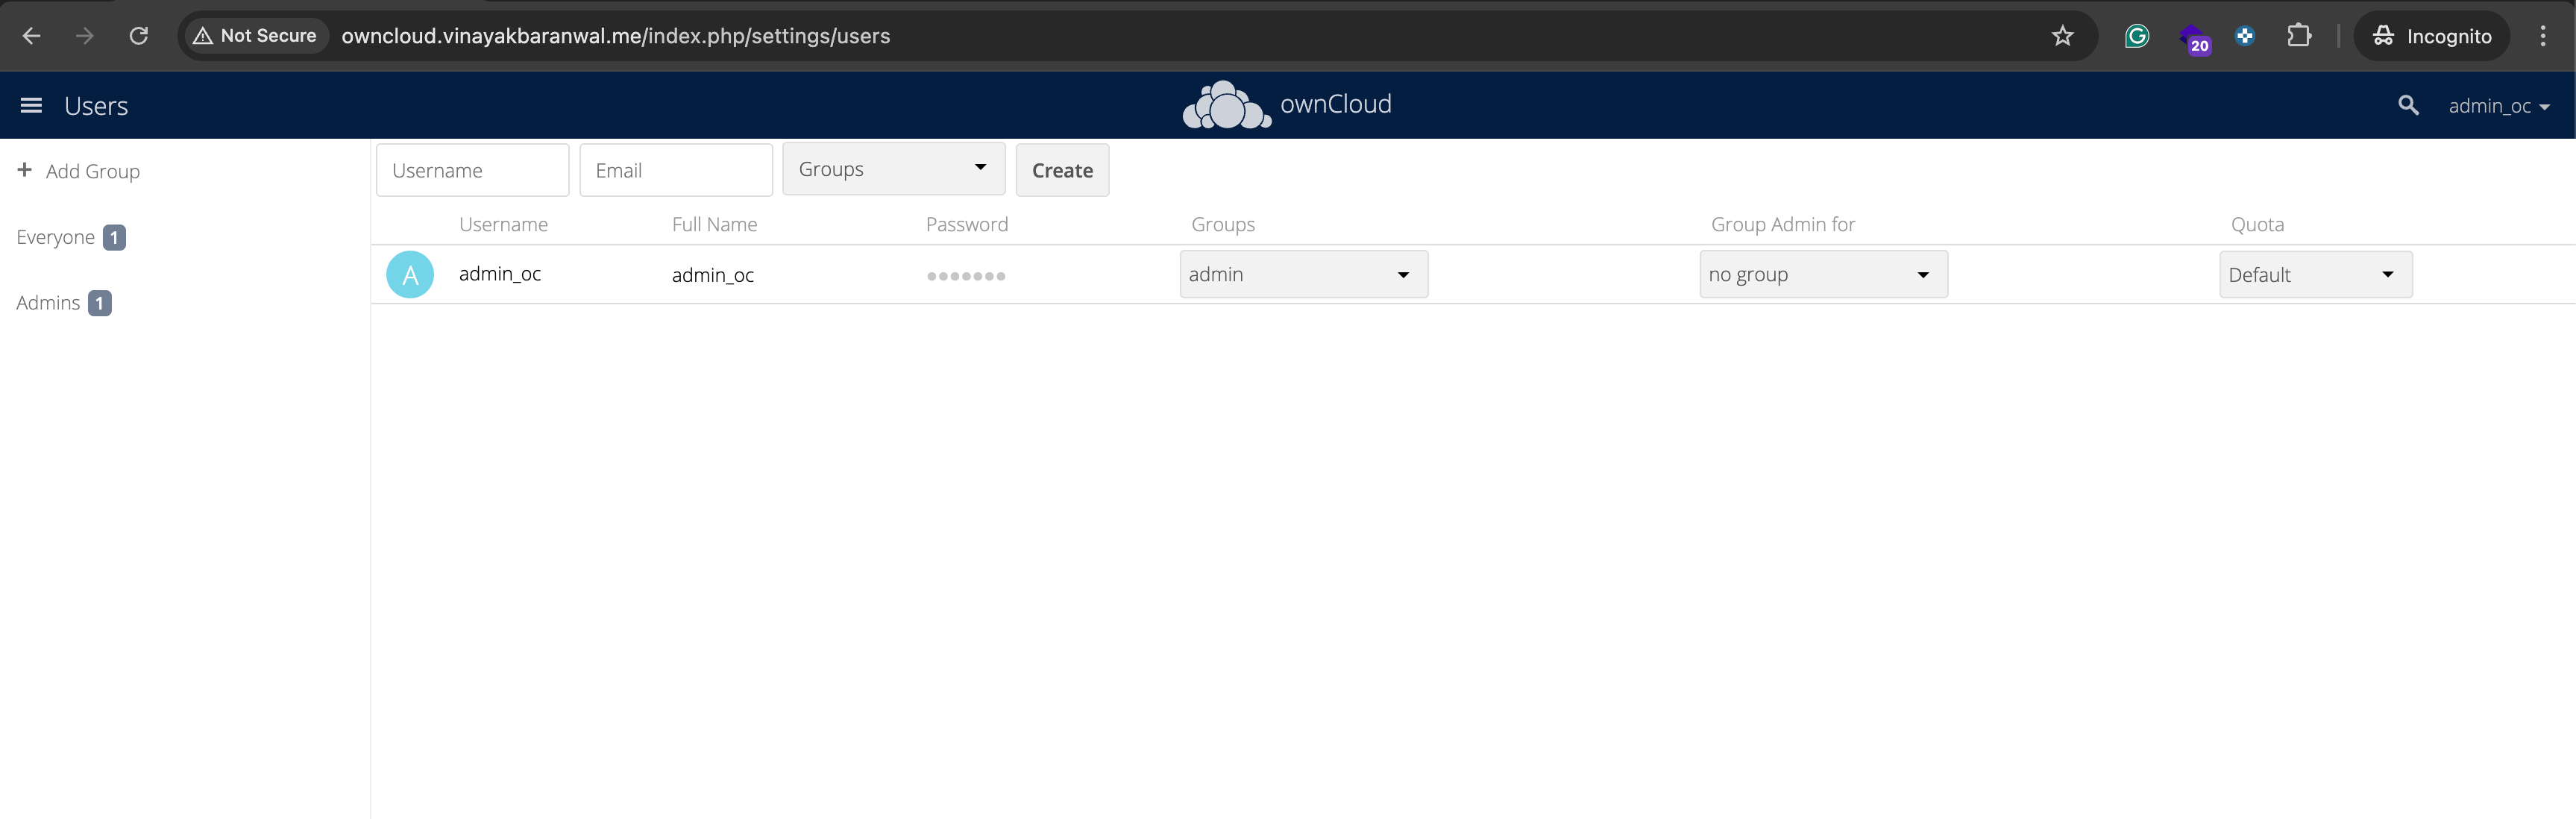
Click + New user and enter:
- Username: A unique username
- Password: A strong password
- Groups: Select groups (or leave empty)
- Storage quota: Set a limit (e.g., 5 GB) or leave unlimited
Click Create to add the user.
Creating Groups
Navigate to Settings → Groups.
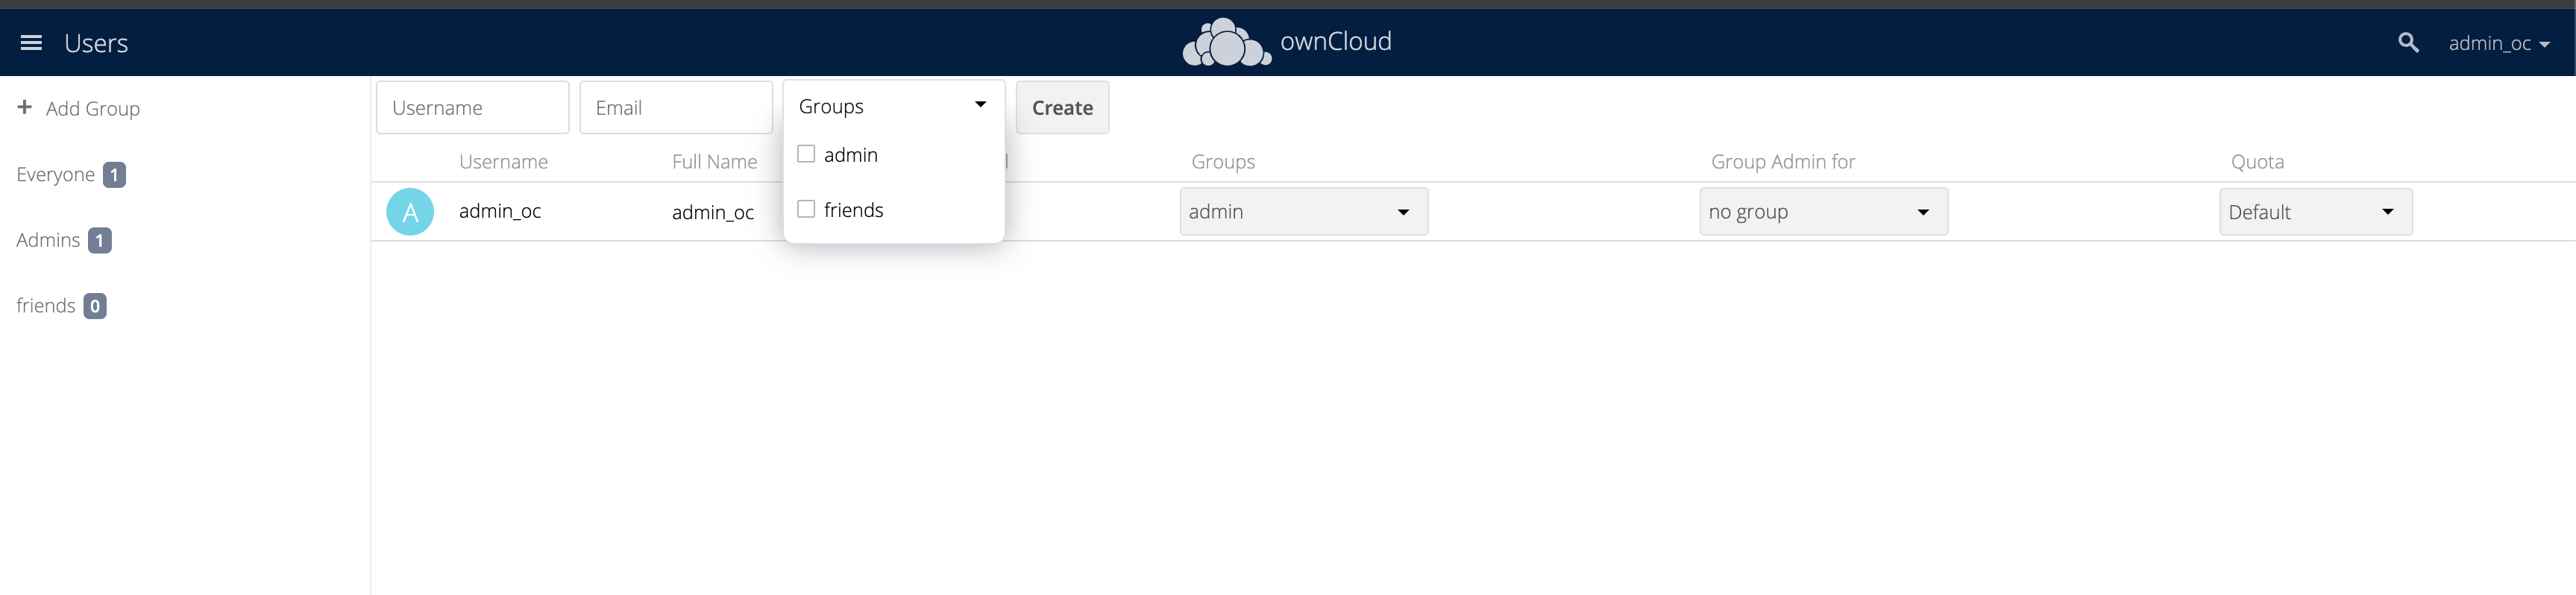
Click + New group, enter a group name, and click Create.
Add users to groups by selecting a group, then clicking Add users and selecting users from the list.
Setting Storage Quotas
Control how much storage each user can consume:
- Go to Settings → Users
- Click the gear icon next to a user
- Set Storage quota (e.g.,
5 GBorunlimited) - Click Save
Storage quotas help prevent individual users from consuming all available disk space.
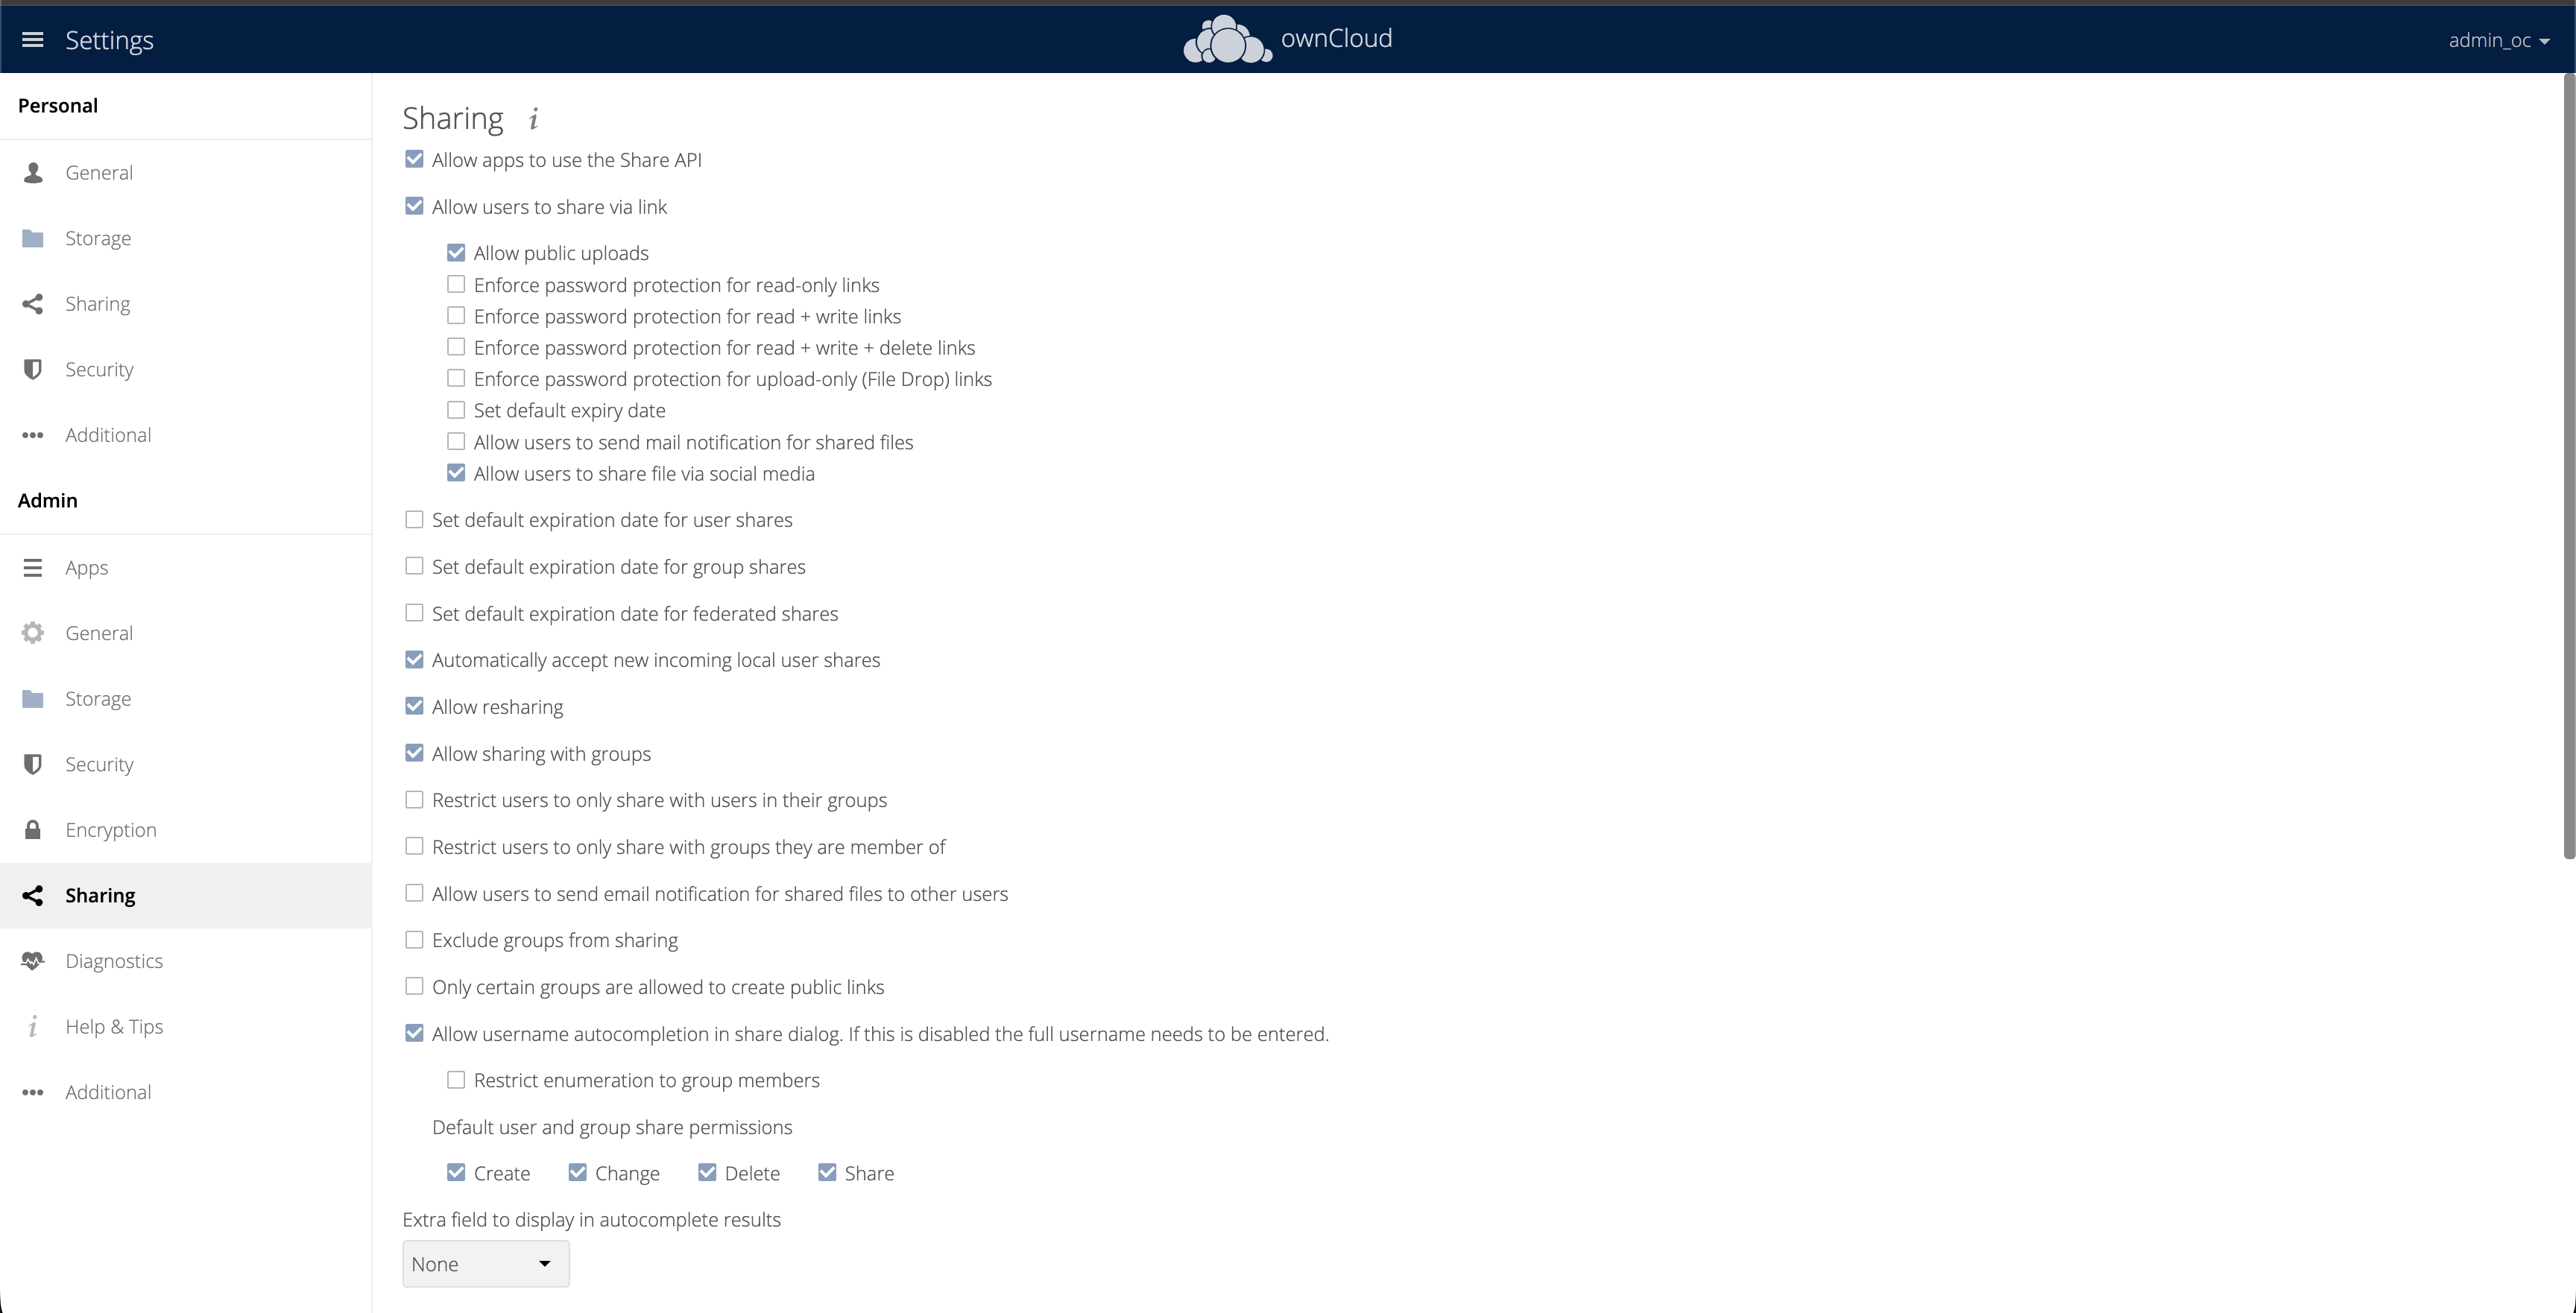
Step 9 — Configuring File Sharing
OwnCloud supports sharing files and folders with other users or via public links.
Internal Sharing
To share with another OwnCloud user:
- Navigate to the file or folder
- Click the Share icon
- Enter the username or select from the list
- Choose permissions: Can view, Can edit, or Can share
- Click Share
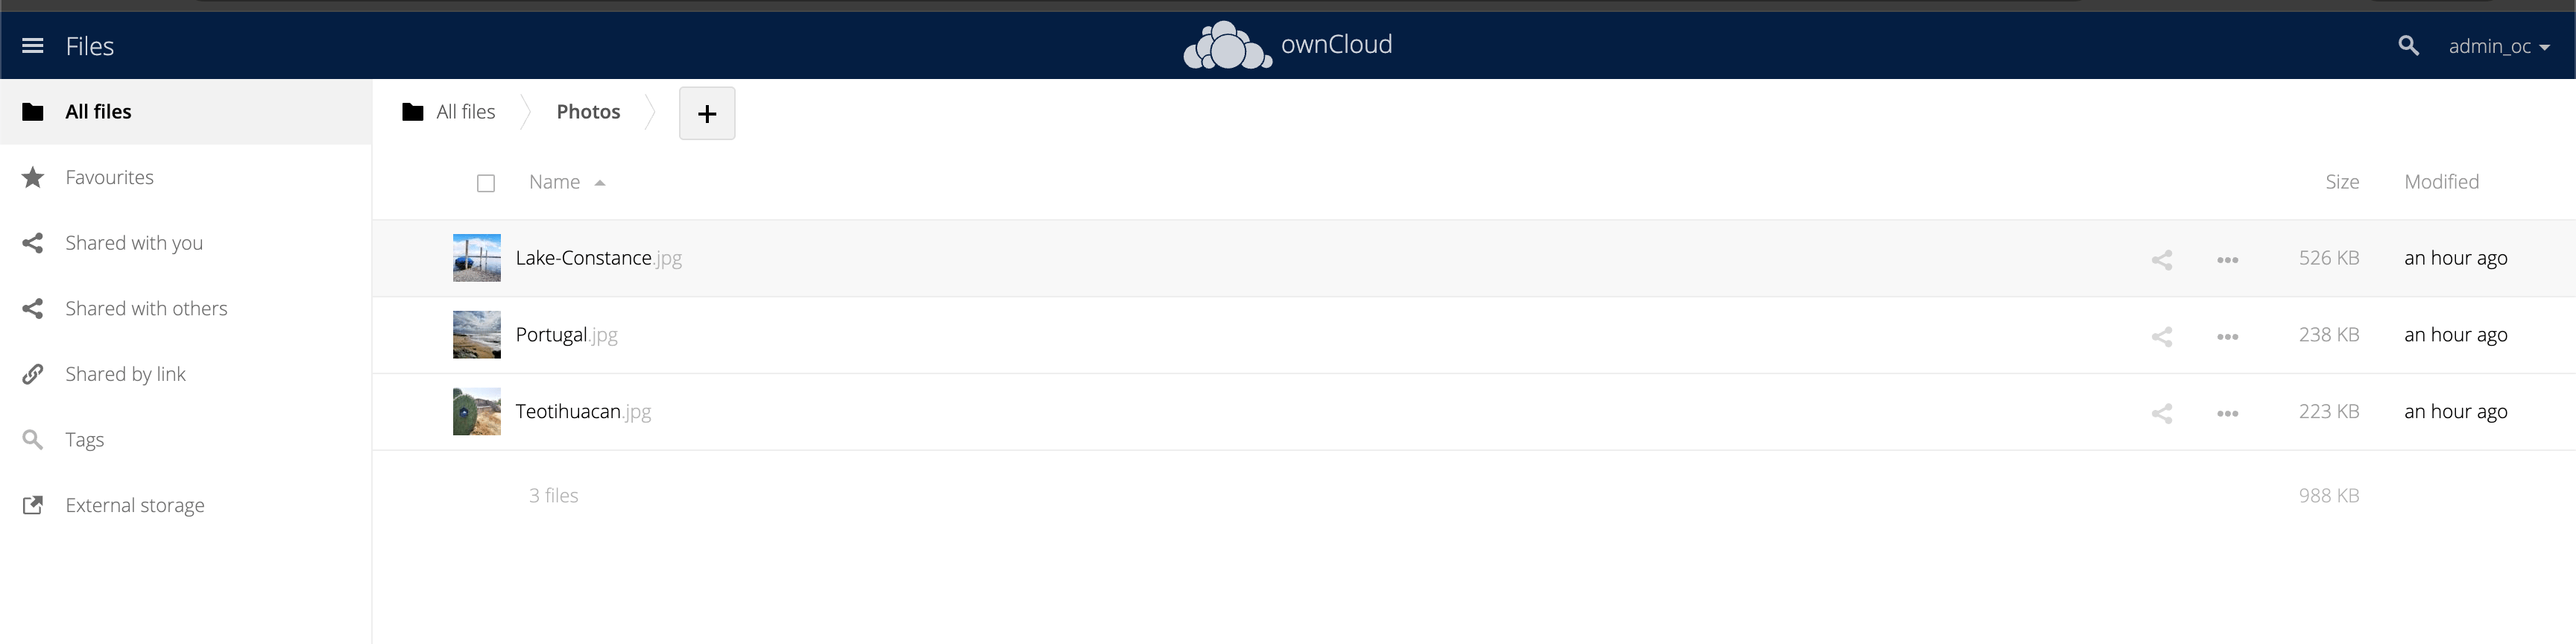

Public Link Sharing
To create a shareable public link:
- Click the Share icon on a file or folder
- Click + Add link share
- Configure options:
- Password protection: Require a password to access
- Expiration date: Set when the link expires
- Permission: View or download
- Copy the generated link
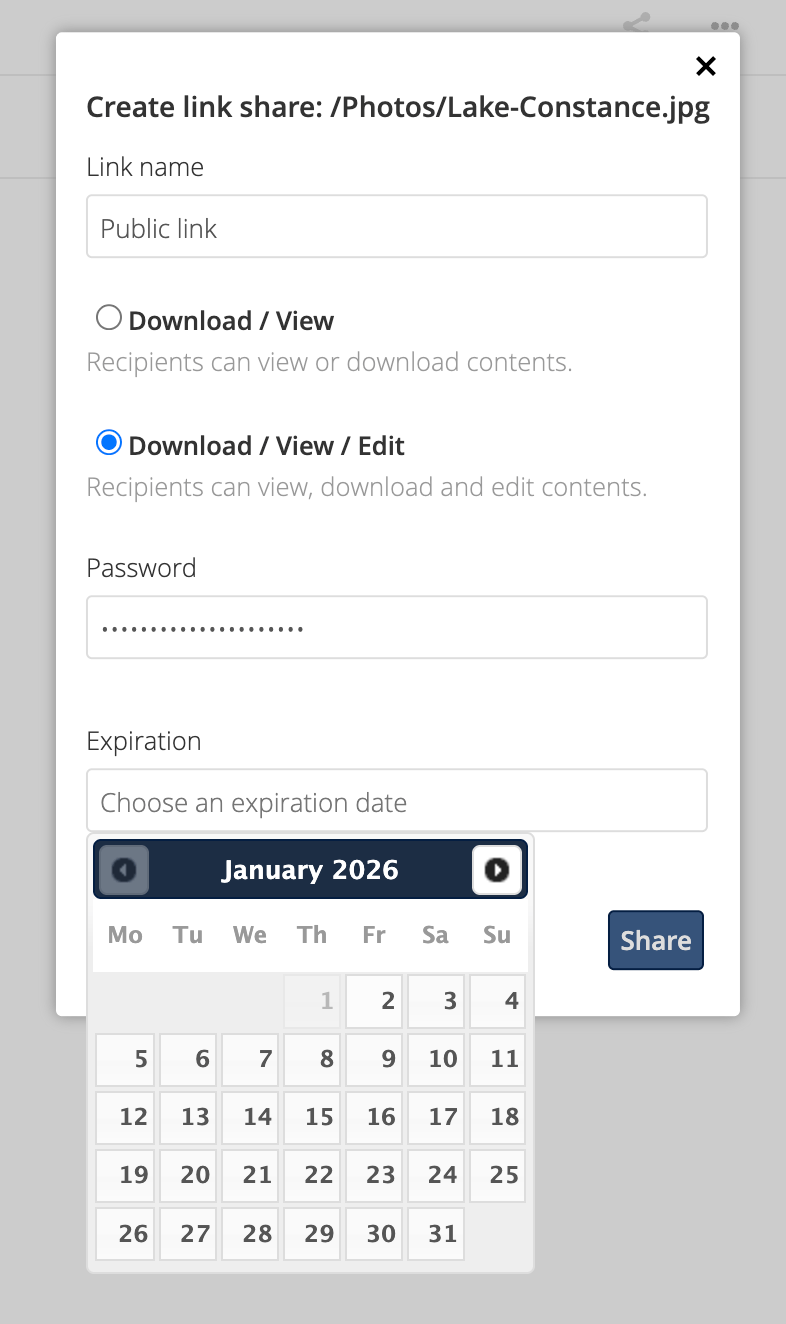
Public links are useful for sharing files with people who don’t have OwnCloud accounts.
Security Hardening
Beyond HTTPS and firewall configuration, additional security measures protect your OwnCloud instance.
File and Directory Permissions
If you encounter permission-related issues, re-apply the ownership and permission commands from Step 3 — Downloading and Installing OwnCloud.
Enabling Two-Factor Authentication
OwnCloud supports two-factor authentication (2FA) for additional account security.
- Install a 2FA app (e.g., Google Authenticator, Authy)
- In OwnCloud, go to Settings → Security
- Click Enable two-factor authentication
- Scan the QR code with your 2FA app
- Enter the verification code to confirm
After enabling 2FA, you’ll need both your password and a code from your 2FA app to log in.
Configuring Trusted Domains
Restrict which domains can access your OwnCloud instance. Edit the configuration file:
sudo nano /var/www/owncloud/config/config.php
Find the trusted_domains array and add your domain:
'trusted_domains' =>
array (
  0 => 'localhost',
  1 => 'your_domain.com',
),
Save and exit. This prevents unauthorized domains from accessing your instance.
Setting Up Fail2Ban (Optional)
Fail2Ban automatically bans IP addresses that show malicious behavior, such as repeated failed login attempts.
Fail2Ban configurations can vary depending on Apache log formats, virtual host paths, and OwnCloud versions. The example below provides a starting point and may require adjustment to match your server’s access log location and request patterns.
Install Fail2Ban:
sudo apt install -y fail2ban
Create a custom jail for OwnCloud:
sudo nano /etc/fail2ban/jail.d/owncloud.conf
Add the following configuration:
[owncloud]
enabled = true
port = 80,443
filter = owncloud
logpath = /var/log/apache2/owncloud_access.log
maxretry = 3
bantime = 3600
Create the filter:
sudo nano /etc/fail2ban/filter.d/owncloud.conf
Add:
[Definition]
failregex = ^.*"POST /owncloud/.*" (4[0-9]{2}|5[0-9]{2}) .*$
ignoreregex =
If Fail2Ban does not trigger as expected, verify the Apache access log path and refine the failregex to match actual OwnCloud request entries on your system.
Restart Fail2Ban:
sudo systemctl restart fail2ban
Fail2Ban will now monitor OwnCloud access logs and ban IPs with suspicious activity.
Performance Optimization
For optimal OwnCloud performance in a production environment, apply several important optimizations: increase PHP limits, enable and configure OPcache, optimize MySQL or MariaDB settings, use SSD storage for the data directory, configure Apache for concurrency, and ensure your server hardware is adequate.
PHP Configuration
Increase PHP memory limit and execution time. Edit the PHP configuration:
sudo nano /etc/php/7.4/apache2/php.ini
Find and modify these settings:
memory_limit = 512M
max_execution_time = 3600
upload_max_filesize = 1G
post_max_size = 1G
Restart Apache:
sudo systemctl restart apache2
Enabling OPcache
OPcache improves PHP performance by caching compiled PHP code. Enable it:
sudo nano /etc/php/7.4/apache2/php.ini
Find and uncomment:
opcache.enable=1
opcache.memory_consumption=128
opcache.interned_strings_buffer=8
opcache.max_accelerated_files=10000
opcache.revalidate_freq=2
Restart Apache:
sudo systemctl restart apache2
Database Optimization
Optimize MySQL for OwnCloud. Edit the MySQL configuration:
sudo nano /etc/mysql/mysql.conf.d/mysqld.cnf
Add or modify these settings under [mysqld]:
innodb_buffer_pool_size = 1G
innodb_log_file_size = 256M
max_connections = 200
Restart MySQL:
sudo systemctl restart mysql
Adjust these values based on your server’s available RAM and workload.
Storage Expansion
As your file storage needs increase over time, you do not have to worry about relocating existing data or disrupting service. OwnCloud allows you to seamlessly expand your available storage by adding additional disks, network shares, or integrating new storage backends through its external storage support. This flexibility means you can grow your storage pool by mounting new local drives, attaching SAN or NAS devices, or connecting to cloud-based storage solutions, all accessible directly through the OwnCloud interface without needing to migrate files.
Adding External Storage
OwnCloud supports mounting external storage backends:
- Go to Settings → Administration → External storage
- Click Add storage
- Select storage type (Local, FTP, S3, etc.)
- Configure connection details
- Set availability (all users or specific groups)
- Click Save
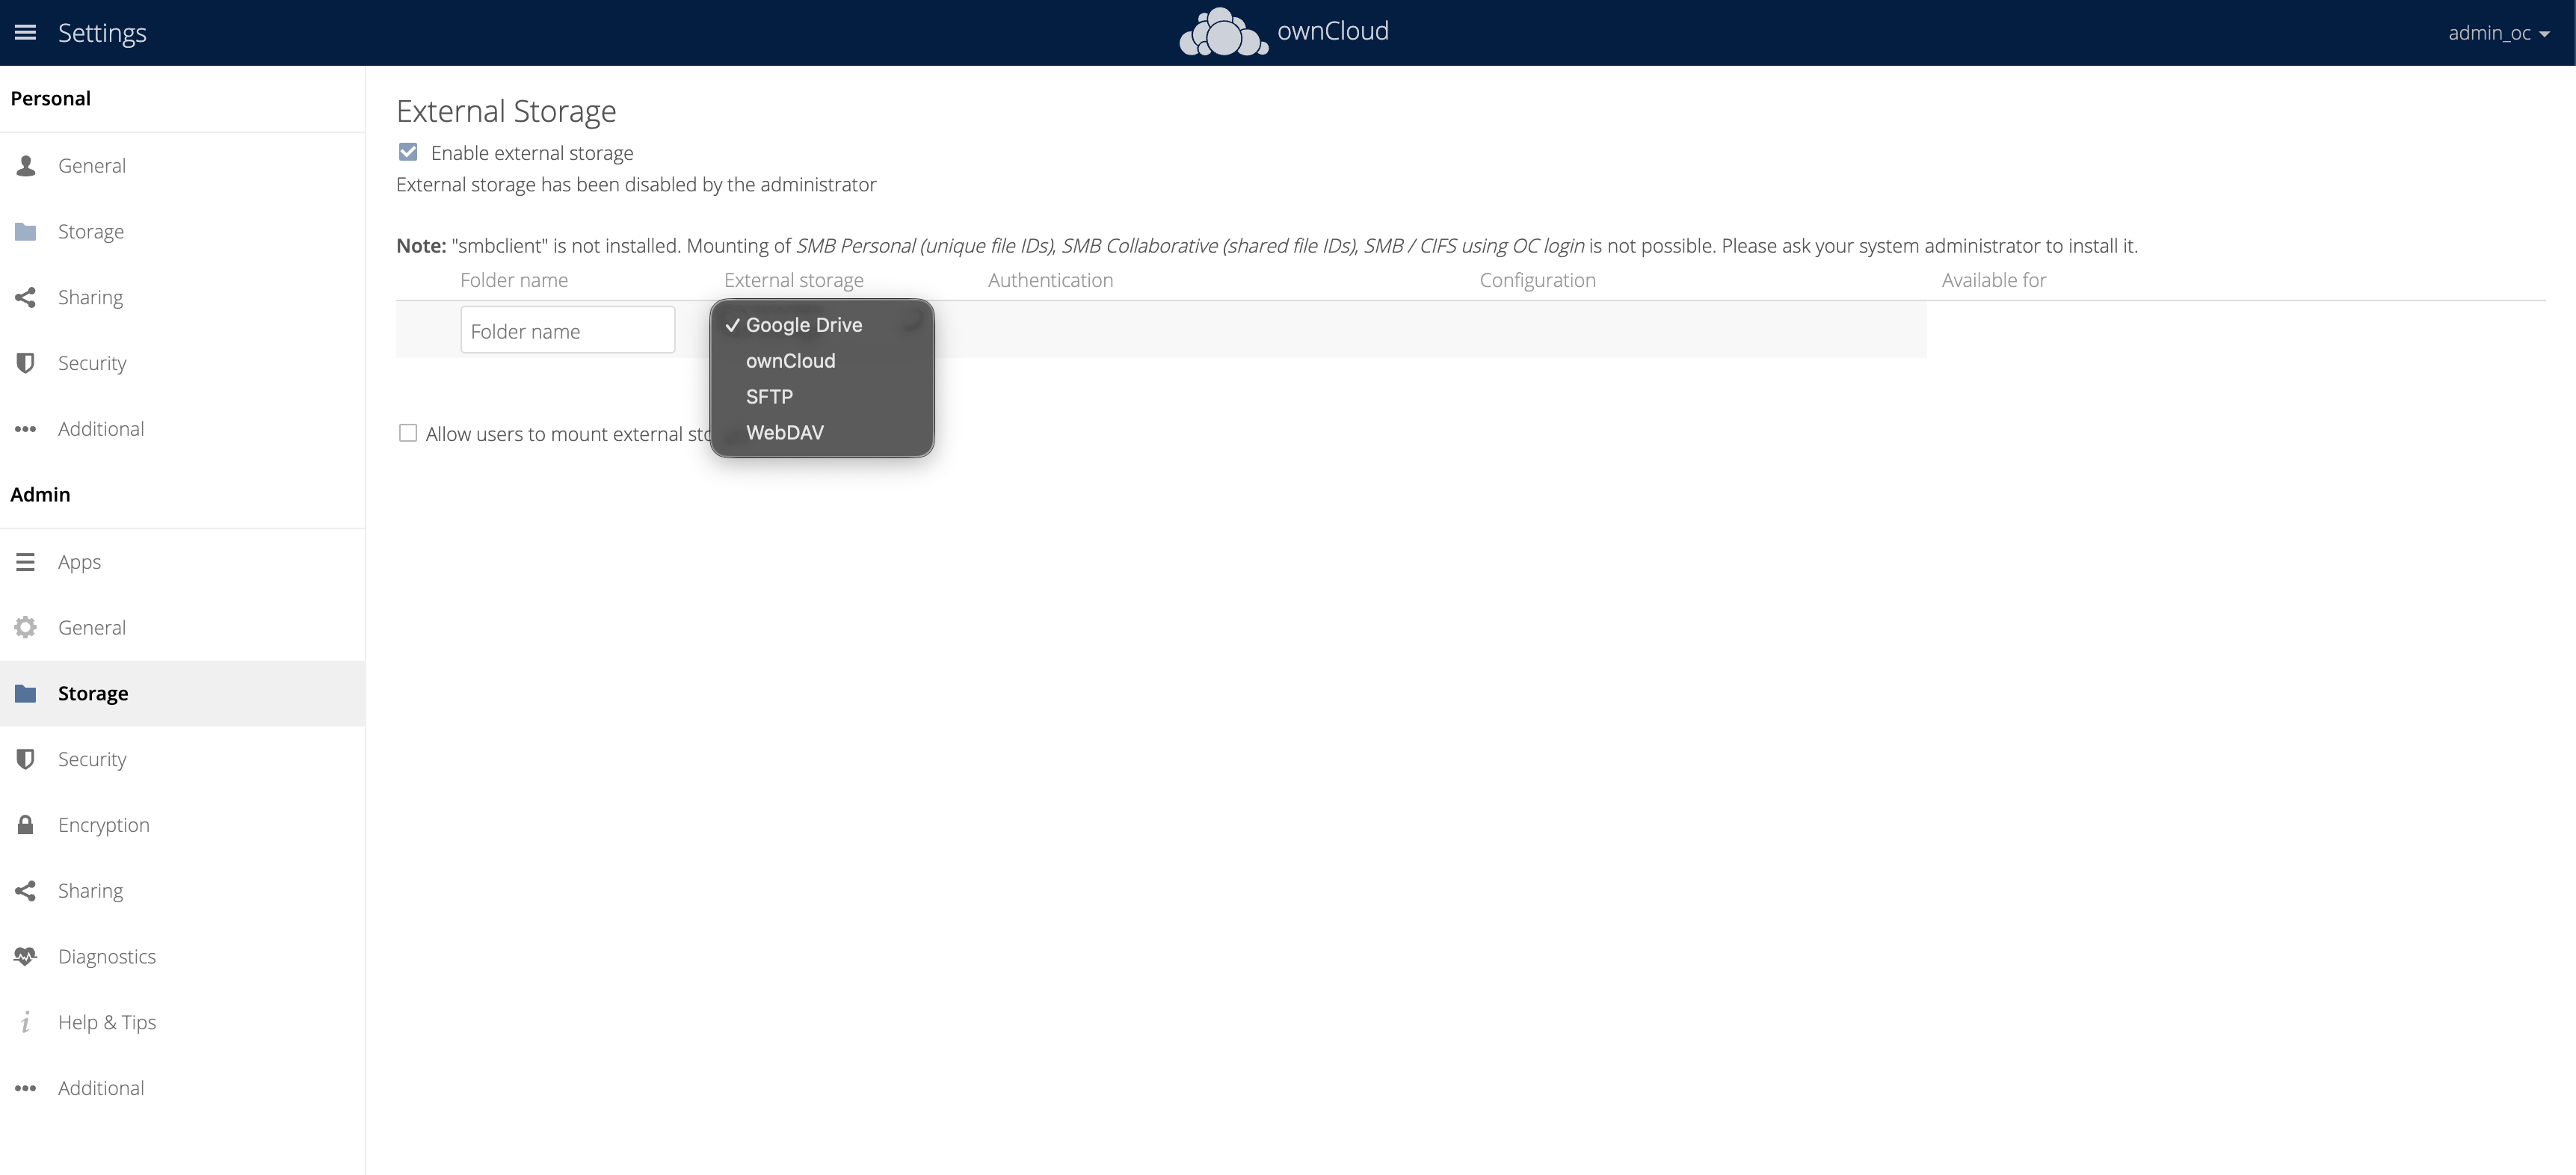
External storage appears in users’ file lists alongside local storage.
Using Object Storage
For large-scale deployments, consider S3-compatible object storage:
- Install the External storage app (usually pre-installed)
- Go to Settings → Administration → External storage
- Select Amazon S3 or S3 Compatible
- Enter access credentials and bucket name
- Configure as needed
Object storage provides scalable, cost-effective storage for large file collections.
OwnCloud vs Nextcloud: A Detailed Comparison for Secure Self-Hosted File Storage
When planning your self-hosted cloud storage solution, two of the top open-source contenders are OwnCloud and Nextcloud. Both offer robust file synchronization, sharing, and collaboration features, but there are important differences in philosophy, development approach, feature sets, security, and support options. This in-depth comparison will help you determine which platform best meets your personal or organizational needs.
Core Differences at a Glance
| Aspect | OwnCloud | Nextcloud |
|---|---|---|
| Primary Focus | Enterprise features, commercial long-term support, stability | Community-driven innovation, rapid feature rollouts, open-source ethos |
| Licensing | AGPL for core; commercial options for enterprise apps and support | 100% AGPL open source (all features) |
| Release Cadence | Stable, well-tested releases, less frequent updates | Fast-paced development, frequent new features and bug fixes |
| Advanced Features | Granular file access, enterprise encryption, ransomware protection, auditing | Collaboration tools, integrated video chat, mail, extensive sharing |
| App Ecosystem | Good but smaller (focused on stability and security) | Largest open-source app store: Notes, Talk, Groupware, Maps, more |
| Community Size | Smaller, enterprise-focused, strong commercial vendor backing | Larger, very active open-source community and contributors |
| Support | Official commercial support and SLAs (ownCloud GmbH) | Community support, optional paid enterprise support (Nextcloud GmbH) |
| Best For | Businesses needing compliance, support, and stability over new features | Organizations/students/developers wanting innovation and customization |
Detailed Feature Comparison
1. Security and Compliance
- OwnCloud: Offers advanced enterprise-grade security modules, including file firewall, ransomware protection, auditing, user provisioning, and multi-factor authentication. Compliance modules are available for GDPR, HIPAA, and other standards.
- Nextcloud: Strong security foundation with regular third-party audits, brute-force protection, two-factor authentication, and an active bug bounty program. Enterprise-level features such as advanced auditing or file firewall may require third-party apps or development.
2. Performance & Scalability
- OwnCloud: Engineered for large-scale, mission-critical deployments. Includes tools for distributed storage, file locking, and optimized handling of millions of files and users.
- Nextcloud: Scales well for most mid-sized organizations and communities. Horizontal scaling options are available, but advanced distributed storage requires additional configuration.
3. Collaboration Tools
- OwnCloud: Focuses on secure, predictable file storage and sharing, with essential collaboration features. Integrations for office document editing (with commercial add-ons) available.
- Nextcloud: Extensive built-in collaboration suite, real-time collaborative document editing (with Collabora/OnlyOffice), calendar, chat (Talk), mail, and more, all tightly integrated through its thriving app ecosystem.
4. Ecosystem and Extensibility
- OwnCloud: Maintains a curated, stable app marketplace targeted at business and compliance.
- Nextcloud: Offers the largest open-source cloud app store, hundreds of extensions for multimedia, groupware, research, DevOps, and more.
5. Commercial and Community Support
- OwnCloud: Backed by ownCloud GmbH, provides professional support, onboarding, and enterprise SLA packages. Used by large enterprises, government agencies, and regulated industries.
- Nextcloud: Led by Nextcloud GmbH with commercial support options, but places strong emphasis on open community collaboration. Online forums, documentation, and regular community events are available for all.
Decision Guidance: Which Platform Should You Choose?
Choose OwnCloud if:
- You require guaranteed enterprise support, long-term maintenance, or a formal service-level agreement (SLA).
- Your organization prioritizes predictability, compliance, and stability over bleeding-edge features.
- You need advanced commercial modules such as file firewall, ransomware protection, or detailed auditing.
- You are part of a regulated industry (e.g., healthcare, finance, government) and need official vendor backing.
Choose Nextcloud if:
- You want an agile, rapidly expanding platform with an active community and frequent feature enhancements.
- You need a wide variety of collaboration tools natively integrated (chat, video, mail, news, etc.).
- You prefer an exclusively open-source approach for all features, with no locked commercial modules.
- You wish to experiment with or contribute to a fast-evolving app ecosystem.
FAQ
Q: Is OwnCloud or Nextcloud better for enterprise use?
A: OwnCloud is generally favored by large enterprises requiring official support, long-term security maintenance, and compliance features. Nextcloud is suitable for enterprises as well, especially those embracing open-source community innovation.
Q: Can I migrate from OwnCloud to Nextcloud or vice versa?
A: Migration is possible since both share a similar core architecture, but compatibility varies by version and installed apps. Always back up your data and test migration in a non-production environment.
Q: OwnCloud vs Nextcloud: which is more future-proof for self-hosted file storage?
A: Both are mature and actively maintained. Nextcloud leads in rapid open-source innovation, while OwnCloud focuses on durability, compliance, and proven enterprise deployments. In summary, both OwnCloud and Nextcloud are powerful, feature-rich alternatives to commercial cloud services like Dropbox or Google Drive, offering privacy, flexibility, and full control over your data. Your decision should be guided by your specific requirements for security, support, and extensibility. By evaluating your organizational priorities, such as need for compliance, appetite for new features, and desired support model, you can confidently choose the right open-source file storage platform for your self-hosted environment.
Backup and Restore (Recommended)
Regular backups are essential to protect your OwnCloud data and enable disaster recovery.
Enable Maintenance Mode
Put OwnCloud into maintenance mode before backup to prevent data changes:
sudo -u www-data php /var/www/owncloud/occ maintenance:mode --on
Database Backup
Back up the MySQL database:
mysqldump -u owncloud -p owncloud > /root/owncloud_db_backup.sql
File Backup
Back up OwnCloud files and data directory:
tar czf /root/owncloud_files_backup.tar.gz /var/www/owncloud
# or, for incremental backup:
rsync -a /var/www/owncloud/ /backup/location/owncloud/
Restore Procedure
-
Restore the database first:
mysql -u owncloud -p owncloud < /root/owncloud_db_backup.sql -
Restore the files and data directory:
tar xzf /root/owncloud_files_backup.tar.gz -C / # or use rsync to copy files back -
Disable maintenance mode:
sudo -u www-data php /var/www/owncloud/occ maintenance:mode --off
Restore order: Always restore the database before restoring the files. After restoring, disable maintenance mode to bring OwnCloud back online.
Troubleshooting Common Issues
-
Internal Server Error: Usually caused by incorrect file permissions or a missing PHP/Apache module. Re-apply the ownership and permission commands from Step 3 — Downloading and Installing OwnCloud and verify required PHP modules are enabled.
-
Trusted domain error: Update the
trusted_domainsarray in/var/www/owncloud/config/config.phpto include your server’s domain. -
Large upload failures: Increase
upload_max_filesize,post_max_size, andmax_execution_timesettings in/etc/php/7.4/apache2/php.ini, then restart Apache. -
Maintenance mode stuck: Disable maintenance mode with:
sudo -u www-data php /var/www/owncloud/occ maintenance:mode --off
PHP Version Compatibility
OwnCloud requires PHP 7.4. Check your PHP version:
php -v
If you’re running an older version, install PHP 7.4 with the Apache module:
sudo apt install -y php7.4 libapache2-mod-php7.4 php7.4-mysql php7.4-gd php7.4-zip php7.4-intl php7.4-xml php7.4-mbstring php7.4-curl
Enable the PHP module and restart Apache:
sudo a2enmod php7.4
sudo systemctl restart apache2
Verify PHP is loaded in Apache:
apache2ctl -M | grep php7
You should see php7_module in the output.
Database Connection Errors
If OwnCloud can’t connect to MySQL, verify:
- MySQL is running:
sudo systemctl status mysql - Database credentials are correct in
/var/www/owncloud/config/config.php - MySQL user has proper permissions:
sudo mysql -u root -p -e "SHOW GRANTS FOR 'owncloud'@'localhost';"
Permission Errors
Re-apply the ownership and permission commands from Step 3 — Downloading and Installing OwnCloud.
If issues persist, verify Apache can read the files:
sudo -u www-data ls -la /var/www/owncloud
This confirms the web server user has proper access.
SSL Certificate Issues
If HTTPS isn’t working:
- Verify certificate:
sudo certbot certificates - Check Apache SSL configuration:
sudo apache2ctl -S - Verify DNS points to your server:
dig your_domain.com - Check firewall allows port 443:
sudo ufw status
Pros and Cons of Self-Hosting OwnCloud
Pros
- Complete Data Control: All data stays on your infrastructure, meeting compliance and data residency requirements
- No Per-User Fees: One-time server costs versus recurring per-user cloud storage fees
- Customization: Modify and extend OwnCloud to match your organization’s needs
- Privacy: No third-party access to your files or metadata
- Integration: Connect with existing on-premises infrastructure and services
- Unlimited Storage: Scale storage based on your hardware, not vendor limits
Cons
- Maintenance Required: You’re responsible for updates, backups, security patches, and troubleshooting
- Initial Setup Complexity: Requires Linux, web server, and database administration knowledge
- Hardware Costs: Need to provision and maintain server hardware or cloud instances
- Performance Tuning: May require optimization for large deployments or high concurrency
- Support: Community support only (unless using OwnCloud Enterprise with commercial support)
Self-hosting OwnCloud makes sense when data sovereignty, cost savings over time, or customization are priorities. It’s less suitable if you lack technical expertise or prefer managed services.
Frequently Asked Questions (FAQs)
Q1: What are the system requirements for running OwnCloud on Ubuntu?
OwnCloud requires Ubuntu 22.04 or later (LTS), Apache 2.4+, MySQL 5.7+ or MariaDB 10.2+, and PHP 7.4. Minimum hardware: 2GB RAM, 20GB disk space. For production with multiple users, plan for 4GB+ RAM and 100GB+ storage. The exact requirements depend on user count, file sizes, and concurrent access patterns.
Q2: Can I use Nginx instead of Apache with OwnCloud?
Yes, OwnCloud works with Nginx, but Apache is the officially recommended web server and has better documentation. If using Nginx, you’ll need to configure PHP-FPM and rewrite rules manually. The OwnCloud documentation includes Nginx configuration examples.
Q3: How do I back up my OwnCloud installation?
Back up three components: the OwnCloud application files (/var/www/owncloud), the data directory (/var/www/owncloud/data), and the MySQL database. Use mysqldump for the database and rsync or tar for files. Schedule regular automated backups and test restoration procedures.
Q4: Is OwnCloud secure for sensitive data?
OwnCloud provides strong security when properly configured: HTTPS encryption, user authentication, optional two-factor authentication, and file-level access controls. For highly sensitive data, consider OwnCloud Enterprise with advanced encryption features, or implement additional security measures like encryption at rest and network isolation.
Q5: How do I upgrade OwnCloud to a new version?
Before upgrading, back up your installation and database. Download the new version, extract it to a temporary location, stop the web server, replace the application files (excluding config/ and data/), update file permissions, and run the upgrade script via the web interface or command line (occ upgrade). Always test upgrades in a staging environment first.
Q6: Can OwnCloud integrate with Active Directory or LDAP?
Yes, OwnCloud supports LDAP and Active Directory integration through the LDAP user backend app. This allows you to use existing user accounts from your directory service, eliminating the need to manage separate OwnCloud user accounts. Configure LDAP in Settings → Administration → User authentication.
Q7: What’s the difference between OwnCloud Community and Enterprise editions?
OwnCloud Community Edition is open-source and free, with core file storage and sharing features. Enterprise Edition adds advanced security (ransomware protection, file firewall), compliance features (retention policies, audit logs), commercial support, and priority bug fixes. Most small to medium deployments work well with Community Edition.
Q8: How can I improve OwnCloud performance on Ubuntu?
Enable PHP OPcache, optimize MySQL settings (increase innodb_buffer_pool_size), use SSD storage for the data directory, configure Apache with appropriate worker settings, and consider using a reverse proxy cache for static assets. For very large deployments, consider object storage backends or distributed file systems.
Q9: Does OwnCloud support mobile apps?
Yes, OwnCloud provides official mobile apps for iOS and Android. These apps allow you to access, sync, and share files from mobile devices. The apps support automatic photo upload, offline file access, and secure connections to your OwnCloud instance.
Q10: Can I use PostgreSQL instead of MySQL?
Yes, OwnCloud supports PostgreSQL as an alternative database backend. During installation, select PostgreSQL instead of MySQL and provide the connection details. PostgreSQL is less commonly used with OwnCloud but works well for deployments already using PostgreSQL infrastructure.
Conclusion
OwnCloud provides a powerful, self-hosted alternative to commercial cloud storage services. By installing OwnCloud on Ubuntu with Apache, MySQL, and PHP, you gain complete control over your file storage infrastructure while maintaining features like file synchronization, sharing, and collaboration.
The setup process involves installing the LAMP stack, configuring the database, securing the installation with HTTPS, and hardening security with firewalls and proper permissions. Once operational, OwnCloud supports user management, external storage integration, and performance optimization for production deployments.
Whether you’re looking to maintain data sovereignty, reduce long-term storage costs, or customize your file storage solution, OwnCloud on Ubuntu offers a flexible foundation that scales from personal use to enterprise deployments. The choice between OwnCloud and Nextcloud depends on your priorities: enterprise support and stability versus community-driven innovation and rapid feature releases.
With proper configuration, security hardening, and regular maintenance, your OwnCloud instance will provide reliable, private file storage for years to come.
Thanks for learning with the DigitalOcean Community. Check out our offerings for compute, storage, networking, and managed databases.
About the author
Building future-ready infrastructure with Linux, Cloud, and DevOps. Full Stack Developer & System Administrator. Technical Writer @ DigitalOcean | GitHub Contributor | Passionate about Docker, PostgreSQL, and Open Source | Exploring NLP & AI-TensorFlow | Nailed over 50+ deployments across production environments.
Still looking for an answer?
This textbox defaults to using Markdown to format your answer.
You can type !ref in this text area to quickly search our full set of tutorials, documentation & marketplace offerings and insert the link!
 This work is licensed under a Creative Commons Attribution-NonCommercial- ShareAlike 4.0 International License.
Become a contributor for community
Get paid to write technical tutorials and select a tech-focused charity to receive a matching donation.

DigitalOcean Documentation
Full documentation for every DigitalOcean product.

Resources for startups and AI-native businesses
The Wave has everything you need to know about building a business, from raising funding to marketing your product.
The developer cloud
Scale up as you grow — whether you're running one virtual machine or ten thousand.

Start building today
From GPU-powered inference and Kubernetes to managed databases and storage, get everything you need to build, scale, and deploy intelligent applications.
