- Log in to:
- Community
- DigitalOcean
- Sign up for:
- Community
- DigitalOcean

Getting errors while updating system repositories or installing new software? You may get errors because your /etc/apt/source.list file is corrupted which contains the repositories details. In this article, We will see how to restore the default repositories in Ubuntu.
There are four standard repositories in Ubuntu:
- Main
- Universe
- Restricted
- Multiverse
Restore default repositories in Ubuntu
First, We need to back up the corrupted source file by moving it to another location. Open a terminal by pressing Ctrl+Alt+T and enter the following command to change the directory to where the source file is located:
cd /etc/apt

Now, move the corrupted file to other location:
sudo mv sources.list <location>
sudo mv sources.list /sid/home/Desktop

Create a new file using the touch command:
sudo touch /etc/apt/sources.list

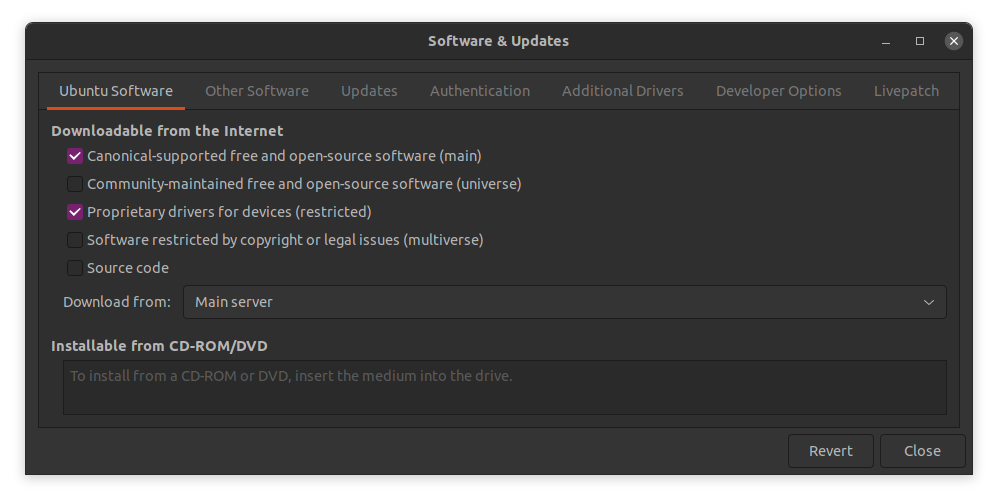
Now, Open the Software & Updates application using the search bar or the app drawer. Change the server to the main server and enable the restriced repository. You can also enable universe and multiverse repositories if needed.

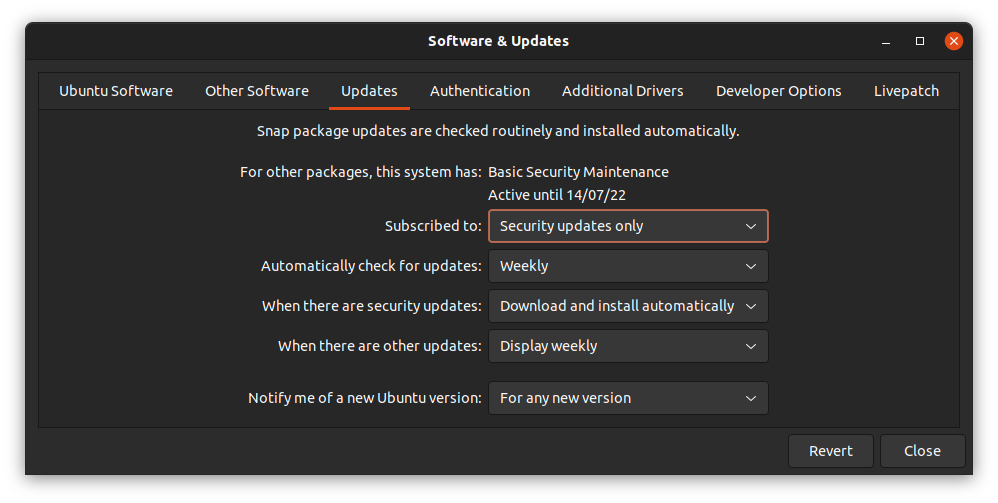
To enable the updates, Under the Updates tab, select All updates or at least security updates in Subscribed to drop-down menu and click on close.

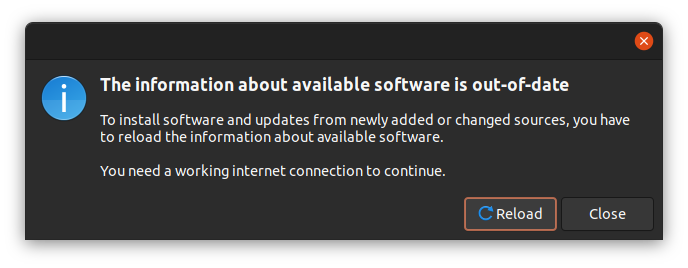
Click on Reload. The software repositories will be updated.

Verify if repositories has been added
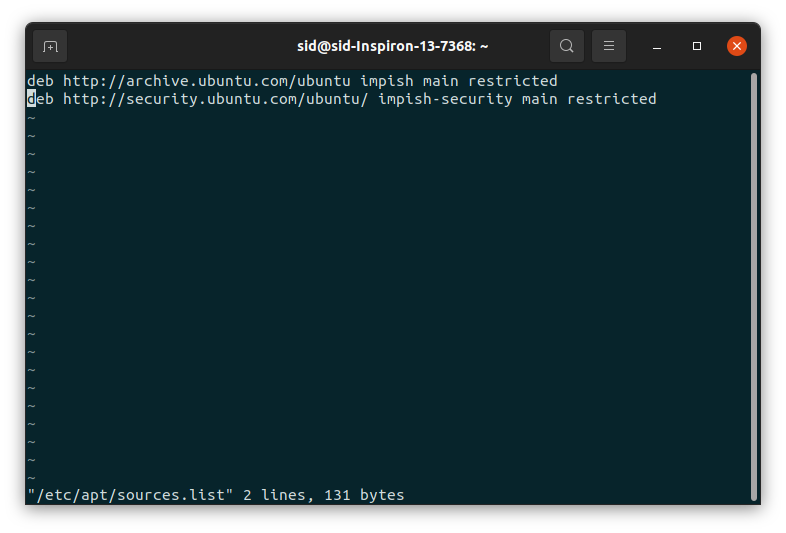
To verify, open a terminal by pressing Ctrl+Alt+T. Open the /etc/apt/sources.list file by running the following command:
sudo vi /etc/apt/sources.list

If there are entries without the # as shown below, the repositories has been added.

Finally, Update the repositories by executing the following command:
sudo apt update

Conclusion
So, We learned how to restore default repositories in Ubuntu. Follow Journaldev.com for even more tutorials on Linux, Python and more!
Thanks for learning with the DigitalOcean Community. Check out our offerings for compute, storage, networking, and managed databases.
About the author
Still looking for an answer?
- Table of contents
- Restore default repositories in Ubuntu
- Verify if repositories has been added
- Conclusion
Deploy on DigitalOcean
Click below to sign up for DigitalOcean's virtual machines, Databases, and AIML products.
Become a contributor for community
Get paid to write technical tutorials and select a tech-focused charity to receive a matching donation.
DigitalOcean Documentation
Full documentation for every DigitalOcean product.
Resources for startups and SMBs
The Wave has everything you need to know about building a business, from raising funding to marketing your product.
Get our newsletter
Stay up to date by signing up for DigitalOcean’s Infrastructure as a Newsletter.
New accounts only. By submitting your email you agree to our Privacy Policy
The developer cloud
Scale up as you grow — whether you're running one virtual machine or ten thousand.
Get started for free
Sign up and get $200 in credit for your first 60 days with DigitalOcean.*
*This promotional offer applies to new accounts only.
