By Egwuenu Gift

The alert() method available on the Window object for notifications and alerts in your apps is really not ideal for most situations. For one, it’s ugly and has no way to be customized. Thankfully, a popular library called SweetAlert 2 (sucessor to SweetAlert) offers us a great replacement that’s responsive, customizable and accessible.
vue-sweetalert2 is a wrapper for SweetAlert 2 that makes it easy to integrate the capabilities in your Vue apps.
Here’s we’ll go over the basic setup and usage.
Installation
Install vue-sweetalert in your Vue.js project using npm or Yarn:
# npm
$ npm install vue-sweetalert2

# Yarn
$ yarn add vue-sweetalert2
Usage
With the package installed, all you’ll need is to add the VueSweetalert2 component to your main.js file:
import Vue from 'vue'
import VueSweetalert2 from 'vue-sweetalert2';
import App from './App.vue';

Vue.use(VueSweetalert2);

new Vue({
  el: '#app',
  render: h => h(App)
});
Now in the main app you can access all the methods of Vue-Sweetalert2 using the $swal function:
<template>
<!-- button used to trigger event -->
<button v-on:click="alertDisplay">Click me</button>
</template>
<script>
export default {
data() {
return {
text: ''
}
},
methods: {
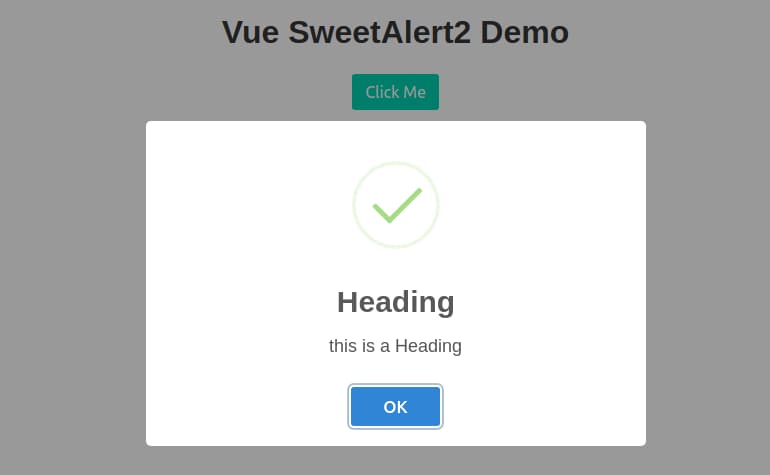
alertDisplay() {
// $swal function calls SweetAlert into the application with the specified configuration.
this.$swal('Heading', 'this is a Heading', 'OK');
}
}
}
<script>
Detailed Examples
SweetAlert 2 comes with other built-in methods which we’ll explore in this section. You can also refer to the API documentation for more examples.
Passing Input Data
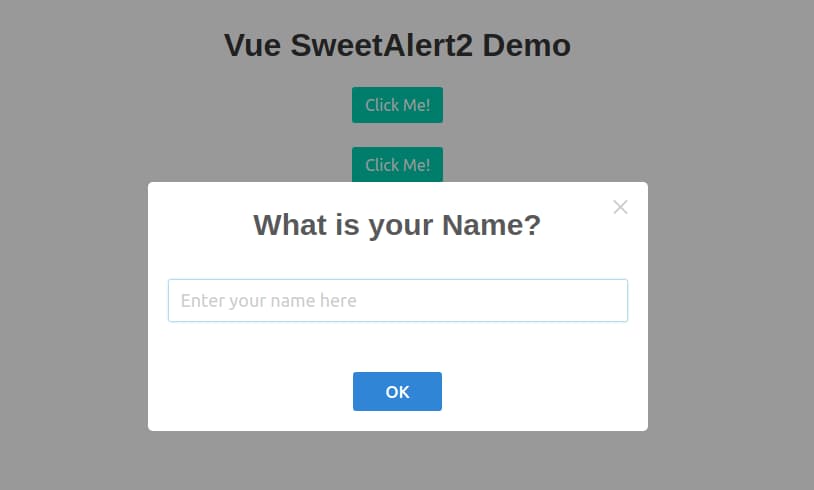
If you want a modal/popup that can accept user input, simply use the input key in the configuration passed to $swal:
<template>
  <button v-on:click="alertDisplay">Click Me!</button>
</template>

<script>
  export default {
    data() {
      return {}
    },
    methods: {
        alertDisplay() {
          // Adding an input method from SweetAlert 2 automatically binds an input form.
        this.$swal({
          title: 'What is your Name?',
          input: 'text',
          inputPlaceholder: 'Enter your name here',
          showCloseButton: true,
        });
      }
    }
  }
</script>
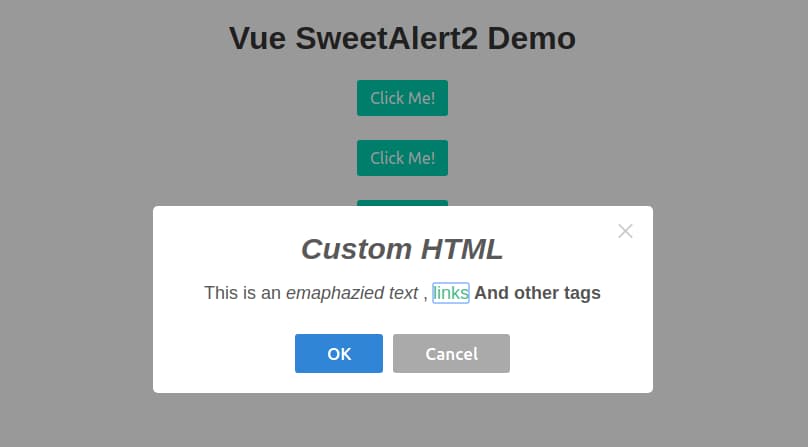
Defining Custom HTML
You can also add your own markup as part of the modal. Simply use the html key in the configuration:
<template>
  <button v-on:click="alertDisplay">Click Me!</button>
</template>

<script>
  export default {
    data() {
      return {}
    },
    methods: {
      alertDisplay() {
        this.$swal({
              title: '<i>Custom HTML</i>',
          // add a custom html tags by defining a html method.
          html:
            'This is an <em> emaphazied text </em>, ' +
            '<a href="#">links</a> ' +
            '<strong>And other tags</strong>',
          showCloseButton: true,
          showCancelButton: true,
          focusConfirm: false,
        })
      }
    }
  }
</script>
Promise-based API
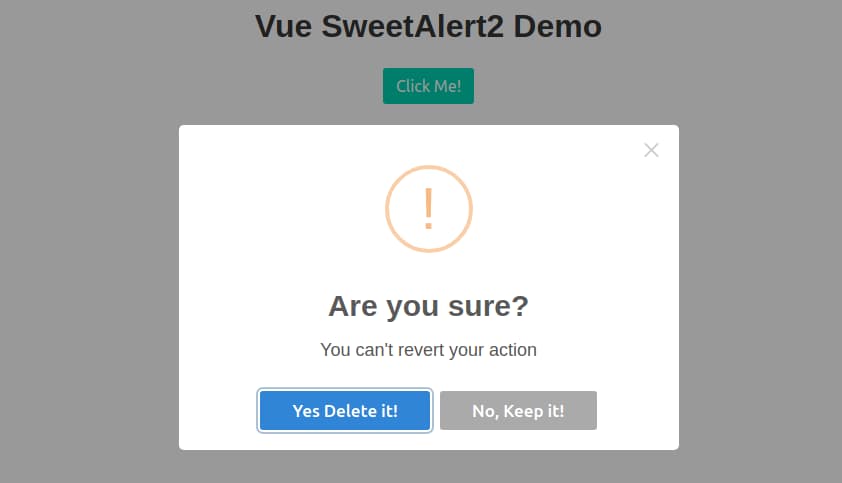
SweetAlert 2 uses promises to keep track of how a user interact with the notification. In the following example, we display a success prompt if the promise resolves with a truthy value, and otherwise we display another alert prompt displaying an alternative message:
<template>
  <button v-on:click="alertDisplay">Click Me!</button>
</template>

<script>
  export default {
    data() {
      return {}
    },
    methods: {
      alertDisplay() {
        this.$swal({
          title: 'Are you sure?',
          text: 'You can\'t revert your action',
          type: 'warning',
          showCancelButton: true,
          confirmButtonText: 'Yes Delete it!',
          cancelButtonText: 'No, Keep it!',
          showCloseButton: true,
          showLoaderOnConfirm: true
        }).then((result) => {
          if(result.value) {
            this.$swal('Deleted', 'You successfully deleted this file', 'success')
          } else {
            this.$swal('Cancelled', 'Your file is still intact', 'info')
          }
        })
      }
    }
  }
</script>
There you go! 🚀 That was really fast and easy-enough right? You can now create simple and easy alerts and notifications in your apps with just a few lines of code.
Thanks for learning with the DigitalOcean Community. Check out our offerings for compute, storage, networking, and managed databases.
About the author
Still looking for an answer?
This textbox defaults to using Markdown to format your answer.
You can type !ref in this text area to quickly search our full set of tutorials, documentation & marketplace offerings and insert the link!
 This work is licensed under a Creative Commons Attribution-NonCommercial- ShareAlike 4.0 International License.
Become a contributor for community
Get paid to write technical tutorials and select a tech-focused charity to receive a matching donation.

DigitalOcean Documentation
Full documentation for every DigitalOcean product.

Resources for startups and AI-native businesses
The Wave has everything you need to know about building a business, from raising funding to marketing your product.
The developer cloud
Scale up as you grow — whether you're running one virtual machine or ten thousand.

Start building today
From GPU-powered inference and Kubernetes to managed databases and storage, get everything you need to build, scale, and deploy intelligent applications.
