Sr Technical Content Strategist and Team Lead

Introduction
Caching is a crucial optimization technique that can significantly enhance the performance of web applications by reducing the load on the server and improving response times.
This tutorial will demonstrate how to set up caching using DigitalOcean Redis on a sample DigitalOcean App Platform web application. We’ll deploy a sample Express.js app from the DigitalOcean sample apps, integrate Redis for caching, and compare performance metrics for cached and uncached endpoints using pm2.
Prerequisites
Before starting, ensure you have the following prerequisites in place:
- A DigitalOcean account.
- A sample Express.js application deployed on App Platform.
- A Redis Database deployed and attached to the App Platform app.
- Artillery installed on your App Platform instance for simulating load testing.
- Pm2 installed on your App Platform Instance for comparing performance.
Creating a DigitalOcean Redis Database
Let’s start with creating a Redis Database.
Navigate to the Databases section in your DigitalOcean cloud control Panel.
Click “Create Database Cluster” and choose Redis. You will need to choose a data center region.
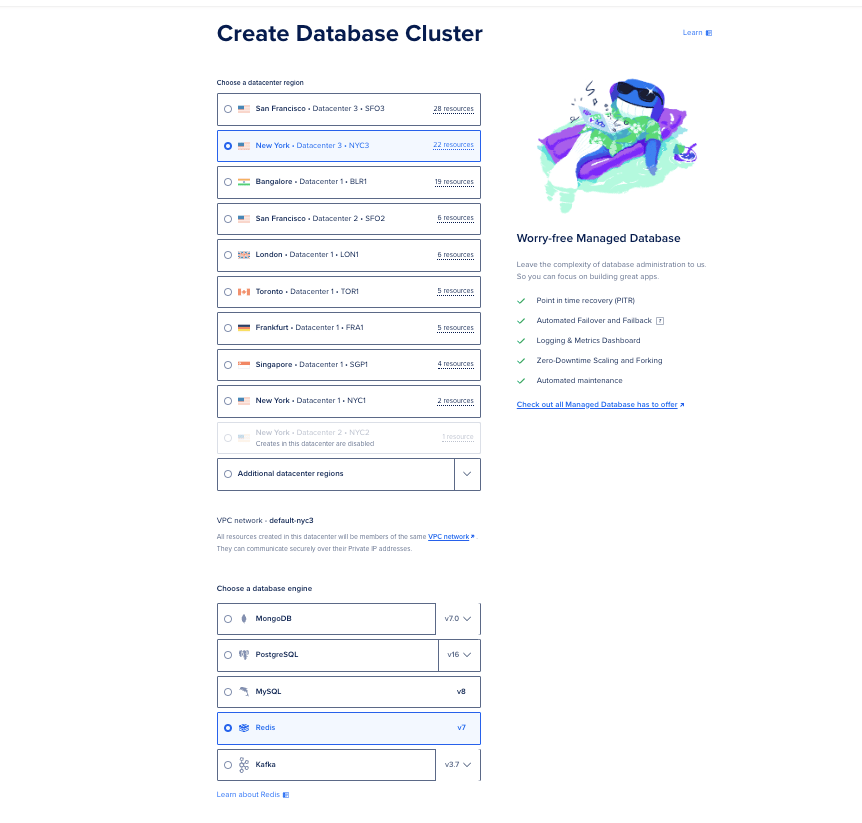
Configure the database settings, follow the on-screen instructions, and click the Create Database cluster.
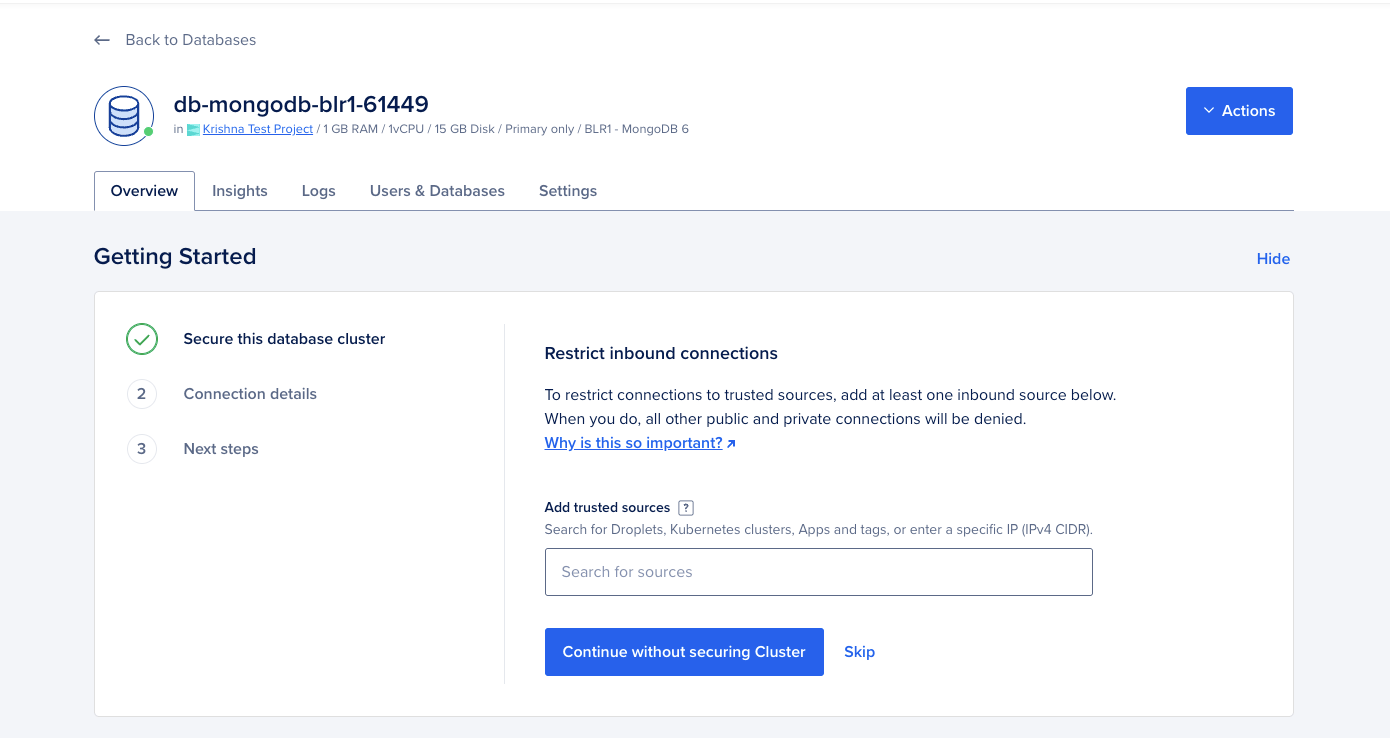
Once the Redis database cluster is created you can check its Overview, insights, logs as well as Settings in the below tabs:
Deploying the Sample Express.js App on the App Platform
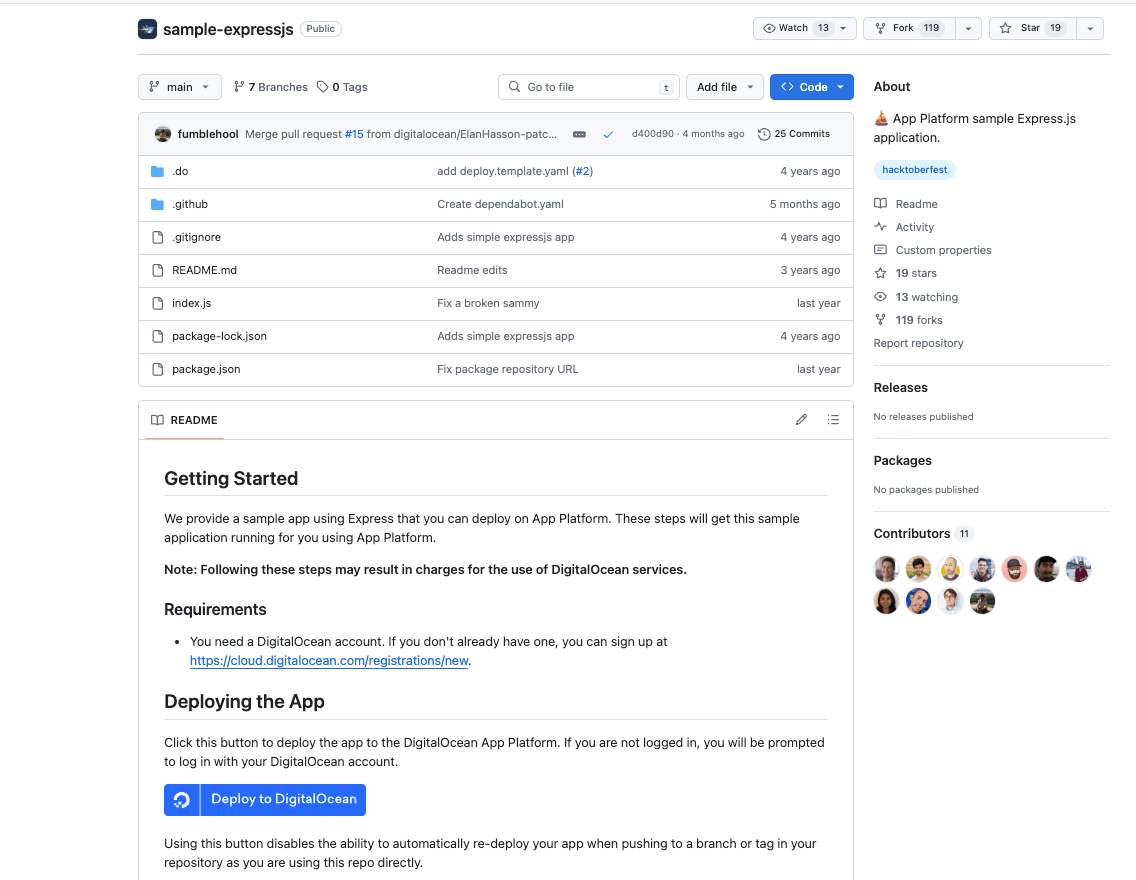
To deploy the sample Express.js app from the DigitalOcean sample apps repository, follow these steps:
You will need to fork this GitHub repository to your Github account to have a copy of it stored in the cloud. Click the Fork button in the GitHub repository and follow the on-screen instructions.
Now, clone the forked Repository locally on your system.
Open your terminal and run the following commands to clone the forked repository to your local machine:
git clone https://github.com/YOUR-USERNAME/YOUR-REPOSITORY.git
cd <YOUR-REPOSITORY-DIRECTORY>
Now Install the necessary npm packages:
npm install ioredis express -g
First, let’s create a file to initialize the Redis Client.
vi redisClient.js
Now add the below code to the file.
const Redis = require('ioredis');

let redisClient;

const getRedisClient = () => {
  if (!redisClient) {
    redisClient = new Redis({
      host: 'You Redis HostName',
      port: 'PORT',
      password: 'Password'
    });

    redisClient.on('error', (err) => {
      console.error('Redis error:', err);
    });
  }
  return redisClient;
};

module.exports = getRedisClient;
The above file creates and manages a Redis client instance using the ioredis node library. ioredis is a popular Redis client for Node. js. It is a high-performance client written in Typescript and supports TLS connections and Redis 6 and above. This module ensures that only one Redis client instance is created and reused throughout the application.
You can copy the host, port, and password of the Redis database from the Redis dashboard on the DigitalOcean Database page:
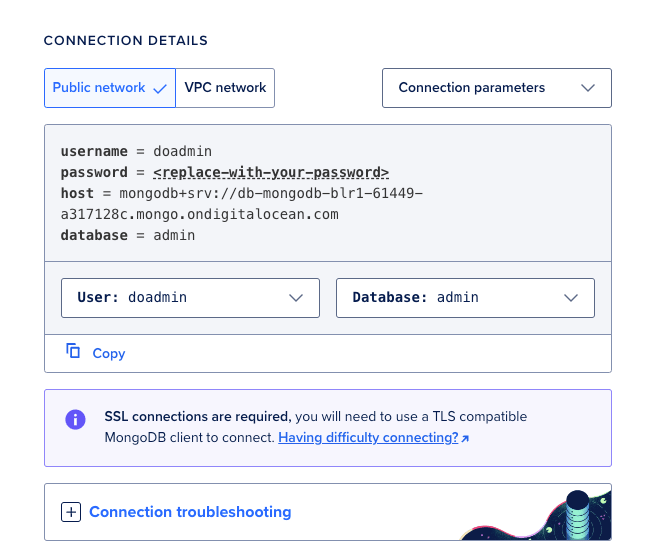
Note: In the steps below, add these Redis database connection details as environment variables while creating an App Platform app.
Now, let’s create a local database.js file with some dummy data to test when the app is deployed:
const data = {
  1: "Hello, World!",
  2: "Welcome to the caching demo.",
  3: "This is a simple Express application.",
  // Add more data as needed
};

function getDataById(id) {
  return new Promise((resolve) => {
    setTimeout(() => {
      resolve(data[id] || null); // Return null if data not found
    }, 1000); // Simulate a 1 second delay
  });
}

function addData(id, value) {
  return new Promise((resolve, reject) => {
    if (data[id]) {
      return reject(new Error('Data already exists'));
    }
    data[id] = value;
    resolve();
  });
}

module.exports = { getDataById, addData };
Next, let’s edit the index.js file to include endpoints for cached and uncached data:
const express = require('express');
const createRedisClient = require('./redisClient');
const { getDataById, addData } = require('./database');

const app = express();
app.use(express.json());

const redis = createRedisClient();

// Function to get data without caching
async function getDataNoCache(id) {
  const data = await getDataById(id);
  if (!data) {
    throw new Error('Data not found');
  }
  return data;
}

// Function to get data with Redis caching
async function getDataRedis(id) {
  const cacheKey = `data:${id}`;
  let data;

  try {
    data = await redis.get(cacheKey);
  } catch (err) {
    console.error('Redis get error:', err);
  }

  if (!data) {
    console.log('Redis Cache miss - fetching from database');
    data = await getDataById(id);
    if (!data) {
      throw new Error('Data not found');
    }
    try {
      await redis.set(cacheKey, data, 'EX', 3600); // Cache for 1 hour
    } catch (err) {
      console.error('Redis set error:', err);
    }
  } else {
    console.log('Redis Cache hit');
  }

  return data;
}

// Endpoint to add data to the mock database and Redis cache
app.post('/data/:id', async (req, res) => {
  const { id } = req.params;
  const { value } = req.body;

  try {
    await addData(id, value);
    await redis.set(`data:${id}`, value, 'EX', 3600); // Cache for 1 hour
    res.status(201).json({ message: 'Data added successfully' });
  } catch (error) {
    res.status(500).json({ error: error.message });
  }
});

// Endpoint to get data without caching
app.get('/data/no-cache/:id', async (req, res) => {
  try {
    const data = await getDataNoCache(req.params.id);
    res.json({ data });
  } catch (error) {
    res.status(404).json({ error: error.message });
  }
});

// Endpoint to get data with Redis caching
app.get('/data/redis/:id', async (req, res) => {
  try {
    const data = await getDataRedis(req.params.id);
    res.json({ data });
  } catch (error) {
    res.status(404).json({ error: error.message });
  }
});

const PORT = process.env.PORT || 3000;
app.listen(PORT, () => {
  console.log(`Server is running on port ${PORT}`);
});
The above sets up an Express.js application with endpoints for handling data with and without Redis caching.
-
getDataRedis(id): An asynchronous function that first attempts to get data from the Redis cache. If the data is not in the cache (cache miss), it fetches from the database and is set in the Redis cache with a 1-hour expiration time. If the data is found in the cache (cache hit), it logs a message and returns the cached data.
-
getDataNoCache(id): An asynchronous function that fetches data from the local cache using getDataById. If the data is not found, it throws an error.
-
POST /data/:id: This is an Endpoint for adding data to the database and the Redis cache. The data is sent in the request body. It responds with a status of 201 and a success message if successful. If there’s an error, it responds with a 500 status and an error message.
-
GET /data/no-cache/:id: Endpoint to get data directly from the database without caching. It uses the
getDataNoCachefunction. If data is found, it responds with the data. If not, it responds with a 404 status and an error message. -
GET/data/redis/:id: Endpoint to get data using Redis caching. It uses the getDataRedis function. If data is found, it responds with the data. If not, it responds with a 404 status and an error message.
This code provides a basic setup for an Express.js application that handles data with and without Redis caching, demonstrating how caching can be used to improve performance by reducing database load.
Note: The above is a simple example. Feel free to edit and use your own logic and code to implement caching using Redis for your application. This tutorial aims to demonstrate how to connect the DigitalOcean Redis Database with an App Platform application and implement caching.
After making the necessary changes, push them back to your forked repository:
git add .
git commit -m "Implementing Redis caching"
git push origin main
Create a New App on the App Platform
Log in to your DigitalOcean account.
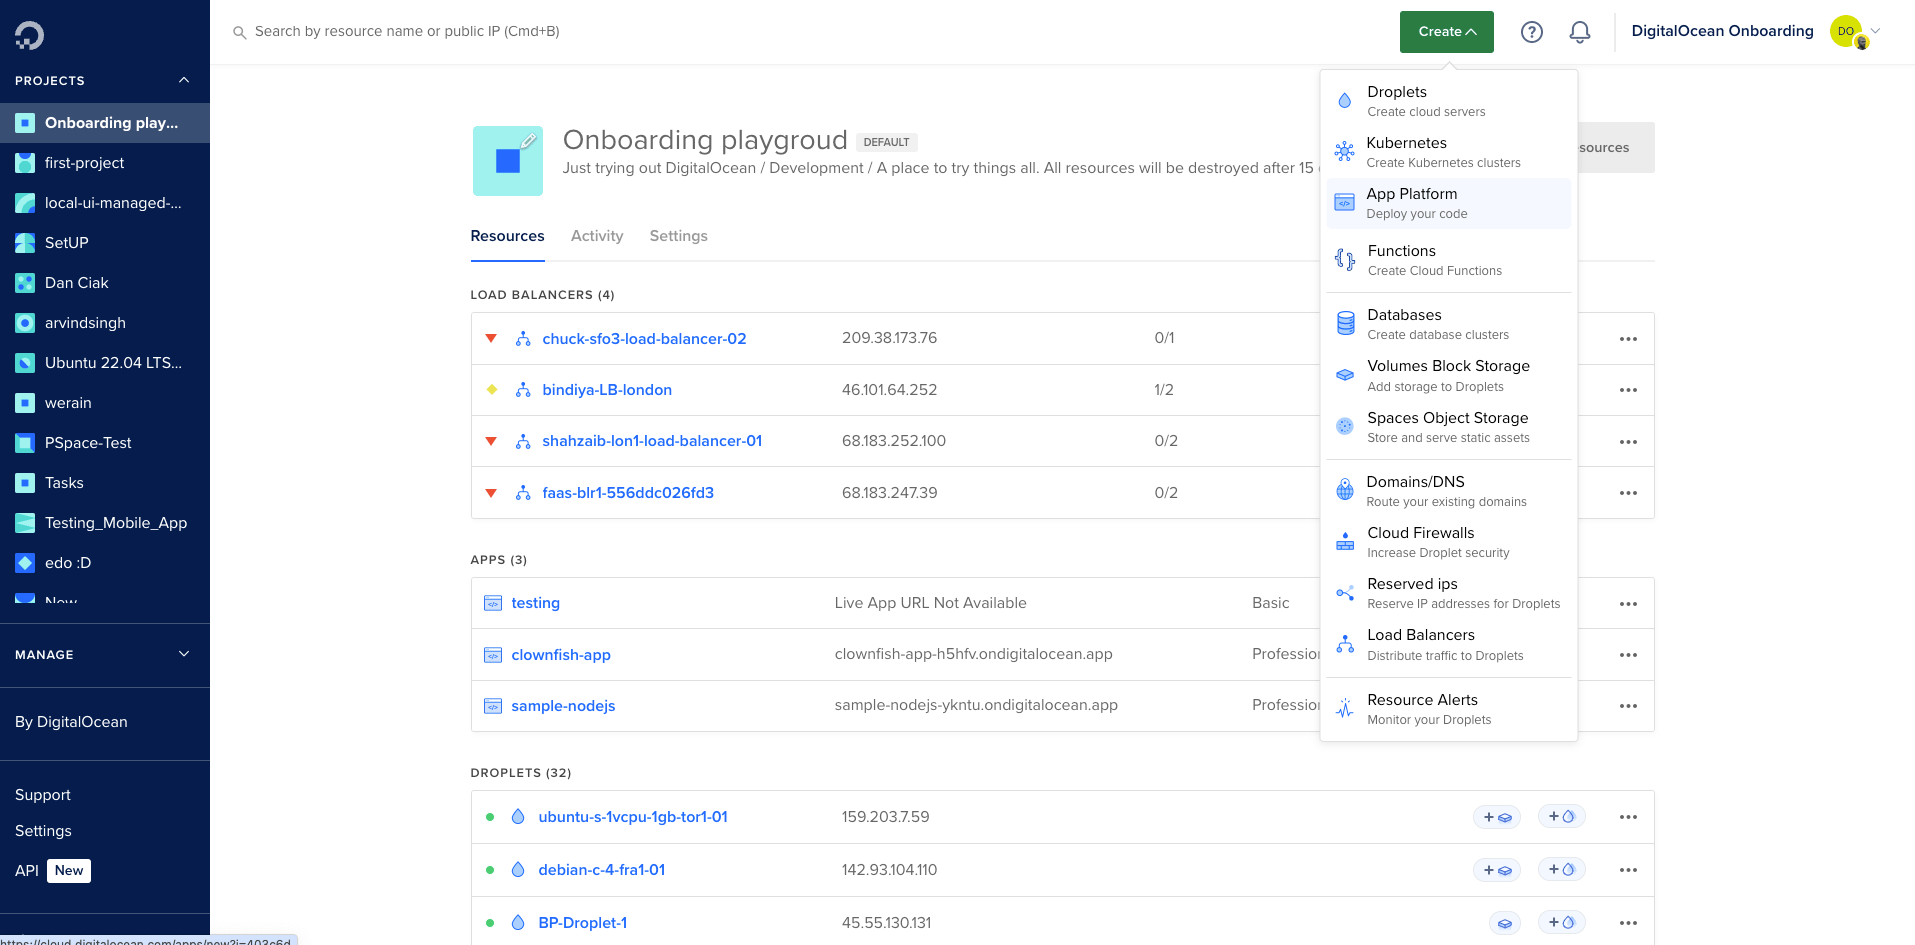
Navigate to the App Platform and click on Create App -> App Platform.
Select “GitHub” as the source and authorize DigitalOcean to access your repository.
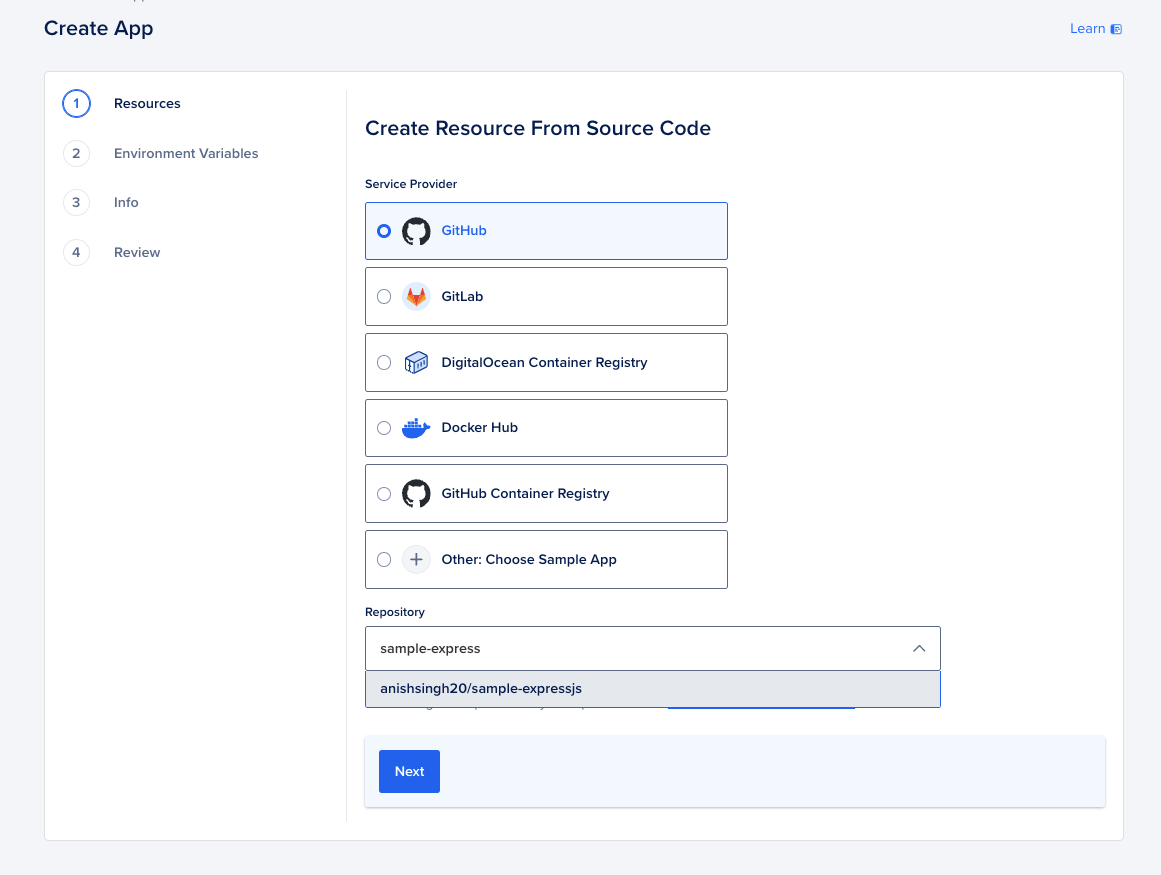
Follow the on-screen instructions to set your application’s resources, general configuration, and Environment variables, and click Next. Once done, review the overall configuration of the app. Click on Create Resources when done. Once the application is created, it will take some time to deploy on the App Platform.
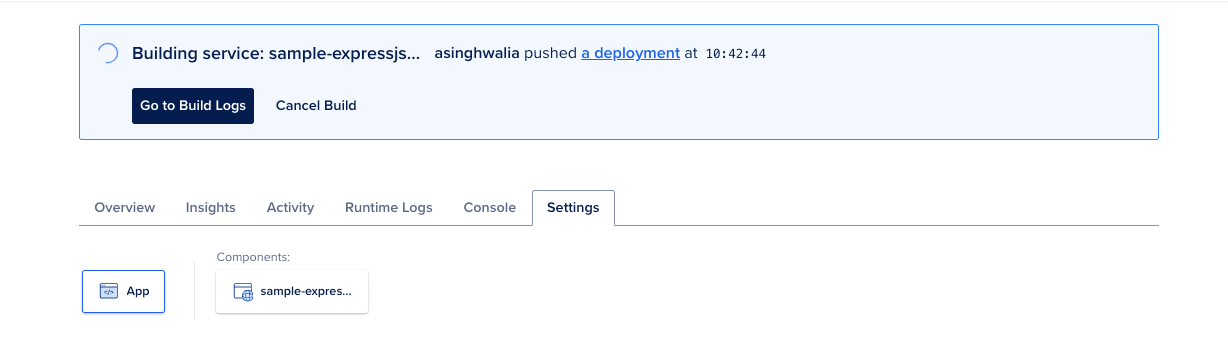
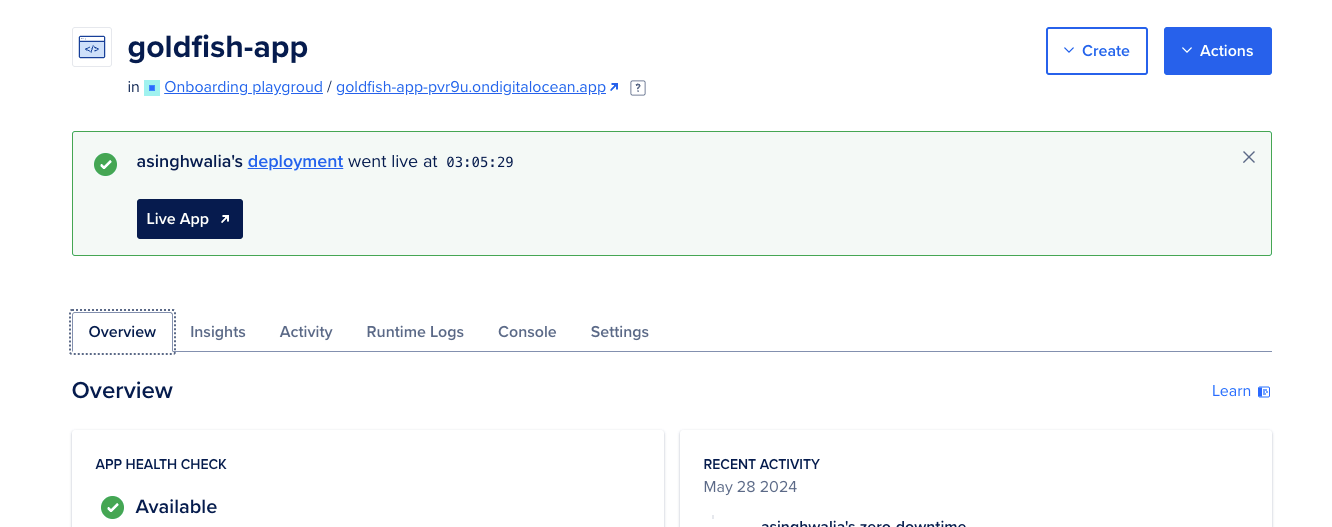
Once the application is deployed and the build is done. You can check the app’s overview and visit the deployed app in your browser.
Connect Redis Database to Your App
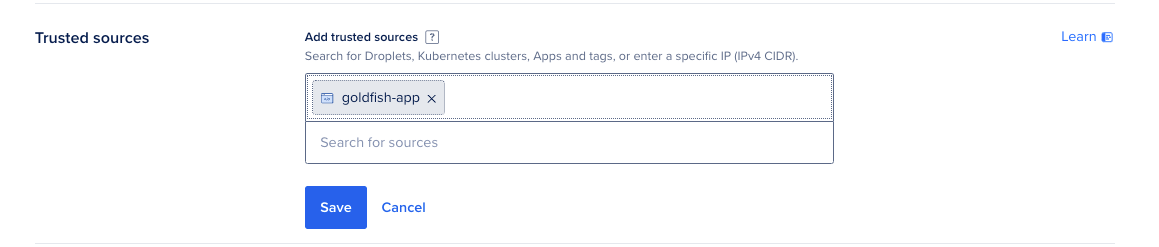
First, we will need to add your App Platform app as a trusted resource in the Redis database settings. This creates a secure connection to the database and accepts traffic only from the app.
To do so, you will need to navigate to the Redis Database “Settings” page and add the App Platform app’s name in the “Trusted sources” section as shown in the screenshot below:
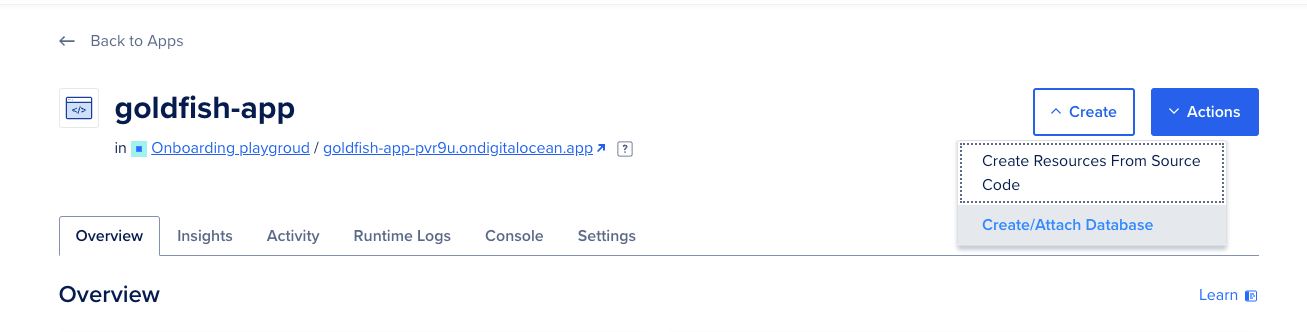
Next, navigate to your deployed App Platform app click the Create button on your deployed app’s dashboard, and select “Create/Attach Database”:
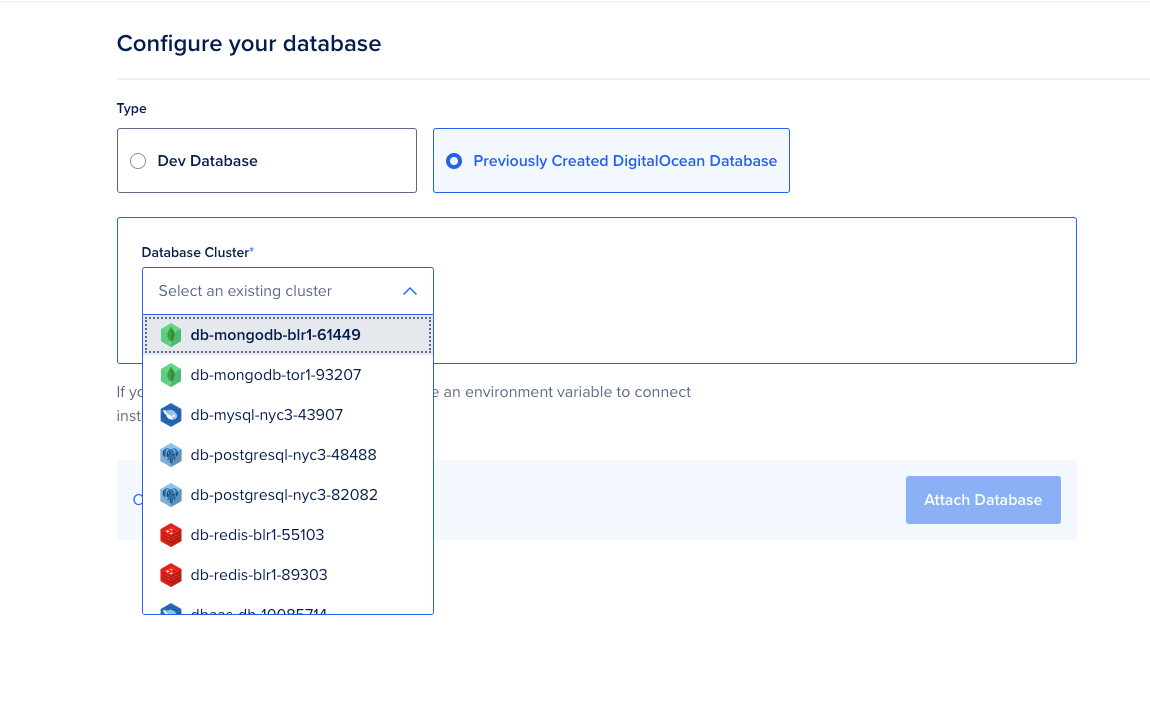
Select “Previously Created DigitalOcean Database” and choose the recently deployed Redis database cluster and click the “Attach Database” button at the bottom.
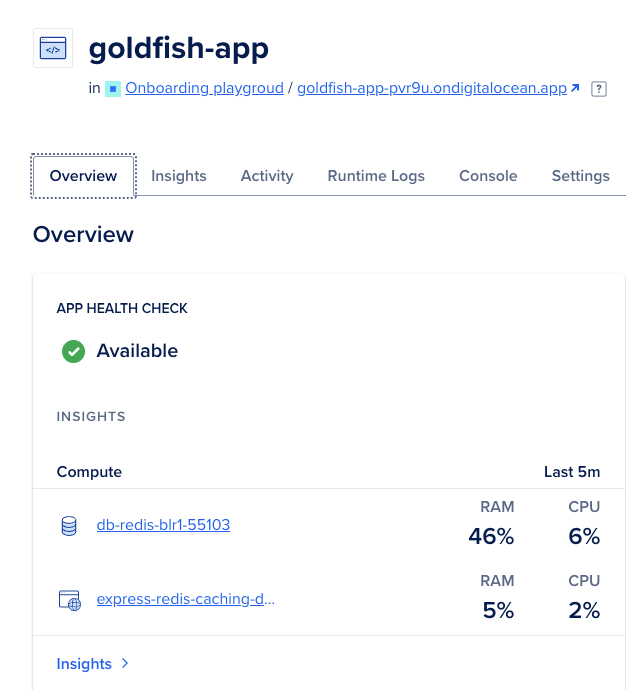
Now, your App Platform app should show you the attached Redis Database in the “Overview” section:
Test the Express.js App
Now, let’s test the app.
You can either check the endpoints in your browser or execute a curl request from the App Platform instance from the “Console” section.
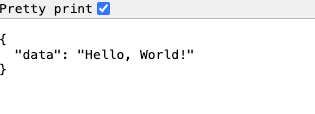
In your browser head to the endpoint https://<YOUR_APP_URL>/data/no-cache/1. You should see the response below. This endpoint fetches the data from the local database.js file we created.
Now, let’s test and fetch the data from the Redis Cache. In your browser enter the following endpoint https://<YOUR_APP_URL>/data/redis/3. This attempts to get data from the Redis cache first. If the data is not in the cache (cache miss), it fetches from the local database.js and sets it in the Redis cache with a 1-hour expiration time. If the data is found in the cache (cache hit), it logs a message and returns the cached data.
In the same way, you can also use the curl command to GET and POST data to the Redis cache. Head to the “Console” to enter the App Platform instance.
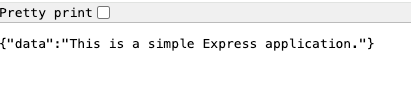
Let’s try to GET the data from the Redis Cache:
curl -X GET https://<YOUR_APP_URL>/data/redis/3
output{"data":"This is a simple Express application."}
Now, let’s execute a POST request and save some new data in the Redis Database Cache:
curl -X POST http://<YOUR_APP_URL>/data/4 -H "Content-Type: application/json" -d '{"value":"This is Redis Cache 4"}'
This should have saved the new data to Redis. Let’s GET the new data:
curl -X GET https://<YOUR_APP_URL>/data/redis/4
output{"data":"This is Redis Cache 4"}
Comparing Performance
To demonstrate the performance improvement with Redis caching, we’ll use Artillery for load testing and pm2 to check performance metrics.
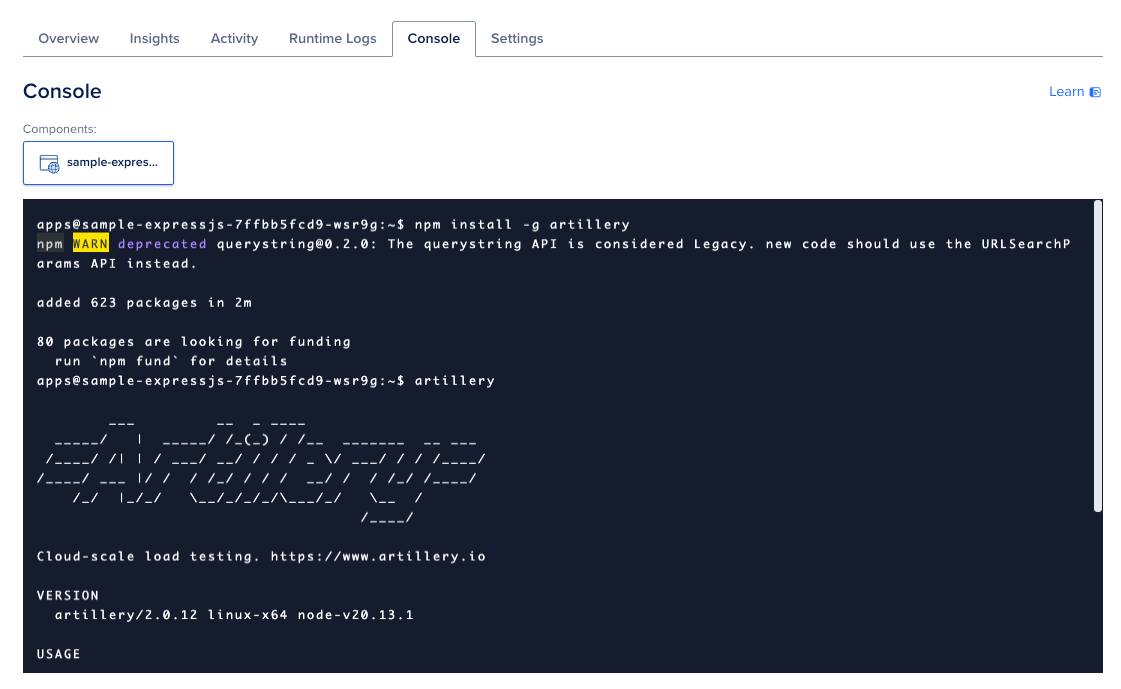
Let’s install Artillery on your App Platform instance. Please navigate to the Console tab.
To install Artillery use the below command:
npm install -g artillery
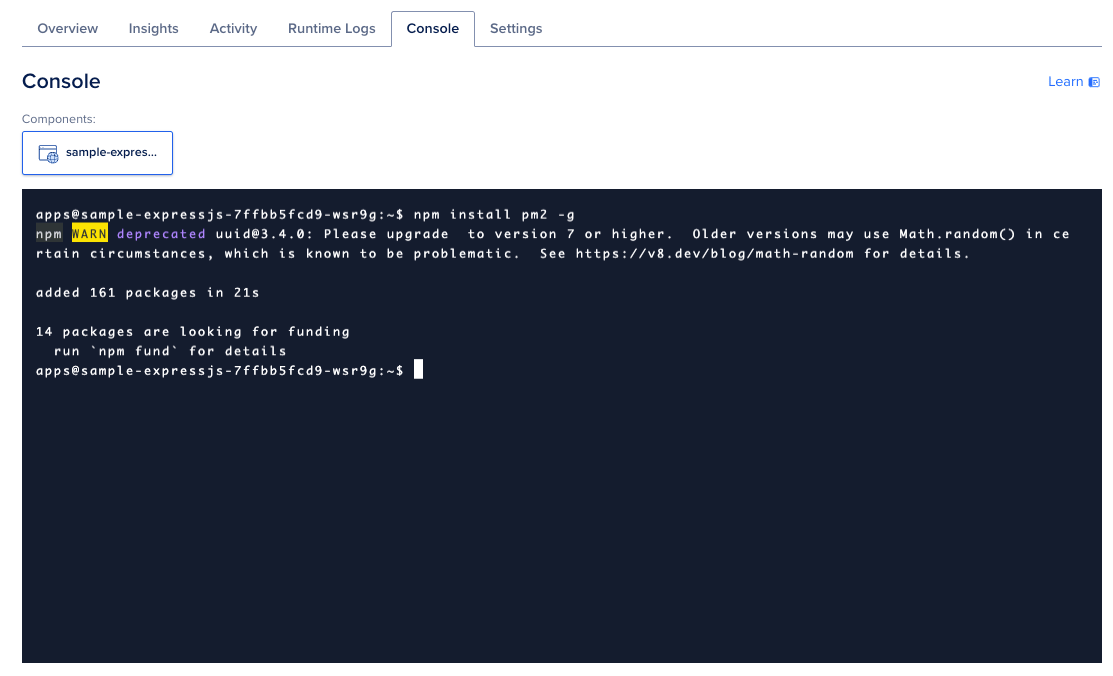
Let’s also install PM2, a powerful tool for managing Node.js applications and providing detailed insights into their performance.
You can install PM2 on the App Platform instance using the below command:
npm install pm2 -g
Let’s start your Express.js application under PM2’s watch:
pm2 start index.js
The output will be as follows:
Output[PM2] Starting /workspace/app.js in fork_mode (1 instance)
[PM2] Done.
┌────┬────────────────────┬──────────┬──────┬───────────┬──────────┬──────────┐
│ id │ name               │ mode     │ ↺    │ status    │ cpu      │ memory   │
├────┼────────────────────┼──────────┼──────┼───────────┼──────────┼──────────┤
│ 0  │index               │ fork     │ 0    │ online    │ 0%       │ 102.3mb  │
└────┴────────────────────┴──────────┴──────┴───────────┴──────────┴──────────┘
Now, let’s use Artillery to load test this application. Let’s create two simple load test scripts for load testing on the non-caching endpoint and with the Redis Caching endpoint.
Let’s create Load Test Scripts for both endpoints.
Create a file named load-test-uncached.yaml with the following content:
config:
  target: 'http://your-app-url.com/data'
  phases:
    - duration: 300
      arrivalRate: 20
      rampTo: 100

scenarios:
  - flow:
      - think: 1
      - get:
          url: "/no-cache/1"
Let’s create a simple load test script for load testing with Caching on the Redis endpoint.
Create a file named load-test-cached.yaml with the following content:
config:
  target: 'http://your-app-url.com/data'
  phases:
    - duration: 300
      arrivalRate: 20
      rampTo: 100

scenarios:
  - flow:
      - think: 1
      - get:
          url: "/redis/3"
Please replace the http://your-app-url.com/ in the above files with your app’s URL.
The example configuration file simulates a load test with 100 virtual users and 20 requests per second for 5 minutes(300s). You have also added a think phase with a duration of 1 second to simulate users’ thinking before making a request
Load Testing on Uncached endpoint
To run this load test you will use the below command to run the load tests one by one for each scenario and observe the results:
artillery run load-test-uncached.yml
Now, let’s use the pm2 show command below to get a comprehensive health report of the Express.js application environment under load. In your browser open another App Platform instance Console and use the below command:
pm2 show index
OutputDescribing process with id 0 - name app
┌───────────────────┬────────────────────────────────────┐
│ status            │ online                             │
│ name              │ index                              │
│ namespace         │ default                            │
│ version           │ 1.0.0                              │
│ restarts          │ 4                                  │
│ uptime            │ 62m                                │
│ script path       │ /workspace/index.js                │
│ script args       │ N/A                                │
│ error log path    │ /workspace/.pm2/logs/app-error.log │
│ out log path      │ /workspace/.pm2/logs/app-out.log   │
│ pid path          │ /workspace/.pm2/pids/app-0.pid     │
│ interpreter       │ node                               │
│ interpreter args  │ N/A                                │
│ script id         │ 0                                  │
│ exec cwd          │ /workspace                         │
│ exec mode         │ fork_mode                          │
│ node.js version   │ 20.13.0                            │
│ node env          │ production                         │
│ watch & reload    │ ✘                                  │
│ unstable restarts │ 0                                  │
│ created at        │ 2024-05-28T09:28:07.075Z           │
└───────────────────┴────────────────────────────────────┘
 Revision control metadata
┌──────────────────┬─────────────────────────────────────────────────────────────┐
│ revision control │ git                                                         │
│ remote url       │ https://github.com/digitalocean/sample-nodejs.git           │
│ repository root  │ /workspace                                                  │
│ last update      │ 2024-05-10T09:40:18.972Z                                    │
│ revision         │ 11145279d540077bbfd2f71bb21adf9b549705c8                    │
│ comment          │ Merge pull request #35 from digitalocean/ElanHasson-patch-1 │
│                  │                                                             │
│ branch           │ HEAD                                                        │
└──────────────────┴─────────────────────────────────────────────────────────────┘

 Actions available
┌────────────────────────┐
│ km:heapdump            │
│ km:cpu:profiling:start │
│ km:cpu:profiling:stop  │
│ km:heap:sampling:start │
│ km:heap:sampling:stop  │
└────────────────────────┘
 Trigger via: pm2 trigger app <action_name>

 Code metrics value
┌────────────────────────┬───────────────┐
│ Used Heap Size         │ 40.70 MiB     │
│ Heap Usage             │ 82.25 %       │
│ Heap Size              │ 49.28 MiB     │
│ Event Loop Latency p95 │ 2.58 ms       │
│ Event Loop Latency     │ 0.95 ms       │
│ Active handles         │ 252           │
│ Active requests        │ 0             │
│ HTTP                   │ 49.78 req/min │
│ HTTP P95 Latency       │ 921.55 ms     │
│ HTTP Mean Latency      │ 753 ms        │
└────────────────────────┴───────────────┘

 Divergent env variables from local env


 Add your own code metrics: http://bit.ly/code-metrics
 Use `pm2 logs app [--lines 1000]` to display logs
 Use `pm2 env 0` to display environment variables
 Use `pm2 monit` to monitor CPU and Memory usage app
In the above output, head to the Code metrics value table where we can notice that the Heap Usage is around 82.25%, which is pretty high. This happens because every request fetches data from the local database and stores it in the application’s memory.
Load Testing on Cached Redis endpoint
Use the following command to run the load tests for the Cached Redis endpoint.
artillery run load-test-cached.yml
Let’s use the pm2 show command below for a comprehensive health report of the Express.js application environment under load.
pm2 show index
OutputDescribing process with id 0 - name app
┌───────────────────┬────────────────────────────────────┐
│ status            │ online                             │
│ name              │ index                              │
│ namespace         │ default                            │
│ version           │ 1.0.0                              │
│ restarts          │ 7                                  │
│ uptime            │ 102m                               │
│ script path       │ /workspace/index.js                │
│ script args       │ N/A                                │
│ error log path    │ /workspace/.pm2/logs/app-error.log │
│ out log path      │ /workspace/.pm2/logs/app-out.log   │
│ pid path          │ /workspace/.pm2/pids/app-0.pid     │
│ interpreter       │ node                               │
│ interpreter args  │ N/A                                │
│ script id         │ 0                                  │
│ exec cwd          │ /workspace                         │
│ exec mode         │ fork_mode                          │
│ node.js version   │ 20.13.0                            │
│ node env          │ production                         │
│ watch & reload    │ ✘                                  │
│ unstable restarts │ 0                                  │
│ created at        │ 2024-05-28T09:23:07.075Z           │
└───────────────────┴────────────────────────────────────┘
 Revision control metadata
┌──────────────────┬─────────────────────────────────────────────────────────────┐
│ revision control │ git                                                         │
│ remote url       │ https://github.com/digitalocean/sample-nodejs.git           │
│ repository root  │ /workspace                                                  │
│ last update      │ 2024-05-28T09:40:18.972Z                                    │
│ revision         │ 11145279d540077bbfd2f71bb21adf9b549705c8                    │
│ comment          │ Merge pull request #35 from digitalocean/ElanHasson-patch-1 │
│                  │                                                             │
│ branch           │ HEAD                                                        │
└──────────────────┴─────────────────────────────────────────────────────────────┘

 Actions available
┌────────────────────────┐
│ km:heapdump            │
│ km:cpu:profiling:start │
│ km:cpu:profiling:stop  │
│ km:heap:sampling:start │
│ km:heap:sampling:stop  │
└────────────────────────┘
 Trigger via: pm2 trigger app <action_name>

 Code metrics value
┌────────────────────────┬───────────────┐
│ Used Heap Size         │ 17.70 MiB     │
│ Heap Usage             │ 35.91 %       │
│ Heap Size              │ 49.28 MiB     │
│ Event Loop Latency p95 │ 1.58 ms       │
│ Event Loop Latency     │ 0.35 ms       │
│ Active handles         │ 352           │
│ Active requests        │ 0             │
│ HTTP                   │ 24.61 req/min │
│ HTTP P95 Latency       │ 542.55 ms     │
│ HTTP Mean Latency      │ 453 ms        │
└────────────────────────┴───────────────┘

 Divergent env variables from local env


 Add your own code metrics: http://bit.ly/code-metrics
 Use `pm2 logs app [--lines 1000]` to display logs
 Use `pm2 env 0` to display environment variables
 Use `pm2 monit` to monitor CPU and Memory usage app
Note: You can read more about using pm2 and what each metric means in the tutorial Troubleshooting Latency issues on App Platform under the Using PM2 for Monitoring and Troubleshooting section.
In the above output, we can notice that metrics like Heap Usage, HTTP P95 Latency, HTTP Mean Latency, and Event Loop Latency have reduced significantly.
By storing frequently accessed data in an external cache (Redis), the application does not need to keep as much data in its own memory, thus reducing heap memory usage. With caching, this data is stored once in Redis and reused, avoiding memory bloat.
In this case, Redis Caching reduces the number of queries made to the database, decreasing database load and contention. This results in faster query response times for uncached requests as well.
Accessing data from Redis is typically faster and less resource-intensive than querying a database. This reduces the time the event loop waits for I/O operations, improving responsiveness.
Monitoring Redis Performance Programmatically
Follow these steps in Monitoring Redis documentation to monitor Redis performance programmatically.
Use the following curl command to access the metrics programmatically:
curl -XGET --silent -u $USERNAME:$PASSWORD https://$HOST:9273/metrics
You can get the username, password, and host details from the Redis database dashboard.
Conclusion
Integrating Redis for caching in your Express.js app on the DigitalOcean App Platform can significantly enhance your application’s performance. Caching reduces server load and improves response times, providing a better user experience. Use the tools and techniques outlined in this tutorial to implement and monitor caching in your applications.
Thanks for learning with the DigitalOcean Community. Check out our offerings for compute, storage, networking, and managed databases.
About the author
Anish is a Sr Technical Content Strategist and Team Lead at DigitalOcean with 7+ years of experience as an DevOps SRE at Nutanix and Cloud consultant at AMEX, and technical writing at DOCN, and shipping deep infra and AI inference tutorials that help developers deploy production‑ready applications on DigitalOcean.
Still looking for an answer?
This textbox defaults to using Markdown to format your answer.
You can type !ref in this text area to quickly search our full set of tutorials, documentation & marketplace offerings and insert the link!
 This work is licensed under a Creative Commons Attribution-NonCommercial- ShareAlike 4.0 International License.
Become a contributor for community
Get paid to write technical tutorials and select a tech-focused charity to receive a matching donation.

DigitalOcean Documentation
Full documentation for every DigitalOcean product.

Resources for startups and AI-native businesses
The Wave has everything you need to know about building a business, from raising funding to marketing your product.
The developer cloud
Scale up as you grow — whether you're running one virtual machine or ten thousand.

Start building today
From GPU-powered inference and Kubernetes to managed databases and storage, get everything you need to build, scale, and deploy intelligent applications.
