
Introduction
Note: The interactive terminal in this tutorial is currently disabled as we work on improving our interactive learning experiences. You can still use this tutorial to learn about the command line and practice Linux commands, but you will need to use the terminal on your computer or a virtual machine.
Today, many of us are familiar with computers (desktops and laptops), smartphones, and tablets which have graphical user interfaces (also referred to as GUIs), allowing us to navigate apps, the web, and our files (like documents and photos) through a visual experience. The Windows, macOS, and Linux operating systems each present varieties of a desktop environment (with images of folders and files, for example), and dropdown menus, all of which provide access to computer programs, applications, and our own media.
Although GUIs can be an intuitive way to use a computer for many users, they often do not provide us with the greatest power over our machines, and they may prevent us from having full administrative access on our computers, including installing, modifying, or deleting software or files. Additionally, as GUIs are largely visual, they are often not as accessible as they could be for all users.
One way of navigating both your own personal computer and remote cloud servers without a GUI is through a text-based terminal or command-line interface (CLI).
Terminal interfaces exist on almost every computer operating system, and terminal emulators are also available as apps for tablets and smartphones. Terminals provide users with greater overall access to their machines through increased administrator access, greater ability to customize environments, and opportunities to automate processes. They also provide users with the ability to access remote computers, such as cloud servers.
This tutorial will provide users who are new to terminal environments with the basics of using a command-line interface through an embedded web terminal in your browser, which you can launch below. If you already have some familiarity with terminals, you may prefer to go through our Introduction to the Linux Terminal tutorial instead. Once you complete this tutorial, you should have an understanding of how to use a terminal on a Linux (or macOS) computer or server.
Understanding the Terminal Window
When you first get access to a new computer or smartphone, you likely want to turn it on and get a feel for how to use it by checking which apps are available, and to learn where things are so that you can customize the device to suit your needs. You can become familiar with a computer through a terminal in a similar way.
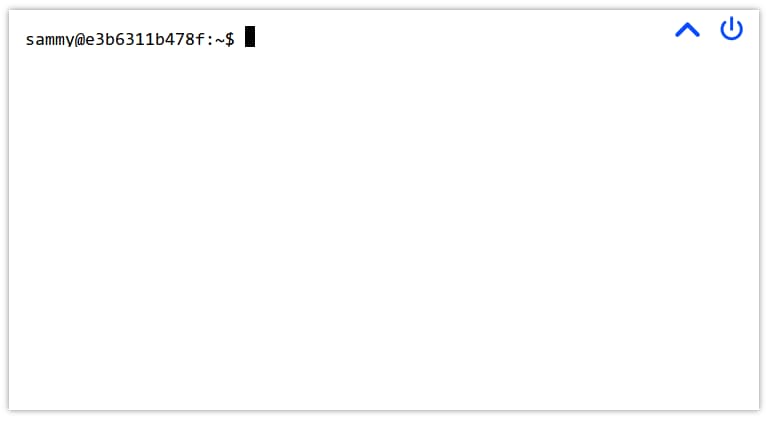
The interactive terminal you launched in this browser window, by clicking the Launch an Interactive Terminal! button above, displays a white rectangle on the bottom of your browser window:
If you have not launched the terminal, please do so now using the button at the beginning of this tutorial.
In your interactive browser terminal, there should be a dollar sign, $ and a blinking cursor. This is where you will begin to type commands to tell the terminal what to do.
The terminal you have launched is an Ubuntu 20.04 terminal. Ubuntu is a popular distribution of Linux, which was originally based on the Unix operating system. The macOS operating system is also based on Unix. If you are reading this tutorial on a Linux or macOS machine, you should have a terminal on your operating system that works similarly to the embedded terminal we’ll be using in this guide.
In many of these Unix (or *nix-based) operating systems, the symbols at the end of the prompt may be a $ symbol or a # symbol, which mean the following:
$or dollar sign — you are logged in as a regular user#or hashtag/pound symbol — you are logged in as a user with elevated privileges
The user that is noted in the # environment is also known as a root user, which is considered to be a super user, or administrator, by default.
For our purposes within the browser terminal below, you are logged in as a regular user, but you also have administrator privileges via the sudo command. As this is a temporary terminal, you do not need to worry about what you type into the terminal, as we will destroy everything once we are done. Similarly, with a cloud server, it is possible to destroy a server and start fresh if something goes awry.
Please note that it is best to exercise more care when working on a local computer’s terminal as there may be changes you can make as an administrator on the terminal that can make permanent changes on the computer you are using.
At this point, with your terminal launched in the browser, you can begin to type into it using your local computer. Your text will appear at the blinking cursor. We’ll learn about what we can type here in the next sections.
Becoming Familiar with Directories
We’ll begin working with the terminal by typing a command. A command is an instruction that is given by a user, communicating what it is that the user wants the computer to do. You will be typing your commands into the terminal and then pressing ENTER or RETURN when you are ready for the computer to execute on a given command.
Let’s type the following command followed by ENTER. You can also copy the command, or ask it to run in a launched interactive terminal by clicking on the relevant links in the code block below when you hover over it with a mouse.
- pwd
Once you run this command, you’ll receive the following output:
Output/home/sammy
The pwd command stands for “present working directory,” and it lets you know where you are within the current filesystem.
In this example, you are in the directory (or folder) called /home/sammy, which stands for the user called sammy. If you are logged in as root, a user with elevated privileges, then the directory would be called /root. On a personal computer, this directory may be called the name of the user who owns the computer. Sammy Shark’s computer may have /sammy or /sammy-shark or /home/sammy as their primary user directory.
Right now, this directory is empty. Let’s create a directory to store the files we’ll be creating as we go through this tutorial, which we can call files, for example.
To do this, we’ll use the mkdir command, which stands for “make directory.” After we type the command, we’ll need to write the name of the folder, which will pass the value to the command so that the command can execute on creating this directory. This value (the name of the folder) is known as an argument, which is an input being given to the command. If you are familiar with natural language grammar, you can think of the argument as an object that is being acted upon by the verb of the command.
In order to create a new directory called files we’ll write the following, with mkdir being the command and files being the argument:
- mkdir files
After you run this command, you won’t receive any output other than a new line with a blinking cursor. With this fresh line on your terminal, you are ready for your next command.
Listing Contents and Understanding Permissions
As we have not received any concrete feedback about our new directory yet, we’ll use a command to learn more about what is in our present working directory. You can confirm that the new directory is indeed there by listing out the files in the directory, with the ls command (signifying “list”):
- ls
You’ll receive output that confirms the files directory is there:
Outputfiles
This gives us general information about what is in our present working directory. If we want to have more details, we can run the ls command with what is called a flag. In Linux commands, a flag is written with a hyphen - and letters, passing additional options (and more arguments) to the command. In our example, we’ll add the -l flag, which — when paired with ls — denotes that we would like to use the option to use a long listing format with our command.
Let’s type this command and flag, like so:
- ls -l
Upon pressing ENTER, we’ll receive the following output in our terminal:
Outputtotal 4
drwxr-xr-x 2 sammy sammy 4096 Nov 13 18:06 files
Here, there are two lines of output. The first line refers to computer memory blocks being allocated to this directory, the second line mostly refers to user permissions on the file.
To get a somewhat more human readable output, we can also pass the -h or --human-readable flag, which will print memory sizes in a human readable format, as below. Generally, one hyphen - refers to single-letter options, and two hyphens -- refer to options that are written out in words. Note that some options can use both formats. We can build multiple options into a command by chaining flags together, as in -lh.
For example, the two commands below deliver the same results even though they are written differently:
- ls -lh
- ls -l --human-readable
Both of these commands will return the following output, similar to the output above but with greater context of the memory blocks:
Outputtotal 4.0K
drwxr-xr-x 2 sammy sammy 4.0K Nov 13 18:06 files
The first line of output lets us know that 4K of computer memory is dedicated to the folder. The second line of output has many more details, which we’ll go over in more detail. A general high-level reference of all the information that we’ll cover is indicated in the table below.
| File type | Permissions | Link count | Owner | Group | File size | Last modified date | File name |
|---|---|---|---|---|---|---|---|
| d | rwxr-xr-x | 2 | sammy | sammy | 4.0K | Nov 13 18:06 | files |
You’ll note that the name of our directory, files, is at the end of the second line of output. This name indicates which specific item in the /home/sammy user directory is being described by the line of output. If we had another file in the directory, we would have another line of output with details on that file.
At the front of the line, there is a list of characters and dashes. Let’s break down the meaning of each of the characters:
| Character | Description |
|---|---|
| d | directory (or folder) — a type of file that can hold other files, useful for organizing a file system; if this were - instead, this would refer to a non-directory file |
| r | read — permission to open and read a file, or list the contents of a directory |
| w | write — permission to modify the content of a file; and to add, remove, rename files in a directory |
| x | execute — permission to run a file that is a program, or to enter and access files within a directory |
In the first drwx characters of the string, the first letter d means that the item files is a directory. If this were a file other than a directory, this string of characters would begin with a hyphen instead, as in -rwx, where the first hyphen signifies a non-directory file. The following three letters, rwx, represent the permissions for the owner of the directory files, and mean that the directory files can be read, written, and executed by the owner of the file. If any of these characters were replaced with hyphens, that would mean that the owner does not have the type of permission represented by that character. We’ll discuss how to identify the owner of a file in just a moment.
The next three characters in the output are r-x, which represent the group permissions for the files directory. In this instance, the group has read and execute permissions, but not write permissions, as the w is replaced with a -. We’ll discuss how to identify the group in just a moment.
The final three characters of the first string, r-x represents the permissions for any other groups that have access to the machine. In this case, these user groups can also read and execute, but not write.
The number 2 in the output refers to the number of links to this file. In Linux, links provide a method to create shortcuts to help users navigate the filesystem. When you created this file, Linux did some background work to create an absolute link to the file, and a self-referential link to the file to allow for users to navigate along a relative path. We’ll discuss absolute and relative paths in the next section.
After the number 2, the word sammy is displayed twice. This part of the output gives information about the owner and group associated with the files directory. The first instance of sammy in this line refers to the owner of the directory, whose permissions we saw earlier are rwx. The sammy user is the owner as we created the files directory as the sammy user and are the current owner of the file. Though the sammy user is the only user in our current environment, Unix-like operating systems often have more than one user and so it is useful to know which user has ownership of a file.
The second instance of sammy refers to the group that has access to the files directory, whose permissions we saw earlier are r-x. In this case, the group name is the same as the owner username sammy. In real-world environments, there may be other groups on the operating system that have access to the directory, such as staff or a username like admin.
The rest of the details on this output line are the 4.0K for the memory allocation of the directory on the machine, and the date that the directory was last modified (so far, we have just created it).
With this greater understanding of file systems and permissions, we can move onto navigating the file system on our Linux terminal.
Navigating the Filesystem
So far, we have learned how to determine where we are in a filesystem, how to make a new directory, how to list out files, and how to determine permissions.
Let’s next learn how to move around the file system. We have made a new directory, but we are still in the main /home/sammy user directory. In order to move into the /home/sammy/files directory that we have created, we’ll use the cd command and pass the name of the directory we want to move into as the argument. The command cd stands for “change directory,” and we’ll construct it like so:
- cd files
Again, you won’t receive output other than a new line with a blinking cursor, but we can check that we are in the /home/sammy/files directory with the pwd command we used earlier:
- pwd
You’ll get the following output, confirming where you are:
Output/home/sammy/files
This validates that you are in the /home/sammy/files directory of the /home/sammy user directory. Does this syntax look familiar to you? It may remind you of a website’s URL with its forward slashes, and, indeed, websites are structured on servers within directories, too.
Let’s move to the primary directory of the server. Regardless of where we are in a filesystem, we can always use the command cd / to move to the primary directory:
- cd /
To confirm that we have moved and learn what is in this directory, let’s run our list command:
- ls
We’ll receive the following output:
Outputbin boot dev etc home lib lib32 lib64 libx32 media mnt opt proc root run s sbin srv sys tmp usr var
There are a lot of files in there! The / directory is the main directory of a Linux server, referred to as the “root” directory. Note that the root directory is different from the default “root” user. You can think of the / directory as the major artery of a Linux machine, as it contains all the folders necessary to run the computer. For example, the sys directory holds the Linux kernel and system information virtual filesystem. If you would like to learn more about each of these directories, you can visit the Linux Foundation documentation.
You’ll also notice that there is a directory we have been in already, the /home user folder. From the / directory, we can change directories back into /home then back into files, or we can move directly back into that folder by typing the absolute path there with cd:
- cd /home/sammy/files
Now, if you run pwd you’ll receive /home/sammy/files as your output.
A file path is the representation of where a file or directory is located on your computer or server. You can call a path to a file or directory in either a relative or absolute way. A relative path would be when we move to a location relative to our current working directory, like we did when we were already in /home/sammy/ and then moved into files/. An absolute path is when we call the direct line to a location, as we did above with /home/sammy/files, showing that we started in the / directory, called the /home/sammy/ user directory and then the nested files/ directory.
Additionally, Linux leverages dot notation to help users navigate via relative paths. A single . stands for the directory you are currently in, and a double .. stands for the parent directory. So, from where we currently are (/home/sammy/files), we can use two dots to return to the parent /home/sammy user directory, like so:
- cd ..
If you run pwd, you’ll receive /home/sammy as your output, and if you run ls, you’ll receive files as your output.
Another important symbol to be familiar with is ~ which stands for the home directory of your machine. Here, our home directory is called /home/sammy for the sammy user, but on a local machine it may be your own name as in sammy-shark/.
You can type the following from anywhere on your machine and return to this home directory:
- cd ~
At this point, feel free to navigate around your file system with the commands you have learned so far. In the next section, we’ll begin working with text files.
Creating and Modifying Text Files
Now that we have a foundation in the Linux file system and how to get around it, let’s start creating new files and learn about how to manipulate text on the command line.
Let’s first be sure that we’re in the files/ directory of the /home/sammy user folder, which we can do by either verifying with pwd, or by changing directories on the absolute path:
- cd /home/sammy/files
Now, we’ll create a new text file. We’ll be making a .txt file, which is a standard file that can be read across operating systems. Unlike .doc files, a .txt file is composed of unformatted text. Unformatted text, including the text in.txt files, can readily be used on the command line, and therefore can be used when working with textual data programmatically (as in, to automate text analysis, to pull information from text, and more).
We’ll begin by using the touch command, which can create a new file or modify an existing file. To use it, you can use the command touch and pass the name of the text file you want to create as the argument, as demonstrated below.
- touch ocean.txt
Once you press ENTER, you’ll receive a new line of the command prompt, and you can list the current contents of files/ to ensure it was created.
- ls
Outputocean.txt
So far we have created an ocean.txt file which contains no text at the time of creation.
If we want to create a text file that is initialized with text, we can use the echo command, which is used to display strings of text in Linux.
We can use echo directly on the command line to have the interface repeat after us. The traditional first program, "Hello, World!", can be written with echo like so:
- echo Hello, World!
OutputHello, World!
Named for Echo of Ovid’s Metamorphosis, the echo command returns back what we request. In this case, it echoed, “Hello, World!” On its own, however, the echo command does not allow us to store the value of our text into a text file. In order to do that, we will need to type the following:
- echo "Sammy the Shark" > sammy.txt
The above command uses echo, then the text we would like to add to our file in quotes, then the redirection operator >, and finally the name of our new text file, sammy.txt.
We can check that our new file exists, again with ls.
- ls
Outputocean.txt sammy.txt
We now have two text files in our /home/sammy/files user folder. Next, we can confirm that the file sammy.txt does have the text we asked the terminal to echo into it. We can do that with the cat command. Short for concatenate, the cat command is very useful for working with files. Among its functions is showing the contents of a file.
- cat sammy.txt
Once we run the command, we’ll receive the following output:
OutputSammy the Shark
If we were to run cat on the empty file ocean.txt, we would receive nothing in return as there is no text in that file. We can add text to this existing file with echo as well. Let’s add a quote from Zora Neale Hurston to the file.
- echo "Some people could look at a mud puddle and see an ocean with ships." > ocean.txt
Now, if we run cat on the file, we’ll receive output of the text we just entered.
- cat ocean.txt
OutputSome people could look at a mud puddle and see an ocean with ships.
So far, we have created text files and have added text to these files, but we have not yet modified these files. If we would like to do that, we can use a command-line text editor. Several popular choices exist, including Vim and Emacs. For our purposes, we’ll use nano, which is a less complex CLI text editor program that we can use to begin our exploration.
The nano text editor can be summoned with the nano command. If we want to edit our existing sammy.txt file, we can do so by passing the file name as an argument.
- nano sammy.txt
The file will open up on your terminal:
Sammy the Shark
With your keyboard’s arrow keys, move your cursor to the end of the line and begin typing a few lines from the perspective of Sammy.
Note: On the command line, you can’t use your mouse or other pointer to navigate, both through the file system and within files. You’ll need to use your keyboard, and your arrow keys in particular, to move around textual files.
When you’re done with your file, it may read something like this:
Sammy the Shark

Hello, I am Sammy.
I am studying computer science.
Nice to meet you!
With your file now containing the text you would like, we can now save and close the file. You may notice that there is some guidance at the bottom of your terminal window:
^G Get Help   ^O WriteOut   ^R Read File  ^Y Prev Page  ^K Cut Text   ^C Cur Pos
^X Exit       ^J Justify    ^W Where Is   ^V Next Page  ^U UnCut Text ^T To Spell
Because we are currently done with working on this file, we would like to Exit the file. Here, the ^ symbol refers to the Control or CTRL key on your keyboard, and the output above tells us that we need to combine that key with X (use this lower case, without pressing the SHIFT key) in order to leave the file. Let’s press those two keys together:
CTRL x
The above is often written inline as CTRL + X or Ctrl+x in technical documentation.
At this point, you’ll receive the following prompt:
OutputSave modified buffer?
 Y Yes
 N No           ^C Cancel
In order to save it, we’ll press the letter y for yes:
y
You’ll receive feedback like the following.
OutputFile Name to Write: sammy.txt
There are additional options, including cancelling with CTRL + C, but if you are comfortable with closing the file, you can press ENTER at this point to save the file and exit it.
Let’s say that we want to make a few files of students at DigitalOcean University. Let’s create a new directory in files/ called students:
- mkdir students
Next, let’s move sammy.txt into the new students/ directory. The mv command, which stands for move, will allow us to change the location of a file. The command is constructed by taking the file we want to move as the first argument, and the new location as the second argument. Both of the following executions will produce the same result.
- mv sammy.txt students
- mv sammy.txt students/sammy.txt
This latter option would be useful if we would like to change the name of the file, as in mv sammy.txt students/sammy-the-shark.txt.
Now, if we run the ls command, we’ll see that only ocean.txt and the students/ directory are in our current directory (files/). Let’s move into the students/ folder.
- cd students
In order to have a template for the other students, we can copy the sammy.txt file to create more files. To do this, we can use the cp command, which stands for copy. This command works similarly to the mv command, taking the original file as the first argument, and the new file as the second argument. We’ll make a file for Alex the Leafy Seadragon:
- cp sammy.txt alex.txt
Now, we can open alex.txt and inspect it.
- nano alex.txt
So far, alex.txt looks identical to sammy.txt. By replacing some of the words, we can modify this file to read like the following. Note that you can use CTRL + K to remove an entire line.
Alex the Leafy Seadragon

Hello, I am Alex.
I am studying oceanography.
Nice to meet you!
You can save and close the file by pressing CTRL + X then y then ENTER.
If you would like to get more practice with text files, consider creating files for Jamie the Mantis Shrimp, Jesse the Octopus, Drew the Squid, or Taylor the Yellowfin Tuna.
Once you feel comfortable with creating, editing, copying, and moving text files, we can move onto the next section.
Autocompletion and History
Many versions of the command line, including the interactive terminal embedded in this tutorial, allow you to autocomplete and to reuse commands as you go. This supports you moving more quickly as it saves you typing time.
Try typing cat along with the first few letters of one of the text files you have been working on — for example, cat sa. Before you finish typing the whole file name of sammy.txt, press the TAB key instead. This should autocomplete the full file name, so that your terminal prompt displays the following:
- cat sammy.txt
Now, if you press ENTER, the terminal should return the contents of the file to the command line.
Another shortcut is to press the UP arrow key, which will let you cycle through the most recent commands you have run. On a new line with a blinking cursor, press the UP arrow key a few times to have quick access to your previous commands.
If you need to replicate all the commands you have done in your terminal, you can also summon the entire history of this session with the aptly named history command:
- history
Depending on how much you have practiced, you should receive 30 or more lines of commands, starting with the following output:
Output    1  pwd
    2  mkdir files
    3  ls
    4  ls -l
...
Familiarizing yourself with these shortcuts will support you as you become more proficient with the command line interface.
Working with Files from the Web
One of the most exciting aspects of working on a command line interface connected to the internet is that you have access to all of the resources on the web, and can act on them in an automated way. With the terminal, you can also directly access cloud servers that you have credentials for, manage and orchestrate cloud infrastructure, build your own web apps, and more. For now, as we have already learned how to work with text files on the terminal, we’ll go over how to pull down a text file from the web so that the machine we are using has that text file available to us.
Let’s move back into the files/ directory:
- cd /home/sammy/files
From here, we’ll use the curl command to transfer data from the web to our personal interactive terminal on the browser. The command curl stands for client URL (web address).
We have uploaded a short passage from Jules Verne’s Twenty Thousand Leagues Under the Seas on a cloud server. We’ll pass the URL of that file to the curl command, as demonstrated below.
- curl https://assets.digitalocean.com/articles/command-line-intro/verne_twenty-thousand-leagues.txt
Once we press ENTER, we’ll receive the text of the passage as output to our terminal (excerpted below)
Output"You like the sea, Captain?"

"Yes; I love it! The sea is everything. It covers seven tenths of the terrestrial globe.
...
"Captain Nemo," said I to my host, who had just thrown himself on one of the divans, "this
is a library which would do honor to more than one of the continental palaces, and I am
absolutely astounded when I consider that it can follow you to the bottom of the seas."
While it’s interesting to have the text display on our terminal window, we do not have the file available to us, we have only transferred the data but have not stored it. (You can verify that the file is not there by running ls).
In order to save the text to a file, we’ll need to run curl with the -O flag, which enables us to output the text to a file, taking the same name of the remote file for our local copy.
- curl -O https://assets.digitalocean.com/articles/command-line-intro/verne_twenty-thousand-leagues.txt
You’ll receive feedback from the terminal that your file has downloaded.
Output  % Total    % Received % Xferd  Average Speed   Time    Time     Time  Current
                                 Dload  Upload   Total   Spent    Left  Speed
100  2671  100  2671    0     0  68487      0 --:--:-- --:--:-- --:--:-- 68487
If you would like to use a specific and alternate name of the file, you could do so with the -o flag and pass the name of the new file as an argument (in this case, jules.txt).
- curl -o jules.txt https://assets.digitalocean.com/articles/command-line-intro/verne_twenty-thousand-leagues.txt
We can now work on this file exactly as we would any other text file. Try using cat, or editing it with nano.
In the next section, we’ll clean up some of the files and exit our terminal.
Removing Files and Terminating Commands
As with any other computer, we sometimes need to remove files and folders that are no longer relevant, and exit the program we are using.
Let’s say that the students we know from DigitalOcean University have graduated and we need to clean up their files and the relevant folder. Ensure you are in the students/ directory:
- cd /home/sammy/files/students
If you run ls, your folder may have a few files, like so:
Outputalex.txt drew.txt jamie.txt jesse.txt sammy.txt taylor.txt
We can remove individual files with the rm command, which stands for remove. We’ll need to pass the file we want to remove as the argument.
Warning: Note that once you remove a file, it cannot be undone. Be sure that you want to remove the file before pressing ENTER.
- rm sammy.txt
Now, if we run ls, we’ll notice that sammy.txt is no longer in the folder:
Outputalex.txt drew.txt jamie.txt jesse.txt taylor.txt
While we now know we can remove individual files with rm, it is not very time efficient if we want to remove the entire students/ directory and all of its contents.
The command that is used to remove directories is called rmdir, which stands for remove directory. Let’s move to the parent folder of files so that we can work with the students/ directory from there (we would not be able to delete a folder we are presently in).
- cd ..
From the /home/sammy/ user directory, we can run rmdir on students.
- rmdir students
However, this does not work, as we receive the following feedback:
Outputrmdir: failed to remove 'students': Directory not empty
The command did not work as rmdir only works on empty directories and the students directory still has files in it. (Here, you can create a new, empty folder, and try rmdir on it. Empty folders can be removed with rmdir.)
To remove the directory with files still inside, we’ll need to try a different option. In computer science, recursion is commonly used to iteratively self-reference; so we can call both a primary item and all its dependencies. Using the rm command, we can recursively remove the primary students directory and all of its content dependencies. We’ll use the -r flag, which stands for recursive, and pass the folder students as the argument.
- rm -r students
At this point, if we run ls, we’ll notice that students/ is no longer in our present directory, and none of the files it held are available either, as they have all been deleted.
When you are done with a terminal session, and especially when you are working on a remote server, you can exit the terminal with the exit command. Once you feel comfortable with what you have achieved in this session (as you won’t be able to restore it), you can type the following, followed by ENTER to leave the terminal.
- exit
On our interactive terminal, we’ll receive the following output, confirming that our session has ended.
OutputSession ended
With this session complete, you can refresh this page and then launch a new terminal to try out alternate commands, or create a new file system to explore.
Conclusion
Congratulations! You now know your way around the terminal interface, and are well on your way to doing more with computers and servers.
To continue your learning, you can take a guided pathway on setting up and managing remote servers with our Introduction to Cloud Computing curriculum.
Thanks for learning with the DigitalOcean Community. Check out our offerings for compute, storage, networking, and managed databases.
Tutorial Series: Getting Started With Cloud Computing
This curriculum introduces open-source cloud computing to a general audience along with the skills necessary to deploy applications and websites securely to the cloud.
Browse Series: 39 tutorials
About the author
Community and Developer Education expert. Former Senior Manager, Community at DigitalOcean. Focused on topics including Ubuntu 22.04, Ubuntu 20.04, Python, Django, and more.
Still looking for an answer?
This textbox defaults to using Markdown to format your answer.
You can type !ref in this text area to quickly search our full set of tutorials, documentation & marketplace offerings and insert the link!
Great tutorial… I’ll link to it as I often have students coming to my office
-
“Hi prof, I want to do a project with you.”
-
“That’s great! Do you know some unix?”
-
blank stare
-
desperate look
The Linux command line is a text interface to your computer. … Allows users to execute commands by manually typing at the terminal, or has the ability to automatically execute commands which were programmed in “Shell Scripts”.
This comment has been deleted
 This work is licensed under a Creative Commons Attribution-NonCommercial- ShareAlike 4.0 International License.
Become a contributor for community
Get paid to write technical tutorials and select a tech-focused charity to receive a matching donation.

DigitalOcean Documentation
Full documentation for every DigitalOcean product.

Resources for startups and AI-native businesses
The Wave has everything you need to know about building a business, from raising funding to marketing your product.
The developer cloud
Scale up as you grow — whether you're running one virtual machine or ten thousand.

Start building today
From GPU-powered inference and Kubernetes to managed databases and storage, get everything you need to build, scale, and deploy intelligent applications.
