AI Technical Writer

Introduction
Developers are always looking for faster, smarter, and more efficient ways to build. Claude Code brings an AI-powered coding assistant right into your terminal.
Claude Code is an AI coding assistant designed to make development smoother and faster. It can generate, explain, and even debug code, freeing you from repetitive tasks.
Working entirely in the terminal can feel daunting, especially if you’re just starting out or building a project from scratch. That’s why using a familiar IDE like Visual Studio Code can make the process much easier. In this article, we’ll walk through how to SSH into a Droplet directly from VS Code, install Claude Code with zero hassle, and start building right away. We’ll also share some handy tips and tricks for working with Claude Code, and finally, cover how to deploy your application smoothly on the DigitalOcean platform.
Key Takeaways:
- Seamless Remote Development – SSH into your DigitalOcean Droplet using VS Code for a fully integrated coding environment.
- Vibe Coding Made Easy – Use Claude Code’s context-aware coding features to auto-generate, debug, and optimize code efficiently.
- Streamlined Git & GitHub Integration – Claude can write commit messages, resolve merge conflicts, create PRs, and manage issues, all from your VS Code setup.
- Enhanced Documentation – Automatically generate high-quality
.mdfiles and project documentation for consistent and professional outputs.
How to Login to a DigitalOcean Droplet with VS Code using SSH Keys
Let’s learn how to connect your DigitalOcean Droplet from your local machine. The most secure and developer-friendly way to do this is using SSH keys and VS Code.
When you log into your DigitalOcean Droplet directly through VS Code, you’re not just gaining access to the server but also gaining more control over your coding environment, especially if you are a beginner. The biggest benefit is that you are working on your droplet as if it were a folder on your own machine. No need to juggle multiple tools.
Step 1: Create a DigitalOcean Droplet
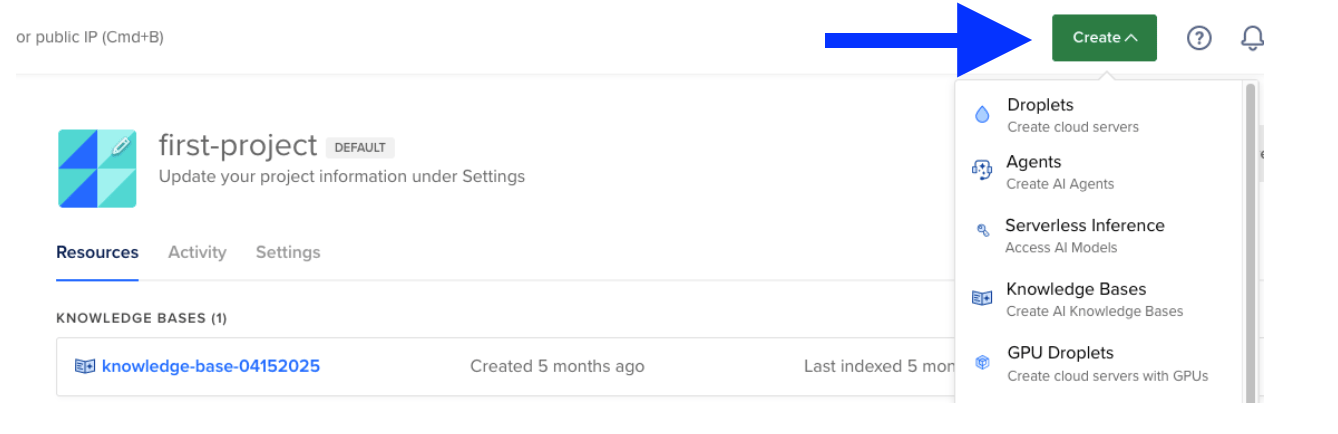
Log in to your DigitalOcean dashboard, click on the “Create” button, and select “Droplet.” Choose the option of your choice to spin up your droplet. For detailed instructions, check out our step-by-step Droplet creation guide (linked in the resources section).
Step 2: Copy Your Droplet’s IP Address
After your Droplet is created with the preferred settings, you’ll see an IP address assigned to it. Copy this IP address — you’ll need it in the next step to establish the SSH connection.

Step 3: Connect to Your Droplet via VS Code
- Open Visual Studio Code and go to the Extensions tab.
- Install the “Remote Development” extension.
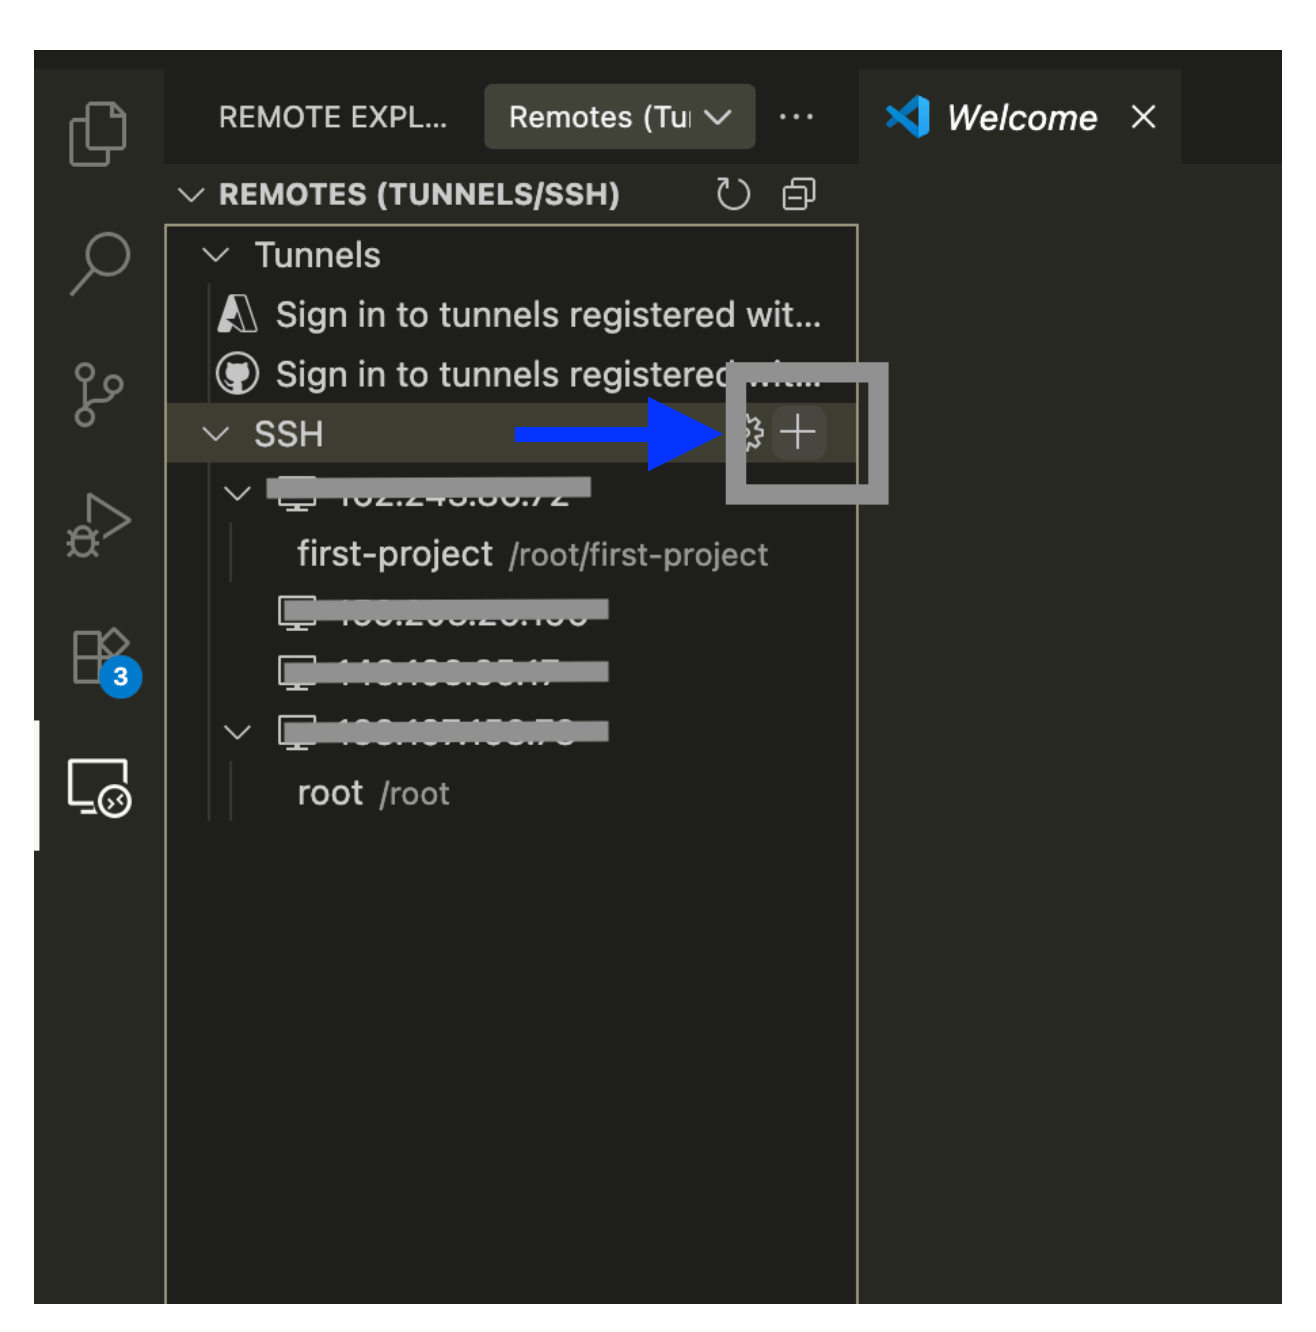
- Click on “Remote Explorer” from the sidebar, then hit the “+” button to add a new SSH connection.
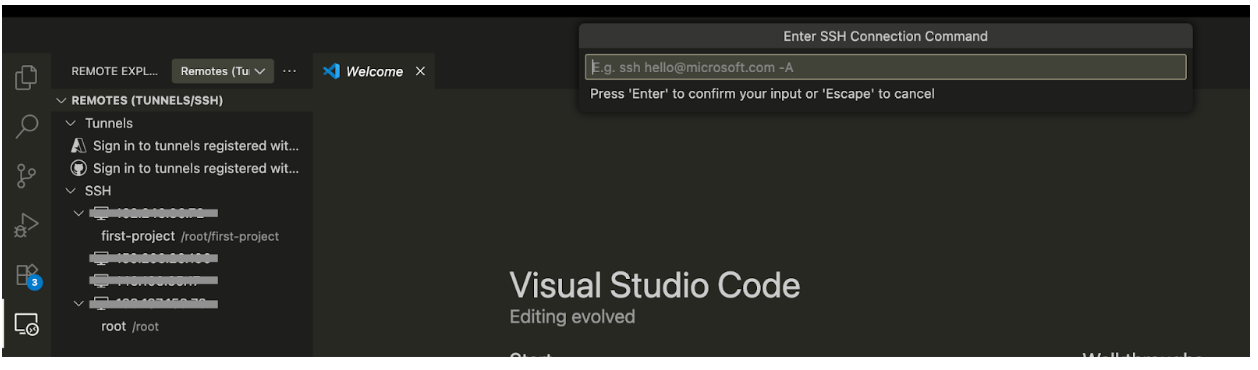
4. Enter the command:
ssh root@your_droplet_ip_address
and press Enter.
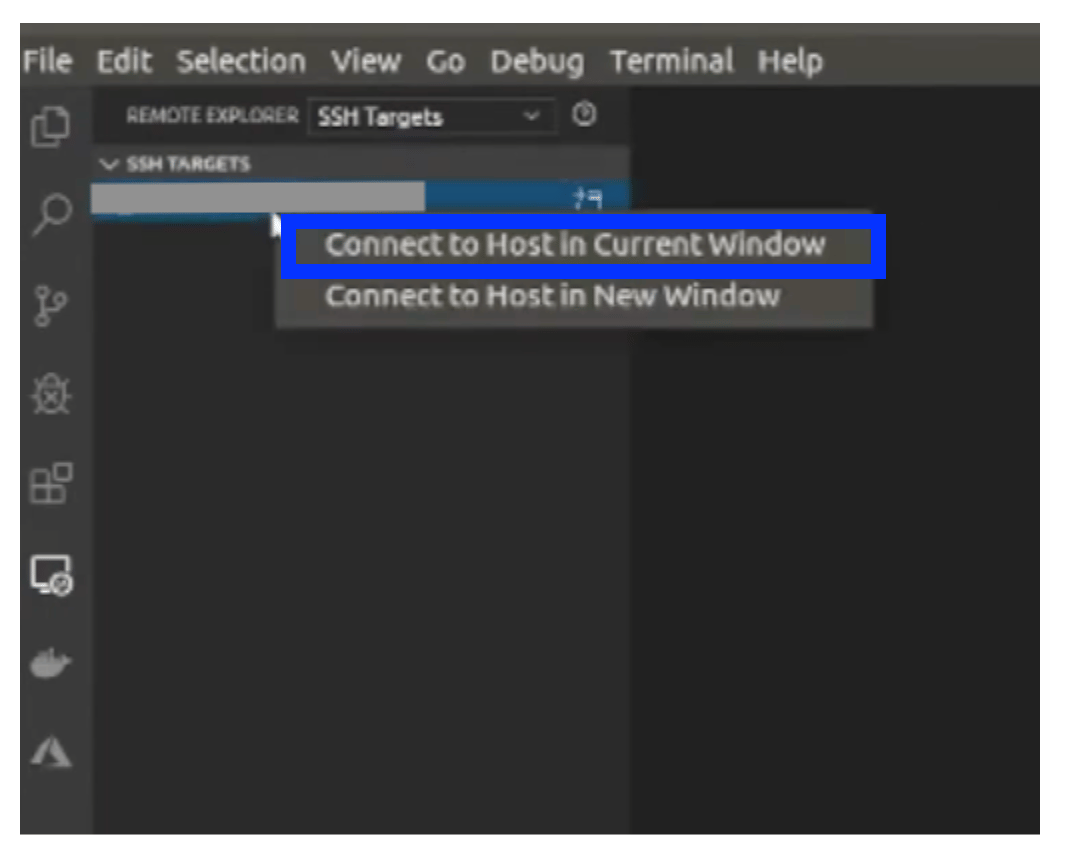
5. You’ll now see your droplet listed in the Remote Explorer panel. Click the remote desktop icon and select “Connect to Host in Current Window.”
6. When prompted, click “Continue.”
Once completed, you’ll be connected to your DigitalOcean Droplet with root access directly inside VS Code.
Installing Claude Code Hassle-Free on DigitalOcean Droplets
Most developers install Claude Code locally on their machines through the terminal and start working. Another great option, especially when you want to build something big, is to use DigitalOcean’s remote servers. The benefit of this approach is that it provides scalable resources, faster performance, and a reliable environment to handle larger workloads without depending on your local machine.
Now that you’re connected to your DigitalOcean Droplet through VS Code, the next step is setting up Claude Code.
Step 1: Update Your Droplet
First, ensure your droplet is up-to-date:
sudo apt update && sudo apt upgrade -y
Step 2: Install Required Dependencies
Claude Code requires Python and Node.js. Install them with:
sudo apt install -y python3 python3-pip npm git
# Download and install nvm:
curl -o- https://raw.githubusercontent.com/nvm-sh/nvm/v0.40.3/install.sh | bash

# in lieu of restarting the shell
\. "$HOME/.nvm/nvm.sh"

# Download and install Node.js:
nvm install 22

# Verify the Node.js version:
node -v # Should print "v22.19.0".

# Verify npm version:
npm -v # Should print "10.9.3".
Step 3: Install Claude Code
npm install -g @anthropic-ai/claude-code
Step 4: Once installed, create a project folder and launch Claude
Make a new directory for your Claude work, open it, and start Claude from the terminal. From inside the folder, just run claude to launch the CLI/interface.
mkdir my-project
cd .\my-project\
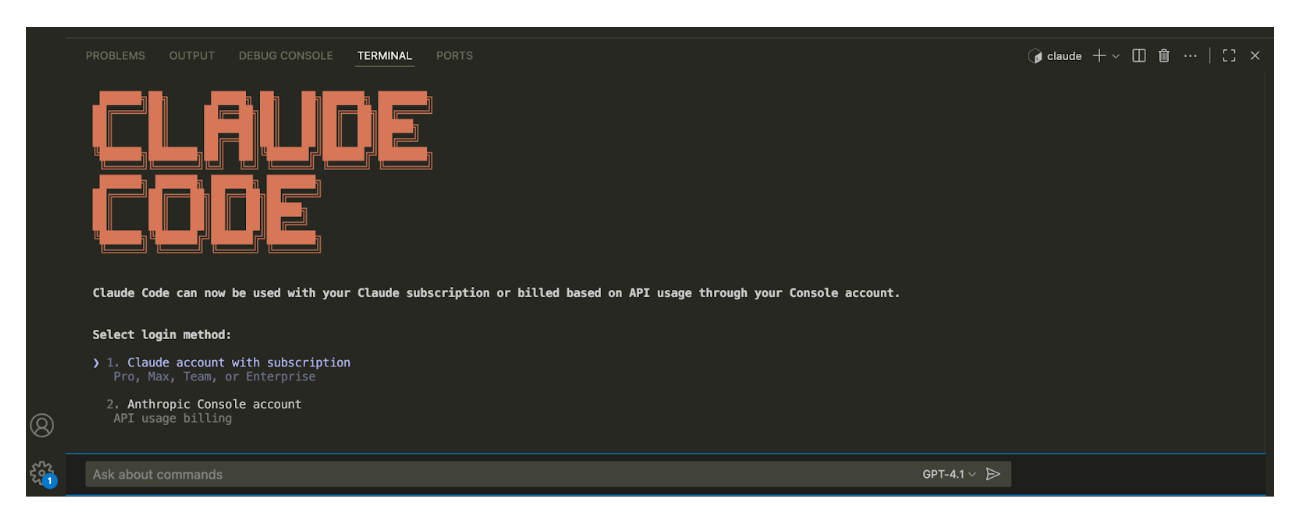
Step 5: To proceed with Claude Code, you need to set up the billing cycle and complete your subscription. Follow the prompts and confirm your subscription plan.
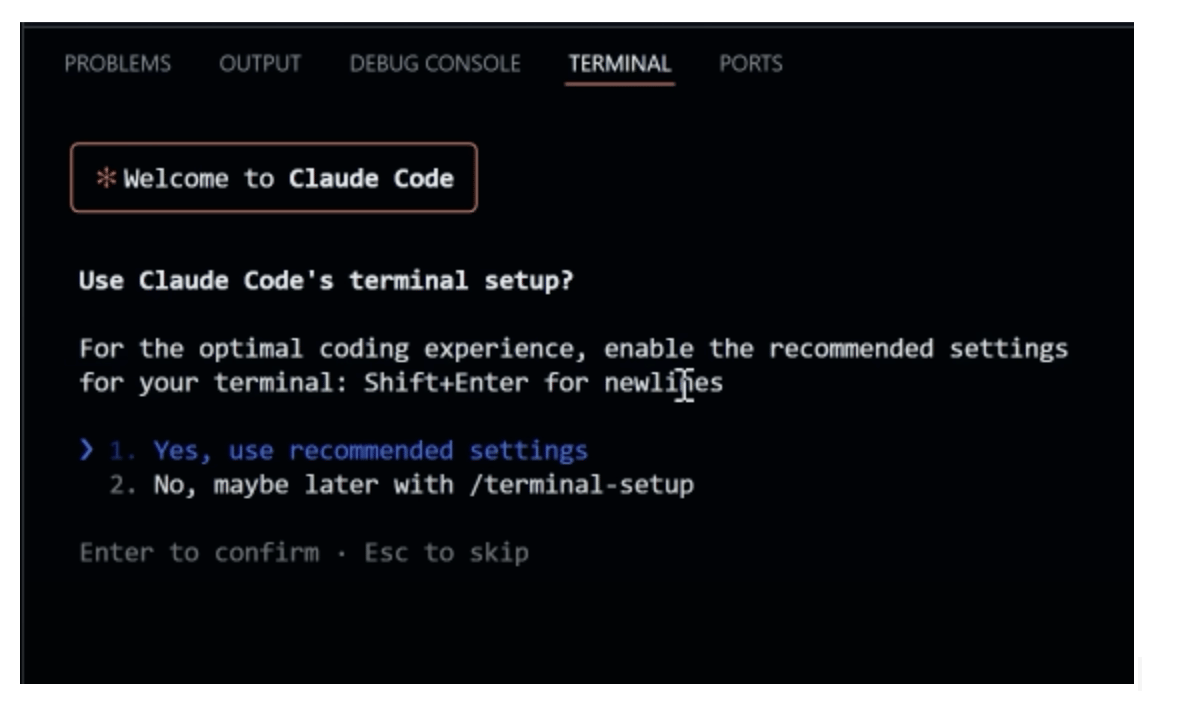
Once billing is configured, you’ll be offered the recommended settings. Feel free to enable them and get the best experience.
With this, you can start your journey to vibe coding with Claude Code.
Vibe Coding with Claude Code
Vibe coding is a process where you are just providing a few prompts, and AI does the rest and takes care of creating the entire project step by step. You will be able to experiment, debug, and create the project in real time. The best part about using Claude Code with your terminal is that it is like a coding partner inside your development environment.
- Faster responses for large-scale code generation and AI-assisted suggestions.
- Real-time iteration that keeps you in the creative zone with minimal interruptions.
However, vibe coding does come with its own set of challenges. Sometimes it can be tempting to accept AI-generated code without fully understanding it, but this often creates problems during deployment. If something breaks, troubleshooting can become a real struggle. While the code may look solid at first, it usually requires manual fine-tuning to ensure reliability and efficiency.
Another limitation is that AI output depends heavily on the quality of your prompts. Ambiguous or unclear instructions can easily result in messy or inefficient code.
The best way to overcome these issues is to maintain some understanding of the code that is being generated. This way, if something goes wrong, you’ll know where to look and how to fix it instead of being caught off guard.
Examples of creative and AI-powered coding
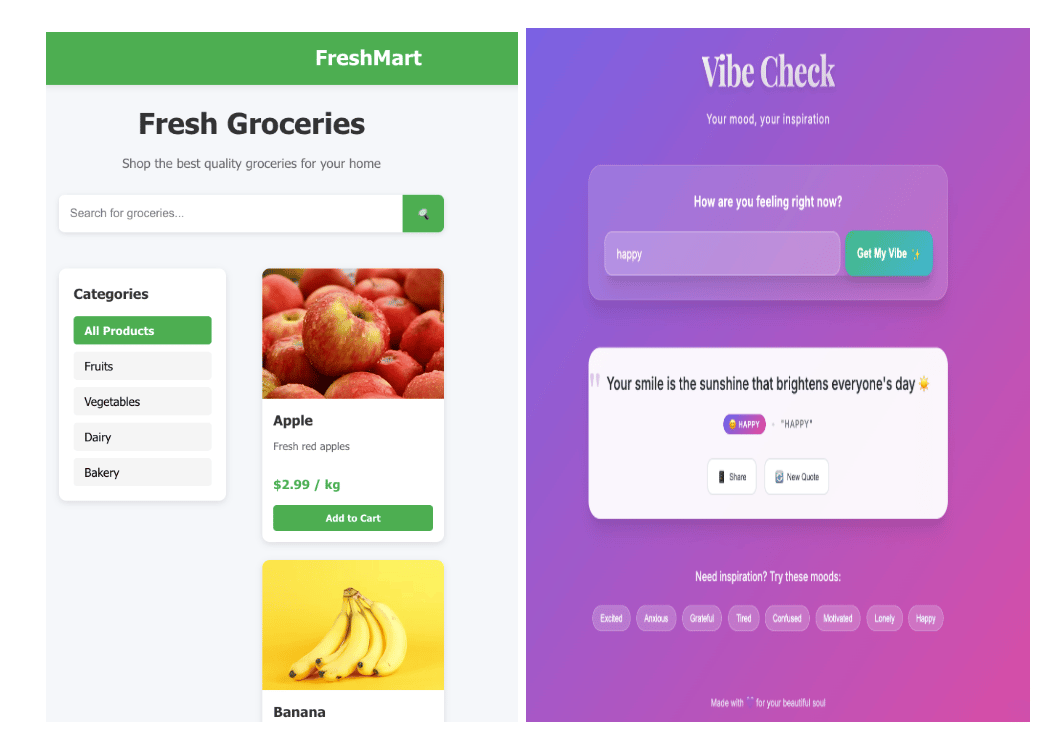
Mood-to-Quote Generator
A lightweight Flask app where users type in their current mood, and the app responds with an AI-generated inspirational quote or song lyric-style line to match that vibe. Create a beautiful ui.
This app is small enough to build quickly but creative enough to show off Claude Code + Flask + vibe coding.
Claude can access your system, but it continuously checks at every step to confirm whether you want to proceed (permission-based access).
Note: Use Escape to actually stop Claude and not control+c
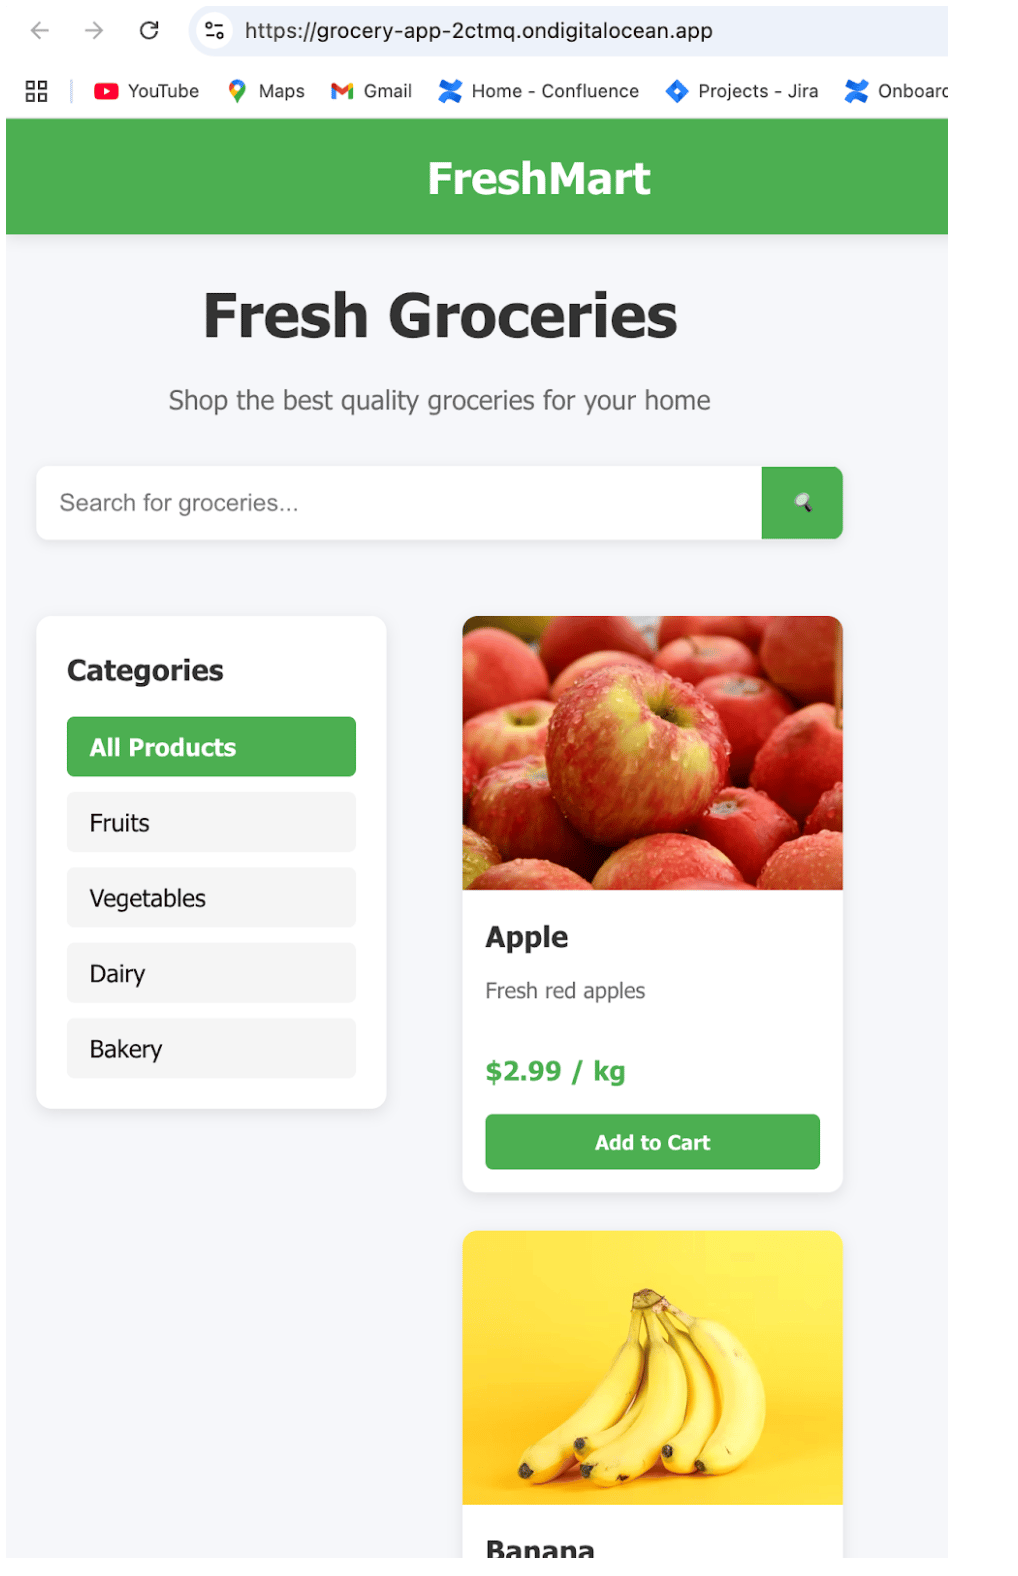
Grocery Shopping App
Build a modern grocery shopping app using React (or Flutter if you prefer cross-platform mobile). The app should have the following features:
- Home Page / Product Listing: Grid or list view of grocery items with images, prices, and “Add to Cart” buttons.
- Search & Filter: Search bar for items, filters by category (fruits, vegetables, dairy, etc.).
- Cart Page: Shows selected items, quantity controls (+/-), total price, and a checkout button.
Keep the design clean, minimal, and mobile-friendly. Include clear navigation between pages and smooth animations for a polished shopping experience.
We have linked the GitHub repository, so feel free to explore the code, try it out yourself, and even fork it to kickstart your own projects.
Use the /clear command in between tasks to reset the context window.
Claude Code Tips and Tricks for Developers
Whether you are using your local machine, a remote server, or AI tools such as Cursor or windsurf, a few smart practices can help you get the most out of it.
-
Checklist – One of the best features of Claude Code is the to-do list, which gets generated whenever you provide a prompt for a specific task. This checklist helps developers keep track of small tasks Claude will cover to complete the main tasks.
-
Debug and Fix Issues – Simply describe a bug or paste an error message, and Claude Code will analyze your codebase, pinpoint the root cause, and suggest or even implement the fix automatically. Claude Code also takes in a screenshot, so in case you have an error message in your web ui, you can simply take a screenshot and show it to Claude, and it will help you fix the error.
-
Streamline Permissions – By default, Claude Code asks for confirmation before editing files or running commands, which can slow down your workflow. If you trust your environment, you can bypass this with
claude --dangerously-skip-permissions. -
CLAUDE.md – Document common commands, coding standards, workflows, and environment setups in
CLAUDE.mdso Claude always has the right project context. Keep refining yourCLAUDE.mdcontent. Test what improves model responses, and don’t be afraid to emphasize critical instructions with “IMPORTANT” or “YOU MUST.” While coding, you can press#to quickly add new instructions or notes, which Claude will automatically incorporate into the relevantCLAUDE.md. -
Customize the tool allowlist – Speed up workflows by pre-approving safe tools (like file edits or
git commit) via/permissions,--allowedTools, or settings files. -
Install the GitHub CLI (gh) – Enable Claude to create issues, open pull requests, and interact with GitHub more seamlessly.
-
Simplify Git Operations – Use Claude to search commit history, generate commit messages, resolve rebase conflicts, and manage complex git workflows with minimal commands. Let Claude create pull requests, resolve review comments, fix failing builds, and triage issues without memorizing
ghCLI syntax. -
Enhance Jupyter Productivity – Work side by side with Claude in VS Code to read, write, and clean up notebooks. Ask it to interpret outputs, refine visuals, and even make your notebooks presentation-ready.
-
Generate High-Quality Documentation – Claude Code excels at creating clear and well-structured
.mdfiles for your projects. From README.md to detailed API references, it can automatically generate usage guides, code explanations, and contribution instructions, saving you time while ensuring your documentation stays consistent and professional. -
Git Worktrees – Use git worktrees to spin up multiple Claude sessions on different branches of the same repo. This lets you tackle independent tasks in parallel, like refactoring auth in one worktree while building a new feature in another, without merge conflicts or blocking each other’s progress.
- Create worktrees: git worktree add …/project-feature-a feature-a
- Launch Claude in each worktree: cd …/project-feature-a && claude
-
Message Queuing – Claude Code supports prompt queuing, letting you stack multiple requests and have them executed intelligently in sequence. This saves time compared to manually pasting prompts one by one and ensures you can step away, answer emails, check Slack, or work on something else while Claude keeps making progress.
-
Subagents for Task-Specific Workflows – Create specialized AI subagents in Claude Code to handle distinct tasks with their own context, tools, and system prompts. This improves efficiency by delegating work to experts within your project, keeping the main workflow organized while letting subagents operate independently.
These are just a few of the key highlights Claude Code provides; however, there is a lot more.
Deploying Your App on DigitalOcean
Now, let us move to the final step: we will deploy the app using DigitalOcean’s app platform.
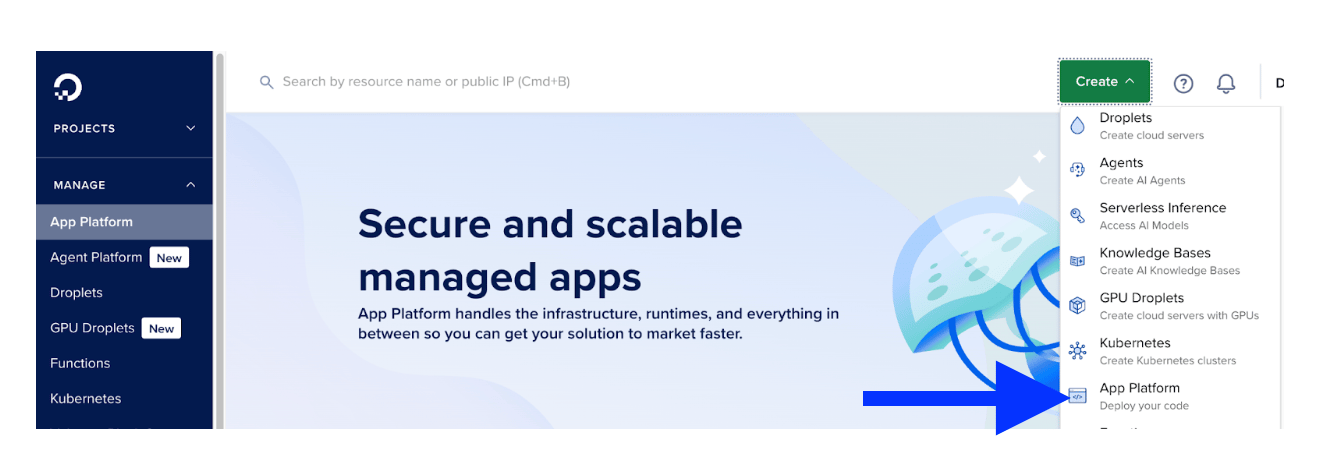
Step 1: Log in to DigitalOcean
Start by logging in to your DigitalOcean account. If you don’t have one, sign up first. Once inside, click on the “Create” dropdown menu and select “App Platform.”
We’ll be deploying the Grocery app that we built using Claude Code and vibe coding. You’ll find the GitHub repository link in the resources section.
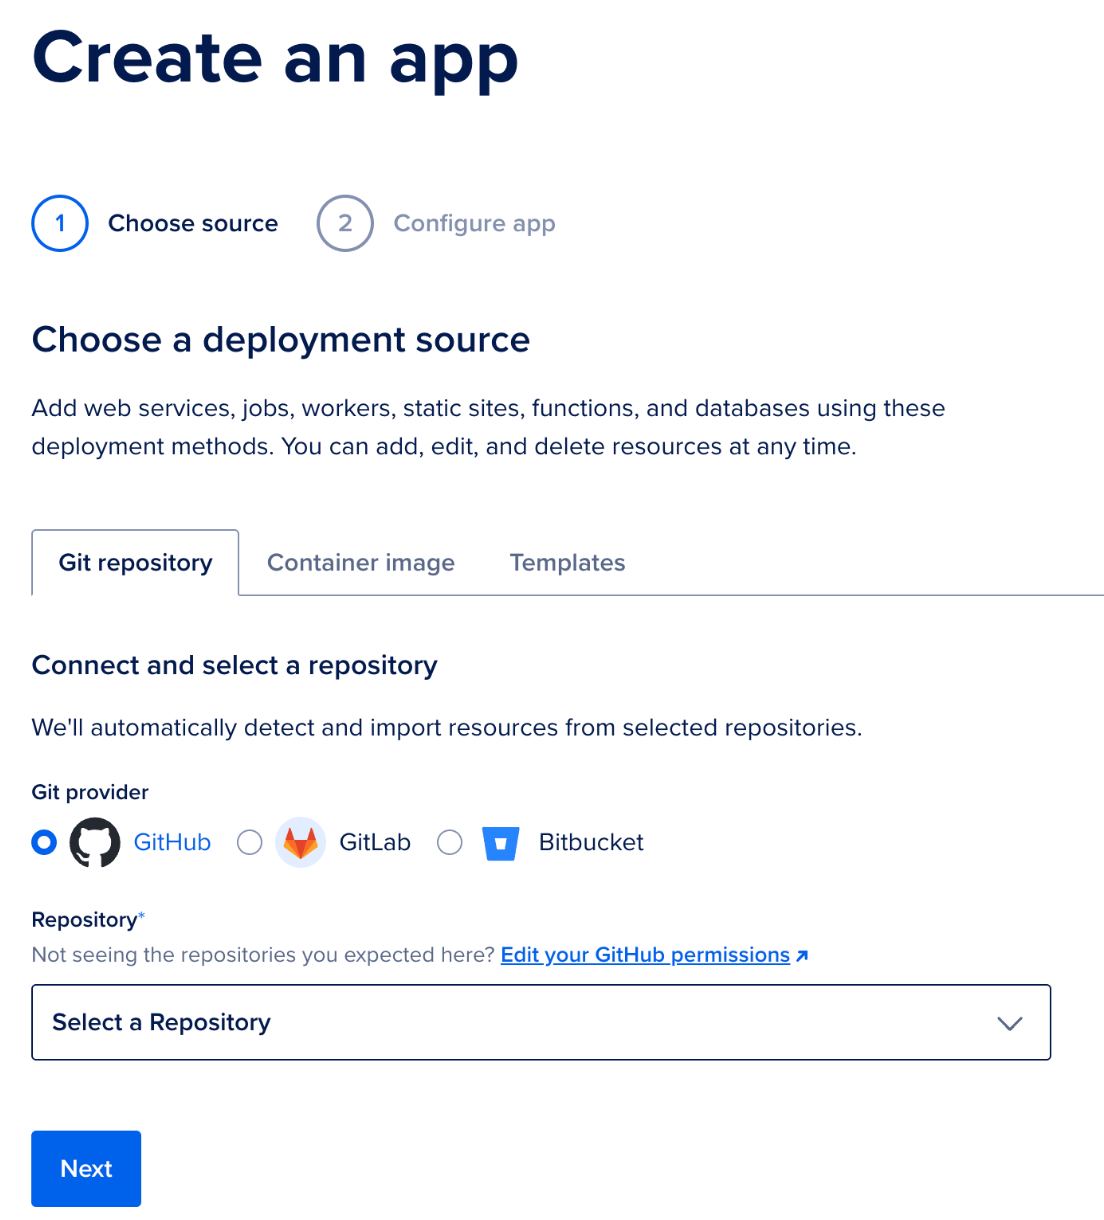
Step 2: Choose a Deployment Source
Next, you’ll be prompted to select a deployment source. Since our app is hosted on GitHub, we’ll choose GitHub. If your app is stored in GitLab or Bitbucket, you can select those instead.
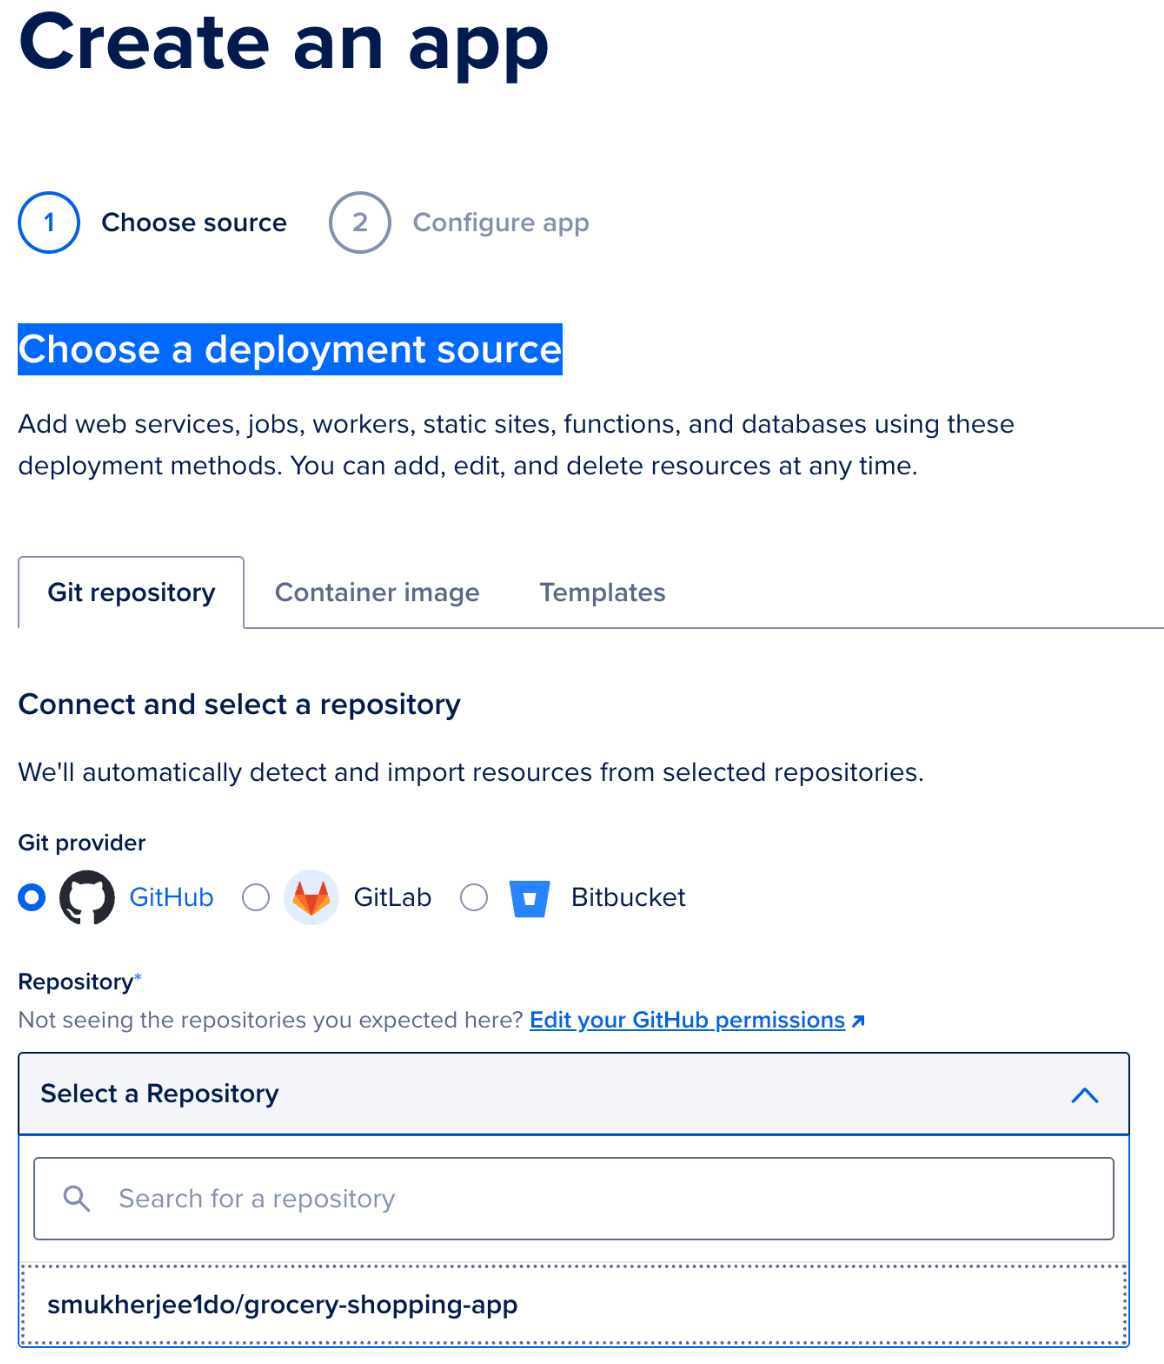
Step 3: Select Repository and Branch
Choose the repository containing your app.
DigitalOcean will request access permissions. Make sure to grant access only to the repository you want to deploy, not all repositories. Then, select the branch you’d like to deploy (in our case, the main branch). Enable the “Autodeploy code changes” option so that any updates pushed to your repo are automatically deployed by DigitalOcean. Click “Next.”
Step 4: Configure the Application
DigitalOcean will automatically detect your app’s configuration and display it in the Review and Configure Resource Settings page. Here, you can:
- Set environment variables (if needed).
- Edit the detected configuration settings.
- Choose a datacenter region closest to your users. For this app, the Run command is set to
npm startand the port is8080(default).
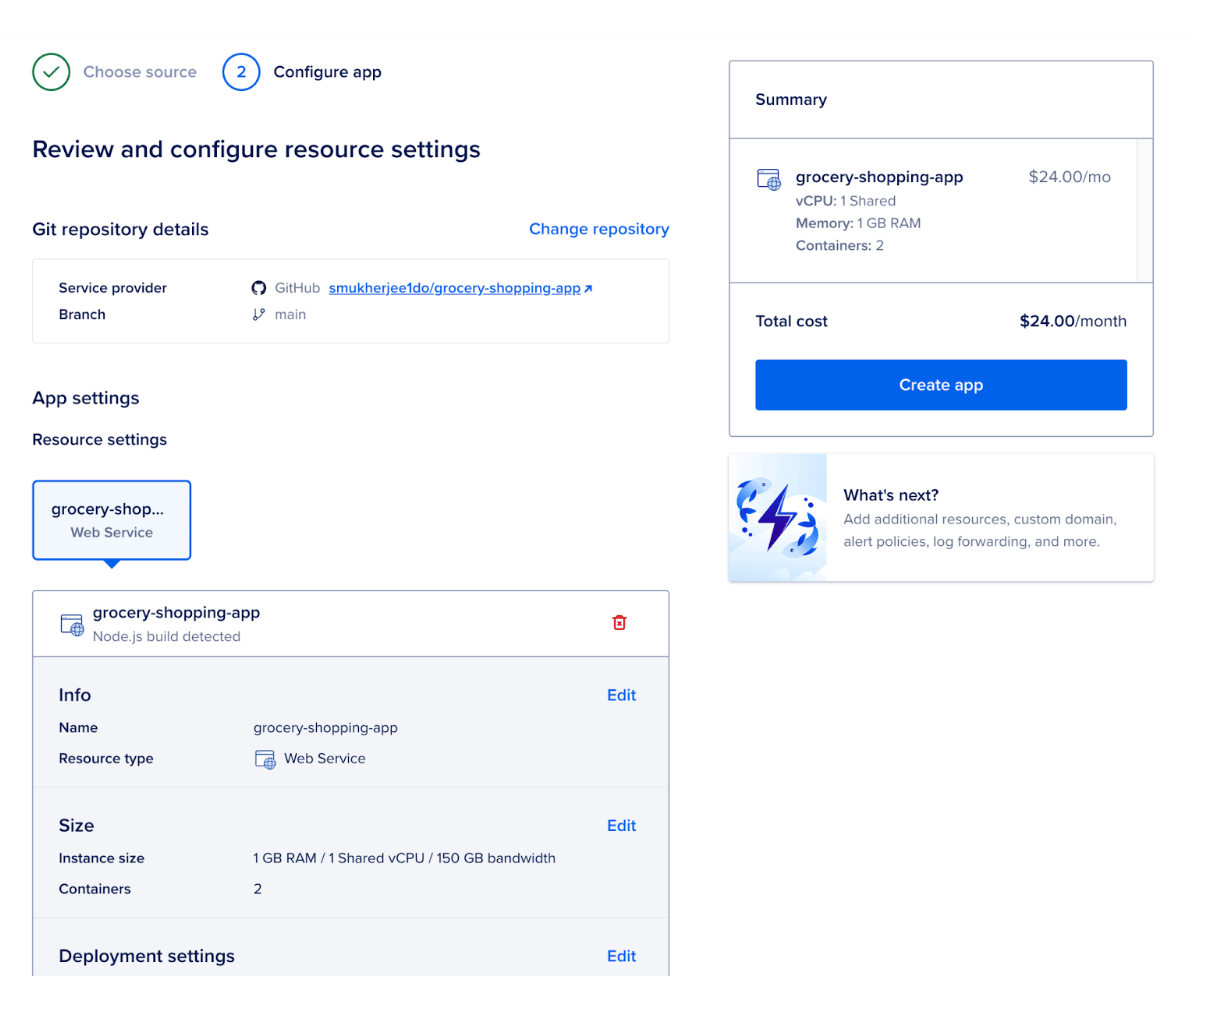
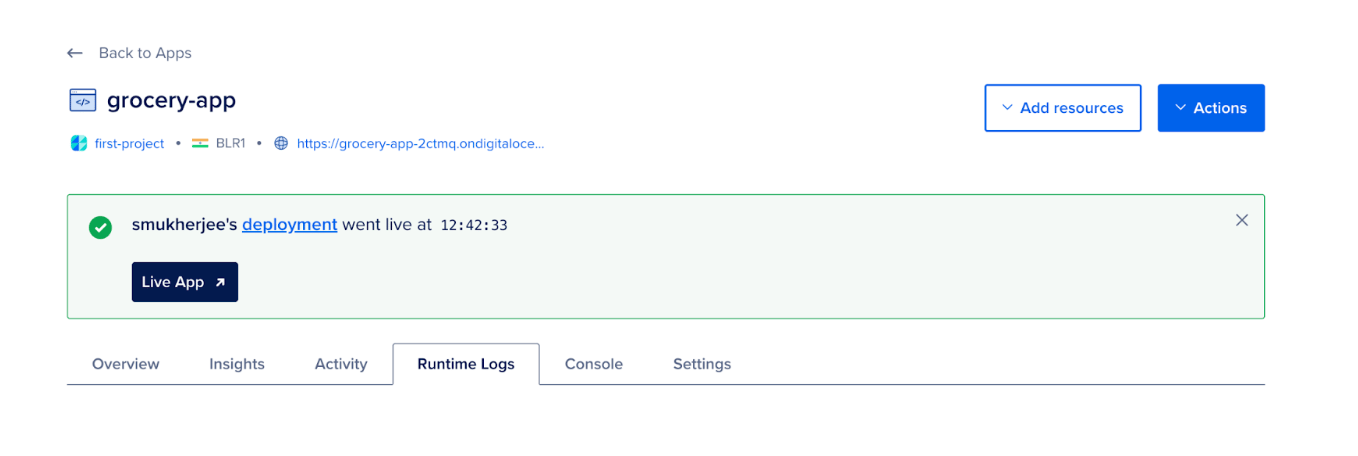
Step 5: Deploy the App
Click on “Create App” to begin the deployment. Within a few minutes, your app will be live, and you’ll also see the Estimated Monthly App Cost. Once the app is created, click “Launch App” to view it in action.
You can also manage settings by navigating to the Settings tab, which includes:
- App Settings: View app details, add a custom domain, and configure HTTP routes or redirects.
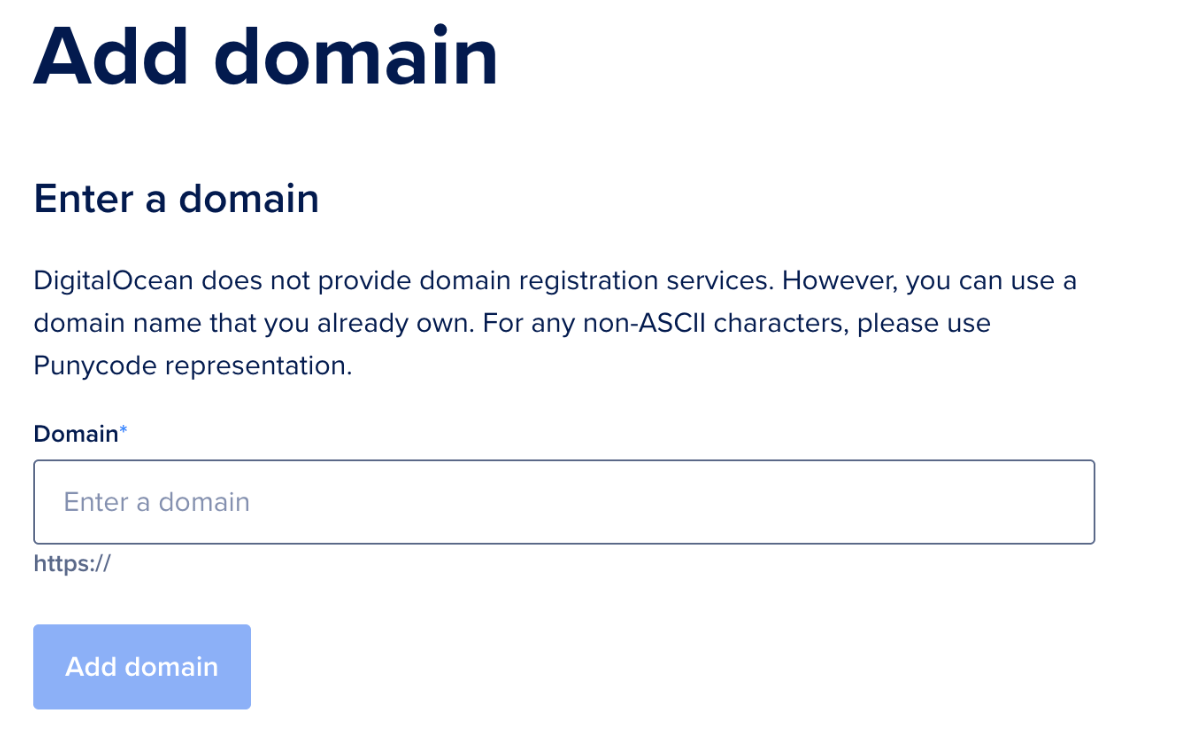
- Components: Manage specific parts of your app.
Additionally, you can check logs, adjust configurations, and connect a custom domain all from the same panel.
Deploying your applications on DigitalOcean’s App Platform is a straightforward process that saves you from the complexities of manual setup and infrastructure management. Also, with GitHub integration, easy deployment process, and flexible configuration options, you can focus more on building features rather than worrying about deployment.
The app platform is great if you’re a beginner experimenting with projects or a developer managing production apps.
FAQs:
Q1: Do I need prior experience with SSH to use Claude Code on a DigitalOcean Droplet?
A1: No. With VS Code’s Remote SSH extension, connecting to your Droplet is straightforward, and you can follow step-by-step instructions to get started.
Q2: Can I run multiple Claude Code sessions simultaneously?
A2: Yes. Using git worktrees or separate directories, you can run independent sessions for different tasks without merge conflicts.
Q3: Is it safe to use --dangerously-skip-permissions?
A3: It reduces prompt interruptions but should be used in a contained environment to avoid potential risks.
Q4: Can Claude Code help with GitHub tasks directly from VS Code?
A4: Yes. Claude can create pull requests, resolve review comments, triage issues, and manage commits without manually using the gh CLI.
Q5: How do subagents improve workflow in Claude Code?
A5: Subagents are specialized AI assistants that handle specific tasks with their own context, tools, and prompts, keeping your main workflow clean and efficient.
Q6: Can Claude Code help improve project documentation?
A6: Absolutely. It can generate README files, API docs, and other .md files automatically, ensuring consistency and clarity across your project.
Conclusion
In this article, we touched upon how to get the best out of Claude’s code using DigitalOcean’s remote server. DigitalOcean’s platform offers developers an efficient way to build an end-to-end workflow from logging in and installing Claude Code to vibe coding, debugging, and deploying projects efficiently. We also learned how to SSH into a remote server using VS Code, and this provides greater control over the development environment, allowing you to manage files, run commands, and debug projects directly on a powerful remote machine without relying solely on your local setup.
Thanks for learning with the DigitalOcean Community. Check out our offerings for compute, storage, networking, and managed databases.
About the author
With a strong background in data science and over six years of experience, I am passionate about creating in-depth content on technologies. Currently focused on AI, machine learning, and GPU computing, working on topics ranging from deep learning frameworks to optimizing GPU-based workloads.
Still looking for an answer?
This textbox defaults to using Markdown to format your answer.
You can type !ref in this text area to quickly search our full set of tutorials, documentation & marketplace offerings and insert the link!
C’mon guys, this is a plain scam. You don’t need a GPU to run Claude Code, since all the inference is happening on Anthropic servers… Don’t be like that, setuping Claude Code on GPU dropplet have no upside in comparison with running it locally or on cheap non GPU VPS.
 This work is licensed under a Creative Commons Attribution-NonCommercial- ShareAlike 4.0 International License.
Become a contributor for community
Get paid to write technical tutorials and select a tech-focused charity to receive a matching donation.

DigitalOcean Documentation
Full documentation for every DigitalOcean product.

Resources for startups and AI-native businesses
The Wave has everything you need to know about building a business, from raising funding to marketing your product.
The developer cloud
Scale up as you grow — whether you're running one virtual machine or ten thousand.

Start building today
From GPU-powered inference and Kubernetes to managed databases and storage, get everything you need to build, scale, and deploy intelligent applications.
