
Introduction
Jekyll is a static-site generator that provides some of the benefits of a Content Management System (CMS) while avoiding the performance and security issues introduced by such database-driven sites. It is “blog-aware” with special features to handle date-organized content. Jekyll is well-suited for people who need to work off-line, who prefer to use a lightweight editor instead of web forms for maintaining content, and who wish to use version control to track changes to their website.
In the first part of this series, we installed Jekyll and its dependencies on an Ubuntu 16.04 server, created a development site in our home directory, and ensured that traffic to the site would be allowed by the firewall.
In this tutorial, we will use the automatically-generated content from the previous guide to explore how Jekyll turns source files into static content, making it easier to create and maintain content.
Prerequisites
To follow this tutorial, you will need to complete the previous guide, How to Set Up a Jekyll Development Site on Ubuntu 16.04. We build on the work we did in that tutorial, and without completing it, the examples will not match.
When you’ve completed Part 1, you’re ready to begin.
The Homepage
Let’s start our exploration on the homepage, which is assembled from four different sources files. We’ll walk through each of those files individually, looking at how they work together to produce the static homepage.
If you exited the development web server after finishing the first tutorial, restart it again now:
- cd ~/www
- jekyll serve --host=203.0.113.0
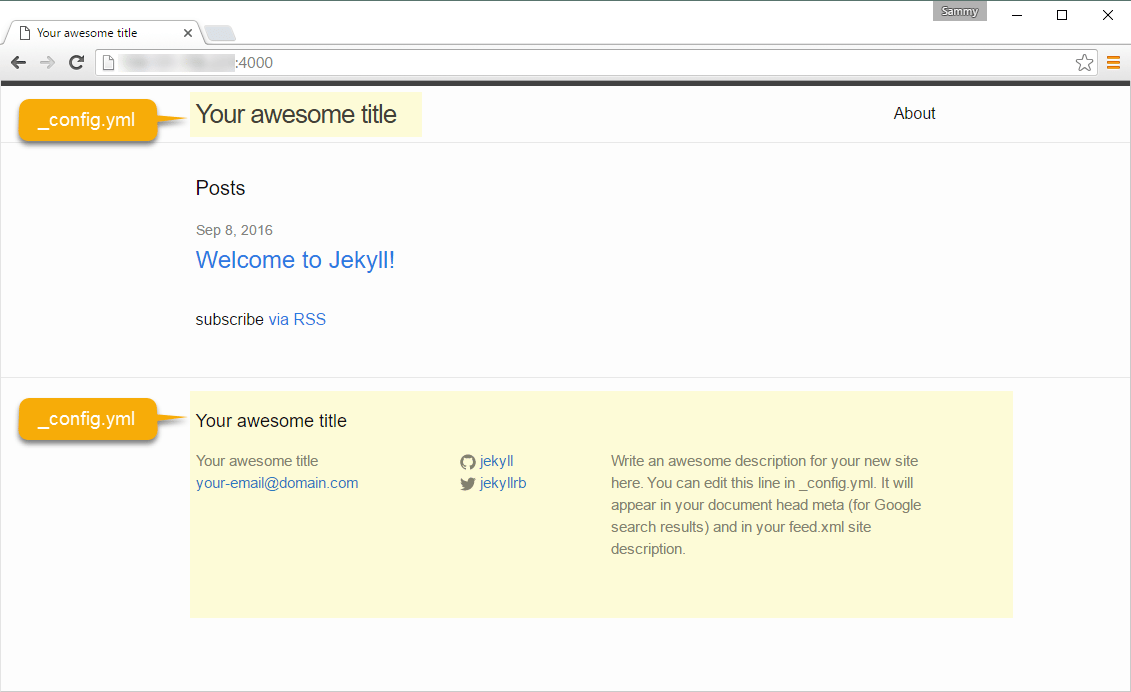
Then, visit your site in a web browser. The screenshot of the homepage below has been modified to highlight the configuration and information sources.

Configuration Settings: _config.yml
Much of Jekyll’s power comes from the ability to set up information that will be repeated in many places on the static web site in a single source file, _config.yml
The default _config.yml created by running jekyll new, contains five settings that are visible on the homepage:
title: Your awesome title email: your-e-mail@domain.com description: Write an awesome description for your new site here … twitter_username: jekyll github_username: jekyllrb
This information is automatically included on all the other pages and posts we create. When we need to update one of these settings, we can make a change in this file, and it will be updated everywhere. To watch this in action, we’ll change these values.
Open the file in a new terminal:
- nano ~/www/_config.yml
We’ll change the settings to the values below:
title: Sammy's Blog
email: sammy@digitalocean.com
description: >
 Welcome to my blog!
github_username: DigitalOcean
twitter_username: DigitalOcean
We will leave the url and baseurl alone while we’re developing, and make any adjustments when it’s time to deploy our site.
To see the changes made in the configuration file, we’ll need to stop the web server with CTRL-C, then restart it:
- jekyll serve --host=203.0.113.0
Note: Be sure each line in the description is indented at least one space or you’ll run into the error: "could not find expected ‘:’ while scanning a simple key at line 19 column 1`.
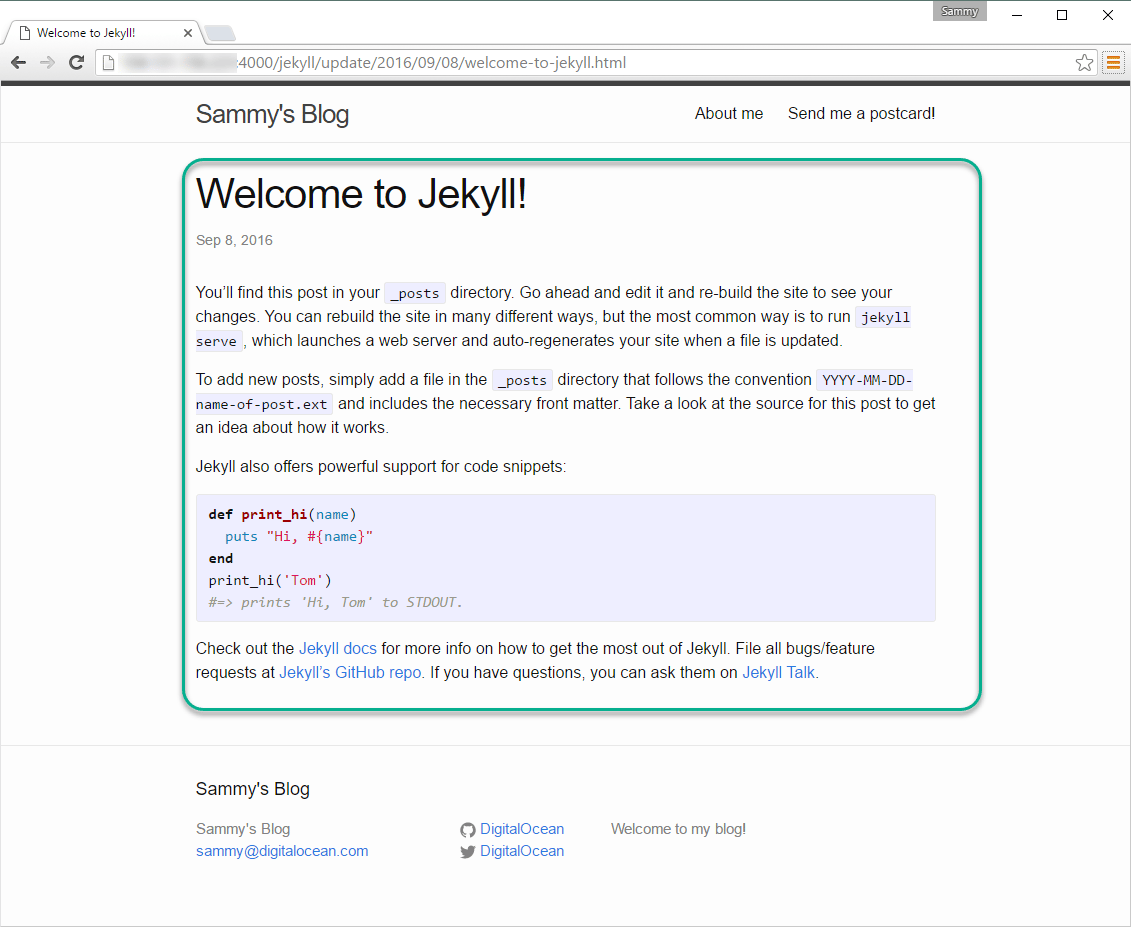
When you’re done, save and exit your editor. Then, reload the page in your web browser. Depending on your web browser’s local cache settings, you may need to Shfit+Reload to see the changes, which should appear in the two regions highlighted below:

There are many more customization that can be made in the _config.yml file, but for now we’ll move on to the next source file and notice how the changes we made are visible on the rest of the site.
Pages: about.md
Follow the About link in the upper-right corner. The changes we made in the configuration file are visible here, above and below the About page’s main content.
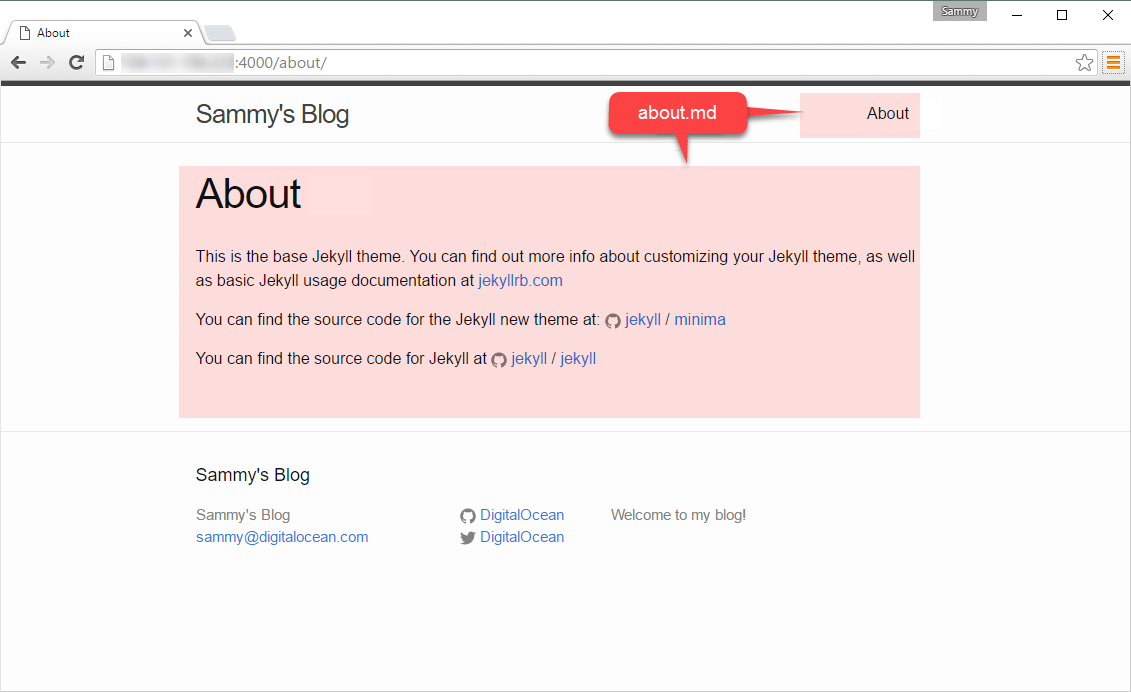
That central content, and the link text in the header, is stored in the about.md file which contains four kinds of content:
1. Jekyll Front Matter
The block at the top of the about.md file beginning and ending with three dashes is Jekyll’s Front Matter. It must be the first thing in the file, and when it is present, it signals to Jekyll that the file should be parsed. It typically includes valid YAML between the lines to take advantage of pre-defined variables, but it can also be blank. A blank Front Matter block is sometimes useful for a CSS file or other place where you don’t need to set any values but you want access to variables.
The “About” page sets three values in its Front Matter:
---
layout: page
title: About
permalink: /about/
---
Layout:
Layouts eliminate repetitious content like headers, footers, and menus to make sites easier to maintain. Jekyll comes with three layouts: default, page, and post. Each one has special characteristics. In this case, a menu link to the title value, “About” appears in the header navigation because the layout is set to “page.”
Title:
In addition to being used as the link text in the header navigation, the title is also used as the visible page title, formatted with Heading 1 tags, and as the page’s <title>, which is the text that appears on the browser bar and when the page is bookmarked.
Permalink:
Jekyll automatically generates directories and HTML files from these source files which determine the URL of a page. The permalink allows you to override the default behavior. Here it causes the page URL to be http://203.0.113.0:4000/about/ rather than http://203.0.113.0 :4000/about.html.
2. Visible Text The page contents begin after the Front Matter. The text here appears on the page, such as “This is the base Jekyll 3. theme.”
3. Markdown Markdown is a part of the main page contents and controls the format of the content. It will be parsed into HTML for the static site. Markdown is often preferred by content writers over HTML because it is designed to be easier to read and write.
4. Liquid template directives
Jekyll uses Liquid as its template engine in order to include dynamic elements. The Liquid directives appear between curly braces such as {% include icon-github.html username="jekyll" %}.
Let’s make some changes to this page to see how the site is affected.
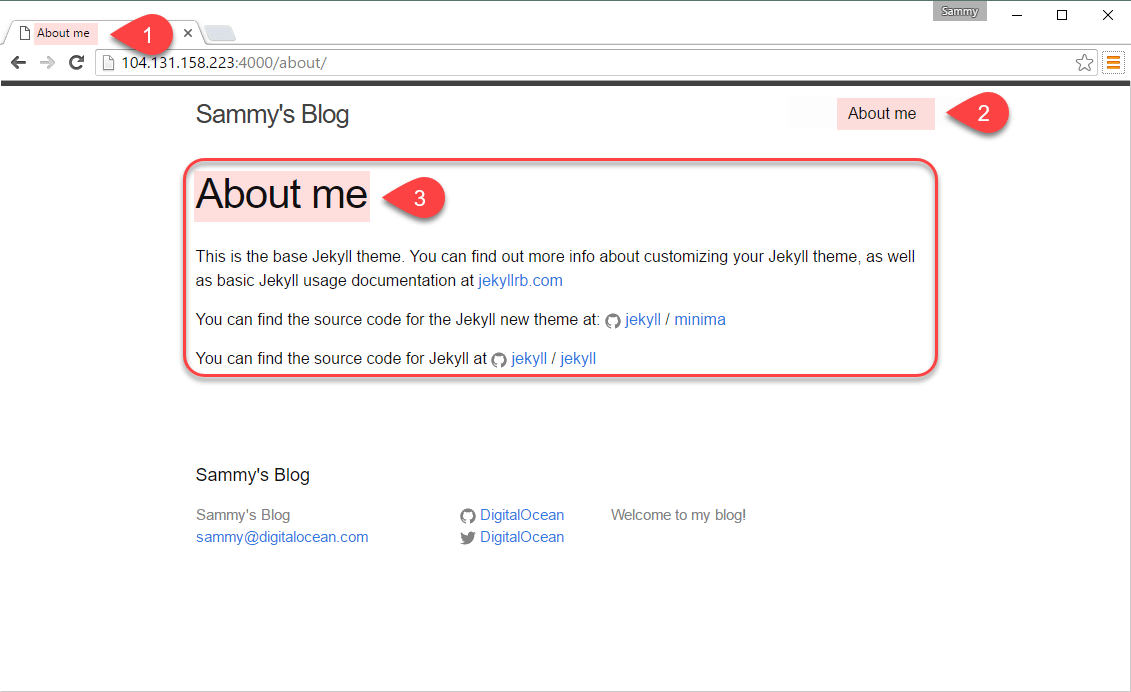
Change the Title
We’ll make a small change and call the page “About me” instead of just “About”:
- nano ~/www/about.md
---
. . .
title: "About me"
. . .
---
When you’re done, save and exit the file.
The change will appear in three locations, and the menu link will be updated on all the site pages:
Add a New Page
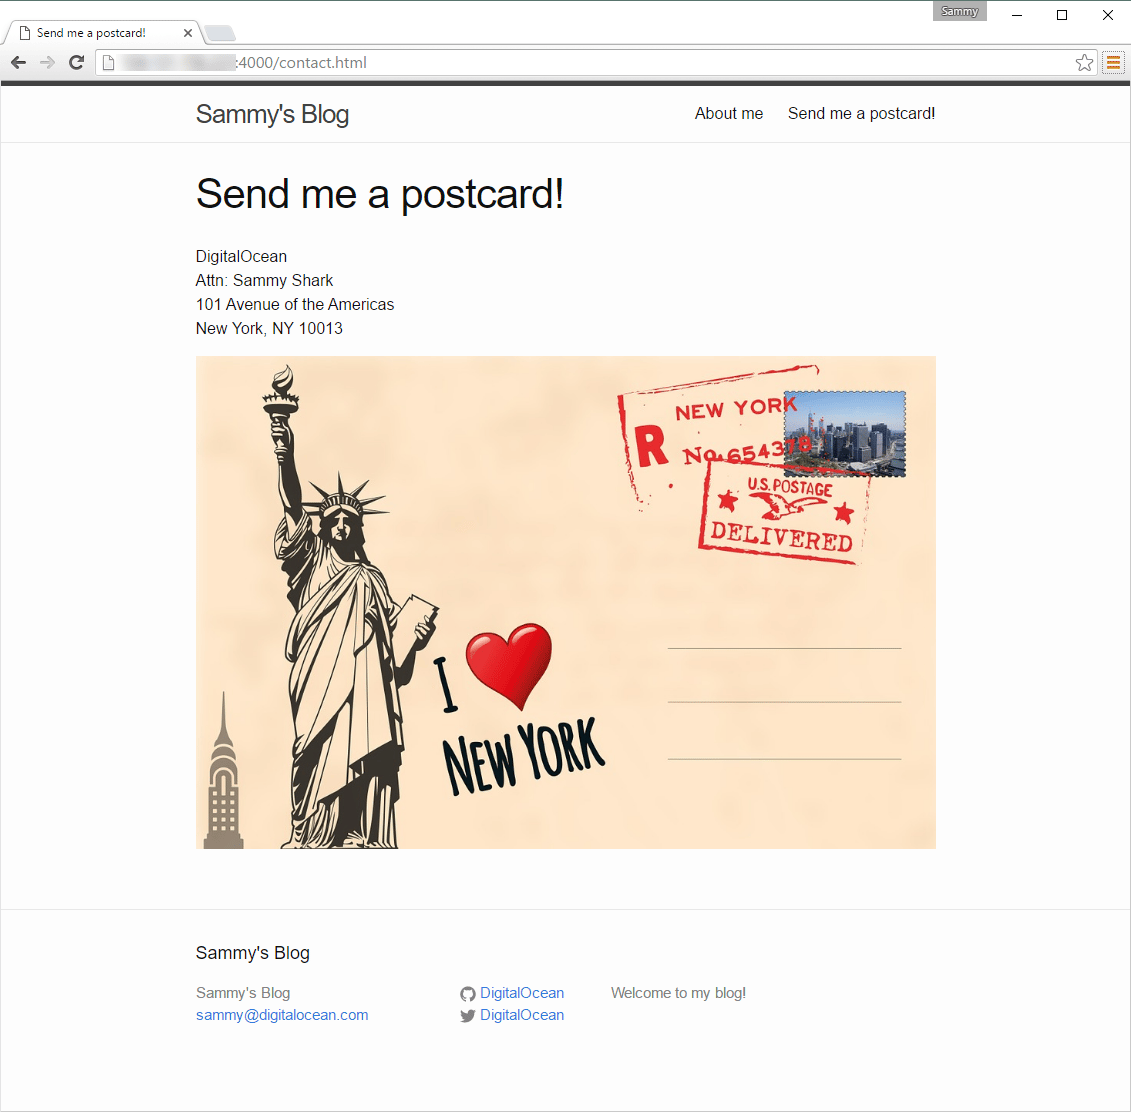
Next we’ll add a “Contact” page to the site and use a little bit of markdown to include an image.
We’ll start by making an assets directory to hold our image:
- mkdir ~/www/assets
Then we’ll transfer the image to our machine using wget. The -O flag will direct it to the directory we created. The flag requires that we also specify the filename, so we will:
- wget -O ~/www/assets/postcard.jpg https://assets.digitalocean.com/articles/jekyll-1604/postcard.jpg
Once the image is in place locally, we’ll create the new page:
- nano ~/www/contact.md
---
layout: page
title: "Send me a postcard!"
---
DigitalOcean\\
Attn: Sammy Shark\\
101 Avenue of the Americas\\
New York, NY 10013

Let’s take a closer look at the markdown. First, the double slash, \\, at the end of each line forces a return without adding extra space. Second, the image is displayed with this markdown ![](). The exclamation mark signals that the link which follows is an image. The brackets contain the alternate text to be used if images are not being loaded or the visitor is using a screen reader. The parentheses contain the link to the image file. You can learn more about Jekyll’s default markdown style on the kramdown website.
Save and exit the file, then reload the page. The new link will appear, ordered alphabetically based on the name of the file.
With the new files in place, the top of our file structure now looks like this:
├── about.md
├── assets
│   └── postcard.jpg
├── _config.yml
├── contact.md
The actual webpage page looks likes this:
Click the site title to return to the homepage, where you should find the new link included in the header navigation.
Note: It’s common to have an interactive web form on a Contact page. Jekyll doesn’t provide any built-in form handling, but you can use cloud-based services such as Disqus, Formspree or FormKeep or host your own.
Posts: _posts/YYYY-MM-DD-welcome-to-jekyll.markdown
Follow the “Welcome to Jekyll” link to take a look at the sample blog post provided.
The _posts directory contains specially named files, following the format YYYY-MM-DD-Words-in-Title. If your post is not named in this format, it won’t be parsed. If the file name has a date set in the future, the page will not be parsed for the static site. Naming the file with a future date does allow the naming scheme to be used in conjunction with cron or other automation strategies to publish a post after particular date and time. The post files can end with .markdown, .md, .html, or other extensions when custom converters are installed.
Posts begin with Front Matter. Front Matter is required for every post file since it contains values like the date that are critical to the creation of the site.
---
layout: post
title:  "Welcome to Jekyll!"
date:   2016-08-31 17:35:19 +0000
categories: jekyll update
---
Layout:
Although it’s possible for a layout to be quite different, the layout for posts is very similar to the default. There are variations in the HTML <head> ... </head> section where the page content is different, and the content between the <div class="wrapper"> ... </div> tags, but the rest is identical. The only visible difference on the page itself is the automatic inclusion of the the Front Matter’s date value below the title.
Title: The title appears both as Heading 1 on the blog post itself and as Heading 2 on the index page.
Date: The date, set here, will determine the date displayed on both the homepage and the post itself. It is this date that will also determine the URL of the post, which we’ll explore in more detail shortly.
Note: The date in the Front Matter has no direct relationship to the date that begins the filename. The filename must begin with a date in the proper format in order to be parsed at all. If it is named with a date in the future, it won’t be parsed until the next site building process after that date. Meanwhile the Front Matter date determines the directory structure once the file is parsed and is used as the value displayed on the homepage and the post.
- Categories: Categories are specific to posts and are used to group content by topics. By default, they’re not visible on the page, although they could be added to a custom template.
Remaining files
We’ve looked closely at three files so far, the _config.yml, about.md, and _posts/YYYY-MM-DD-welcome-to-jekyll.markdown. Here’s a brief overview of the files that are less directly visible from the browser:
main.scss:
Jekyll makes use of Syntactically Awesome Style Sheets (Sass), which it compiles into regular CSS each time the site is rebuilt. The .sass files are located in the css directory.
feed.xml: Jekyll provides an RSS feed, also built each time the static site is rebuilt, to allow sites to aggregate posts and provide a way for users to subscribe.
Gemfile and Gemfile.lock:
The Gemfile lists plugins for Jekyll which are installed with the bundle command. When they’re installed, the Gemfile.lock file is generated to track the specific version of the plugins that were installed.
Of these four files, only the CSS affects the presentation of the content. If you’re specifically interested in Jekyll and Sass, you can learn more about it from Jekyll’s example site for Sass integration.
Conclusion
In this tutorial, we explored the boilerplate content Jekyll provides when we create a new site and made a few changes to demonstrate how the source files come together on the web pages. This makes a site easier to maintain by setting values in a single place, where they can be updated by a single edit rather than having to change every file. It also allows posts to be dynamically included on the homepage, so you don’t have to worry about manually updating another page to feature a new post.
In Part 3, we’ll look into the file structure of the static site, how that structure is reflected in the URLs of our pages and posts by default, and how to override the default behavior.
Thanks for learning with the DigitalOcean Community. Check out our offerings for compute, storage, networking, and managed databases.
About the author
Still looking for an answer?
This textbox defaults to using Markdown to format your answer.
You can type !ref in this text area to quickly search our full set of tutorials, documentation & marketplace offerings and insert the link!
 This work is licensed under a Creative Commons Attribution-NonCommercial- ShareAlike 4.0 International License.
Become a contributor for community
Get paid to write technical tutorials and select a tech-focused charity to receive a matching donation.

DigitalOcean Documentation
Full documentation for every DigitalOcean product.

Resources for startups and AI-native businesses
The Wave has everything you need to know about building a business, from raising funding to marketing your product.
The developer cloud
Scale up as you grow — whether you're running one virtual machine or ten thousand.

Start building today
From GPU-powered inference and Kubernetes to managed databases and storage, get everything you need to build, scale, and deploy intelligent applications.
