
Despite my love for Flutter, when I first came to it from the world of web development I was a bit uneasy with how it was structured. Logic, styles, and markup all in one place and intermixed within a plethora of brackets and commas. Now that I’ve discovered flutter-view, it has immediately became one of my main tools when working with Flutter.
flutter-view is not a replacement for Dart, nor is it completely letting us use Pug and Sass in flutter. It’s a supplement to our workflow by letting us isolate the view and develop it in a cleaner way. We are given the syntax of Pug and Sass (or HTML and CSS), with indentation, mixins, loops, and other goodies, but we’re still restrained to the limits of the widgets we’re using. This should be kept in mind because, for me at least, it’s still very easy to reach for something CSS would allow and wonder why nothing works, like using CSS Grid or adding width to a column widget.
If you are unfamiliar with Pug or a little rusty you can brush up on it here or peruse some of the amazing things Sass will let you do here.
Installation and Setup
flutter-view is still a pretty new package, so I recommend checking out the latest version and the docs for any changes.
$ flutter create flutter_view_example
dependencies:
  flutter:
    sdk: flutter
  flutter_view_widgets: ^1.0.6
Now you’re going to need to open two terminals, one for running flutter-view and the other for your app. All it needs is the location of the code we want compiled, generally the lib folder, and the watch flag.
$ flutter-view -w lib
Pug/HTML
Our file structure is similar to what you’d see in React or Angular with every screen and component in their own folder with our Pug and Sass file. flutter-view will automatically generate a new Dart file based off of both of them.
* lib 📂
  * screens 📂
    * loader 📂
      * loader.pug
      * loader.sass
  * main.dart
Once we import the flutter-view package we can start creating Flutter widgets using the Pug syntax. We can create a new stateless widget by just adding a tag and passing it (flutter-view).
Now all widgets are lowercase and words are separated with hyphens, so appBar becomes app-bar. Creating a new class will generate an empty container which we’ll be able to reference in the Sass file. We can also control what it’s labeled as in its parent widget with the as attribute.
home(flutter-view)
    scaffold
        app-bar(as='appBar')
            .siteName(as='title') Welcome
When you save this, a new home.dart file should have been generated, if we take a peek inside we’ll find something pretty cool.
import 'package:flutter/material.dart';
import 'package:flutter/cupertino.dart';
import 'package:flutter_view_widgets/flutter_view_widgets.dart';

Scaffold Home() {
  return Scaffold( // project://lib\home\home.pug#4,2
    appBar: AppBar( // project://lib\home\home.pug#5,3
      title:
      //-- TITLE ----------------------------------------------------------
      Container( // project://lib\home\home.pug#6,4
        child: Text(
          'Alligator.io',
        ),
      ),
    ),
  );
}
flutter-view even comments everything to make it easy to find something when you’re debugging.
If the compiler starts throwing a fit about indentation for no reason, restart your editor, it just gets like that sometimes.
Any property we need to declare for a widget can be passed-in as a normal argument, following the same naming format as widgets. If you need to do anything with functions you can either preface it with @ to wrap it in brackets or :^ to output as is, which is best used for arrow functions.
import(package='flutter_view_widgets/flutter_view_widgets.dart')
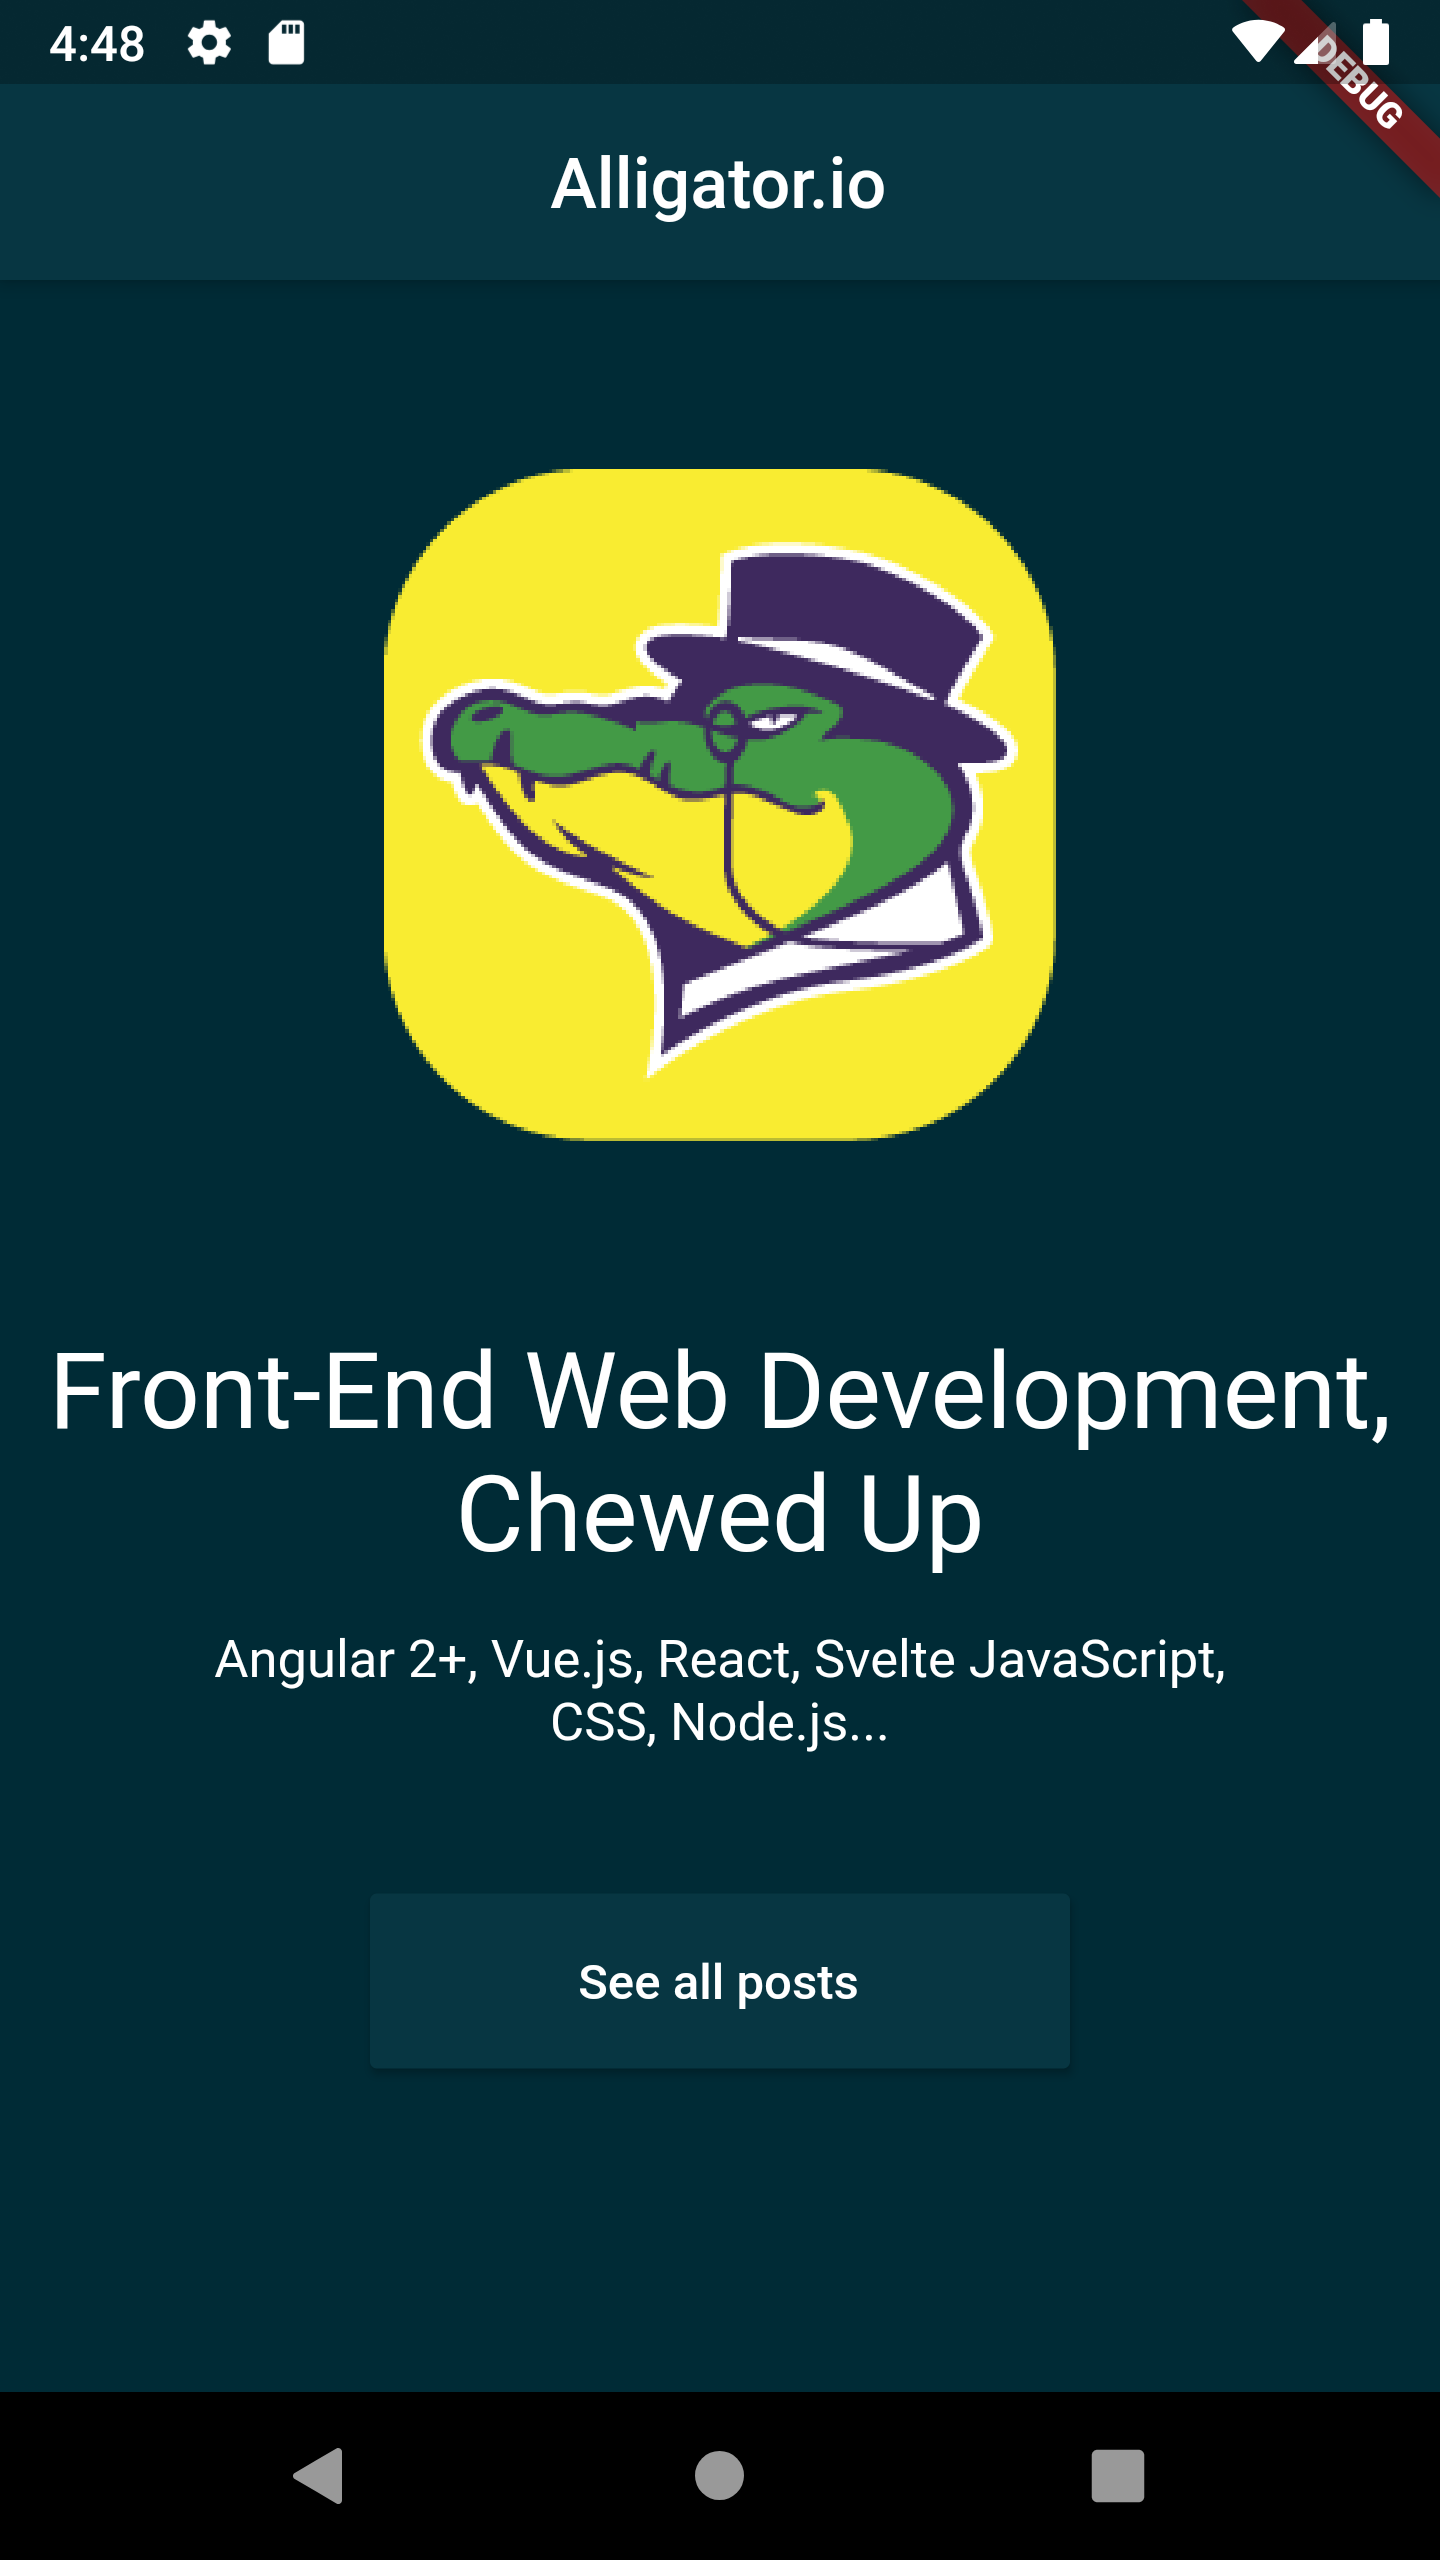
loader(flutter-view)
scaffold
app-bar(as='appBar' center-title=true).bar
.siteName(as='title') Alligator.io
.bg(as='body')
column: array(as='children')
.logo
.slogan Front-End Web Development, Chewed Up
.subSlogan Angular 2+, Vue.js, React, Svelte JavaScript, CSS, Node.js...
.btnText: button(:^on-pressed="() => print('Hello World')") See all posts
Sass
Sadly this is not CSS as you know it, merely the syntax. We have no CSS Grid, no Flexbox, not even any rems or percentages. We are limited only to the properties already available on each particular widget.
We can select our containers directly or with their classes/ids.
$solorized-light: #073642
$solorized-dark: #002b36

app-bar
    background-color: $solorized-light

.bg
    background-color: $solorized-dark
    width: 500
For some attributes there are some modifications to affect what is generated, so now background-image can either take a url() or an asset() to use something locally or an external source. You can find the full list of modified properties here.
@import '../global.sass'

.logo
    background-image: url("https://aws1.discourse-cdn.com/netlify/original/2X/3/3c2117abab23d3cb409b49f75ca0ef8f46bb005c.png")
    height: 300
    width: 300
.slogan
    color: #fff
    font-size: 30
    text-align: center

.subSlogan
    @extend .slogan
    margin-top: 15
    font-size: 15
    width: 300

.btnText
    margin-top: 40
    font-size: 25
    width: 200
    height: 50
    border-radius: 40
    button
        color: $solorized-light
        text-color: white
Once you get used to it the process, creating something like this will easily take half the time as with standard Dart.
Extra Configuration
flutter-view offers us a decent amount of control over our generated files. You just need a flutter-view.json file at the root of your project and you’re good to go.
Here we’re just telling it to add the flutter-view package to generated files by default and we’re remapping button from a RaisedButton to a FlatButton.
{
    "imports": [
        "package:flutter_view_widgets/flutter_view_widgets.dart"
    ],
    "tagClasses": {
        "button": "FlatButton"
    }
}
Closing Thoughts
With only a few lines we were able to generate easily 2-3 times the amount of Dart code without having to worry about a single bracket or type error. Plus, having a clean way of creating mixins, loops, and conditions makes development so much quicker and more enjoyable.
flutter-view has quickly become my go-to for all of my personal projects, and I hope it will for you too.
Thanks for learning with the DigitalOcean Community. Check out our offerings for compute, storage, networking, and managed databases.
About the author
Still looking for an answer?
This textbox defaults to using Markdown to format your answer.
You can type !ref in this text area to quickly search our full set of tutorials, documentation & marketplace offerings and insert the link!
 This work is licensed under a Creative Commons Attribution-NonCommercial- ShareAlike 4.0 International License.
Become a contributor for community
Get paid to write technical tutorials and select a tech-focused charity to receive a matching donation.

DigitalOcean Documentation
Full documentation for every DigitalOcean product.

Resources for startups and AI-native businesses
The Wave has everything you need to know about building a business, from raising funding to marketing your product.
The developer cloud
Scale up as you grow — whether you're running one virtual machine or ten thousand.

Start building today
From GPU-powered inference and Kubernetes to managed databases and storage, get everything you need to build, scale, and deploy intelligent applications.
