By James Quick

Introduction
Python is one of the most popular and easy to learn languages, which is why it is often one of the first languages you learn. Let’s see how to work with and run Python inside of Visual Studio Code.
In this tutorial you’ll install the Python extension then use intellisense and shortcuts to run your Python code.
Prerequisites
- Python installed on your machine and a local development environment set up. You can complete both of these with our tutorial How To Install and Set Up a Local Programming Environment for Python 3.
- Visual Studio Code installed on your machine by visiting the official download page.
Step 1 — Running Python From the Built-in Terminal
With Python installed and your local programming environment set up, open Visual Studio Code.
Inside of Visual Studio Code, open the directory you’re working in by going to File -> Open and selecting the directory. After that, you’ll see your folder open in the explorer window on the left.
With the directory open, you can create your first Python file (.py extension) with some code to print "Hello World".
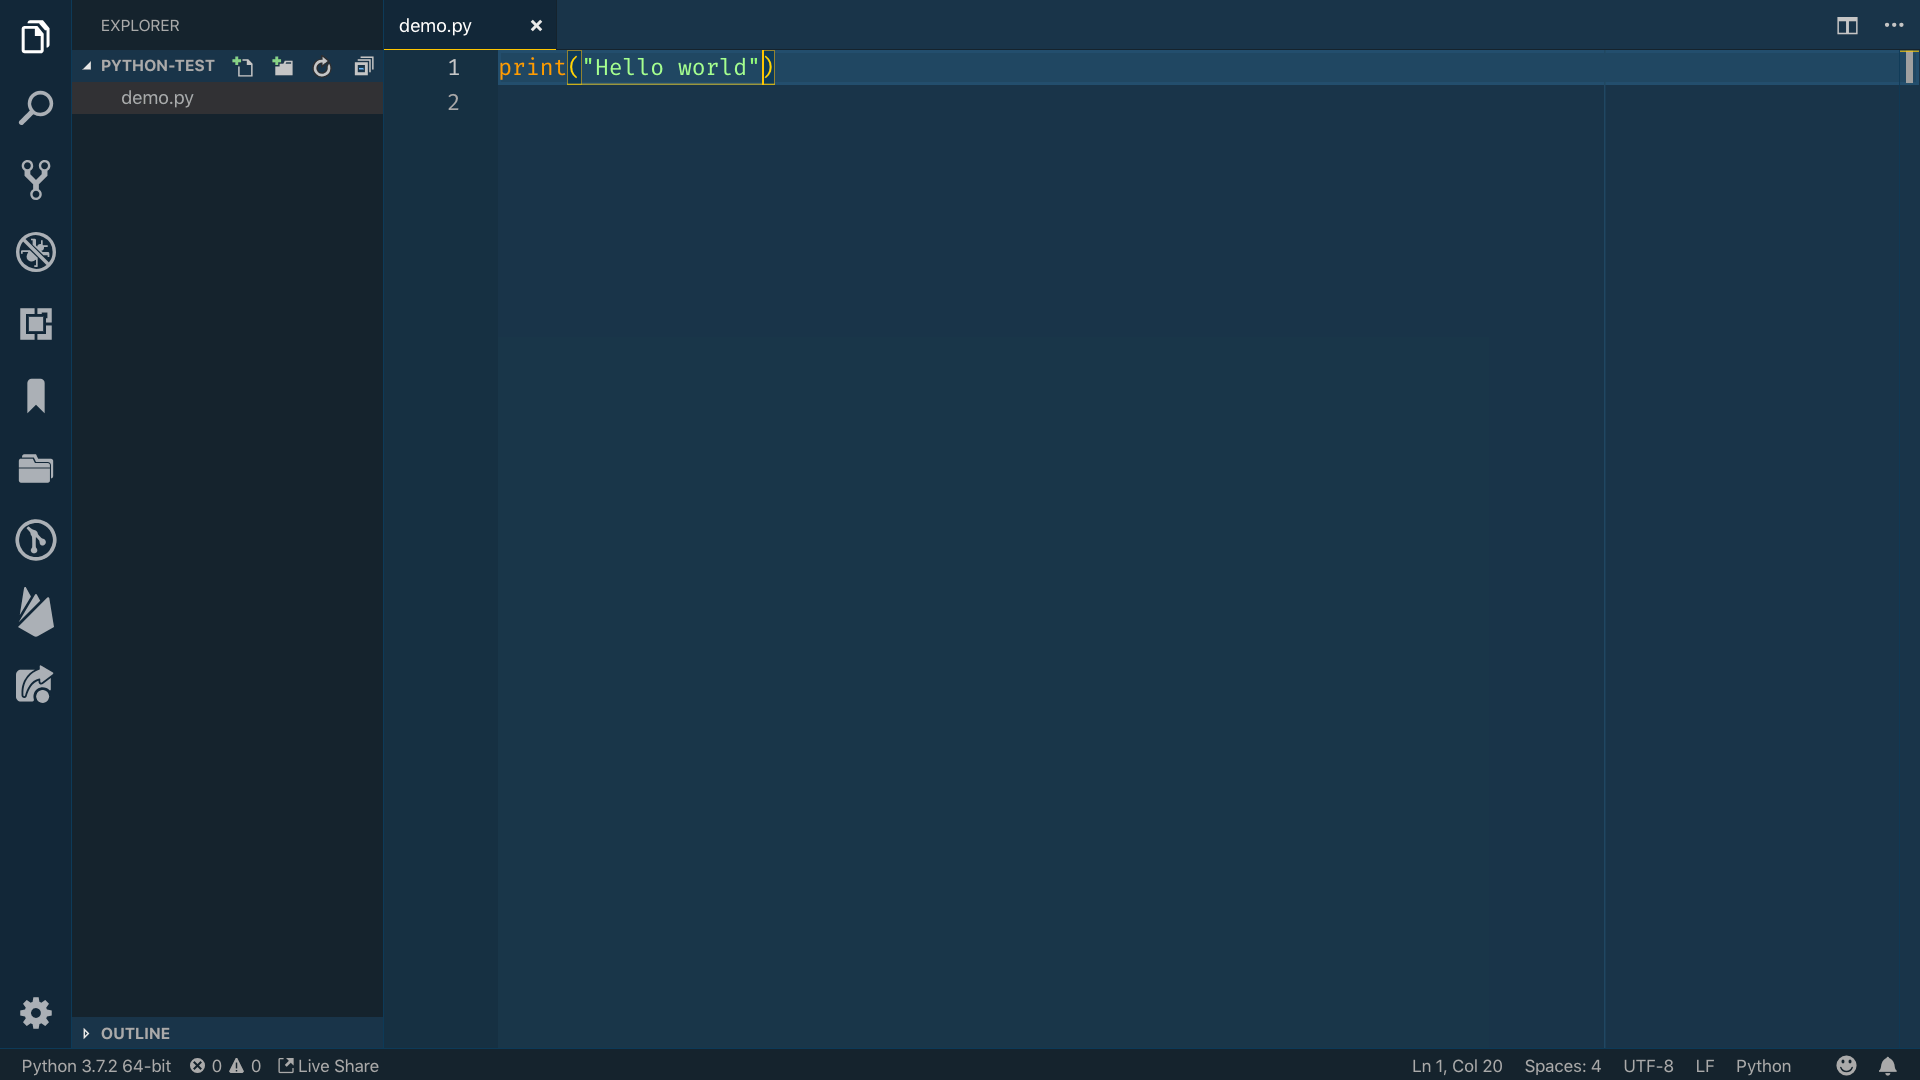
Save the file.
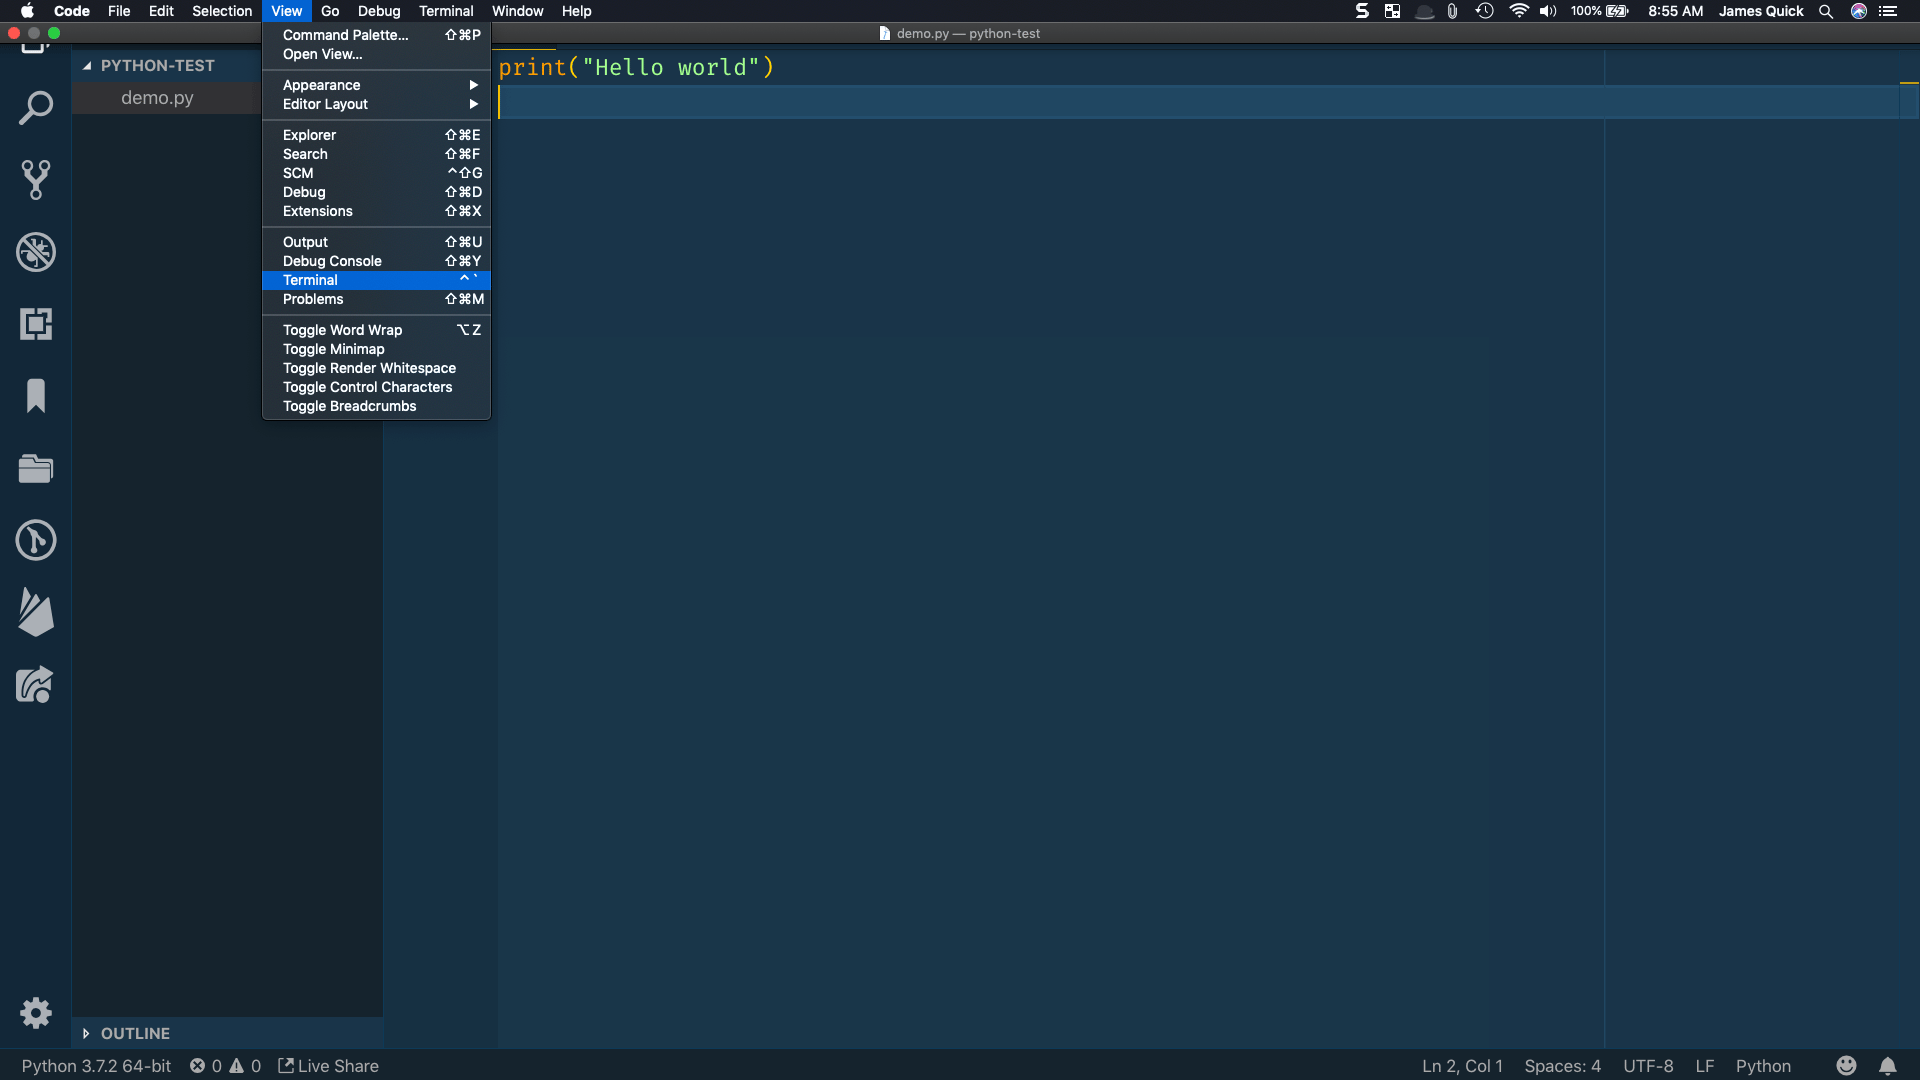
Now that you have your Hello World code ready, we can run it by using the built-in terminal in Visual Studio Code. If if is not open already, you can open it by going to View -> Terminal or use the shortcut, CTRL+~.
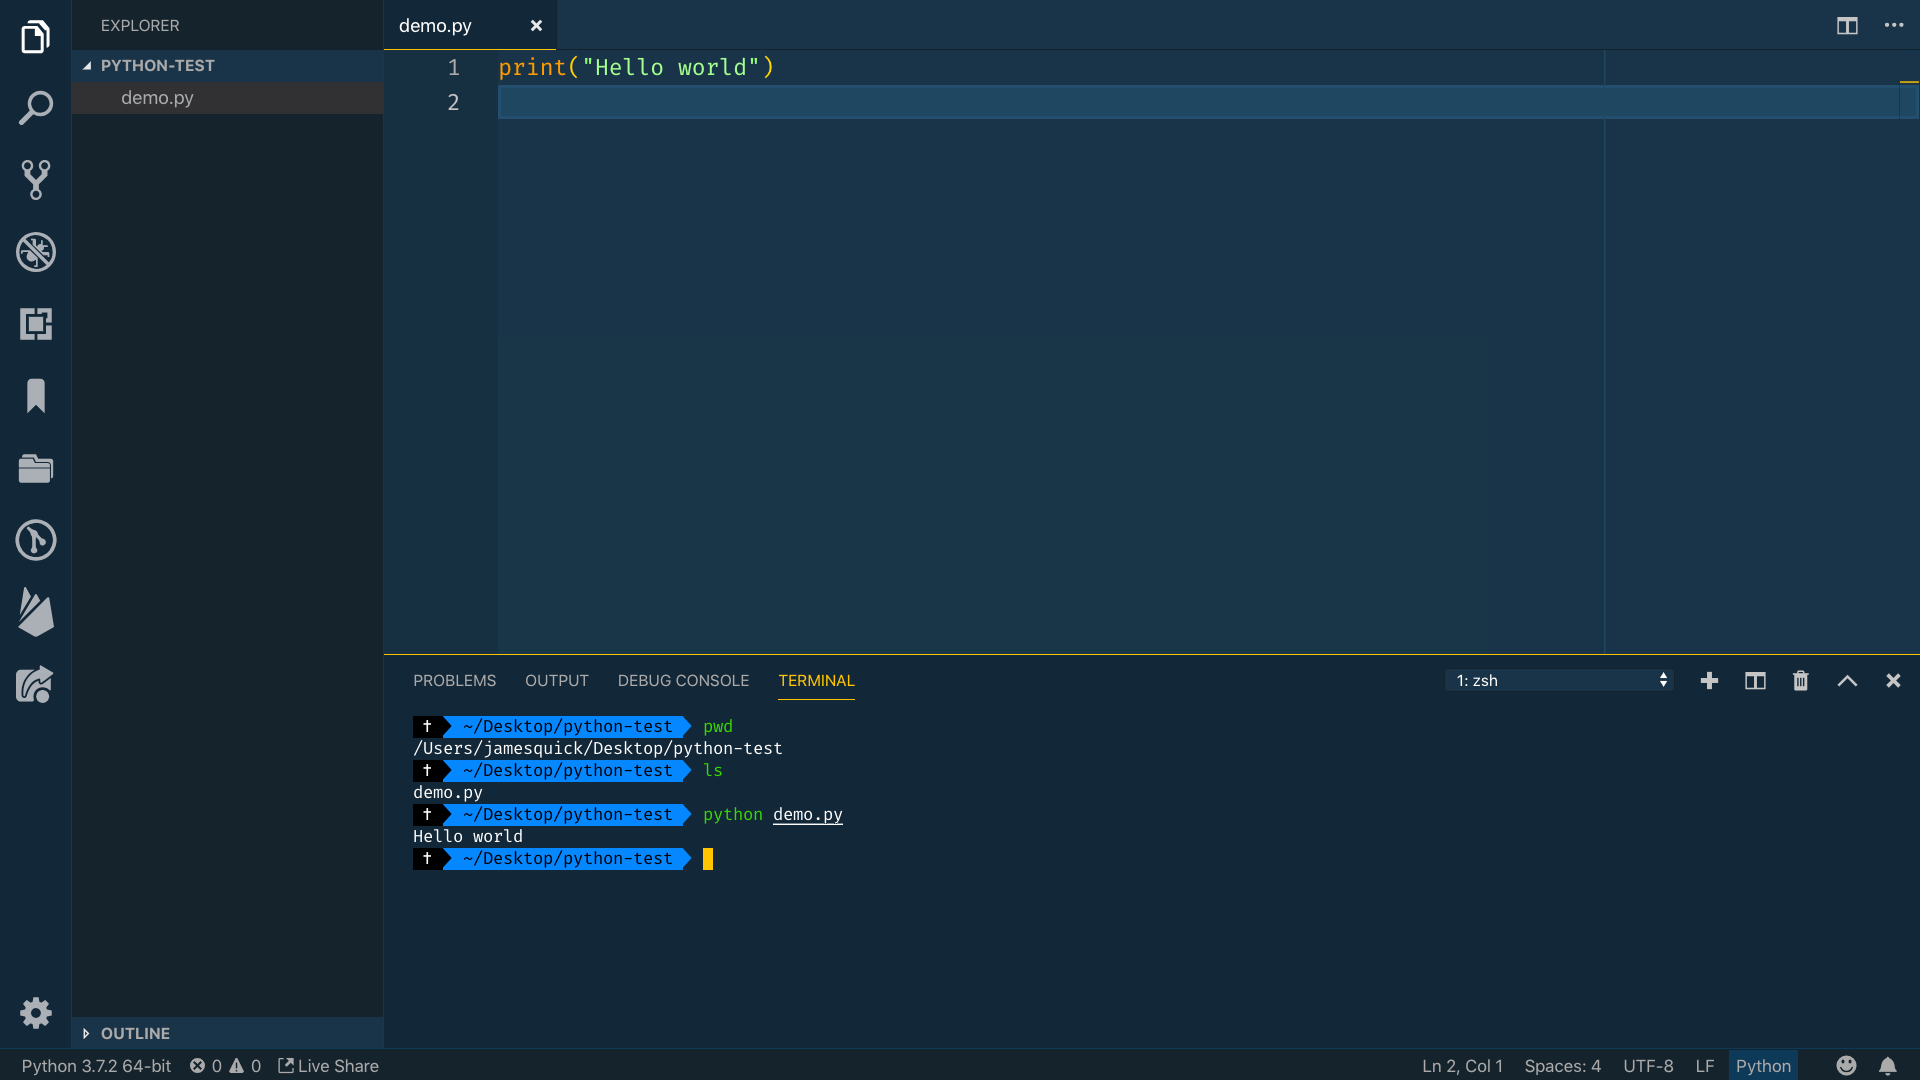
The terminal that you just opened will automatically start in the current directory that you are editing in Visual Studio Code. This is exactly why we created and opened a directory before getting started. We can prove this by running the following command:
- pwd
This command will print the path to the current directory. From there, you can verify that your Python file is also inside of the current directory by running the following command to print a list of files in the directory:
- ls
Now, you can run your Python file with the following command:
- python filename
After running, you’ll see Hello World printed out in the console.
Step 2 — Installing the Python Extension
We can streamline the process of working with Python in Visual Studio by installing the Python extension created by Microsoft. To install the extension, open up the extension menu on the left (the icon looks like a square inside of a square) and search Python.
It will be the first one that pops up, and you can click on it to view the extension details and click Install.
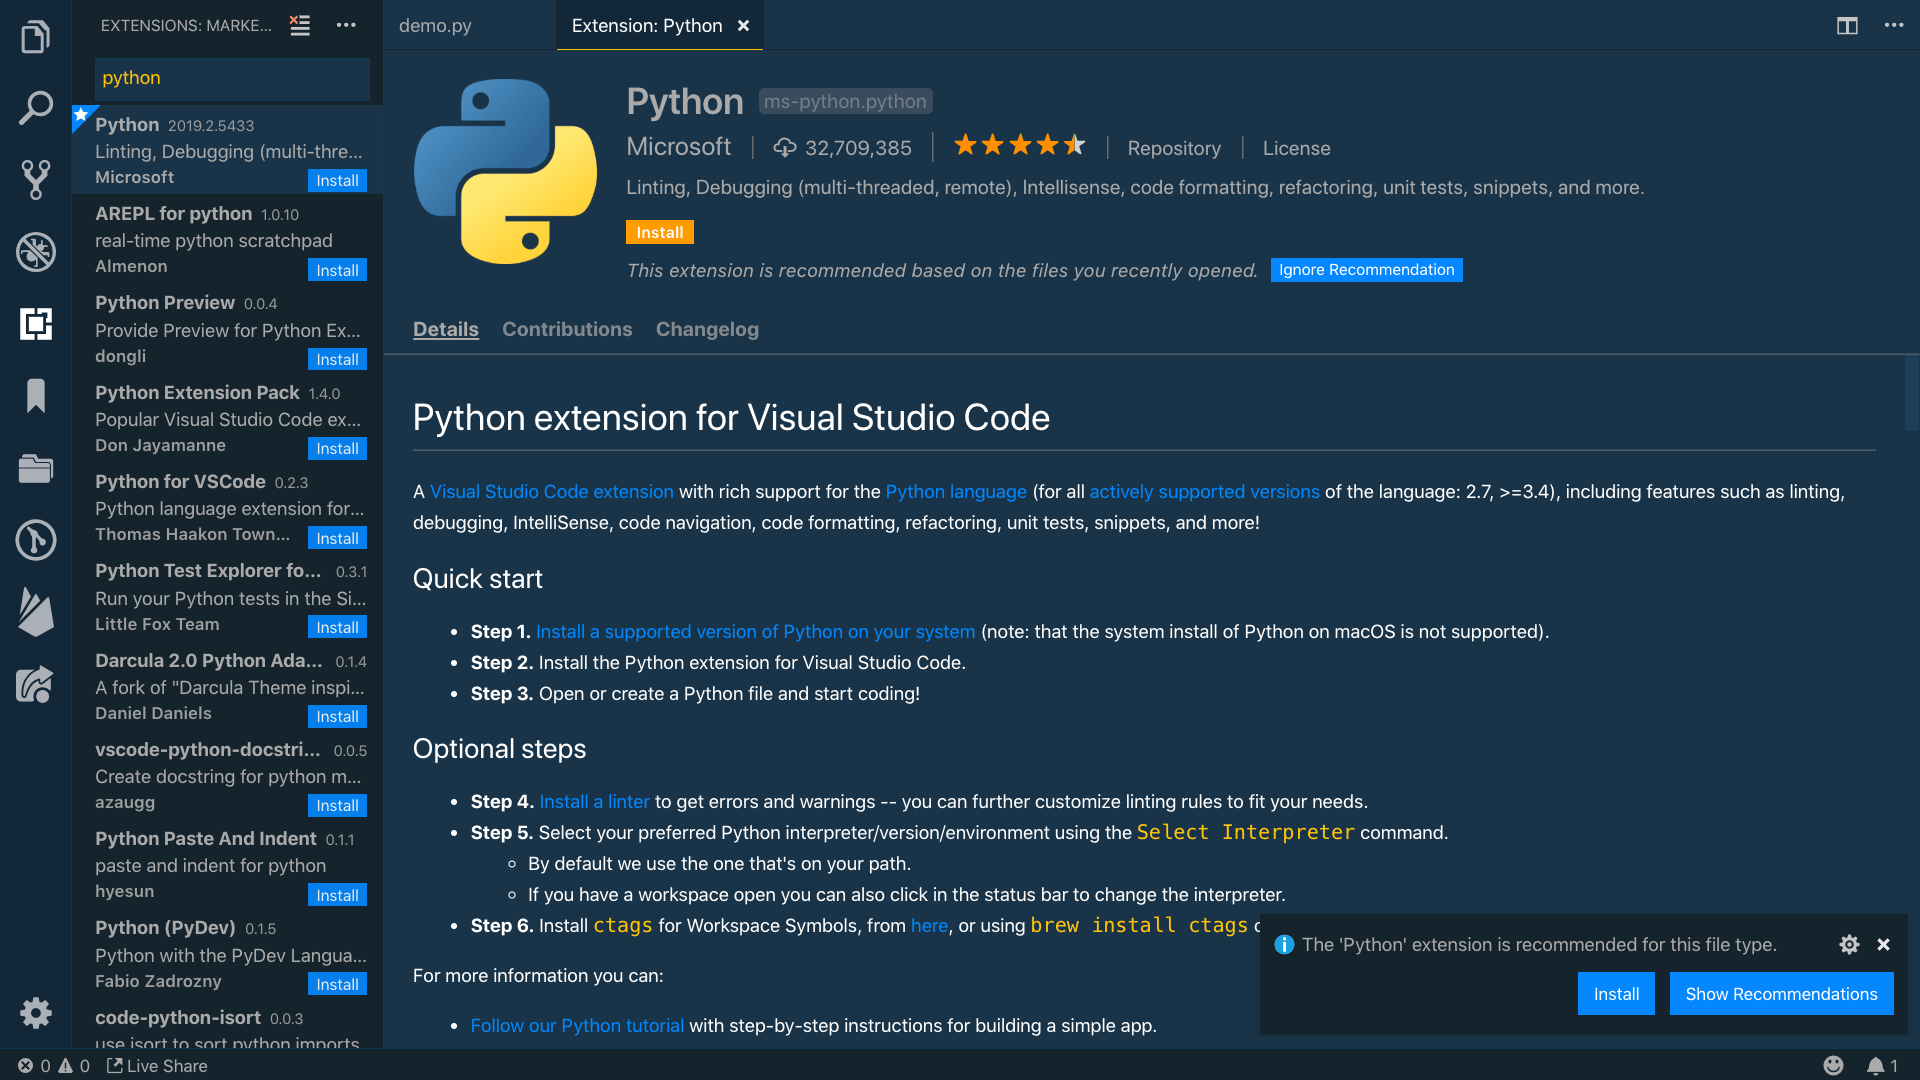
After installing, you might need to reload, so go ahead and do that.
After you restart, you can now take advantage of the Python extension’s features:
- IntelliSense
- Auto-completion
- Shortcuts for running Python Files
- Additional info on hovering Python variables, functions, and so on.
To start working with IntelliSense, create an empty array called list.
list = []
Then following type list. followed by a period and notice that some information pops up. The extension is providing you all the functions and properties of a list that you can use.
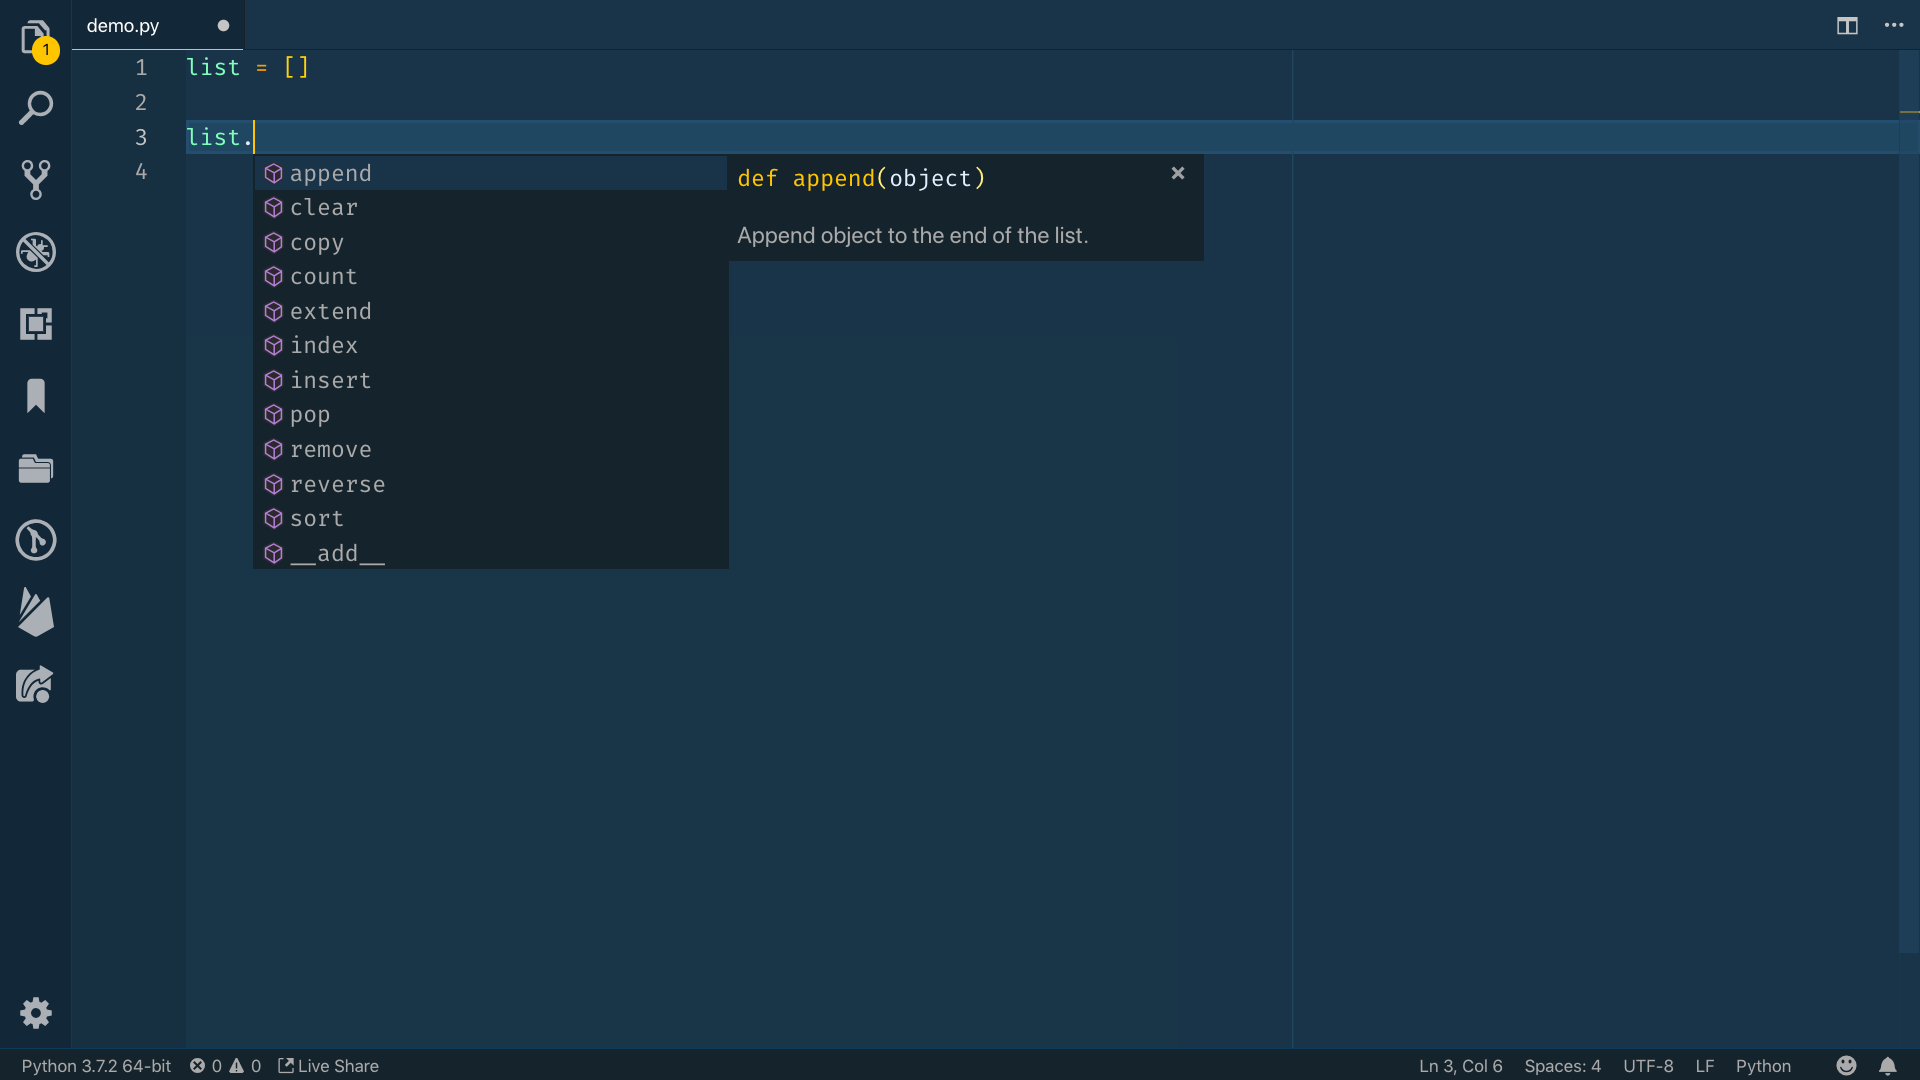
If you want to use one of those functions, you can press ENTER or TAB to auto-complete that function name. This means that don’t have to memorize every function in Python because the extension will give you hints as to what is available. Notice also that it shows you a brief description of what the function does and what parameters it takes.
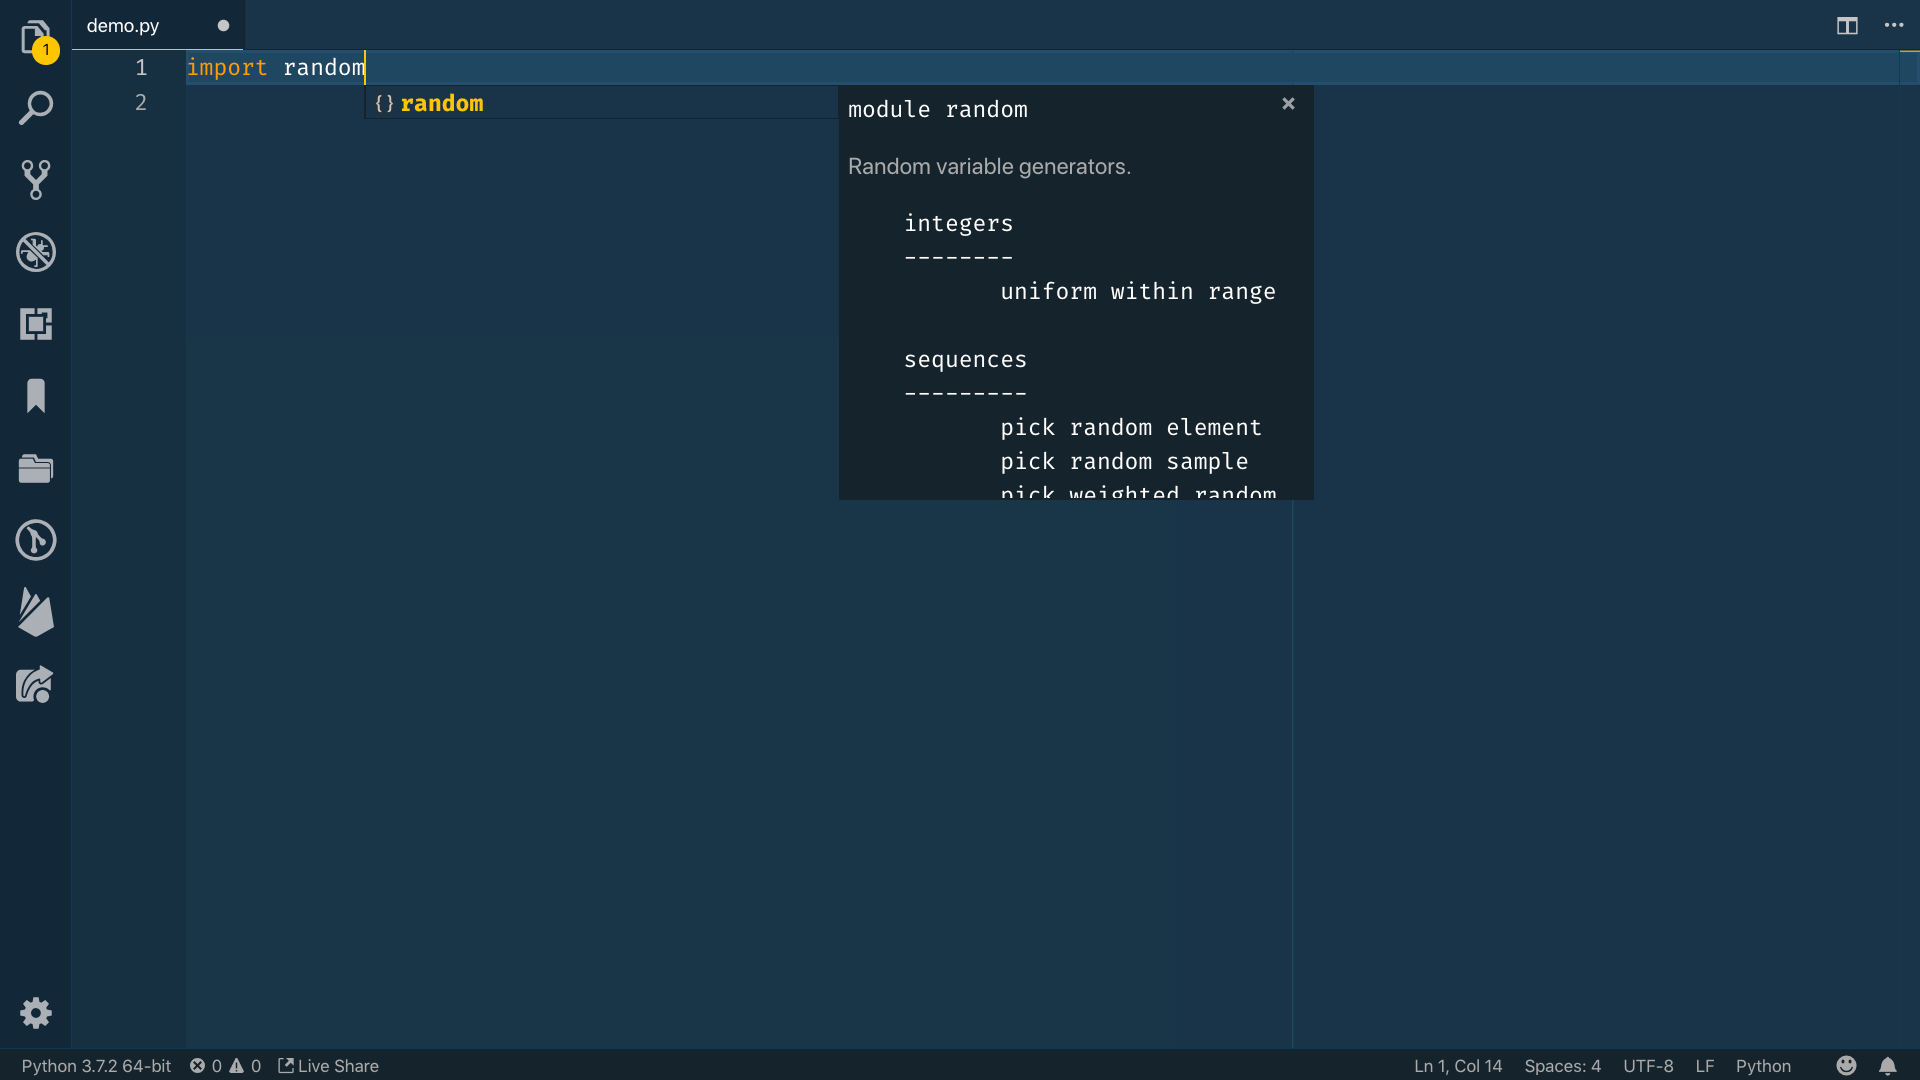
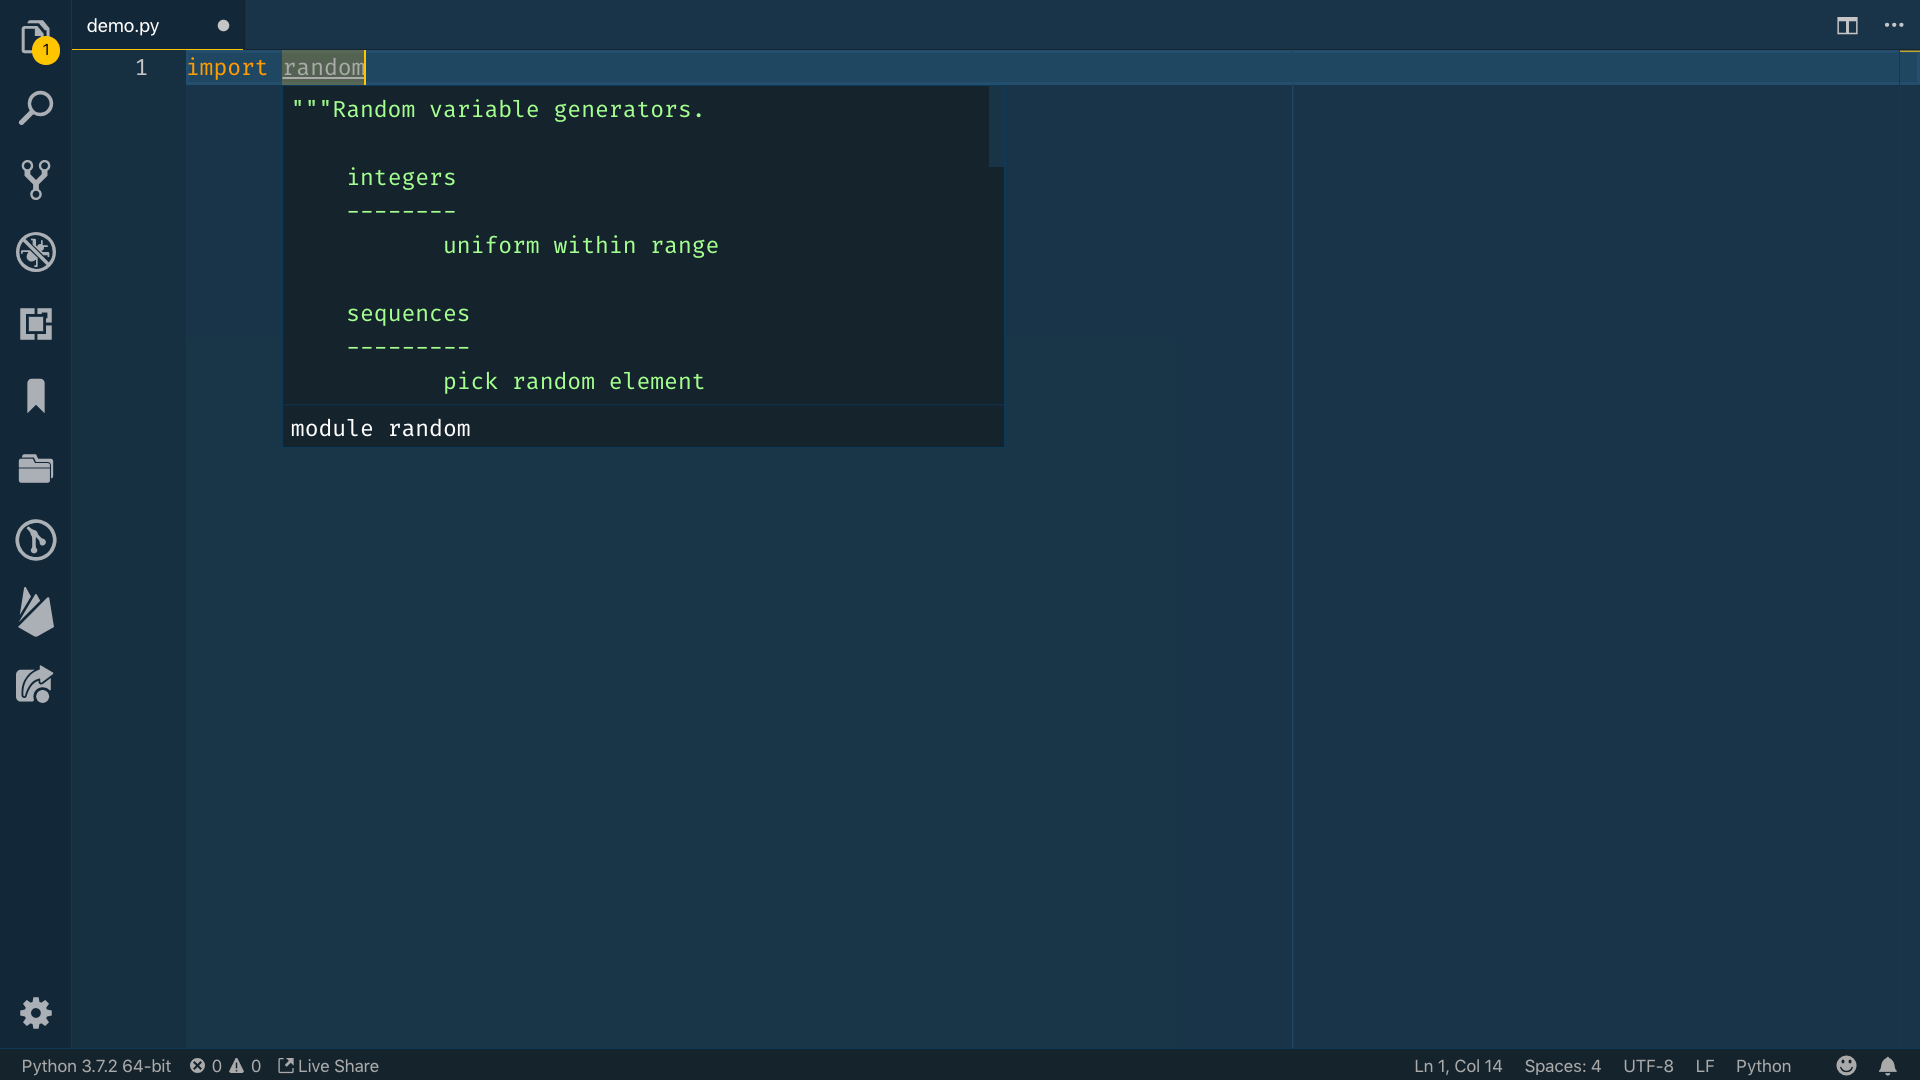
You can also get intellisense when importing modules in Python. Notice if you type random, intellisense pops up to complete the name of the module as well as providing some background info on what it does.
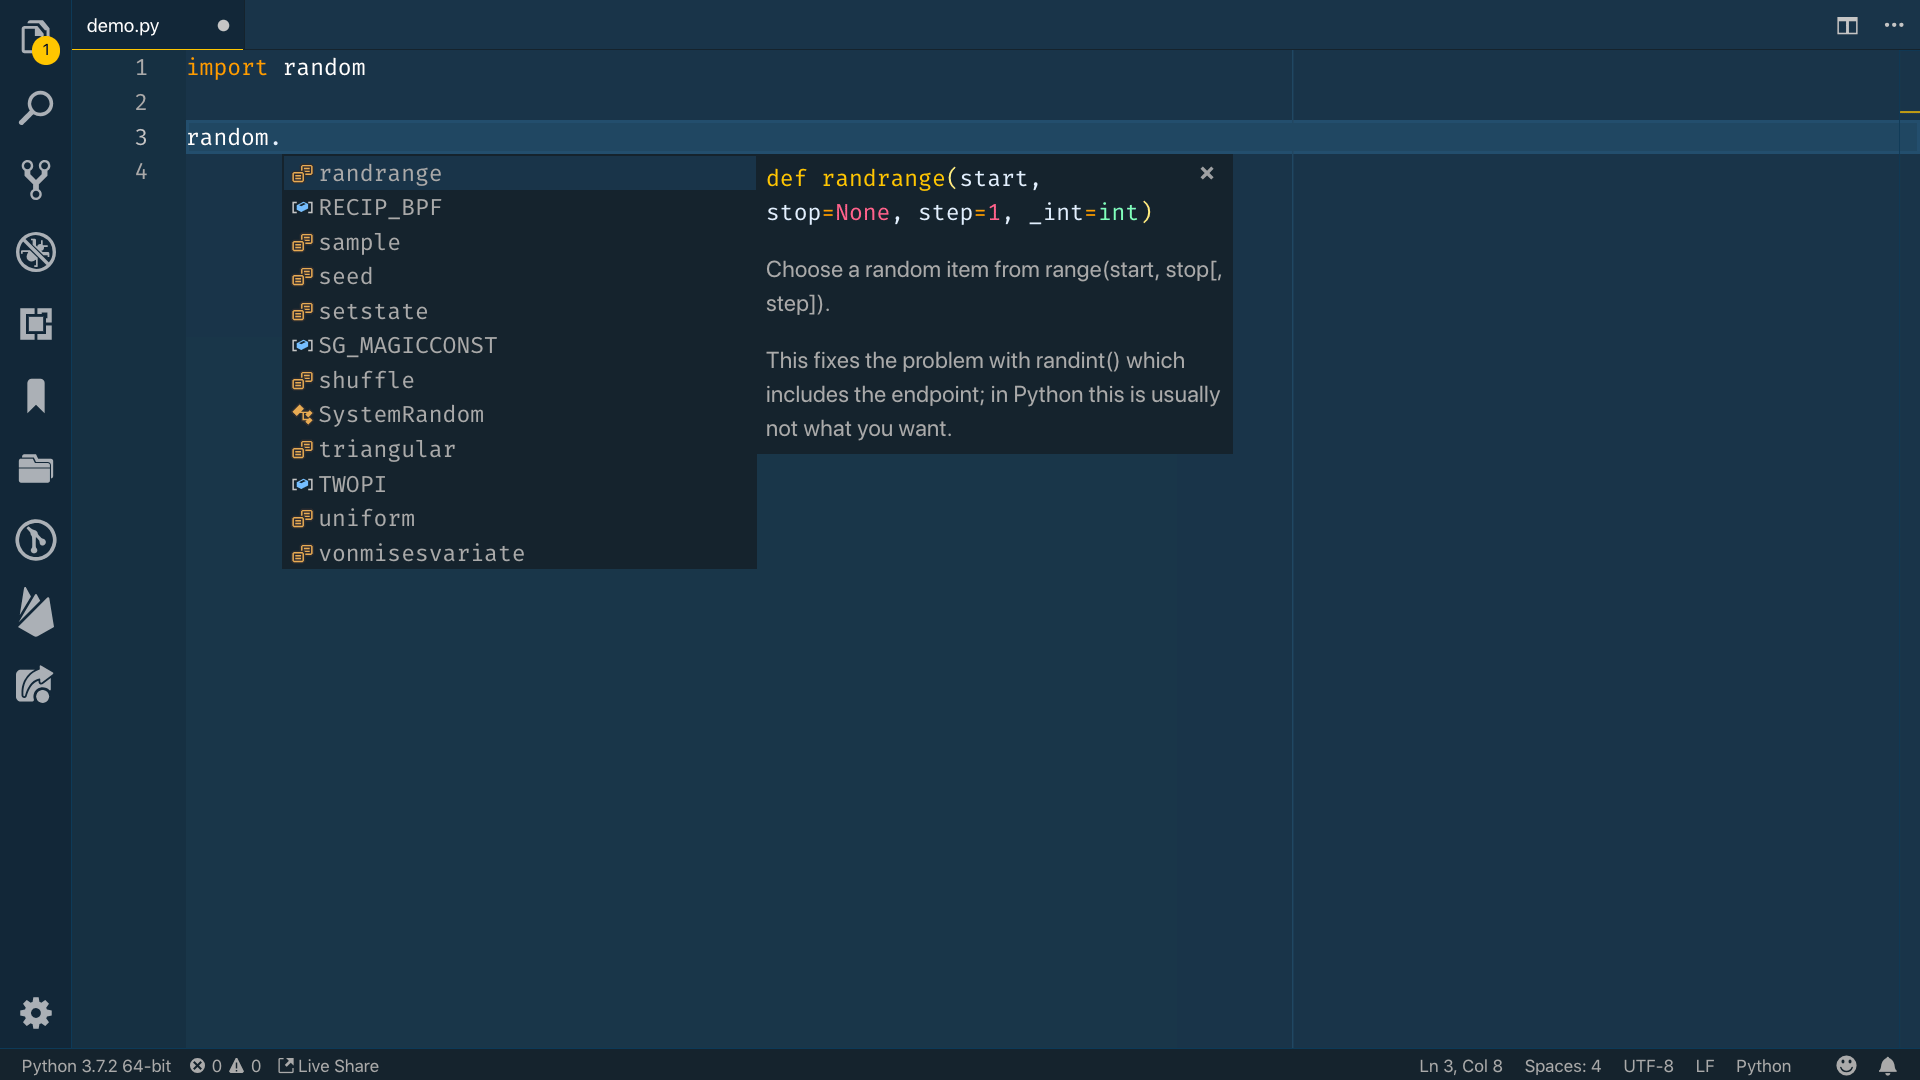
If you then start to use the random module, you’ll continue to get intellisense for functions that you can access with that module.
Lastly, you can hover on existing variables, module imports, and so on, for additional information whenever you need it.
Step 3 — Using Shortcuts to Run Python Code
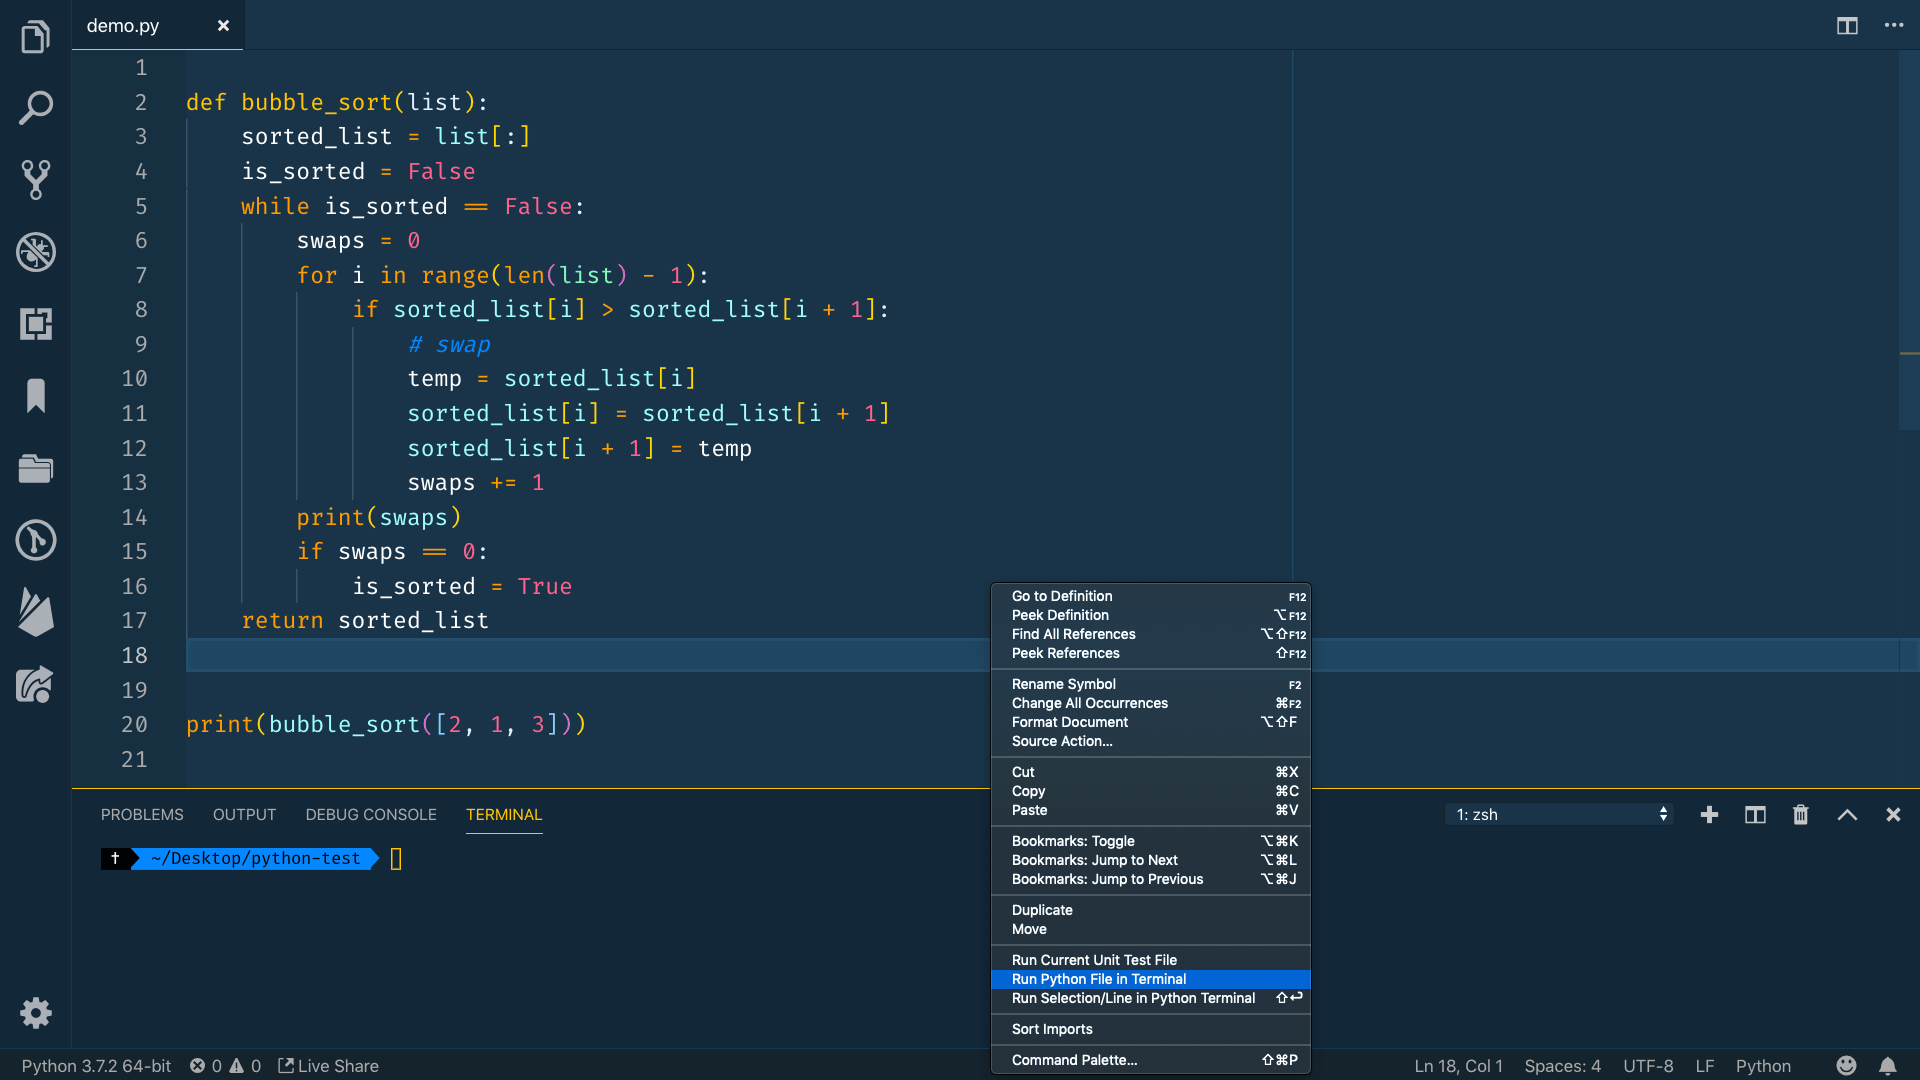
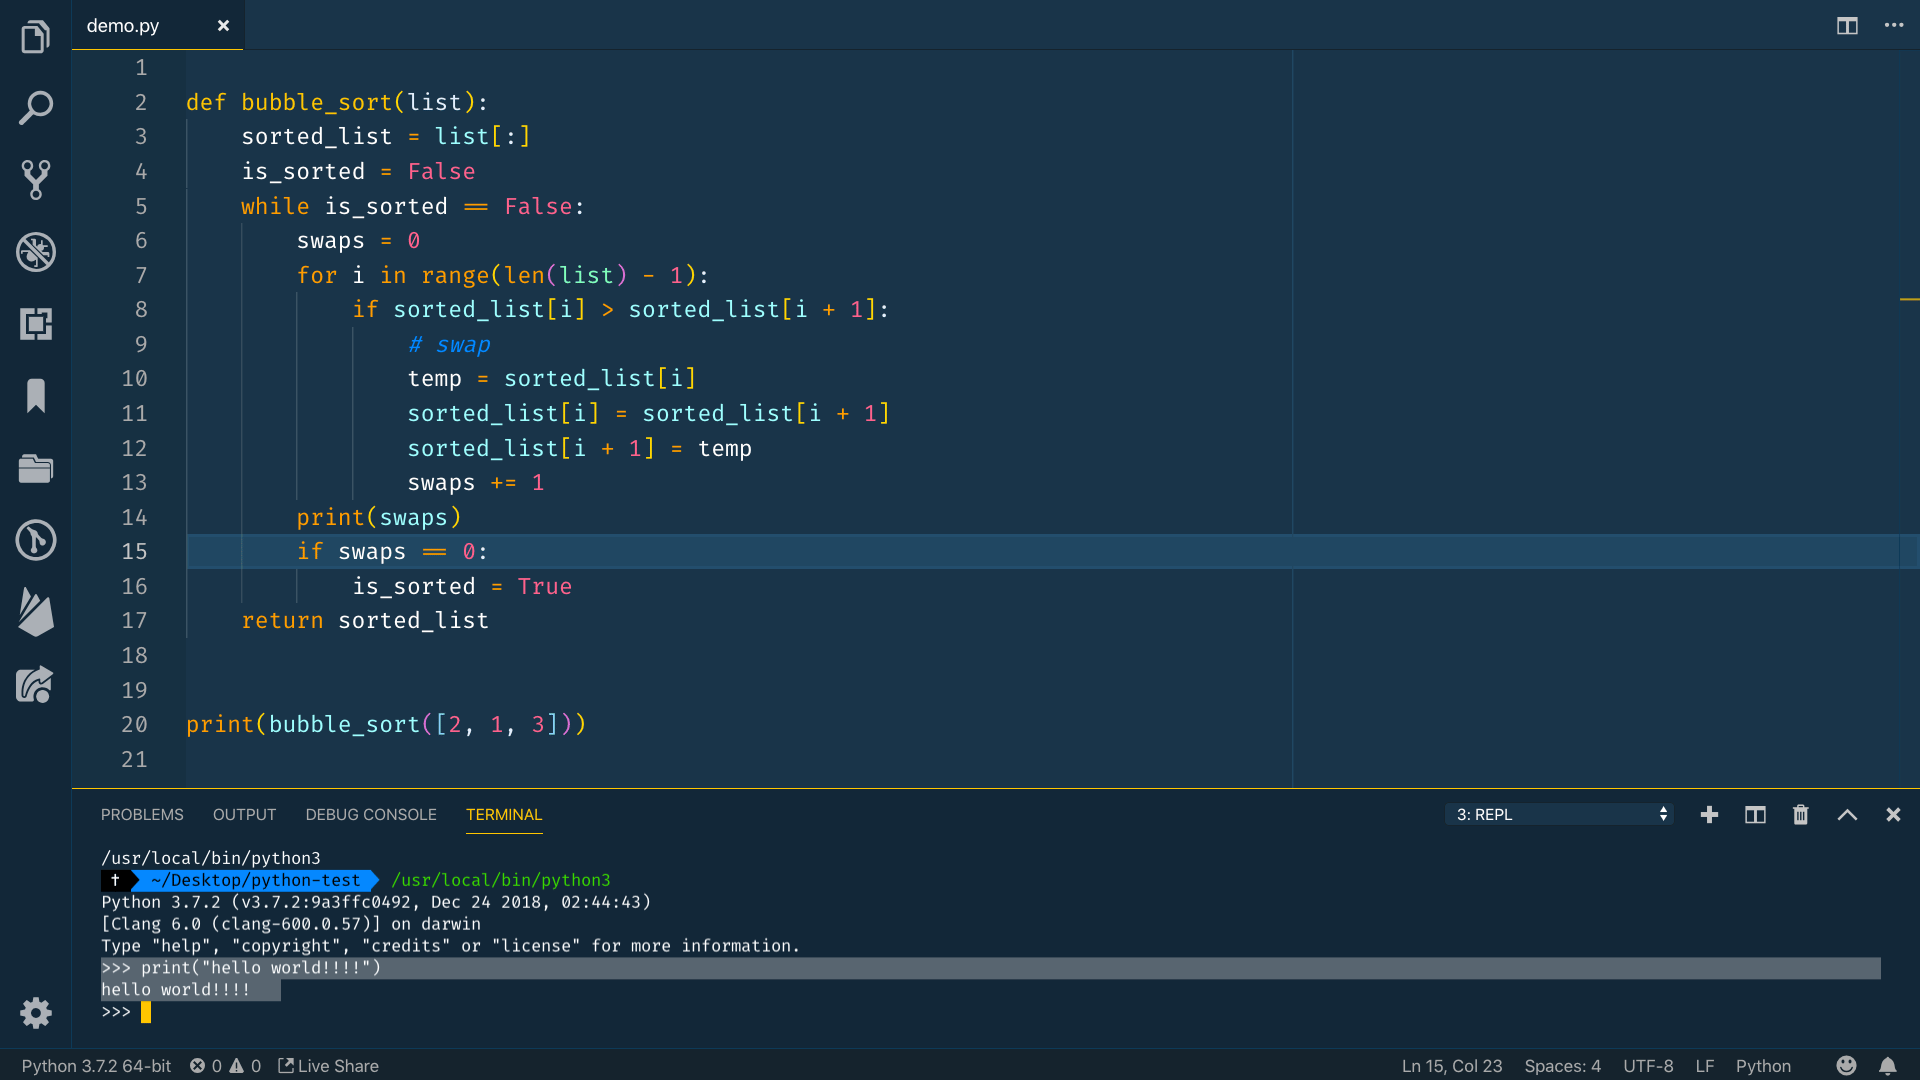
If you want to do more in your Python file, here’s a short snippet for the Bubble Sort algorithm. It calls the bubble_sort function and prints out the result. You can copy this code into your file:
def bubble_sort(list):
    sorted_list = list[:]
    is_sorted = False
    while is_sorted == False:
        swaps = 0
        for i in range(len(list) - 1):
            if sorted_list[i] > sorted_list[i + 1]: # swap
                temp = sorted_list[i]
                sorted_list[i] = sorted_list[i + 1]
                sorted_list[i + 1] = temp
                swaps += 1
        print(swaps)
        if swaps == 0:
                is_sorted = True
    return sorted_list

print(bubble_sort([2, 1, 3]))
With this new piece of code, let’s explore a new way to run our Python file. The typical first workflow for working with Python files is to save your file and then run that Python file in the terminal. With the Python extension, there are a few shortcuts to help with this process.
Inside of any Python file, you can right click in the editor and choose Run Python File In Terminal. This command will do each of the individual steps that we talked about before.
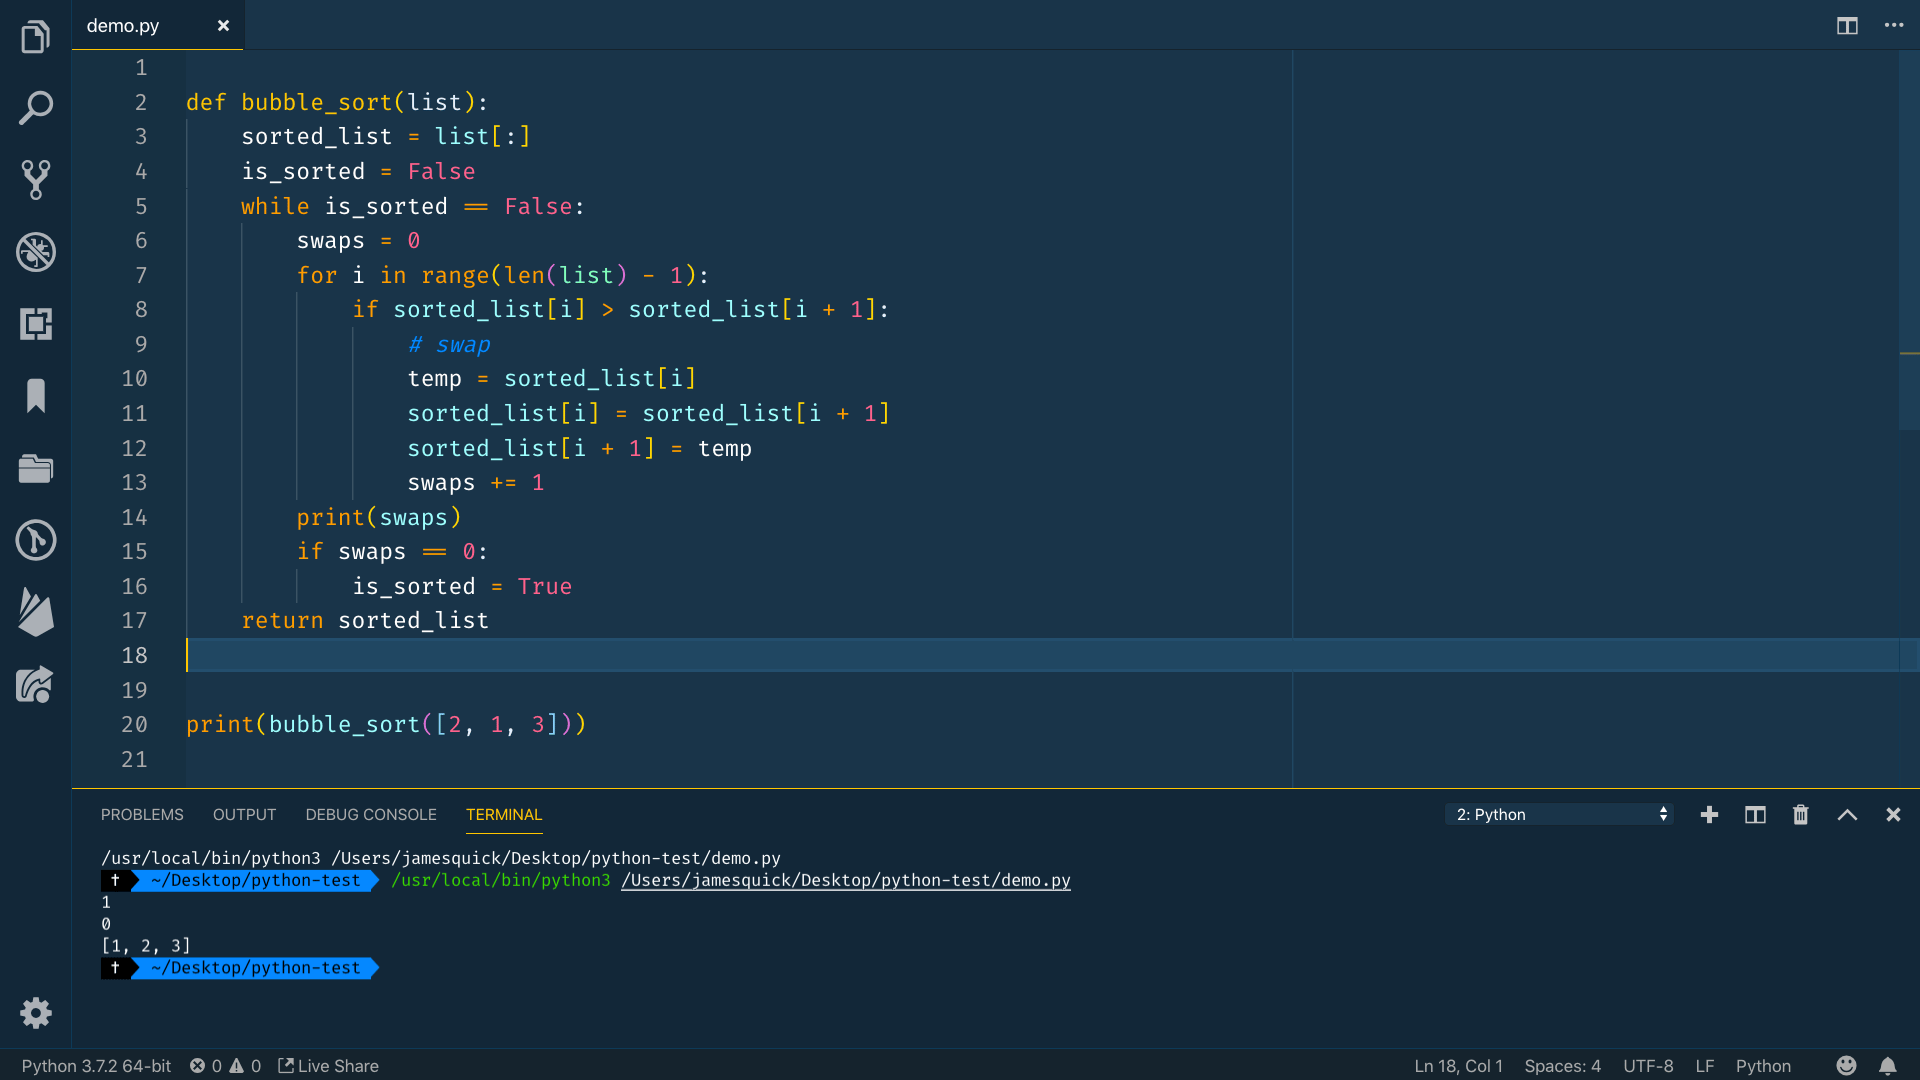
After using the shortcut, you can see the bubble_sort output in your console.
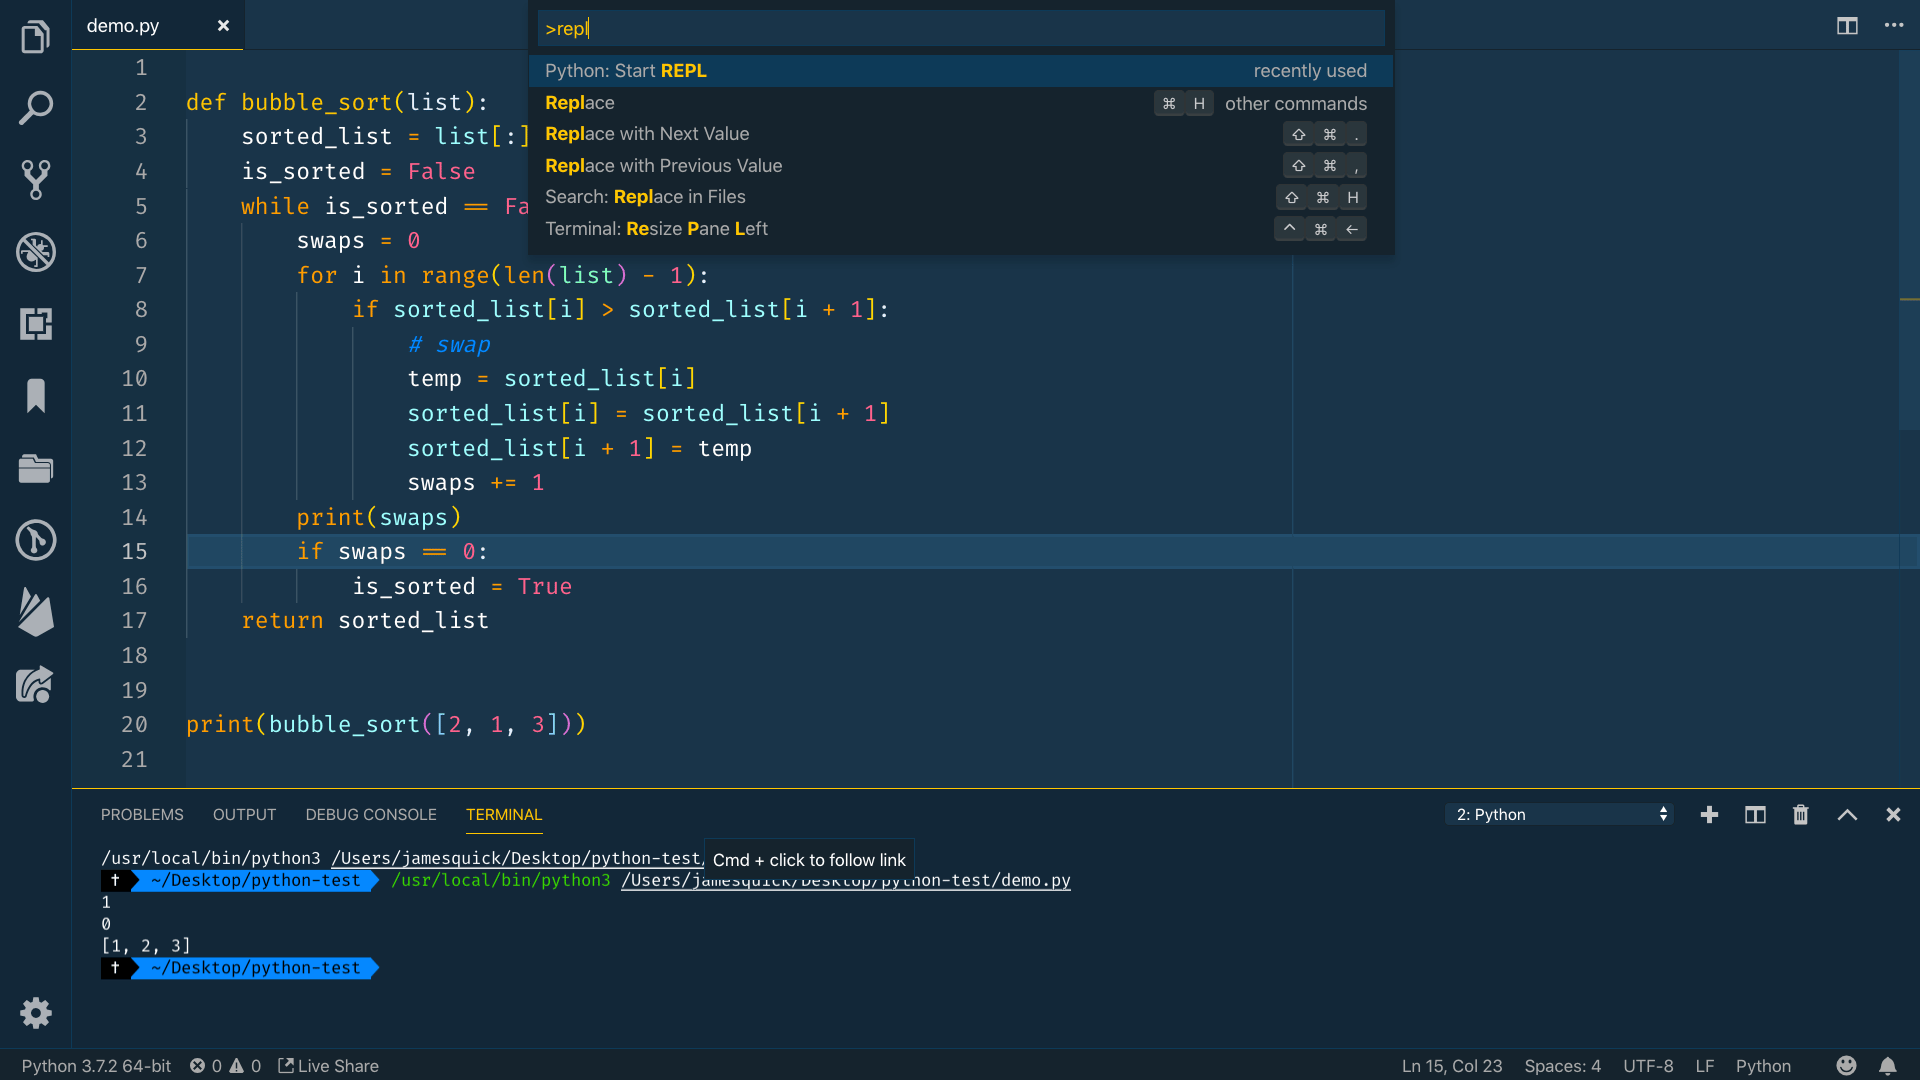
You also have a shortcut to open the Python REPL where you can quickly type Python code directly into your console and see the output. Open the command palette using the shortcut CMD+SHIFT+P on Mac or CTRL+SHIFT+P on Windows and select Python Start REPL.
After typing in a print command, you will see Hello World immediately displayed in the console.
Conclusion
Python is an incredibly popular language with strong support in Visual Studio Code. By installing the Python extension, you’ll get Python intellisense, auto-completion, and other useful miscellaneous shortcuts.
Thanks for learning with the DigitalOcean Community. Check out our offerings for compute, storage, networking, and managed databases.
About the author
Developer. Speaker. Teacher. Developer Advocate at Auth0.
Still looking for an answer?
This textbox defaults to using Markdown to format your answer.
You can type !ref in this text area to quickly search our full set of tutorials, documentation & marketplace offerings and insert the link!
 This work is licensed under a Creative Commons Attribution-NonCommercial- ShareAlike 4.0 International License.
Become a contributor for community
Get paid to write technical tutorials and select a tech-focused charity to receive a matching donation.

DigitalOcean Documentation
Full documentation for every DigitalOcean product.

Resources for startups and AI-native businesses
The Wave has everything you need to know about building a business, from raising funding to marketing your product.
The developer cloud
Scale up as you grow — whether you're running one virtual machine or ten thousand.

Start building today
From GPU-powered inference and Kubernetes to managed databases and storage, get everything you need to build, scale, and deploy intelligent applications.
