By Anthony Herbert

Introduction
In this article, you will build a Django app that displays the current weather for various cities.
The current weather data will be provided by Open Weather Map API.
You will work with a database and create a form. What you learn in this tutorial can be later applied to more complicated projects.
Prerequisites
- This project will require Python installed, you should be able to refer to this tutorial series for additional information.
The code in this article was written with Python 3 and Django 3.0, so to follow this tutorial, you should be somewhat familiar with both.
Step 1 — Setting Up the Project
Installing Django is like installing any other Python library:
- You can start a virtual environment and run
pipto install Django. - Or you can create a project directory, run
pipenv, and then activate thepipenvshell.
Either method works, but for this article, you will be using pipenv.
Note: For alternative Django installation methods, you should be able to refer to this tutorial series for additional information.
The official documentation provides instructions for installing pipenv with Homebrew or Linuxbrew. It is also possible to install pipenv with pip.
In your Terminal, create an environment directory:
- mkdir the_weather_env
Next, navigate into the environment directory:
- cd the_weather_env
Then, use pipenv to install Django:
- pipenv install django
This will install the latest version of Django for you. At the time of writing this article, Django is on version 3.0.5.
Take this moment to also use pipenv to install the Requests library which you will be using later:
- pipenv install requests
Activate the project’s virtualenv by running the following command in your Terminal:
- pipenv shell
This will spawn a new shell subprocess.
Step 2 — Starting a Django Project
Once you have Django installed, create and navigate to a directory for this project if you haven’t already.
You can run the startproject command that Django gives you to generate the project.
- django-admin startproject the_weather
Django should have created a few new files in your directory.
Let’s try starting up your development server. To do that, navigate to the new directory, in your Terminal:
- cd the_weather
Next, use manage.py to run the runserver command in your Terminal:
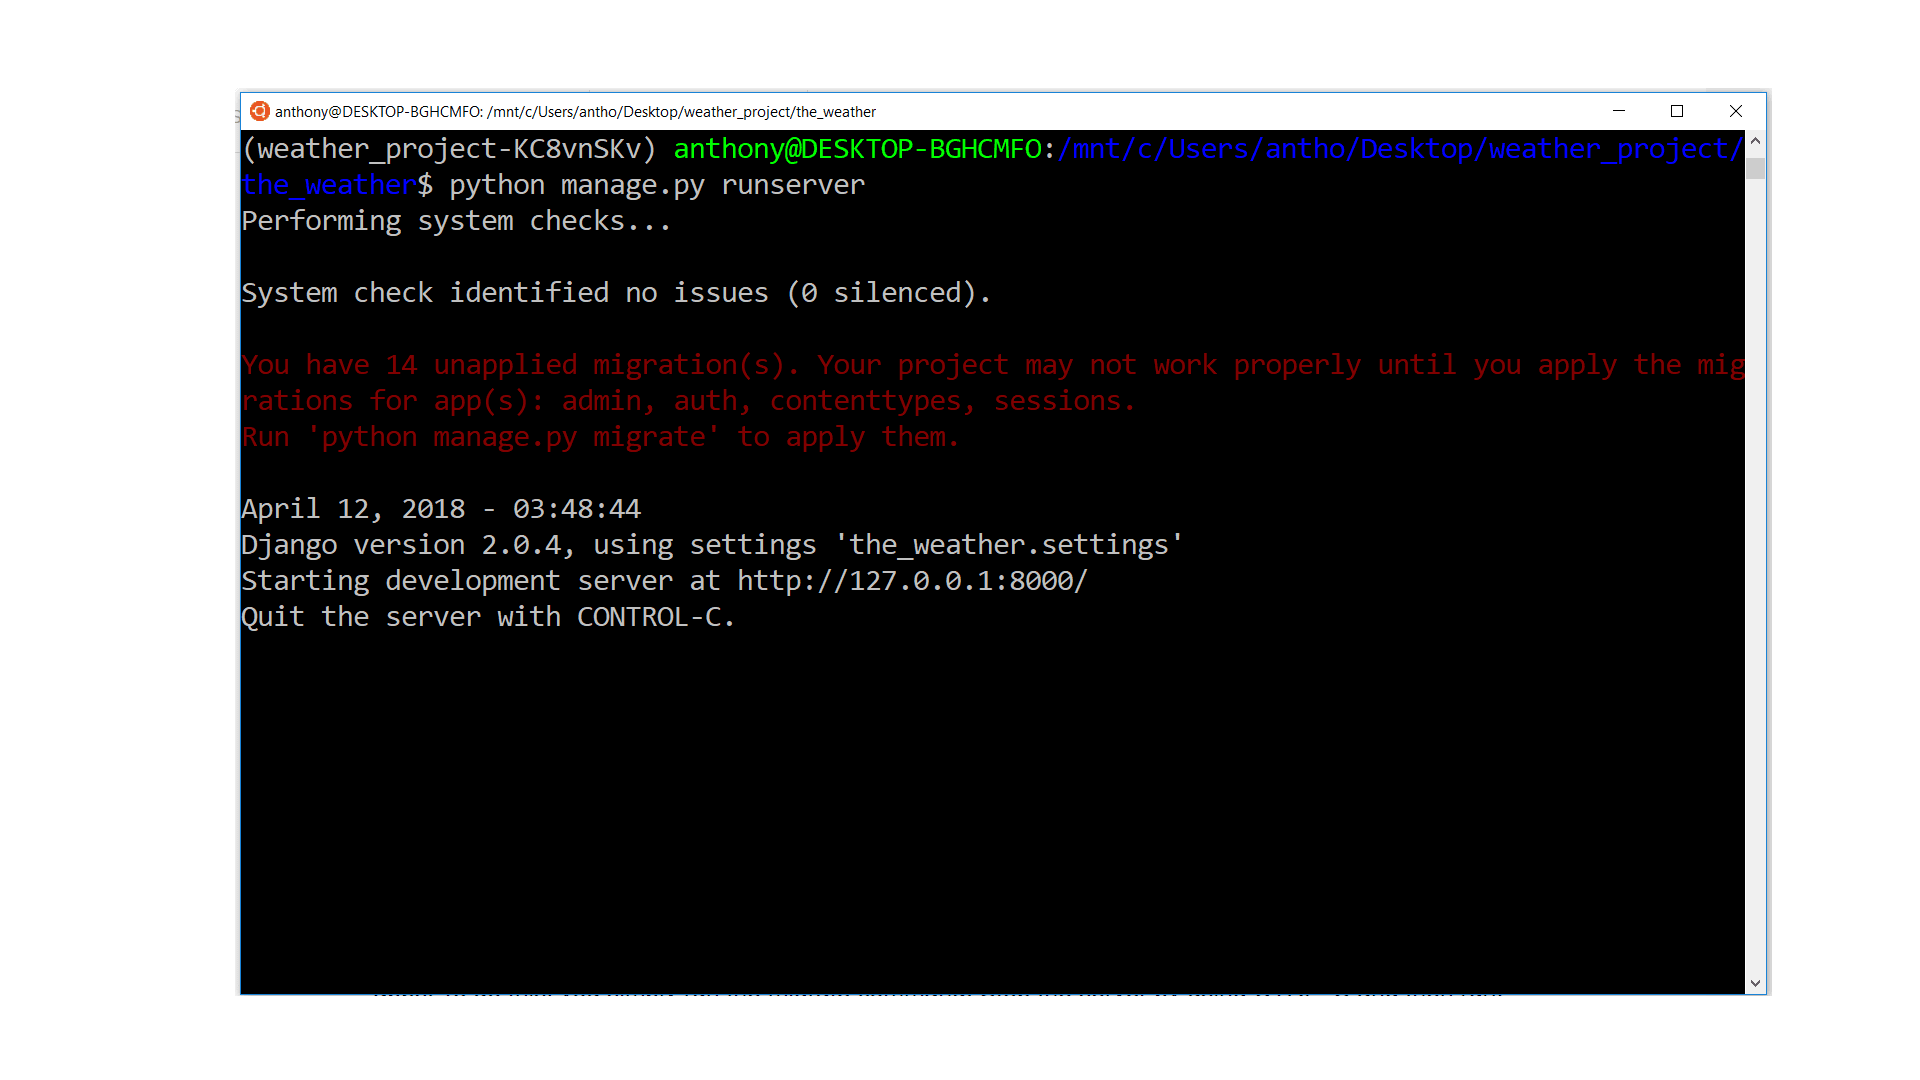
- python manage.py runserver
If you check your Terminal, you should see the URL for your app. By default it should be 127.0.0.1:8000:
Now, open your web browser and visit that URL:
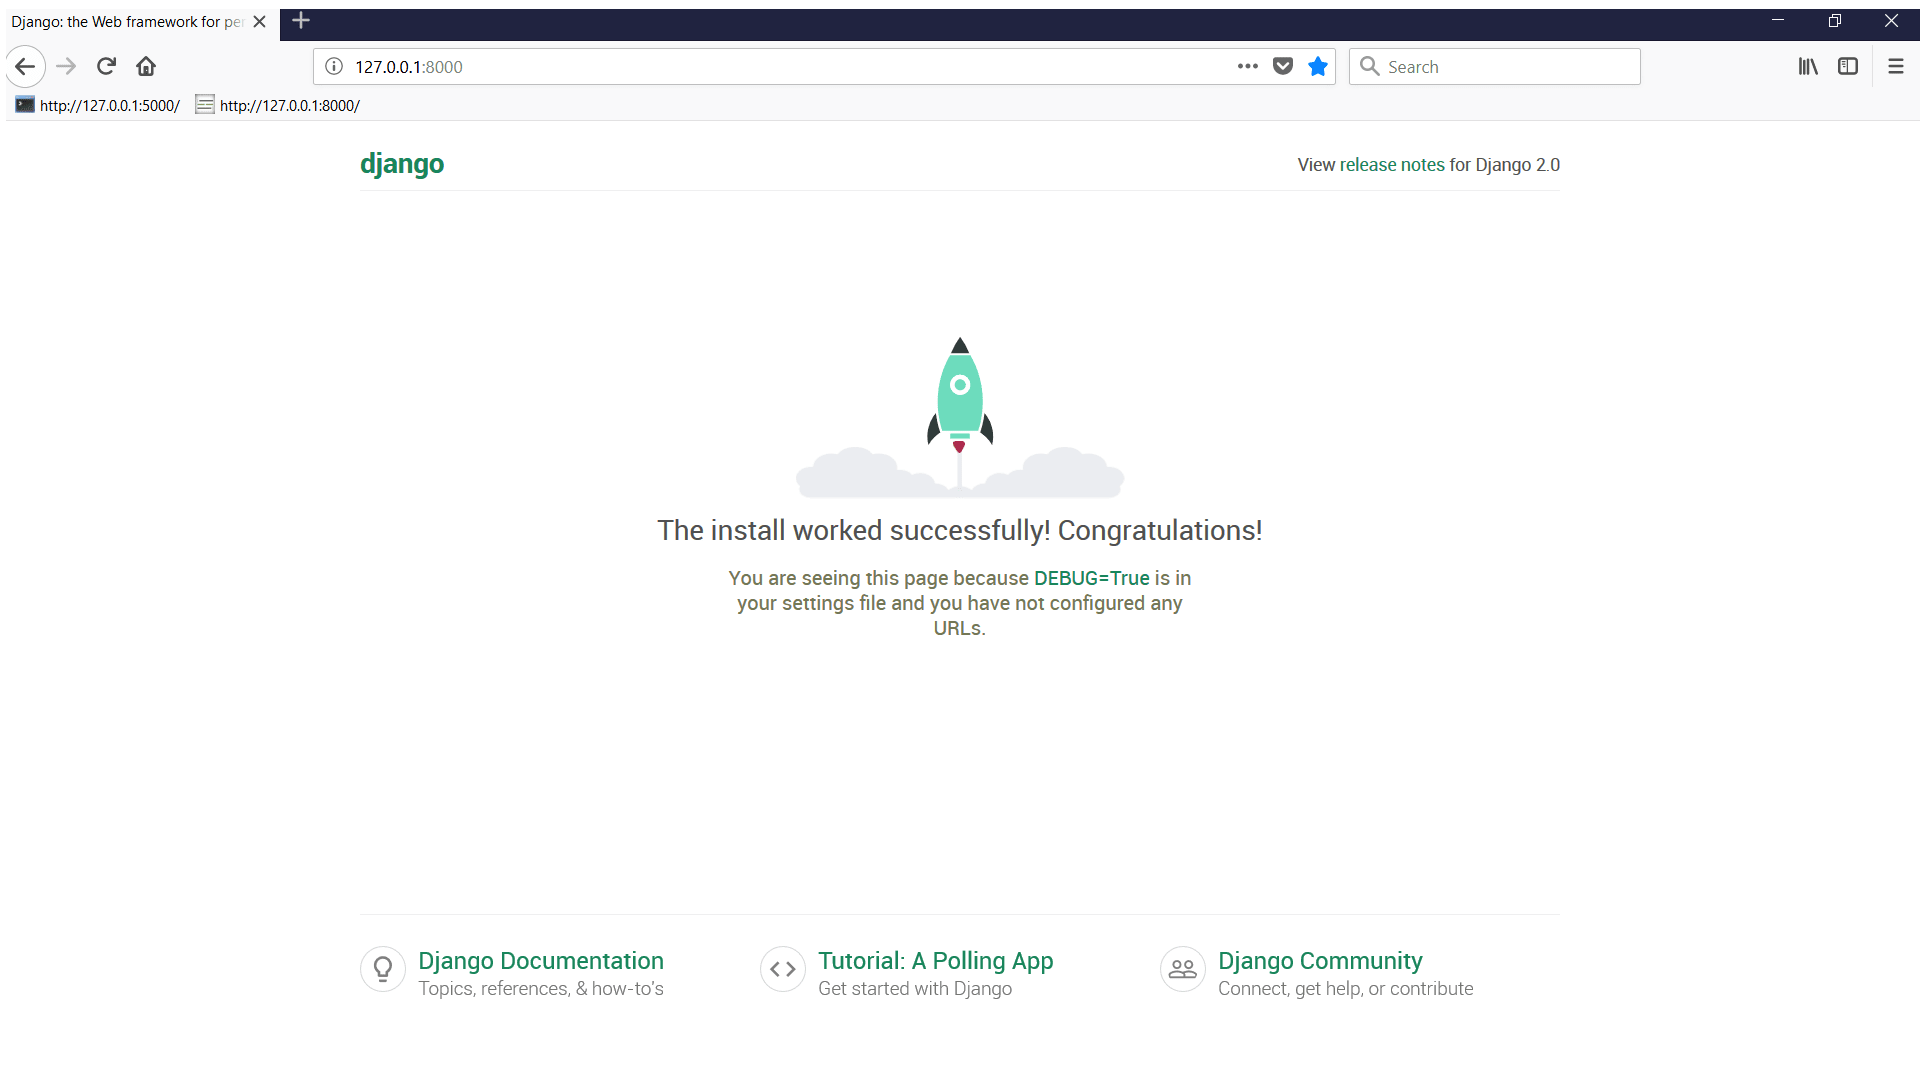
If you are presented with a “Congratulations” page, you know you’ve set up Django correctly.
Step 3 — Logging into the Admin Dashboard
Next, you will log in to the admin dashboard Django gives you. To accomplish that, first, you have to migrate your database, which means Django will create the pre-defined tables that are needed for the default apps.
First, you need to stop the server. Depending on your environment this can be accomplished with the keyboard command CONTROL+C or CTRL+C.
Next, run the migrate command in your Terminal:
- python manage.py migrate
By running that command, Django has created a SQLite database for you, the default database in the settings, and it has added several tables to that database. You will know if the database was created if you see a new db.sqlite3 file in your project directory.
One of the tables Django gives you is a user table, which will be used to store any users in your app. The app you are building does not need any users, but having an admin user will allow you to access the admin dashboard.
To create an admin user, you’ll run the createsuperuser command in your Terminal:
- python manage.py createsuperuser
Follow the instructions by providing a username, email address, and password for your admin user. Once you have finished, you will need to start the server again in your Terminal:
- python manage.py runserver
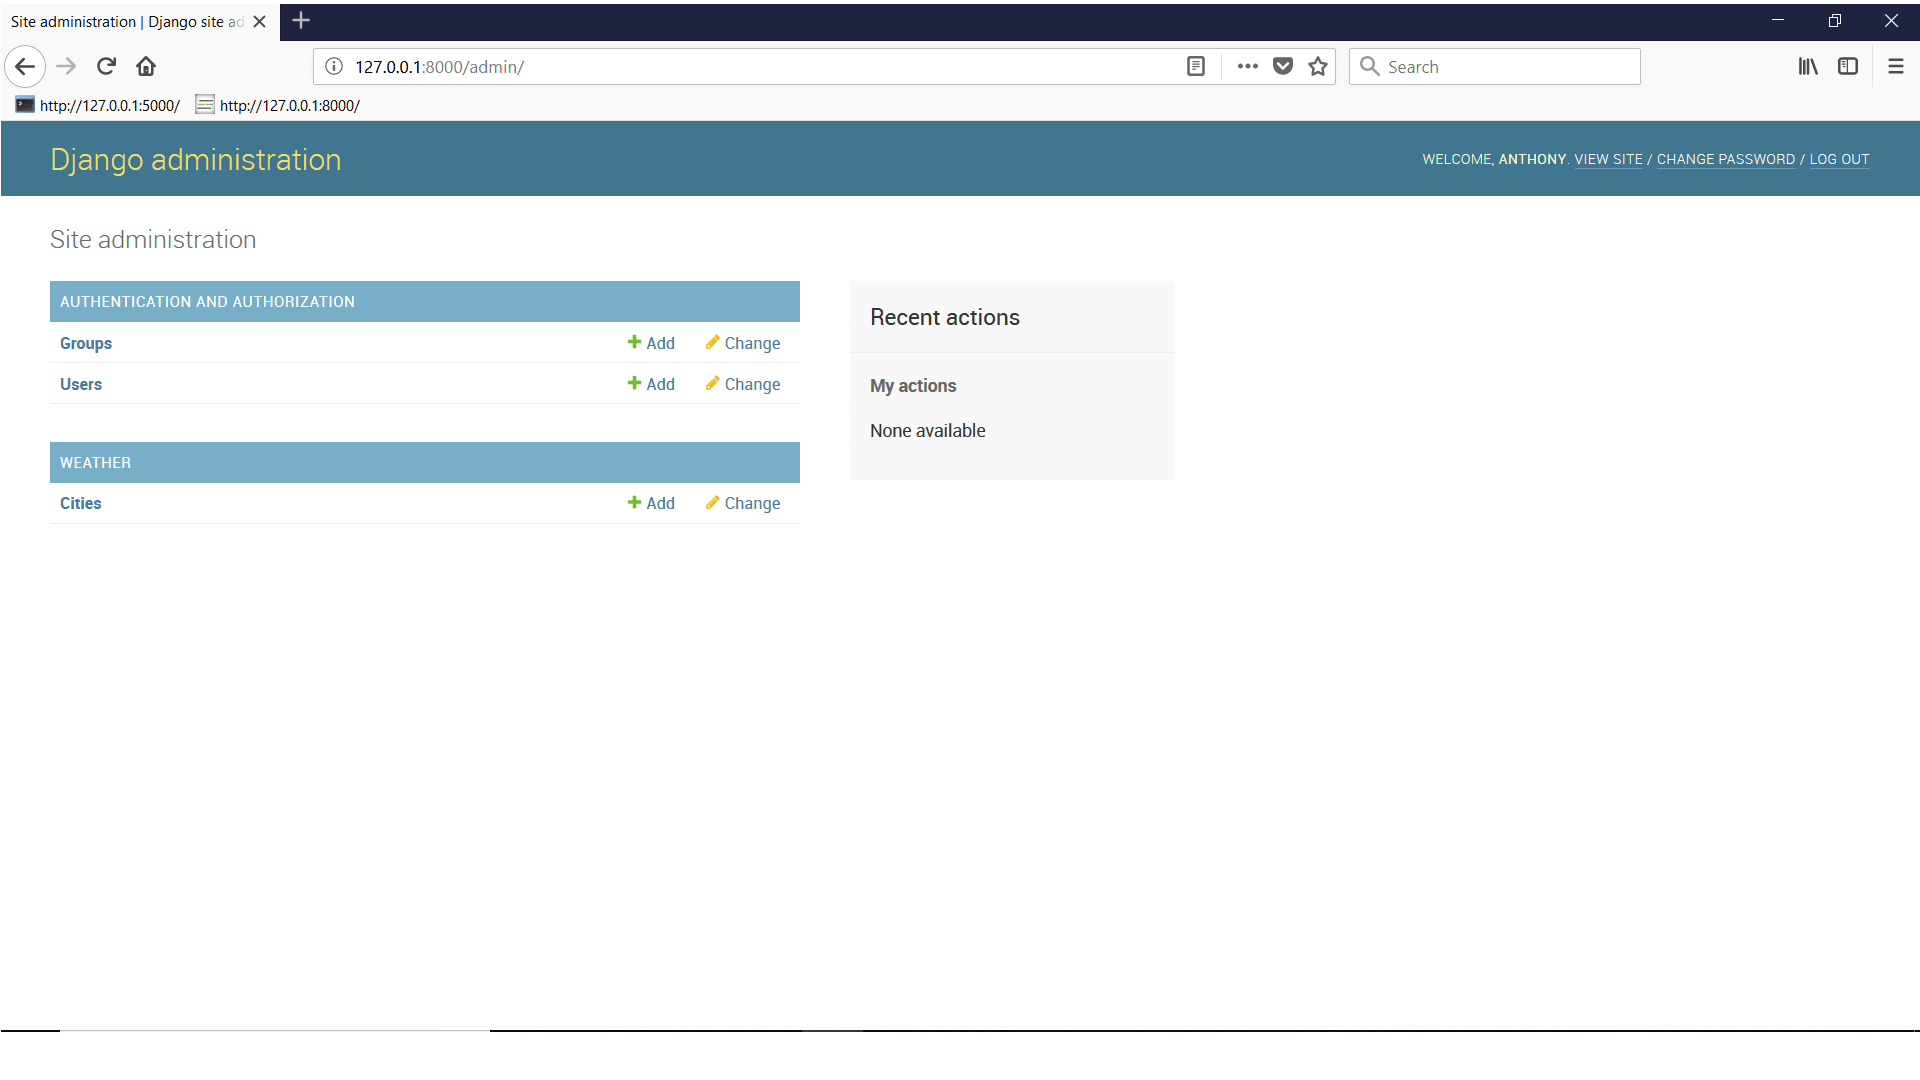
In your web browser, visit the admin dashboard by going to 127.0.0.1:8000/admin.
The reason why you are able to go to this page is that because admin is set up in your urls.py.
If you log in with the username and password you just created, you will be presented with the Django Admin Dashboard:
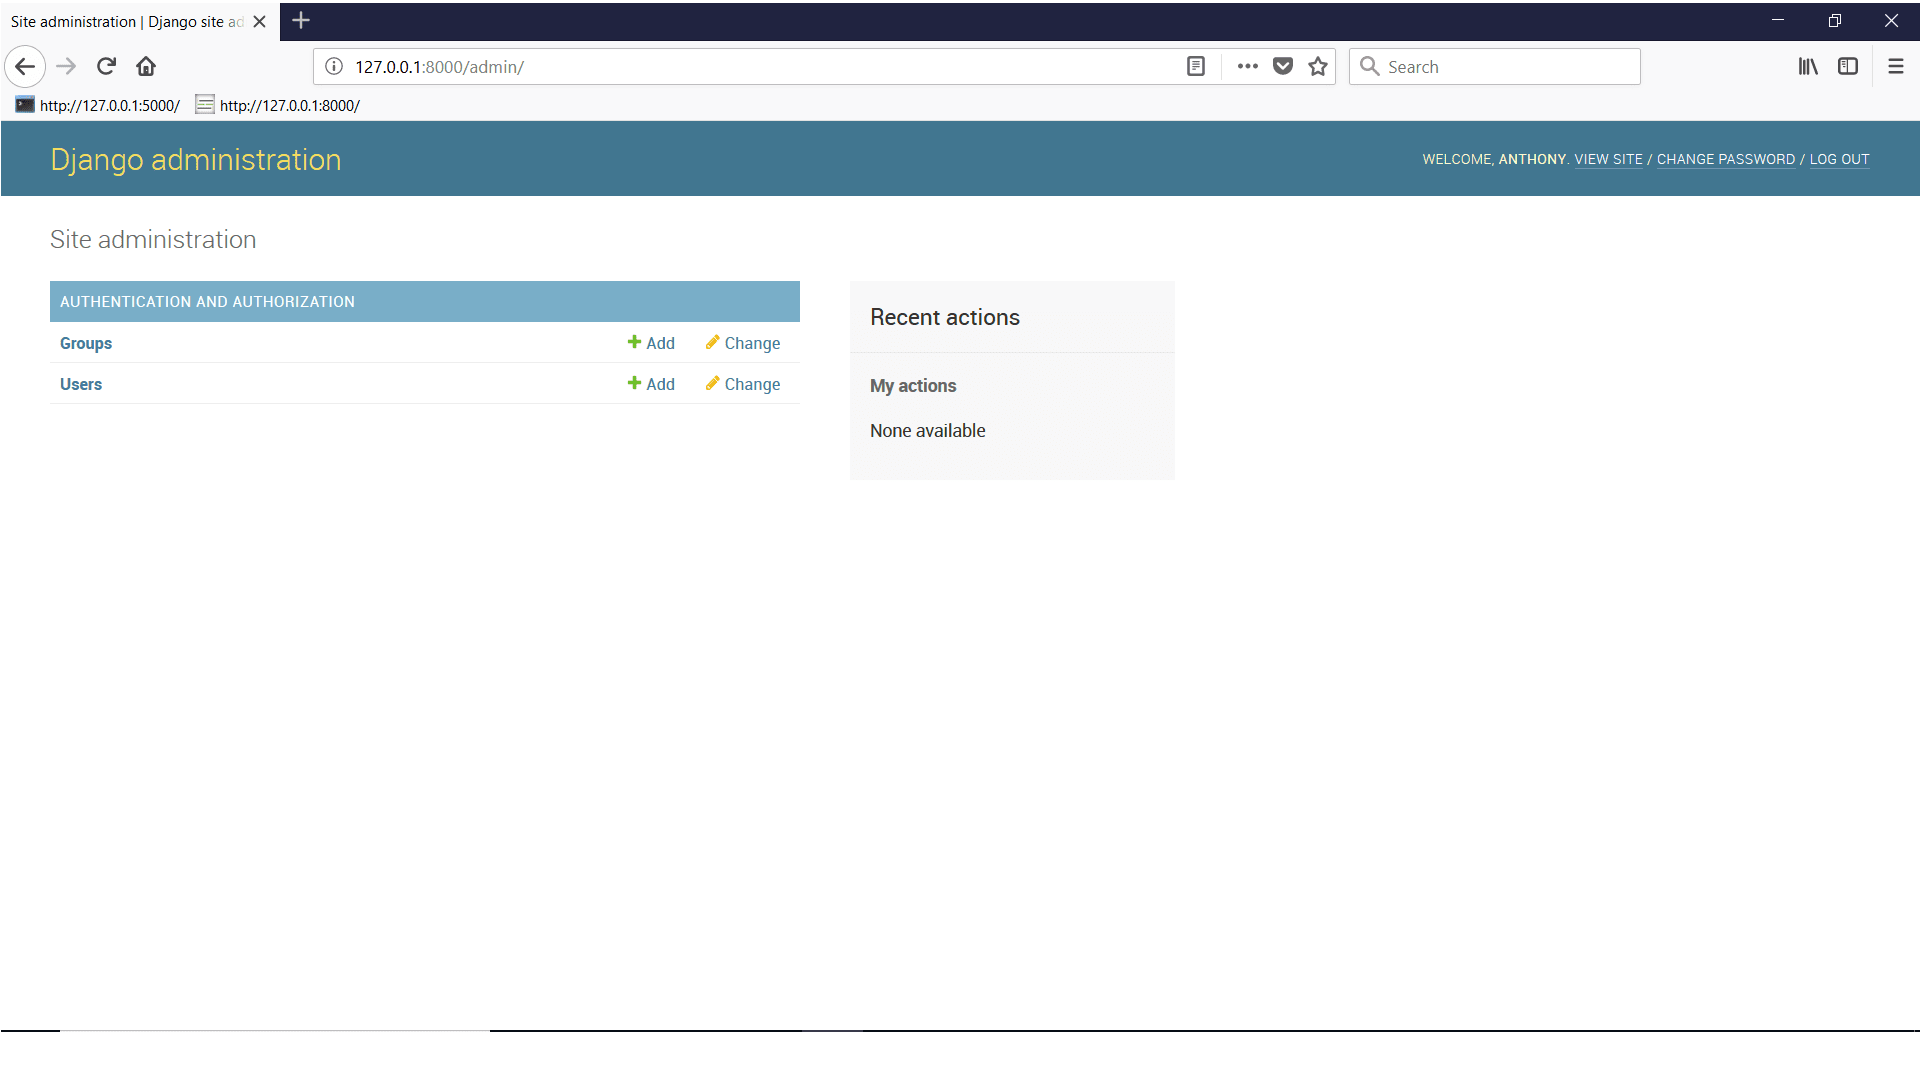
Groups and Users represent two models Django gives you access to. Models are just code representations of tables in a database. Even though Django created more tables, there is no need to access the rest of them directly, so no models were created.
If you click on ‘Users’ you should see more detail about the user table, and you should see the user you created. Take a moment to explore by clicking different links in the dashboard to see what is available. Just be careful not to delete your user, otherwise, you will have to run createsuperuser again.
Let’s leave the admin dashboard for now and work on the code. You will need to create an app inside of your project for your weather app.
Step 4 — Creating the App
In Django, you can separate functionality in your project by using apps. In the case of Django, app refers to a specific piece of functionality in your project.
For example, if you look at the settings.py file, you’ll see the INSTALLED_APPS list.
The first of the installed apps - django.contrib.admin - is what you just used. It handles all the admin functionality and nothing else. Another app in your project by default is django.contrib.auth, which allowed you to log into your admin dashboard.
In your case, you need to create a new app to handle everything related to showing the weather.
First, you need to stop the server.
Next, run the startapp command in your Terminal:
- python manage.py startapp weather
By running startapp, Django has added a new directory and more files to your project.
With the latest files generated, let’s create a new file called urls.py in your weather app directory:
from django.urls import path

urlpatterns = [
]
This file is similar to the urls.py in your the_weather directory. The difference is that this urls.py file contains all the URLs that are relevant to the app itself.
You’re not specifying a URL yet, but you can set up the project to recognize your app and route any URLs specific to your app to the app urls.py file.
First, go to the INSTALLED_APPS list in settings.py and add weather to the list:
...

INSTALLED_APPS = [
    'django.contrib.admin',
    'django.contrib.auth',
    'django.contrib.contenttypes',
    'django.contrib.sessions',
    'django.contrib.messages',
    'django.contrib.staticfiles',
    'weather',
]

...
This lets Django know you want to use the weather app in your project. By doing this, Django will know where to look for migrations and the URLs.
Next, you need to modify the original urls.py to point to your app urls.py file. To accomplish that, you add a line under the existing path for the admin dashboard. You also need to import include so you can point to your app urls.py file.
from django.contrib import admin
from django.urls import path, include

urlpatterns = [
    path('admin/', admin.site.urls),
    path('', include('weather.urls')),
]
The empty string means that you do not need to use an endpoint for the entry point to your app. Instead, you will let the app handle any specific endpoints. You could have put something like path('weather/', ...), which would have meant you would have to type 127.0.0.1:8000/weather/ to get anything associated with your weather app. But since your project is simple, you won’t be doing that here.
Step 5 — Adding the Template and View
Now, you need to add the template to your project.
A template in Django is an HTML file that allows for extra syntax that makes the template dynamic. You will be able to handle functionality like add variables, if statements, and loops.
In your Terminal, navigate to the weather app directory:
- cd weather
Next, make the templates directory:
- mkdir templates
And navigate into it:
- cd templates
You will also create another directory with the same name as your app. This is because Django combines all the template directories from the various apps you have. To prevent filenames from being duplicated, you can use the name of your app to prevent the duplicates:
- mkdir weather
Inside of this weather directory, create a new file called index.html. This will be your main template.
Here’s the HTML you’ll use for the template:
<!DOCTYPE html>
<html lang="en">
<head>
    <meta charset="UTF-8">
    <meta name="viewport" content="width=device-width, initial-scale=1.0">
    <meta http-equiv="X-UA-Compatible" content="ie=edge">
    <title>What's the weather like?</title>
    <link rel="stylesheet" href="https://cdnjs.cloudflare.com/ajax/libs/bulma/0.6.2/css/bulma.css" />
</head>
<body>
    <section class="hero is-primary">
        <div class="hero-body">
            <div class="container">
                <h1 class="title">
                    What's the weather like?
                </h1>
            </div>
        </div>
    </section>
    <section class="section">
        <div class="container">
            <div class="columns">
                <div class="column is-offset-4 is-4">
                    <form method="POST">
                        <div class="field has-addons">
                            <div class="control is-expanded">
                                <input class="input" type="text" placeholder="City Name">
                            </div>
                            <div class="control">
                                <button class="button is-info">
                                    Add City
                                </button>
                            </div>
                        </div>
                    </form>
                </div>
            </div>
        </div>
    </section>
    <section class="section">
        <div class="container">
            <div class="columns">
                <div class="column is-offset-4 is-4">
                    <div class="box">
                        <article class="media">
                            <div class="media-left">
                                <figure class="image is-50x50">
                                    <img src="http://openweathermap.org/img/w/10d.png" alt="Image">
                                </figure>
                            </div>
                            <div class="media-content">
                                <div class="content">
                                    <p>
                                        <span class="title">Las Vegas</span>
                                        <br>
                                        <span class="subtitle">29° F</span>
                                        <br> thunderstorm with heavy rain
                                    </p>
                                </div>
                            </div>
                        </article>
                    </div>
                </div>
            </div>
        </div>
    </section>
    <footer class="footer">
    </footer>
</body>
</html>
Note: Behind the scenes, we are using Bulma to handle styling and layout. For a deeper dive into Bulma and CSS Frameworks, consider reading Get to Know Bulma: My Current Favorite CSS Framework
Now that you have your template created, let’s create a view and URL combination so you can actually see this in your app.
Views in Django are either functions or classes. In this case, since you’re creating a simple view, you’ll create a function. Add this function to your views.py file:
from django.shortcuts import render

def index(request):
    return render(request, 'weather/index.html') #returns the index.html template
You are naming your view index because it will be at the index of your app, which is the root URL. To have the template render, you return request, which is necessary for the render function, and the name of the template file you want to render, in this case, weather/index.html.
Let’s add the URL that will send the request to this view. In the urls.py file for the app, update the urlpatterns list.
from django.urls import path
from . import views

urlpatterns = [
    path('', views.index),  #the path for our index view
]
This allows you to reference the view you just created.
Django is going to match any URL without an endpoint and route it to the view function you created.
Now, use your Terminal to go back to your project root (the_weather).
Next, start the server:
- python manage.py runserver
Then, open your web browser and visit 127.0.0.1:8000 again:

You will observe the rendered HTML of the index.html file. There is an input to add a city. And there is a display of the hardcoded weather for Las Vegas. However, the form at this point does not work and the weather is just a placeholder. Let’s work on that next.
Step 6 — Using the Weather API
What you want to do now is sign up for the Open Weather Map API. This will allow you to get real-time weather for any cities that you add to your app.
Go to the site, create an account and then go to the API keys on their dashboard. You can use the Default key that they provide or you can create a new API key. This key will allow you to use the API to get the weather.
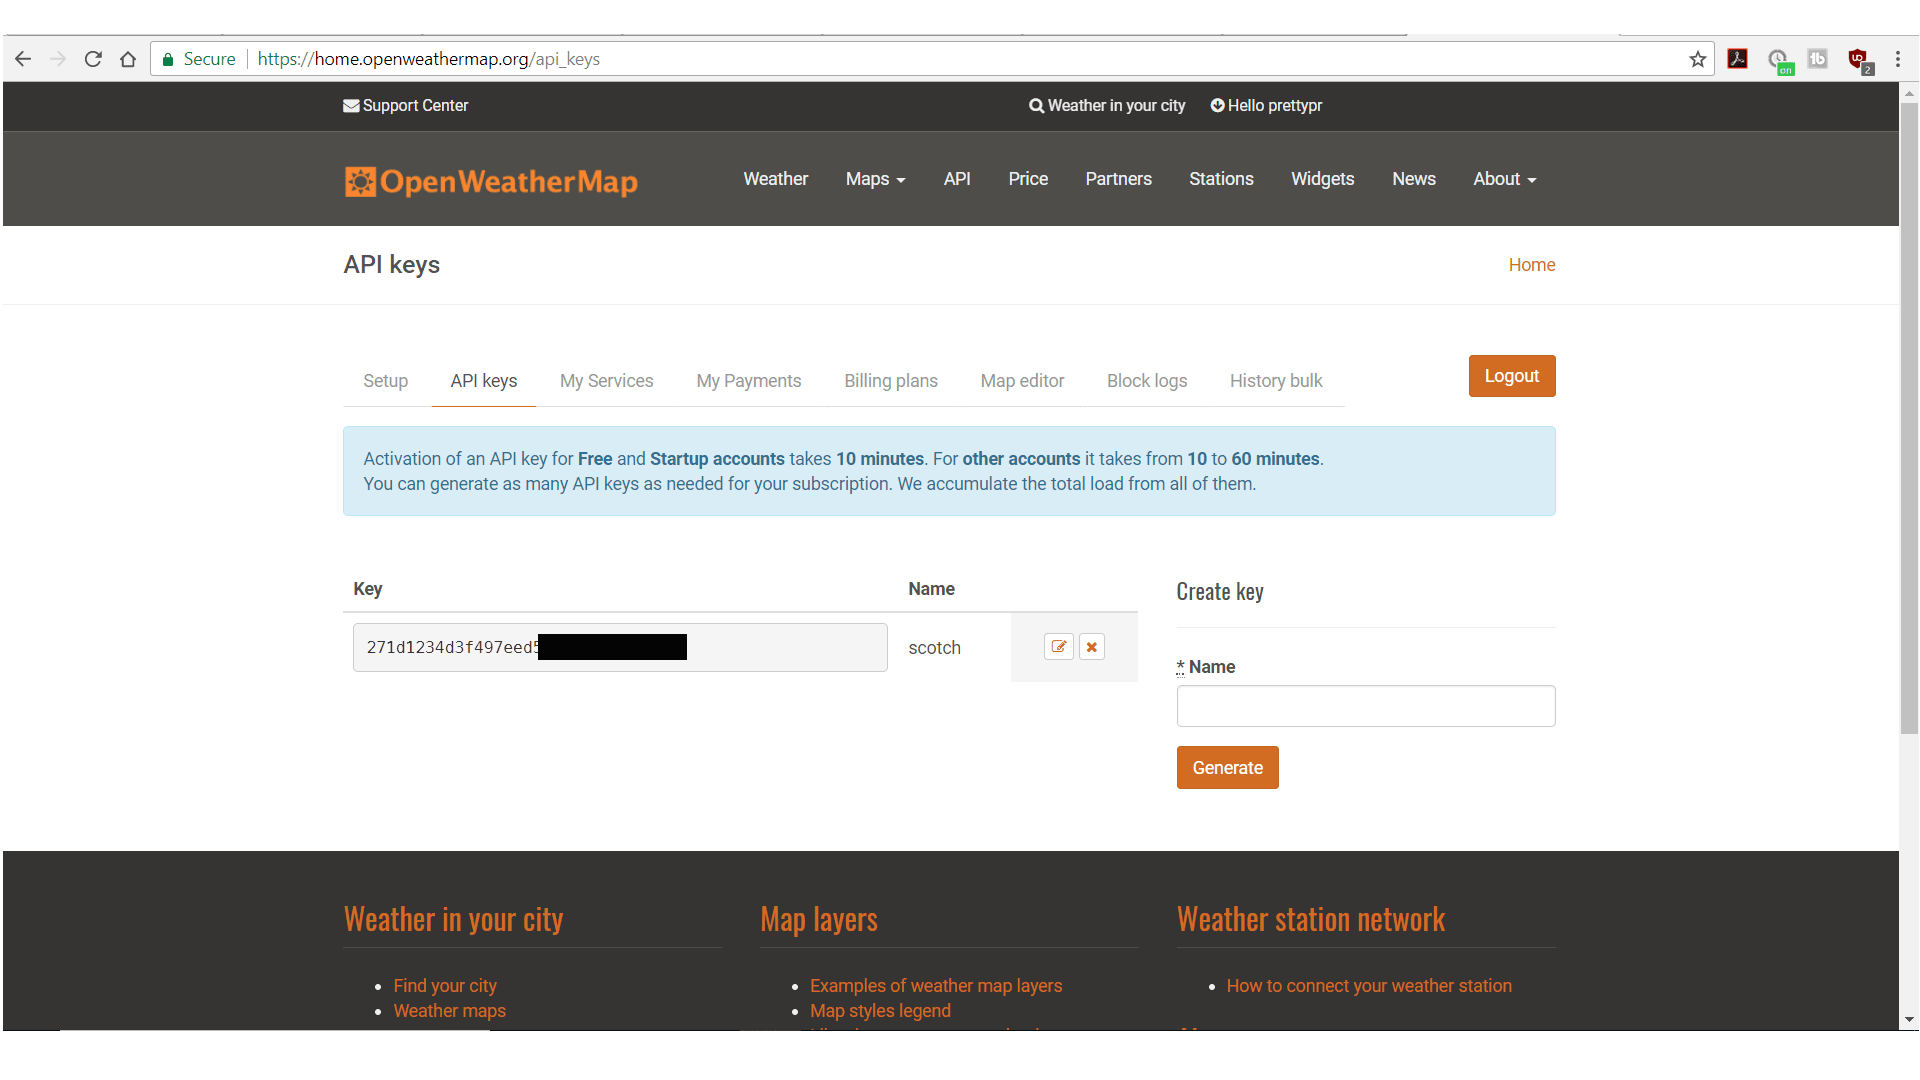
Note: It is important to keep API keys secret to prevent them from being used by other parties. You will want to avoid committing your API keys to remote repositories like GitHub.
The one endpoint you will use is below, so you can see the data that gets returned by modifying the following URL with your API key and navigating to the URL in your browser:
http://api.openweathermap.org/data/2.5/weather?q=las%20vegas&units=imperial&appid=YOUR_APP_KEY
It may take a few minutes for your API key to become active, so if it does not work at first, try again after a few minutes.
You should see a response in JSON format with coordinates, temperatures, and weather conditions.
With that, let’s add in a request to get the data into your app.
Let’s update your index view to send a request to the URL you have.
from django.shortcuts import render
import requests

def index(request):
    url = 'http://api.openweathermap.org/data/2.5/weather?q={}&units=imperial&appid=YOUR_APP_KEY'

    city = 'Las Vegas'

    city_weather = requests.get(url.format(city)).json() #request the API data and convert the JSON to Python data types

    return render(request, 'weather/index.html') #returns the index.html template
Add import requests, url, city, and city_weather.
With those new lines, you’re adding the URL that you will send a request to.
Note that this URL is slightly different from the URL you tested earlier in the browser. The city is not part of the URL, it has been moved out to a variable. This pattern will allow you to substitute other city names in the future.
For now, you will set the city to be “Las Vegas”, but later this will be set to the cities from the database.
Finally, you will send the request to the URL using the city and get the JSON representation of that city.
If you print that to the console you can see the same data you saw when you put the URL in your address bar:
...
def index(request):
    ...
    print(city_weather) #temporarily view output

    return render(request, 'weather/index.html') #returns the index.html template
If you reload the page in your web browser, you will see the data get printed to your console.
After this is verified to be true, you can remove the print statement from your code.
Step 7 — Displaying the Data in the Template
Next, you will need to pass the data to the template so it can be displayed to the user.
Let’s create a dictionary to hold all of the data you need. Of the data returned, you will need temp, description, and icon.
...
def index(request):
    ...
    weather = {
        'city' : city,
        'temperature' : city_weather['main']['temp'],
        'description' : city_weather['weather'][0]['description'],
        'icon' : city_weather['weather'][0]['icon']
    }

    return render(request, 'weather/index.html') #returns the index.html template
Now that you have all the information you want, you can pass that to the template. To pass it to the template, you will create a variable called context. This will be a dictionary that allows you to use its values inside of the template.
And then in render, you’ll add the context as the third argument:
...
def index(request):
    ...
    context = {'weather' : weather}

    return render(request, 'weather/index.html', context) #returns the index.html template
With the weather data added inside of context, let’s go to the template to add the data.
Inside of the index.html template, all you need to do is modify the HTML to use variables instead of the hard-coded values. Variables will use {{ }} tags, and they will reference anything inside of your context dictionary.
Note that Django converts dictionary keys so you can only access them using dot notation. For example, weather.city will give you the city name. You do not use weather['city'] like you would in Python.
Find the “box” <div>, and update it to use variables:
...
<div class="box">
    <article class="media">
        <div class="media-left">
            <figure class="image is-50x50">
                <img src="http://openweathermap.org/img/w/{{ weather.icon }}.png" alt="Image">
            </figure>
        </div>
        <div class="media-content">
            <div class="content">
                <p>
                    <span class="title">{{ weather.city }}</span>
                    <br>
                    <span class="subtitle">{{ weather.temperature }}° F</span>
                    <br> {{ weather.description }}
                </p>
            </div>
        </div>
    </article>
</div>
...
With all the variables replaced, you will now be presented with the current weather for your city.

However, the city is still currently hardcoded. What you will want to do next is pull from the database and display the cities that are in your database.
To accomplish that, you will create a table in your database to hold the cities that you want to know the weather for. You will create a model for this.
Go to the models.py file in your weather app, and add the following:
from django.db import models

class City(models.Model):
    name = models.CharField(max_length=25)

    def __str__(self): #show the actual city name on the dashboard
        return self.name

    class Meta: #show the plural of city as cities instead of citys
        verbose_name_plural = 'cities'
This will create a table in your database that will have a column called name, which is the name of the city. This city will be a charfield, which is just a string.
To get these changes in the database, you have to run makemigrations to generate the code to update the database and migrate to apply those changes.
Let’s stop the server and then perform the migrations in your Terminal:
- python manage.py makemigrations
And migrate:
- python manage.py migrate
You need to make it possible to see this model on your admin dashboard. To accomplish that, you will need to register it in your admin.py file.
from django.contrib import admin
from .models import City

admin.site.register(City)
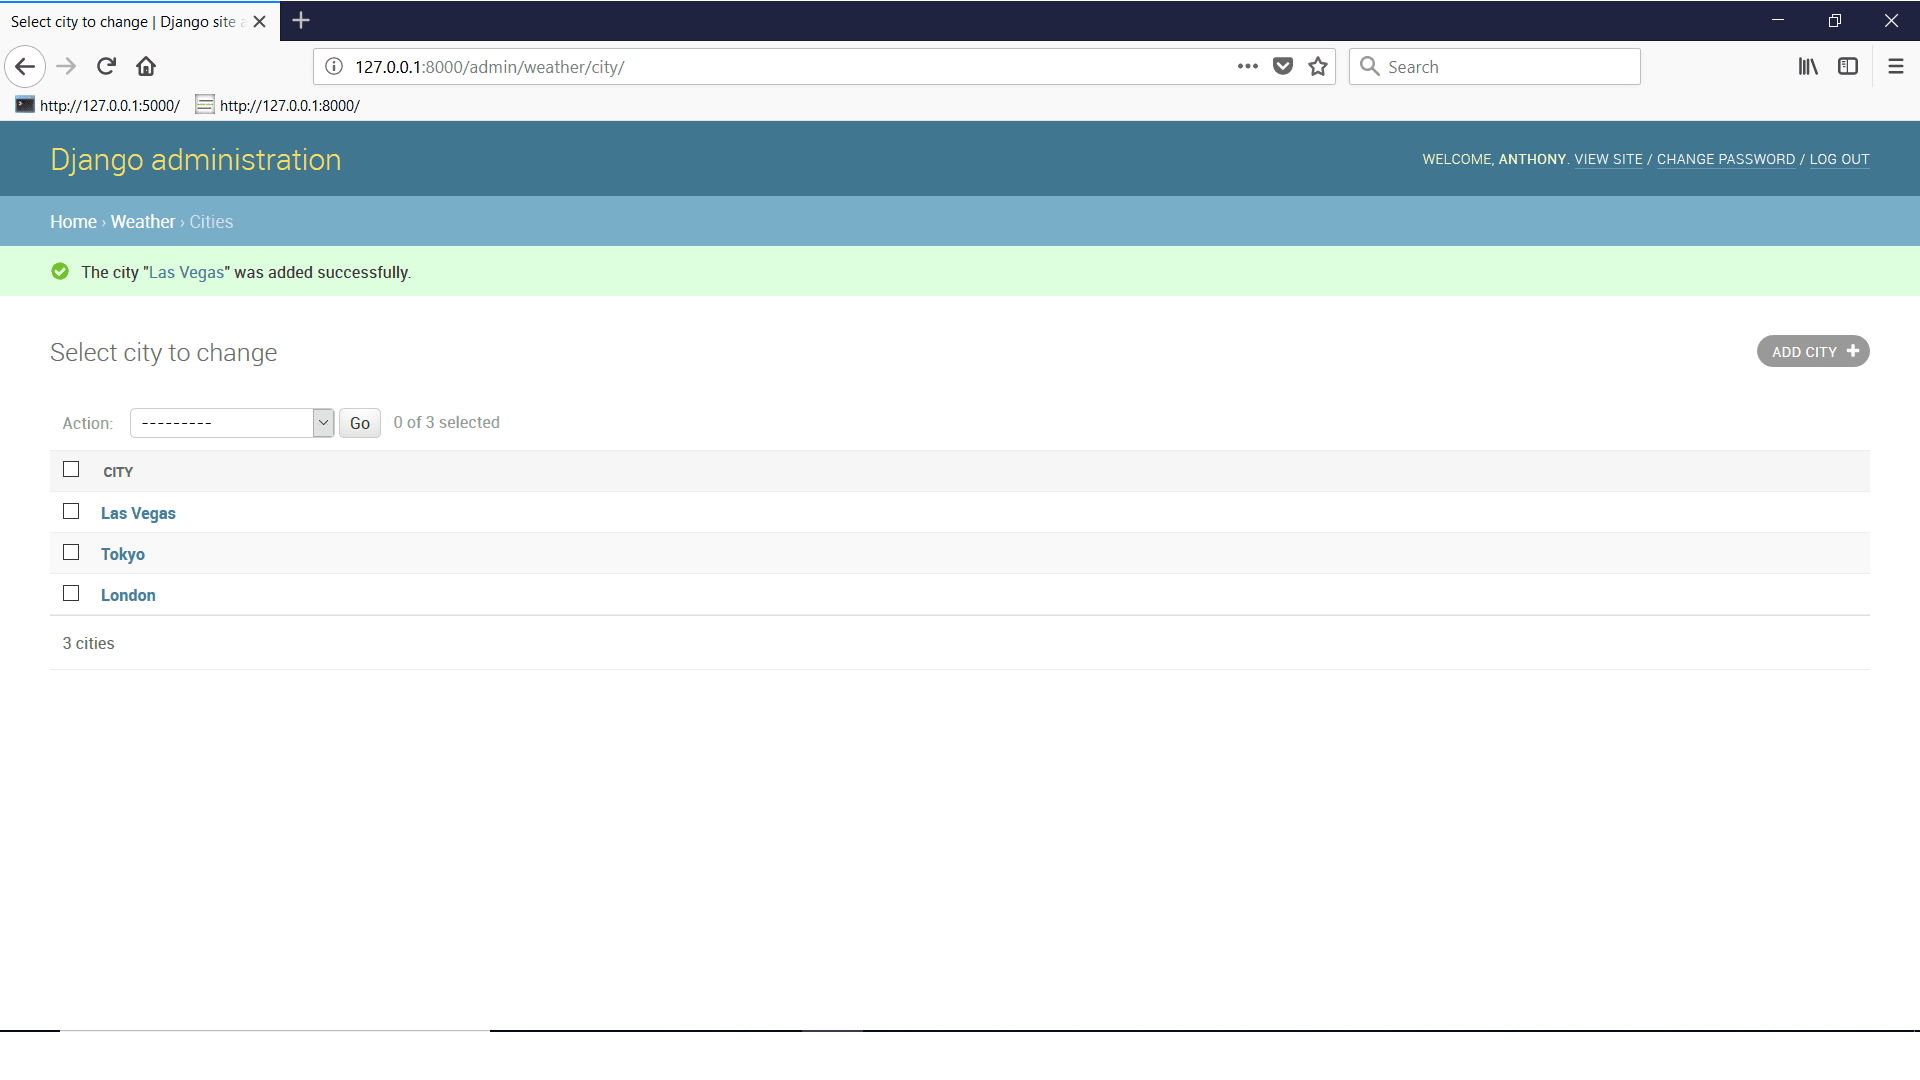
Next, restart the server and view the admin dashboard in your web browser.
City is now an option.
You can then go into the admin dashboard and add some cities. For example: “London”, “Tokyo”, and “Las Vegas”.
With the entries in the database, you will need to query these entries in your view. Start by importing the City model and then querying that model for all objects:
from django.shortcuts import render
import requests
from .models import City
Then, update the request with cities:
...
def index(request):
    url = 'http://api.openweathermap.org/data/2.5/weather?q={}&units=imperial&appid=YOUR_APP_KEY'

    cities = City.objects.all() #return all the cities in the database
    ...
Since you have the list of cities, you will want to loop over them and get the weather for each one and add it to a list that will eventually be passed to the template.
This will just be a variation of what you did in an earlier step. The difference is you are looping and appending each dictionary to a list.
First, you will create a weather_data list to hold the weather for each city.
Then, replace the original city variable and with a loop over cities.
Next, the weather response for each city should be appended to weather_data.
You will also need to update the context to pass this list instead of a single dictionary.
At this point, your views.py should resemble:
...
def index(request):
    ...
    cities = City.objects.all() #return all the cities in the database

    weather_data = []

    for city in cities:

        city_weather = requests.get(url.format(city)).json() #request the API data and convert the JSON to Python data types

        weather = {
            'city' : city,
            'temperature' : city_weather['main']['temp'],
            'description' : city_weather['weather'][0]['description'],
            'icon' : city_weather['weather'][0]['icon']
        }

        weather_data.append(weather) #add the data for the current city into our list

    context = {'weather_data' : weather_data}

    return render(request, 'weather/index.html', context) #returns the index.html template
Next, inside of the index.html template, you will need to loop over this list and generate the HTML for each city in the list. To accomplish this, you can put a for loop around the HTML that generates a single “box” <div> for the city.
...
<div class="column is-offset-4 is-4">
    {% for weather in weather_data %}
    <div class="box">
        <article class="media">
            <div class="media-left">
                <figure class="image is-50x50">
                    <img src="http://openweathermap.org/img/w/{{ weather.icon }}.png" alt="Image">
                </figure>
            </div>
            <div class="media-content">
                <div class="content">
                    <p>
                        <span class="title">{{ weather.city }}</span>
                        <br>
                        <span class="subtitle">{{ weather.temperature }}° F</span>
                        <br> {{ weather.description }}
                    </p>
                </div>
            </div>
        </article>
    </div>
    {% endfor %}
</div>
...
Now, you can examine the data for all the cities you have in the database.
Step 8 — Creating the Form
The last step is allowing the user to add a city directly via the form.
To accomplish that, you will need to create a form. You could create the form manually, but since your form will have exactly the same field as your model, you can use a ModelForm.
Create a new file called forms.py in your weather app:
from django.forms import ModelForm, TextInput
from .models import City

class CityForm(ModelForm):
    class Meta:
        model = City
        fields = ['name']
        widgets = {
            'name': TextInput(attrs={'class' : 'input', 'placeholder' : 'City Name'}),
        } #updates the input class to have the correct Bulma class and placeholder
To display the form, you will need to create it in your view and pass it to the template.
To accomplish that, let’s update the index.html to create the form. You will also need to update the context so the form gets passed to the template.
...
from .forms import CityForm

def index(request):
    ...
    form = CityForm()

    weather_data = []
    ...
    context = {'weather_data' : weather_data, 'form' : form}
Now in the index.html template, let’s update the form section to use the form from your view and a csrf_token, which is necessary for POST requests in Django.
...
<form method="POST">
    {% csrf_token %}
    <div class="field has-addons">
        <div class="control is-expanded">
            {{ form.name }}
        </div>
        <div class="control">
            <button class="button is-info">
                Add City
            </button>
        </div>
    </div>
</form>
...
Note: CSRF stands for Cross-Site Request Forgery. This is a security measure to ensure form data is being submitted from an expected trusted source.
With the form in your HTML working, you will need to handle the form data as it comes in. For that, you will create an if block checking for a POST request. You need to add the check for the type of request before you start grabbing the weather data so you immediately get the data for the city you add.
...
def index(request):
    url = 'http://api.openweathermap.org/data/2.5/weather?q={}&units=imperial&appid=YOUR_APP_KEY'

    cities = City.objects.all() #return all the cities in the database

    if request.method == 'POST': # only true if form is submitted
        form = CityForm(request.POST) # add actual request data to form for processing
        form.save() # will validate and save if validate

    form = CityForm()
    ...
By passing request.POST, you will be able to validate the form data.
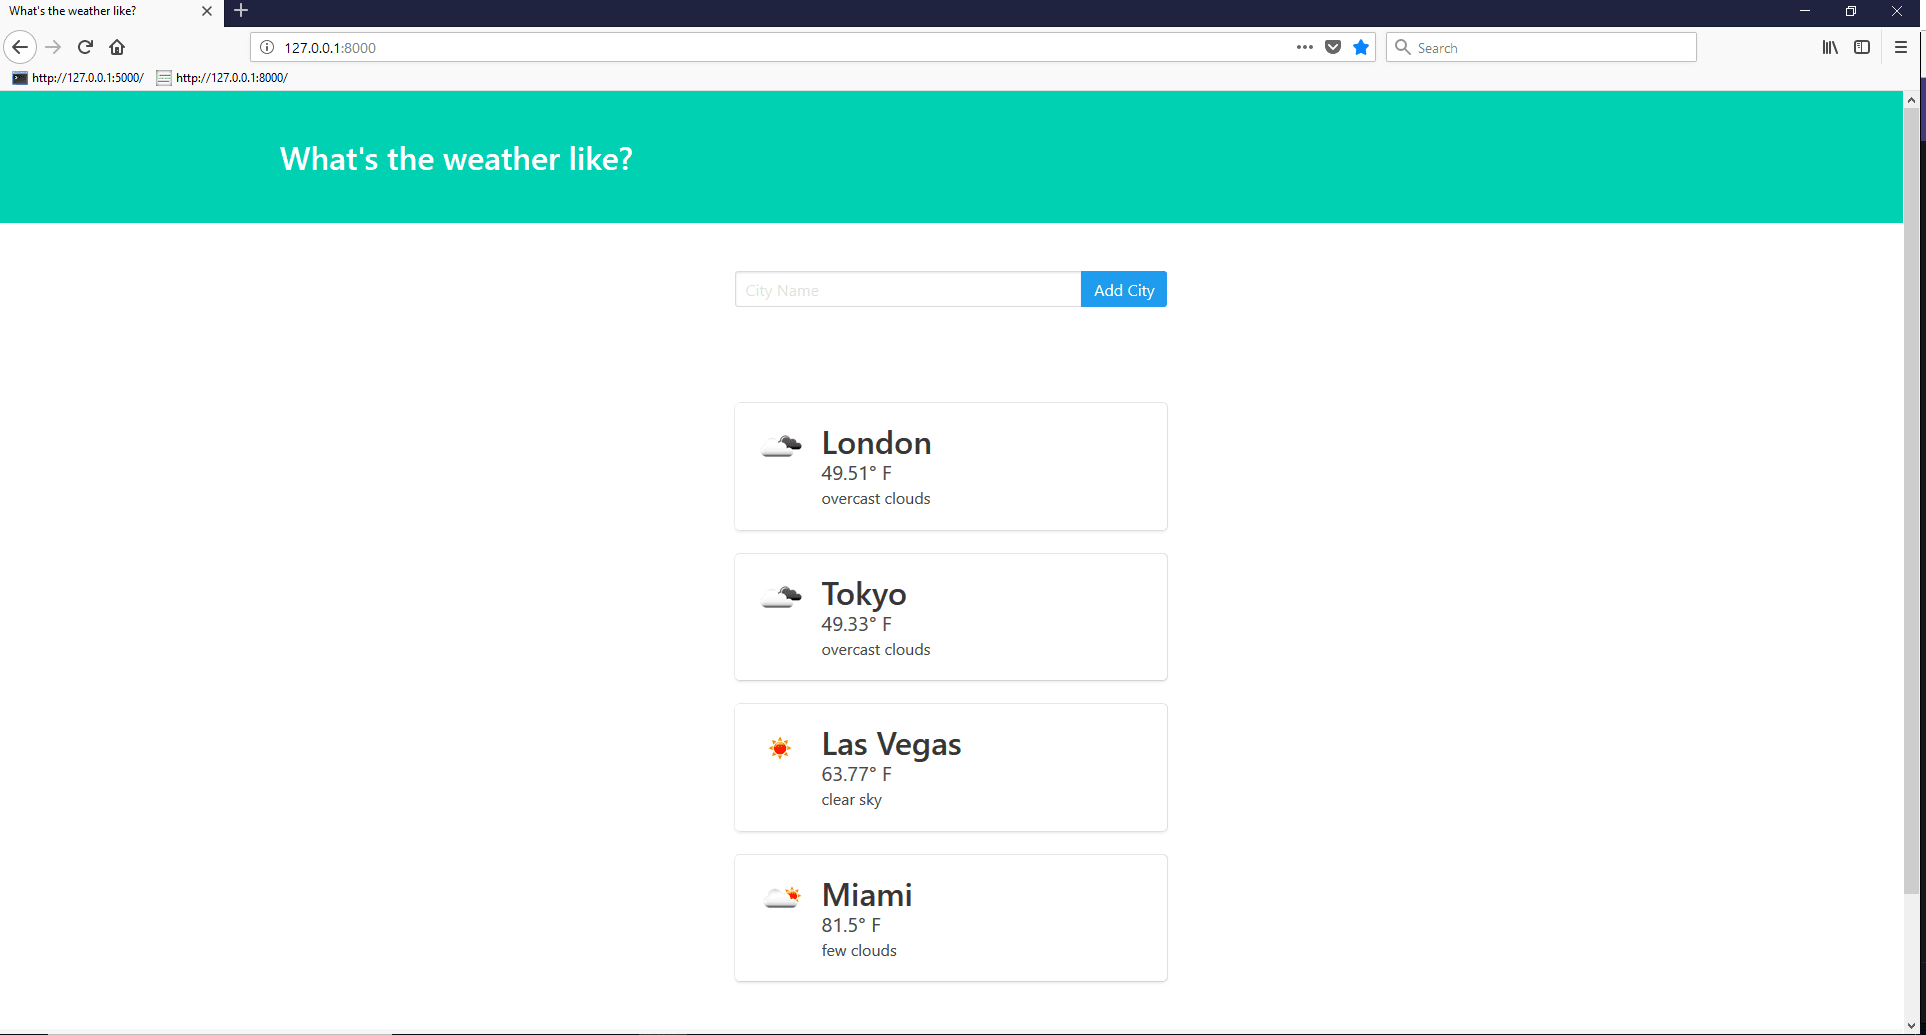
Now, you should be able to type in the name of a city, click add, and see it show up.
For example, add “Miami” as the next city:

When you drop out of the if block, the form will be recreated so you can add another city if you choose. The rest of the code will behave in the same way.
You now have a way to keep track of the weather for multiple cities in your app.
Conclusion
In this article, you had to work with various parts of Django to get this working: views, models, forms, and templates. You also had to use the Python library requests to get the actual weather data. So even though the app is simple, you will use many of the same concepts in apps with more complexity.
Thanks for learning with the DigitalOcean Community. Check out our offerings for compute, storage, networking, and managed databases.
About the author
Still looking for an answer?
This textbox defaults to using Markdown to format your answer.
You can type !ref in this text area to quickly search our full set of tutorials, documentation & marketplace offerings and insert the link!
I get an error here:
form = CityForm() “Undefined variable: ‘CityForm’”
I had the same error has @dawievanemmenes after the fix, I had KeywordError that "main" not defined … Something like that. Actually, city is an object from the queryset and not a string or the name of the city. {'cod': '404', 'message': 'city not found'} is the error I had.
city_weather = requests.get(url.format(city)).json() is supposed to be, perhaps, city_weather = requests.get(url.format(city.name)).json() from the model,
class City(models.Model):
    name = models.CharField(max_length=25)
Well, I change some parts where city was used and it worked fine for me.
Thanks Anthony Herbert
Hey Anthony Herbert,
This project was so good and it really helped me to start a basic project with all connections.
I’m facing an issue in views.py
Cities = City.object.all() ERROR: Class ‘City’ has no ‘object’ member.
I tried changing the name of the city but couldn’t get a fix. Could you please help me with this.
This comment has been deleted
 This work is licensed under a Creative Commons Attribution-NonCommercial- ShareAlike 4.0 International License.
Become a contributor for community
Get paid to write technical tutorials and select a tech-focused charity to receive a matching donation.

DigitalOcean Documentation
Full documentation for every DigitalOcean product.

Resources for startups and AI-native businesses
The Wave has everything you need to know about building a business, from raising funding to marketing your product.
The developer cloud
Scale up as you grow — whether you're running one virtual machine or ten thousand.

Start building today
From GPU-powered inference and Kubernetes to managed databases and storage, get everything you need to build, scale, and deploy intelligent applications.
