By Michael Okoh and Haley Mills
Not using Ubuntu 18.04?
Choose a different version or distribution.
The author selected the Tech Education Fund to receive a donation as part of the Write for DOnations program.
Introduction
Docker is an open-source application that allows administrators to create, manage, deploy, and replicate applications using containers. Containers can be thought of as a package that houses dependencies that an application requires to run at an operating system level. This means that each application deployed using Docker lives in an environment of its own and its requirements are handled separately.
Flask is a web micro-framework that is built on Python. It is called a micro-framework because it does not require specific tools or plug-ins to run. The Flask framework is lightweight and flexible, yet highly structured, making it preferred over other frameworks.
Deploying a Flask application with Docker will allow you to replicate the application across different servers with minimal reconfiguration.
In this tutorial, you will create a Flask application and deploy it with Docker. This tutorial will also cover how to update an application after deployment.
Prerequisites
To follow this tutorial, you will need the following:
- A non-root user with sudo privileges configured by following the Initial Server Setup with Ubuntu 18.04 guide.
- One Ubuntu 18.04 server with Docker installed, set up by following this tutorial or with the DigitalOcean one-click Docker image.
- Nginx installed by following step one of the How To Install Nginx on Ubuntu 18.04 tutorial.
Step 1 — Setting Up the Flask Application
To get started, you will create a directory structure that will hold your Flask application. This tutorial will create a directory called TestApp in /var/www, but you can modify the command to name it whatever you’d like.
- sudo mkdir /var/www/TestApp
Move in to the newly created TestApp directory:
- cd /var/www/TestApp
Next, create the base folder structure for the Flask application:
- sudo mkdir -p app/static app/templates
The -p flag indicates that mkdir will create a directory and all parent directories that don’t exist. In this case, mkdir will create the app parent directory in the process of making the static and templates directories.
The app directory will contain all files related to the Flask application such as its views and blueprints. Views are the code you write to respond to requests to your application. Blueprints create application components and support common patterns within an application or across multiple applications.
The static directory is where assets such as images, CSS, and JavaScript files live. The templates directory is where you will put the HTML templates for your project.
Now that the base folder structure is complete, create the files needed to run the Flask application. First, create an __init__.py file inside the app directory. This file tells the Python interpreter that the app directory is a package and should be treated as such.
Run the following command to create the file:
- sudo nano app/__init__.py
Packages in Python allow you to group modules into logical namespaces or hierarchies. This approach enables the code to be broken down into individual and manageable blocks that perform specific functions.
Next, you will add code to the __init__.py that will create a Flask instance and import the logic from the views.py file, which you will create after saving this file. Add the following code to your new file:
from flask import Flask
app = Flask(__name__)
from app import views
Once you’ve added that code, save and close the file.
With the __init__.py file created, you’re ready to create the views.py file in your app directory. This file will contain most of your application logic.
- sudo nano app/views.py
Next, add the code to your views.py file. This code will return the hello world! string to users who visit your web page:
from app import app

@app.route('/')
def home():
   return "hello world!"
The @app.route line above the function is called a decorator. Decorators modify the function that follows it. In this case, the decorator tells Flask which URL will trigger the home() function. The hello world text returned by the home function will be displayed to the user on the browser.
With the views.py file in place, you’re ready to create the uwsgi.ini file. This file will contain the uWSGI configurations for our application. uWSGI is a deployment option for Nginx that is both a protocol and an application server; the application server can serve uWSGI, FastCGI, and HTTP protocols.
To create this file, run the following command:
- sudo nano uwsgi.ini
Next, add the following content to your file to configure the uWSGI server:
[uwsgi]
module = main
callable = app
master = true
This code defines the module that the Flask application will be served from. In this case, this is the main.py file, referenced here as main. The callable option instructs uWSGI to use the app instance exported by the main application. The master option allows your application to keep running, so there is little downtime even when reloading the entire application.
Next, create the main.py file, which is the entry point to the application. The entry point instructs uWSGI on how to interact with the application.
- sudo nano main.py
Next, copy and paste the following into the file. This imports the Flask instance named app from the application package that was previously created.
from app import app
Finally, create a requirements.txt file to specify the dependencies that the pip package manager will install to your Docker deployment:
- sudo nano requirements.txt
Add the following line to add Flask as a dependency:
Flask==1.0.2
This specifies the version of Flask to be installed. At the time of writing this tutorial, 1.0.2 is the latest Flask version. You can check for updates at the official website for Flask.
Save and close the file. You have successfully set up your Flask application and are ready to set up Docker.
Step 2 — Setting Up Docker
In this step you will create two files, Dockerfile and start.sh, to create your Docker deployment. The Dockerfile is a text document that contains the commands used to assemble the image. The start.sh file is a shell script that will build an image and create a container from the Dockerfile.
First, create the Dockerfile.
- sudo nano Dockerfile
Next, add your desired configuration to the Dockerfile. These commands specify how the image will be built, and what extra requirements will be included.
FROM tiangolo/uwsgi-nginx-flask:python3.6-alpine3.7
RUN apk --update add bash nano
ENV STATIC_URL /static
ENV STATIC_PATH /var/www/app/static
COPY ./requirements.txt /var/www/requirements.txt
RUN pip install -r /var/www/requirements.txt
In this example, the Docker image will be built off an existing image, tiangolo/uwsgi-nginx-flask, which you can find on DockerHub. This particular Docker image is a good choice over others because it supports a wide range of Python versions and OS images.
The first two lines specify the parent image that you’ll use to run the application and install the bash command processor and the nano text editor. It also installs the git client for pulling and pushing to version control hosting services such as GitHub, GitLab, and Bitbucket. ENV STATIC_URL /static is an environment variable specific to this Docker image. It defines the static folder where all assets such as images, CSS files, and JavaScript files are served from.
The last two lines will copy the requirements.txt file into the container so that it can be executed, and then parses the requirements.txt file to install the specified dependencies.
Save and close the file after adding your configuration.
With your Dockerfile in place, you’re almost ready to write your start.sh script that will build the Docker container. Before writing the start.sh script, first make sure that you have an open port to use in the configuration. To check if a port is free, run the following command:
- sudo nc localhost 56733 < /dev/null; echo $?
If the output of the command above is 1, then the port is free and usable. Otherwise, you will need to select a different port to use in your start.sh configuration file.
Once you’ve found an open port to use, create the start.sh script:
sudo nano start.sh
The start.sh script is a shell script that will build an image from the Dockerfile and create a container from the resulting Docker image. Add your configuration to the new file:
#!/bin/bash
app="docker.test"
docker build -t ${app} .
docker run -d -p 56733:80 \
  --name=${app} \
  -v $PWD:/app ${app}
The first line is called a shebang. It specifies that this is a bash file and will be executed as commands. The next line specifies the name you want to give the image and container and saves as a variable named app. The next line instructs Docker to build an image from your Dockerfile located in the current directory. This will create an image called docker.test in this example.
The last three lines create a new container named docker.test that is exposed at port 56733. Finally, it links the present directory to the /var/www directory of the container.
You use the -d flag to start a container in daemon mode, or as a background process. You include the -p flag to bind a port on the server to a particular port on the Docker container. In this case, you are binding port 56733 to port 80 on the Docker container. The -v flag specifies a Docker volume to mount on the container, and in this case, you are mounting the entire project directory to the /var/www folder on the Docker container.
Execute the start.sh script to create the Docker image and build a container from the resulting image:
- sudo bash start.sh
Once the script finishes running, use the following command to list all running containers:
- sudo docker ps
You will receive output that shows the containers:
OutputCONTAINER ID        IMAGE               COMMAND                  CREATED             STATUS              PORTS                            NAMES
58b05508f4dd        docker.test         "/entrypoint.sh /sta…"   12 seconds ago      Up 3 seconds       443/tcp, 0.0.0.0:56733->80/tcp   docker.test
You will find that the docker.test container is running. Now that it is running, visit the IP address at the specified port in your browser: http://ip-address:56733
You’ll see a page similar to the following:
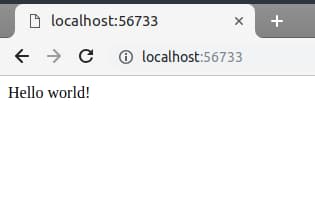
In this step you have successfully deployed your Flask application on Docker. Next, you will use templates to display content to users.
Step 3 — Serving Template Files
Templates are files that display static and dynamic content to users who visit your application. In this step, you will create a HTML template to create a home page for the application.
Start by creating a home.html file in the app/templates directory:
- sudo nano app/templates/home.html
Add the code for your template. This code will create an HTML5 page that contains a title and some text.
<!doctype html>
<html lang="en-us">
<head>
<meta charset="utf-8">
<meta http-equiv="x-ua-compatible" content="ie=edge">
<title>Welcome home</title>
</head>
<body>
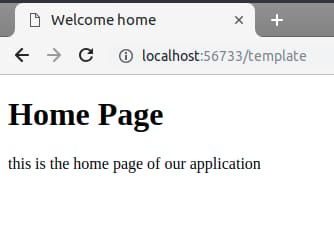
<h1>Home Page</h1>
<p>This is the home page of our application.</p>
</body>
</html>
Save and close the file once you’ve added your template.
Next, modify the app/views.py file to serve the newly created file:
- sudo nano app/views.py
First, add the following line at the beginning of your file to import the render_template method from Flask. This method parses an HTML file to render a web page to the user.
from flask import render_template
...
At the end of the file, you will also add a new route to render the template file. This code specifies that users are served the contents of the home.html file whenever they visit the /template route on your application.
...

@app.route('/template')
def template():
    return render_template('home.html')
The updated app/views.py file will look like this:
from flask import render_template
from app import app

@app.route('/')
def home():
    return "Hello world!"

@app.route('/template')
def template():
    return render_template('home.html')
Save and close the file when done.
In order for these changes to take effect, you will need to stop and restart the Docker containers. Run the following command to rebuild the container:
- sudo docker stop docker.test && sudo docker start docker.test
Visit your application at http://your-ip-address:56733/template to see the new template being served.
In this you’ve created a Docker template file to serve visitors on your application. In the next step you will see how the changes you make to your application can take effect without having to restart the Docker container.
Step 4 — Updating the Application
Sometimes you will need to make changes to the application, whether it is installing new requirements, updating the Docker container, or HTML and logic changes. In this section, you will configure touch-reload to make these changes without needing to restart the Docker container.
Python autoreloading watches the entire file system for changes and refreshes the application when it detects a change. Autoreloading is discouraged in production because it can become resource intensive very quickly. In this step, you will use touch-reload to watch for changes to a particular file and reload when the file is updated or replaced.
To implement this, start by opening your uwsgi.ini file:
- sudo nano uwsgi.ini
Next, add the highlighted line to the end of the file:
module = main
callable = app
master = true
touch-reload = /app/uwsgi.ini
This specifies a file that will be modified to trigger an entire application reload. Once you’ve made the changes, save and close the file.
To demonstrate this, make a small change to your application. Start by opening your app/views.py file:
- sudo nano app/views.py
Replace the string returned by the home function:
from flask import render_template
from app import app

@app.route('/')
def home():
    return "<b>There has been a change</b>"

@app.route('/template')
def template():
    return render_template('home.html')
Save and close the file after you’ve made a change.
Next, if you open your application’s homepage at http://ip-address:56733, you will notice that the changes are not reflected. This is because the condition for reload is a change to the uwsgi.ini file. To reload the application, use touch to activate the condition:
- sudo touch uwsgi.ini
Reload the application homepage in your browser again. You will find that the application has incorporated the changes:

In this step, you set up a touch-reload condition to update your application after making changes.
Conclusion
In this tutorial, you created and deployed a Flask application to a Docker container. You also configured touch-reload to refresh your application without needing to restart the container.
With your new application on Docker, you can now scale with ease. To learn more about using Docker, check out their official documentation.
Thanks for learning with the DigitalOcean Community. Check out our offerings for compute, storage, networking, and managed databases.
About the author(s)
Still looking for an answer?
This textbox defaults to using Markdown to format your answer.
You can type !ref in this text area to quickly search our full set of tutorials, documentation & marketplace offerings and insert the link!
Hi ! Please replace below content in your Dockerfile
from “COPY ./requirements.txt /var/www/requirements.txt” -> to “COPY ./app/requirements.txt /var/www/requirements.txt”
“Deployment” typically means getting it running on the internet, not just your local machine. Would love to see this tutorial expanded to match its title!
My flask app works fine locally, but doesn’t respond at all after I go to my new droplet and pull the image I pushed up to dockerhub. Is there a step I am missing? I opened my port in the firewall and I set host to 0.0.0.0 in the flask run command.
Not sure if anyone else had this issue but there was an error in the bash script, had to change to this:
-v $PWD/app ${app}
I also changed the script due to the requirements not mapping correctly for some reason and eventually got it to work.
sudo touch uwsgi.ini
is not working. I have checked uwsgi.ini and it matches what is above.
Thanks
No success, first I have "BAD GATEWAY ERROR ", after I change file dockerfile
-v $PWD:/app to -v $PWD/app
Now flask looks to be working, i get
""Hello World from Flask in a uWSGI Nginx Docker container with Python 3.6 on Alpine “”
For some reason I cant make to work my view.py instead, is linking the premade from Tiangolo. … not sure how uwsgi works on this… cant make my “hello world” from local disk to work
What needs to be changed to serve the Flask App at just http://ip-address instead of http://ip-address:56733?
 This work is licensed under a Creative Commons Attribution-NonCommercial- ShareAlike 4.0 International License.
Become a contributor for community
Get paid to write technical tutorials and select a tech-focused charity to receive a matching donation.

DigitalOcean Documentation
Full documentation for every DigitalOcean product.

Resources for startups and AI-native businesses
The Wave has everything you need to know about building a business, from raising funding to marketing your product.
The developer cloud
Scale up as you grow — whether you're running one virtual machine or ten thousand.

Start building today
From GPU-powered inference and Kubernetes to managed databases and storage, get everything you need to build, scale, and deploy intelligent applications.
