By Oluyemi Olususi and Kathryn Hancox

The author selected Software in the Public Interest Inc to receive a donation as part of the Write for DOnations program.
Introduction
Symfony is an open-source PHP framework with an elegant structure and a reputation for being a suitable framework to kick-start any project irrespective of its size. As a set of reusable components, its flexibility, architecture, and high performance make it a top choice for building a highly complex enterprise application.
In this tutorial, you will deploy an existing, standard Symfony 4 application to production with a LEMP stack (Nginx, MySQL, and PHP) on Ubuntu 18.04, which will help you get started configuring the server and the structure of the framework. Nginx is a popular open-source, high-performance HTTP server with additional features including reverse proxy support. It has a good reputation and hosts some of the largest and highest traffic sites on the internet. If you choose to deploy your own Symfony application instead, you might have to implement extra steps depending on the existing structure of your application.
Prerequisites
To complete this tutorial, you will need:
- One Ubuntu 18.04 server set up by following the Ubuntu 18.04 initial server setup guide, including a non-root user with
sudoaccess and a firewall. - Nginx, MySQL, and PHP installed by following How To Install Linux, Nginx, MySQL, PHP (LEMP stack) on Ubuntu 18.04 .
- Composer installed following steps 1 and 2 of How to Install and Use Composer on Ubuntu 18.04.
- Git installed by following How to Install Git on Ubuntu 18.04.
Step 1 — Creating a User and Database for the Application
By following the instructions in the Prerequisites, you now have all the basic server dependencies required for the application installation. As every dynamic web application requires a database, you will create a user and properly configure a database for the application in this section.
To create a MySQL database for our application and a user associated with it, you need to access the MySQL client using the MySQL root account:
- mysql -u root -p
Enter the appropriate password, which should be the same password used when running mysql_secure_installation.
Next, create the application database with:
- CREATE DATABASE blog;
You will see the following output in the console:
OutputQuery OK, 1 row affected (0.00 sec)
You have successfully created your application database. You can now create a MySQL user and grant them access to the newly created database.
Execute the following command to create a MySQL user and password. You can change the username and password to something more secure if you wish:
- CREATE USER 'blog-admin'@'localhost' IDENTIFIED BY 'password';
You will see the following output:
OutputQuery OK, 0 rows affected (0.00 sec)
Currently, the user blog-admin does not have the right permission over the application database. In fact, even if blog-admin tries to log-in with their password, they will not be able to reach the MySQL shell.
A user needs the right permission before accessing or carrying out a specific action on a database. Use the following command to allow complete access to the blog database for the blog-admin user:
- GRANT ALL PRIVILEGES ON blog.* TO 'blog-admin'@'localhost';
You will see the following output:
OutputQuery OK, 0 rows affected (0.00 sec)
The blog-admin now has all privileges on all the tables inside the blog database. To reload the grant tables and apply changes, you need to perform a flush-privilege operation using the flush statement:
- FLUSH PRIVILEGES;
You will see the following output:
OutputQuery OK, 0 rows affected (0.00 sec)
You are done creating a new user and granting privileges. To test if you’re on track, exit the MySQL client:
- quit;
And log in again, using the credentials of the MySQL user you just created and enter the password when prompted:
- mysql -u blog-admin -p
Check that the database can be accessed by the user with:
- SHOW DATABASES;
You’ll see the blog table in the output:
Output+--------------------+
| Database           |
+--------------------+
| information_schema |
| blog               |
+--------------------+
2 rows in set (0.00 sec)
Finally, exit the MySQL client:
- quit;
You have successfully created a database, a user for the demo application, and granted the newly created user the right privileges to access the database. You are now ready to set up the demo application.
Step 2 — Setting Up the Demo Application
To keep this tutorial simple, you will deploy a blog application built with Symfony. This application will allow an authenticated user to create a blog post and store it in the database. In addition, the application user can view all the posts and details associated with an author.
The source code of the blog application you will deploy in this tutorial is on GitHub. You will use Git to pull the source code of the application from GitHub and save it in a new directory.
First, create a directory that will serve as the root directory for your application. So, run the following command from the console to create a new directory named symfony-blog:
- sudo mkdir -p /var/www/symfony-blog
In order to work with the project files using a non-root user account, you’ll need to change the folder owner and group by running:
- sudo chown sammy:sammy /var/www/symfony-blog
Replace sammy with your sudo non-root username.
Now, you can change into the parent directory and clone the application on GitHub:
- cd /var/www
- git clone https://github.com/yemiwebby/symfony-blog.git symfony-blog
You’ll see the following output:
OutputCloning into 'symfony-blog'...
remote: Counting objects: 180, done.
remote: Compressing objects: 100% (122/122), done.
remote: Total 180 (delta 57), reused 164 (delta 41), pack-reused 0
Receiving objects: 100% (180/180), 167.01 KiB | 11.13 MiB/s, done.
Resolving deltas: 100% (57/57), done.
The demo application is now set. In the next step, you will configure the environment variables and install the required dependencies for the project.
Step 3 — Configuring your Environment Variables for the Application
To completely set up the application, you need to install the project dependencies and properly configure the application parameters.
By default, the Symfony application runs in a development mode, which gives it a very detailed log for the purposes of debugging. This is not applicable to what you are doing in this tutorial, and not good practice for a production environment, as it can slow things down and create very large log files.
Symfony needs to be aware that you’re running the application in a production environment. You can set this up by either creating a .env file containing variable declarations, or creating environment variables directly. Since you can also use the .env file to configure your database credentials for this application, it makes more sense for you to do this. Change your working directory to the cloned project and create the .env file with:
- cd symfony-blog
- sudo nano .env
Add the following lines to the file to configure the production application environment:
APP_ENV=prod
APP_DEBUG=0
APP_ENV is an environment variable that specifies that the application is in production, while APP_DEBUG is an environment variable that specifies if the application should run in debug mode or not. You have set it to false for now.
Save the file and exit the editor.
Next, install a PHP extension that Symfony apps use to handle XML:
- sudo apt install php7.2-xml
Next, you need to install the project dependencies, run composer install:
- cd /var/www/symfony-blog
- composer install
You have successfully configured the environment variables and installed the required dependencies for the project. Next, you will set up the database credentials.
Step 4 — Setting Up Database Credentials
In order to retrieve data from the application’s database you created earlier, you will need to set up and configure the required database credentials from within the Symfony application.
Open the .env file again:
- sudo nano .env
Add the following content to the file, which will allow you to easily connect and interact properly with the database. You can add it right after the APP_DEBUG=0 line within the .env file:
...
DATABASE_URL=mysql://blog-admin:password@localhost:3306/blog
The Symfony framework uses a third-party library called Doctrine to communicate with databases. Doctrine gives you useful tools to make interactions with databases easy and flexible.
You can now use Doctrine to update your database with the tables from the cloned Github application. Run this command to do that:
- php bin/console doctrine:schema:update --force
You’ll see the following output:
OutputUpdating database schema...
    4 queries were executed
[OK] Database schema updated successfully!
After setting up the required credentials and updating the database schema, you can now easily interact with the database. In order to start the application with some data, you will load a set of dummy data into the database in the next section.
Step 5 — Populating your Database Using Doctrine-Fixtures
At the moment, the newly created tables are empty. You will populate it using doctrine-fixtures. Using Doctrine-Fixtures is not a prerequisite for Symfony applications, it is only used to provide dummy data for your application.
Run the following command to automatically load testing data that contains the details of an author and a sample post into the database table created for the blog:
- php bin/console doctrine:fixtures:load
You will get a warning about the database getting purged. You can go ahead and type Y:
OutputCareful, database will be purged. Do you want to continue y/N ? y
  > purging database
  > loading App\DataFixtures\ORM\Fixtures
In the next section you will clear and warm up you cache.
Step 6 — Clearing and Warming Up your Cache
To ensure your application loads faster when users make requests, it is good practice to warm the cache during the deployment. Warming up the cache generates pages and stores them for faster responses later rather than building completely new pages. Fortunately, Symfony has a command to clear the cache that also triggers a warm up. Run the following command for that purpose:
- php bin/console cache:clear
You will see the following output:
OutputClearing the cache for the prod environment with debug false
[OK] Cache for the "prod" environment (debug=false) was successfully cleared.
You will conclude the set up in a bit. All that remains is to configure the web server. You will do that in the next section.
Step 7 — Configuring the Web Server and Running the Application
By now, you have Nginx installed to serve your pages and MySQL to store and manage your data. You will now configure the web server by creating a new application server block, instead of editing the default one.
Open a new server block with:
- sudo nano /etc/nginx/sites-available/blog
Add the following content to the new server block configuration file. Ensure you replace the your_server_ip within the server block with your server IP address:
server {
    listen 80;
    listen [::]:80;

    server_name blog your_server_ip;
    root /var/www/symfony-blog/public;
    index index.php;
    client_max_body_size 100m;

    location / {
        try_files $uri $uri/ /index.php$is_args$args;
    }

    location ~ \.php {
        try_files $uri /index.php =404;
        fastcgi_pass unix:/var/run/php/php7.2-fpm.sock;
        fastcgi_param SCRIPT_FILENAME $document_root$fastcgi_script_name;
        fastcgi_param SCRIPT_NAME $fastcgi_script_name;
        fastcgi_split_path_info ^(.+\.php)(/.+)$;
        fastcgi_index index.php;
        include fastcgi_params;
      }

    location ~ /\.(?:ht|git|svn) {
        deny all;
    }
}
First, we specified the listen directives for Nginx, which is by default on port 80, and then set the server name to match requests for the server’s IP address. Next, we used the root directives to specify the document root for the project. The symfony-blog application is stored in /var/www/symfony-blog, but to comply with best practices, we set the web root to /var/www/symfony-blog/public as only the /public subdirectory should be exposed to the internet. Finally, we configured the location directive to handle PHP processing.
After adding the content, save the file and exit the editor.
Note: If you created the file example.com in the prerequisite article How To Install Linux, Nginx, MySQL, PHP (LEMP stack) on Ubuntu 18.04, remove it from the sites-enabled directory with sudo rm /etc/nginx/sites-enabled/example.com so it doesn’t conflict with this new file.
To enable the newly created server block, we need to create a symbolic link from the new server block configuration file located in /etc/nginx/sites-available directory to the /etc/nginx/sites-enabled by using the following command:
- sudo ln -s /etc/nginx/sites-available/blog /etc/nginx/sites-enabled/
Check the new configuration file for any syntax errors by running:
- sudo nginx -t
This command will print errors to the console if there are any. Once there are no errors run this command to reload Nginx:
- sudo systemctl reload nginx
You just concluded the last step required to successfully deploy the Symfony 4 application. You configured the web server by creating a server block and properly set the web root in order to make the web application accessible.
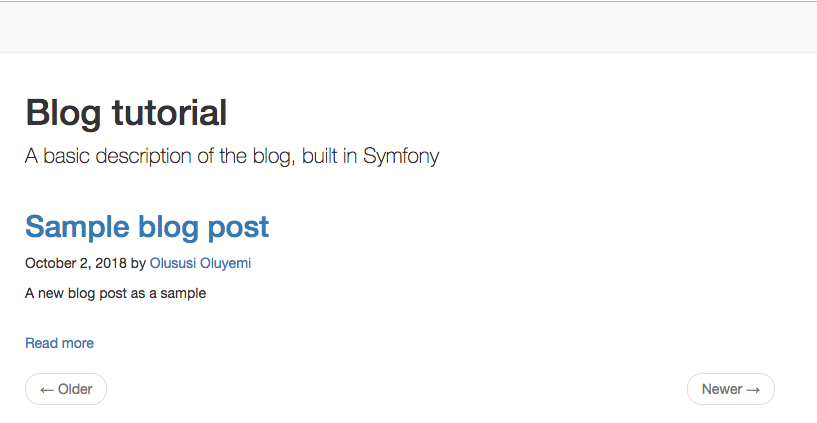
Finally, you can now run and test out the application. Visit http://your_server_ip in your favorite browser:
The following image is the screenshot of the Symfony blog application that you should see at your server’s IP address:
Conclusion
Symfony is a feature-rich PHP framework with an architecture that makes web development fun for the developer who builds software using it. Symfony is a feature-rich web development framework that provides developers powerful tools to build web applications. It’s often considered a good choice for enterprise applications due to its flexibility. The steps to deploy a typical Symfony application vary—depending on the setup, complexity, and the requirements of the application.
In this tutorial, you manually deployed a Symfony 4 application to production on an Ubuntu 18.04 server running LEMP. You can now apply this knowledge to deploying your own Symfony applications.
Thanks for learning with the DigitalOcean Community. Check out our offerings for compute, storage, networking, and managed databases.
About the author(s)
A tech enthusiast, programming freak and web development junkie
Former Senior Technical Editor at DigitalOcean, with a strong focus on DevOps and System Administration content. Areas of expertise include Terraform, PyTorch, Python, and Django.
Still looking for an answer?
This textbox defaults to using Markdown to format your answer.
You can type !ref in this text area to quickly search our full set of tutorials, documentation & marketplace offerings and insert the link!
Hello
You don’t deploy application like that at all… Do you know migrations ? + .env is not recommended (because the file is parsed - it’s recommanded to use real env vars)
You should considere using Deployer : http://deployer.org/
And finally a SIMPLE way to FAST deploy a symfony4 (test) app.
Thanks a lot !
I saw a link to this page at StackOverflow in an answer to a Symfony permissions question. That answer referenced changing the owner and group of the project directory to the non-root user. It was also down voted and later deleted. Any comment on why changing the owner and group would not be considered advisable?
 This work is licensed under a Creative Commons Attribution-NonCommercial- ShareAlike 4.0 International License.
Become a contributor for community
Get paid to write technical tutorials and select a tech-focused charity to receive a matching donation.

DigitalOcean Documentation
Full documentation for every DigitalOcean product.

Resources for startups and AI-native businesses
The Wave has everything you need to know about building a business, from raising funding to marketing your product.
The developer cloud
Scale up as you grow — whether you're running one virtual machine or ten thousand.

Start building today
From GPU-powered inference and Kubernetes to managed databases and storage, get everything you need to build, scale, and deploy intelligent applications.
