
Introduction
When introducing new versions of a service, it is often desirable to shift a controlled percentage of user traffic to a newer version of the service in the process of phasing out the older version. This technique is called a canary deployment.
Kubernetes cluster operators can orchestrate canary deployments natively using labels and Deployments. This technique has certain limitations, however: traffic distribution and replica counts are coupled, which in practice means replica ratios must be controlled manually in order to limit traffic to the canary release. In other words, to direct 10% of traffic to a canary deployment, you would need to have a pool of ten pods, with one pod receiving 10% of user traffic, and the other nine receiving the rest.
Deploying with an Istio service mesh can address this issue by enabling a clear separation between replica counts and traffic management. The Istio mesh allows fine-grained traffic control that decouples traffic distribution and management from replica scaling. Instead of manually controlling replica ratios, you can define traffic percentages and targets, and Istio will manage the rest.
In this tutorial, you will create a canary deployment using Istio and Kubernetes. You will deploy two versions of a demo Node.js application, and use Virtual Service and Destination Rule resources to configure traffic routing to both the newer and older versions. This will be a good starting point to build out future canary deployments with Istio.
Prerequisites
- A Kubernetes 1.10+ cluster with role-based access control (RBAC) enabled. This setup will use a DigitalOcean Kubernetes cluster with three nodes, but you are free to create a cluster using another method.
<$>[note] Note: We highly recommend a cluster with at least 8GB of available memory and 4vCPUs for this setup. This tutorial will use three of DigitalOcean’s standard 4GB/2vCPU Droplets as nodes. <$>
- The
kubectlcommand-line tool installed on a development server and configured to connect to your cluster. You can read more about installingkubectlin the official documentation. - Docker installed on your development server. If you are working with Ubuntu 18.04, follow Steps 1 and 2 of How To Install and Use Docker on Ubuntu 18.04; otherwise, follow the official documentation for information about installing on other operating systems. Be sure to add your non-root user to the
dockergroup, as described in Step 2 of the linked tutorial. - A Docker Hub account. For an overview of how to set this up, refer to this introduction to Docker Hub.
- Istio installed and configured following the instructions in How To Install and Use Istio With Kubernetes. You should also have the Grafana telemetry addon enabled and configured for external access.
Step 1 — Packaging the Application
In the prerequisite tutorial, How To Install and Use Istio With Kubernetes, you created a node-demo Docker image to run a shark information application and pushed this image to Docker Hub. In this step, you will create another image: a newer version of the application that you will use for your canary deployment.
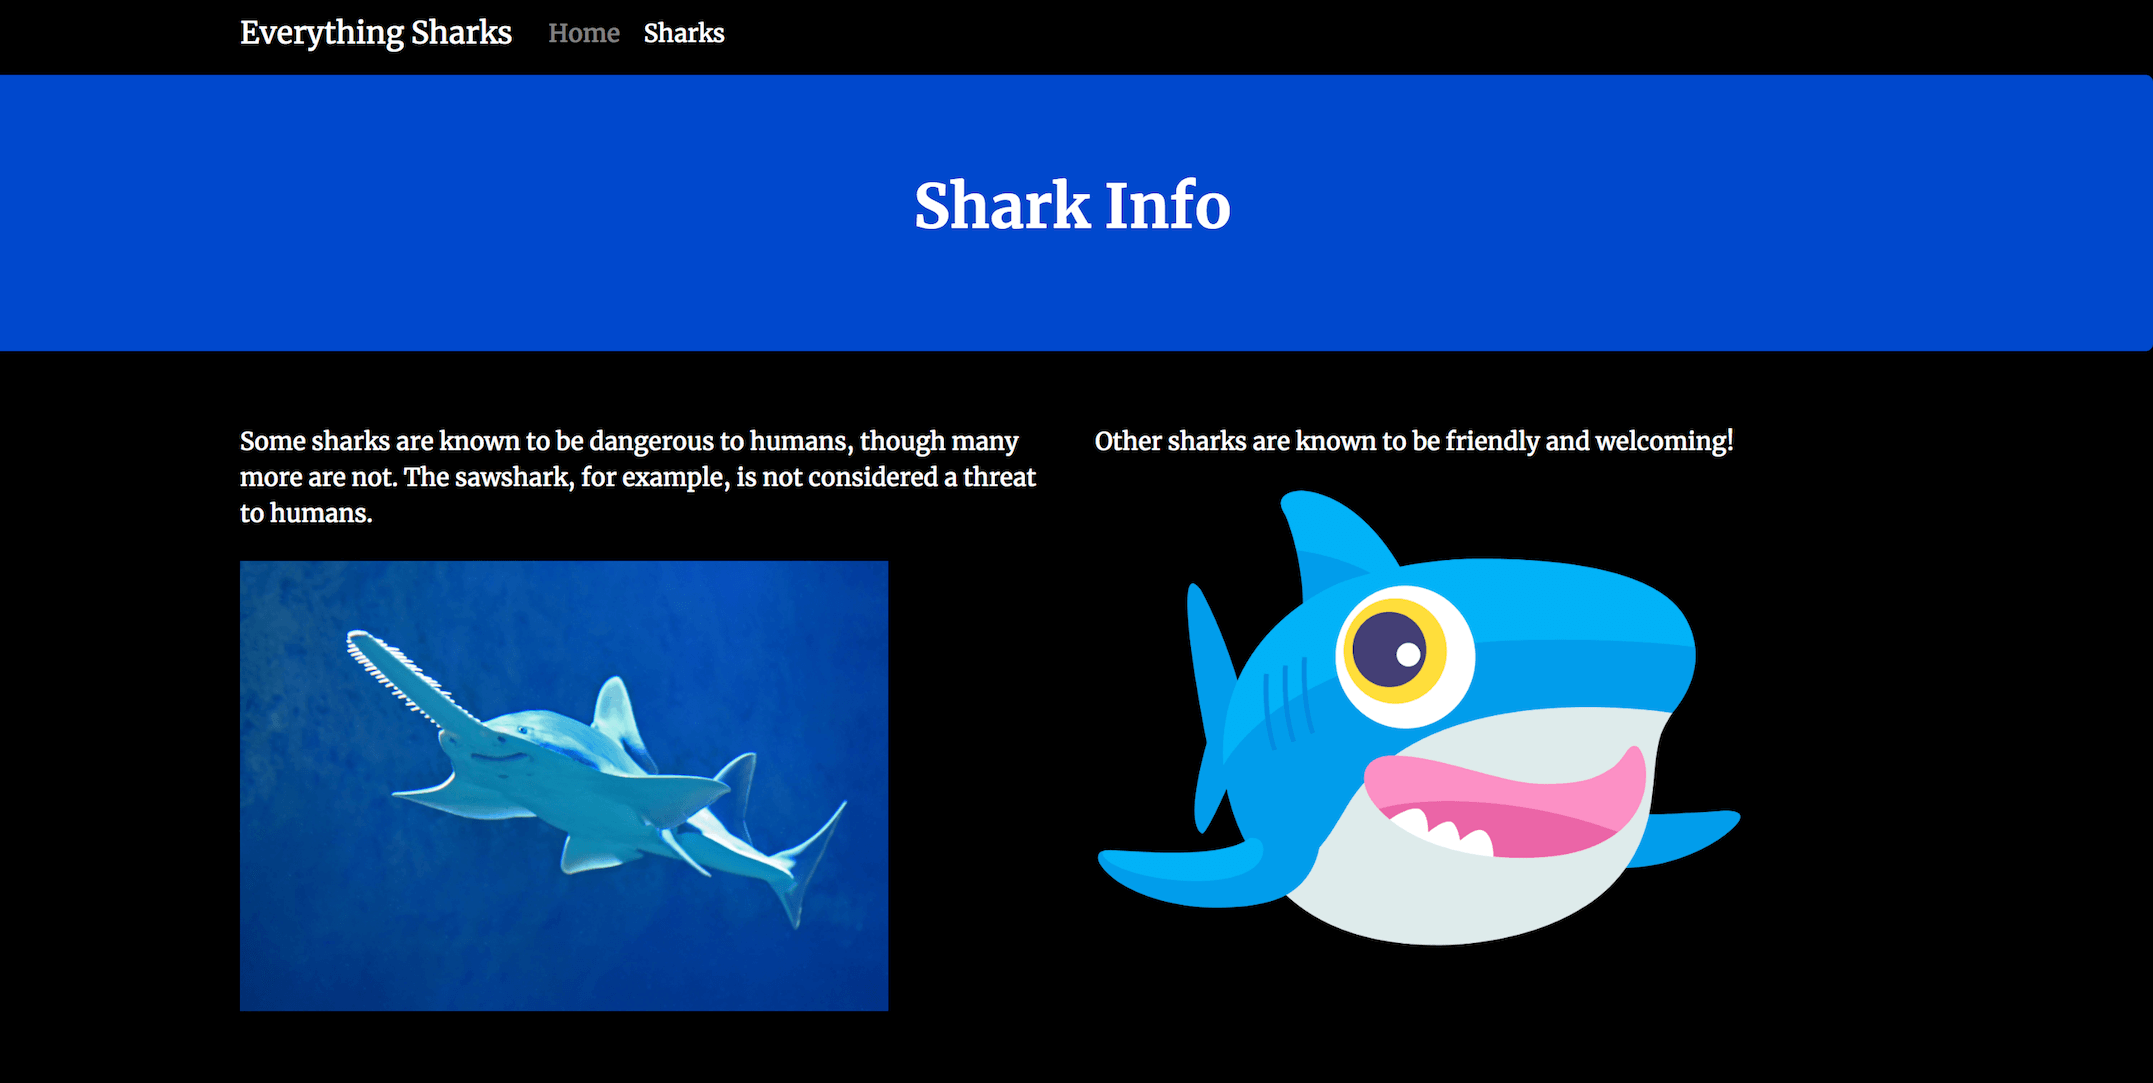
Our original demo application emphasized some friendly facts about sharks on its Shark Info page:
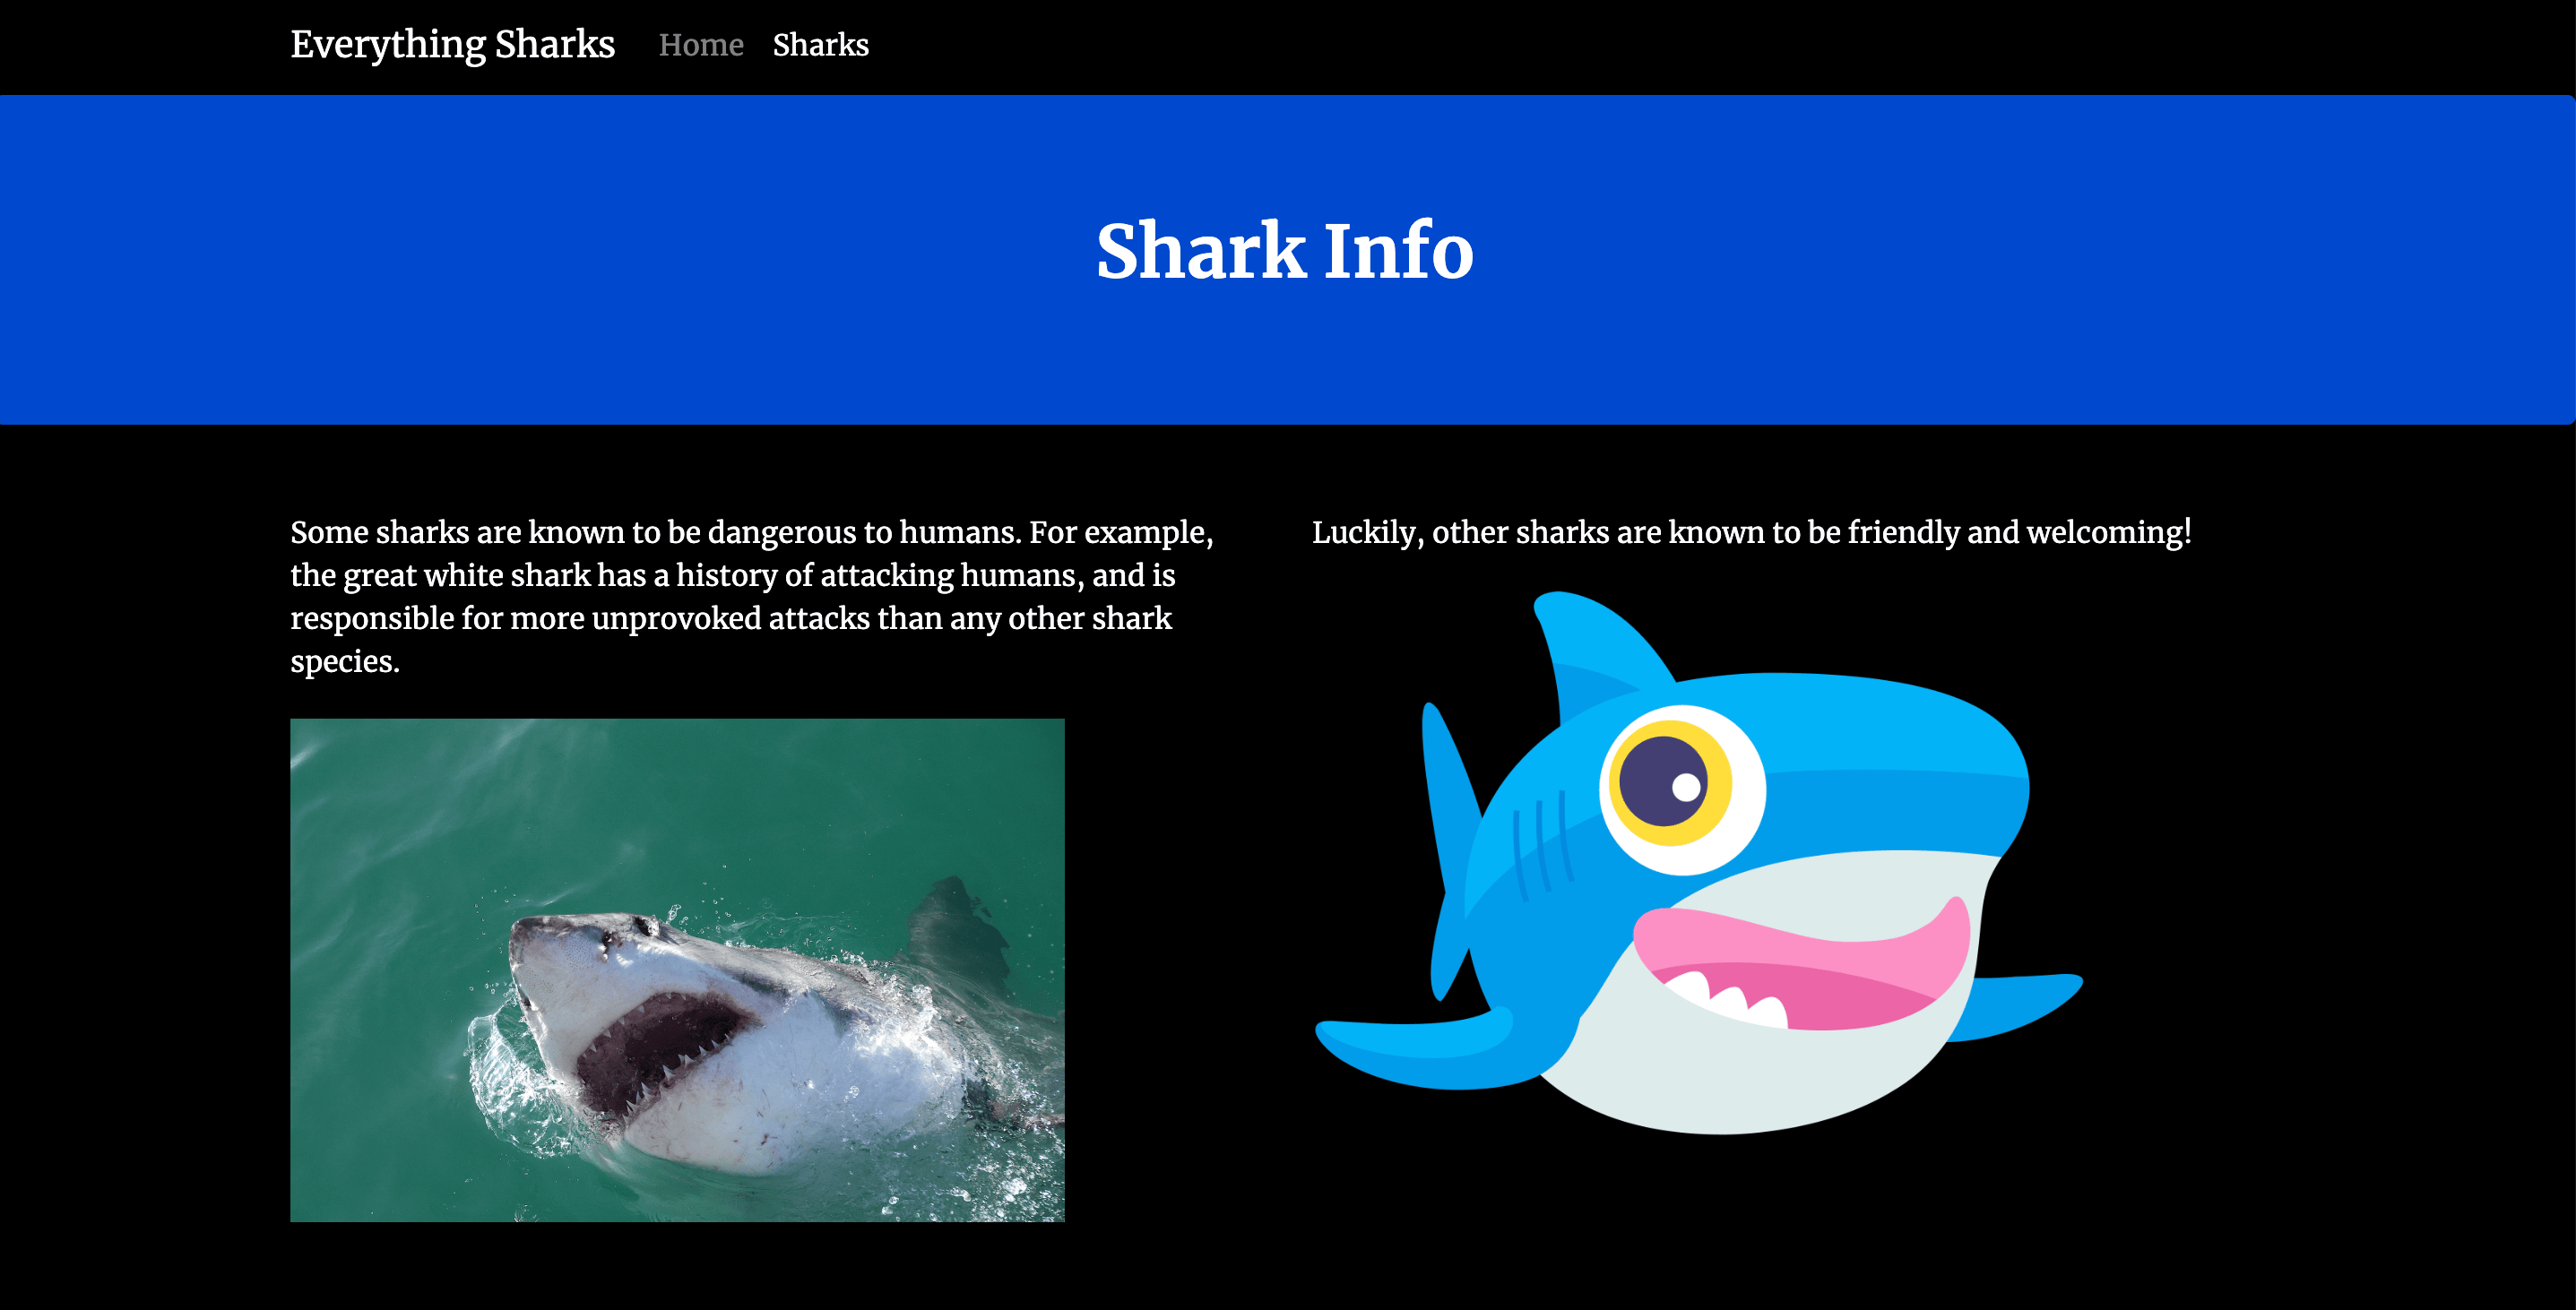
But we have decided in our new canary version to emphasize some scarier facts:
Our first step will be to clone the code for this second version of our application into a directory called node_image. Using the following command, clone the nodejs-canary-app repository from the DigitalOcean Community GitHub account. This repository contains the code for the second, scarier version of our application:
- git clone https://github.com/do-community/nodejs-canary-app.git node_image
Navigate to the node_image directory:
- cd node_image
This directory contains files and folders for the newer version of our shark information application, which offers users information about sharks, like the original application, but with an emphasis on scarier facts. In addition to the application files, the directory contains a Dockerfile with instructions for building a Docker image with the application code. For more information about the instructions in the Dockerfile, see Step 3 of How To Build a Node.js Application with Docker.
To test that the application code and Dockerfile work as expected, you can build and tag the image using the docker build command, and then use the image to run a demo container. Using the -t flag with docker build will allow you to tag the image with your Docker Hub username so that you can push it to Docker Hub once you’ve tested it.
Build the image with the following command:
- docker build -t your_dockerhub_username/node-demo-v2 .
The . in the command specifies that the build context is the current directory. We’ve named the image node-demo-v2, to reference the node-demo image we created in How To Install and Use Istio With Kubernetes.
Once the build process is complete, you can list your images with docker images:
- docker images
You will see the following output confirming the image build:
OutputREPOSITORY                            TAG                 IMAGE ID            CREATED             SIZE
your_dockerhub_username/node-demo-v2  latest              37f1c2939dbf        5 seconds ago       77.6MB
node                                  10-alpine           9dfa73010b19        2 days ago          75.3MB
Next, you’ll use docker run to create a container based on this image. We will include three flags with this command:
-p: This publishes the port on the container and maps it to a port on our host. We will use port80on the host, but you should feel free to modify this as necessary if you have another process running on that port. For more information about how this works, see this discussion in the Docker docs on port binding.-d: This runs the container in the background.--name: This allows us to give the container a customized name.
Run the following command to build the container:
- docker run --name node-demo-v2 -p 80:8080 -d your_dockerhub_username/node-demo-v2
Inspect your running containers with docker ps:
- docker ps
You will see output confirming that your application container is running:
OutputCONTAINER ID        IMAGE                                  COMMAND                  CREATED             STATUS              PORTS                  NAMES
49a67bafc325        your_dockerhub_username/node-demo-v2   "docker-entrypoint.s…"   8 seconds ago       Up 6 seconds        0.0.0.0:80->8080/tcp   node-demo-v2
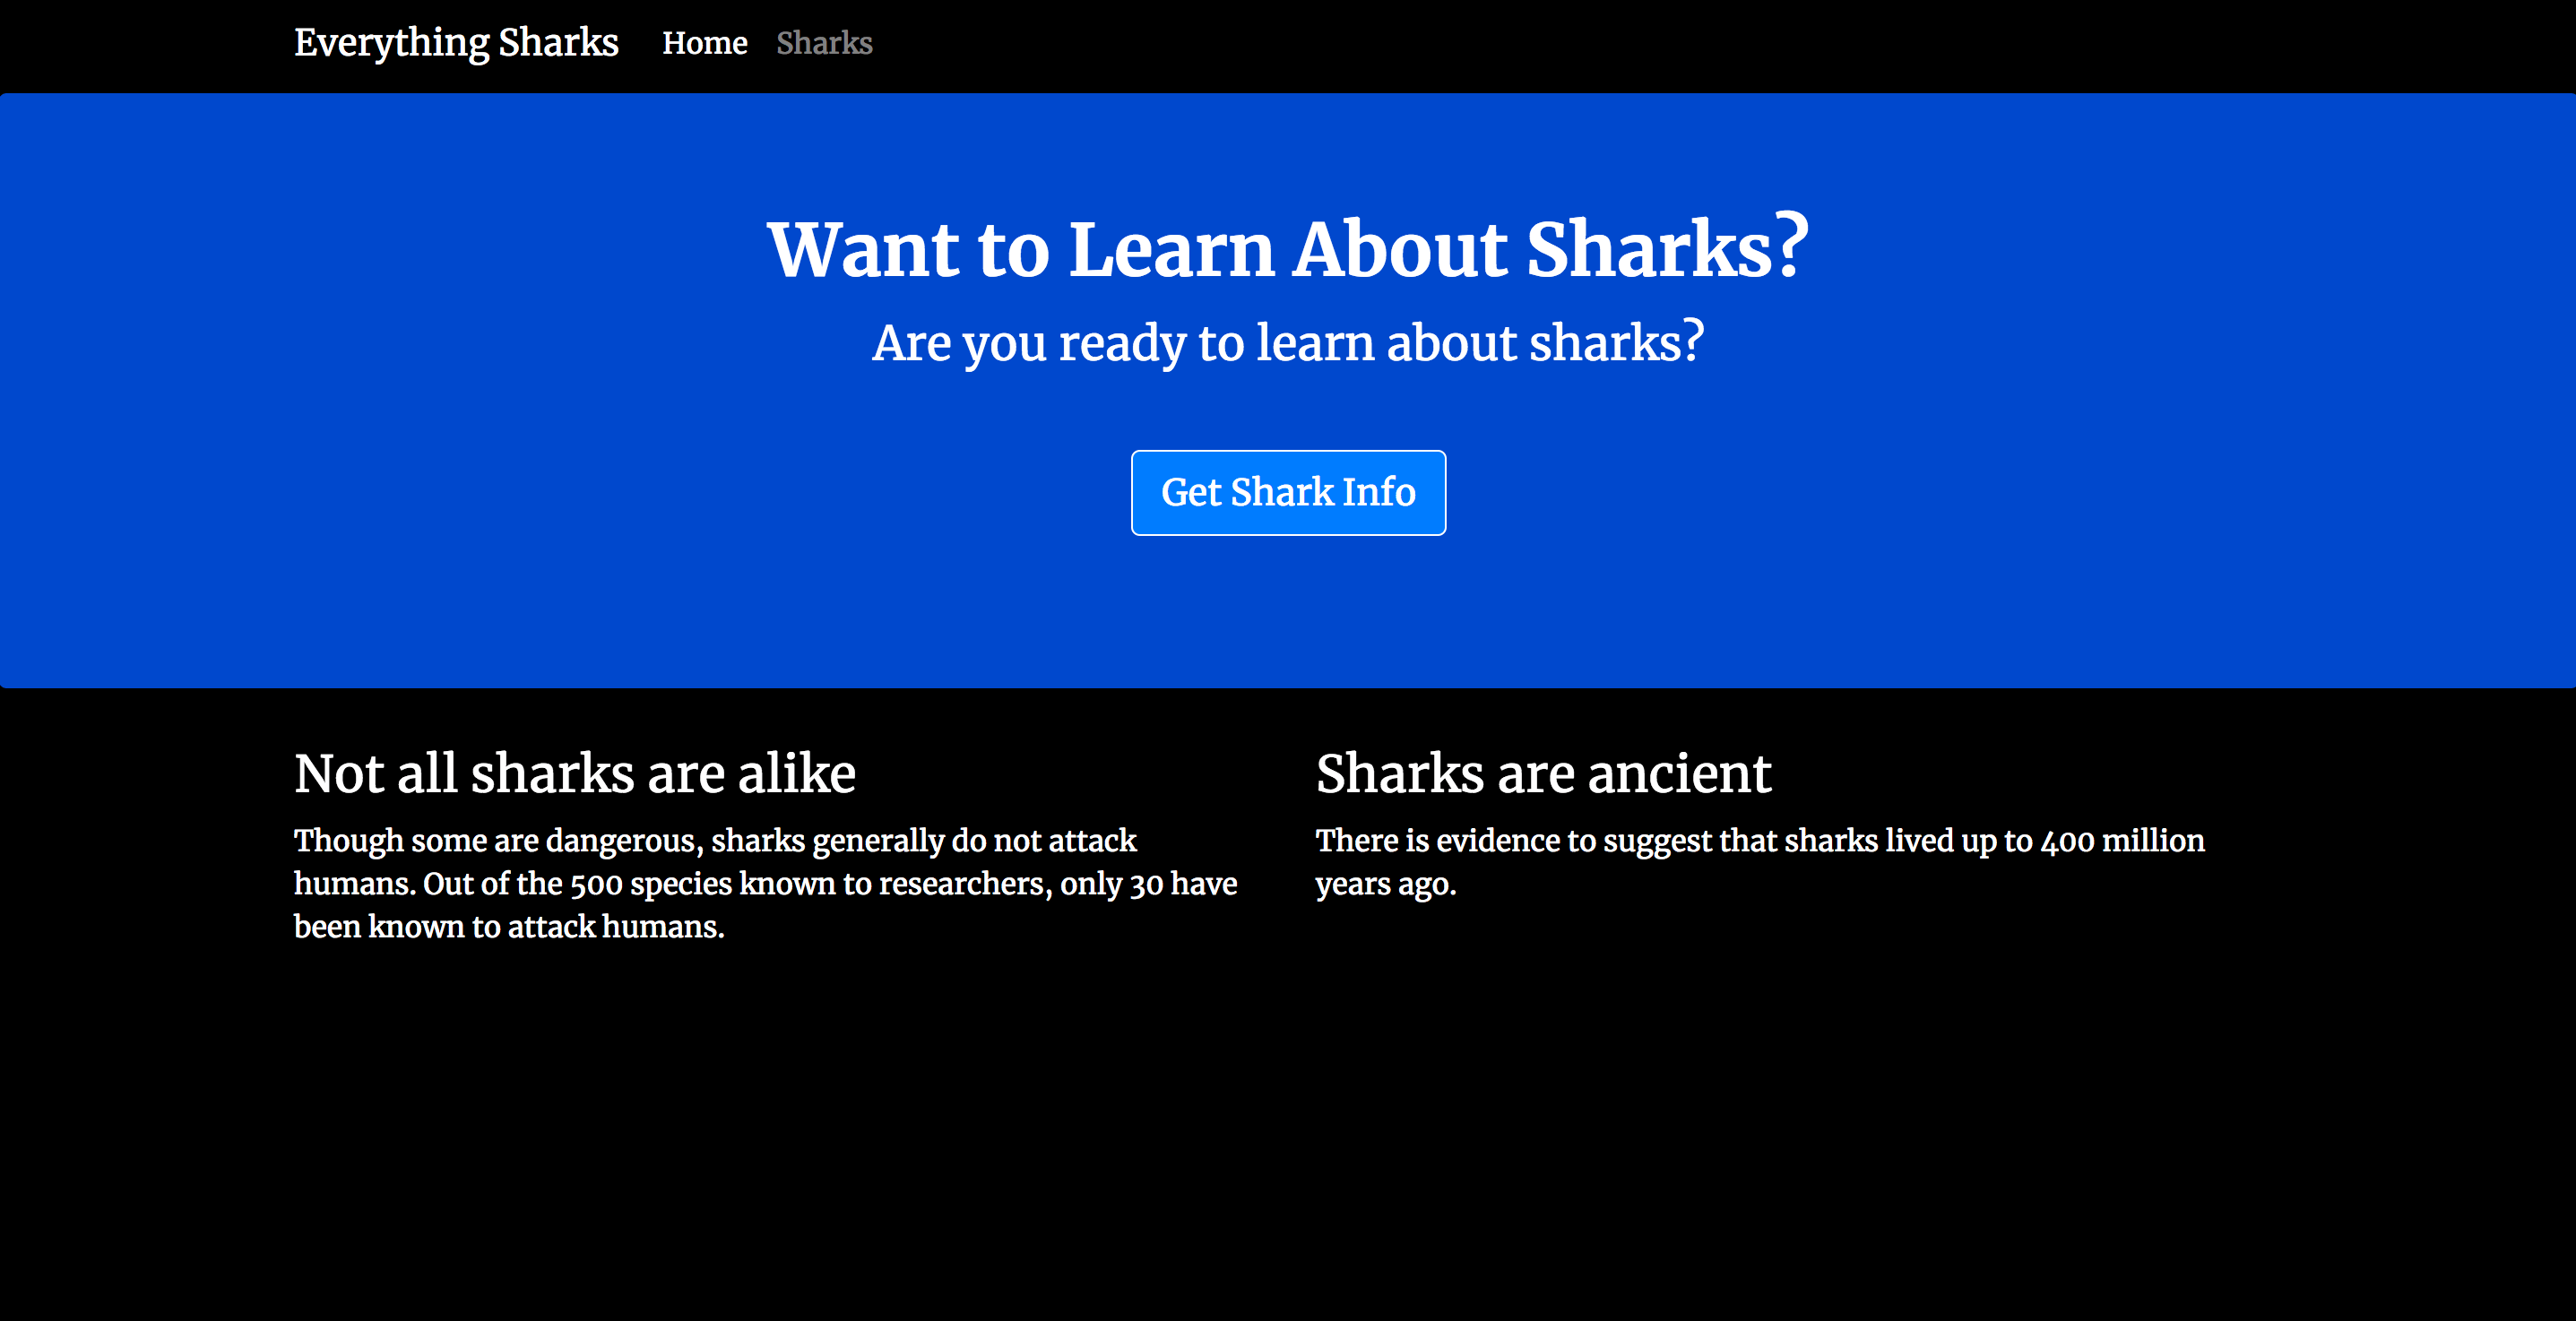
You can now visit your server IP in your browser to test your setup: http://your_server_ip. Your application will display the following landing page:
Click on the Get Shark Info button to get to the scarier shark information:
Now that you have tested the application, you can stop the running container. Use docker ps again to get your CONTAINER ID:
- docker ps
OutputCONTAINER ID        IMAGE                                  COMMAND                  CREATED              STATUS              PORTS                  NAMES
49a67bafc325        your_dockerhub_username/node-demo-v2   "docker-entrypoint.s…"   About a minute ago   Up About a minute   0.0.0.0:80->8080/tcp   node-demo-v2
Stop the container with docker stop. Be sure to replace the CONTAINER ID listed here with your own application CONTAINER ID:
- docker stop 49a67bafc325
Now that you have tested the image, you can push it to Docker Hub. First, log in to the Docker Hub account you created in the prerequisites:
- docker login -u your_dockerhub_username
When prompted, enter your Docker Hub account password. Logging in this way will create a ~/.docker/config.json file in your non-root user’s home directory with your Docker Hub credentials.
Push the application image to Docker Hub with the docker push command. Remember to replace your_dockerhub_username with your own Docker Hub username:
- docker push your_dockerhub_username/node-demo-v2
You now have two application images saved to Docker Hub: the node-demo image, and node-demo-v2. We will now modify the manifests you created in the prerequisite tutorial How To Install and Use Istio With Kubernetes to direct traffic to the canary version of your application.
Step 2 — Modifying the Application Deployment
In How To Install and Use Istio With Kubernetes, you created an application manifest with specifications for your application Service and Deployment objects. These specifications describe each object’s desired state. In this step, you will add a Deployment for the second version of your application to this manifest, along with version labels that will enable Istio to manage these resources.
When you followed the setup instructions in the prerequisite tutorial, you created a directory called istio_project and two yaml manifests: node-app.yaml, which contains the specifications for your Service and Deployment objects, and node-istio.yaml, which contains specifications for your Istio Virtual Service and Gateway resources.
Navigate to the istio_project directory now:
- cd
- cd istio_project
Open node-app.yaml with nano or your favorite editor to make changes to your application manifest:
- nano node-app.yaml
Currently, the file looks like this:
apiVersion: v1
kind: Service
metadata:
  name: nodejs
  labels:
    app: nodejs
spec:
  selector:
    app: nodejs
  ports:
  - name: http
    port: 8080
---
apiVersion: apps/v1
kind: Deployment
metadata:
  name: nodejs
  labels:
    version: v1
spec:
  replicas: 1
  selector:
    matchLabels:
      app: nodejs
  template:
    metadata:
      labels:
        app: nodejs
        version: v1
    spec:
      containers:
      - name: nodejs
        image: your_dockerhub_username/node-demo
        ports:
        - containerPort: 8080
For a full explanation of this file’s contents, see Step 3 of How To Install and Use Istio With Kubernetes.
We have already included version labels in our Deployment metadata and template fields, following Istio’s recommendations for Pods and Services. Now we can add specifications for a second Deployment object, which will represent the second version of our application, and make a quick modification to the name of our first Deployment object.
First, change the name of your existing Deployment object to nodejs-v1:
...
apiVersion: apps/v1
kind: Deployment
metadata:
  name: nodejs-v1
  labels:
    version: v1
...
Next, below the specifications for this Deployment, add the specifications for your second Deployment. Remember to add the name of your own image to the image field:
...
---
apiVersion: apps/v1
kind: Deployment
metadata:
  name: nodejs-v2
  labels:
    version: v2
spec:
  replicas: 1
  selector:
    matchLabels:
      app: nodejs
  template:
    metadata:
      labels:
        app: nodejs
        version: v2
    spec:
      containers:
      - name: nodejs
        image: your_dockerhub_username/node-demo-v2
        ports:
        - containerPort: 8080
Like the first Deployment, this Deployment uses a version label to specify the version of the application that corresponds to this Deployment. In this case, v2 will distinguish the application version associated with this Deployment from v1, which corresponds to our first Deployment.
We’ve also ensured that the Pods managed by the v2 Deployment will run the node-demo-v2 canary image, which we built in the previous Step.
Save and close the file when you are finished editing.
With your application manifest modified, you can move on to making changes to your node-istio.yaml file.
Step 3 — Weighting Traffic with Virtual Services and Adding Destination Rules
In How To Install and Use Istio With Kubernetes, you created Gateway and Virtual Service objects to allow external traffic into the Istio mesh and route it to your application Service. Here, you will modify your Virtual Service configuration to include routing to your application Service subsets — v1 and v2. You will also add a Destination Rule to define additional, version-based policies to the routing rules you are applying to your nodejs application Service.
Open the node-istio.yaml file:
- nano node-istio.yaml
Currently, the file looks like this:
apiVersion: networking.istio.io/v1alpha3
kind: Gateway
metadata:
  name: nodejs-gateway
spec:
  selector:
    istio: ingressgateway
  servers:
  - port:
      number: 80
      name: http
      protocol: HTTP
    hosts:
    - "*"
---
apiVersion: networking.istio.io/v1alpha3
kind: VirtualService
metadata:
  name: nodejs
spec:
  hosts:
  - "*"
  gateways:
  - nodejs-gateway
  http:
  - route:
    - destination:
        host: nodejs
For a complete explanation of the specifications in this manifest, see Step 4 of How To Install and Use Istio With Kubernetes.
Our first modification will be to the Virtual Service. Currently, this resource routes traffic entering the mesh through our nodejs-gateway to our nodejs application Service. What we would like to do is configure a routing rule that will send 80% of traffic to our original application, and 20% to the newer version. Once we are satisfied with the canary’s performance, we can reconfigure our traffic rules to gradually send all traffic to the newer application version.
Instead of routing to a single destination, as we did in the original manifest, we will add destination fields for both of our application subsets: the original version (v1) and the canary (v2).
Make the following additions to the Virtual Service to create this routing rule:
...
apiVersion: networking.istio.io/v1alpha3
kind: VirtualService
metadata:
  name: nodejs
spec:
  hosts:
  - "*"
  gateways:
  - nodejs-gateway
  http:
  - route:
    - destination:
        host: nodejs
        subset: v1
      weight: 80
    - destination:
        host: nodejs
        subset: v2
      weight: 20
The policy that we have added includes two destinations: the subset of our nodejs Service that is running the original version of our application, v1, and the subset that is running the canary, v2. Subset one will receive 80% of incoming traffic, while the canary will receive 20%.
Next, we will add a Destination Rule that will apply rules to incoming traffic after that traffic has been routed to the appropriate Service. In our case, we will configure subset fields to send traffic to Pods with the appropriate version labels.
Add the following code below your Virtual Service definition:
...
---
apiVersion: networking.istio.io/v1alpha3
kind: DestinationRule
metadata:
  name: nodejs
spec:
  host: nodejs
  subsets:
  - name: v1
    labels:
      version: v1
  - name: v2
    labels:
      version: v2
Our Rule ensures that traffic to our Service subsets, v1 and v2, reaches Pods with the appropriate labels: version: v1 and version: v2. These are the labels that we included in our application Deployment specs.
If we wanted, however, we could also apply specific traffic policies at the subset level, enabling further specificity in our canary deployments. For additional information about defining traffic policies at this level, see the official Istio documentation.
Save and close the file when you have finished editing.
With your application manifests revised, you are ready to apply your configuration changes and examine your application traffic data using the Grafana telemetry addon.
Step 4 — Applying Configuration Changes and Accessing Traffic Data
The application manifests are updated, but we still need to apply these changes to our Kubernetes cluster. We’ll use the kubectl apply command to apply our changes without completely overwriting the existing configuration. After doing this, you will be able to generate some requests to your application and look at the associated data in your Istio Grafana dashboards.
Apply your configuration to your application Service and Deployment objects:
- kubectl apply -f node-app.yaml
You will see the following output:
Outputservice/nodejs unchanged
deployment.apps/nodejs-v1 created
deployment.apps/nodejs-v2 created
Next, apply the configuration updates you’ve made to node-istio.yaml, which include the changes to the Virtual Service and the new Destination Rule:
- kubectl apply -f node-istio.yaml
You will see the following output:
Outputgateway.networking.istio.io/nodejs-gateway unchanged
virtualservice.networking.istio.io/nodejs configured
destinationrule.networking.istio.io/nodejs created
You are now ready to generate traffic to your application. Before doing that, however, first check to be sure that you have the grafana Service running:
- kubectl get svc -n istio-system | grep grafana
Outputgrafana ClusterIP 10.245.233.51 <none> 3000/TCP 4d2h
Also check for the associated Pods:
- kubectl get svc -n istio-system | grep grafana
Outputgrafana-67c69bb567-jpf6h 1/1 Running 0 4d2h
Finally, check for the grafana-gateway Gateway and grafana-vs Virtual Service:
- kubectl get gateway -n istio-system | grep grafana
Outputgrafana-gateway 3d5h
- kubectl get virtualservice -n istio-system | grep grafana
Outputgrafana-vs [grafana-gateway] [*] 4d2h
If you don’t see output from these commands, check Steps 2 and 5 of How To Install and Use Istio With Kubernetes, which discuss how to enable the Grafana telemetry addon when installing Istio and how to enable HTTP access to the Grafana Service.
You can now access your application in the browser. To do this, you will need the external IP associated with your istio-ingressgateway Service, which is a LoadBalancer Service type. We matched our nodejs-gateway Gateway with this controller when writing our Gateway manifest in How To Install and Use Istio With Kubernetes. For more detail on the Gateway manifest, see Step 4 of that tutorial.
Get the external IP for the istio-ingressgateway Service with the following command:
- kubectl get svc -n istio-system
You will see output like the following:
OutputNAME                     TYPE           CLUSTER-IP       EXTERNAL-IP       PORT(S)                                                                                                                                      AGE
grafana                  ClusterIP      10.245.85.162    <none>            3000/TCP                                                                                                                                     42m
istio-citadel            ClusterIP      10.245.135.45    <none>            8060/TCP,15014/TCP                                                                                                                           42m
istio-galley             ClusterIP      10.245.46.245    <none>            443/TCP,15014/TCP,9901/TCP                                                                                                                   42m
istio-ingressgateway     LoadBalancer   10.245.171.39    ingressgateway_ip 15020:30707/TCP,80:31380/TCP,443:31390/TCP,31400:31400/TCP,15029:30285/TCP,15030:31668/TCP,15031:32297/TCP,15032:30853/TCP,15443:30406/TCP   42m
istio-pilot              ClusterIP      10.245.56.97     <none>            15010/TCP,15011/TCP,8080/TCP,15014/TCP                                                                                                       42m
istio-policy             ClusterIP      10.245.206.189   <none>            9091/TCP,15004/TCP,15014/TCP                                                                                                                 42m
istio-sidecar-injector   ClusterIP      10.245.223.99    <none>            443/TCP                                                                                                                                      42m
istio-telemetry          ClusterIP      10.245.5.215     <none>            9091/TCP,15004/TCP,15014/TCP,42422/TCP                                                                                                       42m
prometheus               ClusterIP      10.245.100.132   <none>            9090/TCP                                                                                                                                     42m
The istio-ingressgateway should be the only Service with the TYPE LoadBalancer, and the only Service with an external IP.
Navigate to this external IP in your browser: http://ingressgateway_ip.
You should see the following landing page:
Click on Get Shark Info button. You will see one of two shark information pages:
Click refresh on this page a few times. You should see the friendlier shark information page more often than the scarier version.
Once you have generated some load by refreshing five or six times, you can head over to your Grafana dashboards.
In your browser, navigate to the following address, again using your istio-ingressgateway external IP and the port that’s defined in the Grafana Gateway manifest: http://ingressgateway_ip:15031.
You will see the following landing page:
Clicking on Home at the top of the page will bring you to a page with an istio folder. To get a list of dropdown options, click on the istio folder icon:
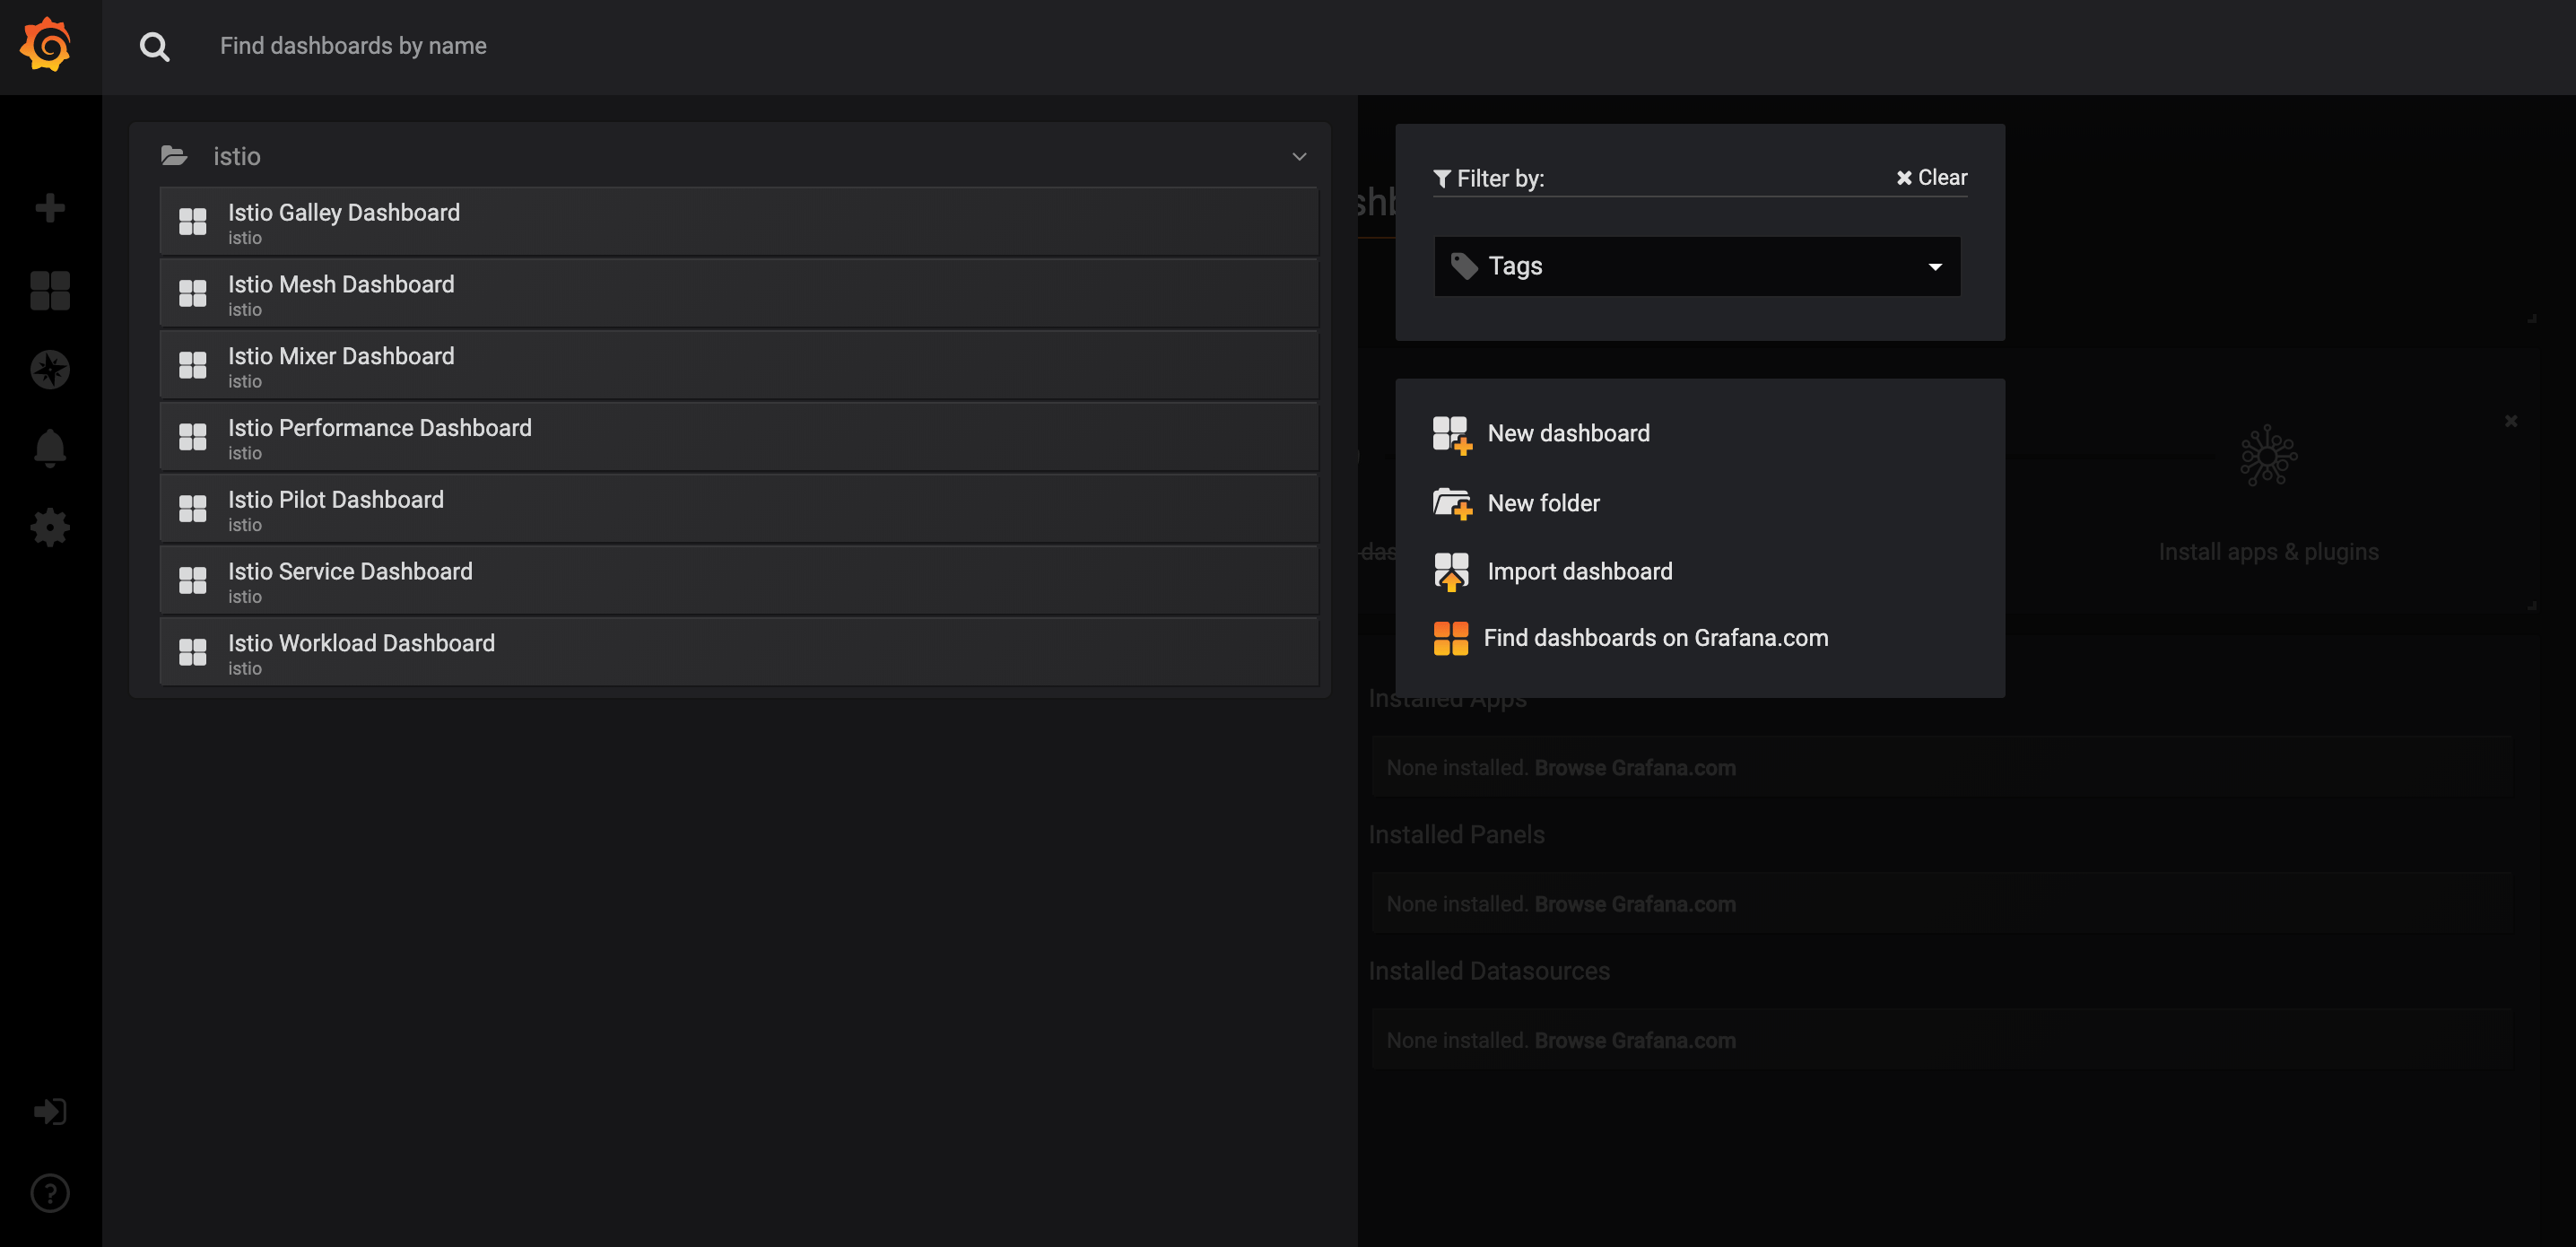
From this list of options, click on Istio Service Dashboard.
This will bring you to a landing page with another dropdown menu:
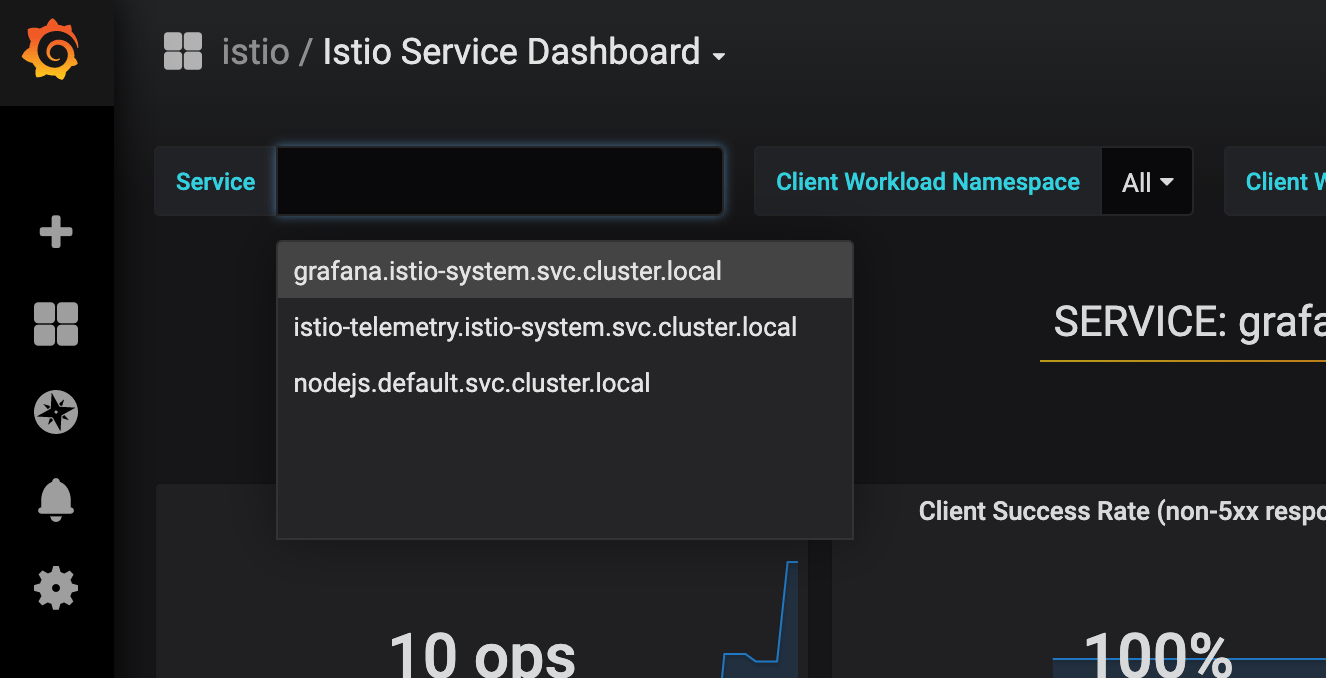
Select nodejs.default.svc.cluster.local from the list of available options.
If you navigate down to the Service Workloads section of the page, you will be able to look at Incoming Requests by Destination And Response Code:
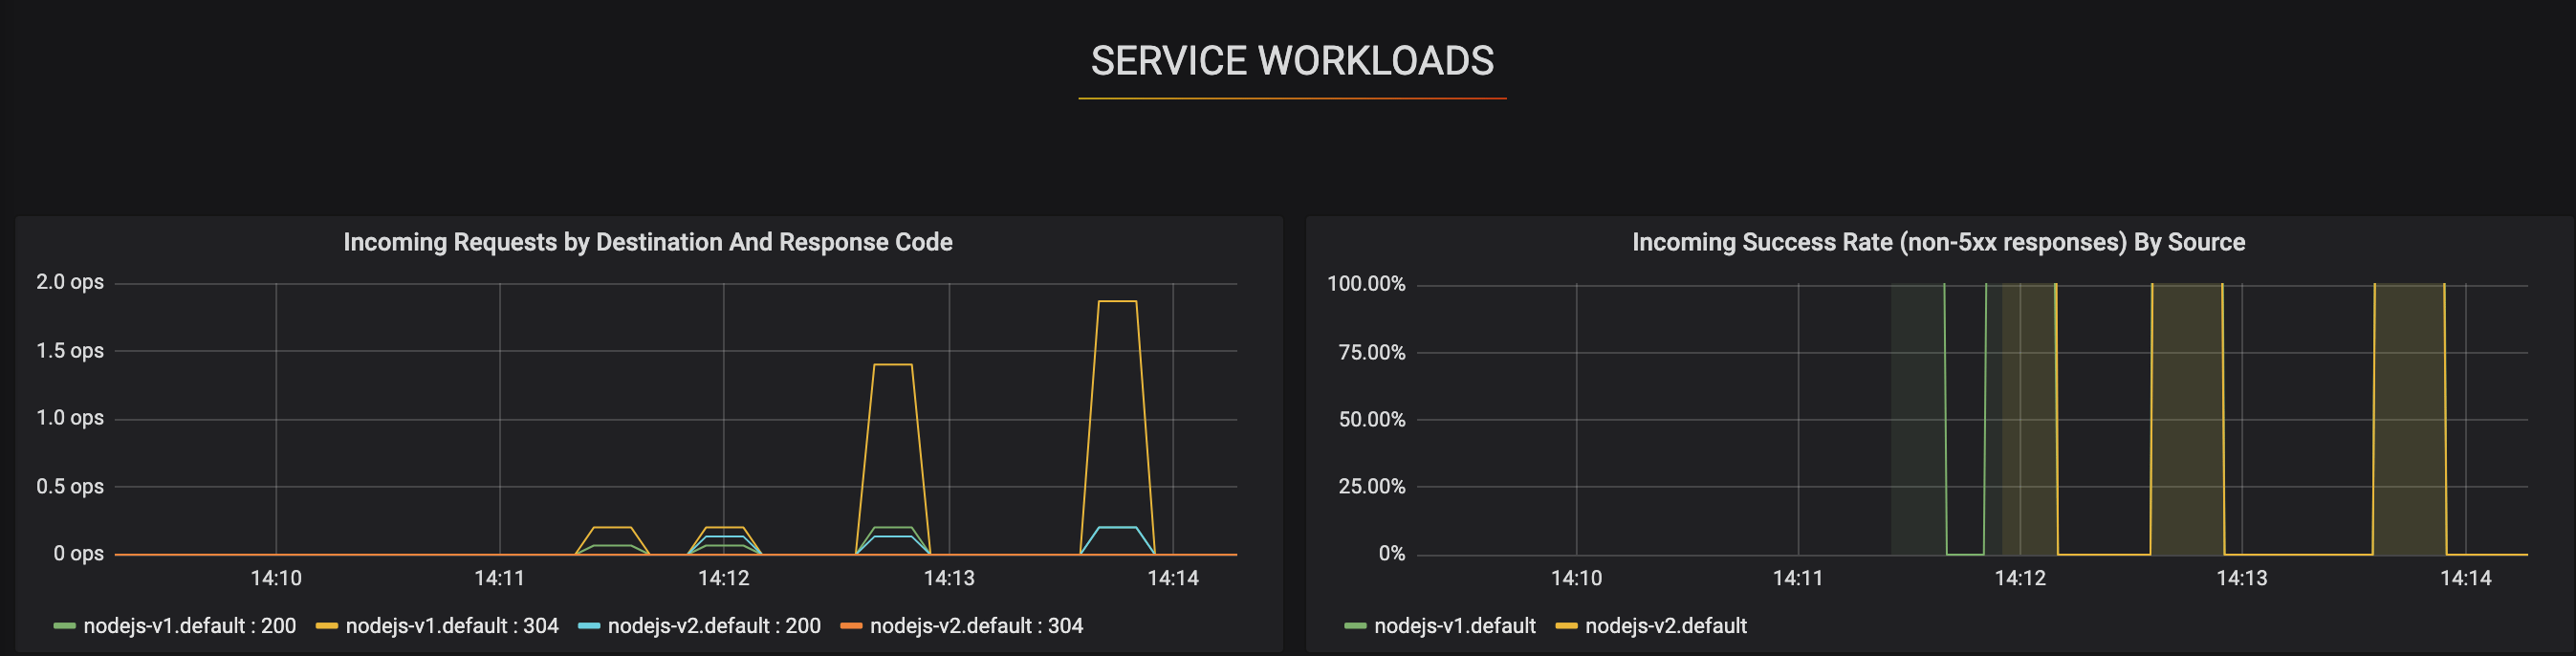
Here, you will see a combination of 200 and 304 HTTP response codes, indicating successful OK and Not Modified responses. The responses labeled nodejs-v1 should outnumber the responses labeled nodejs-v2, indicating that incoming traffic is being routed to our application subsets following the parameters we defined in our manifests.
Conclusion
In this tutorial, you deployed a canary version of a demo Node.js application using Istio and Kubernetes. You created Virtual Service and Destination Rule resources that together allowed you to send 80% of your traffic to your original application service, and 20% to the newer version. Once you are satisfied with the performance of the newer application version, you can update your configuration settings as desired.
For more information about traffic management in Istio, see the related high-level overview in the documentation, as well as specific examples that use Istio’s bookinfo and helloworld sample applications.
Thanks for learning with the DigitalOcean Community. Check out our offerings for compute, storage, networking, and managed databases.
About the author
Former Developer at DigitalOcean community. Expertise in areas including Ubuntu, Docker, Ruby on Rails, Debian, and more.
Still looking for an answer?
This textbox defaults to using Markdown to format your answer.
You can type !ref in this text area to quickly search our full set of tutorials, documentation & marketplace offerings and insert the link!
 This work is licensed under a Creative Commons Attribution-NonCommercial- ShareAlike 4.0 International License.
Become a contributor for community
Get paid to write technical tutorials and select a tech-focused charity to receive a matching donation.

DigitalOcean Documentation
Full documentation for every DigitalOcean product.

Resources for startups and AI-native businesses
The Wave has everything you need to know about building a business, from raising funding to marketing your product.
The developer cloud
Scale up as you grow — whether you're running one virtual machine or ten thousand.

Start building today
From GPU-powered inference and Kubernetes to managed databases and storage, get everything you need to build, scale, and deploy intelligent applications.
