By Donald Le and Adaobi Obi Tulton

The author selected Open Sourcing Mental Illness to receive a donation as part of the Write for DOnations program.
Introduction
Testing is crucial for ensuring a software product works as expected. Traditionally, QA teams often manually execute a lot of end-to-end tests for web applications. However, QA teams spend a considerable amount of effort preparing testing data, implementing the tests, and maintaining them over time. The tests are also flaky since they require integration between multiple services, third-party dependencies, and databases. These issues are why component testing for web applications is important and is now getting more attention from both software developers and QA engineers. Component testing allows them to test their graphical user interface (GUI) early, and it reduces the time and effort they need to implement, create, execute, and maintain the tests over time.
Playwright, a convenient tool for end-to-end testing and interacting with web browsers in general, recently started supporting component testing. Playwright allows developers to write tests for their GUI without waiting for backend services to be completed and without creating a bunch of mock APIs in the mock servers to integrate with. In addition, Playwright has features that support component testing with some popular web frameworks like React, an open-source JavaScript library for building user interfaces. It also has support for major browsers such as Chromium, Firefox, and WebKit-based browsers. You can also use multiple client languages, such as Java, Python, C#, or Node.js, to write tests in Playwright.
In this tutorial, you will implement Playwright for component testing with an existing React application. You will deploy a weather app using React and then use Playwright to write and run component tests for the app to ensure the components are working properly.
Prerequisites
To follow along with this tutorial, you will need the following:
-
An Ubuntu 20.04 server with a sudo-enabled, non-root user and at least 2GB of RAM. To get started, follow our Initial Server Setup Guide for Ubuntu 20.04.
-
Node.js version 16 or greater set up on your server. To install Node.js, follow Option 2 of our tutorial How To Install Node.js on Ubuntu 20.04 to ensure you are installing the correct version.
-
Git installed on the server. Read our tutorial How To Install Git on Ubuntu 20.04 to install Git if it is not already installed.
-
Familiarity with front-end development using JavaScript with React.
-
Knowledge of end-to-end testing, unit testing, and API testing.
Step 1 — Deploying a Weather App Using React
In this step, you will deploy the React-based weather app you will need for this tutorial. The app uses the free version of OpenWeather’s APIs to access current weather data in any city.
To deploy the app on your server, first create a new directory to store the code for the application and then change to the newly created directory. Make sure to replace Projects with your preferred directory name:
mkdir Projects
cd Projects
Next, clone the application code from GitHub:
git clone https://github.com/do-community/react-component-testing-demo.git
Then, change to the react-component-testing-demo directory and use the git checkout command to check out the app branch:
cd react-component-testing-demo
git checkout app
Next, install the dependencies for the weather application:
npm install
After installation is complete, open your application:
npm run start
The console will display the following output:
OutputCompiled successfully!

You can now view demo-playwright-component-testing in the browser.

  Local:            http://localhost:3000/demo-playwright-component-testing
  On Your Network:  http://192.168.1.7:3000/demo-playwright-component-testing

Note that the development build is not optimized.
Note: If you are executing these commands on a local machine that supports a graphical user interface (GUI) and have a browser like Chrome or Firefox already installed, the weather app will open when you navigate to the URL displayed in the output: http://localhost:3000/demo-playwright-component-testing. However, if you are executing these commands on a remote server, you need to use port forwarding via SSH to open the app on your local machine.
In a new terminal, run the following command:
ssh -L 3000:localhost:3000 your_non_root_user@your_server_ip
Upon connecting to the server, navigate to http://localhost:3000/demo-playwright-component-testing on your local machine’s web browser. Keep the second terminal open throughout the remainder of this tutorial.
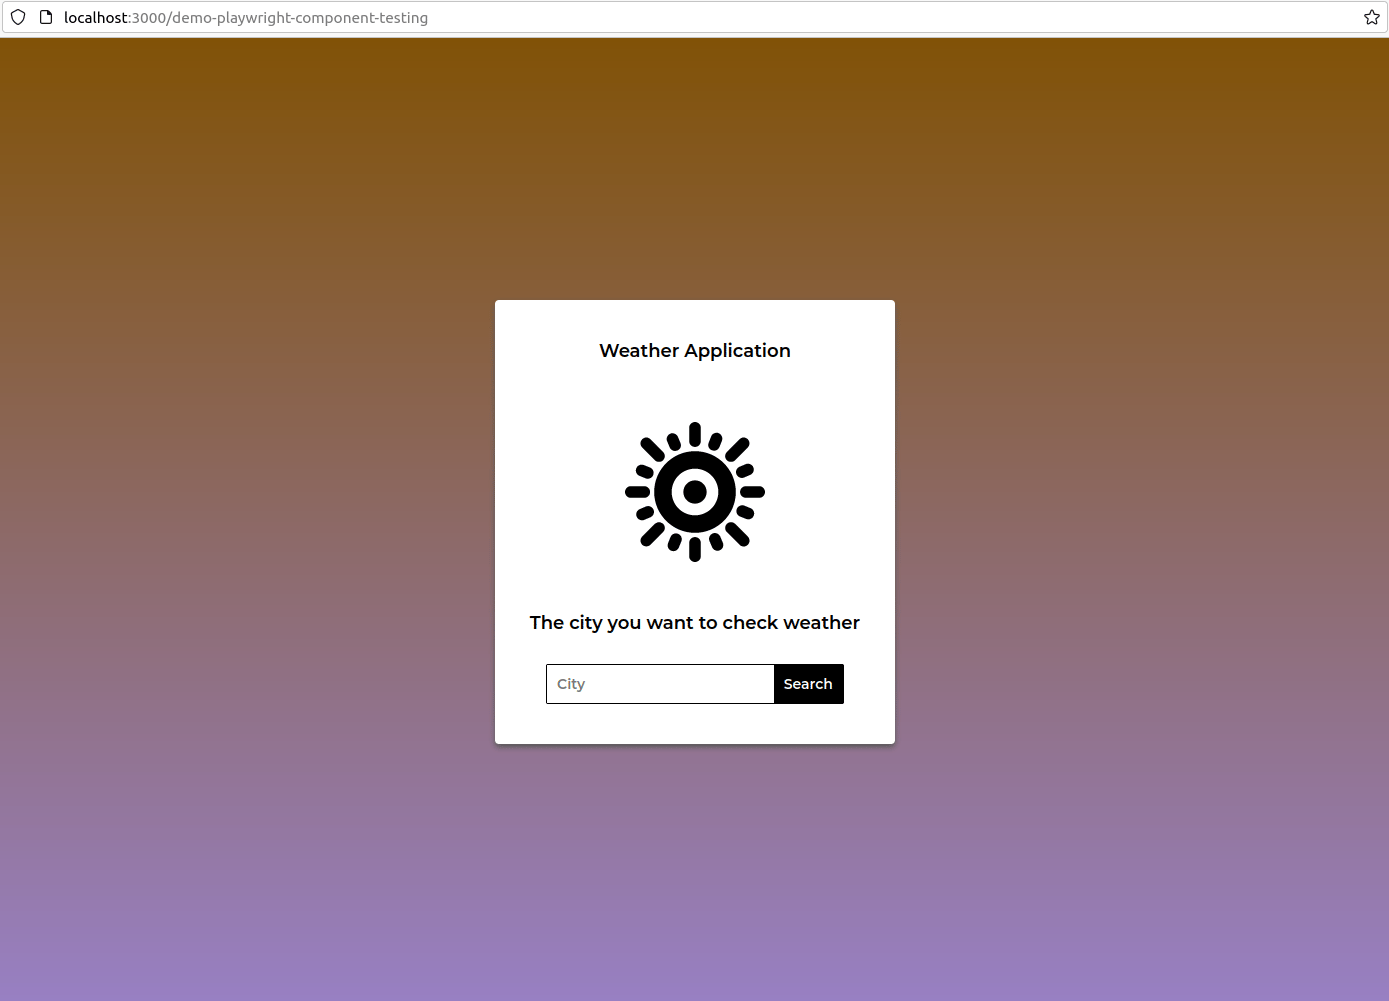
Your browser will open the home page of the application, which displays a City search box where a user will type the city they want to check the weather for:
Type in Hanoi (which is in Vietnam) in the search box. The app will display the current weather in Hanoi:
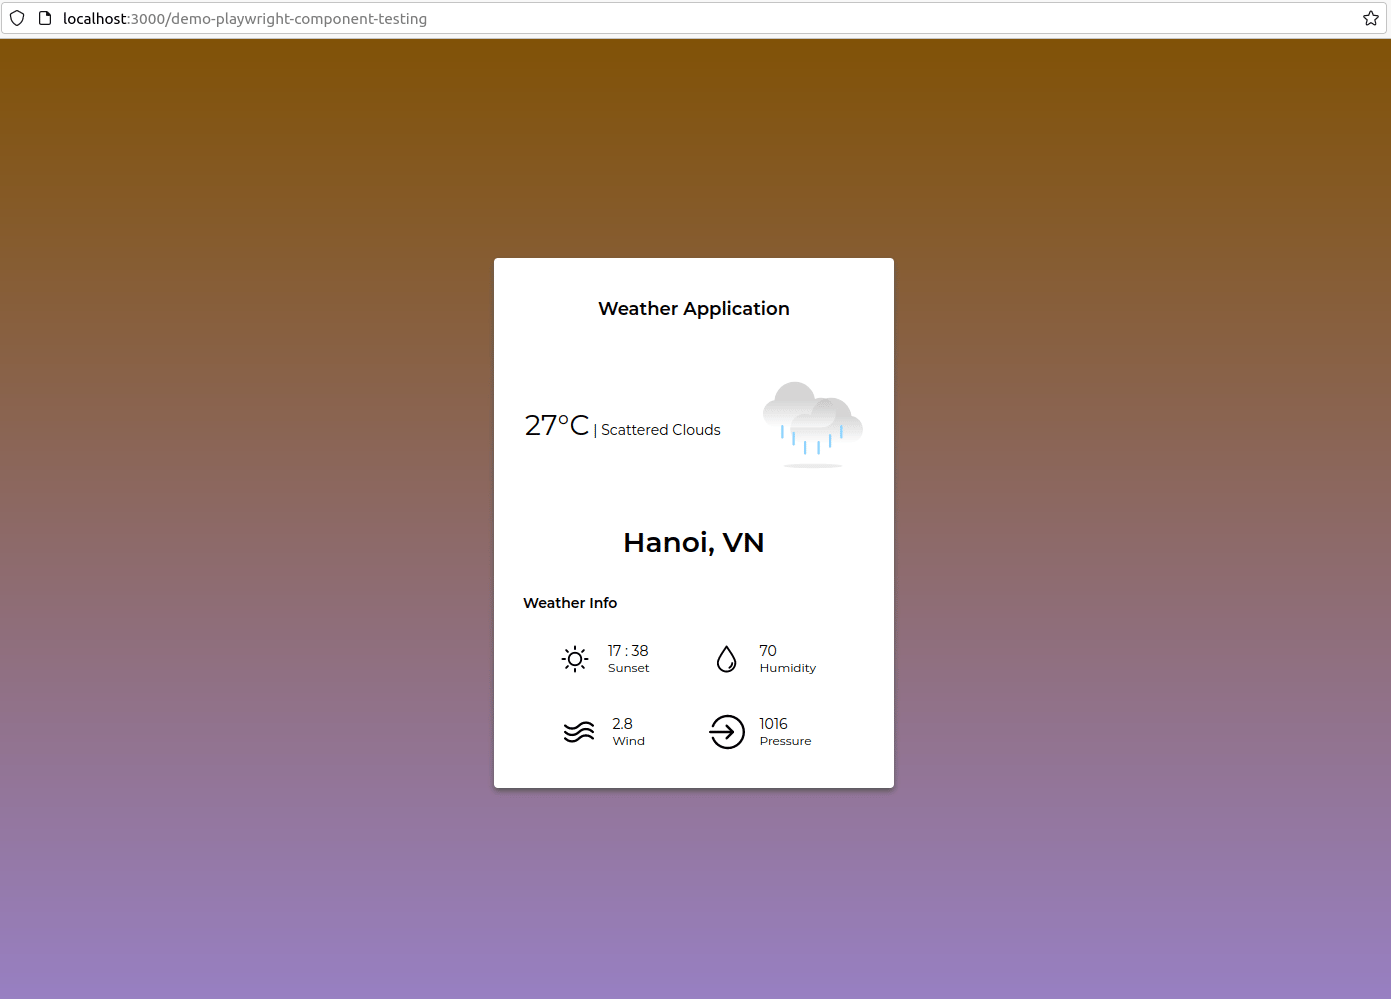
According to the results, at the time the search was run, the weather in Hanoi, Vietnam, was 27°C with scattered clouds. Sunset occurred at 17:38, the humidity was 70 percent, the windspeed was 2.8 meters per second (m/s), and the atmospheric pressure was 1,016 hectopascals (hPa).
Now that you have successfully deployed the application, you will install the test dependencies for it.
Step 2 — Installing the Test Dependencies
In this step, you will install the test dependencies so that you can implement component testing with Playwright later in Step 3.
To begin, run the following command:
npm init playwright@latest -- --ct
This command initiates the code generation process that will allow you to write tests using Playwright. Based on your selected choice, whether you are using TypeScript or JavaScript, or using the React framework or Vue framework for development, the auto-generated code will be different.
You will get the following output in your console:
OutputNeed to install the following packages:
  create-playwright@1.17.123
Ok to proceed? (y)
Press Y and then Enter to proceed. You will then be given the option to choose whether you want to use TypeScript or JavaScript in your project:
OutputGetting started with writing end-to-end tests with Playwright:
Initializing project in '.'
? Do you want to use TypeScript or JavaScript? …
  TypeScript
▸ JavaScript
Choose JavaScript since you will be using that for component testing later in Step 3. The output will then ask which framework you want to use:
Output? Which framework do you use? (experimental) …
▸ react
  vue
  svelte
Choose react since that is what the weather application uses. The output will ask whether you want to install Playwright browsers:
Output? Install Playwright browsers (can be done manually via 'npx playwright install')? (Y/n) ‣ true
Choose Y to install them so that you do not have to install them manually later.
Next, you will be asked whether you want to install the operating system dependencies:
Output Install Playwright operating system dependencies (requires sudo / root - can be done manually via 'sudo npx playwright install-deps')? (y/N) ‣ yes
Choose Y so that you do not have to install the dependencies manually. Note that you need to input the user password for the machine you’re currently running in order to install the system dependencies.
All the necessary dependencies will now be installed, as well as three browsers: Chromium, Firefox, and WebKit. In addition, a new directory named playwright is created, which consists of the index.html and index.js files needed to render the components during testing. Also, a new configuration file named playwright-ct.config.js is generated for running component testing. You can customize this configuration file in order to change the behavior of the component test, such as whether you want it to run only in the Chromium browser.
Note: The script test-ct should be automatically generated in the package.json file as displayed below:
"scripts": {
    "start": "react-scripts start",
    "test-ct": "playwright test -c playwright-ct.config.js"
  },
You will need this script later in Step 5 to run the component test for the app components.
You are now done setting up the dependencies for component testing. In the next step, you will write the test for one of the two weather app components.
Step 3 — Writing the Component Test for CityComponent
CityComponentThe weather app has two components: CityComponent and WeatherInfoComponent. In this step, you will write the script for the component test for the CityComponent. In this code, you will be writing two tests for the CityComponent. The first test will check whether the city input box accepts text input. The second test will check whether the Search button executes the fetchWeather method after the button is clicked.
To begin, navigate to the src directory:
cd src
Then, create the tests directory to store your test:
mkdir tests
Next, navigate to the newly created directory:
cd tests
Now, in thetests directory, create and open a new test file named CityComponent.spec.jsx using nano or your preferred code editor:
nano CityComponent.spec.jsx
Each test framework comes with a defined syntax for the test files so that the test runner knows where to look for the files when they want to collect the test files and execute them. For Playwright, the framework will look for *.spec.* files and consider them as the test files.
The .jsx extension stands for JavaScript XML, which allows you to add HTML tags inside your JavaScript file. The .jsx file allows you to mount the CityComponent into your test, and you achieve it by adding the CityComponent tag.
Now, you will begin to build the CityComponent.spec.jsx file you just created. Add the following code to your file:
import { test, expect } from '@playwright/experimental-ct-react';
import { CityComponent } from '../modules/CityComponent';
In this code, you are importing the test and expect methods from the @playwright/experimental-ct-react library in order to run the component testing in Playwright for your test. You are also importing the CityComponent in order to mount it into your test later.
With the second import command, you are placing the CityComponent file inside the src/modules directory. The file implements the code for the search page, which allows users to input the city name and search for the weather of the city.
Next, add the following code to your CityComponent.spec.jsx file:
...

const cityLocator = '[placeholder="City"]'
const searchButtonLocator = '[type="submit"]'

const cityName = 'Hanoi'
In Playwright, you need to have the UI locator of the element in order to interact with the UI element you want. Here you define two const variables named cityLocator and searchButtonLocator. The const keyword indicates a constant variable, which means that you cannot change its value after assigning the initial value to it. The [placeholder="City"] and [type="submit"] are CSS locators for the text input and search button in CityComponent.
In the third line of code, you are creating a new variable cityName to store the city name that you want to search for, in this case, Hanoi.
Next, you will add your first test code block to your CityComponent.spec.jsx file, which will check whether the cityField accepts text values. Add the following code to your file:
...

test('cityField accepts text input', async ({ mount }) => {
    const cityComponent = await mount(<CityComponent /> );
    const cityField = cityComponent.locator(cityLocator)

    await cityField.fill(cityName)

    await expect(cityField).toHaveValue(cityName)
});
Inside the test code block, you are adding the mount method as a parameter in the async function. This mount method comes from the experimental-ct-react which you installed using npm init playwright@latest -- --ct in Step 2. Using the mount method, you can mount your React component within the app so that you can implement the test for the mounted component.
By adding the async keyword to the test block test('cityField accepts text input', async ({ mount }) => { ..}), you are telling Playwright to run this test asynchronously. With the asynchronous approach, you don’t need to wait for each line of code to be executed sequentially; instead, the codes are run in parallel. This will help your test to run faster.
Next, you are defining the cityComponent by adding the CityComponent tag to the mount method. The React framework also runs code asynchronously, so when working with React components, you need to add the await keyword before mounting CityComponent. By using the await keyword, Playwright will wait for the mounted CityComponent to finish running its code before assigning the mounted value to the cityComponent variable.
Then, you find the cityField by using its locator, which you have created as the cityLocator variable.
Finally, you fill cityField with the cityName value and verify whether cityField has the same value as cityName. By using the await keywords here, you are ensuring that the cityField is filled with the cityName before checking whether the cityField has a cityName value.
You will now add your second test code block to your CityComponent.spec.jsx file, which will check whether the Search button calls the fetchWeather method. Add the following code to your file:
...

test('Click on `Search` button executes fetchWeather prop', async ({ mount }) => {
    let isCalled = false
    const cityComponent = await mount(
        <CityComponent
        fetchWeather={() => isCalled = true}
        />
    );

    await cityComponent.locator(cityLocator).fill(cityName)
    await cityComponent.locator(searchButtonLocator).click()

    expect(isCalled).toBeTruthy()
});
In this second test block, as with the first test block, you are adding the mount method as a parameter in the async function. By adding the async keyword to the test block test('Click on Search button executes fetchWeather prop', async ({ mount }), you are telling Playwright to run this test asynchronously.
Inside the test function, you first create a new variable named isCalled so that you can later check whether the fetchWeather method was called. The let variable allows you to define a new variable and modify the value of the variable, as opposed to the const variable, which does not allow you to modify the variable value.
You then define the cityComponent and assign it to the mount method in order to inject the actual CityComponent. In the CityComponent tag, you add the fetchWeather={() => isCalled = true} line. This means if the fetchWeather method is called, the isCalled value will be updated to true.
Next, you fill the city text input with cityName, then use the click method to simulate the action of users clicking on the Search button on the UI page.
Finally, you check whether the isCalled variable is true or not using the toBeTruthy method.
At this point, your file will contain the following code:
import { test, expect } from '@playwright/experimental-ct-react';
import { CityComponent } from '../modules/CityComponent';

const cityLocator = '[placeholder="City"]'
const searchButtonLocator = '[type="submit"]'

const cityName = 'Hanoi'

test('cityField accepts text input', async ({ mount }) => {
    const cityComponent = await mount(<CityComponent /> );
    const cityField = cityComponent.locator(cityLocator)

    await cityField.fill(cityName)

    await expect(cityField).toHaveValue(cityName)
});

test('Click on `Search` button executes fetchWeather prop', async ({ mount }) => {
    let isCalled = false
    const cityComponent = await mount(
        <CityComponent
        fetchWeather={() => isCalled = true}
        />
    );

    await cityComponent.locator(cityLocator).fill(cityName)
    await cityComponent.locator(searchButtonLocator).click()

    expect(isCalled).toBeTruthy()
});
Save and close your file. If using nano, save and exit by pressing CTRL+X.
You have now written the script for the component test for the CityComponent, which contains two test blocks—one to check whether the city input box accepts Hanoi as input and one to test whether the Search button executes the fetchWeather method after the button is clicked. In the next step, you will write the component test for the second weather app component, WeatherInfoComponent.
Step 4 — Writing the Component Test for WeatherInfoComponent
WeatherInfoComponentIn this step, you will write the test for WeatherInfoComponent, the second component of the weather app that you are testing. The test checks whether the weatherComponent contains the text Hanoi after receiving Hanoi as the weatherInfo input.
First, in the tests directory, create and open a new test file named WeatherInfoComponent.spec.jsx:
nano WeatherInfoComponent.spec.jsx
Add the following content to the WeatherInfoComponent.spec.jsx file:
import { test, expect } from '@playwright/experimental-ct-react';
import { WeatherComponent } from '../modules/WeatherInfoComponent';
Here you are importing the test and expect methods from the @playwright/experimental-ct-react library so that you can run the component test in Playwright.
You are then mounting the WeatherComponent into your test by importing the WeatherInfoComponent. The WeatherInfoComponent file populates the result page, which shows the weather of the city that users provided and is located inside the src/modules directory.
Next, add the following block of code to your test file WeatherInfoComponent.spec.jsx:
...

test('WeatherInfo accepts name and value', async ({ mount }) => {
    const weatherInfo = {"coord":{"lon":105.8412,"lat":21.0245},"weather":[{"id":800,"main":"Clear","description":"clear sky","icon":"01n"}],"base":"stations","main":{"temp":302.15,"feels_like":301.35,"temp_min":302.15,"temp_max":302.15,"pressure":1003,"humidity":35,"sea_level":1003,"grnd_level":1002},"visibility":10000,"wind":{"speed":2.71,"deg":73,"gust":3.29},"clouds":{"all":0},"dt":1673694125,"sys":{"type":1,"id":9308,"country":"VN","sunrise":1673652961,"sunset":1673692464},"timezone":25200,"id":1581130,"name":"Hanoi","cod":200}
    const weatherComponent = await mount(<WeatherComponent
    weather={(weatherInfo)}
    /> );
    await expect(weatherComponent).toContainText('Hanoi')
});
Here, you define a const variable named weatherInfo. Because const is a constant variable, you cannot modify its value after assigning an initial value to it. In this case, the value of weatherInfo is now the weather information for Hanoi in JSON format.
Then, you define another const named weatherComponent that retrieves its value from WeatherComponent.
Because the React framework runs code asynchronously, you need to use await when mounting WeatherComponent. This tells your code to wait for React to completely finish creating the WeatherComponent before mounting it.
Finally, in await expect(weatherComponent).toContainText('Hanoi'), you are checking whether the weatherComponent variable contains the text Hanoi. You need to use await in here because Playwright runs code asynchronously too, and with await, you are making sure that the weatherComponent variable receives the value from WeatherComponent before checking whether weatherComponent contains the text Hanoi.
Your complete WeatherInfoComponent.spec.jsx file will contain the following lines of code:
import { test, expect } from '@playwright/experimental-ct-react';
import { WeatherComponent } from '../modules/WeatherInfoComponent';


test('WeatherInfo accepts name and value', async ({ mount }) => {
    const weatherInfo = {"coord":{"lon":105.8412,"lat":21.0245},"weather":[{"id":800,"main":"Clear","description":"clear sky","icon":"01n"}],"base":"stations","main":{"temp":302.15,"feels_like":301.35,"temp_min":302.15,"temp_max":302.15,"pressure":1003,"humidity":35,"sea_level":1003,"grnd_level":1002},"visibility":10000,"wind":{"speed":2.71,"deg":73,"gust":3.29},"clouds":{"all":0},"dt":1673694125,"sys":{"type":1,"id":9308,"country":"VN","sunrise":1673652961,"sunset":1673692464},"timezone":25200,"id":1581130,"name":"Hanoi","cod":200}
    const weatherComponent = await mount(<WeatherComponent
    weather={(weatherInfo)}
    /> );
    await expect(weatherComponent).toContainText('Hanoi')
});
Save and exit your file by pressing CTRL+X.
You have now finished writing the test for WeatherInfoComponent. Next, you will run the CityComponent and WeatherInfoComponent tests for all three installed browsers.
Step 5 — Running the Component Tests
In this step, you will run the CityComponent and WeatherInfoComponent tests for all three installed browsers—Chromium, Firefox, and WebKit—to ensure that the two components work properly on those browsers.
First, navigate to the root project directory:
cd ../..
After running the command, you will be in the react-component-testing-demo folder. Then, run the following command to execute the tests:
npm run test-ct
Playwright will run the two test files for all three browsers: Chromium, Firefox, and WebKit. You will get results similar to the following output:
Running 9 tests using 2 workers

vite v3.2.5 building for production...
✓ 89 modules transformed.
playwright/.cache/playwright/index.html      0.32 KiB
playwright/.cache/assets/index.2b5442e2.js   313.68 KiB / gzip: 81.07 KiB

  9 passed (12s)

To open last HTML report run:

  npx playwright show-report
To view the report in GUI format, run the following command:
npx playwright show-report
Note: If you are executing these commands on a local machine that supports a graphical user interface (GUI) and have a browser like Chrome or Firefox already installed, the weather app will automatically open in your browser. However, if you are executing these commands on a remote server, you need to use port forwarding via SSH to open the app on your local machine.
In a new terminal, run the following command:
ssh -L 9223:localhost:9223 your_non_root_user@your_server_ip
You will now be able to access the test report from your local machine.
The test report overview will display in your browser:
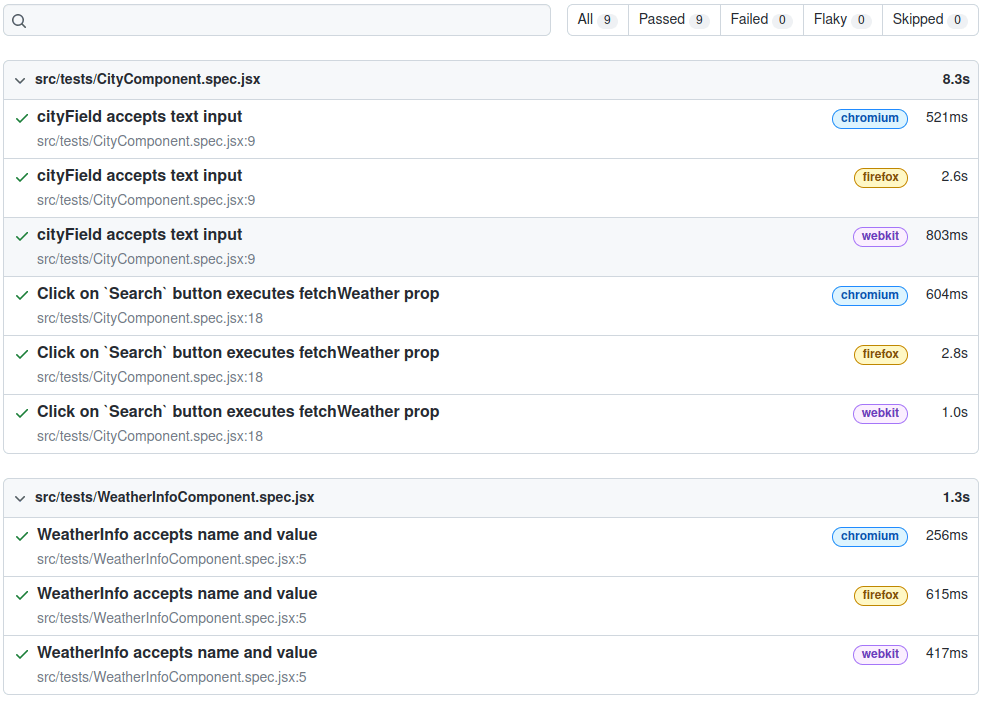
The test report is separated into the three different tests: cityField accepts text input, Click on Search button executes fetchWeather prop, and WeatherInfo accepts name and value, where each test displays the overall time the test took to run, as well as how long each browser’s test took to run.
By clicking on each test—for example, cityField accepts text input—you will get the details of the time and the lines of code for each step in the test:
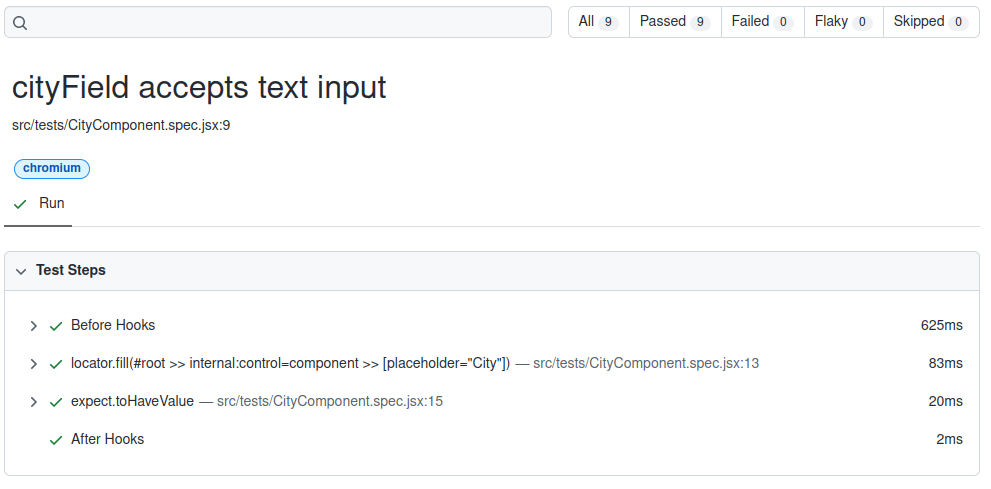
The results indicate that the CityComponent test that checks whether the City input box accepts text as input ran successfully on Chromium. In the details section, the test execution steps will feature Before Hooks and After Hooks steps by default. The Before Hooks section is often used for initial setup, such as logging into the console or reading test data. After the test execution, the After Hooks section will often clean test data in the test environment.
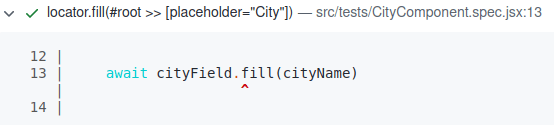
The locator.fill() line shows how the element is located in the test implementation. In this case, the element is located by using the CSS selector with the value [placeholder="City"].
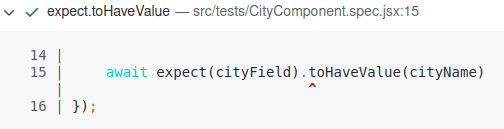
The expect.toHaveValue line show what the assertion of the test is. In this test, you expect cityField to have the value cityName.
You have now fully implemented and run the CityComponent and WeatherInfoComponent tests for your weather application and reviewed the test report to ensure that the two components work on Chromium, Firefox, and WebKit. You can check out the full source code for both the application and the tests on the main branch of the GitHub repository.
Conclusion
You have now used Playwright to implement component testing on a React-based weather app. First, you installed the necessary test dependencies for the weather app components CityComponent and WeatherInfoComponent. Then, you wrote and ran the component tests for the two components. Finally, you reviewed the test report in GUI format to ensure the components ran as expected.
To learn more about Playwright and other functionalities that it supports for component testing, visit the Playwright documentation.
Thanks for learning with the DigitalOcean Community. Check out our offerings for compute, storage, networking, and managed databases.
About the author(s)
A man on a thousand mile walk has to forget his goal and say to himself every morning : Today I'm going to cover twenty-five miles then rest up sleep.
Still looking for an answer?
This textbox defaults to using Markdown to format your answer.
You can type !ref in this text area to quickly search our full set of tutorials, documentation & marketplace offerings and insert the link!
 This work is licensed under a Creative Commons Attribution-NonCommercial- ShareAlike 4.0 International License.
Become a contributor for community
Get paid to write technical tutorials and select a tech-focused charity to receive a matching donation.

DigitalOcean Documentation
Full documentation for every DigitalOcean product.

Resources for startups and AI-native businesses
The Wave has everything you need to know about building a business, from raising funding to marketing your product.
The developer cloud
Scale up as you grow — whether you're running one virtual machine or ten thousand.

Start building today
From GPU-powered inference and Kubernetes to managed databases and storage, get everything you need to build, scale, and deploy intelligent applications.
